1
3. PHYSICAL INSTALLATION
The MSS can be used to monitor the opening of doors, windows, gates and barriers of all types.
The switch module is mounted on the part of the assembly that is fixed (such as a door frame)
and the magnet pack is mounted on the part of the assembly that moves (the door, for
example).
Unlike many magnetic switches, the performance of the MSS is unaffected by the type of
surface it’s mounted on. It will perform the same on steel as on wood.
In planning for mounting the MSS, note that the switch and the magnet pack have to be
oriented correctly, have to be roughly in the same plane and have to be a defined
distance apart.
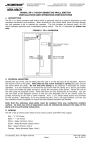
To obtain correct orientation, note the
arrows on the labels on each
component.
The arrows have to
directly face each other and the ends
of the two pieces must be even, not
offset.
SEPARATION DISTANCE
THE ARROWS ON THE SWITCH
AND MAGNET PACK MUST
FACE EACH OTHER AND
AND THE ENDS OF EACH
COMPONENT MUST BE
EVEN- NOT OFFSET.
The MSS includes a minimum and
maximum operating distance. The
unit will report secure only when the
separation distance is between this
maximum and minimum.
If the
magnet pack is too close to the switch
module or too far away, the unit will
alarm.
SEPARATION DISTANCE IS
SPECIFICALLY NOTED FOR
EACH INDIVIDUAL PAIR.
The distance between the minimum
and maximum separation points is called the gap. The MSS provides a gap of 4/10”-1/2”
(10-12.5MM). For best reliability, you want to set the actual separation distance exactly
midway in the gap. The gap will, however, vary somewhat on each unit and the minimum
distance at which the gap starts will also vary. You can, of course determine the optimum
midway separation distance by using a ruler and Ohmmeter but as part of our QC procedure, we
have checked this distance and it is printed on the switch module label. Use this separation
distance when you mount the unit.
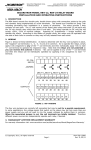
The tamper feature on the MSS works as follows. An oval head screw (supplied) is set into the
surface which is to receive the switch module. Two metal washers are placed under the screw
head to yield the correct height. The template shows positioning of this screw. When the switch
module is installed, the tamper screw depresses the tamper switch. This closes the two wire
tamper circuit. Note that if you push the tamper switch in with a paper clip for example, you’ll
hear it click. This is not the switching point. Switching occurs much earlier in the travel so that
the height of the screw head will always move the tamper switch past its switch point but will
not bottom it out which could damage the tamper switch. Make sure, however that you place
the two metal washers under the tamper screw head and then screw it down flush
with the mounting surface. This sets up the correct height of the screw head. Note also the
fact that the switch module is tampered is undetectable and any attempt to remove the switch
module will open the tamper circuit. This circuit may be directly monitored (usually by a 24
hour circuit) or connected in series with the closed loop of the main switch output such that a
tamper violation will create the same alarm signal as if the door was opened.
3.1 CABLE PROTECTION
The Underwriter’s Laboratories standard for high security switches requires that a cable
sheathed in plastic such as the MSS-1 cable must be protected from attack by being
routed through a metal frame. This is most commonly a door frame but could also be the
frame of a gate or other opening. The mounting methods described in sections 3.2, 3.3 and 3.4
show in detail how this is to be accomplished. If your application is such that the cable
cannot be routed through a metal frame member and therefore fully protected, you
must use model MSS-1G which includes a stainless steel protective jacket for the cable (see
section 3.5). This alternative will satisfy UL’s requirements.
Page 2
PN# 500-16700
Rev. D, 03/13