1
TDS-100M Manual
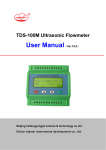
TDS-100M Ultrasonic Flowmeter
User Manual
Ver.18.0
1
TDS-100M Manual
ground line(include upstream ground line
and downstream ground line)
CONTENT
1. Must-knows about TDS-100M··5
2. Introduction to TDS-100M··6
3. Menu Window Details··7
4.transducersinstallation
2
TDS-100M Manual
Technical Manual for new versions TDS-100M
1. Must-knows about TDS-100M
Please the users must read the following paragraphs when you use TDS-100M for the first time
The setup of a TDS-100M ultrasonic flow converter needs one of the three tools. The first tool is a parallel
LCD and keypad module which can be connected to the 20 Pins port. The second tool is a serial LCD and
keypad module which can be connected to the RS232 port. The third one is a PC-based software (under
development), by means of the software, the parameters that TDS-100M needs to work properly could be
downloaded by use of the RS232 port on the PC. If your computer does not have a RS232 port, you need to
buy a USB-RS232 converter.
(1)All setup parameter data are stored in the RAM memory temporally. Users need to solidify the
parameters, when setups are been finished, that is to store the parameter to the internal flash memory. Go to
Menu26, Select the option that says “make default paras” then pressing the ENT key will start the progress
of storing. If the current parameters are different with that in the flash memory, the system will store your
current parameters into the flash memory and then boot again. By doing so, the parameters will always be
5
TDS-100M Manual
get lost, even when both the power supply and the backup battery are removed.
(2)The zero point, that is the indicated flow under the situation of motionless liquid, has a great influence
over the linearity and accuracy of the flow meter. Users should try every possibility to perform the Zero
Setup that is located at Menu 42. Zero setup should always been performed under the condition of
motionless liquids. If Zero setup was been performed with motion of the liquid, you can use Menu 43 to
restore to the original zero point. The zero point will be stored in the RAM memory temporally when you
use Menu 42. If you want to solidify the zero point, you need to perform Menu 26 “make default paras”
function again. If this step was omitted, the system will override the RAM zero point by restoring the zero
point that is stored in the flash memory with next power-on.
(3)The internal calendar is the base of date accumulators. Incorrect date and time will cause messy
records with the date accumulators. Please the user check the calendar by input correct date and time. The
calendar runs relying on the backup battery when there is no 24VDC supply. When the battery voltage is
less than 2 volts, a new backup battery should be replaced with. Replacing the battery with a new one
should be performed with the 24VDC applied so that the accumulator data and calendar data will not get
lost.
(4)Please pay great attention to the power supply. The applied voltage should be in the range of +15V to
24VDC, or 15V to 20VAC. Avoid applying a 110VAC or 220VAC power forever, or the module will be
damaged.
(5)Pay attention to the display located on Menu 48, which shows the points of lines for the linearity
correction function. 0 stands for shutting off the function. The default value is 0. Try to make sure that
value is 0 so as to avoid abnormal flow.
(6)The latest calibrated data which are produced by performing the analog input or output calibration are
store in the RAM memory temporally. Users need to perform the M26 function to make these data be
solidified.
(7)Use Menu 49 to check if there are inputs from the RS232 port with network application. If not, please
check protocol selection software switch located at Menu 63 and the serial port parameters options located
at Menu62. Select option 1 at Menu 63 for the MOSBUS RTU application. Select option 0 for MODBUS
ASCII and FUJI extended and Simple Water Meter protocols.
(8)By a flash of the LED indicator for every 2 seconds, TDS-100M means the meter work properly. A
short flash for every second indicates no-signal or poor signal condition and a long flash for every second
shows the meter is performing a receiving gain adjusting.
2. Introduction to TDS-100M
(1) Development introduction
The TDS-100M is a compact, high performance general purpose ultrasonic flow meter module. The
design of the meter is intended to provide for users like system integrators and OEM users with a lowest
cost but of high performance flow meter. The development of the meter is based on a widely used flow
meter made by this company. The meter uses only one high performance MSP430 series microprocessor
made by Taxes Instruments.
This module can work alone without a LCD and Keypad module. The parameters that the flow meter
needed to work properly can be (1) setup by a parallel keypad module witch will be plugged onto the
parallel interface inside of the module, or by a serial keypad module witch will be plugged onto the
6
TDS-100M Manual
RS232C or RS485 port of the meter. (2) downloaded by use of a PC computer based software (the software
is under development now).
The transducers can be one the all kinds of the types made by this company, include the clamp-on type,
the insertion type, the PI- type and standard-pipe type. It can even use transducers by the users or the
transducers made by other company.
The module will satisfy the measurement requirement for most kind of liquids, such as water, sea
water, sew water and chemistry liquids. It can even measure pure paper pulp or fluids with higher density
suspend particles.
The module can be used alone as a flow meter. Users can even integrate a number of the modules into
a multi-channel flow meter that can measures up to several dozen of different pipes or a flow meter that has
higher accuracy by measures the same pipe with all the channels.
The low flow performance of this module is better compared with our previous flow meters. It can
measures a flow that is as low as 0.001m/S properly when the PI-transducers are used.
(2)Features
1. better than 1% accuracy, better than 0.2% repeatabilty.
2. 128 times of measurement and the revised software make the performance better and the indicated
flow more stable.
3. RS232 and RS485 serial port
4. One or two analog inputs.
5. Optional 4-20mA analog output.
6. Two OCT output channels
7. Ability to measure sew water.
8. 4 kinds of different types of transducers can be used, addition with user-defined transducers.
9. The internal universal serial bus enables several output modules to be connected to it.
10. All the parameters can be solidify into the flash memory.
11. Several optional function module to be chosen to add to the main module.
12. 3 different kinds of communication protocol supported by the same time, include MODBUS.
13. Date totalizers that can record as much as 128 sets of data by day, 64 sets of data by month. All the
data can be retrieved by use of the MODBUS registers
14. 32 times of records of power-on and power-off data. Data can be read through MOBUS.
15. built-in data logger/printer, full programmable with what to be print ,the start time, interval, and
duration.
16. Programmable pulse width of OCT output.
17 Parallel interface for display and keypad.
18 plug-on-and-off display and keypad module can be connected to the serial port of the meter.
19 Almost the same menu arrangement make the users of previous version of flow meter very easy to
operate.
20 A fluid velocity threshold enables the identification of the kinds of fluid.
21. Digital inputs can be inputted by used of the analog inputs.
22. A full programmable built-in batch controller which can be started by key-pressing, inputs to the
7
TDS-100M Manual
analog inputs or through MODBUS protocol.
23. Power supply by 8-36VDC~24VDC
3. Menu Window Details
The flow meter user interface comprises about 100 independent windows. That are numbered by
M00,M01,M02……. M99,M+0,M+1 etc.
You do not need to remember all the menu windows. Just remember the most command used windows and
the proximate window numbers of some uncommonly used windows would be sufficient. You can always
use the going up and going down key to find the right window.
Note: 1 it is recommended to practice those menu windows on your flow meter while reading
this chapter for the sake of easier understanding.
2.To quickly switch to a menu window, simply press the ‘MENU’ key followed by the window
number (a two digit number). To move from one window to the next, use ‘UP’ or ‘Down’ keys.
flow
rate/fl
ow
totalis
er
displa
y
initial
setup
00
display instant flow rate/net totalizer,adjust the units in M30-M32
01
display instant flow rate/instant flow velocity, adjust the units in M30-M32
02
display instant flow rate/positive totalizer, adjust the units in M30-M32
03
display instant flow rate/negative totalizer, adjust the units in M30-M32
04
display instant flow rate/date time
05
display heat flow rate/total heat quantity,adjust the units in M84 ,M88.
06
display temperature input T1,T2
07
display present battery voltage.(suitable to TDS16)
07
display analogue input AI3,AI4
08
display system error code
09
display today net totalizer
10
input outside perimeter of pipe
*11
input pipe outer diameter,data range:0-18000mm
*12
input pipe wall thickness
*13
input pipe inner diameter
*14
choose the kinds of pipe materials
15
input sound velocity of pipe material
16
choose kinds of liner
17
input the sound velocity of liner
18
input the thickness of liner
19
input inner pipe wall absolute degree of roughness
*20
choose kinds of fluids
21
input fluid velocity
22
input fluid viscosity
*23
choose the types of transducers,including more than 20 types to use
*24
choose transducer installation method
*25
display transducer installation space
*26
27
parameter solidifying and setup
store and read installation parameters on installation point
8
TDS-100M Manual
flow
unit
setup
28
When signal set turning poor,keep last datas,choosing”yes”means when the signal
turning poor,the flow meter display last correct measured datas.
29
。Input signal strength when the pipe flow is set to be empty.for example:inputing 65
means when the signal strength is lower than 65,the flow meter will think that there is no
liquid in the pipe and display the flow value as zero.
30
choose metric or imperial unit
31
choose instant flow rate unit
32
33
choose totalizer unit
choosing the totaliser multiplying factor which function is to multiply totaliser data
rang,normaly set it as x1
34
net totaliser switch
35
positive totaliser switch
36
negative totaliser switch
37
restore parameters setup before leaving factory and reset totaliser
38
manual totaliser(the key to control on/off)
choose operating language,including 8 kinds of different languages for international
users to use
39
3•
setup the LCD display method,inputing 0 or 1 means regular displaying content.inputing
2-39 means automatically cycle displaying method,displaying the previous menu of
2-39,time interval is 8 seconds.when inputing accures ,displaying according to the
inputing operation.when there is no inputing operation,it will automatically enter cycle
displaying status.(detailed information in §3.1)
*40
damper coefficient
*41
Input low flow velocity cutoff value
42
Setup static zero point
43
Choo
sing
setup
factory.
44
Set up zero point deviant by hand
45
meter coefficient,rectification coefficient
46
input Network address
47
48
49
sched
uled
time
output
clear zero point setup and manually setup zero point,restore default before leaving
50
identification
number
(IDN)
password protecting operation,after the meter was setup with password,only browse
menus without any modification.
Input degree of linearity broken line rectification data.at most there is 12 segments
broken line,used for users to rectify meter nolinear.
Network communication tester,on this window to visit the datas transfered from upper
computer to judge the problems arised during communication.
Optional setup of datas output at scheduled time,choose output content at scheduled
time to print,more than 20 to selet
51
Setup output time at scheduled time
52
Printing data flow direction control.by default printing data will flow directly to the
thermal printer hanged inside bus.setup printing data output to outside serial
port(RS485 port)
9
TDS-100M Manual
AI5
setup
53
display analogue input AI5(reserved for the TDS16 mainboard)
54
Setup of OCT totaliser pulse output,pulse width,range:6 Ms-1000Ms.
55
choose current loop mode
56
corresponding data to output of current loop 4mA or 0mA
57
corresponding data to output of current loop 20mA
58
59
input
and
output
setup
Verification of current loop output.applied to check whether current loop is normal or
not.
present output of current loop
60
Date time and setup.the date time of the new flow meter is realized by CPU,when
upgrading software,time will be slow,so after upgrading,recommend to adjust the date
and time to display correctly
61
Software version information and Electronic Serial Number (ESN)
62
setup serial port parameter
63
Communication protocol choosing(including compatible protocol choosing),two
options,choosing MODBUS-RTU means using binary system MODUS-RTU
protocol.choosing MODBUS-ASCII+previous protocol means using ASCII protocol,at
this
time
can
support
several
protocols
simultaneously,including
MOSBUS-ASCII,previous 7 version protocol,FUJI protocol,Meter-BUSx protocol etc.
64
analogue input AI3
65
Analogue input AI4
66
Analogue input AI5
67
Setup frequency range of frequency output signal.frequency signal output represent
instant flow rate value by signal frequency value.default:0-1000Hz ,
max-range:0-999Hz.output frequency signal by special frequency output unit.
68
setup lower limit flow of frequency signal output
69
setup upper limit flow of frequency signal output
70
LCD backlit control
71
LCD contrast ratio control
Work timer,logging work time of the meter by unit of second.it can reset.
72
73
74
By inputing measuring range ,the flow meter will turn
current signal into data range users need,so display
related analogue input that corresponding to physical
parameter data.
setup lower limit flow of
frequency signal output
setup upper limit flow of
frequency signal output
by setuping the lower and upper limit of alarm,confirm a
range,when actual flow is over the range set in this
window,then create a alarm signal output.alarm signal
can be transferred to outside by setuping OCT or relay.
75
LCD backlit control
76
LCD contrast ratio control
77
beeper setup options
78
setup Open Collector Transistor output(OCT) output options
setup relay(OCT2) output options
79
80
81
choose input signal of batch controller
batch controller
10
TDS-100M Manual
heat
quanti
ty
meas
uring
diagn
osis
added
menu
windo
ws
hardw
are
adjust
ment
menu
windo
ws
82
day/month/year totaliser,check the flow rate and heat quantity of the totalisers
83
。Automaticaly replenish flow switch during the period of power off,default status:off.this
function is not available under special conditions.
84
85
Choosing heat quantity unit, 0.Gj(default) 2.Kcal 3.Kw
4.BTU (imperial unit)
Choose temperature signal origin,if choosing inputing temperature signal by
AI3,AI4,then need temperature transmitter that can output 4-20mA current signal.
86
heat capacity,default: GB-CJ128 enthalpy potential method. Temperature difference
method is available also.
87
heat quantity totaliser switch
88
89
Heat quantity multiplier factor.
display present temperature difference and setup temperature difference sensitivity.
8•
Options of installation of heat meter on supply water pipe or return water pipe
*90
*91
Display the signal strength and signal quality
Display the transit time ratio
92
Display the calculated fluid sound velocity .
93
Display the total transit time and the delta time
94
95
Display the Reynolds number and the pipe coefficient
Display positive,negative heat quantity totaliser,start cycle display function.
+0
Display the time of power on/off and flow rate
+1
Display the total working time of the flow meter
+2
Display the last time of power off.
+3
Display the flow rate of last power off
+4
Display total times of power on
+5
Scentific
+6
Setup threshold value of fluid sound velocity
+7
Net totaliser of this month
+8
+9
Net totaliser of this year
Operating time with trouble(including power off time)
.2
store static zero point
.5
setup threshold value of Q value
.8
max instant flow rate of this day and this month
.9
serial port testing window with CMM direct output
circuitry hardware parameter adjusting entrance(only inputing password to enter
following windows)
-0
calculator
-1
4-20mA current loop calibration
-2
AI3 inputing calibration of analogue input 4 mA
-3
AI3 inputing calibration of analogue input 20mA
-4
AI4 inputing calibration of analogue input 4mA
-5
AI4 inputing calibration of analogue input 20mA
-6
AI5 inputing calibration of analogue input 4mA
-7
AI5 inputing calibration of analogue input 20mA
-8
zero point setup of PT100 at lower temperature(<40℃)
11
TDS-100M Manual
-9
PT100 setup zero point at higher temperature(>55℃)
-A
PT100 standard calibration at 50℃
PT100 standard calibration at 84.5℃
-B
Note : * means common used menus,red color means new added or changed
functions,blue color means the menus related with heat quantity measurement
4.transducers installation
§4.1 Unpack checking
Check whether the spare parts comply with packing list,enclosure is broken or not during
transportation?did screw drop?connecting line is loose or not?if have questions,pls cotact factory.
§4.2 Power supply and cable
When users place an order,pls inform factory what kinds of power supply is
needed,normaly the power supply of the flow meter have following options:
: DC24V or DC8~36V
Transducers signal cable of TDS-100M series ultrasonic flow meter adopts high frequency special
shielded twisted pair cable.because sending and receiving circuit adopts balanced transmitting
and balanced receiving principle.so to increase the anti-interference function,little signal
consumable ,ensure the device work well in longer term.so the special signal cable supplied by
factory is the best choice for you.if using coaxial shielded radio frequency cable or poor quality
twisted pair cable,it could lower accuracy and the function of the device.when there is bigger
interference signal from outside,the device could not measure normally.
§4.3 Required installation condition
Installation of The new TDS-100M series is the easiest and convenient way in the
installation of all flow meters,just choosing a suitable measurement point,input the pipe
parameters of this pipe point to the flow meter,then fix the transducers on the pipe.
§4.3.1 choosing measurement point
To ensure measurement accuracy and stability,the installation point of tranducers should be on
the straight pipe full of well distributed fluid(when installing,the pipe must be full of liquid),comform
to following principle:
1.Pipe must be full of liquid that is uniform and easy to travel the ultrasonic beam(vertical pipe or
horizontal pipe)
2.Upstream transducer should be installed at the place where the upstream length of the straight
12
TDS-100M Manual
pipe is at least 10D and the downstream length is at least 5D where install the downstream
transducer,so the pipe length should be straight without any valve,pump,angle head, D stands for
pipe ouside diameter. The installation point should stay away from valves,pump,high pressure
current,transformers interference source etc.
3.Avoid to install on the highest point of pipe system or vertical pipe with free exit(flow down)
4.For the opened pipe or half full pipe,the transducers should be installed on
U pipe.
5.The temperature and pressure on the installation point should be within the work ability of the
transducers.
6.Pay more attention to the pipe scaling in inner pipe wall,do best to choose the pipe without
scaling to install,if it is impossible ,then consider the scaling as liner to achieve better accuracy.
7.The two transducers must be installed in horizontal direction to pipe axis plane,within ±45°of axis
line horizontal plane, to prevent bubbles or not full in upper pipe or sediment in down side of pipe
to influence transducer measurement normaly.if there is space limit of installation that could not
install horizontal symmetry,then install the transducers vertically or dip angle under the condition of
no bubbles in upper parts of pipe.
13
TDS-100M Manual
§4.3.2 instrument well construction requirements
If need to install transducers in instrument well,there must be enough installation room,convenient
for people to stand up to work,distance between pipe wall and well wall is at least above
550mm,width is more than (D+550*2)mm,cement pipe width is more than
(D+700*2)mm,instrument well axial width L is more than D+1200mm.when installing
transducers,avoid the place of flange,welding line,reducing,do best to install transducers in the
range of +/-45° of horizontal position of pipe axis.
Attention:1,Do best to install transducers in the range of +/-45° of horizontal position of
pipe axis .
2,Connect the mainframe enclosure with ground.
14
TDS-100M Manual
3, Avoid the installation place of flange,welding line,reducing
4, Enough installation room,convenient for people to stand up to work
§4.4 Quickly input pipe parameter steps:
Need input following parameters when normaly measuring
1. pipe outer diameter
2. pipe wall thickness
3. pipe material
4. liner parameter(if has liner,then include liner thickness and sound velocity)
5. fluid types
6. tansducers tpye(mainframe can support many kinds of
transducers)
7. transducers installation method
8. solidificaiton parameter
§4.5 Clamp on type transducer installation method
:Before installation,choose density pipe to install transducers,and clean the installation
area,clear away rust,paint,anti-rust layer,it is the best to use angle grinder to polish,use cleaning
cloth with alcohol or acetone to clear oil and dust,coat enough couplant around the center of
installation area,attach the transducers on the pipe and fix it without air bubbles or sand between
transducers and pipe wall.
M2 type
Standard S1 type
L2 SENSORS
transducer
Standard S1
type
Standard M2
type
Standard L2
type
Suitable pipe
diameter(mm)
DN15-DN100
DN50-DN700
DN300-DN6000
Fluid
temperature
0℃~160℃
0℃~160℃
0℃~160℃
Outer size
45×30×30mm
60×45×45
80×70×55
quality
75g
250g
650g
Remarks:users input transducers parameters by yourself
15
TDS-100M Manual
§4.5.1 Installation space
Installation space of clamp on type transducer is inner edge distance of the two transducers(face
to face),after inputing the required parameters in Menu,check the display on M25,that is the
installation space.
§4.5.2 Installation method
The method has 2 kinds: V method,Z method
Normaly,V method is suitable to the pipe diameters within the range: DN15-DN200mm .when
using V method can not measure the signal or the signal is poor,try to use Z method that is
suitable to the diameters are more than DN200mm or measuring cast iron.
V method(commonly used method)
Normaly,V method is standard installation method,convenient to use with precise
measurement,when installation,the two transducers horizontally align,its centre line is horizontal
with pipe axis line,suitable pipe diameter range to measure is DN15mm-DN400mm。
Z method (the most commonly used method)
When the pipe diameter is wide,or there are suspended matters in fluid,too thick scaling or
liner inside pipe inner wall,that can make the flow meter can not work normaly and signal poor by
using V method installation,so need to use Z method to install,its features are direct transfering
without reflection(called sigle sound path),little signal attenuation.
Attention:1,when installation,it is a must to clear the pipe area where to install
transducers,showing metal color
2,shield line of ultrasonic signal cable can not be connected,but not short circuit with positive
16
TDS-100M Manual
and negative pole(red and black line)
3,after transducers are connected with circuits,must apply enough sealant to prevent water in.
4,after covering the transducers,must screw and lock tightly the hole for shield line of
transducers to prevent water in.
5,use strap(stainless steel band) to fix on the center part of transducers,to make it weighted
uniform,no moving.
6,apply enough couplant around the area ,so that transducers touch pipe to prevent
air,sands,rust in,that influence the beam transfering.
§4.6 Insertion type transducer installation method
The new TDS-100M series insertion type transducer incorporates the advantages of clamp on
type and in line type transducers,its features:
Transducers can be installed directly on pipes of carbon steel or stainless steel by welding;
while for those pipes of materials like cast iron, glass fiber reinforced plastic, PVC and cement
which cannot be welded directly, special straps should be used for installation. For
those users who are in similar situation, please inform us of the precise outside diameter
of the pipe to be installed to prevent leakage.
insertion B type(insert directly)
Insertion B type (for sement
pipe )
Suitable diameter
Above DN80mm
Above DN80mm
Installation room
≥550mm
≥700mm
Fluid temperature
-40℃-160℃
-40℃-160℃
Transducer material
316L stainless steel
316L stainless steel
§4.6.1 Installation tools
Special hole-drilling positioning tools made by our company (Hipeak Instrument Development Co.,
Ltd), 400w handle rotary drill (high speed adjustable is preferable), spanner and
screwdriver are needed for installing insertion transducers.
§4.6.2 Installation space
Insertion style transducers spacing is calculated based on the distance between the centers of the
two transducers along the pipe axis. The space will be shown on menu M25 when necessary data
are put into the menu, and the transducers should be installed according to this space.
§4.6.3 Installation method
There is only one way to install insertion style transducers which is called Z-method installation
and can be applied for all pipes which diameter is more than DN80mm.
§4.6.4 Locate the installation point
Input the pipe parameters on the mainframe, the installation space L (L=inside diameter-
9.113mm) will be calculated. (the two sensors must be located in the same axis plane), the
installing space L should be the distance between the centers of the two sensors horizonally.
A. Making a fixed position paper: take a 4D (D refers to the pipe inner diameter)
17
TDS-100M Manual
long and 200mm (or D) wide rectangular paper (according to actual situation on spot,
the paper tape can also be replaced by moisture-and-corrosion resistant materials), and draw
a line about 100mm from the edge;
B. Wrap the fixed position paper on the cleaned surface of the pipe, making sure that the two
paper sides are overlapping and aligned and thus the line drawn may be parallel with the pipe
axis;
C. Extend the line on the fixed position paper to the pipeline and the
cross-point between the vertical side of the fixed position paper and the extended line is A
D. Starting from A and along the edge of the position paper, the length of half of the pipe perimeter
is measured and the cross point is C; then draw a line at C to be parallel to the axis (that is, to be
parallel with the line on the position paper);
E.Removing the fixed position paper and starting from C, the installation space L should be
measured along the line, draw on the pipe ,the point is B. Thus, A and B are the points where the
transducers are to be installed. For example, L=280mm. Then two bases of ball valves should be
welded respectively on A and B, making sure the centers of bases overlap A and B respectively.
18
TDS-100M Manual
§4.6.5
Welding the base of the ball valves
For pipes that can be welded (such as steel and stainless steel, etc.), just weld the base on the
pipe (Stainless steel pipe should be welded to stainless base, please indicate in
your
order). Before welding, the rust and paint on the section where the sensors are to be installed shall
be
cleaned up by using an angle grinder, and the oil dirty and dust should be cleaned by using
acetone or
alcohol. to prevent water leakage,so the work of welding is very important, making sure the
centers of bases overlap A and B respectively,no air bubbles.
For pipes which material cannot be welded directly (such as cast iron and cement, etc.), special
hoops
(with airproof rubber pads) should be used. The bases of the ball valves have been welded on the
hoops.
These hoops are directly fixed on the pipe and make sure that the centers of the ball valves
overlap A
and B respectively. Finally, the ball valves should be closely fixed on the bases welded on the
hoops to
prevent water leakage.
§4.6.6
hole-drilling
Connect the sealed sheath of the hole-drilling machine and the outer screw thread of the
tailor-made ball valves,screw tightly,open the ball valves,push the drill pipe to touch the outer
surface of pipe;
then the drill pipe shall be locked to the handle rotary drill before the drill is switched on. During
drilling,
the drill machine should work in a low speed to avoid sticking or even drill bit breaking.after drilling
through pipe wall,pull back the drill pipe until the head of drill bit reach the ball valves spool,turn off
the ball valves,take down hole-drilling machine.
①Pipe ②Ball valve base 19
③Tailor‐made ball valve ④Locating drill pipe bit ⑤19 super hole cutter TDS-100M Manual
§4.6.7 inserting the transducers
screw the screw mut to a position under the bottom of the transducer and screw the transducer
through the ball valve to ball valve spool. Open the ball valve and continue to screw the transducer
until the head of transducer passes the inner wall of the pipe. Before the wires
are connected, the angle of the transducer should be adjusted to make sure that the head of two
transducers can be in face to face position so as to send and receive the signals properly(the hole
for line of two transducers should be upward or downward at same time).and then fix the screw
mut,connect the wires,use silicon rubber to seal the connection place.
①transducer ②ball valve base ③tailor‐made ball valve ④screw thread ⑤locknut ⑥connecting box ⑦signal cable §4.6.8 Length calculation of the part of transducer into the pipe inner wall:
Insertion style transducer is made of stainless steel by casting. As the transducer's length A and
the pipe wall's thickness B are known, and the length part of transducer left
outside the pipe can be measured, the length of the inner part of the transducer can be
calculated through the formula: L=A-B, C=0
Note: the length A of different types of transducers are: Standard insertion type B: A=170mm;
Standard insertion type C: A=220mm, and Cement insertion type B: A=310mm.
§4.6.9 wiring
After wires being connected, screw the mut on the hole for wires (do not lose packing seal),at
last,screw seal cover tightly to prevent water leakage.
§4.6.10 Transducer wiring picture
20
TDS-100M Manual
§4.6.11 Maintenance
The maintenance is easy,exchange the old transducer with the new transducer according to the
reverse process.
Attention:
1 during the process of welding the base of the ball valves,avoid the phenomenon of slag
inclusion,sand hole,water leakage.
2. The bases of the two ball valves should be welded on the same axis plane
to prevent poor receiving of ultrasonic waves;
3. after The holes having been drilled through, the impurities such as iron filings in the ball
valve should be cleaned
up so that the transducer probe may not get stuck or its thread get adhered;if so,still to screw
hardly,and do not stop,the transducer will be destroyed and not work well.
4. Make that the ultrasonic emitting surfaces of the two transducers are face to face (that
is, the holes for wires are in the same direction and either upward or downward);
5. After the transducer is installed, the screw mut should be screwed tightly to avoid
transducer move.
The seal cover should be screwed tightly to prevent water after wires being connected..
§4.7 In-line type transducer installation method
In-line type transducer of new TDS-100M series is characterized by easy installation and
high-accuracy measurement. When ordering, customers need to provide the actual parameters of
the pipe. The parameters of the transducer have been put into the flowmeter before leaving factory
and there is no need to input them when installing.
There are two types of pipe transducers for selection:
1. π-type transducer(DN15-DN40MM)
2. Standard pipe transducer(DN50-DN1000MM)
Parameters
π-type transducer
Standard pipe transducer
Material
Stainless steel
Carbon steel(stainless steel is optional)
21
TDS-100M Manual
Pipe size
DN15-DN40MM
DN50-DN6000MM
Connection:
Flange type
Flange type
Application of temperature
-40℃~160℃
Protection class
IP68(can work in water, and water depth≤3 meter)
Rated pressure
please refer to following table
dimension
please refer to following table
Nominal
diameter(m
m)DN
Rated
pressure
(Mpa)
π-type
Standard-pipe
L1
L2
Flange dimension(mm)
D
D1
D2
f
N-Φ
Flange
thickness
15
320
95
65
45
2
14×4
14
20
360
105
75
55
2
14×4
16
390
115
85
65
3
14×4
16
32
450
140
100
76
3
18×4
18
40
500
150
110
84
3
18×4
20
25
2.5
50
200
160
125
100
3
18×4
22
65
200
180
145
120
3
18×4
24
80
225
195
160
135
3
18×8
24
100
250
215
180
155
3
18×8
26
125
250
245
210
185
3
18×8
28
300
280
240
210
3
23×8
28
200
350
335
295
265
3
23×12
30
250
450
405
355
320
3
25×12
32
300
500
460
410
375
4
25×12
32
350
550
520
470
435
4
25×16
34
400
600
580
525
485
4
30×16
38
600
565
515
482
4
25×16
30
450
700
615
565
532
4
25×20
30
500
800
670
620
585
4
25×20
32
600
1000
780
725
685
5
30×20
36
700
1100
860
810
775
5
24×25
32
150
400
1.6
1.0
22
TDS-100M Manual
800
1200
975
920
880
5
24×30
32
900
1300
1075
1020
980
5
24×30
34
1000
1400
1175
1120
1080
5
28×30
36
§4.8 check installation of transducers
After the completion of transducer installation, the user should check the following items to see
whether the installation is suitable,whether the received ultrasonic signal is correct,enough
strong,that could make the meter work normaly and long time running. By checking the receiving
signal strength S, the signal quality Q value, the delta time, , the transit time ratio
R to assure whether the installation point is good or not. Normaly,apply couplant on the
transducers and attach them on the pipe ,so can obtain measurement results,but it is better to
chech followings to ensure the flow meter is working properly and the results are reliable and
accurate.
§4.8.1 Signal Strength
Signal strength S (display on M90) indicates strength of sending and receiving signals from
upstream transducer and downstream transducer by a 3-digit number. [00.0] means there
is no signal detected, and [99.9] refers to the maximum signal strength that can be detected.
When installation,do best to adjust the position of transducers and check whether the couplant is
sufficient,to make sure to gain the strongest signal.Although the instrument works well
when the signal strength ranges from 60 to 99,when the signal strength is too
low,you should chech the installation position ,installation space,whether the pipe is suitable to
install or change to install by Z method. stronger signal strength should be pursued, because a
stronger signal means a stable measurement results,long and reliable running..
§4.8.2 Signal quality(Q value)
:Signal quality is indicated as the Q value(display on M90) that represent the receiving signal
is good or not,TDS-100M series use 00-99 digits to represent signal quality.00 represent the worst
signal,99 represent the best signal,normaly the signal quality should be above 60. the reason of
poor signal quality could be big interference,or worse installation of transducers,or using bad
quality,not professional signal cable.normaly ,to adjust transducers repeatly,check the couplant
that is enough or not,until the signal is better.
§4.8.3 Total transit time,delta time
The total transit times (or traveling time) and delta time are displayed on menu window M93,they
can display whether the installation is suitable or not, They are
the basic two parameters for the flow meter’s internal measurement and calculation,. When the
data of delta time fluctuates too much,the showed flow rate and velocity will change quickly,under
such condition,it means the signal quality is not good,perhaps the conditions of pipe is not
good,not suitable installation of the transducers,or wrong parameters input.normaly the fluctuation
of delta time is less than ±20%.but when the pipe diameter is too small or lower flow velocity,the
fluctuation of delta time may be higher.
§4.8.4 Transit time ratio
:Transit-time ratio (visit on M91)is usually used to check whether the transducer installation
space is good .If the pipe parameters are correct and the transducers are installed
properly, the transit time ratio should be in the range of 100±3 %.when the
ratio is over the range,you should check,
a) If the entered pipe parameters are correct?
b) If the actual space of the transducers is the same as or close to what shown on window
M25.
c) If the transducers are installed properly in the same axis plane of pipe?
d) If the mounting location is good, if the pipe has changed shape, or if the pipe is too old (i.e.,
23
TDS-100M Manual
too
much corrosion or liner inside the pipe)?
e) If there is any interference source around the flow meter?
§4.8.5 Note the following questions when installing
1,input pipe parameters must be correct,conform to actual facts,otherwise the flow meter will not
work.
2,when installing clamp on type transducers,apply enough couplant to make the transducers
attach on the pipe,check the signal streghth and signal quality displayed on the screen while
moving the transducers around installation point to receive the best signal and signal quality.the
diameter of pipe is more wider,the range of moving transducers is more larger.then ensure
whether the installation space is the same with that on M25,whether transducers are installed in
the same axis line of pipe.if the signal streghth is 0.00,that means no receipt of ultrasonic
beam,check whether the input parameters are correct or not, choosing installation method is
correct or not,whether the pipe is too old,liner is too thick,is there fluid in pipe?the space is too
near valves,angle head?too many air bubbles in fluid?if not these reasons,still no signal,so have to
try another point,or use insertion type transducers.
3,ensure whether the flow meter work normaly:signal streghth is bigger,signal quality is
higher,the displayed flow rate is more reliable,the meter can work for long time.if there is too
bigger environment electromagnetic interference or lower receiving signal,then the flow rate
displayed is poor,not be able to work normaly for long time.
4,after installation,enter M26 to solidify parameters,power on again,check results are correct
or not.
5.Troubleshooting
TDS-100M designed perfect self-diagnosis function.The errors are displayed on the upper
right corner of the menu window via identification code in a timely order.
Display orderly all the existing errors on M08
Hardware self-diagnosis is conducted every time when power is on. Some errors can even be
detected
during normal operation. For those errors undetectable due to incorrect settings
or improper testing
conditions, the flow meter will also display useful information to help the user to quickly debug the
error and solve the problems according to following listed methods.
Displayed errors of TDS-100M have two kinds:one is circuit hardware errors information,arising
possible problems and solve method can refer to table 1.if finding problems when power is on,and
in the state of measuring,it will display “* F”on the upper left corner of screen.power on
again,check the displayed information,adopts measures according to following table.if the
problems still exist,contact manufacter. The other is error information about measurement.refer to
table 2.
Table 1. Hardware self-diagnosis errors and solutions after power on
LCD display information
ROM verification Error
Causes
* ROM operation illegal / error
Solution
* Contact the manufacturer.
Logger reading error
* Stored parameters are wrong
*power on again/contact the
24
TDS-100M Manual
* System stored data area has
error
System logger error
Measuring
error
circuit
hardware
* Sub-CPU circuit errors
manufacturer.
*power on again/contact the
manufacturer.
*power on again/contact the
manufacturer.
Cpu clock speed error
* System timer has errors
*power on again/contact the
manufacturer.
Date time error
* System date and time are
wrong
* reset date and time
No Display. Erratic or
Abnormal Operation
No response to key pressing
* Problem with wiring
* Keypad is locked
* Bad plug connection
* check wiring connections.no
influence
of
measuring
normaly
* input password to unlock
keyboard,or check wiring
connections,no influence of
measuring normaly
Table2. Working status errors code causes and solutions
code M08 displaying
causes
*R
system work normaly * normal system
*J
Circuit Hardware
Error
* Hardware problem
* Unable to receive signal
solutions
* Contact the manufacturer
* Make sure the transducer is in tight
contact with pipe surface, the couplant is
enough .
* Polish the pipe surface and clean the pipe
enough couplant between
transducer and pipe surface. surface. Clear paint,rust.
* Check original installation parameter
* Transducers installed
settings
* Loosen contact or not
*I
No Signal
improperly
* scaling on inner pipe wall is
too thick.
* new changed liner
*H
*H
*E
* Clear the scaling or change the pipe with
thick scaling,normaly change to another
measurement point that has little
scaling,the meter can work normaly.
* Wait until the liner has been solidified and
then test.
* lower signal
lower signal strength
* causes are the same with * solutions are the same with code “I”。
received
code “I”
poor signal quality * poor signal quality
* include above all solutions
received
* include above all caused
The current of
* 4-20mA current loop output * Check current loop settings on M56. or
Current Loop is Over overflow 100%
Confirm if the actual flow rate
20mA (not influence
* Improper settings for current is too high.
the measurement if
loop output 。
not using current
25
TDS-100M Manual
output)
Frequency Output is
Over the set
value(not influence
the measurement if
not using frequency
output)
* 4-20mA current loop output * Check frequency output settings(refer to
overflow 120%
M66-M69). or Confirm if the actual flow rate
* Improper settings for current is too high.
loop output 。
*F
Listed in table 1
* power on again,check the information
* find problems when power on
showed on screen,handled according to
and self-diagnosis
table 1,if not solved ,contact manufacturer.
* contact manufacturer.
* permanent hardware errors
*G
Instrument is in the
progress
of adjusting the gain
Adjusting Gain >S1
Adjusting Gain >S2 to prepare the measurement. If
Adjusting Gain >S3 stopped at S1or S2 or switched
Adjusting Gain >S4 between S1 and S2,that means
( displayed
on
the too lower receiving signal or
M00,M01,M02,M03)
not good wave.
*K
Empty pipe
,setup in M29
*Q
no liquid in pipe or wrong if there is liquid actually,input 0 value in
setup.
M29
:Attention:the codes of *Q,*E displayed do not affect measurement,only means current
loop and frequency output have problems.
6
Warranty and service
§6.1 Warranty
The products manufactured by Dalian Hipeak Instruments Development Co.,Ltd.are warranted to
be free
from defects in materials and workmanship for a period of one year from the date of shipment to
the
original purchaser. Dalian Hipeak Instruments' obligation should be limited to
restoring the meter to
normal operation or replacing the meter, at Dalian Hipeak Instruments' choice, and shall be
conditioned
upon receiving written notice of any alleged defect within 10 days after its
discovery. Dalian Hipeak
Instruments will determine if the return of the meter is necessary. If it is, the user should be
responsible for the one-way shipping fee from the customer to the manufacturer.
Transportation:Buyer should be responsible for the transportation of meters and freight.
26
TDS-100M Manual
§6.2 Maintainance Service
For operational problems, please contact the technical support department by telephone, fax,
email or internet. In most cases, problems could be solved immediately.
For any hardware failure of the instrument, we recommend our customers to send back the
instrument for service. Please contact the technical support department with the model number
and serial number of the unit before sending the unit back to us. Both numbers can be found on
the product label. For each service or calibration request, we will issue a Return Materials
Authorisation (RMA) number.
Take notice that the cost for repairing can only be determined after receipt
and inspection of the instrument. A quotation will be sent to the customer before proceeding
with the service.
§6.3 Software Upgrade Service
We provide
free-of-charge
for any lately
developed software.
software
upgrade
services.
Please contact
the
factory
§6.4 Important Notice for Product Return
Before returning the instrument for warranty repair or service, please read the following carefully:
1. If the return item has been exposed to nuclear or other radioactive
environment, or has been in
contact with hazardous material which could pose any danger to our personnel,
the unit cannot be
serviced.
2. If the return item has been exposed to or in contact with dangerous materials, but has been
certified
as hazard-free device by a recognized organization, you are required to supply the certification for
the
service.
3. If the return item does not have
back without any service conducted.
a RMA#
associated,
it will be
sent
P.R. China
27