1
User’s Manual
Contents
Preface and Guarantee for Product ........................................ 02
Summary of Products ........................................................... 03
Characteristics of Product ....................................................... 04
Structures of Product .............................................................. 05
Function of Keys .................................................................. 05
Operation Instruction .............................................................. 07
Installation and Taking-out of Memory Card ........................... 07
Open and Close of Camera ..................................................... 08
Mode of Camera..................................................................... 08
Mode of Photograph ............................................................... 09
Mode of Repeat ...................................................................... 10
System Settings .................................................................... 11
Operation of Connecting Computer ....................................... 12
Operation Diagram of HDMI .................................................. 13
Random Fittings of Product Parameters .................................. 14
Safety Precautions ................................................................ 16
Solution of Easy difficulties .................................................. 17
Preface
Thank you for purchasing digital driving recorder.
The user’s manual has a detailed description on how to correctly use
the digital driving recorder and provides detailed product information,
including
operation,
installation
precautions
and
technical
specifications. Please read the manual carefully before using. We hope
the product can meet your requirements and provides the service for
you for a long time.
Guarantee for Products
The product is tested strictly that its property complies with the
specification and there is safety guarantee for using of customer.
02
Summary of Product
This kind of digital driving recorder breaks through the digital driving
recorder on the market at present and records the front highway
condition into interior of host machine by using digital camera lens of
host machine itself and keeps back highway condition of the car into
memory car by using a rearview camera lens attached to the back of
car.
Micro SD card is used as storage device to be small and exquisite.
Compared with general digital driving recorder, this kind of digital
driving recorder can record more micromesh and perfect video, and
the video can directly output to HD TV for playing to really enjoy HD
vision effect.
GPS MAP Can be employed to look up the former driving route record,
this kind of digital driving recorder is external and freely choose
whether need function of GPS. (GPS is required to be purchased
separately and not contented in the product), the operation system of
windows XP SP3, CPU is 3G of single core, 2.5G of dual core,
internal memory is more than 2G.
03
Characteristics of Product
■ 1280*720 30fp with rearview video effect of D1 (720*480)
■ 5M 2 million CMOS wafer, interpolation (12 million pixel);
■ Night LED fill-in light;
■ B provided with the function of white balance compensation in
various settings;
■ Built-in rechargeable lithium batteries;
■ Display screen of 2.7 foot TFT 16:9;
■ Be provided with function of exposure compensation;
■ Built-in microphone/trumpet;
■32G for Maximum support volume of micro SD card;
■ Be provided with possesses external GPS antenna, can look up
driving route (need to be purchased externally)
■ HD TV output interface: HDMI sign output, be provided with
resolution ratio reaches up to 1280*720P.
04
Structures of Product
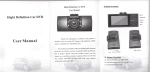
On and Off Key GPS connector
AV connector
SOS lock gear
Menu key
Mode key
Direction/OK
HDMI connector
TF Rabbet
USB connector
05
Function of Keys
MODE is mode-shifting key to be used for shifting mode of camera,
photograph, and play. MENU is menu key to be used for entering into
condition of function table setting, it will enter into function table if
you press once, quit function table if you press again.
On and Off key: start up and power off.
Five keys in lower right corner
The status from left and right is in play condition to be used for
shifting mode all day and night, if you choose picture of picture in
picture, press it to shift the picture,
OK key is used for verifying function table setting in condition of
function table and used for starting, suspending play in play condition.
G-sensor
Sensitivity of G-sensor function can be set in the menu, the best setting
is of 6G, the user can set it according to own way.
Press MENU to enter into menu setting in standby mode.
Red locking key especially is used under the emergency condition,
press lock key once to keep pressed front 10 seconds and rear 10
seconds into card and not be circulated.
06
Operating Guideline
■ Installation and Application
1. Adhere the machine and sucker onto the front glass and remember
that the view of drivers two shall not be blocked.
2. Plug the vehicles-filling wire into the machine, and GPS antenna
can also be plugged into the machine (This function shall be served
as optional).
3. Insert the vehicles-filling wire into the cigarette lighter of car, and
the attention shall be paid to avoid the electric shock, this machine
can convert its 12V~14V into a voltage of 5V.
4. The photographing angle can be adjusted according to personal
preference.
■ Installing and Taking-out of Storage Card
1. When installing the micro SD card, insert the SD card into the slot
in line with the indication direction.
2. When removing the card, gently press the micro SD card, and take
it out when it pops out.
Warm Tips:
1. Prior to using the micro SD card, please confirm whether the
locking key of the micro SD card is locked up;
2.
Please confirm the inserting direction for the micro SD card, if the
inserting direction is incorrect, the machine and card maybe be
damaged;
3.
Please apply the high-speed micro SD card conforming to SDHC
dimension, the high-speed micro SD will be provided with a C4 or
C6 mark;
4.
If SD card format is incompatible with the machine, the card may
not be read, and such phenomenon can be eliminated by formatting
the SD card with the machine.
07
■ Start /Close of Machine and Automatic shutdown
1. Press the power key for around 3 seconds and the machine can be
started or closed.
2. In order to save the battery capacity, employ the setting context
menu to set the automatic shutdown time and the machine can turn
off the power automatically. The machine will be closed
automatically when no operation is performed within the setting
time. Under any mode, press the “MENU” key of context menu to
enter the system setup mode and employ the left and right key to
select the context menu.
■ This driving recorder has a shot with an ultra wide angle of 120
degrees and three lanes can be seen simultaneously. One lens is a
special one for pulling lines to the back of the car. By using this lens,
the situation of rear vehicles can be recorded to the SD card at the
same time.
■ Photographing Mode:
1. Turn on the power, after the machine completes the start mode, the
upper left corner on the display will present the camera mode mark
“
” sign, which denotes that the camera mode has been
entered currently. In other modes, the photo mode can be entered
by pressing the mode conversion key “MODE”.
2.
Push OK button to start the video recording, and push it again to
stop recording. In the process of recording, the yellow graphic
will flash on the display.
3.
Functional list mode: Press “MENU” key to enter the context
menu mode, employ the left and right keys to select the menu,
press up and down keys to modify the contents of context menu,
and press “OK” key to confirm it. In the context menu mode, the
following contents can be modified:
08
Resolution: applied to set the photographic resolution.
Photographing time: Selected based on users’ requirements.
Cycled photographing: Automatically cover the recorded
contents according to the setting time.
Vehicles-filling wire USB IN: Video recording can start
automatically
when
charged.
Several-minute
continued
recording or shutdown can be selected.
Warm Tips: In the process of photographing, pay
attention not to move the lens too quickly to avoid photographing low
quality image when switching scenes rapidly.
■ Photographing Mode
1. Press the mode conversion key MODE to select the photo mode. In
the photo mode, the photo mode sign “
” will appear on the
upper left corner of the display to mean that the photo mode is
entered at present.
2. Photo taking: Push “OK” button and photo taking can be
performed.
3. Functional list mode: Press the MENU key to enter the context
menu mode, employ MODE key to select the menu item, 1M, 2M,
3M.
Press the up and down keys to modify the contents for the context
menu, press “OK” key to confirm it. The following contents can be
modified in the context menu mode:
09
Resolution: choose two kinds of resolutions of quality 1M, 2M and
3M: it means that the compression quality of video and good
compression quality of video not only can produce more exquisite
picture quality but also can occupy more memory space; inversely,
general compression quality of video can save memory space. White
balance: in different environment of light source, picture can have
different displays of color can choose proper scene of light source
when using the function to perfect the quality of video. However, it
also can occupy more memory space. Color: used for producing
specific effect of color, including art, reminiscent, negative film, black
and white, bright-colored and so on.
Warm Tips:
While photographing, pay attention to seize camera quietly to reduce
the shake of hands.
Play mode
1. Press key of mode shifting “MODE” to enter into play mode. In
play mode, on the display can display current shot picture or video,
press left key or right key can have browse, press key OK can enter
into view menu.
2. Index and browse of picture: can use up and down key to browse
picture and video data quickly, press key OK can enter into play
mode of single piece.
3. Video play: In condition of single piece display, if there a mark of
appears in display menu, it means it is video file at present.
Press key OK for playing or suspending, press left, right key to
choose fall back or FF, press key “MODE” to quit playing.
Press key MUNU can delete video.
10
4. Deletion: Under play condition, press “MENU” of functional list
and enter into the functional list mode, use up and down key to
choose “Delete” menu, press “OK” to affirm the deletion.
■ System Setting
Press “MENU” to enter into the functional list mode, employ the left
and right key to choose the functional list mode, employ up and down
key to modify the contents of functional list and then press “OK” to
affirm.
Function list of system setting includes:
1. Size of resolution.
2. Language: set language.
3. Date: set the year, month and day, employ the left and right key to
choose up and down key to increase and decrease the operation,
press “OK” to affirm and enters into next set item.
4. Clock: set hour, minutes, use left and right key to choose, up and
down key to have increase and decrease operation, press “OK” to
affirm and enters into next set item.
5. Formatting: used for formatting memory or micro SD card.
6. Recover presetting value: used for setting system parameter as
preset value of factory-fresh.
7. Motion detection: used for detecting the front object in standby
mode, automatically open video.
8. Frequency of light source: used for choosing the frequency of light
source, the users in Taiwan, choose “60Hz”. If chose wrong
frequency of light source, interference of horizontal stripe shape
will appear on picture.
11
9. Version: Used to check the version number for the video camera.
Operation for Connecting Computer
Connect the machine to the computer through USB, and USB option
context menu will appear, followed by three such modes as “usb Disk”,
“pc camera”, as well as “rec mode”. Users may use the left and right
keys to select, and press “OK” key to confirm it.
1.
usb Disk Mode after entering this mode, the files inside the video
recorder can be scanned through computer, on which two DCIMA
will appear, one is the front picture, and another is simulate lens.
Users can use computer to store these files, perform operation
such as cutting .copying as well as deleting.
2.
pc camera Mode
After entering the pc camera mode, the
computer can be used as a network video head.
3.
Rec mode Mode
In this mode, USB can be used to supply
power to the video camera for performing normal operation.
12
Schematic Diagram for HDMI Operation
HDMI output
﹙HDMI output connecting wire﹚
HD TV
HDMI video input
13
Parameters of Product
Wafer
Lens
Liquid crystal
display
Video output
Photograph
2.8 CMOS wafer,1/2.5″light-sensing surface area
Four pieces of prime lens,3.0 aperture, 7.45mm focus
length
2.7 inches 16:9 TFT LCD
Output of HDMI signal
JPG file format, the top output megapixels:12 million
megapixels
H.264 compression format
Video
1280*720, 30 fps 720*480 D-1
640*480,30fps 720*480 d-1
Audio
Memory
White balance
USB interface
Battery
Dimension/weight
Work
humidity/temperature
Built-in microphone / speaker(AAC)
External medium: MICRO SDHC card (the top support
64G,MICRO SDHC card)
Automatic/sunshine/cloudy
day/fluorescent/incandescence light
USB 2.0
High capacity lithium rechargeable battery,
3.7V180mAh
Dimension:112mm×53mm×32mm
Weight:65.5g(including battery)
10%-80%-10℃-65℃
14
Random Accessories
Warm Tip :
While you purchasing of this product, check accessories as shown on
the picture to avoid the loss for you!
Host
USB cable
Use manual
HDMI connecting line
15
Car charger
Holder
Safety Precautions
If the product is not properly used, the following problems
may be caused, please use it according to the following safety
stipulations.
※Warning
Take notice not to enable other things to enter into
SE-800hd machine.
■ This may cause fire, electric shock and
product defects in case you fall the products into
water or liquid in negligence, please turn the
power off and find our service department as soon
as possible;
Please do not enable the products to fall down the
ground.
■ This may give rise to product damage and
defects;
Please keep the product far away from humid and
dusty place.
■This may result in product fault and defects;
Please do not decompose this product at random
■Otherwise, you can’t get the product warranty
from company;
Please do not wipe the products with chemicals
and detergent
■This may change color;
Please do not remove USB cable when data is
transferring
■This may have serious effect on product.
16
Simple Troubleshooting
In the case of normal operation, if there is a problem with the
products, please refer to the following methods to solve them, please:
■Not be available for taking picture and photographing, check SD
card whether there is enough memory and is locked.
■Automatic stopping due to a greater volume of HD video data in
video recording. Please employ the high speed SD card which is
compatible with SDHC, high speed SD card will bear C4 or C6 mark.
■During playing of picture and video, appear “file error”. This is
because an error occurs when SD storing data, then file error is caused.
Recommended use formatting functions of camera and re-format SD
card.
■No video displayed in television screen, check whether connection
of HDMI TV plug is correct and whether television is set in correct
HDMI state.
■Video taken is foggy, because lens is not clean enough. Please check
whether lens produce the dirt and finger print. Before shooting, use
lens paper to clean lens.
■Video taken is fuzzy, check whether lens is dirty, use clean cloth to
wipe lens.
■When taking the sky and water scenes, the video is very dark, such
situation belongs to a big contrast scene, which will produce serious
effect on automatic exposure function of camera. Under this situation,
the exposed compensation function is required to amend the exposure
value of camera.
■Under cloudy day and indoor lighting, the color presentation is not
perfect. Please set “white balance” function according to specific
scene.
■Flashlight fails to be started, in the case that battery power is not
enough; the flashlight can not be started for using.
■There is horizontal stripe interference in image caused by incorrect
light frequency setting, for Taiwan users, and light frequency shall be
set to “60Hz”.
17