1
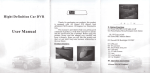
Product structure:
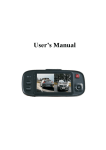
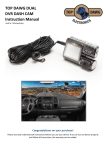
Hight Delinition Car DVR
User Manual
Hight Definition Car DVR
User Manual
Thanks for purchasing our products, this product ts
equipped with
sensor,
1
All
winner F20 chipset, high definition CMOS
20 degrees low illumination lens.
This manual is provided to help you getting good command
HdMl
ofproduct, it will show you how to operate and the specification
list of product. Before using this product, please read this
manual very carefully and keep
it properly. Hope you will like
this product and then we can build long term
relationship in the near future.
business
Baok
bns
II. Button Functions
01: Power ON/OFF, LED light
orloff
02: Menu/Backlight ON/OFF/Emergent lock
03: UP/Mode/Repiai;
mode.
;
2
.,.::-:
r:
i
04: DowrVScreen switch
the Menu sltings, press UPrDown to choose setting your DVR
05: Record./OK
accordingll'. press REC to enter in to, press Menu to exit the
06: Mode button
settings.
07: TF card slot
@Back light ON/OFF: Keep pressing 3 seconds to turn off
08: Reset
the backlight. then press any buttons to tum on the backlight.
09: DC in
@Emergent lock function: When the Car charger had been
l0: Back lens
plugged into the car. the D\rR
will
start recording automatically,
slightly press this bunon, the video which is being record will be
III. Operation Instructions
saved in Lock file and not be deleted by cycle recording.
LPower ON/OFF button:
@Power on/off the DVR: Keep pressing 3 seconds to pos'er
or/off the DVR, it will enter into the recording
automatically. Meanwhile the D\rR
capacity card
will
will
mode
read the TF card" the big
takes more time to get read. Keep pressing
again the Power ON/OFF button, the recording
will be stopped
and the video files get saved.
3. UP/Mode/Replay mode:
@Page Up function: when in the mode of Menu or Replay,
press this button to scan up sub- menu or video files accordingly.
@Mode: press this button to switch modes to Mdeo mode or
Photo mode.
@Keep pressing
@Power ON/OFF back light: After the DVR powered on,
3
seconds
to enter into replay mode:
When in standby mode, keep pressing this button for 3 seconds
slightly press the Power ON/OFF button to choose: LED light
to enter into the replay mode, press UP/Down to
on/o{?auto; in the mode of LED light auto, the LED
scan up/down
li-dt
is
the saved files, keep pressing UP/Mode button to exit the replay
controlled by photoconductive resistance or the brightness
of
mode.
light sensed by the camera lens.
4. Down/Screen switch:
2. Menu:
@Menu: If{bgt*gd$lry,$i1,$less this buttonto enrer into
accordingly.
support seamless recording function.
@screen switch: Press this button to choose screen switch
as
Front lens/Back lens,iPicture in picture/Split screen.
9. Low battery warning:
When the DVR had detected the low battery the LCD screen
5. Record/OK
button:
will
@Press to record: In the stand by mode, press this button to
appear icon of low battery the DVR
will be powered off
within 6-13 seconds and the file will be saved automatically.
record videos or take photos, press again the button to stop the
recording and the video file will be saved.
@OK function: In the mode of
10.U Disk/Webcam/Charging mode:
Memr,/Replay, press this
When the DVR had been plugged into the PC by USB cable,
the DVR screen
button to choose OK.
will
appear
3 option for your choice,
press
Down/Up button to choose which mode you want to enter into.
7. Reset
button:
Choose to restafi the DVR when it is crashed.
After choosing well, the LCD of DVR will appear icons of U
Disk/ Webcam/ Charging respectively.
8. Time&Date update
function:
When the DVR is in the video mode, press Menu button to
find the System Menu, press DownilJp button to select "Time
Set",. press OK,lEmergent button
buJton to set Year, Month, Date,
to
Hou, Min,
to set correct time&date; press OK to
the video standby mode.
choose
OK, press Menu
Sec; press Doun/Up
save, also
it will back to
11. G-Sensor function:
The G-Sensor function can measure the
acceleration
they are crashing. Meanwhile, the DVR
ln the
Menur
will
save the video
file
which is started from 10 seconds before the'accidents and ended
20 seconds after the accidents md
recording.
video time
gravitational
of D\rR, sense the vibration between cars when
will not be covered by circle
DCIMA:
the videos recording by front lens;
DCIMB:
the videos recording by back lens;
Normal: normal videos recording during
the driving;
Lock: videos record by pressing Emergent lock button
or
G-sensor frmction.
Specification list:
G-Senor
Support
Emergent G-Sensor
Support
Video chatting
Webcam
Stock temperatue
-20c-60c
Operating temperature
-10c-60c
Operating humidity
l5-65 %RIj
TF card
oY9712
Support card
Front lens
120 degrees
Support TF card
512M8-64G8
Front lens Resolution
HD(1280*720)/30fos
Banery
300mAH
Back lens
N/A
Back lens motion detect
N/A
Picture in picture
N/A
Photo format
JPEG
Photo resolution
HD 2048X1536
l.Accessories:
Screen size
2.7 inch TFT
1,
Seamless recording
Support
5.USB
Night vision
Support/optional
Motion detect
Support
Circle recording
Support
Voice recording
Support
Image sensor
Recording time
1-1.5 hours
Consumption currenl
400MA-60OMA
DC in
DC5V
DVR 2. Back lens 3.Manual
cable 6. Color box
Ifyou have any question,
:7
:i I
i:tr..: llrrtlr:i:::i
4.Car charger
please free feel to contact us.
Remark: we suggest the customers to use TF card superior than
class 6.
Warranty card
Date: DDI MM/
User profile
YY
rvice is only valid under normal use.
cause by inaorrect operation, mate.ial costs will be €harge for replacement
0d&6iidl"tin9 tlre nalional maintenance regulations ar€ not under warranty, such a5self disassembling
bal damages, the Compa.y has lhe rights not to do atter-sale services.
4,This warranty card must be provided for maintena.ce, the Company has the rigits to treat ihose that
cannot provide wa..anty card or amend the warranty card wilhout authorization as non-warranty processing
5
k;,,rr
I