1
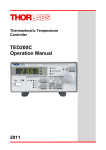
TC200 Temperature Controller User Guide Rev G, April 15, 2011 Table of Contents Chapter 1 Description ........................................................................................................................... 4 Chapter 2 Safety .................................................................................................................................... 5 Chapter 3 Features ................................................................................................................................ 6 3.1. Front and Rear Panel ...................................................................................................... 6 3.2. Operation ......................................................................................................................... 7 Chapter 4 Stand-Alone Operation ....................................................................................................... 9 4.1. Initial Setup ...................................................................................................................... 9 4.2. Turning the Controller On .............................................................................................. 9 4.3. Enabling the Heater......................................................................................................... 9 4.4. Adjusting the Temperature in NORMAL Mode ............................................................. 9 4.5. Turning the Heater Off .................................................................................................. 10 4.6. Navigating the Front Panel ........................................................................................... 10 4.6.1. Overview ............................................................................................................................. 10 4.6.2. Selecting and Adjusting the Gains: P, I, D, and Tune ......................................................... 11 4.6.3. Selecting the Temperature Sensor: PTC100 vs. PTC100 vs. TH10K ................................ 12 4.6.4. Selecting and Adjusting the Maximum Temperature and Power: TMAX and PMAX ......... 13 4.6.5. Selecting the Units Displayed: Celsius vs. Fahrenheit vs. Kelvin ....................................... 13 4.6.6. Selecting the Operating Mode: NORMAL vs. CYCLE ........................................................ 14 4.7. CYCLE Mode .................................................................................................................. 15 4.8. TUNE Function .............................................................................................................. 16 4.9. TMAX Function .............................................................................................................. 16 4.10. Sensor Alarm................................................................................................................ 17 4.11. Setting the PID Gains .................................................................................................. 17 Chapter 5 Operating from a Computer ..............................................................................................18 5.1. Overview ........................................................................................................................ 18 5.2. The Command Line Interface ....................................................................................... 18 5.2.1. Setup and Connection......................................................................................................... 18 5.2.2. Terminal Commands and Queries ...................................................................................... 19 5.3. The TC200 Application Software ................................................................................. 21 5.3.1. Installing the TC200 Application Software .......................................................................... 21 5.3.2. Setup and Connection......................................................................................................... 22 5.3.3. Operating in NORMAL Mode .............................................................................................. 23 5.3.4. Operating in CYCLE Mode.................................................................................................. 25 5.3.5. Disconnecting from the TC200............................................................................................ 26 Chapter 6 Output Connector Pin-Outs ..............................................................................................27 Chapter 7 Temperature Sensor Specifications ................................................................................28 Chapter 8 Troubleshooting .................................................................................................................29 Chapter 9 General Maintenance .........................................................................................................30 Temperature Controller Chapter 1: Description Chapter 10 Auxiliary Output ..................................................................................................................32 Chapter 11 Warranty ..............................................................................................................................33 Chapter 12 Accessories .........................................................................................................................34 Chapter 13 Certifications and Compliance .........................................................................................35 Chapter 14 Specifications .....................................................................................................................36 Chapter 15 Regulatory ...........................................................................................................................37 Chapter 16 Thorlabs Worldwide Contacts ..........................................................................................38 ! ATTENTION ! Please consult this user guide whenever these symbols are encountered on your TC200 Temperature Controller. Note: Throughout this manual, references to temperature are with respect to °C, even though the TC200 can be set to display °C, °F, or K. Rev G, April 15, 2011 Page 3 Temperature Controller Chapter 1 Chapter 1: Description Description The TC200 Temperature Controller is a benchtop controller intended for use with resistive heating elements rated up to 18 Watts. This general purpose instrument can drive various types of heaters, including foil and resistive coil types. It accepts feedback from either positive or negative temperature coefficient thermistors, has programmable P, I, and D gains, and will display the temperature in °C, °F, or K. In addition, it can be programmed for up to five sequential temperature settings along with associated ramp and hold times for each level. A user-programmable maximum temperature limit provides protection to the device being heated, and a user-programmable power limit protects the heating element from being over driven. Capable of stand-alone operation from a simple keypad interface, these units can also operate over an RS232 connection using our TC200 Application program, LabView® driver, LabWindows® driver, or a simple command line interface from any terminal window. Contents of Package Each TC200 is shipped with the following standard accessories: • TC200 User Guide • IEC 320-Compatible Line Cord for North American AC Wall Sockets • CD-ROM Containing TC200 Application Software • RS232-Compatible DB9 Cable Rev G, April 15, 2011 Page 4 Temperature Controller Chapter 2 Chapter 2: Safety Safety Precautions of a general nature should be gathered here. Wherever possible, however, safety warnings, cautions, and notes should only appear immediately before the instructions to which they apply (versus being listed in this section). SHOCK WARNING HIGH VOLTAGE INSIDE To avoid electrical shock, the power cord protective grounding conductor must be connected to ground. Do not operate without cover installed. Refer servicing to qualified personnel. Thorlabs provides the proper power input cable with each TC200 for use in the United States. If using this unit anywhere else, the user will need to supply a properly grounded power cable to power the unit. ! ! ATTENTION Do not obstruct the air ventilation slots in the housing. All statements regarding safety of operation and technical data in this instruction manual will only apply when the unit is operated correctly. WARNING Before applying power to your TC200 system, make sure that the protective conductor of the 3 conductor mains power cord is correctly connected to the protective earth contact of the socket outlet! Improper grounding can cause electric shock resulting in severe injury or even death. Make sure that the line voltage rating marked on the rear panel agrees with your local supply and that the appropriate fuses are installed. Changing of the mains fuse can be done by the user (see page 30 for details). ! ATTENTION ! This unit must not be operated in explosive environments. With the exception of the mains fuses, there are no user-serviceable parts in this product. This device can only be returned when packed into the complete original packaging, including all foam packing inserts. If necessary, ask for a replacement package. Mobile telephones, cellular phones or other radio transmitters are not to be used within the range of three meters of this unit since the electromagnetic field intensity may exceed the maximum allowed disturbance values according to EN50082-1. Rev G, April 15, 2011 Page 5 Temperature Controller Chapter 3 3.1. Chapter 3: Features Features Front and Rear Panel TEMPERATURE CONTROLLER TEMP SET 2 TC200 TEMP ACTUAL HEATER ON PWR ON 5 3 1 | STATUS MODE SELECT ENTER 4 O MODE ENABLE POWER 6 MAIN OUTPUT 7 100 - 240VAC 50-60HZ POWER 25 VA MAX AUXILIARY OUTPUT 8 10 MANUFACTURED BY S.N. RS232C Figure 1 9 435 ROUTE 206 NEWTON, NJ USA Front and Rear Panel 1. Power Switch – Turns the unit On and Off. 2. Power On Indicator – When this text is lit, power is applied to the unit. 3. LCD Display – Provides status and temperature information when in the main screen as shown above. Various programmable mode screens are accessible via the Keypads (4). See Navigating the Front Panel on page 10 for more details. 4. Keypads – Used to adjust the temperature set-point (Temp Set), enable and disable the output, and navigate through the various Mode screens. Rev G, April 15, 2011 Page 6 Temperature Controller Chapter 3: Features 5. Heater On Indicator – When this text is lit, the output relay is energized, and the heater controller is enabled. Note: there are situations where the indicator (and relay) will NOT be on, yet the heater controller will still be enabled – See Maximum Temperature Shutdown on page 8. 6. Cooling Fan 7. Main Output – Use this output to connect to the heating system. See page 27 for connector information. 8. Auxiliary Output – This output is intended for use only with Thorlabs' GCH Gas Cell Heaters. It provides an unregulated output current proportional to the Main Output current. See page 32 for more information. 9. RS232C DB9 Connector – Use this connector for all serial interface connections. 10. AC Input Connector 3.2. Operation 1. Programmable Proportional (P), Integral (I), and Derivative (D) gain settings – The P, I, and D gains can each be set to values from 0 to 250 (I and D) and 1 to 250 (P gain only). These values indicate representative shares of each gain stage, not absolute gain values (which are fixed internally). Adjust each of the gains accordingly to effect the best response from the particular heating system being controlled. See page 11 for more details. 2. Automatic Offset Tune – Often times P, I, or D controllers will not perform as one would hope, leaving either an offset value or constant oscillations about the set-point. The TUNE function allows the user to tune the output of the TC200 exactly to the set-point value without having to adjust the P,I, or D controls. Ideally the I gain and D gain settings should be set to zero, and only the P gain should be adjusted to provide a stable temperature. Once the temperature has reached its maximum value (which should be slightly less than the set-point), enabling the TUNE function will digitally calculate the offset and adjust the output to meet the set-point. 3. Selectable Resistive Sensors – The TC200 allows the use of three different types of resistive temperature sensors: platinum PT100 and PT1000 resistors with Positive Temperature Coefficients (PTC), and a standard Negative Temperature Coefficient (NTC) TH10K 10 kΩ resistor. When selecting TH10K as the sensor, you can also enter the Beta value for the device to provide more accurate operation. The default Beta value shipped with the unit is 3970. See page 28 for more information on the sensors. 4. Maximum Temperature Limit – A value for a maximum temperature limit (TMAX) can be programmed into the TC200. TMAX can range from 20.0 to 205.0 °C. The set-point value is limited to a maximum of TMAX or 200.0 °C, whichever is lower. If TMAX is set to a value that is below the current set-point temperature, the set-point will automatically be lowered to the TMAX value, along with all stopping temperatures programmed into the cycle parameters that are greater than TMAX. 5. Maximum Power Limit – A value for a maximum output power (PMAX) can be programmed into the TC200. Based on a maximum output voltage of 24 VDC, the PMAX value will provide the proper current limit to the output current source that is required to limit the maximum power to the heating device. 6. Selectable Temperature Display Units – All temperature values displayed on the front panel LCD display can be presented in either °C, °F, or K. Internally, the unit operates strictly on °C formats. Due to the conversion factor used, values displayed in °F will not increment at even 0.1° steps as they do with °C and K. 7. NORMAL vs. CYCLE Modes – Two operating modes are possible with the TC200. In NORMAL mode, the unit operates as a single point controller, maintaining the set-point for as long as the user requires. In Rev G, April 15, 2011 Page 7 Temperature Controller Chapter 3: Features CYCLE mode, the user can program one to five distinct temperature levels. A “ramp” time (in minutes) can be programmed for each step to determine how long it will take to get from the starting temperature to the stopping temperature. A “hold” time (also in minutes) can be programmed to determine how long the system will stay at the stopping temperature before moving on to the next step. During the course of any step, CYCLE Mode can be paused, stopping the ramp or hold timers at their present count. Removing the paused function will resume the cycle at the same point at which it was paused. 8. Sensor Alarms – The TC200 can determine whether a temperature sensing element is short circuited or not installed (open circuit). If a short or open circuit occurs, the TEMP ACTUAL field in the main LCD display screen will read !SENSOR! If the sensor alarm occurs during normal operation, the output will immediately be disabled. The unit cannot become enabled again until the error is resolved. ! ATTENTION ! The TC200 can only determine shorted or open sensor connections; it cannot determine if the installed sensor does not match the programmed sensor selection. Care must be taken to ensure that the settings match the actual sensor used, or damage will occur to the heating system. 9. Maximum Temperature Shutdown – Based on the setting of the TMAX parameter discussed above, if the TC200 reads back a temperature value that equals or exceeds TMAX, the output relay will be opened and !TMAX! will be displayed in the MODE field of the main LCD display screen. The controller, however, will remain enabled. Once the system temperature lowers down to the set-point value, the output relay will be closed, connecting the controller to the heater again. If the temperature increases past TMAX again, the relay will open. If this cycle occurs three times, on the third time, the relay will open and the controller will automatically disable. The TMAX text will continue to be displayed until it is cleared manually by the user by either pressing the SELECT keypad while in the main screen, or by pressing the ENABLE keypad. Rev G, April 15, 2011 Page 8 Temperature Controller Chapter 4 4.1. Chapter 4: Stand-Alone Operation Stand-Alone Operation Initial Setup 1. Place the unit on a dry, level working surface. 2. Make sure the POWER switch on the front of the unit is in the OFF position ( 0 ). 3. Plug the female end of the provided AC line cord into the AC Input Receptacle on the rear of the unit. Plug the male end into a properly grounded AC socket. 4. Connect the heater to be controlled to the MAIN OUTPUT connector on the rear panel of the unit. Refer to page 27 for information on proper connections to the output connectors. 4.2. Turning the Controller On 1. Press the POWER switch to the ON position ( | ). If the AC line voltage is sufficient and the internal power supply in the unit is fully functional, the PWR ON indicator will light up and the LCD screen will display a brief message stating the model number and the firmware revision. After approximately 2 seconds, this message will scroll off of the screen and the main LCD screen will appear. 2. The default power-up settings for the main screen are always NORMAL Mode, heater disabled, the last active sensor type used, and the last temperature set-point that was active on the unit. To change these settings, see Navigating the Front Panel on page 10. 3. All parameters from the last working session with the controller will be loaded during unit initialization. These include: PID gain settings, “Tuning” offset, sensor selection (including the TH10K Beta value if applicable), Maximum Temperature TMAX setting, Maximum Power PMAX setting, the last display units used (°C, °F, or K), and all cycle mode parameters for the five programmable cycle steps. 4. If the heater has not been operated yet, the TEMP ACTUAL field on the LCD display should show a value appropriate for a “cold” system (somewhere around room ambient temperature). If it is noticeably different, you should double-check that the selected sensor (PTC100, PTC1000, TH10K) matches the actual sensor used in your heating system. 4.3. Enabling the Heater 1. Press and release the ENABLE keypad on the front panel to turn on the heater. At this time, the Heater ON indicator will immediately light up. If not, see page 29 for troubleshooting suggestions. 2. If successfully enabled, the STATUS field in the LCD screen will read “ENABLED” and the MODE field will read either “NORMAL” or “CYCLE” depending on the particular mode chosen. 4.4. Adjusting the Temperature in NORMAL Mode The set-point temperature can be changed at any time while in NORMAL Mode, regardless of whether the controller is enabled, simply by pressing the UP or DOWN arrow keypads. Pressing the UP arrow will increment the temperature by 0.1°, and pressing the DOWN arrow will decrement the temperature by 0.1°. As with all of the numeric adjustments that can be done on the TC200, holding the arrow keypads down will accelerate the rate of increase or decrease the longer the arrow keypad is held down. Rev G, April 15, 2011 Page 9 Temperature Controller 4.5. Chapter 4: Stand-Alone Operation Turning the Heater Off • When necessary, the heater output can be turned off by either pressing and releasing the ENABLE keypad or pressing the POWER switch to the OFF ( 0 ) position, which will turn off the entire unit. • The heater will also turn off immediately if a shorted or open temperature sensor is detected. In that case, !SENSOR! will be displayed on the LCD screen. • Whenever the unit is ON and the heater is not enabled, the status will be indicated as “DISABLED” on the LCD and the HEATER ON indicator will be turned off. 4.6. Navigating the Front Panel 4.6.1. Overview • The front panel contains six keypads that can be used for various functions depending on what menu screen is actively displayed. • The Main Display screen displays the selected temperature sensor, the basic operating mode (NORMAL or CYCLE), the current temperature set-point, the current actual temperature, and various status messages such as ENABLED, DISABLED, !TMAX!, and !SENSOR! alarms. • There are five MODE screens: PID parameters, Sensor Select, TMAX/PMAX values, Units Display (°C, °F, or K), and NORMAL vs. CYCLE Mode. • There is a sixth sub-menu for programming the CYCLE Mode parameters: Stop Temp, Ramp Time, and Hold Time. • Use the MODE keypad to access the Mode screens. • While a menu is displayed, use the SELECT keypad to move the flashing cursor to the various selection options. • Pressing the ENTER keypad while in the Main Display screen and in NORMAL mode has no effect. • Pressing the ENTER keypad while in the Main Display screen and CYCLE Mode will PAUSE the cycle. See CYCLE Mode on page 15 for more details. • Pressing the ENTER keypad while in a Mode menu screen will accept and save the option that corresponds to the flashing cursor and advance you to the next menu screen or back to the MAIN screen, depending on the situation. • Use the UP and DOWN keypads to change the set-point temperature while in the Main screen. • Use the UP and DOWN keypads to change numerical options while in any of the Mode screens. • Pressing the MODE keypad at any time while in a mode menu will do one of the following: o If you are in the PID Mode screen, pressing the MODE keypad will advance to the Sensor Select menu without changing any of the current PID values. o If you are in the Sensor Select screen, pressing the MODE keypad will advance to the TMAX/PMAX Mode screen without changing the sensor selection. Rev G, April 15, 2011 Page 10 Temperature Controller • Chapter 4: Stand-Alone Operation o If you are in the TMAX/PMAX Mode screen, pressing the MODE key will advance to the Display Units Selection screen without changing the units. o If you are in the Display Units Selection screen, pressing the MODE keypad will advance to the NORMAL vs. CYCLE Mode screen without changing the units. o If you are in the NORMAL vs. CYCLE Mode screen, pressing the MODE keypad will advance to the Main screen without changing the Operating Mode selection. Pressing the ENABLE keypad at any time, in any screen* will either enable or disable the heater, depending on its current status. * While in the Cycle Parameters screen, you can only disable the heater. • Special Functions – While in the Main Display screen, the SELECT keypad will perform two special functions: o If you are using Thorlabs’ gas cell heaters in conjunction with the auxiliary output, pressing the SELECT key will momentarily display the auxiliary heater’s temperature. This function only works when the PTC100 sensor is selected. o If a TMAX error occurs, pressing the SELECT keypad will clear the error. 4.6.2. Selecting and Adjusting the Gains: P, I, D, and Tune Changing the P, I, or D Gains 1. While in the Main Screen press the MODE keypad once. 2. The screen will now display the P, I, and D values as well as the text “TUNE” or “DETUNE”. 3. The cursor will be flashing over the “P” for the proportional gain value. 4. Adjust the P gain using the UP or DOWN arrow keypads. The P gain is adjustable from 1 to 250. 5. Press the SELECT keypad to move the cursor to the “I” for integral gain. 6. Adjust the I gain using the UP or DOWN arrow keypads. The I gain is adjustable from 0 to 250. 7. Press the SELECT keypad to move the cursor to the “D” for derivative gain. 8. Adjust the D gain using the UP or DOWN arrow keypads. The D gain is adjustable from 0 to 250. 9. Press the MODE keypad to escape to the next Mode screen (Sensor Select) without making any changes to the current parameters. 10. Alternatively, press the ENTER keypad to accept any changes made to the P, I, or D values and return to the Main Display screen. Note: The PID screen is the only Mode screen that will return directly to the Main Display screen upon pressing the ENTER keypad. All other Mode screens will save changes and advance to the next Mode screen. Rev G, April 15, 2011 Page 11 Temperature Controller Chapter 4: Stand-Alone Operation Activating or Deactivating the TUNE Function Note: The TUNE function is only accessible in NORMAL mode when the heater is enabled. It cannot be accessed at any time in CYCLE mode or when the heater is disabled. 1. While in the Main Display screen, press the MODE keypad once. 2. The screen will now display the PID values and “TUNE” or “DETUNE” depending on the status of the TUNE function. 3. Press the SELECT key three times to advance to the TUNE/DETUNE text. 4. Press the ENTER keypad once. 5. The MAIN screen will now be displayed. 6. Please refer to TUNE Function on page 16 for more information on tuning the TC200. 4.6.3. Selecting the Temperature Sensor: PTC100 vs. PTC100 vs. TH10K Programming the Appropriate Temperature Sensor 1. While in the Main Display screen press the MODE keypad twice. 2. The screen will now display PTC100, PTC1000, TH10K, and the Beta value. 3. The cursor will be flashing over the “P” for PTC100. 4. Pressing the ENTER keypad at this time will select the PTC100 and advance you to the next Mode screen (TMAX/PMAX). 5. Otherwise, press the SELECT keypad to move the cursor to the “P” for PTC1000. 6. Pressing the ENTER keypad at this time will select the PTC1000 and advance you to the next Mode screen (TMAX/PMAX). 7. Otherwise, press the SELECT keypad to move the cursor to the “T” for TH10K. 8. Pressing the ENTER keypad at this time will select the TH10K and advance you to the “B” for the Beta value within the same Mode screen. 9. Use the UP or DOWN keypads to adjust the Beta value in increments of 10 from 2000 to 6000. For entering exact Beta values, see The Command Line Interface on page 18 or The TC200 Application Software on page 21. 10. Pressing the ENTER keypad at this time will accept the Beta value and advance you to the next Mode screen (TMAX/PMAX). 11. Press the MODE keypad to escape to the next Mode screen (TMAX/PMAX) without making any changes to the current parameters. Note: Any attempt to change the sensor while the heater is enabled will immediately disable the heater. Rev G, April 15, 2011 Page 12 Temperature Controller Chapter 4: Stand-Alone Operation 4.6.4. Selecting and Adjusting the Maximum Temperature and Power: TMAX and PMAX Changing the TMAX or PMAX Values 1. While in the Main Screen display, press the MODE keypad three times. 2. The screen will now display the TMAX and PMAX values. 3. The cursor will be flashing over the “T” for the TMAX value. 4. Adjust the TMAX value using the UP or DOWN arrow keypads. TMAX is adjustable from 20.0 °C to 205.0 °C. 5. Press the SELECT Key to move the cursor to the “P” for the PMAX value. 6. Adjust the PMAX value using the UP or DOWN arrow keypads. PMAX is adjustable from 0.1 Watts to 18.0 Watts. 7. Press the MODE keypad to escape to the next Mode screen (Units Select) without making any changes to the current parameters. 8. Alternatively, press the ENTER keypad to accept any changes made to the TMAX or PMAX values, and then advance to the next mode screen (Units Select). 4.6.5. Selecting the Units Displayed: Celsius vs. Fahrenheit vs. Kelvin The Main screen and Mode screens display various information regarding the output temperature. These values can be displayed as °C, °F, or K, depending on the user’s preferences. Changing the Format of the Temperature Display 1. While in the Main Display screen, press the MODE keypad four times. 2. The screen will now display the Display Units Selection menu with the text “CELSIUS”, “KELVIN”, and “FAHRENHEIT”. 3. The cursor will be flashing over the “C” in CELSIUS. 4. Pressing the ENTER keypad at this time will select Celsius and advance you to the next Mode screen (NORMAL vs. CYCLE Mode). 5. Otherwise press the SELECT keypad to move the cursor to the “K” for KELVIN. 6. Pressing the ENTER keypad at this time will select Kelvin and advance you to the next Mode screen (NORMAL vs. CYCLE Mode). 7. Otherwise press the SELECT keypad to move the cursor to the “F” for Fahrenheit. 8. Pressing the ENTER keypad at this time will select Fahrenheit and advance you to the next Mode screen (NORMAL vs. CYCLE Mode). 9. Pressing the MODE keypad at any time will advance you to the next Mode screen without changing the display format. Rev G, April 15, 2011 Page 13 Temperature Controller Chapter 4: Stand-Alone Operation 4.6.6. Selecting the Operating Mode: NORMAL vs. CYCLE Changing the Operating Mode 1. While in the Main screen press the MODE keypad five times. 2. The screen will now display “NORMAL MODE” and “CYCLE MODE”. 3. The cursor will be flashing over the “N” for NORMAL mode. 4. Pressing the ENTER keypad at this time will select NORMAL mode and advance you to the MAIN screen. 5. Press the MODE keypad to escape to the Main screen without making any changes to the current mode. 6. Otherwise, press the SELECT keypad to move the cursor to the “C” for CYCLE mode. 7. Press the MODE keypad to escape to the Main screen without changing to CYCLE mode. 8. Pressing the ENTER keypad at this time will select CYCLE Mode and advance you to the Cycle Parameters screen described in the following section. Changing the Cycle Parameters The Cycle Parameters menu is a sub-menu of the NORMAL vs. CYCLE Mode menu that can only be accessed if CYCLE Mode has been selected. The Cycle Parameters can only be adjusted if the heater is disabled. You can navigate and review the parameter settings while a cycle is in progress, however. Once you have accessed the Cycle Parameters menu you can make adjustments as follows: 1. Use the SELECT keypad to move the cursor to the parameter that you wish to change: • The STOP Temperature is located in the upper left, “T=nnn.n”. • The RAMP time is located in the upper right, “Rt=nnn m” • The HOLD time is in the lower left, “Ht=nnn m” • The STEP # is in the lower right. 2. Use the UP and DOWN arrow keypads to increase or decrease the parameters. 3. Use the SELECT keypad to advance to the various parameters. • The valid range for the STOP temperature is 20.0 °C to TMAX or 200.0 °C, whichever is lower. • The valid range for the RAMP and HOLD times is 1 to 999 minutes. 4. Pressing the ENTER keypad at any time will accept the changes and advance you to the next step’s parameter screen. After step 5, you will be returned to the Main screen. 5. Pressing the MODE keypad at any time will return you to the Main screen without changes. Note: The cycles will initiate the next time the heater is enabled. Rev G, April 15, 2011 Page 14 Temperature Controller 4.7. Chapter 4: Stand-Alone Operation CYCLE Mode • The STOP temperature determines the final temperature that the system will try to go to in the amount of time determined by the Ramp time value. • The RAMP time is how long it will take to go from a starting temperature to a stopping temperature. • The HOLD time is how long the cycle will stay at the STOP temperature before advancing to the next step, also known as “dwell time”. • The initial starting temperature is determined to be whatever the TEMP SET value is at the start of a cycle. After that, the starting temperature of the subsequent step is the stopping temperature from the previous step. That is, the stopping temperature for step 1 will be the starting temperature for step 2, and so forth. • The number of steps can be reduced by programming in the same STOP Temperature for any steps that you don’t need. That is, if you only want one cycle that ramps from TEMP SET to the STOP temperature over a certain amount of time, simply program in the same STOP temperature for steps 2 – 5. Once the step 1 HOLD time expires, the cycle will “jump” over steps 2 – 5 and resume operation in NORMAL mode. • NOTE: By the same token, if your starting value for TEMP SET is the same as your stopping value for step 1, then step 1 will appear to be jumped over. If ALL off your stopping values are the same as your TEMP SET value then it will appear as though the cycle never happened. • During the course of a cycle, the following actions can be taken: 1. While in the Main screen, pressing the ENTER keypad at any time will cause the scan to pause. Once paused, the cycle will hold at the current ramp or hold time count and remain there with the heater still enabled. Pressing the ENTER keypad again will cause the scan to resume at the current channel. 2. While in any screen, pressing the ENABLE keypad at any time will cause the cycle to terminate completely, turning off the heater, disabling the output, and changing the operating mode to NORMAL. 3. At no time during an active cycle can the set-point be adjusted from the Main screen using the UP or DOWN arrow keypads. 4. At no time during an active cycle can any of the cycle parameters be adjusted. • CYCLE Mode will be terminated and changed back to NORMAL Mode as follows: o Letting a cycle completely run its course will change the mode back to NORMAL, and the temperature will remain at the last stopping temperature with the heater still enabled. o Pressing the ENABLE keypad during an active cycle will terminate the cycle and disable the heater. o From the main screen, press the MODE keypad five times: The NORMAL vs. CYCLE Mode menu will come on, with NORMAL mode as the active selection. Pressing the ENTER keypad at this point will terminate the cycle at the current temperature and return you to the Main screen. The heater will remain enabled. Rev G, April 15, 2011 Page 15 Temperature Controller 4.8. Chapter 4: Stand-Alone Operation TUNE Function • The TUNE function is a manually enabled feature that digital calculates the offset between the TEMP SET value and the TEMP ACTUAL value. The offset is only calculated at one time and is not actively adjusted after that point. • Once the TUNE function is activated, the TEMP ACTUAL value should slowly adjust to within 0.1 °C of the TEMP SET value. The rate of adjustment and accuracy depends on the PID settings. • The TUNE function should only be set once the output has reached a final value and has settled completely. Activating a TUNE function while the temperature is changing will result in less than ideal performance. • If the unit is being DETUNED, the output will develop an offset between the set-point and actual temperatures. Note: For best results, the I and D values should be set to zero. The output must be completely settled before starting a TUNE function. If for whatever reason the output needs to be retuned, you must select DETUNE from the Gains mode screen, wait for the offset to settle out, and then select TUNE again. • The offset value calculated by any tune function will be saved to memory and will be loaded on the next power up of the unit. • To determine if an offset value exists from a tuning action, simply enter the PID Gains mode screen. If the text reads DETUNE, then there is an offset preset. • In general, the offset should be consistent for a large range of temperatures for the same heating system. It may be necessary, however, to detune and then re-tune after changing set points. • Adjustments to the P, I, or D gains will affect the offset value and therefore, if the P, I, or D values are adjusted after a tuning action has been done, the offset will be detuned. • The TUNE function can only be set while in NORMAL Mode. It is not accessible while operating in CYCLE Mode. Once an offset is tuned in NORMAL mode, however, the tuning action will still apply to the target temperatures set in the cycle parameters. 4.9. TMAX Function • The TMAX function allows the user to set the maximum temperature to which the control will operate. • The TEMP SET set-point temperature will be limited to the current TMAX or 200.0 °C, whichever is lowest. If the TMAX value is adjusted to a value lower than the current TEMP SET value, the TEMP SET value will be changed to match TMAX. • The STOP temperature values in the cycle parameters are limited to the current TMAX or 200.0 °C, whichever is lowest. If the TMAX value is adjusted to a value lower than any of the current STOP temperature values, the STOP temperature values will be changed to match TMAX. • If the TC200 reads back a temperature value that equals or exceeds TMAX, the output relay will be opened and !TMAX! will be displayed in the MODE field of the Main Display screen. The controller, however, will remain enabled. Once the system temperature reduces down to the TEMP SET set-point value, the output relay will re-close, connecting the controller to the heater again. If the temperature increases past TMAX again, the relay will re-open. If this cycle occurs three times, on the third time, the relay will open and the controller will automatically disable. The TMAX text will continue to be displayed until it is cleared manually by the user by either pressing the SELECT keypad while in the Main screen, or pressing the ENABLE keypad. Rev G, April 15, 2011 Page 16 Temperature Controller Chapter 4: Stand-Alone Operation • If the temperature stabilizes to TEMP SET after having crossed the TMAX threshold less than three times, the !TMAX! alarm will remain active in the Main Display screen to alert a user to the fact that the system exceeded TMAX momentarily. The !TMAX! display can be cleared by pressing the SELECT keypad while in the Main Display screen. • Pressing the SELECT keypad while in the Main Display screen will always clear the TMAX count and resets the alarm. • Pressing the ENABLE keypad at any time with a TMAX alarm present will disable the heater and clear and reset the TMAX alarm. 4.10. Sensor Alarm • The TC200 can determine whether a temperature sensing element is short circuited or not installed (open circuit). If this occurs, the TEMP ACTUAL field in the Main LCD display screen will read !SENSOR! If the sensor alarm occurs during normal operation, the output will immediately be disabled. The unit cannot become enabled again until the error is resolved. ! ! ATTENTION The TC200 can only determine shorted or open sensor connections; it cannot determine if the installed sensor does not match the programmed sensor selection. Care must be taken to ensure that the settings match the actual sensor used, or damage will occur to the heating system. • A common sense approach to verifying the proper sensor is selected is to simply connect a heating system to a unit that has been sitting at room ambient temperature for a while. Observe the TEMP ACTUAL value displayed on the TC200. If the sensor has been properly programmed, the display will show a value corresponding to the room ambient temperature. 4.11. Setting the PID Gains • The PID gains determine the overall stability and accuracy of the entire heating system. Incorrect values, especially for the Integral (I) gain, could result in undesired overshoots and instabilities. • A good approach to setting these values is to start with a mid-range value (125) for the P gain and to set both I and D gains to zero (0). • Enable the heater and observe the response and settling times. Typically, the system will undershoot the set-point and settle to a value below TEMP SET. Despite the offset, the temperature should remain fairly stable. • If the temperature offset is too great (greater than 3 – 4°), an increase in P gain might be required. • The offset can now be adjusted out by setting the I gain to a suitable value. Always start with a low value (typically less than 10). Observe any changes in the system response after each adjustment to I gain. If the value is too large, you will observe overshoot and oscillations about the set-point. If it is too low, you will not remove the offset. • After arriving at a value for I gain, apply a Step function to the system by increasing the TEMP SET value by a few degrees. Observe the response and adjust the gains accordingly. • The D gain is the hardest to observe any influence on, as it generally affects the rate at which the system responds to disturbances. For most small heater systems being controlled by the TC200, a value of zero (0) for the D gain is sufficient for good operation. Rev G, April 15, 2011 Page 17 Temperature Controller Chapter 5 5.1. Chapter 5: Operating from a Computer Operating from a Computer Overview • The TC200 Temperature Controller is fully operational from a remote computer via an RS232 interface. • Connection from the computer to the TC200 is made with a standard DB9 “straight through” cable; do not attempt operation using a “null modem” cable. • The TC200 can be accessed directly using a command line interface and any Terminal Communications software, such as HyperTerminal. • The TC200 can also be controlled using the TC200 Application Software provided with the unit. 5.2. The Command Line Interface 5.2.1. Setup and Connection 1. Connect the TC200 to your computer using a standard DB9 cable connected to an available COM port on your computer and the RS232C connector on the rear panel of the unit. 2. Open your terminal interface program and, referring to documentation specific to your program, set up the terminal for the COM Port to which you have connected: Parameter Value Baud Rate Data Bits Parity Stop Bits Flow Control 115200 Bits Per Second 8 None 1 None 3. Apply AC power to the TC200, turn the TC200 on (see page 9), and wait for the unit to complete its power-on initialization. 4. Press the ENTER keypad on your computer. If the connection is working, you will receive the following message on your terminal: o Command error CMD_NOT_DEFINED 5. Followed immediately by the prompt: o > • The basic command structure consists of two types: commands and queries, both of which are sent to the TC200 by a carriage return (CR) or by pressing the ENTER key on your computer. • Most commands follow a format of: o • Command = Argument (CR) Command is a keyword and Argument is a numerical value always followed by a carriage return (CR). The following section gives a listing of all command keywords. Rev G, April 15, 2011 Page 18 Temperature Controller • All queries follow a format of: o • Chapter 5: Operating from a Computer query? (CR) Query is a keyword always followed by a question mark (?) and carriage return (CR). The following section gives a listing of all query keywords. 5.2.2. Terminal Commands and Queries Command/Query ens Function Toggle Enable State stat? mode pgain igain dgain pid? unit sns sns? beta pmax tmax pmax? tmax? beta? stop ramp hold cycle Set Temperature Get TEMP SET Value Get Current Temperature Get TEMP SET and TEMP ACTUAL values Status Query Assign Operating Mode Set P Gain Set I Gain Set D Gain Get PID Gains Set Degree Units - °C, °F, or K Select Sensor Get Sensor Set TH10K Beta Value Set Max Power Set Max Temperature Get Max Power Get Max Temperature Get TH10K Beta Value Set StopTmp Set Ramptime Set Holdtime Set Step Number cycles? Cycle Mode Parameters tset tset? tact? temps? pause config? tune tune? commands? id? *idn? taux? Rev G, April 15, 2011 Pause Cycle Get Current Configuration Tune Temperature Is Tune Function Set? Commands Query Identification Query Identification Query Get Temperature of Auxiliary Heater Description If the unit is disabled, ens will enable the unit. Otherwise, it will disable. tset=nnn.n (20.0 to 200.0 to TMAX) Returns the current value of TEMP SET. Returns the current value of TEMP ACTUAL. Returns TEMP SET and TEMP ACTUAL. Returns the Status Byte (see page 20). mode=normal or mode=cycle pgain=nnn (1 to 250) igain=nnn (0 to 250) dgain=nnn (0 to 250) Returns P, I, D values, respectively. unit=c, unit=k, or unit=f sns=ptc100 or sns=ptc1000 or sns=th10k Returns current sensor selection. beta=nnnn (2000 to 6000) pmax=nn.n (0.1 to 18.0) tmax=nnn.n (20.0 to 205.0) Returns current PMAX value. Returns current TMAX value. Returns current Beta value. stop=nnn.n (20.0 to 200.0 or TMAX- see page 20) ramp=nnn (1 to 999- see page 20) hold=nnn (1 to 999- see page 20) cycle=n (1 to 5- see page 20) Returns cycle parameters for all 5 steps. (see page 20) pause (cr). Initiates or terminates a pause to cycle mode. Returns all pertinent set-up parameters (see page 21). tun(cr). Initiates or terminates (detunes) a tuning function. Returns offset value. “O” represents no tune performed. Returns a list of available commands. Returns the unit identification string. Returns the unit identification string. Returns the current value of Aux Temp. Page 19 Temperature Controller Chapter 5: Operating from a Computer • All commands and queries are in lower case letters. • All temperature inputs and read backs are in °C only, regardless of what the display units are for the front panel LCD of the TC200. The Status Byte The “Status Byte” is an 8-bit hexadecimal value that is returned as part of the stat? query. Each bit corresponds to the following definitions to provide a snapshot of the status of the unit at any given time: Status Byte Definitions Bit 0 Bit 1 Bit 2 Bit 3 Bit 4 Bit 5 Bit 6 Bit 7 0 = Disabled 0 = Normal Mode 0 = TH10K 0 = See Bit2 0 = See Bit5 0 = Degrees K 0 = No Sensor Alarm 0 = Cycle Not Paused 1 = Enabled 1 = Cycle Mode 1 = PTC100 (sensor select bit one) 1 = PTC1000 (sensor select bit two) 1 = degrees C (unit select bit one) 1 = Degrees F (unit select bit two) 1 = Sensor Alarm 1 = Cycle Paused If a TMAX alarm is also present when the stat? query is sent, the text “Tmax ERROR” will also be returned. Setting the Cycle Parameters from the Command Line The cycle parameters (STOP temp, RAMP time, and HOLD time) can be programmed from the command line interface as follows: 1. Set the Step number to which the three parameters will apply by typing cycle=n, where n represents the Step number (1 to 5). 2. Enter valid values for the STOP temp by typing stop=nnn.n (20.0 to 200.0 or TMAX) 3. Enter valid values for the RAMP time by typing ramp=nnn (1 to 999) 4. Enter valid values for the HOLD time by typing hold=nnn (1 to 999) Until the cycle number is changed to another value, any values entered for STOP, RAMP, or HOLD will apply to the current value of cycle. Typing the cycles? query will return a string of fifteen comma-delineated numbers: five groups of three values. Each group of three values represents the STOP temp, RAMP time, and HOLD time for each successive cycle step. The value of the STOP temp is an integer value ten times greater than the actual temperature value. For example, a value of 600 represents 60.0 degrees. Rev G, April 15, 2011 Page 20 Temperature Controller Chapter 5: Operating from a Computer The Configuration Command Typing config? Into the command line interface will return a list of all of the pertinent set up parameters to allow a user to view all items at a glance. The following is a typical return: > config? Tset = 54.3 C Pgain = 126, Igain = 0, Dgain = 0 Sensor = PTC100 Tmax = 200.0 C Pmax = 15.9 Watts Temperature Display Units are CELSIUS Unit is Normal Mode Step1: StopTemp = 60.0 C, RampTime = 1 m, HoldTime = 5 m Step2: StopTemp = 70.0 C, RampTime = 5 m, HoldTime = 5 m Step3: StopTemp = 80.0 C, RampTime = 5 m, HoldTime = 5 m Step4: StopTemp = 90.0 C, RampTime = 5 m, HoldTime = 5 m Step5: StopTemp = 100.0 C, RampTime = 5 m, HoldTime = 5 m 5.3. The TC200 Application Software The TC200 Application Software provides an easy graphical interface between a computer and the TC200 Tunable Laser Source. 5.3.1. Installing the TC200 Application Software The TC200 Application Software is compatible with Windows® operating systems from Win2000 and greater. 1. Insert the TC200 Application Software CD-ROM that is included with your unit into the CD-ROM drive of your computer. 2. Right-click the START button and click on RUN. Rev G, April 15, 2011 Page 21 T Temperature Controller Cha apter 5: Operrating from a Computer 3. Brows se the CD-RO OM drive until you find “settup.exe”. 4. Click on “setup.exe e” to highlightt it, then click on OK. 5. Click on OK from the RUN wind dow and follow w the installattion directionss. T This program requires National Instrument’s VISA an nd IVI Runtim me Software. If you have a any National Instrument p products insta alled on your computer, the ere is a good chance that tthese program ms already re eside on yourr machine. Iff they do no ot, you will be e prompted for f them whe en you initiallly run the T TC200 Applica ation Software. These p programs are included on the TC200 Application A So oftware CD-R ROM. To insttall them, browse the CD-ROM and ffind the corres sponding folders (one for each e program m). Open the ffolder and run n the appropriiate setup file es. 5 5.3.2. Setup and Conn nection 1. Connect the TC200 to your com mputer using a standard DB B9 cable connected to an available CO OM port on your computer nel of the unitt. c and d the RS232C C connector on the rear pan 2. Apply y AC power to o the TC200, turn t the TC20 00 on (see pa age 9), and w wait for the uniit to complete e its power on inittialization. 3. Open the TC200 Application A pro ogram. See In nstalling the e TC200 Appllication Softw ware on page e 21. 4. The in nitial window should look like this: Figurre 2 R Rev G, April 15, 1 2011 TC200 0 Application n Opening Sc creen Page 22 T Temperature Controller Cha apter 5: Operrating from a Computer 5. Click on the Optio ons menu and d then select Serial Conn nection and th hen Com Port. Select the e com port onnected. to which you have the TC200 co Note: The e baud rate is s fixed at 1152 200. 6. Click on the File menu m and choo ose Open Co onnection. 7. Once you are conn nected, the window will become active a and the curre ent status of th he unit will be e reflected on the e screen. 5 5.3.3. Operrating in NO ORMAL Mod de Figure 3 Active Conn nection Betw ween Computter and Unit • Figure e 3 shows an active conne ection to a uniit set to 54.5 °°C and config gured for NOR RMAL Mode. • To en nable the heatter, click on th he button labe eled ENABLE E. • Any changes c made e from the Ap pplication Softtware will be rreflected on tthe LCD of the e TC200. • Any changes c made e from the TC C200 will also be reflected on the Appliccation Softwarre. • The time for these updates to ta ake effect varies with the ccomputer. R Rev G, April 15, 1 2011 Page 23 T Temperature Controller Cha apter 5: Operrating from a Computer Figu ure 4 • Heate er Enabled in n NORMAL M Mode Once Connected, the t SET TEM MP can be cha anged by one e of two metho ods: h the TEMP SET slide control c and drrag the sliderr to the next d desired tempe erature. 1. Click and hold 2. Double clic ck in the TEM MP SET wind dow to highlig ght the tempe erature text, a and enter the e value for the temperrature from 20 0.0 °C to TMA AX or 200.0 ° C. • As wiith the other operating me ethods, the SET S TEMP ccan be chang ged at any tim me other tha an CYCLE Mode e, regardless of o whether the e heater is en nabled. • To dis sable the hea ater, click on the DISABLE button. R Rev G, April 15, 1 2011 Page 24 T Temperature Controller Cha apter 5: Operrating from a Computer 5 5.3.4. Operrating in CY YCLE Mode Figu ure 5 Heater Enabled iin CYCLE Mo ode C Changing the e TC200 from m NORMAL Mode M to CYC CLE Mode 1. With the t heater dis sabled, click on o the CYCLE E button. 2. The CYCLE C MODE E indicator will now turn on n. 3. Clicking on the ENABLE button will initiate th he cycle. 4. To retturn to NORM MAL mode clic ck the NORM MAL or ENABL LE button. 5. To PA AUSE a cycle e, click on the PAUSE butto on. C Changing the e CYCLE Mode Paramete ers 1. All of the cycle mo ode paramete ers are visible e on the GUI screen. To change any orr all of the pa arameters, simply y double click k on the value e you wish to change and e enter in a valiid new value. 2. Hitting g a carriage return (ENTE ER key), tab key, or clickiing on any otther box on tthe GUI will ccause the progra am to accept the new value entered and d send it to th he TC200. R Rev G, April 15, 1 2011 Page 25 Temperature Controller Chapter 5: Operating from a Computer Note: Parameters cannot be changed while a cycle is in progress. Changing other Parameters • Changing any of the other values is done in much the same manner as described previously. Text box values can be entered by double clicking the text box and entering a new value, followed by the ENTER key, tab key, or clicking elsewhere on the screen. • Items such as the sensor and display units are changed by checking the appropriate boxes. • Any out-of-range values that might be entered will be rejected and you will be prompted to re-enter a valid value. Hiding Graphics in the GUI • Various components of the GUI can be hidden from view to provide a cleaner, less cluttered display. • Click on the View menu and select or de-select the various choices to be displayed on the screen. Auxiliary Temperature The Auxiliary Temperature cannot be displayed on the GUI at this time. Press the SELECT key while in the Main display screen or use the taux? query in the command line mode. 5.3.5. Disconnecting from the TC200 • To disconnect from the unit, choose Close Connection from the File menu. • Exiting the program is done by either clicking on the X in the upper right hand corner of the screen or choosing EXIT from the FILE menu. Rev G, April 15, 2011 Page 26 Temperature Controller Chapter 6 Chapter 6: Output Connector Pin-Outs Output Connector Pin-Outs Figure 6 Detail of Main and Auxiliary Connector (HIROSE HR10A-7R-6S) As Viewed from the Rear Panel Pin Assignments Pin 1 Pin 2 Pin 3 Pin 4 Pin 5 Pin 6 Heater Output Positive Heater Output Return (Ground) Reserved (Do Not Connect to this Pin) Sensor Input (+) Sensor Input (Ground) Reserved (Do Not Connect to this Pin) Use HIROSE connector HR10A-7P-6P (73) to mate with the TC200 output connectors. Rev G, April 15, 2011 Page 27 Temperature Controller Chapter 7 Chapter 7: Temperature Sensor Specifications Temperature Sensor Specifications The TC200 is compatible with two types of Platinum Thermistors: PT100 and PT1000. The TC200 is also compatible with the TH10K thermistor. The following specifications are used for determining the set-point and read back values for these types of thermistors. 7.1. PT100 and PT1000 For the temperature range of 0 to 850 °C: RT = R0 (1 + AT + BT2) Equation 1 *In accordance with IEC 751, 2:1995-07 [DIN EN 60751; 1996-07] Where: A = 3.9083 x 10⁻³ °C-1 B = -5.775 x 10⁻⁷ °C-2 RT is the resistance in Ω at temperature T T is the temperature in °C R0 = 100 Ω for the PT100 R0 = 1000 Ω for the PT1000 7.2. TH10K RT = 1000expβ[(1/T) – (1/298)] Equation 2 Where: RT is the resistance in Ω at temperature T T is the temperature in K β is the constant associated with the particular thermistor Rev G, April 15, 2011 Page 28 Temperature Controller Chapter 8 Chapter 8: Troubleshooting Troubleshooting The following table describes some typical problems that may be encountered while using the TC200 and possible solutions to these problems. Problem Unit does not turn on when switching the power switch to the ON position. Unit does not enable the heater when pressing the ENABLE keypad. I can’t adjust the TEMP SET value using the UP/DOWN arrow keypads. I can’t adjust the TEMP SET value above a certain value that is below the 200.0 degree maximum capability. When I reach my TEMP SET value, the unit displays !TMAX! The unit appears to be holding the TEMP SET value, but there is a !TMAX! message on the display. The unit is enabled but does not seem to be driving the heater. The unit overshoots the set-point by a large amount. I can’t connect to the TC200 over the RS232 com port. Rev G, April 15, 2011 Solution 1. Make sure AC line cord is fully inserted into the AC Input receptacle and plugged into an outlet providing 100 to 240 VAC. 2. Fuse(s) may be open. Refer to page 30 for information on replacing open fuses. If the problem persists, please return the unit to Thorlabs for evaluation. Make sure that a compatible temperature sensor is installed. If one is not, you should see a message that says “!SENSOR!” on the front panel LCD. If you are operating in CYCLE mode, you will not be able to make adjustments to the set-point using the UP/DOWN keypads in the Main screen. If you need to make adjustments, first terminate CYCLE mode and either reprogram the cycle parameters (see page 14) or operate the unit in NORMAL mode. The TEMP SET value is limited by the TMAX maximum temperature setting. If you need to operate at a higher temperature, you must first increase TMAX. The TMAX value is the same as the TEMP SET value. Either increase the TMAX value or lower the TEMP SET value. The unit exceeded the TMAX setting at some point, but during the reset phase it settled to the correct level. This is normal; simply press the SELECT keypad from the Main screen to clear the alarm. 1. The PMAX value is too low. Increase the PMAX value to the maximum rating of the heater you are driving. 2. The output connector is not fully inserted into the MAIN OUTPUT connector. 1. Check your I gain setting. It may be too high and if so, should be lowered. 2. you have a sensor installed, but it is the wrong type. 1. Make sure that the com port is configured correctly for the unit. Refer to page 18 for the correct com port settings. 2. The incorrect com port is selected on your terminal program or TC200 application. Page 29 Temperature Controller Chapter 9 9.1. Chapter 9: General Maintenance General Maintenance AC Line Voltage Your TC200 Series Temperature Controller will operate from AC line voltages ranging from 100 VAC to 240 VAC at 50 – 60 Hz. There is no need to configure the unit for specific line voltages. 9.2. Installing Fuses If for some reason you need to replace an open fuse, you must perform the following procedure: 1. Remove any AC Input cords that may be connected to the unit. 2. Remove the cover of the unit by removing the two 4-40 Phillips head screws located on the bottom rear of the unit and sliding the cover off. Refer to Figure 1 on page 6. 3. Refer to Figure 7 below. Locate the two Fuse Holders near the AC Input Module towards the back of the unit. Remove the cover to each fuse holder. The fuse is installed in the cover. Remove the existing fuse and install the appropriate replacement fuse. ATTENTION Use only 250 mA, 250 VAC, Type T, 5x20 mm style fuse. (IEC 60127-2/III, Low Breaking capacity, slow blow) 4. Reinstall the cover and replace the two 4-40 Phillips head screw. Figure 7 Rev G, April 15, 2011 Fuse Holders Fuses are installed in the covers. Location of Fuse Holders Page 30 Temperature Controller 9.3. Chapter 9: General Maintenance General Maintenance Aside from the AC Input fuses, there are no user-serviceable parts in the TC200. If you suspect something has failed on the unit, and if you have first referred to Troubleshooting on page 29, please contact Thorlabs for advice on returning the unit for evaluation. 9.4. Cleaning The unit can be cleaned using a soft, slightly damp cloth. Avoid using any solvents on or near the unit. Rev G, April 15, 2011 Page 31 Temperature Controller Chapter 10 Chapter 10: Auxiliary Output Auxiliary Output The TC200 provides a secondary output to enable operation of multiple Thorlabs’ Gas Cell Heaters using only one control unit. The Auxiliary Output shares the total output current of the unit proportionally with the Main Output. The Main Output current is regulated via the feedback from the temperature sensor in the main heater. The Auxiliary Output is not regulated and follows the changes in current made to the Main Output. For best results, both heaters should have similar heater resistances (within a few ohms). The Auxiliary heater temperature can be momentarily shown on the LCD display by pressing and holding the SELECT keypad. The temperature will be shown under the ACTUAL TEMP text on the Front Panel display. The Auxiliary temperature can also be viewed from the command line interface by typing taux?. Note: the Auxiliary temperature is only updated once every five seconds and only when the sensor is of the PTC100 type. Note: The Auxiliary input is only compatible with PT100 sensors. 10.1. Operating the Gas Cell Heater Due to the unbalanced nature of the Auxiliary Output, it is best to connect the heater with the least resistance to the Main Output and the higher resistance heater to the Auxiliary Output. This will ensure that the Auxiliary heater does not exceed the TMAX level (which is only monitored on the Main Output). Determine the main heater by connecting both heaters to the unit, setting the target temperature, and enabling the TC200. Once the main heater starts to show an increase in temperature, press the SELECT keypad to view the Auxiliary temperature. If the Auxiliary temperature is greater than the Main temperature, disable the heater, turn off the power, and exchange the two heaters by connecting the original main heater into the Auxiliary Output. Repeat this process once the temperatures have settled to verify proper balance. 10.2. Alternate Use of the Auxiliary Output The Auxiliary output can also be used as an input for a second PT100 temperature sensor placed elsewhere in your thermal system, without the use of a secondary heater load. Connect the sensor as shown on page 27. Pressing the SELECT keypad while in the Main Display screen will now show the secondary sensor temperature. Rev G, April 15, 2011 Page 32 Temperature Controller Chapter 11 Chapter 11: Warranty Warranty Thorlabs, Inc. warrants the material and production of the TC200 Temperature Controller for a period of 24 months from the date of shipment. During this warranty period, Thorlabs, Inc. will repair or exchange any units found to be defective in material or workmanship. For warranty repairs or service, the unit must be returned to Thorlabs, Inc. or one of our worldwide offices. All returns must be accompanied by a Returned Material Authorization (RMA) number issued by Thorlabs. The customer is responsible for all costs incurred to ship the unit back to Thorlabs; in the case of warranty repairs, Thorlabs will cover the cost of shipment back to the customer. In the case of shipments from outside of the United States, duties, taxes etc. shall be the responsibility of the customer. Thorlabs, Inc. warrants all firmware and software used for the TC200 to operate fault-free, provided they are used in accordance with the requirements stated in this manual. However, Thorlabs does not warrant a fault-free operation for special applications. Thorlabs, Inc. does not guarantee that this manual is error free and reserves the right to change this manual, the specifications, or the data of the described unit at any time, without notice. Thorlabs, Inc. is not liable for any incidental damage caused by failure of this unit. This warranty does not cover errors in operation, defects, or damage caused by the use of software not supplied by Thorlabs, modifications or misuse, or damage caused if the unit is used outside the operating parameters specified in this manual. This warranty does not cover failure due to incorrectly connected heater and/or sensor elements, or failure of heater and/or sensor elements. ! ATTENTION ! The TC200 is not intended for use in medical and/or life support situations. Rev G, April 15, 2011 Page 33 Temperature Controller Chapter 12 Chapter 12: Accessories Accessories The following accessories are directly compatible with the TC200 Temperature Controller: 1. PPLN Ovens o PV10: PPLN Oven for 10 mm Long Crystals o PV20: PPLN Oven for 20 mm Long Crystals o PV40: PPLN Oven for 40 mm Long Crystals 2. Gas Cell Heaters o GCH09-150: Heater for 9 x 150 mm Reference Cell o GCH09-50: Heater for 9 x 50 mm Reference Cell o GCH09-75: Heater for 9 x 75 mm Reference Cell o GCH19-100: Heater for 19 x 100 mm Reference Cell o GCH19-75: Heater for 19 x 75 mm Reference Cell o GCH25-75: Heater for 25 x 75 Reference Cell Rev G, April 15, 2011 Page 34 Temperature Controller Chapter 13 Chapter 13: Certifications and Compliance Certifications and Compliance Category Standards or Description Meets intent of Directive 89/336/EEC for Electromagnetic Compatibility. Compliance is given to the following specifications as EC Declaration of Conformity – EMC listed in the Official Journal of the European Communities: EMC requirements for Class A electrical equipment for measurement, control, and laboratory use, including Class A Radiated and Conducted -EN 61326 Emissionsa, b and Immunitya, c Electrostatic Discharge Immunity (Performance Criterion C) -IEC 61000-4-2 Radiated RF Electromagnetic Field Immunity -IEC 61000-4-3 (Performance Criterion B)b Electrical Fast Transient / Burst Immunity (Performance Criterion B) -IEC 61000-4-4 Power Line Surge Immunity (Performance Criterion C) -IEC61000-4-5 Conducted RF Immunity (Performance Criterion B) -IEC61000-4-6 Voltage Dips and Interruptions Immunity (Performance Criterion C) -IEC 61000-4-11 AC Power Line Harmonic Emissions -EN 61000-3-2 Complies with the Radio Communications Act per EMC Emission Australia/New Zealand Declaration of Standarda, b: Conformity – EMC Industrial, Scientific, and Medical Equipment: 1992 -AS/NZS 2064 Emissions comply with the Class A Limits of FCC Code of Federal -FCC EMC Compliance Regulations 47, Part 15, Subpart Ba, b Compliance is given to the following specification as listed in the EC Declaration of Conformity – Low Official Journal of the European Communities: Voltage Low Voltage Directive 73/23/EEC, amended by 93/68/EEC Safety requirements for electrical equipment for measurement control EN 61010-1/A2: 1995 and laboratory use. U.S. Nationally Recognized Testing Laboratory Listing Standard for electrical measuring and test equipment. -UL3111-1 Safety standard for electrical and electronic test, measuring, -ANSI/ISA S82.01:1994 controlling, and related equipment. Canadian Certification Safety requirements for electrical equipment for measurement, control, CAN/CSA C22.2 No. 1010.1 and laboratory use. Additional Compliance Safety requirements for electrical equipment for measurement ,control IEC61010-1/A2:1995 and laboratory use. Test and Measuring Equipment Type Class 1 (As Defined in IEC 61010-1, Annex H) – Grounded Product Safety Class a Using high-quality shielded interface cables b Emissions, which exceed the levels required by these standards, may occur when this equipment is connected to a test object. c Minimum Immunity Test requirement. Rev G, April 15, 2011 Page 35 Temperature Controller Chapter 14 Chapter 14: Specifications Specifications Item # TC200 Min Typical Max 100 VAC 240 VAC Input Voltagea 25 VA Input Power 18 Watts DC Output Power 750 mADC Output Current 24 VDC Output Voltage b 20.0 °C 200.0 °C Temperature Control Range 0.1 °C Set-Point Resolution ±0.1 °C ±0.5 °C Actual Temp. Display Accuracyc ±0.1 °C Temperature Stability, 24 hoursd a Universal input 50 – 60 Hz; no line switching required. Unit is supplied with a 115 V parallel blade line cord for North American use only. For all other applications, use an IEC 320 compatible line cord fitted with a plug appropriate for your particular AC wall socket. b Heating mode only. Ambient temperature must always be less than set-point temperature. c Does not account for errors due to sensor tolerances. d Measured in a constant ambient temperature. Accuracy is strongly dependent on the individual heating system and P, I, and D gain parameters. e All technical data valid at 23 ± 5 °C and 45 ± 15% humidity. TC200 Sensor Types Output Connector Mating Connector Serial Interface Operating / Storage Temperatures Dimensions (LxWxH) Weight Rev G, April 15, 2011 Platinum 100 Ω, Platinum 1000 Ω, TH10K HIROSE HR10A-7R-6S HIROSE HR10A-7P-6P (73) RS232C – DB9 10 – 40 °C / 0 – 50 °C 11.5" (292 mm) x 5.3" (135 mm) x 3.0" (76 mm) 5 lbs Page 36 Temperature Controller Chapter 15 Chapter 15: Regulatory Regulatory As required by the WEEE (Waste Electrical and Electronic Equipment Directive) of the European Community and the corresponding national laws, Thorlabs offers all end users in the EC the possibility to return “end of life” units without incurring disposal charges. • • • • • • This offer is valid for Thorlabs electrical and electronic equipment: Sold after August 13, 2005 Marked correspondingly with the crossed out “wheelie bin” logo (see right) Sold to a company or institute within the EC Currently owned by a company or institute within the EC Still complete, not disassembled and not contaminated Wheelie Bin Logo As the WEEE directive applies to self-contained operational electrical and electronic products, this end of life take back service does not refer to other Thorlabs products, such as: • • • • Pure OEM products, that means assemblies to be built into a unit by the user (e. g. OEM laser driver cards) Components Mechanics and optics Left over parts of units disassembled by the user (PCB’s, housings etc.). If you wish to return a Thorlabs unit for waste recovery, please contact Thorlabs or your nearest dealer for further information. 15.1. Waste Treatment is Your Own Responsibility If you do not return an “end of life” unit to Thorlabs, you must hand it to a company specialized in waste recovery. Do not dispose of the unit in a litter bin or at a public waste disposal site. 15.2. Ecological Background It is well known that WEEE pollutes the environment by releasing toxic products during decomposition. The aim of the European RoHS directive is to reduce the content of toxic substances in electronic products in the future. The intent of the WEEE directive is to enforce the recycling of WEEE. A controlled recycling of end of life products will thereby avoid negative impacts on the environment. Rev G, April 15, 2011 Page 37 Temperature Controller Chapter 16 Chapter 16: Thorlabs Worldwide Contacts Thorlabs Worldwide Contacts USA, Canada, and South America Thorlabs, Inc. 435 Route 206 Newton, NJ 07860 USA Tel: 973-579-7227 Fax: 973-300-3600 www.thorlabs.com www.thorlabs.us (West Coast) Email: [email protected] Support: [email protected] Europe Thorlabs GmbH Hans-Böckler-Str. 6 85221 Dachau Germany Tel: +49-(0)8131-5956-0 Fax: +49-(0)8131-5956-99 www.thorlabs.de Email: [email protected] UK and Ireland Thorlabs Ltd. 1 Saint Thomas Place, Ely Cambridgeshire CB7 4EX Great Britain Tel: +44 (0)1353-654440 Fax: +44 (0)1353-654444 www.thorlabs.com Email: [email protected] Support: [email protected] France Thorlabs SAS 109, rue des Côtes 78600 Maisons-Laffitte France Tel: +33 (0) 970 444 844 Fax: +33 (0) 811 381 748 www.thorlabs.com Email: [email protected] Scandinavia Thorlabs Sweden AB Box 141 94 400 20 Göteborg Sweden Tel: +46-31-733-30-00 Fax: +46-31-703-40-45 www.thorlabs.com Email: [email protected] Japan Thorlabs Japan, Inc. Higashi-Ikebukuro Q Building, 1F 2-23-2, Higashi-Ikebukuro, Toshima-ku, Tokyo 170-0013 Japan Tel: +81-3-5979-8889 Fax: +81-3-5979-7285 www.thorlabs.jp Email: [email protected] China Thorlabs China Oasis Middlering Centre 3 Building 712 Room 915 Zhen Bei Road Shanghai China Tel: +86 (0)21-32513486 Fax: +86 (0)21-32513480 www.thorlabs.hk Email: [email protected] Rev G, April 15, 2011 Page 38 www.thorlabs.com