1
SMH10
Attach
any responsibility for use of it. Users may have to use the glued
adapter at their own risk and responsibility.
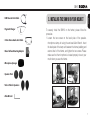
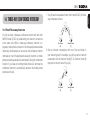
5.Attach the headset main unit to the speaker-microphone clamp
unit. Insert the bottom part of the main unit completely into the
lower slot of the clamp unit first. Then push the upper part of the
main unit until it clicks into the upper holder of the clamp unit.
English
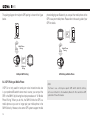
4.If you have any problem to clamp the speaker-microphone unit
on the helmet for any reason, you may use the glued surface
mounting adapter to attach the speaker-microphone clamp unit
on the external surface of the helmet.
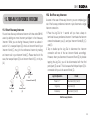
•Remove the back plate of the speaker-microphone clamp unit by
loosening the two screws with the enclosed Allen Wrench.
•Attach the glued external adapter to the speaker-microphone
clamp unit by tightening the two screws instead of the removed
back plate.
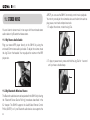
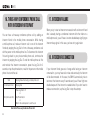
•Locate a proper surface on the helmet to attach the unit, clean
the helmet surface location with a moistened towel, and allow to
dry thoroughly.
•Peel off the cover of the adhesive tape of the adapter and attach
the unit on the proper surface of your helmet.
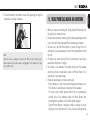
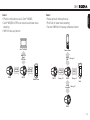
6.To remove the main headset from the speaker-microphone clamp
unit, hold the lower part of the speaker-microphone clamp unit
with your thumb and gently press down the hook on the upper part
of the headset main unit with your index finger until it clicks out.
You may have to do this to charge up or to carry the headset main
unit.
Sena recommends the clamp unit over the glued surface
mounting adapter. Even though the glued surface mounting
adapter is provided for convenience, Sena does not assume
9