1
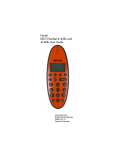
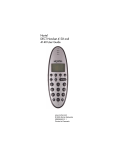
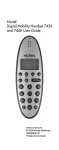
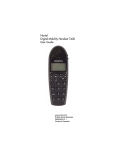
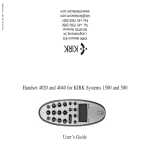
DECT Handset 4145Ex
User Guide
www.nortel.com
© 2007 Nortel Networks
N0018957 02
Printed in Denmark
Congratulations
on your new handset
Your new handset will provide you with the
greatest possible degree of flexibility and
mobility due to high battery capacity, practical weight, size and design.
STOP!
Charge your
handset 14 - 16
hours prior to
first use for best
performance
Contents
Getting Started . . . . . . . . . . . . . . . . . . 5
Handset information . . . . . . . . . . . . . 5
Label information . . . . . . . . . . . . . . . 7
Battery information . . . . . . . . . . . . . . 7
Installing battery . . . . . . . . . . . . . . . . 8
Charging battery . . . . . . . . . . . . . . . . 9
Checking battery capacity . . . . . . . 11
Battery disposal . . . . . . . . . . . . . . . 12
About your 4145Ex handset . . . . . . 13
Handset display . . . . . . . . . . . . . . . 15
Display backlight . . . . . . . . . . . . . . 16
Basic handset options. . . . . . . . . . . 17
Turning the handset ON/OFF . . . . . 17
Adjusting speaker volume . . . . . . . 17
Changing Menu Language . . . . . . . 17
Subscribing to system . . . . . . . . . . 18
Customizing handset . . . . . . . . . . . 22
Making and answering calls . . . . . . 26
Dial directly . . . . . . . . . . . . . . . . . . . 26
On hook dialling (pre-dial) . . . . . . . 26
Dial from your phone book . . . . . . . 27
Redial . . . . . . . . . . . . . . . . . . . . . . . 27
Answering calls . . . . . . . . . . . . . . . 28
Hold a call . . . . . . . . . . . . . . . . . . . . 28
Call transfer (blind transfer) . . . . . . 28
Transfer call with announce . . . . . . 29
Making or answering a second call 29
Mute a call . . . . . . . . . . . . . . . . . . . 30
Listening to voice messages . . . . . 30
More handset options . . . . . . . . . . . 31
Moving around in the Menu . . . . . . 31
Using phone book . . . . . . . . . . . . . 34
Using text messages (E2) . . . . . . . 38
Shortcuts . . . . . . . . . . . . . . . . . . . . 42
General information. . . . . . . . . . . . . 43
Troubleshooting . . . . . . . . . . . . . . . 43
Information . . . . . . . . . . . . . . . . . . . 44
3
EC Declaration of Conformity. . . . . 46
Product . . . . . . . . . . . . . . . . . . . . . . 46
Type number . . . . . . . . . . . . . . . . . 46
Telecom requirements . . . . . . . . . . 46
Applied standards . . . . . . . . . . . . . . 47
Application, Intended purpose . . . . 47
Meaning of Conformity . . . . . . . . . 48
Electrical apparatus for potentially
explosive atmospheres . . . . . . . . . . 48
Notified Body . . . . . . . . . . . . . . . . . 49
Examination Certificate . . . . . . . . . 49
Validity . . . . . . . . . . . . . . . . . . . . . . 49
Quality Assurance . . . . . . . . . . . . . 49
Safe use of the ATEX approved
DECT Handset 4145Ex . . . . . . . . . 50
Name and adress of manufacturer . 59
4
Getting Started
Read all the information in this section
before you use your handset.
Handset information
The DECT Handset 4145Ex is developed for use in potentially explosive
working environments, as defined by
local fire protection authorities. The
handset complies with the ATEX
directive 94/9/EC as well as IEC standards. Please refer to “EC Declaration of Conformity” on page 46 for
more details.
The handset uses radio signals and
does not guarantee a connection in all
circumstances. Do not rely on a cordless handset to make emergency
calls.
Warnings
For safe use of DECT Handset
4145Ex:
• Please consult your system
administrator for instruction before
using DECT Handset 4145Ex.
• Do not open DECT Handset
4145Ex in a potentially explosive
atmosphere.
• Use only the dedicated charger
N0018956 (orange) for charging
DECT Handset 4145Ex.
5
• Do not charge DECT Handset
4145Ex in a potentially explosive
atmosphere.
• The AC power adaptor used in
connection with the charger must
not be connected to a higher
voltage than 250V AC.
• Use only battery pack N0018955 for
battery replacement.
• Use only headset part no. 0231
9517 (KIRK part no.) with DECT
Handset 4145Ex.
• The leather pouch A0553741 must
be used with DECT Handset
4145Ex in the following situations:
• In dry areas with humidity
conditions of less than 60 %
• When the user is wearing
clothes that could cause
electrostatic charging of the
handset
• If defects occur, remove DECT
Handset 4145Ex immediately from
the potentially explosive
atmosphere.
• Only KIRK telecom A/S may repair
and service DECT Handset
4145Ex.
• Relevant data concerning repairs
must be logged.
• For traceability it is advisable to
keep a record of type and serial
numbers and users of the
handsets.
6
Label information
• HW PCS = Hardware version
• SW PCS = Software version
• 2006 07 = Warranty period
• 05W04 = Production date (year
2005, week 4)
• SN = Serial number
Battery information
Read the following information before
you handle the batteries:
• Do not replace the batteries in
potentially explosive environments,
such as rooms where flammable
liquids or gases are present.
• The battery will explode if disposed
of in a fire.
• Do not charge the batteries unless
you use the Nortel Networks
approved charger and the proper
batteries.
7
Only use battery type N0018955 in
the DECT Handset 4145Ex handset.
Do not use these batteries with other
products. These batteries were
designed specifically for use with the
DECTHandset 4145Ex handset and
the DECT Handset 4145Ex charger
ONLY. Improper use of the batteries
may result in fire hazard.
• Do not do anything that would
cause the battery to short circuit.
• Do not let the battery or the charger
come into contact with conductive
metal objects.
Installing battery
The battery is connected to the handset when it is shipped from the factory.
Warning: The battery must not be
removed in a potentially explosive
atmosphere.
1 To change the battery unscrew
the plate on the rear of the
handset to access the battery
compartment. Use a normal
screwdriver.
2 Insert normal screwdriver into the
small crack behind the blind cover
and break to open the handset.
8
3 Place the battery plug in the slot
in the battery box.
4 Insert battery with the label
readable.
5 Replace the back cover.
Charging battery
Warning: Do not charge DECT
Handset 4145Ex in a potentially
explosive atmosphere. Use only the
dedicated charger N0018956
(orange) for charging of DECT
Handset 4145Ex.
When charging the battery for the first
time, it is necessary to leave the
handset in the charger for 14-16
hours for the battery to be fully
charged.
During normal operation, it takes
approximately 4 - 5 hours to charge
the handset from fully discharged to
its full capacity.
9
• Place the handset in the charger.
For correct charging, be sure the
room temperature is between 0°C
and 25°C. Do not place the
handset in direct sunlight. The
battery has a built-in heat sensor
which will stop charging if the
battery temperature is too high.
When charging, the display shows
the charging status in line 3. The
display goes back to normal mode
when fully charged. It will not
vibrate. Auto-answer is inactive.
The handset reacts normally for
incoming calls.
It is necessary to recharge the battery
when the display shows BATTERY
LOW, or if the handset cannot be
turned on. When the battery is fully
discharged, up to 10 minutes may
pass before charging begins (display
lights up). When the charger begins
the charging, status is shown in the
display.
10
Checking battery capacity
In the BATTERY MENU it is possible
to see the remaining battery capacity.
For reading the correct capacity, the
handset has to be removed from the
charger for at least one hour.
1 Press MENU ( ) and use the <
or > keys to switch to the
BATTERY MENU.
2 Press 3 to enter the BATTERY
MENU, and see the current status
of the battery capacity.
3 Press 3 to return to the menu
system, or press MENU ( ) to
quit.
The indication on the display is not
necessarily an exact reflection on the
remaining speech time, but only an
indication of the voltage on the battery.
Low battery warning
If the battery capacity reaches a certain minimum value then if:
• On hook: the display shows
BATTERY LOW.
• Off hook: the display shows
BATTERY LOW and the handset
gives four short bleeps every five
seconds.
11
Battery disposal
Defective batteries must be returned
to a collection point for chemical
waste disposal.
Warning: Nickel metal hydride
batteries must be disposed of
properly. Do not dispose of the
batteries in office or household waste.
Nickel metal hydride batteries are
recyclable. You can help preserve the
environment by returning your
unwanted batteries to your nearest
recycling center for recycling or
proper disposal.
Contact your system administrator for
more information about battery disposal and recycling centers in your
local area.
12
About your 4145Ex handset
F
A
C
B
C
D
D
G
H
I
H
J
L
J
K
E
A LED
Flashes fast when phone is ringing.
Flashes at low frequency if messages waiting.
Lights constantly when showing
CLIP numbers in Redial list.
B Volume control
Adjusts the handset and ringer
volume.
13
C Display
Shows call information, handset
status icons, and guides you
through option menus.
D Headset connector
E Microphone
F SOS key
When activating this key for 3
seconds the handset directly
dials a user defined SOS number.
Keys G to L activate different functions when your handset is on hook
or off hook.
On hook: Handset is idle (not in
use).
Off hook: Handset is active, call or
feature in progress.
G
MENU key
On hook Enters the Handset
Options menu
(idle)
OR
Exits the Handset Options
menu.
) key
H <(
On hook Enters the Redial List
menu.
(idle)
I
>(
) key
On hook Enters the Telephone
Book menu.
(idle)
J
3 ( ) key
On hook Turns the handset off with
a long (three second) key
(idle)
press.
Off hook Turns the microphone off
(active) or on when you are on a
call.
R
(
)
key
K
14
On hook Read or write messages.
(idle)
Off hook Recall.
(active)
L
On/Off hook key
On hook Turns the handset on.
(idle)
Off hook Ends an active call.
(active)
Handset display
There are four lines on your handset
display.
Display information example
JEAN
144
Line 1
Line 2
236
Line
Line 33
(((.)))
Line 4
The types of information shown on
the display are:
• Standby text: When the handset is
on hook (idle), your standby text
appears on the first line of the display.
• Information text: Call information
appears on the second and third
line of the display.
15
• Handset icons: The following
icons appear on the fourth line of
the display:
(((.))) The radio signal icon indicates
connection to system.
Note: The icon flashes when
the system is busy and you
will not be able to make or
answer calls.
The envelope icon indicates a
new text message (E2-MAIL).
Left and right arrow icons
appear on the display when
you access Handset option
menus.
The telephone icon indicates a
call is active.
Display backlight
The display backlight automatically
turns on when there is an incoming
call, or if a key is pressed.
The backlight turns off after 10 seconds when the handset is idle.
You can disable the backlight to save
power, refer to the “Customizing
handset” section in this guide for
more information.
Note: The backlight is disabled when
the key lock function is activated.
16
Basic handset options
Turning the handset ON/OFF
ON
Press
.
When the handset is turned on the
radio signal display icon is shown in
the lower left corner of the display, if
the handset is subscribed to a system
(For more information, see “Subscribing to system” on page 18).
OFF
Press 3 ( ) for 3 seconds.
Note: When the handset has been
outside the coverage area, it can take
up to 30 seconds before the handset
is back on the system after
re-entering the coverage area.
Adjusting speaker volume
1 Press
.
2 Use the two keys placed at the
upper right side of the handset for
volume control.
3 Press
again.
Changing Menu Language
There are 9 predefined languages in
the handset: English, German,
French, Italien, Spanish Dutch, Portuguese, Swedish and Danish.
1 Press MENU (
3.
), and then press
2 Switch to SET PROFILE
LANGUAGE using the <> keys,
then press 3.
17
3 Use the <> keys to choose
between the predefined
languages, then press 3 to select
the required language.
4 Press MENU (
structure.
) to exit the menu
See Figure 1 on page 61.
Subscribing to system
Before you can use the registered
handset it is necessary to subscribe
the handset to a base station first.
Note: The first handset subscribed to
the system is called the Master
handset.
Create subscription
To make subscriptions, the system
must allow subscriptions to be made.
Some systems also require an
Authentication Code (AC). If more
than one system currently permits
subscription, you will need to know
the ID of the system to which you
wish to subscribe. Authentication
Codes and system ID’s will be provided by the system administrator.
Note: Every subscription must have a
name and a local extension number.
The subscription name is used as
standby text. The name must be
between 1 and 12 characters. If no
characters are entered the
subscription will fail.
1 Press MENU ( ), use the <>
keys to switch to LOGIN MENU,
and then click 3.
18
2 Use the <> keys to switch to
SUBSCRIPTION CREATE
MENU, and then click 3 to
subscribe to a new system.
3 Use the <> keys to scroll between
the search ID’s of the different
systems available.
During subscription the handset
will search for free positions and
perform subscription on the first
free position.
An alternative position can be
choosen using < and >.
4 Enter the AC (if required) using
the keyboard, and then press 3.
5 Enter subscription name using the
keyboard, and then press 3.
6 Enter local number using the
keyboard, and then press 3.
If the subscription was successful,
the startup text will be replaced by
the standby text entered into the
system by the system
administrator and (((.))) is shown in
the display.
If not, the subscription has failed
and the procedure must be
retried.
Note: If the handset is already
subscribed to 10 systems, you will
have to remove a subscription before
creating a new subscription (For more
information see “Remove
subscription” on page 22).
19
Subscribing to different systems
The handset can be subscribed (connected) to a maximum of 10 different
systems.
Note: To be able to log on to a
system, subscription to the system
must be established (For more
information, see “Create subscription”
on page 18).
Auto Login
If you want to change to another system automatically, you use the AUTO
LOGIN MENU.
Note: Auto Login should only be used
when systems are separate, with no
overlaps.
1 Press MENU ( ), use the <>
keys to switch to LOGIN MENU,
and then press 3.
2 Use the <> keys to switch to
SELECT LOGIN AUTO, and then
press 3.
The handset automatically selects
a system. The selected system is
marked with an A.
Login
If you want to change to another system manually, you use the LOGIN
MENU to connect to another system
number.
1 Press MENU ( ), use the <>
keys to switch to LOGIN MENU,
and then press 3.
20
2 Use the <> keys to switch to
SELECT LOGIN, and then press
3.
The actual chosen system is
marked with a * or an A (if Auto
Login is selected).
3 Press 3- use the <> keys to scroll
between the IDs of the different
systems to find the system t which
you want to connect.
Under SELECT LOGIN only
subscriptions display. Free
positions do not display.
4 Press 3 to confirm.
Edit the active subscription
It is possible to edit subscription name
(standby text) and local number.
1 Press MENU ( ), use the <>
keys to switch to LOGIN MENU,
and then press 3.
2 Use the <> keys to switch to
SUBSCRIPTION EDIT MENU,
and then press 3.
3 Use < to delete the subscription
name, enter new text, and then
press 3.
4 Use < to delete the local number,
enter a new number, and then
press 3.
21
Remove subscription
Subscriptions can be removed from
the system in use and from the 9
other systems (if connected).
Removing a subscription requires a
password. Password is factory set at
0000.
If the system in use is removed, it is
necessary either to select one of the
remaining systems or to subscribe to
a new one.
If one of the systems not chosen is
removed, the handset remains connected to the system in use.
1 Press MENU ( ), use the <>
keys to switch to LOGIN MENU,
and then press 3.
2 Use the <> keys to switch to
SUBSCRIPTION REMOVE
MENU, and then press 3.
3 Enter the password (factory
default is 0000), and then click 3
to remove it from the system.
Customizing handset
The handset has one user-defined
profile (set up), and a mode where all
sounds are disabled (SILENT).
• Press MENU ( ) followed by 3 to
show the profile.
All settings have to be defined
under the profile. The display
shows if the SILENT mode is
enabled.
22
Profile set-up
In the following you will find a description of how to set up the profile.
1 Press MENU ( ) to enter the
PROFILE SET UP MENU.
2 Press 3.
You are now able to switch
between the different settings
using < or >.
3 Press 3 when you find the setting
you wish to change (or see).
4 Change the setting according to
your needs, confirm with 3 and
you automatically go to the next
setting.
5 Press MENU (
profile setup.
) to finalize
See Figure 2 on page 62.
Description of profile functions
RINGERTONE:
Scroll through the 9 different ringertones using < and >. Confirm with 3.
RINGER VOL:
Turn the volume up and down using <
or >. Confirm with 3.
KEY CLICK:
Turn the volume up and down using <
and >. Confirm with 3.
VIBRATOR:
Can be turned on/off using < and >.
Confirm with 3.
23
AUTO-ANSWER:
Can be turned on/off using < and >.
Confirm with 3.
When turned on, the handset automatically goes off hook when ringing.
START VOL:
Start volume can be adjusted using <
and >. Confirm with 3.
OUT OF RANGE:
The out of range indication can be
turned on/off using < and >. Confirm
with 3.
With the out of range indicator turned
on, a beep will sound when the handset is moving out of range of the
DECT system, and “OUT OF RANGE” will
appear in the display. When the handset reenters the coverage area, “OUT
OF RANGE” disappear in the display.
MESSAGE:
Define how the handset should react
when receiving messages using <
and >. Confirm with 3.
Following can be set:
• Vibrator: On/off
• Normal Melody: Off, 1-9 (Melody to
be played when receiving a Normal
message)
• Urgent Melody: Off, 1-9 (Melody to
be played when receiving an
Urgent message)
• Display: On/Off (Display a Normal
message when received)
• Overwrite: On/Off (Oldest message
automatically deleted)
24
SOS NUMBER:
Enter a number to be called when
pressing the SOS key. Confirm with
3.
Note: If no SOS number is entered,
the SOS key is inactive.
LANGUAGE:
Choose between predefined languages using < and >. Confirm with
3.
BACKLIGHT:
Can be turned on/off using < and >.
Confirm with 3.
Refer to “More handset options” on
page 31 for more information on the
menu.
25
Making and answering calls
The handset must be subscribed and
registered to make or answer a call.
(For more information, see “Subscribing to system” on page 18).
For internal calls, dial the extension
number. (Contact your system administrator for a list of extension numbers).
For external calls, dial the external
code (or line pool code) to access an
external line, then dial the external
telephone number. (Contact your system administrator to confirm what
external code or line pool code to
use).
Dial directly
1 Press
.
2 Dial the number.
3 Press
again to end the call.
On hook dialling (pre-dial)
1 Dial the number.
A long press on º will make a
pause, if necessary.
2 Press
3 Press
.
again to end the call.
26
Dial from your phone book
1 Press > ( ) to enter the
telephone book.
2 Search for the number either by
using the < > -keys, or by pressing
the first letter in the name by
using the digits 2 – 9.
3 Press
.
4 Press
again to end the call.
Note: For more information on using
your phone book, refer to “Using
phone book” on page 34.
Redial
The handset has maximum 10 redial
or CLIP (Calling Line Identification
Presentation) numbers. Each number is only represented once.
1 While on hook, press < (
enter the redial/CLIP list.
) to
You can also reach the REDIAL
MENU in the main menu.
2 Search for the number by using
the < > -keys.
Redial numbers are marked with
“REDIAL” or name of the person
who called, if present in the phone
book.
CLIP numbers are marked with
CLIP or name of the person who
called. The LED lights constantly
if a new number (unanswered
call) has arrived in the CLIP list.
3 Press
4 Press
.
again to end the call.
27
Answering calls
When the phone rings, the LED
flashes fast and the display shows the
CLIP (if presented). If it is an external
call (or if no CLIP) the display shows
“INCOMING CALL”.
To answer a call:
• Press
to answer a call when
your handset rings.
To stop the handset ringing without
answering the call:
• Press and the ring signal is
muted. The display shows:
»RINGER MUTED«
Hold a call
1 While on a call, press R (
).
2 To retrieve the held call, press R
( ) again.
Call transfer (blind transfer)
You can transfer the call to another
handset.
1 Press R (
number.
), and dial the new
2 Press
to end your call.
The call is transferred to the other
handset.
Note: If the called number does not
answer, the original call can be
resumed by pressing R ( ) again.
28
Transfer call with announce
You can transfer the call to another
handset and announce the call to the
called party.
1 Press R (
number.
), and dial the new
2 The called party answers and you
present the call to the called party.
3 Press
to end your call.
The call is transferred to the other
handset.
Note: If the called number does not
answer, the original call can be
resumed by pressing R ( ) again.
Making or answering a second
call
You can have two calls active at the
same time. Use R ( ) to switch
between calls.
To answer a second call while on
another call
• Press R ( ) to answer the second
call. The first call is automatically
put on hold.
To hold a call and make a second
call
1 Press R (
hold.
) to put the first call on
2 Dial the telephone number of the
second call.
29
To return to the first call
• Press R (
first call.
) again to return to the
The second call is automatically
put on hold.
Mute a call
1 While on a call, press
.
2 To cancel mute, press
again.
Listening to voice messages
Note: Only available in systems
configured with the possibility of
receiving voice messages.
The LED flashes at low frequency if
you have a voice mail.
1 Press
.
2 Dial the number and password to
access the voice mail system.
3 Press
again when voice
mail(s) is listened to.
“Voice Mail” is no longer
displayed.
30
More handset options
Moving around in the Menu
Press MENU ( ) to enter or exit the
menu structure. It has to be used if a
“NO” or “CLEAR” is wanted in the
menu structure.
Press 3 to jump to a lower level in the
menu. When the lowest menu level is
reached, it will store the setting and
jump to a higher level. It has to be
used if a “YES” is wanted.
Note: If the handset is in the menu,
and an incoming call arrives, then the
menu will be dropped and the call
handled in the normal way.
See Figure 3 on page 63.
Menu structure
The main menu consists of the following 6 menus:
MENU PROFILE SET UP
For more information, see “Customizing handset” on page 22.
MENU BATTERY
For more information, see “Checking
battery capacity” on page 11.
MENU PHONE BOOK
For more information, see “Using
phone book” on page 34.
31
MENU REDIAL
The handset has maximum 10 redial
numbers and 10 Caller IDs placed in
the same list. Each number is only
represented once.
• Press MENU ( ), press > four
times from standby text to enter the
REDIAL MENU, and then press 3.
Repeated presses at < turn
backward through the dialled
numbers and CLIP numbers (from
newest to the oldest).
Right arrow moves in the opposite
direction.
Note: It is also possible to reach the
REDIAL MENU, using the < (
)
key.
• Numbers are named “REDIAL”,
“CLIP” or with the name.
• If you want to delete a ”REDIAL”
use < or > to scroll to the name/
number, and then press 3 twice.
The name/number is now deleted.
If the number is stored, it is moved
to the telephone book.
It is possible to add prefixes to the
redial numbers.
• Find the number you wish to edit
and press the digits you want to
add to the number, e.g. prefix = O.
See also “Redial” on page 27.
32
MENU MESSAGE (Text message)
For more information,see “More
handset options” on page 31.
MENU LOGIN
For more information on this menu
option, contact your system administrator.
Note: The PHONE BOOK MENU,
REDIAL MENU and MESSAGE
MENU can be accessed directly. The
PHONE BOOK MENU by pressing >
( ), the REDIAL MENU by pressing
<(
), and the MESSAGE MENU
by pressing R ( ).
33
Using phone book
You can store telephone numbers and
names in your telephone book.
The telephone book can store up to
80 numbers with name. A maximum
of 23 digits, including spaces, is
allowed for each number. A maximum
of 24 digits, including spaces, is
allowed for each name. Names are
sorted alphabetically starting with
their first character.
Using the alphanumeric keyboard
The normal dialling keys (0-9) are
used for writing the name to be
placed in the telephone book. By
pressing the keys a certain number of
times the related letters or digits will
appear in the display.
Spaces are made by using the 0 -key.
Keyº changes between uppercase
and lowercase letters.
The arrows will move the cursor.
Left arrow is also used for deleting.
Hold for 1 sec. = delete the letter to
the left. Hold for 3 sec. = delete all
entries. New letters can be inserted.
Change of key press and pauses lasting more than one second automatically moves the cursor to next
position.
34
Storing a number
1 While on hook, press the number
to be stored (max. 23 digits),
press >, and then press 3.
2 Enter a name (max. 24 digits),
and then press 3 to store the
number.
After storing, the handset will go
back to standby mode.
35
3 If the display shows “MEMORY
FULL”, it is necessary to delete
one or more numbers from the
telephone book.
See Figure 5 on page 65.
Storing from Redial/CLIP list
1 While on hook, use the < -key to
find the number in the redial/CLIP
list to be stored in the telephone
book.
2 Press 3, then >, and then press
3 again.
3 Enter a name, and then press 3
to store the redial/CLIP list
number in the telephone book.
Storing number from last caller
• While on hook, press < to store a
number from last caller, then 3,
then press >, then 3 to confirm.
Reading BOOK numbers
1 While on hook, press > ( ) to
enter the telephone book.
2 For quick-search: press the first
letter of the name (using
2-9)(Refer to “Using the
alphanumeric keyboard” on page
34).
3 Press
person.
to call the displayed
It is also possible to reach the
PHONE BOOK MENU from the
main menu.
36
4 Press MENU ( ) to exit the
telephone book.
Note: Viewing and editing the
telephone book can also be done
while in conversation (off hook) by
pressing > ( ).
See Figure 6 on page 66.
Changing numbers
1 While on hook, press > ( ) to
enter the telephone book.
2 Use the < > -keys to find the
number to be edited, press 3,
press >, then press 3.
3 Edit the number, and then press
3 to store the number.
Note: Viewing and editing the
telephone book can also be done
while in conversation (off hook) by
pressing > ( ).
See Figure 6 on page 66.
Changing Redial number
1 While on hook, press < (
),
use the < > -keys to find the redial
number to be edited, and press
the digits you want to add to the
number, e.g. prefix = O.
2 Press 3, followed by >, enter a
name, and then press 3 again to
store the number.
37
Deleting numbers
1 While on hook, press > ( ) to
enter the telephone book.
2 Use the < > -keys to find the
number to be deleted, press 3
twice.
See Figure 6 on page 66.
Deleting from Redial list
• While on hook, press < (
), then
use the < > -keys to find the name/
number to be deleted, and press 3
twice.
The name/number is now deleted.
If number is stored, it is moved to
the telephone book.
Using text messages (E2)
Note: Only available in systems
configured with the possibility of
sending text messages.
It is possible to send text messages
from handset to handset on the same
system.
See Figure 4 on page 64.
At the reception of a text message the
envelope display icon appears. The
envelope display icon is indicating
one or more unread messages.
38
• The text message is shown in the
display, and when the message is
read the envelope display icon will
disappear.
• If the message contains a callback
number, this will be displayed on
the bottom line of the display.
• The icon in the display, in front of
the timestamp, shows the message
status:
Urgent message
Normal message read
Normal message unread
Transmitted message confirmed
Transmitted message not yet
confirmed
Message could not be
transmitted successfully
• Mails include a maximum of 160
letters or digits. Call back no. is
max 23 digits.
• 10 messages can be ”stored” in the
handset. When receiving a new
message, the oldest will be
deleted.
Reading a text message
1 While on hook, press R (
press 3.
), then
2 Use the > -key to scroll between
the mails, and then press 3 to
select a mail.
39
3 Press 3 to read the mail.
If the message includes more
than 36 letters or digits, the
message will run over more than
one display screen. Use the < >
-keys to scroll between the lines.
4 To see the sender of the mail,
press the > -key at the end of the
message.
5 To leave the mail, press MENU
( ).
Replying a text message
1 While on hook, press R (
press 3.
), then
2 Use the > -key to scroll between
the mails, and then press 3 to
select a mail.
3 Use the < > -keys to find the send
message feature, then press 3.
4 Enter your reply, then press 3.
5 Dial the number of the receiver,
then press 3.
6 Use the > -key to select a
message status URGENT or
NORMAL, and then press 3.
The message is sent.
Deleting all text messages
1 While on hook, press R (
press 3.
), then
2 Use the > -key to scroll between
the mails, and then press 3 to
select a mail.
40
3 Use the < > -keys to find the
delete all message feature, then
press 3.
All mails are deleted.
Deleting a text message
1 While on hook, press R (
press 3.
), then
2 Use the > -key to scroll between
the mails, and then press 3 to
select a mail.
3 Use the < > -keys to find the
delete message feature, then
press 3.
The mail is deleted.
Writing a text message
1 While on hook, press R (
press 3.
), then
2 Use the < > -keys to find the new
message feature, then press 3.
3 Write your message, then press
3.
4 Dial the number of the receiver,
then press 3 to confirm.
5 Use the > -key to select a
message status URGENT or
NORMAL, and then press 3.
The message is sent.
41
Shortcuts
”SILENT”: Press: MENU ( ) followed
by #. (No sounds) (Display shows
SILENT)
”KEY LOCKED”: Press: MENU ( )
followed by º. (Display shows KEY
LOCKED)
“PHONE BOOK”: Press > (
hook).
) (in on
Name search in telephone book:
Press the first letter in name.
Store a number: Press > (
number (in on hook).
) after the
“REDIAL” and “CLIP”: Press < (
in on hook.
“E2-MAIL”: Press R (
)
) in on hook.
MUTE temporarily the ringer: Press
3 ( ) when the handset is ringing.
MUTE the microphone: Press 3 ( )
when the handset is off hook.
RECALL: Press R (
).
Pause(-): Hold º for one second (only
for on hook dialling/pre-dial).
42
General information
Troubleshooting
The handset does not ring.
Check whether the ringer is SILENT
or RINGER VOL. is OFF.
The handset cannot find a system ID
at “SUBSCRIPTION CREATE”.
Check whether the system is set to
allow subscriptions.
The handset cannot subscribe even
if system ID has been found.
Check if Authentication Code is necessary.
The telephone display icon
continues to flash.
An error has occurred. Contact your
system administrator.
Not possible to turn on the handset.
Check if battery is connected. If yes,
charge the battery.
The handset turn off when receiving
a call and going off-hook.
Charge the battery. If still a problem
change the battery as it might be
defective.
Warning: Do not charge DECT
Handset 4145Ex in a potentially
explosive atmosphere. Use only the
dedicated charger N0018956
(orange) for charging of DECT
Handset 4145Ex.
Warning: The battery must not be
removed in a potentially explosive
atmosphere.
43
Information
Error information
Improper function of the handset
might be related to the installation of
the DMC system or failures related to
the main system.
Before declaring a handset for repair
be sure that the main system is operating properly.
Warranty
The handset is covered by a normal
warranty solution, except the battery.
The lifetime of the battery depends on
the general use of the handset.
The handset is not covered by a general warranty if:
• The handset is exposed to water or
metal dust.
• The handset is mistreated.
• The handset is exposed to
unauthorised break-in.
Technical specification
Approvals
Acoustics: CTR10/TBR 10 ed. 3
Electrical: EN 301 406 V1.4.1 (DECT
RF)
Access profile: CTR22/TBR 22 Jan.
97 (GAP)
EMC: EN 301 489-1 V1.4.1/EN 301
489-6 V1.2.1
IP54 class: IEC 529 (IP54)
EN50014/IEC 60079-0
EN50020/IEC 60079-11
44
Size and weight
Size: 148 x 50 x 28 mm
Weight: 130 g incl. battery ± 10 g
Capacity
Active talking time 15 hours
Stand-by time 150 hours
Temperature and air pressure
Operating temperature: 0-40°C
Air pressure: Normal atmosphere
condition
Charger (orange)
The AC power adapter used in connection with the handset charger
N0018956 must not be connected to
a voltage higher than 250V AC.
45
EC Declaration of
Conformity
Manufacturer:
KIRK telecom A/S
Langmarksvej 34
8700 Horsens
Denmark
Product
DECT Handset 4145Ex
ATEX handset
Type 0238 02XX
Type number
XX can vary (numbers and letters)
depending on software and design.
Telecom requirements
The transceivers described above
comply with the essential requirements of the R&TTE directive 99/5/
EC if used for the intended purpose.
46
Applied standards
Standards
Date
EN 60950
Health and Safety
requirements
2000-1
EN 301 489-1
2001-09
Electromagnetic
Compatibility requirements
EN 301 489-6
2000-09
Electromagnetic
Compatibility requirements
TBR 22
Generic Access Profile
(GAP)
1997
TBR 10
General Terminal
Attachment requirements
1999
TBR 6
General Terminal
Attachment requirements
1999
Application, Intended purpose
The DECT Handset 4145Ex is a
DECT based handset, designed to be
used in connection with Nortel Networks wireless communication solutions in potentially explosive
environments. The DECT transmitter
frequencies of the apparatus are harmonized for these services in the
European Community.
47
Meaning of Conformity
For the application of the equipment
in areas which have a potentially
explosive atmosphere, the manufacturer declares on his own responsibility that under the claimed type of
protection the equipment is in conformance with the relevant European
harmonized standards. The equipment may only be used under conditions that are mentioned in the ATEX
and IEC Type Examination Certificate.
Electrical apparatus for
potentially explosive
atmospheres
The DECT Handset 4145Ex is in conformance with the requirements of the
ATEX Directive 94/9/EC as well as the
below standards:
Standards
Date
EN 50014
(+ amendments) General
requirements
1997
EN 50020
Intrinsic Safety “ i “.
2002
EN 50281-1-1
For use in the presence of
combustible dust.
1998
EN 60529
(+ amendments) Ingress
Protection Degree,
IP-code.
2000
IEC 60079-0
General requirements
2000
IEC 60079-11
Intrinsic Safety “ i “.
1999
48
Notified Body
Identification number: 0539
Examination Certificate
EN: DEMKO 04 ATEX 136204 X
IEC: IECEx ULD 04.0001 X
Validity
This declaration is only valid if accompanied with an EC Type Examination
Certificate obtained from a Notified
Body or from a competent authority in
an EU member state.
Quality Assurance
The product is designed and produced by a manufacturing organisation, which is certified on ISO 9001:
2000 and ISO 14001: 1996 standards. These products are in conformance with the full quality
assurance procedures as mentioned
in annex III, IV and VII of the ATEX
directive 94/9/EC and annex V of the
R&TTE directive 99/5/EC and bears
the marking 0539. The number 0539
is the identification number of UL
International, Demko A/S. Compliance with the requirements of ISO
9001: 2000 and ATEX directive are
assessed and certified by the Notified
Body:
UL International
Demko A/S
Lyskaer 8
P. O. Box 514
DK-2730 Herlev
49
Technical Director: Erik Stridbæk
Signed:
Date:
10-09-2004
Quality Manager:
Søren E. Mikkelsen
Signed:
Date:
10-09-2004
Safe use of the ATEX approved
DECT Handset 4145Ex
For safe use of the ATEX approved
DECT Handset 4145EX, remember
the following:
The DECT Handset 4145Ex is developed for use in potentially explosive
working environments, as defined by
local fire protection authorities. The
handset complies with the ATEX
directive 94/9/EC as well as IEC standards.
50
UK
For safe use of Nortel DECT Handset
4145Ex:
• In potentially explosive atmosphere
areas (as defined by your system
management) only ATEX-approved
handsets may be used.
• The handset may only be used after
information from the system
manager about safe use.
• Follow the instructions for safe use
as prescribed.
• Do not open the handset in an
unsafe area.
• Do not charge the batteries in an
unsafe area.
• Use the prescribed pouch in areas
with a humidity less than 60% or
when wearing clothes that could
cause electrostatic charging of the
handset.
• Remove a defective handset
immediately from the unsafe area.
• For further information consult the
extended user manual obtainable
from your system management.
• If in doubt or if questions arise,
consult the system manager
responsible for the issue of the
handset.
• Only manufacturer may repair and
service DECT Handset 4145Ex.
51
FR
Pour utiliser en toute sécurité la version ATEX du combiné Nortel DECT
Handset 4145Ex, veuillez suivre les
instructions suivantes:
• Dans les zones à atmosphère
potentiellement explosive (telles
que définies par le responsable du
système), utilisez uniquement des
combinés ATEX agréés.
• N’utilisez le combiné qu´après avoir
reçu les instructions de sécurité du
responsable du système.
• Suivez scrupuleusement les
instructions reçues.
• Ne pas ouvrir le combiné dans la
zone à risque.
• Ne pas charger les batteries dans la
zone à risque.
• Utilisez l’étui réglementaire dans les
zones présentant un taux
d’humidité inférieur à 60% ou si
vous portez des vêtements
susceptibles de produire des
charges électrostatiques sur le
combiné.
• Evacuez immédiatement tout
combiné défectueux de la zone à
risque.
• Pour plus d’information, consultez le
Manuel de l’utilisateur, disponible
auprès du responsable du système.
• En cas de doute ou de question,
adressez-vous au responsable du
système.
52
• Toutes réparations et services du
portable DECT 4145Ex doivent
être effectuées exclusivement par
le fabricant.
DE
Beachten Sie die folgenden Hinweise
zur sicheren Verwendung des Nortel
DECT Handset 4145Ex:
Hiermit erklärt Nortel, dass sich das
DECT Handset 4145Ex in Übereinstimmung mit den grundlegenden
Anforderungen und den sonstigen
einschlägigen Bestimmungen der
Richtlinie 1999/5/EG R&TTE befindet,
CE gekennzeichnet ist and nach der
ATEX Direktive 94/9/EG (Zertifikate
DEMKO 04 ATEX 136204 X) geprüft
wurde. Die Identifizierungsnummer
des Notified Body ist 0539.
Besuchen Sie unsere Webseite um
die Herstellererklärung (DoC) anzufordern:
http://www.nortelnetworks.com/products/announcements/eumrdc/index.html
Wichtige Sicherheitshinweise:
• In potenziell explosiver Umgebung
(gemäß Definition Ihres
zuständigen Systemverwalters)
dürfen nur DECT Handsets
verwendet werden, die gemäß
ATEX Direktive 94/9/EG geprüft
wurden und den grundlegenden
Anforderungen der R&TTE 1999/5/
EG entsprechen.
53
• Das DECT Handset darf erst
eingesetzt werden nachdem eine
Sicherheitsunterweisung durch den
zuständigen Systemverwalter
erfolgt ist.
• Halten Sie sich strikt an die
vorgeschriebenen Anweisungen
zur sicheren Verwendung des
DECT Handset.
• Öffnen Sie das DECT Handset nicht
in potenzieller explosiven
Bereichen.
• Laden Sie das DECT Handset nicht
in potenzieller explosiven
Bereichen.
• Verwenden Sie die vorgeschriebene
Tasche in Bereichen mit weniger
als 60 % Feuchtigkeit oder wenn
Sie Kleidung tragen, die eine
elektrostatische Aufladung des
DECT Handset hervorrufen kann.
• Entfernen Sie ein defektes DECT
Handset unverzüglich aus
potenziell explosiven Bereichen.
• Weitere Informationen entnehmen
Sie bitte dem ausführlichen
Benutzerhandbuch, das bei Ihrer
Systemverwaltung erhältlich ist.
• Bei Unklarheiten oder Fragen
wenden Sie sich bitte an den
Systemverwalter, der für die
Ausgabe des DECT Handset
verantwortlich ist.
• Reparaturen und Service des
DECT Handsets 4145Ex dürfen
nur von Hersteller vorgenommen
werden.
54
ES
Para un uso seguro de la versión
ATEX del teléfono Nortel DECT Handset 4145Ex, recuerde lo siguiente:
• En zonas potencialmente
explosivas (según lo definido por el
administrador de su sistema)
solamente deberán utilizarse
teléfonos aprobados por ATEX.
• El teléfono solamente debe ser
utilizado una vez recibidas por
parte del administrador del sistema
las instrucciones de seguridad
• Siga las instrucciones para un uso
seguro según se indica.
• No abra el teléfono en una zona
insegura.
• No cargue las baterías en una zona
insegura.
• Utilice la bolsa de transporte
recomendada en zonas con un
nivel de humedad inferior a 60% o
cuando utilice ropa que pudiese
generar una carga electrostática en
el teléfono.
• Si el teléfono tuviese algún fallo,
retírelo inmediatamente de la zona
insegura.
• Para obtener información adicional,
consulte el manual de usuario, que
podrá proporcionarle el
administrador de su sistema.
• Si tuviese preguntas, consulte al
administrador de su sistema,
responsable del teléfono.
• La reparación y servicio del portatil
DECT 4145Ex se realizarán
exclusivamente por el fabricante.
55
NL
Let voor een veilig gebruik van de
ATEX-versie van een Nortel DECT
Handset 4145Ex - handset op de volgende punten:
• Gebruik in explosiegevaarlijke
omgevingen (zoals aanngewezen
door uw systeembeheerder) alleen
handsets met het ATEX-keurmerk.
• U mag de handset alleen gebruiken
na een veiligheidsinstructie van de
systeembeheerder.
• Neem alle veiligheidsvoorschriften
in acht
• Maak nooit een handset open in een
onveilige omgeving.
• Laad nooit de batterijen op in een
onveilige omgeving.
• Gebruik altijd het voorgeschreven
etui in droge omgevingen met een
luchtvochtigheid die lager is dan
60%, en wanneer u kleren draagt
die elektrostatische ontladingen
kunnen veroorzaken.
• Verwijder een defecte handset
onmiddellijk uit het onveilige gebied.
• Raadpleeg voor meer informatie de
uitgebreide handleiding die bij uw
systeembeheerder verkrijgbaar is.
• Neem bij twijfel of vragen contact op
met de systeembeheerder die
verantwoordelijk is voor de uitgifte
van de handset.
• Alleen de fabrikant mag reparaties
en service verlenen op de DECT
Handset 4145Ex.
56
IT
Per un uso sicuro della versione ATEX
di un apparecchio Nortel DECT Handset 4145Ex tenere presante i seguenti
puni:
• In ambienti ad atmosfera
potenzialmente esplosiva (come
difinito dalla gestione del sistema)
si possono usare solo apparecchi
approvati ATEX.
• L’apparecchio potrà essere
utilizzato sola dopo che sono state
ricevute informazioni dal gestore
del sistema riguardo alla sicurezza
d’impiego.
• Attenersi alle isreuzioni sull’uso
sicuro, come descritto.
• Non aprire l’ apparecchio in aree
non sicure.
• Non caricare le batterie in aree nin
sicure.
• Usare la busta prescritta nelle aree
con umidità inferiore al 60% o
quando vengono indossati
indumenti potrebbero generare
carica elettrostatica
sull’apparecchio.
• Eliminare immediatamente un
apparaecchio difettoso da un´area
non sicura.
• Per ulteriori informazioni fare
riferimento al manuale utente
esteso che viene fornite dal proprio
gestore del sistema.
57
• In caso di dubbi o in presenza di
domande, rivolgersi al gestore di
sistema responsabile per le
problematiche relative
all’apparecchio.
• La riparazione e la manutenzione
dei terminali DECT 414Ex possono
essere effettuate solo dal
produttore.
58
Name and adress of
manufacturer
DECT
Handset
4145Ex
Product name
IP64
IP 64 classification
Ex
DECT Handset 4145Ex is
approved according to
International standards
ib
Intrinsic safe, ib category
IIC
Equipment group II, ib
group C (gas group C)
T3
Temperature group T3
(relevant for gas)
IECEx
International country code
for notified body/year/
certification number
X
Special warnings
concerning the use of
DECT Handset 4145Ex
exist, please refer to the
users guide
59
II 2G
Equipment group II, zone
1 (gas)
II 3D
Equipment group II, zone
2 (dust)
T60ºC
Max. surface temperature
of DECT Handset 4145Ex
in use
Ex logo
Specific marking of
explosion protection
EEx
DECT Handset 4145Ex is
approved according to
European standards
ib
Intrinsic safe, ib category
IIC
Equipment group II, ib
group C (gas group C)
T3
Temperature group T3
(relevant for gas)
Demko
Name of notified body/
year/certification number
X
Special warnings
concerning the use of
DECT Handset 4145Ex
exist,please refer to the
users guide
CE 0539
CE marking and Demko
identification number
60
61
Figure 1 Menu language
62
Figure 2 Menu profile set-up
63
Figure 3 Menu structure
64
Figure 4 Menu mail
65
Figure 5 Menu phone book - storing a number
66
Figure 6 Menu phone book - reading, deleting, editing a number
14128800-HD ED2