1
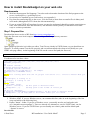
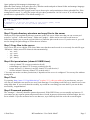
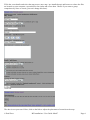
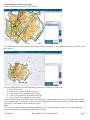
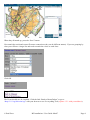
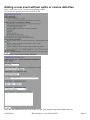
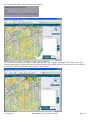
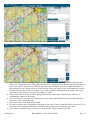
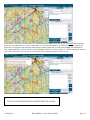
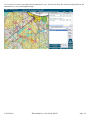
Adding a route: • • • • • • • • Check the box "Draw your route", which is located in the top-right corner of the screen. Choose your class and name from the lists that appear when you click the box. Locate the starting point (the triangle) on the map. You can move the map around by pressing and holding down the left mouse button somewhere on the map while moving the mouse in the desired direction. You can also zoom in using the + & - buttons on the right. Draw your route from the starting point to the first control by clicking the left mouse button in places where you changed direction. (The program will create a continuous route between these points that you plot.) Your route is drawn in red. The blue line shows the direction to your next control and there is a halo round the circle. When you have created a point close to the centre of the ring marking the control, the Blue line switches to the next control. If you make a mistake while plotting the points, you can go back one or more points at any time by pressing "undo". Snap on/off, turn it off if you want to plot points near the centre of the control circle, otherwise it automatically snaps it to the centre. You can also move the map while drawing your route: Press and hold the left mouse button and move the mouse in the desired direction. RG spreads your time out evenly along the route that you draw for each leg. This may not be accurate, particularly if you had trouble with any part of the leg. If you wandered around in some location make sure to include a lot of fine detail in your drawing, even if you don't know exactly where you were. This will appear to slow the animation in that area (and not on the part of the leg where you did well). You can also artificially introduce a pause if, for example, you stood for a minute relocating. You can show this by creating a small tick mark across your route and oscillated back and forth in place on the tick mark for a while when you are drawing the route. Then the animation will also appear to pause at the same location. You can also press the +3sec button once or more to add your thinking time at a particular point (these points are displayed when viewing routes). Draw your entire route from start to finish. In some cases the routes will speak for themselves, but there is also a comment field for you to use. You can write to the comment field when you think of things while you are drawing your route. This can be particularly helpful for beginners looking at the animations and wondering what was going on. Was the route planned or accidental? If it was planned, what was the thinking? Make sure to include the leg number in the comment since the comment is associated with the entire course. For example: • • • • • 1-2: Aimed for the fence corner to use it as an attack point. 4-5: Accidentally drifted much lower than planned. Saw the road and turned. 5-6: The undergrowth seemed much slower than mapped. So I switched to the stream bed for a faster route. 9-10: Was planning to use the trail bend to attack, but found the boulder and used that instead. If you make a mistake before you save it you can use the UNDO button to go back. The RouteGadget administrator can remove your route if you realize that you made a drawing mistake after having saved it. Import from GPS: You can also import a route recorded on your GPS. There are 5 different formats offered. Click the GPS button at the top right of the page, there is a help button on the GPS import page that links to the developers website: http://www.routegadget.net/grgpshelp/ This provides very detailed guidance through the process. Your GPS route can be in addition to you manually plotted route. As the GPS route does not register the individual control splits your time is averaged out over the whole course for the animation. It can also be interesting to plot your route from memory then upload your GPS one and see how good you memory is! Paul Frost RG Installation / User Guide Mar07 Page 16