1
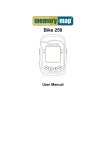
Compact, lightweight folding electric bike
User manual
Specification
Bike
Weight:
20 kg
Wheel size:
20”
Maximum speed:
25 km/h
Range:
Up to 40km (with pedal assist)
Battery
Type:
lithium
Voltage:
24V
Capacity:
8.5h
Motor
250W 24V
Charger
Input Voltage:
AC100V-240V 50HZ-60HZ
Output:
29.4V/2.0A
Charging Time:
5~8h
2 • UK
Please read!
General maintenance and safety advice
1) Users of E-BIKE STRADA should observe local road and traffic regulations for standard bicycles
in force in the country of use at all times.
2) Please read this manual before using E-BIKE STRADA
3) Ensure that the power switch on the handlebar is switched off when
the E-BIKE is not use.
4) The seat post should not be raised beyond the safety line indicated.
Please note that the tightening torque of the saddle’s grip nut and
post’s clamping bolt is 18N.m.
5) The handlebar post should not be raised beyond the safety line
indicated. Please note that the tightening torque of screw rod for
handle and the torque of horizontal road fixing bolt is 18N.m.
Insert
Safety Line
Insert
6) Always check that the front and rear brakes are working correctly
and that the tyre pressures are correct before riding E-BIKE STRADA.
7) The tightening torques of the front and the rear hub nuts are 18N.m
and 30N.m respectively.
8) Do not wash your E-BIKE STRADA with the battery charger
connected to the battery whilst charging to prevent the possibility
of electric shocks.
9) Do not submerge the battery in water. Do not ride your E-BIKE
through water deeper than 8” or 20 cm.
10) Do not tamper with the electrical control unit on your E-BIKE STRADA.
This could endanger the rider and will invalidate the warranty.
Safety Line
(insert seat post until
safety line can no longer
be seen)
11) Approximately every 6 months it is important to clean and lubricate the front, back and middle
axles, flywheel, and front forks plus other moving parts with a good quality grease.
3 • UK
Quick start guide
●●
●●
●●
Charge the battery following the battery charging instructions below.
Adjust the height of the seat and handlebars to your preferred position ensuring that you do not
exceed the height safety line indicated on the seat post and handlebar post.
Check that the tyre’s have been inflated to the correct pressure and that the front and rear brakes
operate correctly. Please refer to the section below explaining how to adjust the brakes as necessary.
●●
Next power on the P.A.S. (Pedal Assist System) A red LED will indicate that the device is powered on.
●●
Use the + and – buttons to select the amount of pedal assistance required.
●●
The battery level indicator will inform you of how much power is left in the battery.
●●
Your E-BIKE STRADA is now ready to use. Ride your E-BIKE as you would a normal bicycle but as you
pedal you will feel the bike’s motor providing gentle assistance depending on the level of pedal
assistance set.
Please note: Your E-BIKE STRADA has a range of up to 40km. This range will be determined by the
amount and severity of slope on your route, the weight of the rider, correct tyre pressure, opposing
wind and the amount of pedal operation by the rider themselves.
●●
To conserve battery power please ensure you switch the battery off when not in use.
Battery On/Off Switch
Riding without pedal assistance.
●●
It is possible to ride your E-BIKE STRADA like a normal bike. To deactivate the P.A.S. simply switch the
pedal assist off and switch off the battery using the battery on/off switch.
4 • UK
Battery and charger safety advice
●●
●●
●●
●●
●●
●●
Please save this manual as it contains important operating and safety information about the battery
and charger.
Please read this manual before using the battery and charger, including the warning label on the
charger and battery pack.
Do not expose the battery charger to rainy or wet conditions or operate in temperatures below 0°C or
above 35°C as this may damage the charger.
Only use the charger to supplied to charge the battery supplied with your E-BIKE STRADA. Do not use
the charger supplied to charge any other battery.
Do not attempt to lengthen the power cable supplied with the charger or to open and tamper with
the charger in any way.
Do not store the battery in an environment which could exceed 50°C – in the car in summer for
example, as it may adversely affect the performance of the battery.
●●
Do not throw the battery pack into fire, as there is a risk of explosion.
●●
Only operate the charger according to the INPUT and OUTPUT values marked on the rating label.
●●
Ensure that the battery charger is well ventilated and do not cover during charging.
●●
Store the battery in a safe and dry place when not in use. To maintain battery quality during long
periods of inactivity, fully charge the battery every 2 to 3 months.
Charging the battery
●●
The battery is located inside the bicycle cross member and does not need to be removed for charging.
Please note: when charging the battery for the first time, please charge for 10 hours to ensure that the
battery is fully charged and conditioned.
●●
●●
Connect the charger to the bicycle by lifting the plastic cover to reveal the charging socket - located on
the cross member on the opposite side to the on/off switch.
Connect the power plug of the charger to an appropriate AC outlet socket.
If you should need to remove or replace the battery
Battery handle
1. Fold the bicycle by releasing the
retaining catch at the centre hinge.
2. Carefully lift the battery handle.
3. Slide the battery out of the frame.
Retaining catch
5 • UK
Adjusting the brakes
Examine the brakes on your E-BIKE regularly to ensure they are working correctly as follows:
Adjusting the front and rear brake
1.1 Check the right brake leaver as per the picture. Full
braking should be reached when the leaver reaches the
halfway point indicated by the ‘X’.
1.2 Loosen the screw on the braking cable seat as per the
picture.. Then tighten or loosen the braking cable,
enabling the average stroke between the two brake
blocks and the rims so it is approximate 1.5mm to 2mm.
X
1. Brake arm
2. Brake block
3. Spring adjusting screw
4. Braking cable seat
5. Braking cable
Controls:
Left Hand
Right Hand
1-6 gear selector
Pedal assist controller
Front and rear lights
Gear change
Warning horn
6 • UK
Troubleshooting
Trouble Description
Causes
PROBLEM/ QUESTION
The power LED is not
illuminated and the bicycle
doesn’t start when the switch
is turned on.
The motor runs immediately
once the E-BIKE is powered on.
(Note: immediately power off
the switch to avoid accident.)
E-BIKE is slow when riding or
pedal assist range is short.
●●
●●
●●
●●
●●
●●
Poor contact between the
electrodes of the battery box.
The speed-adjusting handle is
not reset.
Trouble shooting
Methods
●●
●●
The controller is damaged.
The tyres are not inflated
enough.
Frequent starts, hills and slopes
on route or riding against the
wind.
Battery capacity is in decline or
there is a fault with the battery.
●●
●●
●●
Check for dirt on the
electrodes of the battery box
or seat, and remove it.
Check whether the speedadjusting handle is operating
correctly and reset if
necessary.
Check tyres are properly
inflated.
Increase the amount of
pedaling independent of PAS
while riding on flat areas.
Replace battery with the new.
IMPORTANT!
We reserve the right to make modifications to E-BIKE without prior notice.
7 • UK
Performance Products Ltd, Cleaver House, Sarus Court, Manor Park, Runcorn WA7 1UL. Tel 0333 240 1000 Fax 0333 240 1100
www.snooper.co.uk