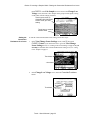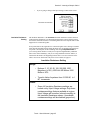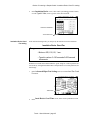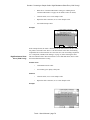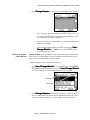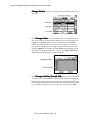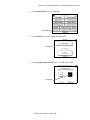
1
Touch 1 User’s Manual
(1000-Volt and 1500-Volt)
Version 3.1X
12 April, 2000
1000 Volt System
1500 Volt System
Touch 1 User’s Manual
(1000-Volt and 1500-Volt)
Version 3.1
12 April, 2000
Copyright 2000 by Cirris Systems Corporation
1991 Parkway Boulevard
Salt Lake City, Utah 84119-2026
United States of America
All Rights Reserved
I Need Your Help!
As Senior Editor, it’s my responsibility to constantly improve the manuals and other documentation
we include with our equipment. We try hard, but we know we’ll never please everyone. If you were
in my chair, how would you change the documentation to make it better? Here’s your chance to
take gripes, suggestions and (we hope) praise directly to the guy who can change things. Please
fax or mail this form to me, or contact me by e-mail.
Thanks!
Fax Telephone: 801-973-4609
e-mail: [email protected]
Van Nielson
Senior Editor, Technical Documentation
Analyzer: Touch 1
Attach more pages if needed
Van Nielson
c/o Cirris Systems Corporation
1991 Parkway Boulevard
Salt Lake City, Utah 84119-2026
U.S.A.
Table of Contents
Section 1: How to Use the Manual .................................................................................. 7
Section 2: Flow Diagram ................................................................................................. 9
Section 3: Hardware Overview ..................................................................................... 11
Section 4: Navigational and Quick Tips ........................................................................ 19
Section 5: Learning a Sample Cable ............................................................................ 27
Section 6: Editing Wirelists ........................................................................................... 89
Section 7: Managing Wirelists ..................................................................................... 155
Section 8: Testing Cables ........................................................................................... 173
Section 9: Interpreting Cable Testing Errors ............................................................... 183
Section 10: Multiple Wirelists ...................................................................................... 197
Section 11: Four-Wire Testing .................................................................................... 205
Section 12: Security/Passwords ................................................................................. 223
Section 13: Digital Inputs/Outputs ............................................................................... 253
Section 14: System Setup Options ............................................................................. 263
Section 15: Trouble Shooting ...................................................................................... 287
Section 16: Glossary of Terms .................................................................................... 291
Section 17: Example Test Settings ............................................................................. 295
Section 18: Specifications (1500 Volt Hardware) ........................................................ 301
Section 19: Specifications (1000-Volt Hardware) ....................................................... 303
Section 20: Statement of Warranty ............................................................................. 305
Index ............................................................................................................................ 307
Section 1:
How to Use
the Manual
Finding Your Way Around
This manual is designed to tell you everything you should know about your Cirris
Touch 1 cable analyzer. Part of the information included in this manual is also
contained in the Touch 1 Quick Start Manual.
We’ll try to cover each topic in enough detail to make you comfortable moving
around in the Touch 1’s graphical user interface. Once you’re used to using the
interface, most of the procedures you’ll go through will become pretty selfexplanatory.
Font settings in this
manual
Other helpful features
We’ll use a few different font settings in this manual. These are:
•
Body text will be set in this font.
•
Screen names will be shown in this font
•
Notes and cautions will be given in this font.
•
Where appropriate, we’ll use either bold type or italics for emphasis.
The running headers that appear throughout the manual will help you find your way
around. There’s an on-line help system (see page 19) for details, a complete table of
contents, and an index to help you find information too.
You’ll find answers to most of the questions you have about the Touch 1 somewhere
in this manual. If you have questions about things not covered in the manual or the
on-line help, or if you need sales or technical support, please telephone Cirris
Systems at (801) 973-4600 or (800) 441-9910. We’ll do everything we can to keep
your Touch 1 working hard for you.
Touch 1 User’s Manual / page 7
Section 1: How to Use the Manual / Other helpful features
Touch 1 User’s Manual / page 8
Section 2:
Flow Diagram
Work Flow in the Touch 1
This diagram tells you in general terms how you and your Touch 1 do things. You
enter a wirelist from any of the five sources shown in the upper box, connect the cable
you want to test, and start testing. If the cable you’re testing fails any of the tests
along the way, the Touch 1 stops testing, then displays the error(s). If the cable passes
all tests, you’ll get a “Good Cable” result.
Enter Wirelist
Learn Sample
Network
Hard Disk
Create Wirelist
Manually
Floppy Disk
Connect Cable To Test
Push-to-Start button (optional)
Continuity Test (LV)
PASS
FAIL (Short, Open, Miswire)
Component script (optional)
Components Test (optional)
FAIL (Component Error)
PASS
Hipot Test (HV) (optional)
PASS
FAIL (Hipot Error)
Intermittent Test (optional)
FAIL (Intermittent Error)
PASS
Good Cable
Remove cable, ready for next test
Touch 1 User’s Manual / page 9
Section 2: Flow Diagram
Touch 1 User’s Manual / page 10
Section 3:
Hardware
Overview
110 / 230 volt switch
Your Touch 1 is capable of operating using 115 VAC power (standard in the United
States), or 230 VAC (standard outside the U.S.). The selector switch is located on the
back of the Touch 1 as shown below. Be sure the switch is in the correct position
before you turn on the Touch 1. Whichever voltage setting you use, be sure to plug the
Touch 1 into a well-grounded outlet.
1500 Volt System
1000 Volt System
Main Power
Switch
115 or 230 V
50-60 Hz
200 VA
Voltage Select Switch
Main Power Cord
Increasing Test Point
Capacity
Installing Expansion
Boxes
Voltage Select Switch
Main Power Cord
Auxiliary Monitor Power
You may choose to increase the test point capacity of your Touch 1 by adding
expansion boxes. You can add up to seven additional boxes to your system. The test
point capacity increases in increments of 128 points, up to a maximum of 1024 points.
Up to six additional expansion boxes may be connected using the existing main cable,
and short box-to-box cables. For a fully-loaded system, a second main cable is needed
to connect all the boxes. For a fully-loaded system, we recommend connecting four
boxes to each main cable.
To install an expansion box, follow the steps beginning below. The diagram on the
next page will help to make things clear.
1.
Unlock the twistlock fasteners on the cover plate of the Touch 1, and lift off the
cover plate.
2.
Gently lift the scanner assembly up out of the chassis a short distance, to expose
the short box-to-box cable (with a female connector) inside the chassis.
3.
Carefully plug the male connector on the box-to-box cable leading from the
expansion box, into the newly-exposed female connector. Be sure the connector
is seated well.
Touch 1 User’s Manual / page 11
Section 3: Hardware Overview / Scanner “J” Positions
4.
Once the box-to-box cable is securely plugged in, gently lower the scanner
assembly back into the chassis, replace the cover plate, and lock the twistlock
fasteners.
5.
Slide the expansion box until it fits flush against the side of the Touch 1 (or the
last expansion box). The pins on the side of the expansion box will fit into the
openings in the sidewall of the next box to the left. This keeps the expansion
boxes neatly lined up against each other. Hook the draw latches on each side of
the expansion box onto the plastic “keepers” on the next box, then snap the
latches into the closed position. This locks the expansion box(es) securely onto
the analyzer.
Remove the scanner cover plate, unlock the twistlock fasteners, and lift the
.
scanner
assembly out of the chassis as shown. Connect the box-to-box
cable to the female connector on the main cable trailing from the chassis.
Box-to-box cable
Connect the box-to-box cable to the
connector on the main cable
Main cable
Connect the other end of the boxto-box cable to the connector on
the bottom of the scanner mounting
plate. Lower both scanner
assemblies into their chassis,
replace the cover plate, and lock
the twistlock fasteners.
.
Hook the drawlatch
over the keeper
Twistlock fastener open
Twistlock fastener locked
Slide the two boxes together as you feed the excess box-to-box cable
inside the analyzer. The alignment pins should fit into the corresponding
holes. Hook the drawlatches over the keepers, and snap the latches shut.
Scanner “J” Positions
The Touch 1 has four “J” positions on its base scanner assembly. The “J” positions are
marked J-1 through J-4 on the scanner cover plate. Each expansion box has four “J”
positions on its scanner assembly. Up to seven additional expansion boxes can be
added. For a fully-loaded 1500 volt system, there are 32 “J” positions. You’ll install
Touch 1 User’s Manual / page 12
Section 3: Hardware Overview / Adapter Types
connector adapters into these positions.
Adapter Types
To use the Touch 1 at voltages over 1000 volts, special (high voltage) adapters are
required. The part numbers of these special adapters begin with the letter “H,” and the
adapters contain a diode. The special adapters have the same adapter signatures as
their standard counterparts. For example, an “HHED-64” is an AHED-64 adapter
modified for use above 1000 volts. Both versions of the adapter have the same
adapter signature, D507F1.
There are three general types of cable adapters (standard, and special) designed to fit
your Touch 1. The types are Single-high, Double-high, Quad-high. We’ll show an
example of each type (not shown to scale) here.
1.
Single-high adapters. These adapters cannot have more than 28 pins, and take up
one “J” position on the Touch 1 scanner assembly.
An ADBS-15 adapter in
position J-2. It occupies only
one “J” position.
Touch 1 User’s Manual / page 13
Example: An ADBS-15 adapter
Section 3: Hardware Overview / Adapter Part Number Identification
2.
Double-high adapters. These adapters have more than 28 pins, and as many as 64
pins. They take up two “J” positions on the Touch 1 scanner assembly.
An ADBS-37 adapter in
positions J-1 and J-2.
It occupies two “J”
positions.
3.
Example: An ADBS-37 adapter
Quad-high adapters. These adapters have more than 64 pins, and as many as 120
pins. They take up four “J” positions on the Touch 1 scanner assembly. To use
more than one of these, you must add an expansion box.
An AD5P-68 adapter in all
four “J” positions on the
analyzer scanner assembly.
Adapter Part Number
Identification
Example: An AD5P-68 adapter
You can determine what kind of Cirris adapters you have by looking at the beginning
letters in their part numbers.
•
If the part number begins with the letter “A,” the adapter is a standard
Cirris adapter, intended for use below 1000 volts.
•
If the part number begins with the letter “H,” the adapter is modified for
use above 1000 volts.
•
If the part number begins with the letter “U,” the adapter is a custommade adapter.
Touch 1 User’s Manual / page 14
Section 3: Hardware Overview / How to Install Adapters
How to Install
Adapters
To install connector adapters on your Touch 1, follow these steps:
1.
Unlock the four twistlock fasteners on the scanner assembly, then lift off the
cover plate.
Twistlock fastener locked
Twistlock fastener unlocked
J2
J4
J1
J1
J3
2.
Plug in the adapters. You will need special adapters for hipot testing above 1000
volts. Be sure that the pins on the bottom of each adapter are lined up properly, so
they don’t bend as they’re inserted into the sockets. To line the pins up properly,
press the adapter against the inside edge of the metal frame, and have the bottom
of the adapter card resting on the plastic adapter support.
These horizontal pin sockets...
Touch 1 User’s Manual / page 15
...accept the adapter connector
pins on the bottom of each
adapter
Section 3: Hardware Overview / How to Install Adapters
3.
Replace the scanner cover plate, making sure the small alignment pins on its
underside fit into the corresponding holes on the scanner’s upper surface.
Each cover plate alignment pin...
...fits into a hole in the scanner’s
upper surface.
4.
Lock the twistlock fasteners to hold the adapters firmly in place.
In the photo, two
ADBS-15 single-high
adapters are installed in
positions J-1 and J-3. The
cover plate is in place, with
the twistlock
fasteners in the locked
position.
Touch 1 User’s Manual / page 16
Section 3: Hardware Overview / Location of Ports and External Connections
Location of Ports and
External Connections
These photos show you the location of external connectors on the Touch 1.
1500 Volt System
3.5” floppy disk drive
Digital I/O port
Inputs 0-6V max.
Outputs 0-24 V max.
Parallel port
External keyboard
port (use also with
barcode scanner)
Com 1
Com 2
Serial Ports
Network
Probe jack
+ 6V m ax.
card
Video output port
(for monitor)
1000 Volt System
3.5” Floppy
disk drive
Serial port
(serial printer)
One of these slots
for a network card
Digital I/O port
Inputs 0-6V max.
Outputs 0-24 V max.
Probe jack
+6V max.
External
keyboard
port (May
also be
used for barcode
scanner).
How to Connect a
Printer
Video Output
port (monitor)
Parallel port
(parallel printer)
You may use a parallel or a serial printer on your Touch 1. Your printer must be able
to work with DOS. Printers designed to work only with Windows (the LexMark 1100
ColorJet, for example) will not work. (Note: The serial printer may be used only
with the scripting function, which is sold separately.) To install a printer on your
Touch 1 system, follow these steps:
1.
Plug the appropriate end of the parallel printer cable into the parallel printer port,
Touch 1 User’s Manual / page 17
Section 3: Hardware Overview / Installing the Hand-Held Test Probe
or the serial printer into either Com1 or Com 2 as shown in the photo.
2.
Turn the printer on, and make sure the printer is selected (on-line). Note: If the
printer is not on line, the PRINT button will be disabled (grayed out).
Note: If you’re using a serial printer, you must set up the communications port
settings in your script. For details, see the Scripting on the Touch 1 manual.
Installing the HandHeld Test Probe
How to Connect a Bar
Code Scanner
Care of the Touch
Screen
To install the hand-held test probe, simply plug the probe into the port on the back of
the Touch 1 as shown in the photo.
To connect a bar code scanner, plug it into the port otherwise used for a
supplementary keyboard. Note: To use the barcode scanner with cable serial
numbers, the scripting feature must be on. (You must have purchased the Scripting
feature. The Scripting on the Touch 1 manual contains details.)
The Touch screen on the Touch 1 is quite durable. You may clean it by wiping it off
with a soft, dry cloth. If it is very soiled, wipe it off with a damp (not wet) cloth. Be
sure not to let water run down into the analyzer. Do not clean the screen with organic
solvents (benzene, gasoline, toluene, etc.), because they may attack the plastic overlay
on the screen.
Avoid dropping or stacking heavy objects on the touch screen. This is a touchsensitive device. Treat it with respect.
Care of the Touch 1 in
General
The Touch 1 is designed to work well in a manufacturing environment. Treat it with
the same sort of care and respect with which you’d treat a good digital multimeter,
and you should have no trouble.
The outside of the case may be wiped down with a dry cloth, or with a cloth dampened with water. Be sure not to let water run inside the case through the cooling holes,
ports, or other openings. Do not clean the case with organic solvents (benzene, gasoline, toluene, etc.), because they may attack the paint on the case.
If your Touch 1 needs a thorough internal cleaning, we’d suggest you return it to
Cirris. Our factory technicians are equipped and trained to disassemble the analyzer,
clean, adjust, and repair it, and return it to you in good condition. Telephone us at
Cirris (801) 973-4600 or (800) 441-9910 for details on how to ship your Touch 1 to
us.
Touch 1 User’s Manual / page 18
Section 4:
Navigational
and Quick Tips
On-Line Help System
Overview
You can use the on-line help system to find answers to most of your questions regarding the Touch 1. Even when this manual isn’t available, the information you need is
literally at your fingertip. You can get help by:
•
Touching the? button in the upper right-hand corner of the touch screen
twice will bring up the help index.This is referred to as “help on help.”
•
Touching the? button once, then touching on anything in the screen that
you need help on, whether it is:
• selected (darkened) on the screen.
•enabled (normally colored) on the screen.
• disabled (grayed out) on the screen.
•a text field (boxed or unboxed) within a screen.
To close help, touch anywhere in the help window except on buttons.
Touch 1 User’s Manual / page 19
Section 4: Navigational and Quick Tips / Using the help index
Using the help index
Though you can access the index from any screen with a? button, we’ll use Test
Setup as an example. In the Test Setup screen, touch the? button twice to bring up
help on help. When you do this, the title bar will darken, the title will change to HELP
ON TEST SETUP as shown in the drawing, then the help on help window will appear
as shown. In the help on help window, touch Index to bring up the Quick
Reference window
.
Touch here twice...
d
...then touch here
Getting help on
objects
Touch the? button once (the title bar will darken and the title will change to HELP...)
then touch anywhere on the screen you want help.
Disabled object
Selected object
Enabled object
Touch 1 User’s Manual / page 20
Text field
Section 4: Navigational and Quick Tips / The Home button
Home / Scrolling
The Home button
To return to the Main Menu screen from any screen where you see the Home button, simply touch the button. We’ll show you the Test Setup screen as an example.
(Note: For information on home and scrolling using the keyboard, see page 24). You
can plug a keyboard into the Touch 1, and use it to enter information or get help,
instead of using the touch screen. The TAB key will take you from field to field
within a given window, and will draw a heavy border around the selected field. Note:
The Touch 1 can automatically detect a keyboard when it’s connected.
Touch the Home button
to return to the Main Menu
screen
Line Up/Down
Some screens in the Touch 1 have scroll bars. We’ll use the View/Change
Wirelist screen as an example. To scroll up or down one line at a time, touch the
arrows at the top or bottom of the scroll bar. To scroll quickly, hold down the arrow.
Touch the arrows to scroll
up or down a line at a time
Page Up/Down
In screens that have scroll bars, you can scroll up or down a whole screen (page) at a
time by touching above or below the scroll bar itself.
To scroll up or down a
screen (page) at a time,
touch within the scroll bar
Touch 1 User’s Manual / page 21
Section 4: Navigational and Quick Tips /
Setting the Touch Screen Contrast
You can adjust the contrast of the Touch 1’s touch screen to fit your viewing angle.
You can do this either from the System Setup screen, or by using the Contrast button at the Main Menu or View/Change Wirelist screen. We’ll show you examples of each method.
To set the screen contrast using the
1.
System Setup screen, follow these steps:
In the Main Menu screen, touch System Setup, or touch the contrast icon to
go directly to the contrast icon.
Touch here
...or touch the
contrast icon
2.
In the System
Setup screen, touch Screen Contrast.
Touch here
3.
In the Screen Contrast screen, touch the arrows to adjust the contrast, then
touch OK to accept the setting.
Use the arrows to adjust
the contrast...
...then touch here
Touch 1 User’s Manual / page 22
Section 4: Navigational and Quick Tips /
Speaker Volume
You can set the volume of the sounds coming from the Touch 1’s speaker to whatever
loudness level you like. To set the speaker volume, follow these steps:
1.
In the Main
Menu screen, touch System Setup.
Touch here
2.
In the System
Setup screen, touch Volume.
Touch here
3.
In the Volume screen, touch the arrows to adjust the volume, then touch OK to
accept the setting.
Use the arrows to adjust the
volume...
...then touch here
Touch 1 User’s Manual / page 23
Section 4: Navigational and Quick Tips / Commands for keyboard navigation
Keyboard
You can plug a keyboard into the Touch 1, and use it to enter information or get help,
instead of using the touch screen. Both upper-case and lower-case entries are allowed.
The TAB key will take you from field to field within a given window, and will draw a
heavy border around the selected field. Note: The Touch 1 can automatically detect a
keyboard when it’s connected.
1000 Volt System
1500 Volt System
Plug in the keyboard here
Commands for
keyboard navigation
Use these commands when you’re using a keyboard connected to your Touch 1:
•
The Tab key moves you through the buttons.
•
Shift-Tab tabs through the buttons in reverse order
•
The ESCape key acts like a Cancel button, and closes a window.
•
The Page Up, Page Down keys, and the arrow keys operate the scrolling function within screens.
•
The character on the button which is underlined links you to the next
screen if you press that key on the keyboard. (Note: The underlines are
not displayed on the buttons until you hit a key on the keyboard.)
•
The DELETE key acts like the Clear button, and deletes everything.
•
The Backspace key deletes one character.
•
The ? key enters the help system.
•
The Enter or Return key acts like the OK button.
•
The Home key acts like the Home button.
•
The space bar acts on the button which is displayed with a heavy border.
Touch 1 User’s Manual / page 24
Section 4: Navigational and Quick Tips / Commands for keyboard navigation
Software/Hardware Versions and Tester Serial Number
You can get the current software and hardware version numbers your system contains
in several different ways:
• In the Main Menu screen, touch? twice. The hardware and software
version numbers, and the serial number of the analyzer will be displayed.
software version
hardware version
serial number
• When your system displays its initial self-test screen, touch the Pause
button. The software and hardware version numbers, touch screen type
(digital or analog), maximum number of test points on your system,
scanner voltage limit, hardware voltage limit, and additional installed
options will be displayed.
•
Run the self test under Tester Checkout, and print the Tester Checkout
Summary. Note: There is a Performance Verification Kit available for
your Touch 1. For details, telephone Cirris at 800-441-9910.
Touch 1 User’s Manual / page 25
Section 4: Navigational and Quick Tips / Commands for keyboard navigation
Touch 1 User’s Manual / page 26
Section 5:
Learning a
Sample Cable
Learning vs. Editing Wirelists
The Touch 1 can learn most types of cables on its own, if you set up the learn
parameters properly before you have the Touch 1 perform the learn.
A few cable types are so complicated the Touch 1 cannot learn them completely.
You’ll have to edit (modify) the wirelist manually after the learn, and before you test
cables. You may choose to learn a cable with one group of settings, then test it with a
modified group of settings.
Preparing to Learn a Sample Cable
Learn, Verify, Modify if
necessary
The best (and usually simplest) way to create a new wirelist is to let the Touch 1 do
the work for you. Follow these steps:
1.
Have the Touch 1 learn a correctly-built cable of the kind you want to test. We
refer to such a cable as a Sample Cable.
2.
Verify the wirelist. Check the learned wirelist displayed by the Touch 1 against
the build list for the cable. Make sure the wirelist is correct and complete,
including any discrete components (resistors, diodes, capacitors), 4-wire pairs, 4wire resistors, wire components, links, or twisted pairs.
3.
If the learned wirelist is not correct, modify the wirelist.
When you learn a Sample Cable, one of three things will happen:
•
The whole Sample Cable will learn correctly with the learn settings that
are already stored in the “Last Modified” area of the Touch 1’s memory.
When you verify the wirelist, you’ll find that it’s correct and complete.
You’re ready to test cables!
•
The Sample Cable will not learn correctly, but you can make it learn
correctly by modifying the learn settings before you perform the learn.
•
The Sample Cable will not learn correctly no matter how you set the
learn settings. You’ll have to learn that portion of the cable that will
learn correctly, then modify the wirelist after the learn, and before you
test cables. An example of this would be when you find that some
components in the wirelist have learned as Links. You’ll have to change
the links into the correct component type(s) before you test the cable.
Touch 1 User’s Manual / page 27
Section 5: Learning a Sample Cable / “Last Modified” Settings
“Last Modified”
Settings
The “Last Modified” settings are stored on the hard drive, and are used when learning
a Sample Cable. They consist of low voltage (continuity), and high voltage (hipot)
test parameters, components to learn, 4-wire learn, and whether SPC data collection
and Scripting are turned on (enabled).
Getting to the Learn
Settings
The easiest way to create a new wirelist is to make sure the “Last Modified” settings
do all (or most) of the creating work for you. We’ll show you how to look at the learn
settings. Then we’ll show you how to change those settings if you need to. To reach
the learn settings, follow these steps:
1.
In the
Main Menu screen, touch Test Setup.
Touch here
2.
In the Test
Setup screen, touch Learn Sample.
Touch here
3.
You’re in the Learn Setup screen. Look carefully through the list of settings.
•
If the settings are the ones you want to learn the Sample Cable with, go
directly to “Learning a Sample Cable” on page 77.
Touch 1 User’s Manual / page 28
Section 5: Learning a Sample Cable / Editing Learn Settings: the Factory Defaults
•
4.
Editing Learn
Settings: the Factory
Defaults
If the settings are not the ones you want to learn the Sample Cable with,
you’ll have to edit them. Touch CHANGE to bring up the View/
Change Learn Settings screen.
This is the View/Change Learn Settings screen, where you can change
the “Last Modified” settings by either using the Factory RESET button, or by
editing individual settings.
One of the easiest ways to edit the learn settings in the Touch 1, is to set the system to
learn the Sample Cable using the factory defaults. These default settings work well
for testing many kinds of cables. They’re also a good starting point from which to do
additional editing. The defaults are shown in this table:
Factory Default Settings (Factory Reset Button)
Parameter
Setting
Connection Resistance
10.0 ohms
LV Insulation Resistance
100K ohms
Hipot Voltage
50 volts
Insulation Resistance
5 M ohms
Soak Time
0 seconds
Hipot Duration
0.010 seconds
Apply Hipot To:
All Adapter Pins
Learn Components
None
4-Wire Fixture Learn
No
SPC Data Collection
OFF
Script (test event and component)
OFF
High Voltage Settings (1500
Volts only)
Standard
Touch 1 User’s Manual / page 29
Section 5: Learning a Sample Cable / Editing Learn Settings: Beyond Factory Defaults
To learn cables using the factory default settings, touch Factory RESET in the
View/Change Learn Settings screen (Note: If you don’t know how to get to
the View/Change Learn Settings screen, see “Getting to the Learn Settings”
on page 28.) You have now made the “Last Modified” setting the factory defaults,
and you can learn your Sample Cable by touching the OK button (see “Learning a
Sample Cable” on page 77). Note: If you touch CANCEL at this point, you’ll undo
any changes you’ve made.
Touch here
Editing Learn
Settings: Beyond
Factory Defaults
Not all cables will learn correctly using the factory default settings. (Note: If you’re
using the factory default settings, “Last Modified” contains the factory default settings.) You can change the “Last Modified” settings as necessary for the cable you
want to learn. A few cable types are so complicated that the Touch 1 cannot learn
them completely. You’ll have to modify the wirelist after you learn the Sample Cable,
before you can test these cables. Also, be aware that the Touch 1 can test components
over a wider range of settings than it can learn.
To help the learning process along, you can change the learn settings in the LowVoltage (LV), High-Voltage (HV), Component (COMP), four-wire (4-Wire), Statistical Process Control (SPC), and script (SCRIPT) areas to get your cable(s) to learn
correctly.
The Low-Voltage (LV) Learn Settings
There are three low-voltage related learn settings in the Touch 1. These settings are
important during low-voltage (Continuity) testing. They are:
•
Connection Resistance
•
LV Insulation Resistance
•
Component Resistance
You set the Connection Resistance and the LV Insulation Resistance yourself. The
Component Resistance sets itself automatically if learn components is on. Note: You
can use the CALC Sample feature to help determine the best Connection Resistance
setting to use.
Touch 1 User’s Manual / page 30
Section 5: Learning a Sample Cable / Connection Resistance Learn Setting
Connection
Resistance Learn
Setting
The Connection Resistance sets how much resistance a connection can have and still
be considered a “good” connection.
Connection Resistance Learn Setting
Range:
Using CALC Sample
•
0.1 - 100 K ohms (± 1% ± 0.1 ohm for 1500-Volt
system, ± 4% ± 0.1 ohm for 1000-Volt System.)
•
500 K ohms, 1 Megohm, 5 Megohms (± 10% for
1000-Volt System, ± 20% for 1000-Volt System)
•
Note: Testing down to 0.001 ohms is possible
using 4-Wire components. For details, see Section
11.
Important! If you already know the Connection Resistance setting to use, go directly
to “Setting Connection Resistance for a Learn” on page 33.
If you don’t know what Connection Resistance setting to use, you can use the CALC
Sample feature to help you find the setting. To calculate a Connection Resistance
setting using the CALC Sample feature, follow these steps:
1.
In the View/Change Learn Settings screen, touch LV, then touch
CHANGE LV. Note: If you don’t know how to get to the View/Change
Learn Settings screen, see “Getting to the Learn Settings” on page 28.
Touch here...
...then here
Touch 1 User’s Manual / page 31
Section 5: Learning a Sample Cable / Using CALC Sample
2.
In the Change
Low Voltage screen, touch CALC Sample Cable.
Touch here
3.
Connect the Sample Cable you want to measure.
4.
The Touch 1 will calculate the resistances in the Sample Cable, then display
them. (Note: If you have a printer connected to your Touch 1, you can touch
PRINT to print out the resistances. If you don’t have a printer connected to your
system, the PRINT button will be disabled (grayed out)).
Here’s a suggested
setting...
5.
To measure another Sample Cable for comparison, remove the first Sample
Cable, and connect a new Sample Cable, then touch CALC New Sample, then
repeat steps 2 and 3. From this information, you should be able to arrive at a suitable Connection Resistance setting. Note: In each CALC Sample result screen,
the Touch 1 gives you a suggested connection resistance based on the Sample
Cables you used. It’s wise to run CALC Sample on a group of several cables (six
is a good number to start) before you decide on which Connection Resistance
setting to use. If one of the cables you check shows a value radically different
than the rest of the group, you probably have an “outlying” value. You should
Touch 1 User’s Manual / page 32
Section 5: Learning a Sample Cable / Setting the Connection Resistance for a Learn
touch CANCEL in the Calc Sample screen to return to the Change Low
Voltage screen, then run CALC Sample on the group of cables again, leaving
out the cable with the outlying resistance.
Touch here to return to
CHANGE LOW VOLTAGE
screen. Enter your new
setting.
Touch here to measure
another cable.
Setting the
Connection
Resistance for a Learn
To edit the Connection Resistance learn setting, follow these steps:
1.
View/Change Learn Settings screen, touch LV, then touch
CHANGE LV. Note: If you don’t know how to get to the View/Change
Learn Settings screen, see “Getting to the Learn Settings” on page 28. If you
In the
need help to determine what Connection Resistance setting to use, see “Using
CALC Sample” on page 31
Touch here...
...then here
2.
In the Change
button.
Low Voltage screen, touch the Connection Resistance
Touch here
Touch 1 User’s Manual / page 33
Section 5: Learning a Sample Cable / Setting the Connection Resistance for a Learn
3.
In the Enter Connection Resistance screen, touch the range button you
want to use (we’ll choose.1 to 999 ohm), then touch CLEAR. The OK button will
be disabled (grayed out) until an entry is made. Note: Some of the range buttons
are disabled either because their values are bounded by the LV Insulation
Resistance setting or because if you’re learning components, the upper resistance
limit is 100K ohms. Enter the resistance you want to use (we’ll enter 20 ohms),
then touch OK.
Choose the range...
Clear out old
values, enter
resistance...
...then touch here
4.
In the Change Low Voltage screen, the new setting will be displayed inside
the Connection Resistance button.
•
If you can’t decide what Connection Resistance setting to use, touch the
CALC Sample Cable button. The CALC Sample feature (see “Using
CALC Sample” on page 31) measures all of the connection resistance
values in a Sample Cable, so you can use them for reference. By comparing several different Sample Cables, you should be able to decide on
a Connection Resistance setting to use.
•
If you’re going to edit the LV Insulation Resistance setting, touch the
LV Insulation Resistance button.
•
If you’re through editing the Low-Voltage settings, touch OK to return
to the View/Change Learn Settings screen. Note: If you touch
CANCEL, you’ll undo the changes you’ve made.
Touch 1 User’s Manual / page 34
Section 5: Learning a Sample Cable / LV Insulation Resistance Learn Setting
LV Insulation
Resistance Learn
Setting
This setting tells the Touch 1 how to tell the difference between connections that
should exist, and connections that should be ignored. This setting is the level at which
short circuits (“shorts”) will be detected during the low-voltage continuity test.
Any detected resistance greater than the LV Insulation Resistance setting is ignored as
a connection, but could cause a hipot test error.
LV Insulation Resistance Learn Setting
Range:
•
0.1 ohm - 100 K ohms (± 1% ± 0.1 ohm for 1500Volt System, ± 4% ± 0.1 ohm for 1000-Volt
System)
•
500 K ohms, 1 Megohm, 5 Megohms (± 10% for
1500-Volt System, ± 20% for 1000-Volt System)
Limits:
•
Resistors with resistances higher than the LV
Insulation Resistance setting will not learn.
To edit the LV Insulation Resistance setting: follow these steps:
1.
View/Change Learn Settings screen, touch LV, then touch
CHANGE LV. Note: If you don’t know how to get to the View/Change
Learn Settings screen, see “Getting to the Learn Settings” on page 28.
In the
Touch here...
...then here
Touch 1 User’s Manual / page 35
Section 5: Learning a Sample Cable / LV Insulation Resistance Learn Setting
2.
In the Change
button.
Low Voltage screen, touch the LV Insulation Resistance
Touch here
3.
In the Enter LV Insul. Resistance screen, touch the button for the range
you want to use (we’ll choose 1K to 100K), then touch CLEAR. Note: The OK
button will be disabled (grayed out) until an entry is made. Enter the resistance
you want to use (we’ll enter 100 Kohms), then touch OK.
Choose the range...
Clear out old values
and enter resistance...
...then touch here
4.
In the Change Low Voltage screen, the new setting will be displayed inside
the LV Insulation Resistance button.
Touch here
•
If you’re going to edit the Connection Resistance setting, touch the
Connection Resistance button.
•
If you’re through editing the Low-Voltage settings, touch OK to return
to the View/Change Learn Settings screen. Note: If you touch
CANCEL, you’ll undo the changes you’ve made.
Touch 1 User’s Manual / page 36
Section 5: Learning a Sample Cable / Component Resistance learn setting
Component
Resistance learn
setting
The component resistance is automatically calculated if Learn Components is on
(see page 71). It is calculated from 5% to 25% less than the lowest resistance of any
component found above the connection resistance. The component resistance can be
changed after a learnby editing the wirelist.
Component Resistance Learn Setting
Range:
•
0.1-100Kohms
•
1000 volt: ± 4%, ± 0.1 ohm
•
1500 volt: ± 1% ± 0.1 ohm
Limits:
•
High Voltage Learn
Settings
Resistors with resistances higher than the LV
Insulation Resistance setting will not learn.
The purpose of the high voltage (hipot) test is to test insulation for:
•
Dielectric Withstand capability (DWV)
•
Insulation Resistance (leakage)
(1000 Volts Only)
There is only one type of hipot testing available. The Dielectric Strength test and the
Insulation Resistance test are combined into a single test.
(1500 Volts)
There are two setting types when hipot is turned on. Standard settings combine the
Dielectric Strength test and the Insulation Resistance test into one test. The Advanced
hipot settings use two separate tests: (1) the Dielectric Strength test (AC or DC) and
(2) the Insulation Resistance test (DC only).
Hipot test
requirements
To hipot test at certain voltages, you must meet the following special requirements:
•
The AC high voltage capability is a special feature that must be
purchased separately. For details, or to order, telephone Cirris at 801973-4600 or 800-441-9910. It is installed using a feature access code.
For details see page 281.
•
High voltage adapters designated by an “H” as the first character in their
part numbers, are required for testing at voltages greater than 1000 VDC
or 707 VAC.
Touch 1 User’s Manual / page 37
Section 5: Learning a Sample Cable / Hipot Test Selection
•
Hipot Test Selection
The scanner daughter cards inside the Touch 1 must be designed for
testing at voltages greater than 1000 VDC or 707 VDC.
To set the hipot selection, follow these steps:
1.
In the View/Change
Learn Settings screen, touch HV, then Change HV.
Touch here...
...then here
(1500 volts Only)
2.
If you have a 1500 volt Touch 1, in the Change High Voltage screen, touch:
•
OFF to turn hipot testing off.
•
STD to use the standard settings, which combine the Dielectric Strength
Test and the Insulation Resistance Test into one test.
•
ADV to use the advanced setting, which uses a separate Dielectric
Strength Test (AC or DC), and in Insulation Resistance Test (DC only).
Touch one of these...
...then here
Touch 1 User’s Manual / page 38
Section 5: Learning a Sample Cable / (1000 Volts Only)
(1000 Volts Only)
3.
If you have a 1000 volt Touch 1, in the Change High Voltage screen, touch
Hipot Off to turn hipot testing off, or Hipot On to turn hipot testing on, then
touch OK.
Touch one of
these...
...then touch here
What high voltage
testing does
High voltage testing determines the adequacy of insulation using two kinds of tests.
These are:
• The Dielectric Strength test. This tests the adequacy of the insulation
against breakdown of insulating materials and spacings under normal
conditions.
• The Insulation Resistance test. This test looks for current flow
(leakage) of insulating materials.
How current flow
affects results
Current flow defines high voltage test results as a function of the test parameters.
• Good insulation prevents current flow between unconnected test
points. The maximum allowable current flow is set by the Dielectric
Strength and Insulation Test settings.
Controlling parts of
the cable to be highvoltage tested
You can control what parts of your cable are hipot tested. The Hipot Application,
Link component, high-capacitance shield, and custom component settings allow you
to selectively test part of a cable. Important! No hipot voltage or insulation testing
voltage is applied across component test points, so it is safe to test any component.
See High-Capacitance Shield allowed on page 28, Hipot application on page 28,
Links on page 141,and Custom Components on page 144 for details.
Corona
Corona refers to small electrical discharges, either in the voids or gaps inside the
insulation on a wire, or across air spaces between conductors. To understand corona,
we’ll define some terms:
Ionization is the process by which electrons are either transferred to, or lost from neutral molecules or atoms to form positively or negatively charged particles.
Corona is generally defined as a partial discharge. There are two kinds.
•
In the first kind, arcing or discharging of ionized particles occurs inside
the insulation on a wire, without complete discharge to something
external. If the charge is high enough, air in the void or gap within the
insulation will begin conducting the electrical charge. After the charge
Touch 1 User’s Manual / page 39
Section 5: Learning a Sample Cable / How Corona relates to the performance of insulation
has moved across the gap (has discharged), the air will no longer be ionized, and the arcing will stop. The void or gap will then recharge. A
series of impulse currents will be created.
•
How Corona relates to
the performance of
insulation
How corona affects
the results of high
voltage testing
Recommendations for
dealing with corona
In the second kind, arcing or discharging of ionized particles occurs
across the air-filled space between two exposed conductors. This is
sometimes called a glow discharge. This process can become selfsustaining if the electrical field is strong enough to maintain continuous
ionization.
If corona is present, these things are of concern:
•
Ionic contaminants or voids may be present in the insulating materials.
•
The insulating materials being used, or the spacings between
conductors may be inadequate for the voltage rating of the cable.
•
The cable may not stand up to long-term exposure to high voltage,
since arcing or discharging degrades insulation.
The Touch 1 does not do quantitative tests for corona. However, some cable failures
can be caused by corona.
•
If corona causes current spikes where current flow is greater than the
the Dielectric Withstand Voltage (DWV) parameter setting Max.
Current, then the analyzer will indicate a DWV Dielectric Breakdown
error if the failure occurs during the Dielectric Strength test, or an
Insulation Dielectric Breakdown error if the error occurs during the
Insulation Resistance test.
•
If continuously-occurring corona has enough total discharge energy to
cause shifts in the level of the measured current flow during the
Insulation Resistance test, the analyzer will report a Leakage error.
To test for the possible presence of corona, set the parameter settings to:
•
Minimum Max. Current (to allow for cable capacitance).
•
Short Dwell Times.
•
Short Soak Times, or no soak time at all.
If detecting corona is not among your test requirements, set the parameters to:
•
A high setting for Max. Current.
Long Dwell Times, long Soak Times, or both.
Touch 1 User’s Manual / page 40
Section 5: Learning a Sample Cable / Standard (STD) mode settings
Standard (STD) Mode Hipot Testing
Standard (STD) mode
settings
Dielectric Withstand
Voltage Guidelines
There are four high-voltage related learn settings in the Standard (STD) hipot testing
mode of the Touch 1. Important: All hipot testing in the Standard mode is DC-only.
•
Hipot Voltage setting (DC only, voltages from 50 to 1500). Note:
voltages above 1000 VDC require “H” adapters and 1500-volt scanner
daughter cards for testing.
•
High-Voltage Insulation Resistance (5-1000 Megohm)
•
Hipot Duration (Dwell Time) (.01- 120 seconds)
•
Maximum Soak Time (zero- 120 seconds.
The Dielectric Withstand Voltage (DWV) is the voltage at which a component can
operate safely at its rated operating voltage, and also withstand any momentary
overpotentials due to switching, power surges, and other overvoltage situations.
The Hipot Voltage setting of the Dielectric Strength Test, and the cable’s specified
Dielectric Withstand Voltage should be equal to each other. If possible, we
recommend you follow this relationship for setting the Hipot Voltage:
Hipot Voltage = 75% of Dielectric Breakdown Voltage, or
Hipot Voltage = Dielectric Breakdown Voltage x 0.75
For example, if the Dielectric Breakdown Voltage = 100 volts,
the Hipot Voltage setting should not exceed 75 volts.
Hipot Voltage = 300% of Rated Operating Voltage, or
Hipot Voltage = Rated Operating Voltage x 3.0
For example, if the Rated Operating Voltage = 100 volts,
the Hipot Voltage should not exceed 300 volts
Rated Operating
Voltage Guidelines
The Rated Operating Voltage is typically a voltage defined by the manufacturer,
which is the maximum continuous or steady-state voltage that should be applied to a
cable assembly.
In practical situations, momentary overpotentials caused by switching, power surges,
and other overvoltage situations often exceed the Rated Operating Voltage for a cable
assembly. It is best to perform the Dielectric Strength Test at the Dielectric Withstand
Voltage rating which encompasses overvoltage situations, and environmental deterio-
Touch 1 User’s Manual / page 41
Section 5: Learning a Sample Cable / Dielectric Breakdown Voltage
ration. Use these guidelines when you set the hipot voltage:
Hipot Voltage = Rated Operating Voltage x 3.0 (maximum)
For example, if the Rated Operating Voltage = 100 volts, the Hipot
Voltage should not exceed 300 volts.
Hipot Voltage = Dielectric Breakdown Voltage x 0.75
For example, if the Dielectric Breakdown Voltage for a cable
assembly is 100 volts, the Hipot Voltage should not exceed 75 volts.
Dielectric Breakdown
Voltage
The Dielectric Breakdown Voltage is the voltage at which electricity actually breaks
through insulation, or arcs through air. A dielectric breakdown will degrade some
insulating materials, or cause a failure that cannot be repaired or reversed. With some
self-healing kinds of insulation, this may not be the case.
•
Dielectric Breakdown tests may be destructive. They differ from
Dielectric Strength or Dielectric Withstand tests, which are not
destructive when they are done properly.
•
For safe Dielectric Strength testing, use this rule of thumb:
Hipot Voltage = Dielectric Breakdown Voltage x 0.75
For example, if the Dielectric Breakdown Voltage for
a cable assembly is 100 volts, Hipot Voltage should
not exceed 75 volts.
Dielectric Breakdown
testing
The Touch 1 does not support Dielectric Breakdown testing. It supports Dielectric
Withstand Voltage (DWV) testing only). Important!: Dielectric Breakdown testing
destroys cables! Such a test applies a high voltage across two unconnected
conductors in order to find out at what voltage the insulation on those conductors fails
catastrophically.
Touch 1 User’s Manual / page 42
Section 5: Learning a Sample Cable / Hipot Voltage Setting
Hipot Voltage Setting
The Hipot Voltage is the voltage the Touch 1 applies to the test points during hipottesting.
Hipot Voltage Setting
Range:
Setting Hipot Voltage
•
Buttons: 50, 100, 200, 300, 400, 500, 600, 800,
900, 1000, 1100, 1200, 1300, 1400, 1500 volts DC
(± 10%) Note: 1000-Volt systems do not test
above 1000 VDC.
•
Typed in: Anywhere from 50-1500 volts in 1-volt
increments (Note: 1000-Volt systems do not test
above 1000 VDC.)
•
Limits: Voltages greater than 1000 volts require
“H” adapters and 1500-volt scanner daughter
cards for testing.
To set the hipot voltage, follow these steps:
1.
In the View/Change Learn Settings screen, touch HV, then touch
CHANGE HV. Note: If you don’t know how to get to the View/Change
Learn Settings screen, see “Getting to the Learn Settings” on page 28.
Touch here...
...then here
2.
In the Change High Voltage screen, touch the STD button to display the
standard hipot testing settings.Important Note! 1000-Volt Touch 1 systems do
not do Advanced Mode hipot testing. The difference on the controls on the touch
Touch 1 User’s Manual / page 43
Section 5: Learning a Sample Cable / Setting Hipot Voltage
screen are as shown here:
1000 Volt System
1500 Volt System
Touch here
3.
In the Standard
Hipot Settings screen, touch the Hipot Voltage button.:
We’ll touch here
4.
In the Hipot Voltage screen, touch a predefined button or the Typed In Value
button to set the voltage, then touch OK. We’ll touch 100V, then OK.
Touch here...
...then here
5.
In the Standard
•
Hipot Settings screen:
If you’re through changing settings, touch OK to return to the View/
Change Learn Settings screen. Note: If you touch Cancel, you’ll
undo the changes you’ve made.
Touch 1 User’s Manual / page 44
Section 5: Learning a Sample Cable /
•
If you’re going to change other hipot settings, remain in this screen..
Touch the correct button
Insulation Resistance
Setting
The Insulation Resistance is the minimum allowable insulation resistance between
connections that should not exist.The Insulation Resistance setting tells the Touch 1
the minimum allowable resistance of insulating materials between points that are not
supposed to be connected together.
If two points that are not supposed to be connected together test as having a resistance
lower than this threshold setting (during the hipot test), the insulation between those
two points is not adequate. It isn’t insulating well enough. Important Note! If
you’re testing cables that have recently been exposed to high-humidity conditions
(above 60% relative humidity), and you’re seeing insulation resistance failures, it
could be that the failures are happening because there is excessive moisture in the
cables. You can use Soak Time to dry them out. For details see page 51.
Insulation Resistance Setting
Range:
•
Buttons: 5, 10, 20, 50, 100, 200,500, 1000
Megohms (± 10%) 1000-Volt 500 Mohm-1000
Mohm ± 20%
•
Typed in Value: Anywhere from 5-1000 MΩ in 1
MΩ increments
Limits:
•
Some HV Insulation Resistance settings are
locked out by Hipot Voltage settings. Only those
resistance settings that are available at a given
Hipot Voltage will be active (colored normally) in
the Insulation Resistance screen. Unavailable
resistance settings will be disabled (grayed out).
Touch 1 User’s Manual / page 45
Section 5: Learning a Sample Cable / Insulation Resistance Setting
Insulation Resistance Setting
5
Meg
10
Meg
20
Meg
50
Meg
50 V
X
X
X
X
100 V
X
X
X
X
X
200 V
X
X
X
X
X
X
300 V
X
X
X
X
X
X
400 V
X
X
X
X
X
X
500 V
X
X
X
X
X
X
X
600 V
*
X
X
X
X
X
X
800 V
X
X
X
X
X
X
1000 V
X
X
X
X
X
X
X
X
X
X
X
X
X
11001500 V
100
Meg
200
Meg
500
Meg
1 Gig
* Notes: 1000-Volt systems do not test above 1000 VDC. At a typed-in setting of
630 volts, the 5 Megohm setting is allowed.
To set the Insulation Resistance, follow these steps:
1.
In the View/Change Learn Settings screen, touch HV, then touch
CHANGE HV. Note: If you don’t know how to get to the View/Change
Learn Settings screen, see “Getting to the Learn Settings” on page 28.
Touch here...
...then here
Touch 1 User’s Manual / page 46
Section 5: Learning a Sample Cable / Insulation Resistance Setting
2.
In the Change
High Voltage screen, touch the STD button.
Touch here
3.
In the Standard
Hipot Settings screen, touch Insulation Resistance.
Touch here
4.
In our example, we’ve set the hipot voltage to 100 volts. We want to set the
High-Voltage Insulation Resistance threshold to 10 megohms. to do this, in the
Insulation Resist at 100V screen, we’ll touch 10M ohm, then OK.
We’ll touch here...
...then here
Touch 1 User’s Manual / page 47
Section 5: Learning a Sample Cable / Guidelines Duration (Dwell Time)
5.
Guidelines Duration
(Dwell Time)
In the Standard
Hipot Settings screen:
•
If you’re through editing the high voltage settings, touch OK to return
to the View/Change Learn Settings screen. Note: If you touch
Cancel, you’ll undo the changes you’ve made.
•
If you are going to change other standard hipot settings, remain in this
screen.
This sets the amount of time the Hipot Voltage is applied to a net during hipot testing.
Range: In DC, the range runs from 10 ms. to 120 full seconds. In AC, the range runs
from 1 to 480 cycles, with typed-in entry. Note: Depending on the frequency setting,
a cycle can be from 16.67 ms. to 40 ms., and the total time can be up to 120 sec.
Short Dwell Times are better for detecting corona or humidity-related problems.
They also let your hipot testing go faster. Short dwell times do not provide as
stringent a test for predicting dielectric failures as long dwell times do.
Long Dwell Times are better for predicting dielectric failures, and increase the
chance you’ll detect a breakdown condition. They do not provide as stringent a test
for corona and humidity-related problems as short dwell times do. Your hipot testing
will also take longer. Note: If you set long dwell times, it may not be necessary to set
long Soak Times.
Hipot Duration (Dwell
Time) Setting
The Hipot Duration (Dwell Time) setting tells the Touch 1 how long to apply the
hipot voltage to each test point during the hipot test. If you’re using soak time to dry
out your cables (in high-humidity situations), the soak time will stop when no current
spikes last longer than ten microseconds during a period of time equal to the Hipot
Duration setting.
The default setting for this parameter is 0.010 seconds (10 milliseconds). If this isn’t
long enough to meet your testing requirements, you’ll have to edit the setting.
Touch 1 User’s Manual / page 48
Section 5: Learning a Sample Cable / Hipot Duration (Dwell Time) Setting
Important Note! Most hipot failures are caught within the first 10 milliseconds.
Hipot Duration Setting
Range:
•
Buttons for 0.01, 0.1, 1, 2, 5, 10, 30, 60, 120
seconds.
Limits:
•
If you use long Hipot Duration settings, your cables
will take a long time to test.
To set the Hipot Duration (Dwell Time), follow these steps:
1.
In the View/Change Learn Settings screen, touch HV, then touch
CHANGE HV. Note: If you don’t know how to get to the View/Change
Learn Settings screen, see “Getting to the Learn settings” on page 28.
Touch here...
...then here
2.
In the
Change High Voltage screen, touch the STD button
Touch here
Touch 1 User’s Manual / page 49
Section 5: Learning a Sample Cable / Guidelines for Soak Time
3.
In the
Standard Hipot Settings screen, touch Duration or Dwell Time.
Touch here
4.
In the Hipot Duration screen, touch the button for the time you want to enter,
then touch OK. In our example, we’ll enter.1 seconds.
We’ll touch here...
...then here
5.
Guidelines for Soak
Time
In the Standard
Hipot Settings screen:
•
If you’re through editing the high voltage settings, touch OK to return to
the View/Change Learn Settings screen. Note: If you touch
Cancel, you’ll undo the changes you’ve made.
•
If you’re going to change other standard settings, stay in this screen.
Soak Time is the amount of time the hipot voltage is applied to each test point before
the Touch 1 makes the critical measurement. In the Standard (STD) mode, you can
set the Max Soak or the Soak For times. In the advanced (ADV) mode, you can set
the Maximum Soak Time using the Soak Until Good checkbox.
Touch 1 User’s Manual / page 50
Section 5: Learning a Sample Cable /
If your cables have recently been exposed to relative humidity greater than 60%,
humidity-related failures are a real possibility. If you’re experiencing dielectric
failures or high-voltage leakage failures in these “wet” conditions, try setting the
maximum soak time to 2 minutes, then repeating the test.
If the problem(s) disappear, your cables may indeed contain too much moisture. With
a little experimentation, you’ll soon arrive at a Soak Time setting that will dry out
your cables so they’ll pass hipot tests, without using extra time unnecessarily.
Experience has shown that 100 milliseconds (0.1 seconds) is often a good setting to
use.
Soak time stops when no current spikes last longer that ten microseconds during a
period of time equal to the Hipot Duration setting.
The Soak Time is the amount of time the Insulation Resistance test voltage is applied
to a net before the critical measurement for the Insulation Resistance test is made.
Soak Time removes moisture from any contaminants on a cable, so that any
remaining insulation leakage is more stable during the Insulation Resistance test.
Short Soak Time settings are better for detecting corona, and other humidity-related
problems in a cable. They also allow the testing to go faster. Using short time settings
doesn’t factor out most environmental variables if you want to measure insulation
resistance under best-case conditions. It is also less accurate for measuring steadystate resistances.
Long Soak Times are better for measuring best-case insulation resistances, or for testing the physical properties of insulation independent of environmental degradation.
Testing using long settings isn’t as stringent for detecting corona or humidity-related
problems. Your testing will also take longer. Note: If you set long Dwell Times, you
may not need to set long Soak Times.
Maximum Soak Time
Setting
Maximum Soak Time Setting
Range:
•
Buttons: 0, 0.01, 0.1, 1, 10, 30, 60, 120 seconds.
Limits:
•
If you’re using long time settings, your cables may
take a long time to test.
To set the Maximum Soak Time, follow these steps:
1.
In the View/Change Learn Settings screen, touch HV, then touch
CHANGE HV. Note: If you don’t know how to get to the View/Change
Touch 1 User’s Manual / page 51
Section 5: Learning a Sample Cable / Maximum Soak Time Setting
Learn Settings screen, see “Getting to the Learn settings” on page 28.
Touch here...
...then here
2.
In the
Change High Voltage screen, touch the STD button
Touch here
3.
In the
Standard Hipot Settings screen, touch Maximum Soak Time.
Touch here
Touch 1 User’s Manual / page 52
Section 5: Learning a Sample Cable / Maximum Soak Time Setting
4.
In the Maximum Soak Time screen, touch the time setting you want to use.
In our example, we’ll enter.01 seconds. Once you’ve entered your setting, touch
OK.
We’ll touch here...
...then here
5.
In the
Standard Hipot Settings screen:
•
If you’re through editing the high voltage settings, Touch OK to return
to the View/Change Learn Settings screen. Note: If you touch
Cancel, you’ll undo the changes you’ve made.
•
If you’re going to change other high voltage settings, stay in this screen.
Touch 1 User’s Manual / page 53
Section 5: Learning a Sample Cable / AC Mode selection
Advanced (ADV) Mode Hipot Testing (1500 V Only)
The advanced high voltage mode has two tests: (1) the Dielectric Strength test (AC or
DC), and (2) the Insulation Resistance test (DC only). The AC high voltage test is a
feature that is purchased separately. In the advanced mode, there are several parameters you control. We’ll discuss them as we work our way along.
AC Mode selection
If your Touch 1 has the AC hipot feature installed, turn on AC mode by doing these
things:
1.
In the Advanced Hipot
Settings screen, touch AC Mode..
Touch here
2.
In the Advanced Hipot Settings screen, you’ll now see that the Hipot
Voltage is displayed as an RMS value, that Duration or Dwell Time is displayed
in cycles, and that the Frequency button has become enabled (colored
normally).
AC Hipot testing
AC hipot testing is an option that is purchased separately, and is installed using a
feature access code (see page 281). The maximum voltage range you can use depends
on the scanner daughter cards installed inside your Touch 1. Scanners designed for
1000 volts DC have a 707 VAC maximum voltage limit. Scanners designed for 1500
volts DC have a 1000VAC maximum voltage limit. The AC mode only affects the
Dielectric Strength test in the following ways:
•
It sets the hipot voltage to AC. Voltages are specified as RMS (Root
Mean Square) values, as is customary in AC electronics.
•
Enables (turns on) the frequency setting.
Touch 1 User’s Manual / page 54
Section 5: Learning a Sample Cable / The Dielectric Strength Test
•
Displays the Hipot Duration (Dwell Time) in cycles per second.
All other settings remain the same. Insulation voltage is always DC.
The Dielectric
Strength Test
The parameters of the Dielectric Strength test are as follows:
•
DWV Hipot voltage: This is the voltage the analyzer applies to each test
point during the Dielectric Strength test. The maximum setting is 1500
VDC and 1000VAC.
•
DWV Max Current: This is the maximum amount of current the analyzer will allow to flow in the test circuit during the Dielectric Strength
test. The maximum setting is 1.5mA.
•
Duration, or Dwell Time (AC or DC): This is the amount of time the
analyzer will apply the hipot voltage to each net during dielectric
strength test. The maximum setting is 120 seconds in DC mode, and
7200 cycles (the frequency of the hipot voltage) in AC mode.
Remember that when you do hipot testing in Standard (STD) mode, you’re
automatically combining the Dielectric Strength and Insulation Resistance tests. In
Advanced (ADV) mode, the Dielectric Strength, and Insulation Resistance tests are
not combined.
Hipot Voltage setting
Hipot Voltage
Range:
Buttons:
•
DC: 50, 100, 200, 300, 400, 500, 600, 700, 800,
900, 1000, 1100, 1200, 1300, 1400, 1500 VDC.
Note: 1000-Volt systems do not test above 1000
VDC.
•
AC: 50, 100, 200, 300, 400, 500, 600, 700, 800,
900, 1000 VAC. Note: the 1000 volt scanner
hardware only works up to 707 VAC.
•
Typed-in entry: 50-1500 VDC, 50 - 1000 VAC
The process for setting the hipot testing voltage in the advanced testing mode is the
same as that for standard mode.
Touch 1 User’s Manual / page 55
Section 5: Learning a Sample Cable / Guidelines for Maximum Current
How both the Dielectric Strength (DWV) Test and the Insulation (IR) Test
measure insulation: Both these tests apply a voltage you select between
unconnected test points. They then measure the resulting current flow through the
insulation. The differences between the tests are these:
Guidelines for
Maximum Current
•
The Dielectric Strength Test is set up so that if capacitive current during
charge time stays below about 2 mA, the test continues. If no arcing or
current spikes exceed the Maximum Current setting during the Dwell
Time, the insulation passes the DWV test.
•
The Insulation Resistance Test is set up so that if current flow stays
below the Max. Current setting during the period you can control using
the Soak Time setting, the test continues. By dividing the voltage
you’ve chosen by the measured current, the analyzer calculates the insulation resistance using Ohm’s Law. If the current flow is low enough
that the calculated resistance stays above the Resistance setting you’ve
chosen for Good For, the cable passes the IR test.
Maximum Current sets the maximum leakage current the Touch 1 will allow before
it turns off the Hipot Voltage.
Low Maximum Current settings: In general, using low settings provides a more
stringent test. Testing with a low Maximum Current setting is more likely to detect
corona. However, you may find that it is more difficult to separate truly defective
cables from those that have enough capacitance to fail the test, but are otherwise
good. A low Maximum Current setting is harder to use when you are testing using
AC.
High Maximum Current settings: These settings are better for testing cables
which have lots of capacitance, especially when you’re testing using AC voltages.
High settings are also better for minimizing the number of errors reported because
corona is present, especially if corona detection is not relevant to your test specifications. Conversely, testing with high Maximum Current settings does not provide as
stringent a test as testing with low settings, especially if a given breakdown has a
resistive aspect to it. Using high Maximum Current settings will also give you a test
that isn’t as stringent for detecting instantaneous failures.
Touch 1 User’s Manual / page 56
Section 5: Learning a Sample Cable / Maximum Current setting
Maximum Current
setting
Before you do hipot testing in the Advanced testing mode, you should set the
maximum amount of current you want to use.
Even the best insulation allows some current to flow between unconnected test points.
By setting limits on the amount of current allowed to flow, you define what “good”
insulation is.
Maximum Current
Range:
• Buttons:
0.1mA, 0.2mA, 0.5mA, 1mA., 1.5mA
• Typed-in values:.1mA - 1.5mA in.1mA
increments
To set the maximum current allowed for hipot testing in Advanced mode, do these
things:
1.
In the Advanced Hipot
Settings screen, touch Maximum Current.
Touch here
2.
Press the button for the amount of current you want to use, then touch OK. In our
example, we’ll touch.1mA, then touch OK.
We’ll touch here...
...then here
Touch 1 User’s Manual / page 57
Section 5: Learning a Sample Cable / Duration (Dwell Time) setting
Duration (Dwell Time)
setting
Duration (Dwell Time)
Range:
• Buttons:.01,.1, 1, 2, 5, 10, 30, 60, 120 sec. (DC
mode), 1, 10, 60, 300, 3600, 7200 cycles (AC
mode).
• Typed-in entry: None (DC mode), 1 cycle
increments (AC mode)
Setting the duration in advanced setting DC mode is the same as setting it under the
standard settings. To set the Duration in the advanced setting AC mode, do these
things:
1.
In the Advanced Hipot
Settings screen, touch Duration or Dwell Time.
Touch here
2.
In the Duration or Dwell Time screen, either touch a predefined cycle button, or touch Typed In Value to bring up the Enter AC Duration screen.
Enter the setting you want to use, then touch OK to return to the Advanced
Hipot Settings screen..
Enter the setting...
...then touch here
Touch 1 User’s Manual / page 58
Section 5: Learning a Sample Cable /
Frequency Setting
DC is generally less damaging than AC. Use DC whenever you can. Use AC testing
only when your customer specifies it.
Frequency
Range:
• Buttons:
25, 30, 50, 60 Hz.
To set the frequency of the AC signal for hipot testing, do these things:
1.
In the
Advanced Hipot Settings screen, touch Frequency.
Touch here
2.
In the Frequency screen, touch the button for the frequency you want to use,
then touch OK to return to the Advanced Hipot Settings screen.
Select the frequency...
...then touch here
The Insulation
Resistance Test
The parameters of the Insulation Resistance test are as follows:
• Insulation Voltage: This is the voltage the analyzer applies to each
point during the Insulation Resistance test. This voltage must be less
than or equal to the Dielectric Withstand Voltage (DWV). The
maximum setting is 1500 volts DC.
• Insulation Resistance: This sets the maximum current leakage allowed
between connections that are not supposed to exist. The maximum setting depends on the Insulation Voltage setting.
Touch 1 User’s Manual / page 59
Section 5: Learning a Sample Cable /
• Insulation Resistance Good For: This specifies how long the
insulation resistance measurement must remain within the “good”
range for the cable to pass the test. Maximum setting is 120 seconds
using typed-in entry.
• Soak Time: This is the maximum amount of time the analyzer will
apply the insulation voltage before it makes the critical insulation resistance measurement. This helps to dry out the insulation on the cable so
insulation resistance will be more stable during the critical testing time.
Maximum setting is 120 full seconds.
The Insulation Resistance Test measures the amount of current leakage in an insulator
or spacer between any test points that are intentionally not connected together.This
determines whether or not a cable has adequate insulation resistance either under
ideal conditions, or under day-to-day environmental conditions.
How the Insulation Resistance Test works: The Insulation Resistance (IR) test
applies a voltage you select between wires that should not be connected together. The
resulting current flow is constantly measured. By dividing the voltage you selected
(V) by the measured current (I), the analyzer calculates the insulation resistance (R).
If the Insulation Resistance (R) is above the Insulation Resistance setting in the analyzer, the cable’s insulation passes the IR test. For example:
Voltage you selected (V) = 100 volts
Measured current flowing (I) = 100 milliamps (0.1 amp)
Insulation Resistance setting = 500 ohms
Since Ohm’s law (stated for resistance) is R =
V
I
100 volts 1000 ohms
=
0.10 amp
Since the calculated resistance is above the 500 ohm
IR setting, the insulation passes the IR test.
Possible causes for IR test failures: The insulation may be physically damaged
(crushed, crimped, cut, etc.), or there may be excessive humidity or corona present.
Some IDC cables present with tolerance errors.
When is the Insulation Resistance (IR) test appropriate?: On cables tested
(usually at 500 Vdc). Important note!: If the cable fails the DWV test, the Touch 1
will not perform the IR test.
What is the difference between the DWV test and the IR test?: The
Dielectric Strength Test is performed first, and tests the cable for gross insulation
failures such as excessive capacitance current and discharge from dielectric failure. In
essence, the test looks for current spikes between 0.1 mA and 1.5 mA.
The Insulation Resistance Test is performed after the DWV test, and takes a more
detailed look at the adequacy of the insulation on the cable. It tests for insulation leakage or insulation resistance. In essence, it looks for current leakage between 1 uA and
0.1 mA.
Touch 1 User’s Manual / page 60
Section 5: Learning a Sample Cable / Current Flow during the IR Test
Current Flow during
the IR Test
This table shows how voltage and resistance relate to Insulation Current Flow.
Remember that Voltage (V) divided by Resistance (R) = Maximum allowable current
flow (I) during test time.
Current Flow During IR Testing
5MΩ
Ω
10MΩ
Ω
20MΩ
Ω
50MΩ
Ω
100MΩ
Ω
200MΩ
Ω
500MΩ
Ω
1 GΩ
50V
10.0uA
5.0uA
2.5uA
1.0uA
100V
20.0uA
10.0uA
5.0uA
2.0uA
1.0uA
200V
40.0uA
20.0uA
10.0uA
4.0uA
2.0uA
1.0uA
300V
60.0uA
30.0uA
15.0uA
6.0uA
3.0uA
1.5uA
400V
80.0uA
40.0uA
20.0uA
8.0uA
4.0uA
2.0uA
500V
100.0uA
50.0uA
25.0uA
10.0uA
5.0uA
2.5uA
1.0uA
600V
60.0uA
30.0uA
12.0uA
6.0uA
3.0uA
1.2uA
700 V
70.0uA
35.0uA
14.0uA
7uA
3.5uA
1.4uA
0.7uA
800V
80.0uA
40.0uA
16.0uA
8.0uA
4.0uA
1.6uA
0.8uA
900V
90.0uA
45.0uA
18.0uA
9uA
4.5uA
1.8uA
0.9uA
1000V
100.0uA
50.0uA
20.0uA
10.0uA
5.0uA
2.0uA
1.0uA
1100V
55.0uA
22.0uA
11uA
5.5uA
2.2uA
1.1uA
1200V
60.0uA
24.0uA
12.0uA
6.0uA
2.4uA
1.2uA
1300V
65.0uA
26.0uA
13uA
6.5uA
2.6uA
1.3uA
1400V
70.0uA
28.0uA
14uA
7uA
2.8uA
1.4uA
1500V
75.0uA
30.0uA
15.0uA
7.5uA
3.0uA
1.5uA
•
Capacitive current is limited to 2 mA during charge time.
•
Testing continues if current flow during Soak Time does not exceed the
Dielectric Strength Max. Current setting (if the DWV test is on) or 0.1]
Touch 1 User’s Manual / page 61
Section 5: Learning a Sample Cable / Guidelines for Insulation Test Voltage
mA (if the DWV test is off). A cable passes the IR test if the current
never exceeds V/R during “Good For” time.
Cable passes Dielectric Strength,
Insulation Resistance Tests
2mA Touch 1
machine limit
Max. Current
Setting 1.5 mA
IR threshold
Passed
Dielectric Strength Test
Guidelines for
Insulation Test Voltage
“Good For”
Time
Soak
Time
Hipot
Duration
Charge
Time
Zero Current
Insulation Resistance Test
This setting is the voltage that will be applied to each test point during the Insulation
Resistance Test.
•
Most agency specifications are for 500 volts.
•
Testing with more voltage is not necessarily better. If the voltage is too
high, electric field gradients will produce forces that distort the insulation, create corona, or cause arcing thus making current flow
disproportionate to the applied voltage.
•
If the applied voltage is too low, generated current effects (triboelectric,
piezoelectric, electrochemical, etc.) will be greater than the “resistive
current,” making it impossible to measure.
Touch 1 User’s Manual / page 62
Section 5: Learning a Sample Cable / Insulation Voltage Setting
Insulation Voltage
Setting
Insulation Voltage
Range:
• Buttons:
50, 100, 200, 300, 400, 500, 600, 700,
800, 900, 1000, 1100, 1200, 1300, 1400, 1500
VDC dependent upon the hipot voltage setting.
• Typed-in values: 1-volt increments
•Limit: Insulation voltage can never exceed the
hipot voltage of the Dielectric Strength test.
•Note: If you change the DWV Hipot Voltage setting to a
value lower than the Insulation Test Voltage setting, the
Touch 1 will automatically lower the Insulation Test Voltage
setting to equal the new Hipot Voltage setting.
To set the Insulation Voltage in Advanced Mode hipot testing, do these things:
1.
In the Advanced Hipot
button.
Settings screen, touch the Insulation Resistance
Touch here
2.
In the Insulation Voltage screen, either touch a predefined button or touch
the Typed In Value button to enter a typed in value, then touch OK. Note: the
Touch 1 User’s Manual / page 63
Section 5: Learning a Sample Cable / Insulation Resistance setting
setting must be less than or equal to the Dielectric Withstand Voltage (DWV).
Enter the voltage...
...then touch here
Insulation Resistance
setting
Insulation Resistance
Range:
• Buttons: 5, 10, 20, 50, 100, 200, 500, 1000 MΩ
dependent on high voltage setting.
• Typed-in values: 5 - 1000 MΩ, 1MΩ increments
•Limit: Insulation Resistance setting is limited by
the hipot voltage setting.
1.
In the Advanced Hipot
Settings screen, touch Insulation Resistance.
Touch here
Touch 1 User’s Manual / page 64
Section 5: Learning a Sample Cable / Insulation Resis. Good For setting
2.
In the Insulation Resist. screen, either touch a predefined resistance button,
or touch Typed In Value, enter a typed-in value, then touch OK..
Enter the resistance...
...then touch here
Insulation Resis. Good
For setting
In the Advanced testing mode, you can specify the amount of time the Insulation
Insulation Resis. Good For
Range:
• Buttons:.002,.012,.02,
1 sec.
• Typed-in values: 0-120 seconds 0.002 second
increments.
Resistance test result must remain within the “good” range for a cable to pass the test.
You do this by setting the Insulation Resis Good parameter. To set this parameter, do
these things:
1.
In the Advanced Hipot Test
For button.
Settings screen, touch the Insul. Res. Good
Touch here
2.
In the Insul.
Resist. Good Time screen, either touch a predefined second
Touch 1 User’s Manual / page 65
Section 5: Learning a Sample Cable / Soak Time setting
button, or touch Typed In Value, enter a typed in value, then touch OK.
Enter the resistance setting...
...then touch here
Soak Time setting
Soak Time (Max. Soak and Soak For)
• Buttons:
0,.01,.1, 1, 10, 30, 60, 120 seconds.
• Typed-in entry: 0-120 seconds 0.01 second
increments
Soak Time is the amount of time the analyzer applies the hipot voltage to a set of
points before it begins the critical measurements. The purpose is to drive moisture
from the insulation on a cable, so the insulation resistance remains more stable during
a test. In Advanced mode, you can either specify a definite period of soak time
referred to as “Soak For,” or specify soak time (referred to as “Soak Until Good”) to
last no longer than necessary with a maximum time. To specify a Soak Time, do these
things:
1.
In the Advanced Hipot Settings screen, be sure that the check box next to
Soak Until Good contains no check mark. If it does contain a check mark, touch
the box to make the check mark disappear.
Make sure there is no
check mark here
2.
In the Advanced Hipot
Settings screen (with the Soak Until Good
Touch 1 User’s Manual / page 66
Section 5: Learning a Sample Cable / Max. Soak
checkbooks empty) touch Soak For:.
Touch here
3.
In the Soak For screen, either touch the button for the Soak Time you want to
use, or touch Typed In Value, enter the time you want to use, then touch OK. In
the Soak For screen, touch OK to return to the Advanced Hipot Settings
screen.
Enter the time...
...then touch here
Max. Soak
To specify a Maximum Soak Time, do these things:
1.
In the Advanced Hipot Settings screen, be sure the Soak Until Good
checkbox has a check mark inside. If it doesn’t, touch the checkbox, and a check
mark will appear, then touch the Max Soak button.
Make sure there is a
check mark here,
then touch here
2.
In the Maximum Soak Time screen, either touch the button for the soak
time you want to use, or touch Typed in Value to bring up the Enter
Maximum Soak Time screen. Type in the time you want to use, then touch
Touch 1 User’s Manual / page 67
Section 5: Learning a Sample Cable / Guidelines for High Capacitance Shield Allowed
OK to return to the Maximum Soak Time screen. Touch OK to return to the
Advanced Hipot Settings screen.
Enter the Soak Time...
...then touch here
Guidelines for High
Capacitance Shield
Allowed
Why good shields can cause “false” hipot errors: When you hipot test a
cable’s shield, a large capacitive current can flow. This is because there is a capacitance from the shield to each wire in the cable. When hipot voltage is applied to the
shield, all other wires are connected to a common ground. Consequently, the capacitance of the shield to every wire adds together, making the total capacitance very
large. The analyzer limits the amount of charge (Q) when the hipot voltage (V) is
applied. If the cable has enough capacitance (C), it will require too much charge to
reach full hipot voltage (where Q = CV). If the charge exceeds the analyzer’s limit,
the analyzer will report an overcurrent error even though the cable is not really “bad.”
Recommendations:
•
Use the High Capacitance Shield Allowed YES setting to raise the
Dielectric Withstand Voltage setting if your test specifications allow it.
Since all conductors within the shield have had hipot voltage applied in
succession, a leak to the shield (the same as a leak from the shield)
would have been detected. Whenever a test point is not at high voltage,
it is at ground. A potential difference between the shield and every conductor inside the shield has been evaluated for leakage current even
though the shield has remained at ground. The only drawback to using
the YES setting, is there will not be a hipot test from the shield to anything external to the whole cable assembly in the environment.
•
Lowering the hipot voltage allows cables to pass that would otherwise
fail because the analyzer limits the amount of charge during ramp-up of
the hipot voltage.
Touch 1 User’s Manual / page 68
Section 5: Learning a Sample Cable / High Capacitance Shield Allowed Setting
High Capacitance
Shield Allowed Setting
The High Capacitance Shield Allowed setting can be set to either YES, or NO. If the
setting is Yes (on), the Touch 1 will allow a cable to pass with one net that is too
capacitive to pass a hipot test. Important Note! If your cable has multiple shields
that must be linked in a single hipot test, you should use the Link feature (see “Links”
on page 141) to tie all the nets together, and be sure to turn the High Capacitance
Shield Allowed feature on, or use custom components.
To set the High Capacitance Shield Allowed parameter, follow these steps:
1.
In the View/Change
Change HV.
Learn Settings screen, touch HV, then touch
Touch here...
...then here
2.
In the Change High Voltage screen, touch either Yes or No (we’ll leave
ours set at No). Selecting Yes will disable the Connections Only button for
hipot application.
Touch one of these
Hipot Application
setting
•
If you’re through editing the high voltage settings, touch OK to return to
the View/Change Learn Settings screen. Note: If you touch
Cancel, you’ll undo the changes you’ve made.
•
If you’re going to edit other high voltage settings, stay in this screen.
The Hipot Application setting allows you to apply the hipot voltage either to all of
the test points of the adapters listed in the wirelist, or only to those test points in the
net list (CON), and the component (COMP) test points. The Connections Only
button will be disabled when High Capacitance Shield Allowed is set to yes.
Important Note! The Touch 1 does NOT apply high voltage across components
except twisted pairs.
Touch 1 User’s Manual / page 69
Section 5: Learning a Sample Cable / Hipot Application setting
•
The Connections Only setting sets the analyzer to hipot test only the
connector contacts that have connections. Use this option when you
want testing to go fast, and you don’t have to hipot all contacts in the
connector.
•
The All Adapter Pins setting sets the analyzer to hipot test all connector
contacts, whether or not they have anything connected to them. It slows
down hipot testing.
Note: Custom components can also be used for hipot testing. For details, see
page 144. They allow you do do the following:
•
Hipot test individual nets or groups of nets.
•
Hipot test nets at different voltages
•
Test gas fuses to a breakdown voltage.
To set the Hipot Application parameter, follow these steps:
1.
In the View/Change Learn Settings screen, touch HV, then touch
CHANGE HV. Note: If you don’t know how to get to the View/Change
Learn Settings screen, see “Getting to the Learn Settings” on page 28.
Touch here...
...then here
2.
High Voltage screen, touch either All Adapter Pins, or
Connections Only (we’ll leave ours at All Adapter Pins).
In the Change
Touch either
of these...
Touch 1 User’s Manual / page 70
Section 5: Learning a Sample Cable / Hipot Application setting
•
If you’re through editing the high-voltage settings, touch OK to return to
the View/Change Learn Settings screen. Note: If you touch
CANCEL, you’ll undo the changes you’ve made.
•
If you’re going to edit other high-voltage settings, stay in this screen.
Component (COMP) Learn Settings
The Touch 1 can learn many common components in addition to wires and
connectors. In the learn setup, all you do is turn learning on or off for each component
type using a check box. To refine your testing, you’ll have to edit the components in
the wirelist manually. For a detailed discussion on this topic see page “Editing
Components (COMP)” on page 131.
Component Learn Settings
Range:
•
Resistors 0.1 to 100KΩ (± 1% ± 0.1 Ω) Testing tolerance defaults to 10% during learning.
•
Capacitors 400 nF to 100 µF (± 10%). Testing tolerance defaults to 10% during learning.
•
Diodes: silicon, germanium, Schottky Note:
Anodes are listed first when you view the wirelist.
•
Twisted Pairs: Cable must be at least 6 feet long,
and contain at least 3 wires.
•
Child Wirelists
Touch 1 User’s Manual / page 71
Section 5: Learning a Sample Cable / Hipot Application setting
Component Learn Settings (Continued)
Limits:
•
Resistors with resistances between 100K Ω and
4.5 MΩ learn as Links. You should manually
change them into resistors before you test cables.
For details see “Changing a Link Into Another
Component” on page 142.
•
Resistors with resistances greater than the LV
Insulation Resistance setting are not learned.
Resistors and capacitors may have to be manually edited after the learn so their values and
tolerances match the manufacturer’s
specifications.
•
Diodes: LED’s, Zeners, very leaky diodes, diodes
in series with some resistors, are not learned.
LED’s can be tested.If you have purchased Scripting, you can use Custom Components to test zeners, schottkys, and lighting of LED’s. See
page 144.
•
Twisted Pairs: Learning cables with twisted pairs
may take a long time. To avoid this problem learn
cable without twisted pair learning turned on, then
manually add twisted pairs to wirelist after the
learn.
•
Note: If all components are not learned, raise the LV Insulation Resistance setting during the learn; or you may need to lower the Connection Resistance setting below the lowest value of the components
you want to learn.
To select the components you want to learn, follow these steps:
1.
In the View/Change Learn Settings screen, touch More, then COMP,
then CHANGE COMP. Note: If you don’t know how to get to the View/
Touch 1 User’s Manual / page 72
Section 5: Learning a Sample Cable / Hipot Application setting
Change Learn Settings screen, see “Getting to the Learn settings”,
page 28.
Touch here...
...then here...
...then here
2.
In the Change Learn Components screen, touch the boxes for the kind(s)
of components you want to learn. Select Standard Components to learn resistors, capacitors, and diodes. Select ALL to learn all components. Select NONE if
you don’t want to learn components. (In our example, we’ll turn on the standard
components.) When you’ve finished, touch OK to accept the settings. Note:
When you turn on the Component Resistance feature in the Low-Voltage settings
screen.
Turn on the component
types you want to test...
...then touch here
3.
You’re in the View/Change Learn Settings screen. If you scroll down the
screen, you’ll see the new component settings you’ve selected displayed.
•
If you’re through editing the learn settings, touch OK to return to the
Learn Setup screen. Note: If you touch CANCEL, you’ll undo the
changes you’ve made.
Touch 1 User’s Manual / page 73
Section 5: Learning a Sample Cable /
•
If you’re going to edit other learn settings, stay in this screen.
Learning 4-Wire Fixturing Learn Setting
At learn time, you can turn on learning four-wire fixturing, and the Touch 1 will automatically detect the 4-Wire pairs the fixture contains. We’ll discuss four-wire testing
in detail elsewhere in this manual (see Section 11, Method 1, Learning a fixture and a
cable). To set the Touch 1 to learn 4-wire fixturing, follow these steps:
1.
In the View/Change Learn Settings screen, touch MORE, then 4-WIRE,
then Change 4-WIRE. Note: If you don’t know how to get to the View/
Change Learn Settings screen, see “Getting to the Learn Settings” on
page 28.
Touch here...
...then here...
...then here
2.
In the Change Learn Four-Wire screen, touch the Learn Four-Wire
Fixturing button, then touch OK.
Touch here...
...then here
•
If you’re through editing learn settings, touch OK to return to the
Learn Setup screen. Note: If you touch CANCEL, you’ll undo the
changes you’ve made.
•
If you’re going to edit other Learn settings, stay in this screen.
Touch 1 User’s Manual / page 74
Section 5: Learning a Sample Cable /
The SPC (Statistical Process Control) Learn Setting
The Statistical Process Control (SPC) package is available from Cirris Systems (801)
973-4600. You’ll need this package to take advantage of the SPC features in the
Touch 1.
When you purchase the package, you’ll receive all of the software and instructions
you’ll need to set your Touch 1 up to collect SPC data for you. You can collect
summary data, measured values, and error text. We’ll show you how to turn on SPC
data collection here. For a detailed discussion, see the SPC manual.
To turn on SPC data collection, follow these steps:
1.
In the View/Change Learn Settings screen, touch MORE, then SPC, then
CHANGE SPC.
Touch here...
...then here...
...then here
2.
In the Change SPC screen, touch ON, then touch the buttons for the kind(s) of
SPC data you want to collect. When you’re through, touch OK. Note: If you
touch CANCEL, you’ll undo the changes you’ve made.
Touch here...
...choose the
data to store...
...then touch here
Touch 1 User’s Manual / page 75
Section 5: Learning a Sample Cable /
Script Setting
The Scripting package is available from Cirris Systems (801) 973-4600. With this
package, you can program your Touch 1 to do things that are not part of the standard
software package included with the analyzer.
When you purchase the package, you’ll receive all of the software and instructions
you’ll need to write and run scripts on your analyzer. For a more detailed discussion,
see the Scripting manual for the Touch 1.
Custom component and test event scripts are attached to wirelists. Custom report
scripts are global to the whole system.
To select the kind of script to use, do these things:
1.
In the View/Change Learn Settings screen, touch More, then Script, then
Change Script.
Touch here...
...then here...
...then here
2.
In the Change
Script screen, touch the kind of script you want to use.
Touch here for custom
component scripts
Touch here for test event
scripts
Touch 1 User’s Manual / page 76
Section 5: Learning a Sample Cable / How to Learn a Sample Cable
Learning a Sample Cable
How to Learn a
Sample Cable
What the Touch 1
Learns
To Learn a Sample
Cable
Once you’ve verified the learn settings are correct, you’re ready to learn the Sample
Cable. Note: If you find that the settings are not correct, you should edit them. We’ll
begin in the Learn Setup screen. No components, 4-Wire, or SPC settings have
been turned on for the learn in this example.
When the Touch 1 learns a cable, it learns:
•
The adapters installed in the Touch 1 whether they have connections or
not.
•
The connections in the cable.
•
Any components in the cable if learn components were turned on.
•
The test settings you’re using to test the cable.
•
If the cable contains a script (if Scripting has been installed and turned
on).
To learn a Sample Cable, follow these steps:
1.
Connect the Sample Cable you want to learn to the Touch 1.
2.
In the Learn
3.
Setup screen, look at the “last modified” settings carefully.
•
If the settings in the Learn Setup screen are correct, proceed to step
3.
•
If the settings in the Learn Setup screen are not the ones you want to
use, touch Change to edit them, then proceed to step 3.
In the Learn Setup screen, the “Last Modified” settings are displayed.Touch
LEARN. Note: If you don’t know how to get to the Learn Setup screen, see
“Getting to the Learn Settings” on page 28
Touch here
4.
The Touch 1 will learn the Sample Cable, then display the following screen if the
learn process goes well. The cable signature for the learned Sample Cable will be
Touch 1 User’s Manual / page 77
Section 5: Learning a Sample Cable / High Resistance Error
displayed. The cable description automatically defaults to “Last Learned.” You
can change this cable description when you store the wirelist.
•
If the cable learned properly, you need to verify the wirelist before you
start testing cables. For instructions on how to do this see “Verifying a
Learned Wirelist” on page 86.
•
If there are problems learning a cable, the Touch 1 will display an error
screen. We’ll discuss possible errors during learning next.
Errors during Learn
There are several error types that can occur during the learning process. In general,
they are:
High Resistance Error
•
High Resistance error
•
4-Wire Fixture Learn errors
This error indicates that there is more resistance in the cable than the Low-Voltage
Connection Resistance setting, or that a detected resistance is more than 100K ohms,
but less than the LV Insulation Resistance setting.
Possible causes:
•
The Components test is not turned on, and there are components along
with the wires and connectors in the cable.
•
The LV Connection Resistance setting is set too low for the test
specification.
•
The Sample Cable has too much wire resistance, either because it is bad,
or it is the wrong cable.
•
Contamination is on the cable.
•
The cable has a solder joint of extremely poor quality.
Solutions:
•
Turn on Learn Components (see “Component (COMP) Learn Settings”
on page 71 for details on how to do this).
Touch 1 User’s Manual / page 78
Section 5: Learning a Sample Cable / High Resistance Short Error (1000 V only)
•
Raise the LV Connection Resistance setting (see “Editing the LV
Connection Resistance” on page 106 for details on how to do this).
•
Clean the cable, or use a new Sample Cable.
•
Repair the cable connection, or use a new Sample Cable.
•
Use another Sample Cable.
Example:
In the example shown, the Touch 1 has detected a 3K ohm resistance in net 2 at the
test points J1-024 and J1-052. There’s a 3K ohm resistor in the cable, and learning
components has not been turned on.To correct this error, turn on learning components
(see “Component (COMP) Learn Settings” on page 71) before learning the cable.
High Resistance Short
Error (1000 V only)
This error indicates that a detected resistance is more than 100K ohms, but less than
the LV Insulation Resistance setting
Possible causes:
•
Contamination on the cable.
•
An extremely poor quality solder joint.
Solutions:
•
Clean the cable, or use a new Sample Cable.
•
Repair the cable connection, or use a new Sample Cable.
Example:
Touch 1 User’s Manual / page 79
Section 5: Learning a Sample Cable / 4-Wire Fixture Learn Errors
4-Wire Fixture Learn
Errors
4-Wire Kelvin Pair
Error
There are three 4-Wire fixture learn errors. See section 11 on four-wire for more
information on four-wire setup. The possible errors are:
•
4-Wire Kelvin Pair error
•
Learn 4-Wire Pair warning
•
Adapter Error
This error message indicates the four-wire fixturing is set up incorrectly.
Possible causes:
•
The wrong combination of type 1 and type 2 Kelvin points is defined.
For each 4-Wire pair, there should be one type 1 point, and one type 2
point.
•
More than two points are connected together to make up a 4-wire pair.
•
Cable not removed from the fixture before you learned the fixture.
Solution:
•
Define each 4-Wire pair with one type 1 point, and one type 2 point.
•
Remove one of the connections so the 4-Wire pair consists of only two
points connected together.
•
Remove cable from fixture.
Example:
In the example shown, the Touch 1 has detected three different incorrectly
constructed Kelvin pairs. In the first error shown, more than two points are connected
within a single pair. In the second error, both points within the pair are type 2 points.
In the third error, both points are type 1 points. Remember, only two points are
required to construct a 4-wire pair. Each 4-wire pair must have one type 1 point, and
one type 2 point.
Learn 4-Wire Pair
Warning
This error indicates that you have not defined the 4-Wire pairs properly before you
attempted to learn the 4-wire fixturing.
Touch 1 User’s Manual / page 80
Section 5: Learning a Sample Cable / Adapter Error
Cause:
•
You have defined only one 4-wire pair. You need to define at least two
for 4-wire testing to work.
Solution:
•
Define at least two correctly-structured 4-wire pairs before you learn the
4-wire fixturing.
Example:
In this example, the Touch 1 has learned only a single 4-wire pair. For the process, to
work properly, at least two correctly-structured 4-wire pairs must be defined before
you learn the 4-wire fixturing.
Adapter Error
This error indicates that after the 4-wire fixturing was learned, the adapter was
changed.
Cause:
•
An adapter was changed after the 4-wire fixturing was learned.
Solution:
•
Do not change the adapters after the 4-wire fixturing has been learned.
Use the same adapters for learning the cable, that you used for learning
the 4-wire fixturing.
Example:
Touch 1 User’s Manual / page 81
Section 5: Learning a Sample Cable /
In this example, the adapter was changed after the 4-wire fixture was learned. To
correct the error, don’t change the adapter(s) after you’ve learned the 4-wire fixturing.
In this example, the Touch 1 has detected that the wrong adapters are installed. Touch
the OK button to display the Required Adapters For Learn screen.
The screen shows the correct adapters needed to learn the cable. To correct the error,
install the correct adapters, then touch CANCEL to restart the learn.
Adding an Adapter to the Adapter List During a Learn
You can add a new adapter to the adapter list during the process of learning a cable.
The new adapter can be installed in any scanner position on the Touch 1 for this
process. We’ll add a new custom adapter in our example, installed at scanner position
J1. To add a new adapter to the adapter list during a learn, follow these steps:
1.
In the Main Menu screen, touch Test Setup.
Touch here
Touch 1 User’s Manual / page 82
Section 5: Learning a Sample Cable /
2.
In the Test
Setup screen, touch Learn Sample.
Touch here
3.
In the Learn
Setup screen, touch Learn.
Touch here
4.
In the New Adapters
Found screen, touch ADD ADAPTER TO LIST.
Touch here
Touch 1 User’s Manual / page 83
Section 5: Learning a Sample Cable /
5.
In the Add
Adapter to List screen, touch Part No.
2EA762
Touch here
6.
In the Add/Change Add Part No. screen, enter the part number (we’ll
enter UH2M-SDA), then touch OK. Note: The adapter part number can be up to
8 characters long including the beginning required letter “U.” Lower-case letters
can be entered using a keyboard. We recommend that you enter the part number
information found on the adapter label. The part number is used when you order
adapters.
Enter the part number...
...then touch here
7.
In the Add
Adapter to List screen, touch Adapter Description.
Touch here
8.
In the Add/Change ADP Descrip. screen, enter the adapter description,
then touch OK. (Note: The adapter description can be up to 30 characters long.
Touch 1 User’s Manual / page 84
Section 5: Learning a Sample Cable /
You can enter lower-case characters using a keyboard. (We recommend that you
enter the “mates to” information found on the adapter label, as the description).
Enter the adapter description...
...then touch here
9.
In the Add Adapter to List screen, touch SAVE to add the new adapter to
the adapter listing.
10. In the Continue
Learn screen, touch Continue Learn.
11. The Touch 1 will complete learning the cable. You can check to be sure the new
adapter is in the adapter list by touching Adapter List in the System Setup
screen, and scrolling until you can see the new adapter in the list.
Touch 1 User’s Manual / page 85
Section 5: Learning a Sample Cable /
Verifying a Learned Wirelist
Before you test cables, you should check the wirelist (and parameter settings) stored
in the Touch 1’s memory, against the master build list for the Sample Cable. If the
Touch 1 learned the Sample Cable correctly, it should have the complete wirelist in
memory.
To verify the wirelist, follow these steps:
1.
In the
Main Menu screen, touch Test Setup.
Touch here
2.
In the Test
Setup screen, touch View & Change Wirelist.
Touch here
3.
In the View/Change Wirelist screen, use the arrows to scroll down the list.
Check the displayed information against your build documentation for the
Sample Cable. Be sure to check all connections and test settings as you go. Note:
If you have a printer connected to your Touch 1, you can touch PRINT to print
out the wirelist. If you don’t have a printer connected to your Touch 1, the
PRINT button will be disabled (grayed out).
Verify connections
and settings as you
scroll the wirelist
Touch 1 User’s Manual / page 86
Section 5: Learning a Sample Cable /
•
If the wirelist (and settings) stored in the Touch 1’s memory are correct
and complete, you’re ready to test cables.
•
If the wirelist (and settings) are not correct and/or complete, you’ll have
to edit the wirelist.
Touch 1 User’s Manual / page 87
Section 5: Learning a Sample Cable /
Touch 1 User’s Manual / page 88
Section 6:
Editing Wirelists
Editing Wirelists
Overview
Wirelists contain a great deal of information. Among that information is:
•
The Adapter signature(s) for the adapters you’re using. These adapter
signatures identify the particular connector adapters you’re using to
connect your cables to the Touch 1. Adapters are either automatically
learned by the Touch 1, or are set up by hand-editing the wirelist.
•
The Low-Voltage (LV) Continuity Test parameters. These settings define
what makes up a “good” connection, and what makes up an open circuit
(an “open”), a short circuit (a “short”), or what connections are ignored
by the Touch 1.
•
The High-Voltage (HV) Test parameters. These settings control hipot
testing.
•
The net list of connections (CON) in a cable. A net consists of two or
more test points connected together.
•
The components (COMP). These are (optional) additional parts of the
testing process designed to examine resistors, diodes, capacitors, individual wire resistances, and twisted pairs.
•
Custom test point labels (LABEL). These are (optional) user-entered
names that relabel the default test points.
•
Four-wire (4-Wire) pairs in a cable (optional). These are used in 4-Wire
testing. For details see Section 11.
•
Statistical Process Control (SPC) settings (optional feature purchased
separately) for a cable. These settings turn SPC data gathering on and
off, and determine what data is collected. For details, see the SPC
package manual.
•
Script (SCRIPT) filename and location (optional feature purchased
separately) settings. These settings define which script will run when
you’re testing. For details, see the Scripting on the Touch 1 manual.
You’ll use a wirelist each time you test a cable. In this section, we’ll show you how to
create wirelists using the Touch 1’s powerful learning technology. Also, since the
Touch 1 can test cables over a range of settings even wider than it can learn on its
own, we’ll teach you how to edit wirelists manually to use that wider range.
Touch 1 User’s Manual / page 89
Section 6: Editing Wirelists / Adapter Signatures
Signatures
The Touch 1 uses several different kinds of signatures that are displayed in wirelists
and on printouts. We’ll discuss each of these here.
Adapter signature
CRC Signature
Cable signature
Wirelist signature
Insul test parm signature
Adapter Signatures
CRC Signature
Cable Signature
The Touch 1 identifies connector adapters by their adapter signatures. Each adapter
type has a signature that’s unique to it. The adapter signature is shown on the label
attached to each adapter.
The CRC Signature is the signature that is always displayed. It is a six-digit identifier
composed of the following elements contained in a wirelist:
•
Test parameters. Standard high voltage and advanced high voltage
options are only included in the CRC if they are used.
•
Adapter signatures (adapter descriptions don’t change the CRC).
•
Connections (wiring pattern). Changing the order of the connections
within a net does not change the CRC signature.
•
Custom test point labels. The CRC signature is based on the tester pin
numbers, so the order of the labels doesn’t change the CRC signature.
•
4-Wire pairs.
•
Components. Changing the order of the component(s) will change the
CRC signature. Changing the value of the component(s) will change the
CRC signature. This means learning a complex assembly will probably
change the CRC signature.
•
Script filename (if the Scripting feature has been purchased and
installed). The path is not included in the CRC signature, so the file can
move around without changing the CRC signature.
A cable signature is an eleven-digit alphanumeric entity the Touch 1 generates as it
learns a cable. Note: When you modify a wirelist, the Touch 1 recalculates the
signature. The cable signature is only displayed if the Signature Display option under
System Options is set to Yes.
•
The first six digits in a cable signature are unique to the pattern of wire
Touch 1 User’s Manual / page 90
Section 6: Editing Wirelists /
connections (CON) in a cable, the component (COMP) connections in a
cable, and the adapters (ADP) you’re using to connect the cable to the
Touch 1. These six digits are often referred to as a connections
signature. This signature doesn’t include components in the calculation.
•
The last five digits in a cable signature represent the Low-Voltage (LV),
and the standard High-Voltage (HV) test parameters (except soak time)
within the wirelist. These five digits are often referred to as a parameter
signature. If the wirelist contains components, the parameter signature
will be MULTI. If the advanced high voltage settings are turned on, the
parameter signature will be zeros.
You may end up with more than one signature in a cable if that cable contains components other than wires and connectors. The MULTI parameter signature also gives you
a WIRELIST signature, and an INSUL. TEST PARM signature. These two signatures will be zeros if the advanced high voltage settings are used.
Error Signatures
Wirelist signatures
Insul Test Parm
Signature
Different cable types,
same Parameter
Signature?
Remember, the first six digits of a cable signature represent the adapters, and the
pattern of connections in a cable. If the first six digits in a cable you test are different
than they should be for a “good” cable, there’s something wrong in the pattern of
connections in that cable.
•
Error signatures help you identify repeated connection-related errors.
•
They do not identify hipot errors, or component value errors.
This signature only displays if the wirelist contains components. The first six-digit
alphanumeric is composed of the adapters, and the connection wiring pattern. It does
not contain the pattern of components. The last five-digit alphanumeric contains the
component and connection threshold settings. It does not contain the LV insulation
parameter, or any high voltage settings.
This signature only displays if the wirelist contains components. It is a five-digit
alphanumeric composed of the LV Insulation Resistance, and any hipot settings that
are being used.
It’s possible to have two different cable types with the same parameter signature. If
the LV and the standard HV test settings are the same (even though the list of connections is different), both cables will have the same parameter signature.
Touch 1 User’s Manual / page 91
Section 6: Editing Wirelists /
Editing an Existing Wirelist
In this section, we’ll show you how to edit wirelists in the Touch 1. You’ll need to do
this if the Touch 1 hasn’t learned the wirelist correctly, or if you wish to modify the
wirelist after the learn. If you’ve read the section on learning a Sample Cable (“Learning a Sample Cable” on page 77), you’ll already be familiar with a lot of what we’ll
cover here. If not, don’t worry; we’ll cover things in enough detail to help you edit
wirelists with confidence.
Getting to the View/
Change Wirelist
screen
When you want to look at a wirelist, or edit it, you’ll begin in the screen. First we’ll show you how to get there, then we’ll give you a
detailed look at the screen itself.
To get to the screen, follow these steps:
1.
In the screen, touch Test Setup.
Touch here
2.
In the screen, touch View & Change Wirelist.
Touch here
Touch 1 User’s Manual / page 92
Section 6: Editing Wirelists / Navigating the View/Change Wirelist Screen
3.
Navigating the View/
Change Wirelist
Screen
You’ve arrived at the screen.
This diagram will describe how to get around in the screen.
2
1
3
4
10
5
9
8
7
6
1.
Touch these “go to” buttons (ADP, LV, HV, CON) to highlight them and quickly
locate the relevant highlighted screen section. The text inside the CHANGE
button will change to the right text for whatever button you’ve highlighted.
2.
Touch the MORE button to bring down the popdown menu that contains the
additional options: components (COMP), labels (LABEL), 4-Wire pairs (4WIRE), Statistical Process Control (SPC), and Script (SCRIPT). Once the
popdown menu is displayed, the buttons operate like the other “Go To” buttons.
3.
Touch the CHANGE button to go to the individual edit window shown within the
button. The content of this button changes depending upon which “go to” button
and screen section is highlighted.
Touch 1 User’s Manual / page 93
Section 6: Editing Wirelists / Editing Adapters (ADP)
4.
Touch in the gray area above the arrow buttons for “page up” and “page down.”
This jumps several lines at once.
5.
Touch the arrow buttons to scroll one line at a time.
6.
Touch the contrast button to change the screen contrast.
7.
Touch the CANCEL button to discard any changes made to the wirelist, and
close the window. This will discard all changes made in the individual edit
windows that you reach by touching CHANGE.
8.
Touch the PRINT button to print the entire wirelist, including the filename, the
date, the cable description, and any notes you’ve made. Note: For this button to
work, you must have a printer installed on your Touch 1 system. For instructions
on how to install a printer see “How to Connect a Printer” on page 17.
9.
Touch the OK button to save all changes made to the wirelist in the individual
edit windows and close the window. Important! Changes will not be saved
unless you touch OK.
10. Touching each individual section in the scroll box will highlight the section, and
change the text in the CHANGE button. You’ll find sections with corresponding
buttons for Low-Voltage (LV), High Voltage (HV), Connections (CON),
Components (COMP), Labels (LABEL), 4-Wire Pairs (4-WIRE), Statistical
Process Control (SPC), and Script (SCRIPT).
Adapters
Editing Adapters
(ADP)
The signatures for the adapters you use to connect your cables to the Touch 1 are an
essential part of each wirelist. They identify the adapter’s counting order, and the
number of pins in the adapter. This allows the Touch 1 to check that the correct
adapters are installed before your cables are tested. The adapters become part of the
wirelist one of two ways:
•
The adapters are automatically recognized, and placed in the wirelist
when the Touch 1 learns a Sample Cable. If they are new adapters, the
Touch 1 can automatically learn the adapters and add them to the
adapter list. For new “Cirris Adapters,” install the latest software version.
•
You can add adapters to the wirelist manually when you edit the
wirelist. Important Note: The adapters listed in the wirelist must
match the physical location(s) of the adapters on the Touch 1’s scanner
for the Touch 1 to test cables correctly. They must be the same adapter,
or have the same signature. However, having extra adapters installed on
the Touch 1’s scanner (without any connections) will not affect your
cable tests. They will not appear in the wirelist.
Touch 1 User’s Manual / page 94
Section 6: Editing Wirelists / Identifying Adapters
Identifying Adapters
You can identify the adapters you’re using (and the scanner positions they’re installed
in) by looking at the information shown in the wirelist. The position(s) adapter(s) are
installed in is important, because not all adapters fit onto the scanners in any “J”
position.
J1 7E63D0
scanner position on the
Touch 1
Adapter signature on adapter
label
J4
J2
J1
J1
J3
“J” positions on the Touch 1 scanner assembly
Adding an Adapter to
a Wirelist
You may need to add an adapter if you’re creating a wirelist from scratch (see “Creating a Wirelist from Scratch” on page 153), or if you’ve already labeled a series of test
points, and you’ve decided to change the gender of the adapter after the fact. To add
an adapter to a wirelist by manually editing the wirelist, follow these steps
1.
In the
screen, touch ADP, then touch CHANGE
ADP. Note: If you don’t know how to get to the screen, see “Getting to the View/Change Wirelist screen” on page 92.
Touch here...
...then here
2.
In the screen, touch ADD. Note: If the ADD button is
disabled, all the available positions have been used. If you want to add another
adapter, you must either add another scanner box (see “Installing Expansion
Touch 1 User’s Manual / page 95
Section 6: Editing Wirelists /
Boxes” on page 11), or delete an existing adapter first, then add the new adapter
(see “Editing an Adapter in a Wirelist” on page 98).
Touch here
3.
In the screen, use the arrow keys to scroll down a
line at a time, or use the scroll bar to page up/down to highlight the position(s)
you want to add an adapter to (in our example positions J1 and J2 are occupied,
so we’ll choose J3), then touch ADD.
Highlight the position...
then touch here
4.
In the screen, use the arrows to scroll through the adapter list
until you highlight the adapter you want to add to the wirelist. When you’ve
highlighted the right adapter (we’ll add an AHED-34 1” Female, a double-high
adapter that will occupy J3 and J4), touch Add.
Highlight the adapter...
...then touch here
Touch 1 User’s Manual / page 96
Section 6: Editing Wirelists / Deleting an Adapter From a Wirelist
5.
Deleting an Adapter
From a Wirelist
In the screen, the newly-added adapter will be displayed.
•
If you’re going to add another adapter, touch ADD, and go to step 3. (In
our example, the ADD button is disabled because all available scanner
“J” positions have been filled with adapters.)
•
If you need to delete an existing adapter, see “Deleting an Adapter From
a Wirelist” on this page.
•
If you’re through adding adapters, touch OK to return to the screen. Note: If you touch CANCEL, you’ll
undo the changes you’ve made.
Important Notes: Test points in the net and component lists may become invalid
when you delete existing adapters, since not all adapters contain all of the relevant
points. All wirelists must include at least one adapter.
To delete an adapter from a wirelist, follow these steps:
1.
In the screen, touch ADP, then touch CHANGE
ADP. Note: If you don’t know how to get to the screen, see “Getting to the View/Change Wirelist screen” on page 92.
Touch here...
...then here
2.
In the screen, use the arrow keys to scroll one line at a
time, or use the scroll bar to page up/down to highlight the adapter you want to
delete (we’ll delete the AHED-34 1” female adapter at scanner position J3,
Touch 1 User’s Manual / page 97
Section 6: Editing Wirelists / Editing an Adapter in a Wirelist
signature 1E67F0), then touch DELETE. You’ll also have to delete any points
rendered invalid when you deleted the adapter.
Highlight the adapter...
...then touch here...
...and finally, here
3.
Editing an Adapter in a
Wirelist
•
If you need to delete other existing adapters, repeat this step.
•
If you’re through deleting adapters, touch OK to return to the screen. Note: If you touch CANCEL, you’ll
undo all the changes you’ve just made.
In the screen, delete the points that
belonged to the adapter that’s just been deleted, then touch OK.
You may occasionally need to change an adapter within a wirelist. You may need to
do this for some of the following reasons:
•
Change the gender of the adapter from male-to-female, or female-tomale.
•
Change from an ungrounded adapter to a grounded adapter.
•
Change from a standard adapter to a high voltage adapter.
To edit an adapter within a wirelist, follow these steps:
Adding/Changing an
Adapter Description in
the Wirelist
1.
Delete the adapter you’ll be replacing. If you don’t know how to delete an
adapter, see “Deleting an Adapter From a Wirelist” on page 97.
2.
Add the replacement adapter. If you don’t know how to add an adapter, see “Adding an Adapter to a Wirelist” on page 95.
3.
Verify that the correct adapters are now present in the wirelist.
There may be times when you’ll want to add or change an adapter description in a
wirelist because you want to use the same adapter signature but a different description. Note: If you want the adapter description to display in the wirelist, or print in
the wirelist, you must add the description manually to each adapter.
To change the adapter description in a wirelist, follow these steps:
1.
In the screen, touch ADP, then touch CHANGE
Touch 1 User’s Manual / page 98
Section 6: Editing Wirelists / Adding/Changing an Adapter Description in the Wirelist
ADP. Note: If you don’t know how to get to the screen, see “Getting to the View/Change Wirelist screen” on page 92.
Touch here...
...then here
2.
In the screen, use the arrow keys to scroll up/down a
line at a time, or the scroll bar to page up/down until the adapter whose description you want to change is highlighted, then touch ADP Descrp.
Highlight the adapter...
...then touch here
3.
In the screen, highlight the adapter
description, then touch Select Existing, or touch Create New to create a new
adapter description. In our example, we will create a new description.
Touch here
4.
In the screen, enter a new description.
Adapter descriptions can be up to 30 characters long. Lower-case entries are possible using a keyboard. When you’ve finished entering the new description, touch
Touch 1 User’s Manual / page 99
Section 6: Editing Wirelists / Editing the Low Voltage (LV) Settings
OK. In our example, we’ll add the description : SPEC SOCKET. Note: If you
touch CANCEL, you’ll undo the change you’ve made.
Enter new description...
...then touch here
5.
In the screen verify that the displayed
description is the one you want. If it is wrong, touch Clear Descrp. If it is right,
touch OK. Note: If you touch CANCEL, you’ll undo the change you’ve just
made.
Touch here
• If you’re going to add another adapter description, touch ADP
Descrp. in the screen.
• If you’re through adding adapter descriptions, touch OK to return to
the screen. Note: If you touch Cancel,
you’ll undo all the changes you’ve made.
Low Voltage (LV) Settings
Editing the Low
Voltage (LV) Settings
The low voltage test parameters are used in Continuity testing. We’ll explain what
these settings are, and how they affect each other here.
The settings are:
•
Connection Resistance
•
LV Insulation Resistance
•
Component Resistance (if the wirelist includes components)
•
Advanced
Touch 1 User’s Manual / page 100
Section 6: Editing Wirelists / Cables with Wires
Cables with Wires
As it tests a cable, the Touch 1 first measures the resistances between connection
points included in the wirelist. In effect, the analyzer acts like a multimeter set in
resistance mode as it measures each set of points..
Conn. Resis. Threshold
Intended:
Good
LV Ins. Resis. Threshold
High Resistance Errors
OPENS
Shorts
Unintended:
Zero ohms
Ohms
The Touch 1 measures the resistance across each wire in the connection list We call
these connections intended connections. To be “good” connections, all resistances
should be less than the Connection Resistance threshold. If a measured resistance is
greater than the Connection Resistance threshold, the Touch 1 will tell you that it has
high resistance (if the resistance is less than the LV Insulation Resistance threshold)
or an open (if the resistance is greater than the LV Insulation Resistance threshold).
The analyzer also makes sure that there are no connections (unintended connections) in the cable other than the connections you’ve listed in the wirelist. If it measures the resistance between any two points not listed as connections in the
connections list and finds the resistance is less than the LV Insulation Resistance
threshold, it will report the error as a short.
.
Errors for Cables with Wires
Cable Error
Short or
High Resistance Error
(1500 V) or High
Resistance Short
(1000V)
Possible Causes
Solutions
- Defective cable.
- New cable.
- Incorrect wirelist
setup: Connection
should be in the
connection list and
isn’t.
- Fix wirelist setup:
Add connection to
connections list in the
wirelist.
- LV Insulation
Resistance threshold
is set too high.
Touch 1 User’s Manual / page 101
- Lower LV Insulation
Resistance threshold
setting.
Section 6: Editing Wirelists / Guidelines for setting the Connection Resistance threshold
Errors for Cables with Wires (Continued)
Cable Error
High Resistance or
Open
Guidelines for setting
the Connection
Resistance threshold
Possible Causes
Solutions
- Defective cable.
- New cable.
- Incorrect wirelist
setup: Connection
should not be in
connection list, and is.
- Fix wirelist setup:
Remove connection
from connections list
in the wirelist.
-Connection
Resistance threshold
is set too low.
- Raise Connection
Resistance threshold
setting.
•
In most cases, your Connection Resistance threshold should be set 0.2
ohms or 20% greater than the expected maximum resistance in your
assembly (see “Using CALC Sample” on page 31).
•
Insulation Resistance threshold should typically be set at 100K ohms for
most tests (if you’re going to perform hipot tests), or 5 Megohms (if
you’re not going to perform hipot tests).
•
If you need to measure a very low resistance (less than 0.1 ohms) or a
resistance less than 10 ohms with high precision, see 4-Wire testing in
Section 11.
Touch 1 User’s Manual / page 102
Section 6: Editing Wirelists / Cables with Components
Cables with
Components
If you have components in your cable assembly such as resistors, capacitors, or
diodes, or you’re using the “wire, or 4-wire wire component” to measure individual
wire resistances, the Touch 1 will add a Component Resistance threshold to the
settings you must use. Connections will be tested just as they are in “simple” cables
(cables with only wires and connectors). Then the Touch 1 checks to see that all
components with resistances greater than the Connections Resistance threshold also
have resistances greater than the Component Resistance threshold. .
Intended connections with components
Comp Res.
Conn. Res.
LV Ins. Resis.
High Res.
Good Error
Opens
Ohms
0Ω
Unintended connections with components
Conn. Res.
Comp Res.
Shorts
LV Ins. Resis.
Ignored
Ohms
0Ω
Guidelines for setting
the Connection and
Component
Resistance thresholds
•
You can have components with less resistance than the Connection
Resistance threshold. If you do, they should be listed in the connections
list and also in the components list. A common problem is they don’t
get listed in the connections list and the analyzer reports them as shorts
until they’re added to the connections list.
•
The Component Resistance threshold should be set 20% less than the
resistance of any resistors whose resistance is greater than the
Connection Resistance threshold.
•
Large capacitors (values greater than 10 microfarad) may require you to
set the “Component Resistance >” threshold to 1K ohm, so that they
will not be reported as shorts.
Touch 1 User’s Manual / page 103
Section 6: Editing Wirelists / Guidelines for setting the Connection and Component Resistance thresholds
Range and
tolerance for
more resistors
}
}
}
Range of
resistances for
wire segments
Conn. Resis.
threshold
Range of resistance
and tolerance for
some resistors
Insul. Resis.
threshold
If you need to measure a very low resistance (less than 0.1 ohms) or a
resistance less than 10 ohms with high precision, see 4-Wire testing in
Section 11.
Component
Resis. threshold
•
Ω
}
Zero
ohm
min.
Please See Next Page
Touch 1 User’s Manual / page 104
}
}
}
>0.1Ω
>4%
More
Resistors
}
Conn. Resis.
threshold
}
Resistors and wire segments
Comp. Resis.
threshold
Note the open range here
where no resistances overlap.
This is a good place to set
the Connection Resistance
and Component Resistance
thresholds. This window
should be at least 0.5
ohms wide. (The diagram
below shows this range at
an expanded scale.)
>0.3Ω
> 20%
Ω
Section 6: Editing Wirelists / Guidelines for setting the Connection and Component Resistance thresholds
If you find that the Connection Resistance threshold setting and the Component
Resistance threshold setting are right on top of each other, you may need to move the
Connection Resistance setting above the value of the component that is causing you
to set the Component Resistance threshold setting low. That component will then need
to be added to the connections list.
Errors for Cables With Components
Cable Error
Short or
High Resistance Error
High Resistance or
Open
Possible Causes
Solutions
- Defective cable.
- New cable
- Incorrect wirelist
setup: Connection
should be in the
connections list, and
isn’t.
-Fix wirelist setup: Put
connection in
connections list.
-Insulation Resistance
threshold is set too
high.
-Lower Insulation
Resistance threshold
setting.
-Component’s
measured resistance
is less than the
Component
Resistance threshold.
-Lower Component
Resistance threshold
setting.
-Defective cable.
- New cable.
-Incorrect wirelist
setup: Connection is
listed in connections
list, and shouldn’t be.
-Fix wirelist setup:
Remove connection
from connections list
in the wirelist.
-Connection
Resistance threshold
setting is too low.
-Raise Connection
Resistance threshold
setting.
Touch 1 User’s Manual / page 105
- If component’s
resistance is less than
Connection Resistance threshold, that
component should be
added to the connection list.
Section 6: Editing Wirelists /
Editing the LV
Connection
Resistance
The Low-Voltage (LV) Connection Resistance setting tells the Touch 1 the maximum resistance a connection can have and still be considered to be a “good” connection.
If there are components in the wirelist, the LV Connection Resistance threshold lets
the Touch 1 discriminate between “good” connections and components having
moderate to high resistance. In this situation, connections (in the wirelist) with resistances greater than the LV Connection Resistance threshold setting, but less than the
Component Resistance threshold setting will be seen as “bad” connections. Note: If a
wire or resistor component falls into the resistance range below the Connection Resistance threshold setting , the From and To points should be added to the connections
list. These points don’t need to be added if the Isolation and Components test is
checked under advanced settings. See Advanced LV setting on page 112 for details
Connection Resistance settings
Range:
•
0.1 ohm to 100 K ohms (± 1% ± 0.1 ohm for 1500Volt systems, ± 4% ± 0.1 ohm for 1000-Volt systems).
•
Also 500 K ohm, 1 Megohm, 5 Megohms (± 10%
for 1500-Volt systems, ± 20% for 1000-Volt
systems).
Limits:
•
The Connection Resistance setting is limited to
100 K ohms when testing components.
To edit the Connection Resistance setting, follow these steps:
1.
In the screen touch LV, then touch CHANGE LV.
Note: If you don’t know how to get to the screen
see “Getting to the View/Change Wirelist screen” on page 92.
Touch here...
...then here
Touch 1 User’s Manual / page 106
Section 6: Editing Wirelists / Editing the LV Connection Resistance
2.
In the screen, touch the Connection Resistance
button. Note: In our example, the Component Resistance button is disabled
(grayed out) because component testing is not turned on.
Touch here
3.
In the ! screen, touch the range button
you want to use (we’ll choose.1 to 999 ohm), then touch CLEAR. Enter the
resistance setting you want to use (we’ll enter 20 ohms), then touch OK. Note:
Depending on what setting you want to use, you LV Insulation Resistance setting
or the LV Connection Resistance setting may lock out certain choices. If
component testing is turned on, what settings are available may also be affected.
Choose the range...
...then touch here...
... enter the setting
...then touch here
4.
In the screen, the new Connection Resistance
setting will be displayed inside the Connection Resistance button.
•
If you’re through editing the low-voltage settings, touch OK to return to
the screen. Note: If you touch
CANCEL, you’ll undo the changes you’ve made.
Touch 1 User’s Manual / page 107
Section 6: Editing Wirelists / Editing the LV Insulation Resistance
•
Editing the LV
Insulation Resistance
If you’re going to edit other low-voltage settings, stay in this screen.
The LV Insulation Resistance setting tells the Touch 1 how to tell the difference
between connections that should exist, and connections that should be ignored. It also
defines what constitutes open circuits (“opens”) and short circuits (“shorts”). Any
detected resistance greater than the Low-Voltage (LV) Insulation Resistance will be
ignored as a connection (if it is an unintended connection).
Important! Though detected resistances greater than the LV Insulation Resistance
setting will be ignored as connections, they may cause Hipot Test errors.
LV Insulation Resistance Settings
Range:
•
0.1 ohm to 100K ohms (± 1% ± 0.1 ohm for 1500Volt systems, ± 4% ± 0.1 ohm for 1000-Volt
systems).
•
500K ohms, 1 Megohm, 5 Megohms (± 10% for
1500-Volt systems, ± 20% for 1000-Volt systems).
To edit the Low-Voltage (LV) Insulation Resistance setting, follow these steps:
1.
In the screen, touch LV, then touch CHANGE LV.
Note: If you don’t know how to get to the screen,
see “Getting to the View/Change Wirelist screen” on page 92.
Touch here...
...then here
Touch 1 User’s Manual / page 108
Section 6: Editing Wirelists / Editing the LV Insulation Resistance
2.
In the screen, touch the LV Insulation Resistance
button. Note: In our example, the Component Resistance button is disabled
(grayed out) because component testing is not turned on.
Touch here
3.
In the ! " screen, touch the range button you
want to use (we’ll choose 1K to 100K), then touch CLEAR. The OK button will
be disabled (grayed out) until an entry is made. Enter the resistance setting you
want to use (we’ll enter 50 K ohms), then touch OK.
Choose the range...
...then touch here
Enter the setting...
... then touch here
4.
In the
screen, the new setting will be displayed
inside the LV Insulation Resistance button.
Note: If “Skipped” shows up in any
of the boxes in this screen, touch
“Advanced” to go to the Advanced
LV Test Settings screen, touch
“Standard Tests” (the topmost
check box), then touch OK. The
“Skipped” should no longer appear.
Touch 1 User’s Manual / page 109
Section 6: Editing Wirelists / Editing the Component Resistance
Editing the
Component
Resistance
•
If you’re through editing the low-voltage settings, touch OK to return to
the screen. Note: If you touch
CANCEL, you’ll undo the changes you’ve made.
•
If you’re going to edit other low-voltage settings, stay in this screen.
Component Resistance allows the Touch 1 to discriminate between wires and connectors (and low-resistance components that appear both in the connections list and the
components list), and any other components in the wirelist.
A connection with a resistance greater than the Component Resistance threshold, but
less than the Insulation Resistance threshold, will be seen as a component. Whether or
not that component will pass the shorts test depends on how well it tests against the
Component Resistance and Insulation Resistance settings you’ve entered. The actual
component is tested to the parameters of the component during component testing.
Important Note: If you do not have components in the wirelist, this setting will not
be available. For information on how to add components, see “Adding a Component”
on page 132.
Component Resistance
Range:
0.1 ohms to 100 K ohms (± 1% ± 0.1 ohm for 1500-Volt
systems, ± 4% ± 0.1 ohm for 1000-Volt systems).
To edit the Component Resistance setting, follow these steps:
1.
In the screen, touch LV, then CHANGE LV.
Touch here...
...then here
2.
In the screen touch the Component Resistance
button. Note: If the Component Resistance button is disabled, your wirelist
Touch 1 User’s Manual / page 110
Section 6: Editing Wirelists / Editing the Component Resistance
does not contain any components. See “Editing Components (COMP)” on
page 131.
Touch here
3.
In the !screen, touch the range you
want to use (we’ll choose ohm), then touch CLEAR. Enter the resistance setting
you want to use (we’ll enter 40 ohms), then touch OK. Note: The OK button will
be disabled until an entry is made. Also remember that certain settings may be
locked out by the system, if the value you want to set is out of range.
Note: This range can shift as
Connection Resistance and
LV Insulation Resistance
settings change.
Choose the range...
...then touch here...
...then enter the setting...
...then touch here
4.
In the screen, the new setting will be displayed
inside the Component Resistance button.
•
If you’re through editing the low-voltage settings, touch OK to return to
the
screen. Note: If you touch
CANCEL, you’ll undo the changes you’ve made.
Touch 1 User’s Manual / page 111
Section 6: Editing Wirelists / Advanced LV settings
•
Advanced LV settings
If you’re going to edit other low-voltage settings, stay in this screen.
To reach the advanced LV test settings, touch Advanced in the screen.
Touch here
In the settings screen, you’ll see three check boxes.
Standard Tests(Continuity, Isolation, and Components: If this checkbox is
checked, the analyzer performs the continuity, isolation, and components tests as
usual. All connections in the wirelist are checked for continuity. The Isolation Test
checks to make sure that everything that is supposed to be open in the cable under test
is actually open. Any components you have defined for testing are also tested as
usual.
Uses:
•
•
•
•
•
By-wire testing
Tests that use one wirelist.
Continuity testing where wire connections are tested to one parametric
threshold set by the Connection Resistance setting. (The alternative is
by-wire testing.)
Testing a switch with an open position.
Testing connectors without connections.
Testing components with no resistance less than 200 ohms.
Isolation and Component Tests: If this box is checked, the analyzer will not perform continuity tests as usual. The Isolation test is performed to make sure that everything in the cable under test that is supposed to be open, is actually open. Any
components you have defined will be tested as you have specified. You can also use
wire and resistor components to test connections.
Touch 1 User’s Manual / page 112
Section 6: Editing Wirelists / Uses:
Uses:
This is by-wire testing because you can choose the order in which the connections are
tested. Components testing replaces the continuity test (the resistance of each component defines a wire).
No LV Settings, components define LV tests: If this box is checked, the analyzer will not perform low voltage tests as usual. (no LV settings will be used). Low
voltage (continuity) tests are performed in the child wirelists. You must define all
components (including any wires you want tested) for low voltage testing.
Uses:
Multi-pass testing. Note: This setting is contained only in the Parent wirelist.
Important! For this option to work, you must use multiple wirelist(s). For details,
see “Multiple Wirelists” beginning on page 197.
High Voltage (HV) Settings
The HV settings control how the hipot (Dielectric Strength and/or Insulation Resistance) tests operate. You can change the high voltage parameters and settings after
you have created the wirelist.
For detailed explanations on parameter ranges and settings, see the high voltage learn
section beginning on page 41
Hipot Test
Requirements
Hipot Selection (1500
Volts only)
There are special requirements when you do hipot testing at certain voltages.These
are:
•
AC hipot testing is a 1500-Volt analyzer option that you must purchase
separately. It is installed using a feature access code. See feature
updates beginning on page 281.
•
High voltage adapters (designated by an “H” as the first character in
their part numbers) are required when you are testing at voltages greater
than 1000 volts DC, or 707 volts AC.
•
Scanner daughter cards designed for testing at 1500 volts are required
when you are testing at voltages greater than 1000 volts DC, or 707
volts AC.
There are three hipot test selections in the #
screen. OFF
turns all hipot testing off. The standard setting, STD, combines the Dielectric
Strength test and the Insulation Resistance test into a single test. The Advanced
setting, ADV, uses two tests (1) the Dielectric Strength Test (AC or DC), and (2) the
Insulation Resistance Test (DC only).
To set the hipot selection, follow these steps:
1.
In the screen, touch HV, then CHANGE HV.
Note: If you don’t know how to get to the screen
Touch 1 User’s Manual / page 113
Section 6: Editing Wirelists / Editing Four-Wire (4-Wire) Pairs
see “Getting to the View/Change Wirelist screen” on page 92.
Touch here...
...then here
2.
In the #
screen, touch OFF to turn hipot testing off,
or STD to set standard settings. Touch ADV to set advanced settings. Touch OK
to complete the setting.
Touch one of these
•
If the high-voltage settings are correct for the test, touch OK to return to
the screen. Note: If you touch
CANCEL, you’ll undo the changes you’ve made.
•
If the high-voltage settings are not correct for the test, stay in this screen
to edit the high-voltage settings.
4-Wire
Editing Four-Wire (4Wire) Pairs
By using the 4-Wire testing technique, you can extend the resistance testing range of
the Touch 1 down to 0.001 ohm. You can also effectively eliminate the resistance of
your fixturing during testing using 4-Wire technique. 4-Wire testing is covered in
detail in Section 11, “What four-wire testing is used for” on page 205.
Labels
Editing Labels
(LABEL)
The Touch 1 automatically assigns a default label to each test point. An example of a
default label is J1-001, where J1 corresponds to the adapter position, and 001
corresponds to the pin number on the connector.
•
You can convert the wirelist’s default labels into custom test point labels
of your own. This will make reading your cable documentation easier.
You can either create the custom labels manually, or automatically label
Touch 1 User’s Manual / page 114
Section 6: Editing Wirelists / Creating custom test point labels
(autolabel) them. You can do this both with or without using the handheld test probe.
Creating custom test
point labels
You can make reading and interpreting your cable documentation easier by creating
custom test point labels. In screens where you see these labels, they’ll be sorted
alphabetically. Instead of seeing points labeled as J1-001, J1-003, etc., you can label
the points as you like. Your custom test point labels will appear in the screen, in the SPC data and probe pop-up windows, in any
relevant error windows and printouts, and in the wirelist printout. A custom label
section does not appear on the Test Summary report.
Custom Test Point Label Format
•
Maximum length: 30 characters
•
First character: A to Z, a to z, underscore
•
All other characters: A to Z, 0 to 9, dash, underscore, #
•
A keyboard or a barcode scanner can be used for
entering long labels.
•
An example of label format is:
J1-001 = mylabel[ ][*comment] where [ ] is optional.
Each custom label must have at least a space or “=”
between the point and the label. It may or may not
have a space before the comment. Anything after the
“*” is ignored.
To create a custom test point label, follow these steps:
1.
In the
screen, touch MORE, then LABEL, then
CHANGE LABEL. Note: If you don’t know how to get to the Touch 1 User’s Manual / page 115
Section 6: Editing Wirelists / Creating custom test point labels
screen, see “Getting to the View/Change Wirelist screen”
on page 92.
Touch here...
...then here...
...then here
2.
In the $ screen, use the arrow keys to scroll down a line at a
time, or the scroll bars to page up/down until the point you want to create a custom label for is highlighted (J1-001 in our example), then touch CHANGE
LABEL. The probe can also be used to locate your test point for the first time
only. After the first time, the probe begins to automatically label points as you
touch them. Note: In our example, the Clear Label button is disabled (grayed
out) because no custom label for J1-001 exists yet. The Apply?Label?button is
disabled because auto-labeling has not been turned on.
Highlight the point...
...then touch here
3.
In the $%&'(''' screen, enter the custom label
you want to use (we’ll enter Green1), then touch OK. The dash, #, and numeric
buttons will be disabled (grayed out) until an entry is made. Once the OK button
has been touched, a base label has been created, and automatic labeling can begin
(see “Automatic Labeling: Overview” on page 120). You can use the Upper
Touch 1 User’s Manual / page 116
Section 6: Editing Wirelists / Creating custom test point labels
Case and Lower Case buttons to change the character case when you’re using
the touch screen.
Touch here...
Enter the custom label...
...then touch here
4.
In the $ screen, the newly-created custom test point label will
be highlighted. You’ll see that both upper case and lower case letters have been
used. The system is case-sensitive. Note: In our example, the Apply?Label?
button is disabled (grayed out) because automatic labeling has not been turned
on.
•
If you want to custom-label another test point, scroll to that point. The
point will display a suggested automatic label, enclosed in question
marks (?Green2? in our example). You may use the automatic label (see
“Automatic Labeling: Using the “Apply Label” Button” on page 121) or
touch CHANGE LABEL to create your own label. In the $ screen, touch CLEAR to delete the automatic label, then enter
the custom label you want to use. Touch OK to return to the
$ screen where the custom label you’ve just entered is displayed.
•
If you are through creating custom test point labels, touch DONE to
return to the screen. Note: If you touch
Touch 1 User’s Manual / page 117
Section 6: Editing Wirelists /
CANCEL, you’ll undo all the changes you’ve made.
Importing Labels
You can import test point labels from an existing wirelist file. By importing labels
from an existing wirelist, you avoid having to reenter all the labels. Note: Only labels
with common adapters will import. To do this, follow these steps:
1.
In the screen, touch More, then Label, then
Change Label. Note: If you don’t know how to get to the screen, see “Getting to the View/Change Wirelist screen” on page 92.
Touch here...
...then here...
...then here
2.
In the $ screen, touch Change Many.
Touch here
Touch 1 User’s Manual / page 118
Section 6: Editing Wirelists / Importing Labels
3.
In the
) $ screen, touch Import the Label Section
From a Wirelist File.
Touch here
4.
In the $% screen, use the arrow keys or the
scroll bars to scroll until the wirelist you want to import labels from is highlighted. (You can also use the Fast Find function to help you locate the wirelist
quickly.) Once the wirelist is highlighted, touch Open LOC. In our example,
we’ll open CFOLDER.
Touch here
5.
Scroll to highlight the wirelist that contains the labels you want to import, then
touch Start Import. In our example we’ll import labels from the wirelist
setup1.WIR.
Highlight the wirelist...
...then touch here
•
If the labels import correctly, touch Done in the $
screen to return to the screen. The
imported labels will be displayed in the wirelist. Note: If you touch
Cancel, you’ll undo the changes you’ve made.
Touch 1 User’s Manual / page 119
Section 6: Editing Wirelists / Why label importing can fail
Why label importing
can fail
Automatic Labeling:
Overview
Automatic Label
Format
Label importing can fail for one of the following reasons:
•
The wirelist you selected does not have any labels to import. To solve
the problem, either select a wirelist that does contain labels, or Cancel
the import.
•
The adapters don’t match for both wirelists. To correct the problem,
touch Import Labels for adapters that do match, or Cancel the import.
•
The current wirelist already contains existing labels. To correct the
problem, touch Overwrite Labels to import the labels over the existing
ones, or Cancel the import.
You can automatically label test points by hand in the Touch 1. Using the auto
labeling feature, you can label all of the points in a wirelist in very little time; but you
must create a base label first. This base label can be an existing custom label, or you
can create a new label. It follows the format shown on page 115. You can then quickly
label other points in the wirelist by using either the APPLY LABEL button, or the
probe.
Automatic labels have the following restrictions:
Automatic Test Point Label last character Format
Restrictions
If the label ends in:
•
A numeric digit, the numeric increments: Pt1, Pt2, Pt3, etc.
•
An alpha character where the last character is different, the
character increments: ptA, ptB, ptC, etc.
•
An identical double alpha character, both characters increment: AA, BB, CC, etc.
Rollovers:
•
Z to AA
•
ZZ to a
•
zz to A
•
z to aa
•
Note: If a base label ends in a dash (-), an underscore (_), or
a pound sign (#), automatic labeling is disabled.
•
Auto labeling allows up to 104 labels before duplicates are
encountered.
Touch 1 User’s Manual / page 120
Section 6: Editing Wirelists / Automatic Labeling: Using the “Apply Label” Button
Automatic Labeling:
Using the “Apply
Label” Button
To automatically label points using the APPLY LABEL button, follow these steps:
1.
In the screen, touch MORE, then LABEL, then
CHANGE LABEL. Note: If you don’t know how to get to the screen, see “Getting to the View/Change Wirelist screen”
on page 92.
Touch here...
...then here...
...then here
2.
In the $ screen, use the arrow keys to scroll down one line at
a time, or use the scroll bar to page up/down, and highlight a test point you want
as a base label. (Note: You can use the probe here. The first time you touch a
point, the probe serves as a locator. All subsequent times, it auto labels points.) A
base label can be created from a default label or an existing custom label point (in
our example we’ll highlight J1-002). Once the point is selected, touch Change
Label.
Highlight a point for a base label...
...then touch here
Touch 1 User’s Manual / page 121
Section 6: Editing Wirelists / Automatic Labeling: Using the “Apply Label” Button
3.
In the
$%&'(''' screen, enter the label you
want to use (we’ll enter RED1), then touch OK. Use the Upper Case and Lower
Case buttons to control the character case when you’re using the touch screen.
Enter a new base label...
...then touch here
4.
In the $ screen, the base label is highlighted. To activate automatic labeling, select an unlabeled test point by using the arrow keys to scroll a
line at a time, or the scroll bar to page up/down. Moving the highlight bar off the
base label will activate automatic labeling by enabling the Apply? Label?
button.
5.
Once you have highlighted the test point you want to label (we’ll highlight J1005), touch the Apply?Label? to button (Apply?Label? to J1-005 in our
example). This will apply the next label in the series (RED2 in our example) to
the highlighted point.
Highlight the next
point to label in the series...
...then touch here
Touch 1 User’s Manual / page 122
Section 6: Editing Wirelists / Automatic Labeling: using the probe
6.
Automatic Labeling:
using the probe
In the $ screen, the next label in the series is ready to be
applied to the next test point. The Touch 1 has automatically scrolled to and
highlighted the next test point in the list.
•
If you want to autolabel another point in the series, select the test point
by highlighting it, then press the Apply Label button. You are not
forced to label the points in the order J1-001, J1-002, J1-003, etc. You
can label points in whatever test point sequence you like.
•
If you’re through autolabeling test points, touch DONE to return to the
screen. If a test point is highlighted (and
shows a suggested test point label), that label will not be saved. Only
labels not enclosed in question marks (?) are saved. If you touch
CANCEL, you’ll undo the changes you’ve made.
You can automatically label (autolabel) test points using the probe. Once you’ve
created a “base” test point label, you can label test points as quickly as you can touch
them with the probe.
To automatically label test points using the probe, follow these steps:
1.
In the screen, touch MORE, touch LABEL, then
touch CHANGE LABEL. Note: If you don’t know how to get to the screen, see “Getting to the View/Change Wirelist screen”
on page 92.
Touch here...
...then here...
...then here
2.
In the $ screen use the arrow keys to scroll down a line at a
time, or use the scroll bar to page up/down, and highlight a test point you want to
Touch 1 User’s Manual / page 123
Section 6: Editing Wirelists / Automatic Labeling: using the probe
use as the base label. A base label can be created from a default label, or you can
use an existing custom label. (Note: You can use the probe here. It will
automatically locate the first point you touch. On all subsequent touches, it will
automatically label the point you touch.) Once the point is selected, touch
CHANGE LABEL. In our example, we’ll highlight J1-002.
Highlight a point
for a base label...
...then touch here
3.
In the $%&'(''' screen, either leave the
existing custom label as it is, or enter the label you want to use (we’ll enter
RED1), then touch OK. You can use the Upper Case and Lower Case buttons
to control the character case when you’re using the touch screen.
Keep the existing
label or enter a
new base label...
...then touch here
4.
In the
$ screen, the base label is highlighted. To activate
automatic labeling using the probe, touch the probe to the next point you want to
label. Note: When you’re automatically labeling with the probe, the Apply?
Label? button is disabled (grayed out).
Touch 1 User’s Manual / page 124
Section 6: Editing Wirelists / Deleting Custom Labels
5.
Deleting Custom
Labels
In the label.
$ screen, the test point will be displayed with the new
•
If you want to automatically label another test point in the series, touch
the probe to the next test point you want to label.
•
If you’re through automatically labeling test points, touch DONE to
return to the screen. Note: If you touch
CANCEL, you’ll undo the changes you’ve just made.
You may sometimes need to delete a custom label. In our example, we’ll undo the
label BLUE21 in our wirelist. To undo
•
If you’re through undoing custom labels, touch DONE.
Connections (CON)
Editing Connections
(CON)
The connections (CON) list is sometimes referred to as a net list. Each net contains
only the test points connected to each other by wires. Each net has a unique number
(1, 2, 3, etc.), and test points are displayed either as default-labeled test points or as
custom-labeled test points.
Test points are automatically listed their default labels, such as J1-001. J1-002, etc.
Default labels consist of the adapter location, and pin number.
Default test point =
J1-001
Adapter position
Touch 1 User’s Manual / page 125
Pin number
Section 6: Editing Wirelists /
If the default labels are not satisfactory for your work, you can create custom test
point labels, and use them in place of the default labels.
This is an example of the way the net list format is laid out. The first net shows test
points as the default labels. The second net shows test points with the custom labels
PIN 6GNDWIRE assigned to them in place of their default labels. You can see the
labels in the screen, the Single and Continuous
Test error windows, printouts (if you have a a printer on your system), and SPC data
displays. You’ll also see the labels when you use the probe in test and error windows.
Default test point labels
connected to each other
First net
Second net
1 J1-001 J3-015
2 PIN6 GNDWIRE
Custom test point labels
connected to each other
1
15
J1
J3
Pin 6
GndWire
You can add nets to the connections list, add test points to nets, change nets within the
connections list, or delete nets from the connections list. We’ll show you examples of
all three processes here, using a cable learned using the factory default learn settings.
Touch 1 User’s Manual / page 126
Section 6: Editing Wirelists / Adding a Net
Adding a Net
You may need to add a net to a wirelist by hand, either because you’re creating a wirelist from scratch, or because there was an error when the Touch 1 learned a cable. (An
example would be a short or a high resistance error reported on testing because a
connection should be in the wirelist, and isn’t.) To add a new net requires adding at
least two test points. To add net(s) to the connections (CON) list within the wirelist,
follow these steps:
1.
In the screen, touch CON, then touch CHANGE
CON. Note: If you don’t know how to get to the screen, see “Getting to the View/Change Wirelist screen” on page 92.
Touch here...
...then here
2.
In the screen, touch the ADD Net X button to display the screen where test points are selected for the new net. In our example, we
will be creating net 8. (Note: If the test points have been assigned custom labels,
the custom labels will be displayed instead of the default labels.)
Touch here
3.
When you enter the * screen, the DELETE and OK buttons can be disabled (grayed out) because no test points have yet been selected
for the net. To add a test point, select a point from the Available Points:
list. Either use the arrow keys to scroll up and down one line at a time, the scroll
Touch 1 User’s Manual / page 127
Section 6: Editing Wirelists / Adding a Net
bars (to page up/down), or the probe to select the point.Once the point is highlighted, touch the ADD button. In our example, we’ll select J1-014.
Highlight the point to
add to the net...
...then touch here
4.
5.
The newly-added point will move to the Points In Net list. The OK button
is still disabled (grayed out) because only one point has been assigned to the new
net. Repeat step 3 to add additional points.
•
If you’re going to add additional points to your net, repeat step 5.
•
If you’re through adding points and your new net is complete, touch the
OK button. In our example, our new net will contain two points, so
we’ll touch OK..
In the screen, the new net will be highlighted on
entry. The net number in the Add Net X button will have incremented by 1 (to
the number 9 in our case) since an additional net has been added.
•
If you’re going to add more nets, repeat steps 2 through 6 until you’ve
added all the nets you want.
Touch 1 User’s Manual / page 128
Section 6: Editing Wirelists / Changing a Net
•
Changing a Net
If you’re through adding nets, touch OK to return to the screen. Note: If you touch CANCEL, you’ll
undo the changes you’ve made.
You may sometimes need to change nets within a net list. You can either add new
points, or delete existing points. You may need to do this because the cable wasn’t
learned correctly, or because you want to change the wirelist to meet a test specification. To change nets within the connection list in the wirelist, follow these steps:
1.
In the screen, touch CON, then touch CHANGE
CON. Note: If you don’t know how to get to the screen, see “When you want to look at a wirelist, or edit it, you’ll begin in the
View/Change Wirelist screen. First we’ll show you how to get there, then we’ll
give you a detailed look at the screen itself.” on page 92.
Touch here...
...then here
2.
In the
screen, use the arrow keys to scroll a line at
a time, or use the scroll bar to page up/down until the net you want to change is
highlighted. The net number in the CHANGE Net X button will change as you
highlight different nets. Once the net to be changed is highlighted, touch the
CHANGE Net button. In our example, net 3 is selected, so our button displays
CHANGE Net 3. We will change net 3.
Touch here
3.
To complete the changing process, follow steps 3 through 7 in “Adding a Net” on
page 127.
Touch 1 User’s Manual / page 129
Section 6: Editing Wirelists / Deleting a Net
Deleting a Net
You may need to delete a net from the connections list if a wirelist is set up incorrectly. (An example would be when the analyzer reports an open, because a net
appears in the wirelist, that shouldn’t actually be in the wirelist at all.) To delete a net
from the connections (CON) list within the wirelist, follow these steps:
1.
In the
screen, touch CON, then touch CHANGE
CON. Note: If you don’t know how to get to the screen, see “Getting to the View/Change Wirelist screen” on page 92.
Touch here...
...then here
2.
In the screen, use the arrow keys to scroll down a
line at a time, or the scroll bars to page up/down, until the net you want to delete
is highlighted. The number inside the DELETE Net X button will change as you
highlight the different nets. Once the net to be deleted is highlighted, touch the
DELETE Net X button. Note: In some wirelists, the ADD Net X button is disabled (grayed out) because all available test points are used. In our example, net
4 is highlighted, so our button says DELETE Net 4. We will delete net 4.
Touch here
3.
Once the highlighted (selected) net is deleted, the remaining nets are automatically renumbered, and the scroll bar highlights net 1. The net number in the ADD
Net X button will also be decremented, since an additional net position is available. Note: If all the nets have been deleted, the ADD Net X and the Change
Touch 1 User’s Manual / page 130
Section 6: Editing Wirelists / Editing Components (COMP)
Net X buttons will be disabled (grayed out). In our example, net 8 is displayed,
since we deleted net 4 from the original list of eight nets.
•
If you’re going to delete more nets, repeat step 2 until all the nets you
want to delete are gone.
•
If you’re through deleting nets, touch OK to return to the screen. Note: If you touch CANCEL, you’ll
undo the changes you’ve made.
Components (COMP)
Editing Components
(COMP)
When the Touch 1 doesn’t learn components correctly, or a link component should be
changed to a specific component, you’ll need to edit the component information
stored inside the wirelist. The Touch 1 allows you to add, change, and delete components. You can edit resistors, capacitors, diodes, wires, links, twisted pairs, 4-wire
wires, and 4-wire resistors.
Important! In resistors, capacitors, and 4-wire resistors, the Touch 1 learns the component with a default testing tolerance of 10%. After the learn is complete, to match
the tolerance to your testing protocol (to 20% for example), you can change the
testing tolerance over a range from 1 to 99%.
Touch 1 User’s Manual / page 131
Section 6: Editing Wirelists / Adding a Component
Adding a Component
The Touch 1 can test a variety of components included in cables. You can even test
using multiple wirelists (see Section 10).We’ll give you an example of how to add a
component to a wirelist, then move on to give you some specifics regarding each
component type. In our example, we’ll add a resistor. To add a component to a wirelist, follow these steps:
1.
In the screen, touch MORE, then COMP, then
CHANGE COMP.
Touch here...
...then here...
...then here
2.
In the
screen, touch Add.
Touch here
3.
In the screen, touch the button for the component type
you want to add. Note: If the Four-Wire and Four-Wire Resistor buttons are
disabled (grayed out), it’s because there are no four-wire pairs in the wirelist.
Touch the button
for the component
you want to add
4.
In the screen (Add/Change Resistor in our example),
touch From: Note: Whatever component you want to add will display in the
Touch 1 User’s Manual / page 132
Section 6: Editing Wirelists / Adding a Component
screen’s title bar. If the component has a value or a tolerance, defaults will be displayed. In our resistor example, the default component value is 100 ohms, tolerance 10%.
We’ll touch here
5.
In the screen, use the arrow keys to scroll
one line at a time, or the scroll box to page up/down until the first point you want
to connect to is highlighted. Once the point is highlighted, touch OK. Repeat
steps 4 and 5, but select the TO: point instead.
Highlight the point...
...then touch here
6.
In the screen, set the other parameters the component requires.
In our resistor example, we’ll set the component value at 200 ohms. To do this,
we’ll touch Component Value:
Touch here
7.
In the !screen (because we’re adding a resistor to
the wirelist), touch the range button for the component (we’ll use ohm), touch
CLEAR, then enter the component value (we’ll enter 200 ohms). Touch OK to
Touch 1 User’s Manual / page 133
Section 6: Editing Wirelists / Adding a Component
complete the entry. Note: If you touch CANCEL, you’ll undo the changes
you’ve made.
Touch here...
...enter the value...
...then touch here
8.
In the screen (Add/Change Resistor
in our example), once all the parameters have been defined, touch OK to complete the editing process. Note: If you touch CANCEL, you’ll undo the changes
you’ve made.
Touch here
9.
In the screen, the newly-added component will be
displayed. Do one of these things:
•
If you want to add another component, repeat the adding process.
•
If you want to make other component changes in the wirelist, work from
the
screen to do that.
•
To complete the adding process, touch OK.
Touch 1 User’s Manual / page 134
Section 6: Editing Wirelists / Resistor
To undo all the changes you’ve made, touch CANCEL.
•
Resistor
Reasons you might want to edit a resistor in your wirelist:
•
If a resistor has a resistance greater than 100K ohms, the Touch 1 will
learn it as a Link. You’ll have to change the Link into a resistor (see
“Changing a Link Into Another Component” on page 142 for details),
then make sure the value and tolerance for that resistor are set properly
in the Touch 1.
•
The Touch 1 learns resistors with a default testing tolerance setting of
10%. If you want to set some other tolerance level, you’ll have to
change the tolerance setting manually.
Resistor: Range and Limits
Range:
•
1000 Volts: 0.1 Ω to 1 MΩ (± 4% ± 0.1Ω)
•
1500-Volts: 0.1 Ω to 1 MΩ (± 1% ± 0.1Ω).
•
Tolerance: 1 to 99%.
Things to Remember:
•
Resistors test as “short” errors if their resistance is
less than the LV Component Resistance setting,
but more than the LV Connection Resistance setting.
•
The Component Resistance (in the low voltage)
setting should be set at least 20% less than the
lowest resistor value you want to measure.
Touch 1 User’s Manual / page 135
Section 6: Editing Wirelists / Adding/Changing a Resistor
Schematic Symbol
Adding/Changing a
Resistor
Capacitor
Color bands show value and tolerance
To add a resistor component in a wirelist, follow the basic steps in “Adding a Component on page 132. In summary, the steps to add a resistor are:
1.
Enter the screen from the screen by touching More, Comps, then Change Comps.
2.
If you are adding a resistor, touch Add, and in the screen, touch Resistor. If you are changing a resistor, highlight that resistor, then
touch Change.
3.
In the screen enter the pin locations, component
value, and tolerance.
4.
Touch OK to return to the screen.
Reasons you might want to add a capacitor to your wirelist.
•
It is in the device under test.
•
Capacitors with capacitances greater than 5 nanofarads, but less than
400 nanofarads don’t learn properly in the Touch 1. You’ll have to add
these to the wirelist by hand, and be sure their tolerances are set correctly.
•
If you’re creating a wirelist from scratch, you’ll have to add any capacitors you want to test.
•
Change the default test tolerance to 10% to something else.
Capacitor: Range and Limits
Range:
•
Guaranteed testing range: 5 nF to 100 µF (± 10% ±
0.02 nF).
•
Extended testing range (typical, not guaranteed)
10 pF to 5 nF (± 5% ± 20 pF).
•
Testing tolerance: 1 to 99%.
Touch 1 User’s Manual / page 136
Section 6: Editing Wirelists / Adding / Changing a Capacitor
Capacitor: Range and Limits (Continued)
Limits:
•
Capacitance measurements below 5 nF are
relative measurements. Experiment by adding an
offset value until the capacitor tests correctly.
Schematic Symbol
Note: Electrolytic and Tantalum capacitors must be installed
with their orientation in the circuit correct for polarity.
+
Axial
Disk
Adding / Changing a
Capacitor
+
Radial
To add a capacitor component in a wirelist, follow the basic steps in “Adding a Component” on page 132. In summary the steps to add or edit a capacitor are:
1.
Enter the screen from the screen by touching More, Comps, then Change Comps.
2.
If you are adding a capacitor, in the screen, touch
Capacitor. If you are editing a capacitor, highlight the capacitor, then touch
Change.
3.
In the screen enter the pin locations,
component value, and tolerance.
4.
Touch OK to return to the screen.
Touch 1 User’s Manual / page 137
Section 6: Editing Wirelists / Diode
Diode
You handle diodes in your wirelists by using the standard diode component, or a custom component script (if you’ve purchased the Scripting option). See page 144 for
details on custom components..
Diode: Range and Limits
Types:
Tests generic diodes with voltages between 0.3 volts (germaniuim, schottky), and 0.9 volts (power rectifiers).
Diode Type
Germanium
LED
Schottky
Silicon
Zener
Learns
Yes
No
Maybe
Yes
Some
Tests
Yes
Yes
No*
Yes
Yes
* = Use custom components
Limits:
•
Cannot learn LED’s, very leaky diodes, diodes in
series with some resistors, back-to-back diodes.
•
LED’s can be tested, but not learned by the
system. They will not light up when they’re tested,
unless they’re tested using a custom component.
•
Tests LED’s in series with a resistor up to a
maximum of 1000 ohms.
•
Test the reverse breakdown voltage for a zener
using the zener breakdown voltage kit, purchased
separately.
Note: Anodes are listed first when you view or print the wirelist.
Cathode
Schematic Symbol
Color band identifies
cathode
Touch 1 User’s Manual / page 138
Anode
Section 6: Editing Wirelists / The “Test Reversed” option
The “Test Reversed”
option
Adding / changing a
Diode
Changing a Diode
•
If this option is turned on (box is checked), the Touch 1 tests the diode
with current flow in both directions. This is useful for testing single
diodes, silicon, germanium, LED’s, Zeners (above 4 volts), reversed
diode detection (backwards).
•
If this option is turned off (box is unchecked), the Touch 1 tests the
diode with current flow in only one direction, anode to cathode. Used
for testing back-to-back diodes, Zeners (below 4 volts), schottky,
passing very leaky diodes, two-pin bicolor LED’s.
To add a diode component to a wirelist, follow the basic steps in “Adding a Component” on page 132. In summary the steps or add or edit a diode are:
1.
Enter the screen from the screen by touching More, Comps, then Change Comps.
2.
If you are adding a diode, touch Add, then Diode. If you are editing a diode,
highlight the diode, then touch Change.
3.
In the screen, touch either Common or LED
depending upon what kind of diode you’re entering, then enter the connection
points for the anode and cathode. Diodes do not have specified component values
or tolerance levels. If you want to test the diode in reverse direction, make sure
there is a check mark in the Test Reverse box. If there isn’t, touch the box to
make the check mark appear.
4.
Touch OK to return to the screen.
If a diode hasn’t been entered into the wirelist correctly, you’ll want to change it by
hand. To change a diode in a wirelist, follow these steps:
1.
Enter the screen from the screen, then touch Change.
2.
Highlight the diode you want to make changes on.
3.
Touch CHANGE to bring up the screen.
4.
Edit the settings on the diode as necessary. Remember, diodes do not have
specified component values or tolerance levels.
5.
Touch OK to return to the screen.
Touch 1 User’s Manual / page 139
Section 6: Editing Wirelists / Wire
Wire
You can create wire components in your wirelists to test each net to a different
specific resistance threshold other than the LV Connection Resistance setting.
Wire Components: Range and Limits
Range:
•
1000 Volts: 0.1 Ω to 1 MΩ (± 4% ± 0.1Ω)
•
1500-Volts: 0.1 Ω to 1 MΩ (± 1% ± 0.1Ω).
Limits:
•
Adding / changing a
Wire
Wires test as errors if their resistance is between
the LV Connection Resistance setting and the
Component Resistance setting.
To add a Wire component to a wirelist, follow the basic steps in “Adding a Component” on page 132. In summary the steps to add or edit a wire are:
1.
Enter the s
screen from the screen by touching More, Comps, then Change Comps.
2.
If you are adding a wire, touch Add, then Wire. If you are editing a wire, highlight the wire, then touch Change.
3.
In the
screen enter the connection points for the Wire
component, and the component value.Wire components do have specified component thresholds, but do not have specified tolerance levels.
4.
Touch OK to return to the
screen.
Touch 1 User’s Manual / page 140
Section 6: Editing Wirelists / Links
Links
When you don’t want things hipot tested with respect to each other, you can link two
nets together to test them as one net. We’ll explain how to use them.
Links: When to Use Them
Use links in these situations:
•
You can use links with the “High-Capacitance Shield
Allowed” feature on, (see page 69) when you’re testing
cables with multiple shields in a hipot test. Since the High
Capacitance Shield Allowed setting allows one, and only
one high-capacitance shield to pass, you can link the multiple
shields together to form what the Touch 1 sees as a single
shield. Once you’ve done this, the analyzer will allow the
grouped high-capacitance shields it sees to pass if the High
Cap. feature is on. Note: This doesn’t apply hipot voltage
across the shields from shield A to shield B.
•
Use links when you’re performing a hipot test for multiple
nets.
1
3
4
2
Link goes between 1 and 2
•
Before the link between 1 and 2
was built, the wirelist would have
contained net 1,3 and net 2,4.
When we link points 1 and 2, the
result is net 1234. We’ve linked
two nets to form one. Hipot
voltage will not be applied across
the link.
Use links when the cable you’re testing has components connected together back-to-back, or in networks if the Touch 1
cannot properly test them .
Works for large-value resistors, unpowered
active IC components, IC’s like optocouplers
Link
Touch 1 User’s Manual / page 141
Section 6: Editing Wirelists / How Links affect the test
How Links affect the
test
Links effectively “switch out” or “drop” the LV Isolation Resistance threshold for the
link. This means that the link is tested to the Component Resistance Threshold rather
than to the LVIR threshold.
LVIR Threshold
Comp > Threshold
The link will be tested against the
component threshold rather than
the LVIR threshold. The LVIR
threshold is “switched out” for the
link only.
Conn. Res. Threshold
Zero ohms
Resistors with resistances between 100K ohms and 2 Megohm learn as links.
Before you test cables, change these links into Resistor components.
Adding a Link
To add a link component to a wirelist, follow the basic steps in “Adding a Component” on page 132. In summary the steps are:
1.
Enter the screen from the screen, then touch Add.
2.
In the
3.
In the + screen enter the connection points between
which the Link is to be built.
4.
screen, touch Link.
•
You may choose to select one point from one net, and another point
from another net between which to build the link. This will link the two
nets together
•
You may choose to select one point at the beginning of a group of
components, and a second point at the end of a group of components
between which to build the link
•
Note: Link components do not have specified component values.
Touch OK to return to the screen.
Note: Use the connection list within the wirelist to determine the From and To points
you should assign to the link.
Changing a Link Into
Another Component
If your wirelist contains a link that should be a resistor, change the link. The basic
idea in making the change, is to manually create the new component in the same
position as the link, then delete the link. Remember: Resistors with resistances
between 100K ohms and 1 Megohm learn as links. Before you test cables, you should
change these links into resistors.
To change a link into a another component, follow these steps:
Touch 1 User’s Manual / page 142
Section 6: Editing Wirelists / Twisted Pairs
Twisted Pairs
1.
Add the component you’re going to replace the link with, to the wirelist. Be
sure to connect the new component to the same test points as the link is
connected to. If you don’t know how to add a component see “Editing
Components (COMP)” on page 131.
2.
Check to make sure that the test points for the new component match the test
points for the link. If they don’t match, correct them.
3.
Delete the link component. If you don’t know how to delete a component, see
“Deleting a Component” on page 148.
Because it may take a long time to learn a cable with twisted pairs, learn the cable
without twisted pair enabled, then add the twisted pair component later.
Twisted Pairs: Ranges and Limits
Ranges:
Adding / changing a
Twisted Pair
•
Minimum cable length: 6 feet
•
Minimum number of wires in cable: 3
To add a Twisted Pair to a wirelist, follow the basic steps in “Adding a Component”
on page 132. In summary the steps to add or edit a twisted pair are:
1.
Enter the screen from the screen by touching More, Comps, then Change Comps.
2.
If you are adding a twisted pair, touch Add, then Twisted Pair. If you are editing
a twisted pair, highlight the twisted pair, then touch Change.
3.
In the screen enter the connection points for
the Twisted Pair component. (Remember, Twisted Pairs do not have specified
component values, or specified tolerance levels.)
4.
Touch OK to return to the screen.
Touch 1 User’s Manual / page 143
Section 6: Editing Wirelists / 4-Wire Wires and Components
4-Wire Wires and
Components
We’ll discuss four-wire technique in detail beginning in Section 11. Four-wire technique allows you to extend the connection resistance testing capability of the Touch 1
down to 0.001 ohms, and to eliminate resistance introduced by your test fixturing.
Before you can do four-wire testing, you’ll have to create 4-wire pairs and components in the wirelist. We’ll show you how to do that in the section on 4-wire (see
Section 11). We’ll give you the ranges here.
Four-Wire Wires and Components
4-Wire Wire Testing Range:
•
1000 Volts: 0.001 Ω to 1 MΩ (± 4% ± 0.001Ω)
•
1500-Volts: 0.001 Ω to 1 MΩ (± 2% ± 0.001Ω).
4-Wire Resistor Testing Range:
•
1000 Volts: 0.001 Ω to 1 MΩ (± 4% ± 0.1Ω)
•
1500-Volts: 0.0011 Ω to 1 MΩ (± 2% ± 0.1Ω).
•
Tolerance:
1-99%
Custom Component
To use component scripting in the Touch 1, you must have purchased and installed the
scripting option. Component scripts (filename suffix.cmp) control the testing of a
wide range of components (switches, bicolor LED’s, etc.) for you. You can create
your own script, or use one of the default scripts we provide. For component scripting
to work, do two things:
•
Attach the component script to the wirelist.
•
Select the components within the script you want to test.
Once the component script has been attached to the wirelist, scriptable components
are handled in much the same way as ordinary components are.
Touch 1 User’s Manual / page 144
Section 6: Editing Wirelists / Attaching the component script to the wirelist
Attaching the
component script to
the wirelist
To attach a component wirelist to your wirelist, do these things:
1.
In the screen, touch More, then Comp, then
Script, then Change Script.
Touch here...
then here...
and finally here
2.
In the screen, touch Custom Component Script.
Touch here
3.
In the), screen, use the arrows to highlight the
script you want to use, then touch Select.
Highlight the script...
...then touch here
Touch 1 User’s Manual / page 145
Section 6: Editing Wirelists / Adding a component from a component script
4.
In the screen, touch OK. The component script (filename
suffix .cmp) is now attached to the wirelist.
Touch here
Adding a component
from a component
script
To add a custom component to the wirelist, do these things:
1.
In the
screen, touch More, then Comp, then
Change Comp.
Touch here...
...then here...
...then here
2.
In the screen, touch Add.
Touch here
Touch 1 User’s Manual / page 146
Section 6: Editing Wirelists / Adding a component from a component script
3.
In the screen, touch Custom. Note: If the Scripting
feature had not been purchased, the Custom button would have been inactive
(grayed out).
Touch here
4.
In the screen, use the arrows to highlight the custom component you want to use, then touch Select. (In our example, we’ll select
an LED we’re going to light for the test.) See the Scripting on the Touch 1 manual for a listing of parameter types. Fill in the values for each parameter, then
touch OK to save the parameters.
Highlight the component...
...then touch here
5.
In the screen, touch OK.
Touch here
Touch 1 User’s Manual / page 147
Section 6: Editing Wirelists / Deleting a Component
Deleting a Component
You can delete any component from your wirelist easily. To delete a component from
the wirelist, follow these steps:
1.
In the
screen, touch MORE, then COMP, then
CHANGE COMP. Note: If you don’t know how to get to the screen, see “Getting to the View/Change Wirelist screen”
on page 92.
Touch here...
...then here...
then here...
2.
In the screen, use the arrow keys to scroll one at a
time, or the scroll bars to page up/down until the component you want to delete is
highlighted. Once the component is highlighted, touch Delete. In our example,
we’ll delete the diode.
Scroll to the component
to delete...
...then touch here
3.
In the screen, the component is no longer
displayed.
•
If you’re through deleting components, touch OK to return to the
screen. Note: If you touch CANCEL,
Touch 1 User’s Manual / page 148
Section 6: Editing Wirelists / Editing Statistical Process Control (SPC) Settings
you’ll undo the changes you’ve made.
•
If you’re going to delete other components, repeat step 2.
Statistical Process Control (SPC)
Editing Statistical
Process Control (SPC)
Settings
The Touch 1 is capable of collecting Statistical Process Control (SPC) data for you.
You’ll need the SPC package available from Cirris Systems. Contact us at 1-801-9734600 for details or to order.
We’ll show you how to turn on SPC data gathering here. For more details on the SPC
feature in the Touch 1, see the SPC package manual.
Turn On SPC Data
Gathering
To turn on SPC data gathering in the current wirelist, follow these steps:
1.
In the screen, touch MORE, then SPC, then
CHANGE SPC. Note: If you don’t know how to get to the screen, see “Getting to the View/Change Wirelist screen” on page 92.
Touch here...
...then here...
...then here
2.
In the screen, touch ON, then touch the buttons for the data you
want to collect. Once you’ve selected the data to collect, touch OK. In our
example, we’ll turn on both Measured Values and Error Text.
Touch here...
...select the data...
...then touch here
Touch 1 User’s Manual / page 149
Section 6: Editing Wirelists / Types of scripts
Scripts
Types of scripts
Uses for scripts
Scripting is a feature that you purchase separately. It allows you to extend the functionality of the Touch 1 by using script files. There are three types of script files:
•
Test event script files (.lua)These files perform special functions at
the start of a test run, at the start of a specific test, or at the end of a test.
•
Component script files (.cmp) These files let you create your own component types, such as new LED, Bicolor LED, Hipot Net, Schottky,
Message, Gas Fuse, Momentary Switch, and other components supplied
with Scripting.
•
Report script files (.rpt).These files can replace standard automatic
printing, Test Summary, Wirelist, and Error printouts.
Some examples of situations where you might use scripts are as follows:
•
Using barcodes to record serial numbers on cables you test.
•
Using scripts to display prompt messages to your analyzer’s operator.
•
Customizing reports.
•
Print using Serial and Parallel printers simultaneously.
•
Hipot test different nets using different voltages.
•
Control external devices such as relays.
•
Test devices such as switches, gas fuses, and zener diodes.
•
Verify the color and lighting capability of LED’s.
•
Testing SCSI Terminators (requires SCSI Testing Kit, sold separately).
•
Record company-specific information as SPC data (requires SPCLink
sold separately).
•
Create complex tests that are easy for line workers to use.
Touch 1 User’s Manual / page 150
Section 6: Editing Wirelists / Attaching / Unattaching Script settings
Attaching /
Unattaching Script
settings
After scripting has been enabled, to attach or unattach test event or component scripts,
follow these steps:
1.
In the screen, touch More, then Scripts, then
Change Scripts.
Touch here...
...then here...
then here
2.
In the
screen, select a custom component or test event script
which will run with the current wirelist, then touch OK. For a custom component
script, a custom component must be added to the wirelist.
Touch a button...
...then touch here
Note: Custom report scripts are global to the system, and do not have to be attached
to a wirelist. They are set up through System Options, Report. See page 274 for
details.
For more details on scripting, see the Scripting on the Touch 1 manual.
Verifying a Wirelist
Once the Touch 1 has learned a wirelist, and you’ve edited it as necessary, you should
verify that it is correct, and complete before you test cables. To verify the wirelist, do
this:
•
In the screen, use the arrow keys to
scroll one line at a time, or the scroll bars to page up/down through the
wirelist. Using the build documentation for your cable, verify that all
parameter settings, connections, and components are correctly and com-
Touch 1 User’s Manual / page 151
Section 6: Editing Wirelists / Attaching / Unattaching Script settings
pletely shown.
Verify the wirelist
•
If the wirelist is not correct, you’ll have to edit the incorrect sections.
•
If the wirelist is correct, touch OK. You’re ready to test cables! Note: If
you touch CANCEL, you’ll undo the changes you’ve made.
Printing a Wirelist
If you have a printer connected to your Touch 1, you can print out the wirelist
currently stored in the analyzer’s memory. If you don’t know how to set up a printer,
see “How to Connect a Printer” on page 17. The wirelist printout can be the standard
one, or a custom script you have created. See Reports on page 274. To print out the
wirelist, do this:
•
In the screen, touch PRINT.
PRINT
Touch here
•
If your wirelist contains Child wirelists, a message box will prompt
you, asking if you want to print only the Parent wirelist, or both the Parent and Child wirelists.
•
If your wirelist printout displays the wrong date, or date format, see
“Date / Time” on page 270 for setup instructions.
•
If your wirelist printout displays “Last Learned,” or no cable
description, see page 157 for setup.
•
If your wirelist printout shows no adapter descriptions, see “Adding/
Changing an Adapter Description in the Wirelist” on page 98 for details.
Touch 1 User’s Manual / page 152
Section 6: Editing Wirelists / Using a Template
Creating a Wirelist from Scratch
Using a Template
In some testing situations, you may have to create a wirelist from scratch. The easiest,
way to do this is to use an existing wirelist as a template, then edit that wirelist until
you have the final wirelist you need for testing.
We’ll work through an example to show you how this is done. We’ll begin by learning
a Sample Cable using the factory default learn settings, then modify the wirelist using
manual editing to create the wirelist we want.
To create a wirelist from scratch, do these things:
1.
Create an “empty” wirelist by learning a cable using the factory default settings,
one connection, and one adapter. For details, see “Learning a Sample Cable” on
page 77.
2.
Save the wirelist file as template.wir. For details, see “Saving a Wirelist” on
page 157.
3.
Retrieve the template wirelist file when needed. See “Loading (Retrieving) a
Wirelist on page 163 for details.
4.
Edit the wirelist to fit your test specifications.
5.
Save the edited wirelist with a new filename, so that template.wir is not
overwritten.
Touch 1 User’s Manual / page 153
Section 6: Editing Wirelists / Using a Template
Touch 1 User’s Manual / page 154
Section 7:
Managing
Wirelists
Overview of Wirelist Management
Location Example
A location is the computer pathway that leads to a stored wirelist. You’ll need to
retrieve stored wirelists from their storage locations when you prepare to test cables
using them. We recommend grouping similar wirelists in different locations.
Let’s look at the pathway to a stored wirelist called DEMO1.WIR in the Retrieve
Wirelist window.
Location shown here
A wirelist called DEMO1.WIR is stored on the A drive (a floppy disk)
in a location called BLOCK1.
Using Fast Find
When you’re dealing with many stored wirelists, it can be hard to find a given wirelist
with a simple manual search of the list of files. To make things easier, we’ve included
a Fast Find function in the Touch 1. You can search for a wirelist either by Filename
or by Cable Description, in the present location using Fast Find.
Lets search for the same DEMO1.WIR using the Fast Find Function. We’ll search by
Filename. Follow these steps:
1.
In the Test
Setup screen, touch Retrieve Wirelist.
Touch here
Touch 1 User’s Manual / page 155
Section 7: Managing Wirelists / Using Fast Find
2.
In the Retrieve Wirelist screen, touch Fast Find.
Touch here
3.
In the Fast Find Wirelist screen (since we’re going to search by filename),
we’ll touch Filename.
Touch here
4.
In the Enter Filename To
Find screen, we’ll enter VANTEST, then touch
Find.
Enter the filename...
...then touch here
Touch 1 User’s Manual / page 156
Section 7: Managing Wirelists / Find Next
5.
Find Next
In the Retrieve Wirelist screen, the wirelist is now located and highlighted.
The Find Next function lets you search for other wirelists which have all or part of
the same text you just searched on.
Saving a Wirelist
When you save a wirelist, you must tell the Touch 1 what to name the wirelist, how to
describe the wirelist, and where to store the wirelist.
Filename
Cable Description
Location
How to Save a Wirelist
Each saved wirelist must have its own filename. In the Touch 1, filenames must be in
DOS style, with not more than 8 characters.
The cable description you enter appears in the header of any printouts you make
when you’re testing cables using this wirelist file. The description can include up to
30 characters.
The location is the path that leads to the wirelist file in the Touch 1. It represents
where the wirelist file is stored.
We’ll show you an example of how to save a wirelist that’s already in the Touch 1’s
memory. To do this, follow these steps:
1.
In the Test
Setup screen, touch Save Wirelist.
Touch here
Touch 1 User’s Manual / page 157
Section 7: Managing Wirelists / How to Save a Wirelist
2.
In the Save Wirelist screen, touch Filename. Note: If you are saving the last
learned wirelist, the filename will default to untitled.wir, and the cable
description will have a default of Last Learned.
Touch here
3.
In the Name Wirelist File screen, enter the filename (we’ll enter
SCHEME1), then touch OK.
Enter the filename...
...then touch here
4.
In the
Save Wirelist screen, touch Cable Description:.
Touch here
Touch 1 User’s Manual / page 158
Section 7: Managing Wirelists / How to Save a Wirelist
5.
In the Name Cable Description screen, enter the description (we’ll enter
BOX-TO-BOX), then touch OK.
Enter the description...
...then touch here
6.
In the Save
Wirelist screen, touch Location.
Touch here
7.
In the Name Location screen, use the arrow keys to scroll a line at a time, or
the scroll bars to scroll a screen at a time until the location where you want to
store the wirelist is highlighted (we’ll store ours on the I drive in the folder called
BOBO), then touch OK.
Highlight the location...
...then touch here
Touch 1 User’s Manual / page 159
Section 7: Managing Wirelists / Adding a location
8.
In the Save
touch OK.
Wirelist screen (with all newly-entered information displayed)
Touch here
Adding a location
If you need to add a new location for storing wirelists, follow these steps:
1.
In the Save
Wirelist screen, touch Location:.
Touch here
2.
In the Name Location screen, use the arrow keys to scroll a line at a time, or
scroll bars to scroll a screen at a time, until the place where you want to add a
new location is highlighted. Once it is highlighted, touch Open Loc. Once the
Loc: box contains the correct location, touch Add to create a new location..
Scroll to confirm the correct
location...
...then touch here
Touch 1 User’s Manual / page 160
Section 7: Managing Wirelists / Adding a location
3.
In the Name New Location screen, enter the new location name, then touch
OK. (In our example, we’ll enter STORE6.)
Enter the new
location name...
...then touch here
4.
In the Name
Location screen, touch OK.
Touch here
5.
In the Save Wirelist screen, you’ll see the newly-entered location displayed in
the Location field. To save the wirelist into this new location, touch Save.
Touch here
Touch 1 User’s Manual / page 161
Section 7: Managing Wirelists / Using the “Open Location” button
Using the “Open
Location” button
When you need to see what is stored inside a location, the Open Location button
lets you do that. You can also open a location so that you can store a wirelist into it,
retrieve a wirelist from it, or delete a wirelist from it. We’ll work through an example
to show you how the button is used. We want to retrieve a wirelist from the Touch 1’s
internal hard disk drive (drive C).
1.
In the Test
Setup screen, touch Retrieve Wirelist.
Touch here
2.
In the Retrieve Wirelist screen, use the arrow keys to scroll down until the C
drive is highlighted. Touch Open Location to open the C drive directory.
Touch here
3.
In the C drive directory, we see a list of what is stored inside. To retrieve the
wirelist, highlight it, then touch Retrieve.
Touch 1 User’s Manual / page 162
Section 7: Managing Wirelists / Using the “Open Location” button
Loading (Retrieving) a Wirelist
If you already have a wirelist stored, you’ll need to load it into the Touch 1 before you
can use it to test cables. Note: If you are doing multi-pass testing, you only need to
retrieve the Parent wirelist. The Child wirelists will load automatically. We’ll work
through an example to show you how to do this.
In our example, we’ll be loading a wirelist called DEMO1.WIR from the Touch 1’s
hard disk drive. Note: A location can contain more than one wirelist. The name of
each wirelist must be unique.
To load a wirelist into the Touch 1, follow these steps:
1.
In the Test Setup screen, touch Retrieve Wirelist. Note: To get to the Test
Setup screen, touch Test Setup in the Main Menu screen.
Touch here
2.
In the Retrieve Wirelist screen, use the arrow keys to scroll down one line at
a time, or the scroll bars to page up/down until the location you want to retrieve a
wirelist from is highlighted. In our example, we’ll highlight for the system’s A drive (the floppy disk drive). When the correct location is highlighted,
touch OPEN LOC. Note: The Retrieve button is disabled (grayed out) because
we haven’t chosen a wirelist to retrieve yet.
Highlight the drive...
...then touch here
3.
In the Retrieve Wirelist screen’s Loc field, we now see the A drive, location KEEPER1. We’ll scroll down the list until wirelist SCRATCH4.WIR is
highlighted. Now that we’ve selected a wirelist, the RETRIEVE button is
Touch 1 User’s Manual / page 163
Section 7: Managing Wirelists / Using the “Open Location” button
enabled (colored normally). We’ll touch RETRIEVE to load the wirelist into the
Touch 1. This will take us back to the Test Setup screen.
Highlight the wirelist...
...then touch here
4.
In the Test Setup screen, you’ll see the signature and description for the
newly-loaded wirelist displayed within the View & Change Wirelist button.
The wirelist is now loaded in the Touch 1. Note: If you are doing multi-pass testing, retrieve the Parent wirelist, and the Child wirelists will load automatically.
Touch 1 User’s Manual / page 164
Section 7: Managing Wirelists / Procedure
Copying Files and Creating a New Location
In this section, we’ll show you how to copy a group of files from the Touch 1’s A
drive (the floppy disk drive) to a selected storage location we will create on the C
drive (the Touch 1’s internal hard disk drive). Though we’ll be working from a floppy
disk to the hard disk drive in our example, you use the same general procedure for any
type of storage location (floppy disk, hard disk drive, network). Note: Files available
for copying include Wirelist files (.wir), and Script files (.cmp, .lua, .rpt).
Procedure
1.
In the System Setup screen, touch Disk Utilities.
Touch here
2.
In the Disk
Utilities screen, touch Copy Files.
Touch here
3.
In the Copy
Files screen, touch From.
Touch here
Touch 1 User’s Manual / page 165
Section 7: Managing Wirelists / Procedure
4.
In the Select ‘From’ Loc and Files screen, use the arrows to scroll to the
location you want to open, then touch Open Loc. In our example, we’ll open the
A drive.
Highlight the location to open...
...then touch here
5.
In the Select ‘From’ Loc and Files screen, highlight the file(s) you want to
copy, then touch Mark. You can mark all of the files showing by touching Mark
All. In our example, we’ll mark REDTAG.WIR. When the file(s) are marked,
touch OK.
Highlight file(s) to copy...
...then touch here
Once files are marked, touch here
6.
In the Copy Wirelist(s) &
Script(s) screen, touch To.
Touch here
Touch 1 User’s Manual / page 166
Section 7: Managing Wirelists / Procedure
7.
In the Select ‘To’ Location screen, highlight the location you want to copy
the files to (we’ll highlight the Touch 1’s hard disk drive, the C drive), then touch
Open Loc.
Highlight the location...
...then touch here
8.
In the Select ‘To’ Location screen, highlight the location you want to store the
file(s) in, then touch Open Loc.
Highlight the location...
...then touch here
9.
In the Select
‘To’ Location screen touch Add.
Touch here
Touch 1 User’s Manual / page 167
Section 7: Managing Wirelists / Procedure
10. In the Name New Location screen, enter the name of your new location
(we’ll enter STORTAG), then touch OK.
Enter the new location name...
...then touch here
11. In the Copy
Files screen, touch Copy.
Touch here
12. The Touch 1 will display a copying screen...
Touch 1 User’s Manual / page 168
Section 7: Managing Wirelists / Copying files to another Touch 1
13. When the copying process is complete, you’ll see this screen. Touch Cancel to
return to the Disk Utilities screen.
Touch here
Copying files to
another Touch 1
You can use the same procedure we’ve just given, to move a set of files from one
Touch 1 to another. Simply copy the file(s) you want to move onto floppy disk(s),
carry the disk(s) to the second Touch 1, then copy the file(s) from the floppy disk(s)
onto the second Touch 1’s hard disk drive.
If your Touch 1 analyzers use a common network drive where they can “talk” to each
other, you can copy files directly to a common network drive that both analyzers can
reach.
Where in the software
to add new locations
Archiving Files
There are several places you can create a new location. They are:
•
Copying wirelist and script files.
•
Selecting an SPC file location if the SPC package was purchased.
•
Saving a wirelist file.
Create a storage location which you’ll designate as your archive. It’s a good idea to
put this location either on the Touch 1’s internal hard disk drive (the C drive), or on a
network drive which the Touch 1 can reach. Use this location only for storing archival
copies of your files. To create your archive storage location and copy the files to your
archive location, follow the general procedure given in “Copying Files and Creating a
New Location” beginning on page 165.
Touch 1 User’s Manual / page 169
Section 7: Managing Wirelists / Deleting a File
Deleting Wirelists, Scripts, Locations
Deleting a File
To delete a wirelist or script file, follow these steps:
1.
In the System Setup screen, touch Disk Utilities. Note: To get to the
System Setup screen, touch System Setup in the Main Menu screen.
Touch here
2.
In the
Disk Utilities screen, touch Delete Wirelist(s) & Location(s).
Touch here
3.
In the Delete File(s) and Location(s) screen check the location box, making sure it’s showing the location containing the wirelist you want to delete. If it
is not, use the arrow keys to scroll down one line at a time, or the scroll bars to
page up/down until the location you want to delete files from is highlighted.
When the correct location is highlighted, touch Open Loc.Use the arrow keys to
Touch 1 User’s Manual / page 170
Section 7: Managing Wirelists / Deleting a Location
scroll one line at a time, or the scroll bars to page up/down until the file you want
to delete is highlighted, then touch Delete.
Navigate to the
correct location...
...highlight the file....
...then touch here
4.
In the Delete File(s)
shown. Touch Cancel.
and Location(s) screen, the deleted file is no longer
Touch here
Deleting a Location
Important Note! When you delete a location, you delete all of the wirelists and
script files which that location contains. To delete a location, follow these steps:
1.
In the Delete File(s) & Location(s) screen, use the arrow keys to scroll one
line at a time, or the scroll bars to page up/down until the location where the
wirelist you want to delete is highlighted, then touch Open Loc. If the location is
a sublocation, you must open that location using Open Loc.
Highlight the drive...
...then touch here
Touch 1 User’s Manual / page 171
Section 7: Managing Wirelists / Deleting a Location
2.
In the Delete File(s) & Locations screen, use the arrow keys or scroll bars
to highlight the location you want to delete. Once you’ve done that, touch Delete
to delete the location.
Highlight the location...
...then touch here
3.
Delete Entire Location screen, touch OK to delete the location, or
Cancel to cancel the deletion process. Remember, if you touch OK, the entire
In the
location (with all the files it contains) will be deleted.
Touch here
4.
In the Delete File(s) & Location(s) screen, the newly-deleted location is
no longer shown. Touch Cancel.
Touch here
Touch 1 User’s Manual / page 172
Section 8:
Testing
Cables
Overview
Each cable must pass the low-voltage tests (and the component tests if the cable contains components) before the hipot test can begin. A cable that doesn’t pass lowvoltage tests (and component tests if applicable) will not be hipot tested.
Starting a Test
If the “Test Cable”
button is disabled
Adapter installation
errors
Test Cable button (in the Main Menu screen), or the Test button (in the
Test Setup screen) can be disabled (grayed out) for one of the following reasons:
The
•
The Touch 1 has the security feature turned on, and no password has
been entered. You will have to enter a password to enable the Test
Cable button. See section 12, “Entering a Password” (page 251) for
details.
•
The wirelist you are going to use for testing has the scripting feature
turned on, and the script did not load successfully, or there was an error
while the script was running. See the Scripting on the Touch 1 Manual
for details.
If the adapters installed on the Touch 1 do not match the adapters listed in the wirelist,
you will get an adapter error. The possible causes for the error are:
•
The wrong adapter(s) are installed for the wirelist you are currently
using.
•
The correct adapters are installed but in the wrong “J” position(s) on the
Touch 1.
•
The adapter(s) is/are loose, or are not plugged in all the way.
•
The correct adapters have been installed, but the wirelist you have
loaded is wrong.
•
If the adapters installed on the Touch 1 cannot handle the hipot voltage
setting in the wirelist, you will get an adapter voltage error.
Touch 1 User’s Manual / page 173
Section 8: Testing Cables / Adapter installation errors
To correct either of these errors, follow these steps:
1.
In the Adapter Errors screen or the Adapter Voltage
touch OK to display the incorrectly installed adapter(s).
Note: This error is only
applicable to 1500 volt
analyzers.
2.
Error screen,
Touch here
In the Required Adapters screen, the adapter(s) marked with the > symbol
are the incorrectly installed adapters. Install the correct adapter(s), then touch OK
to start testing.
Install the correct adapters...
...then touch here
Note: To identify the correct adapters, match the adapter signature in the
window, with the label on the adapter. You can also search the adapter
list under System Options to match part numbers and descriptions.
Touch 1 User’s Manual / page 174
Section 8: Testing Cables /
Setting the Test Mode
The test mode setting determines whether the Touch 1 will run the battery of tests
you’ve requested once, then stop testing (Single Test), or run the requested tests, then
return to continuous low-voltage testing looking for intermittent faults in the cable
(Continuous Test). To set the test mode, follow these steps:
1.
In the Test
Setup screen, touch Test Control.
Touch here
2.
In the Test Control screen, touch the Test Mode: button you want to use
(we’ll touch Continuous Test). To complete the testing process, touch OK.
Note: If you touch Cancel, you’ll undo the changes you’ve made.
Choose the test mode...
...then touch here
3.
You can begin a test by touching Test in the
Touch 1 User’s Manual / page 175
Test Setup screen.
Section 8: Testing Cables /
Starting a Test
Automatically
If you set the system for Continuous Test, it will run the full battery of tests you’ve
set up, then return to continuous low-voltage testing to look for intermittent failures in
the cable. You can set the test mode to Continuous Test in the Test Control
screen. For details, see Section 8 (page 175), “Setting the Test Mode.”
You can begin the test either by touching Test in the Test Setup screen, or by
touching Test Cable in the Main Menu screen. We’ll begin from the Main
Menu screen. Note: If the Test, or Test Cable button is disabled, there could be a
problem with scripting. Either the script did not load correctly, or there was a problem
when running the script. See the Scripting on the Touch 1 Manual for details.
1.
In the Main Menu screen, touch Test Cable.
Touch here
2.
In the Continuous Test screen, connect the cable you want to test, to the
Touch 1. The testing process will begin as soon as the cable is connected.
Connect the cable...
...the test will begin
3.
In the Continuous
Test screen, touch Start Hipot to start hipot testing
Touch here
Touch 1 User’s Manual / page 176
Section 8: Testing Cables / Starting a Test Using the Push-to-Start Feature
4.
Starting a Test Using
the Push-to-Start
Feature
After the test runs (if the cable passes the test), the Continuous Test screen
reappears as shown here. The cable is now being tested for intermittent errors.
Intermittently are defined by cables that test good, then bad, then good. To begin
another test, disconnect the cable, then connect the next cable you want to test.
The test will begin as soon as the cable is connected.
You can set the Touch 1 to wait until you start each test using a push-to-start button, to
begin testing. You set the Test Mode to Single Test in the Test Control
screen. For details see section 8, “Setting the Test Mode” on page 178. You can begin
either from the Test Setup screen (touch TEST), or from the Main Menu
screen. We’ll begin from the Main Menu screen. Note: If the Test or Test Cable
button is disabled, there could be a problem with scripting. Either the script didn’t
load, or there was a problem when the script was run. See the Scripting on the Touch
1 Manual for details.
1.
In the
Main Menu screen, touch Test Cable.
Touch here
Touch 1 User’s Manual / page 177
Section 8: Testing Cables / Using an External “Start” switch
2.
Connect the cable you wish to test. In the Single Test screen, touch START
TEST and the continuity test will begin. Note: The Start Test button will be
disabled until a cable is connected.
Touch here
3.
If the cable passes the low-voltage tests, this screen will appear. Touch Start
Hipot to begin the hipot test.
Touch here
4.
Using an External
“Start” switch
If the cable passes the test, the Single Test screen will reappear as shown here.
To begin another test, disconnect the cable you’ve just tested, and connect the
next cable you want to test. Note: If you want to test the same cable again, press
the New Test button.
You can control the Touch 1 using an external “Start Test” switch wired to the correct
digital I/O port on the touch 1. For details see Section 13 (page 256) on digital input/
output. Once you’ve wired the external switch, you’ll begin each test by closing the
external switch rather than touching the Start Test or New Test buttons on the touch
screen.
Touch 1 User’s Manual / page 178
Section 8: Testing Cables / Manual vs. Automatic Hipot Testing
Manual vs. Automatic
Hipot Testing
You can set the Touch 1 to wait for you to touch a Start Hipot switch before it begins
each hipot test (manual hipot testing), or to begin each hipot test automatically. This
option is set up in the Test Control screen. To set the Touch 1 to use the Start
Hipot button to begin each hipot test, follow these steps:
1.
In the Test Control screen, touch Manual, then touch OK to save the change.
Note: If you touch CANCEL, you’ll undo the change you’ve made. You can
begin a text by touching TEST in the Test Setup screen.
Touch here...
...then here
Setting Up For
Automatic Hipot
Testing
You can set the Touch 1 to begin each hipot test automatically, after a cable passes the
low-voltage and component-related tests. You can set the system either to begin the
hipot test immediately after the cable passes the LV and component tests, or to wait
for a preset period of time before beginning the hipot test. In our example, we’ll set
the system for automatic hipot testing, with a two-second delay before the hipot test
begins.
To set the Touch 1 for automatic hipot testing, follow these steps:
1.
In the Test Control screen, touch Automatic to set the system for automatic
hipot testing, then touch the Delay Before Automatic Hipot Test Starts button
to bring up the Enter Hipot Delay Time entry screen.
Touch here
...then here
Touch 1 User’s Manual / page 179
Section 8: Testing Cables / High-Speed Hipot Testing
2.
In the Enter Hipot Delay Time screen, touch CLEAR, then enter the delay
time (we’ll enter 2 seconds). When you’ve entered the delay time, touch OK.
Note: If you touch CANCEL, you’ll undo the changes you’ve made.
Touch here...
...then enter delay...
...then touch here
3.
In the Test Control screen, touch OK. Note: If you touch CANCEL, you’ll
undo the changes you’ve made. You can begin a test by touching TEST in the
Test Setup screen.
Touch here
High-Speed Hipot
Testing
The main reason that high-speed hipot testing exists is to speed up hipot testing.
When the high-speed option is ON, the analyzer eliminates test redundancy by testing
groups of nets, so that all nets are tested against all other nets. If the analyzer detects a
failure, it tests each net one at a time only in the group of nets that have the failure.
When the option is OFF, the analyzer tests each net, one at a time, against all other
nets.
•
Advantages: This speeds up the hipot test, is fastest when looking for
repeatable failures, works best for low-capacitance cables, and is faster
for testing cables that have low background leakage.
•
Disadvantages: High-speed testing will not pinpoint a single, nonrepeatable hipot failure as soon as it happens. You cannot use highspeed testing if your customer specifies that each net be tested one at a
time. There is no speed advantage if the cables you’re testing are highly
capacitive, or for cables with lots of insulation leakage
Touch 1 User’s Manual / page 180
Section 8: Testing Cables / Using a Hipot Safety Switch
Using a Hipot Safety
Switch
You may want to wire an external switch to the Touch 1 to control hipot testing. This
switch will act as a “dead man” switch on the hipot test. If the external switch is open,
hipot testing will not proceed. If the external switch is closed, hipot testing will
proceed. The hipot test will stop if the switch opens at any time during the hipot test.
You can control the Touch 1 in this way by wiring a switch to the appropriate position
on the Touch 1’s Digital I/O port. For details on using the port see Section 13
(page 255) on digital input/output.
Stopping a Test
There may be times when you’ll want to stop a test in mid-test. There are some things
you should know:
•
If the Touch 1 is set for Single Test, the test will stop automatically at
the end of the test sequence.
•
If the Touch 1 is set for Continuous Test, you can stop the test by simply disconnecting the cable being tested.
•
If you’re controlling hipot testing using an external switch, hipot testing
will stop if the external switch is opened.
•
If you touch the Cancel button during the hipot test (see the drawing
below) the hipot test will stop, and the high voltage will be turned off.
Touch here to
abort the hipot
test
Order of Tests
The Touch 1 performs tests on cables in a specific order. As shown in the flow
diagram “Work Flow in the Touch 1” on page 3, the order is:
1.
Low-Voltage (continuity) tests
2.
Components tests
3.
High-Voltage tests (hipot)
4.
Intermittents (continuity test only)
Medical Caution!
The Touch 1 is designed to be a safe device. However, it must generate high voltages
for hipot testing. The high-voltage energy limit is 10 millijoules. Current is limited to
Touch 1 User’s Manual / page 181
Section 8: Testing Cables / Using a Hipot Safety Switch
6 milliamps for a maximum of 10 milliseconds. No one who is wearing a cardiac
pacemaker, an insulin pump, or any other electronically-controlled medical device
should do hipot testing using the Cirris Touch 1 Cable Analyzer.
Touch 1 User’s Manual / page 182
Section 9:
Interpreting
Cable Testing
Errors
Interpreting an Error Window
Here’s an example of an Error Window, with some explanations you should find
helpful:
If you probe a point
it will display
First error is
displayed here, press
Display Error(s)
button for all errors
To print errors (with
a printer connected)
touch here
To use Fault Location or
display all errors, touch here
Finding Errors Using the Probe
The hand-held test probe will work in the Single and Continuous Test windows. It
will also function when you see error windows in either Single or Continuous Test.
There are a couple of things you should remember:
•
When you probe a point, the entire net (up to 11 test points) that
contains the test point you have probed will be displayed.
•
The first test point listed in the display is not always the test point you
probed.
Interpreting Error Tones
When the Touch 1 detects errors (if you have the volume set) it will beep in specific
ways:
•
Open = a single beep.
•
Short = double beeps.
•
Miswires = triple beeps.
•
High voltage errors = +triple beeps.
For instructions on how to set the speaker volume, see page 23.
Touch 1 User’s Manual / page 183
Section 9: Interpreting Cable Testing Errors /
Fault Location
The Touch 1 can find the location of opens and shorts under most testing conditions.
There are two ways to use fault location:
•
Locate All will find the location of all errors, and underline the test
point(s) closest to the error. Some miswires will have all test points
underlined. Locate All can take a long time to run.
•
Locate Marked will find the location of the highlighted error. Asterisks
(*) will indicate the test point(s) located closest to the error. If the error
is a short, both points will have an asterisk. Per cent signs (%) indicate
where along the wire the fault is located. Note: When returning to the
error window or printing the location of the faults, the asterisk(s) will be
replaced by underline(s).
Example:
In this example, we’ll assume that the Touch 1 has been set in Single Test mode, and
that a simple cable (one that contains only wires and connectors) has been tested. The
cable has failed its low voltage test, with only one error showing.
To locate the fault:
1.
Test Cable Error screen, touch Display Error(s). The Single Test Error(s) screen will appear. Because the cable has displayed only
In the Single
one error, only that error is highlighted. If there had been more than one error
found, all errors would be displayed.
Touch here to locate fault
2.
Single Test Error(s) screen, touch Locate Marked. The Which
End Fault Location screen will be displayed.
In the
Touch here
Touch 1 User’s Manual / page 184
Section 9: Interpreting Cable Testing Errors /
3.
This shows the Which
End Fault Location screen.
The asterisk (*) indicates that the fault location was done on a very short wire. 98 per
cent of the wire was in the J3-002 group, 2 per cent was in the J1-001 and J1-002
groups.
We could have also located all the errors by touching Locate All in the Single Test
Errors screen. If we’d done this, you’d find the points within the fault underlined.
The points closest to the fault are underlined for capacitance less than 25 picofarads.
Printing Test Errors
If you have a printer connected to your Touch 1, your can print error data in several
ways. There are two kinds of reporting. Standard reporting (which ships with all analyzers), and Custom reporting, which is part of the optional Scripting package. Custom report scripts can replace the automatic bad report and error printouts. A test
event script can also be used to create a custom report. The ways to print errors are:
•
In the Single
Test and Continuous Test error windows.
•
Automatically after each test, if the “Automatic Print After Test” bad
report option is turned on. This can be a standard or a custom report.
•
In the display error windows after doing a Locate All. See “Fault Location” on page 184 for details.
•
From a custom report created in a test event script if you are using the
Scripting package. Note: You can also print errors from a spreadsheet
or a statistics package if you are using the SPC package.
Continuity Errors
There are several types of continuity errors. They are:
•
Open Errors
•
Short Errors
•
High-Resistance Errors
•
Miswire Errors.
Touch 1 User’s Manual / page 185
Section 9: Interpreting Cable Testing Errors / OPEN
•
Intermittent errors
Important! Component and High Voltage errors will not be reported until the cable
passes the continuity test.
OPEN
Possible causes are:
•
A wire connection that is supposed to be present is actually missing.
•
A wire connection has more resistance than the LV Insulation
Resistance setting. Remember, any detected resistance greater than this
setting is ignored as a connection. Note: This applies when you’re
testing wires only.
•
A connection has more resistance than the Component Resistance
setting. Remember, this resistance setting separates the lowest resistance of a component from a simple wire. Note: This applies when
you’re testing components.
Example: In this case, an open exists between pin J1-001 and pin J1-015.
SHORT
This is a continuity error. Possible causes are:
•
A connection exists that is not supposed to exist. This connection has
less resistance than the LV Insulation Resistance setting.
•
A resistor is present which has less resistance than the Component
Resistance setting.
•
Test points are missing from the net list.
•
Component resistance(s) are set below the Connection Resistance
setting.
Example: In this case, a short exists between the line that runs from J1-001 and J1-002, and the
line that runs from J2-003 and J2-004.
MISWIRE
. Possible cause is:
•
Some combination of opens and shorts (open circuits and short circuits).
Example: In this case, J1-001 should be connected to J2-015. Instead, J1-001 is shorted to J2-
Touch 1 User’s Manual / page 186
Section 9: Interpreting Cable Testing Errors / INTERMITTENT
004 and J2-005.
INTERMITTENT
HIGH RESISTANCE
You’ll see these errors only during continuity testing. Intermittent errors are detected
when you’ve set the Touch 1 to test continuously, and the analyzer has completed a
test cycle. Note: If hipot testing is turned on, the hipot test must be completed before
intermittent errors will be detected. The cable tests as good, then as bad, then as good
again. Some errors that can be reported as intermittent errors include opens, shorts,
high resistance errors, and missing components.
This error indicates that a connection has too much resistance. Possible causes are:
•
The resistance of a wire or a contact is greater than the Connection
Resistance setting, but less than the LV Insulation Resistance setting.
•
The Component test is not turned on (enabled during a learn).
•
The Connection Resistance setting is too low.
Example: ! ""#"
$"% & ' #(
)!% % In this case, a resistance of 2000 ohms was measured between J1-001 and J2-001.
This resistance is greater than the Connection Resistance setting.
4-WIRE KELVIN PAIR
ERROR
This is a setup error. Possible causes are:
•
No connection (continuity) existed for the 4-wire pair.
Example: "
'*+ " ""#"
% # !# !%
In this case, points J1-001 and J1-015 are supposed to be connected. They are not
actually connected.
INVALID 4-WIRE
KELVIN PAIR
These are setup errors during a four-wire learn. The possible cause is:
•
The Touch 1 has found a 4-wire pair (a Kelvin pair) that isn’t properly
structured. When the Touch 1 learns 4-wire fixturing, it compares the
fixturing with valid 4-wire pairs for the given adapter. If the Touch 1
finds that the fixturing does not match the adapter, it reports the error as
an invalid 4-wire Kelvin pair.
•
Cable was not disconnected from the fixturing during the Learn process.
Example 1 (more than two points):
,-) '-, Touch 1 User’s Manual / page 187
Section 9: Interpreting Cable Testing Errors /
.
.)
/ The fixturing has three points connected. A valid Kelvin pair can only have two
points. In this example, J1-014 and J1-018 should make up the Kelvin pair. To fix the
problem, disconnect J1-022.
Example 2 (two type 1 points):
Note: A type 1 point can be a either a net list or a hidden point. It depends on the
adapter type.
+*% 0" 1*+ 2"
3# 2# 4 % 45
" 62 2# &
We know that two type 1 points have been used for a four-wire pair. A pair must consist of a type 1 point and a type 2 point.
Example 3 (two type 2 points):
Note: A type 1 can be either a net list or hidden point. It depends on the adapter type.
+*% 0" 1*+ 2"
3# 2# % /
" 62 2# &
We know that two type 2 points have been used for a four-wire pair. A pair must
consist of a type 1 point and a type 2 point.
Component Errors
There are a number of different errors that occur when you test components. We’ll
discuss each of them in some detail here.
BAD RESISTOR
This is a component error. Possible causes are:
•
Wrong value resistor.
•
Resistor is present, but outside of acceptable tolerance.
•
A resistor is missing that should be present, or a resistor that is present
has a resistance greater than 1 Megohm.
•
The tolerance setting may be unreasonably tight for the resistor you’re
using.
Touch 1 User’s Manual / page 188
Section 9: Interpreting Cable Testing Errors / BAD CAPACITOR
Examples: 7%
#" 30
% 82!% +*$ 9& #( :
$"% +*$ ;& #(
7% #" 30
% 5
#" ( 82!% +*$ #( <
$"% +*$ & = #(
In the first error, a 47.0 ohm resistor was supposed to be present. The Touch 1
detected a resistor with a value of 49.5 ohm. In the second error, a resistor is missing
between J1-005 and J1-006.
BAD CAPACITOR
This is a component error. Possible causes are:
•
Wrong value capacitor.
•
A capacitor is present that is out of tolerance.
•
A capacitor that is supposed to be present is not actually present.
•
Your tolerance setting may be unreasonably tight for the capacitor
you’re using.
Examples: 7%
.2!#" 30
% 82!% +*$ &9 $> :
$"% +*$ & $>
7% .2!#" 30
% .2!#" ( 82!% +*$ > :
$"% +*$ ;2>
There are two errors here. In the first case, a capacitor with a capacitance of 4.7
microfarads should have been present. Instead, the Touch 1 detected a capacitor with
a capacitance of 10.0 microfarads. In the second case, there is a capacitor missing
between J1-004 and J1-005.
DIODE Errors
These are component errors. Possible causes are:
•
Reversed. A diode is present, but is installed backwards. The anode and
cathode are swapped.
•
Missing. A diode that is open (has an open contact) is present.
•
A diode that is supposed to be present is missing entirely.
•
Leaky. A leaky diode is present.
Touch 1 User’s Manual / page 189
Section 9: Interpreting Cable Testing Errors / NOT TWISTED
Examples: ,)
%#% 30
% = %#% 30
% 9
-'? %#% 30
/ % In this case, the diode between J1-001 and J2-001 is installed backwards. A diode that
is supposed to be present between J2-021 and J2-007 is missing entirely. A leaky
diode is present between J1-008 and J1-010. Note: Diodes connected to the wrong
test points are often reported as shorts by the Touch 1.
NOT TWISTED
This is a component test error. The possible cause is:
•
Example:
Two wires that are supposed to be twisted together are not twisted
together. Note: If the twisted pair has been learned, and is part of the net
list, missing or shorted twisted pairs will first be reported as a continuity
error (opens or shorts).
" !# !% #
% # 0%
In this case, the wire running between J1-001 and J1-003, and the wire running
between J2-001 and J2-003 are supposed to be twisted together.
BAD WIRE
This is a component test error. Possible causes are:
•
The measured net or wire resistance is greater than the Wire Component
setting that specifies the maximum allowable net resistance.
•
Component is missing.
Example: 7%
" 30
% 0" ( 82!% +*$ & #(
$"% +*$ & = #(
In this case, the maximum resistance allowed (the Wire Component setting) is 5.00
ohm. The Touch 1 detected no wire component.
BAD 4-WIRE
This is a component error. Possible causes are:
•
The detected resistance of the device under test is greater than the
threshold you specified when you created the 4-Wire Component.
•
Wire component is missing.
Examples: 7%
" 30
Touch 1 User’s Manual / page 190
Section 9: Interpreting Cable Testing Errors / BAD 4-WIRE RESISTOR
% 82!% +*$ & #(
$"% +*$ &/ #(
7% " 30
% " ( 82!% +*$& #(
$"% +*$ & = #(
There are two errors here. In the first case, you’ve set the maximum allowable resistance in the 4-Wire wire at less than 0.05 ohm. The Touch 1 measured the resistance
between J1-001 and J2-001 as 0.82 ohm. Since the measured value exceeded the
allowable resistance, the analyzer reported the error. In the second case, there is a
wire missing between J1-005 and J2-005.
BAD 4-WIRE
RESISTOR
This is a component error. Possible causes are:
•
The 4-Wire resistor is out of tolerance, or was of the wrong value as
specified by the 4-Wire Resistor component setting.
•
Component is missing.
Examples: 7%
#" 30
% 82!% +*$ & #( :
$"% +*$ & #(&
7% "#" 30
% #" ( 82!% +*$ #(
$"% +*$ & = #(
There are two errors here. In the first case, the 4-Wire Resistor the Touch 1 detected
has a resistance far greater than the 1.00 ohm (tolerance 1%) you’ve specified in the
4-Wire Resistor component setting. In the second error, there is a 4-wire resistor missing between J1-005 and J2-005.
Bad Custom Component Errors
See the Scripting on the Touch 1 manual for information on custom component errors
detected when using a component script.
High Voltage Errors
DIELECTRIC FAILURE
When the Touch 1 applied high voltage to the cable, it detected current spikes that
indicated failure of the insulation (the dielectric).
Possible causes are:
•
The insulation on a wire (or wires) has been damaged when a connector
was crimped into place.
Touch 1 User’s Manual / page 191
Section 9: Interpreting Cable Testing Errors / HIGH VOLTAGE LEAKAGE
•
Contaminants such as oil film or dirt are present. Excessive moisture
has mobilized these contaminants, causing them to become electrically
conductive.
•
The Hipot Voltage setting is too high for the cable or the fixture you’re
testing
•
Arcing, sparking, or excessive corona is present.
Example: )*!"!
>*$" .
)*!"! >*$" 9
In the first error, the point failed to an unknown place NC. In the second error, all the
points in that net failed the test.
2mA Touch 1
machine limit
Dielectric Strength Test Failure
(Dielectric Failure)
Dielectric failure during hipot duration
Max. Current
Setting 1.5 mA
OK
Note: OK spike not
an error since Max.
Current not reached
Test ends when current spikes from
insulation breakdown exceed Max.
Current setting during Hipot Duration
0.1 mA
Dielectric Strength Test
“Good For”
Time
Soak
Time
Hipot
Duration
Charge
Time
Zero Current
Insulation Resistance Test
- OK spikes are considered to be corona or other dielectric absorption
phenomena.
This error occurs when:
- V > 50 volts, I > 1mA during voltage ramp-up
- Current > DWV Max. Current after voltage ramp-up
- Current jumps300 uA over 0.3 msec
HIGH VOLTAGE
LEAKAGE
This is a high voltage error. It indicates that insulating materials have failed to provide
adequate electrical isolation between wires or test points that are not supposed to be
connected together. Possible causes are:
•
The insulation on the cable you’re testing has less resistance than the
HV Insulation Resistance setting. In other words, the insulation resistance threshold is set too high for the insulating material under test.
•
There is damaged insulation or contamination on the cable or fixture
Touch 1 User’s Manual / page 192
Section 9: Interpreting Cable Testing Errors / OVERCURRENT
you’re testing. The contamination forms an electrically conductive path
that is not supposed to exist and the error occurs.
•
You’re testing in high (excessive) relative humidity conditions, or
corona is present.
•
The insulating material under test has been incorrectly specified.
Insulation Resistance Test Failure
Leakage Error
2mA Touch 1
machine limit
Max. Current
Setting 1.5 mA
Error occurs when
current spikes above
IR threshold during
“Good For” interval
V/R
IR Threshold
Dielectric Strength Test
“Good For”
Time
Soak
Time
Hipot
Duration
Charge
Time
Zero Current
Insulation Resistance Test
Note: IR Threshold is set by resistance
Example:
,#* -1 .
;
(1500-Volt Only)
,#* -1 &; #(
The 1500-volt version will display the measured value.
OVERCURRENT
•
It reports the resistance of that net to all other nets.
•
When not measured, the leakage resistance is below 3M ohms.
There is too much current flowing in the circuit under test when this error occurs.
Possible causes are:
•
There is too much current leakage (or insufficient insulation resistance)
Touch 1 User’s Manual / page 193
Section 9: Interpreting Cable Testing Errors / OVERCURRENT
when the Touch 1 begins a hipot test.
•
Contaminants present in/on the cable have become electrically conductive at high voltage.
•
The cable you’re testing has a shield with too much capacitance for the
hipot test. Note: You may be able to solve this problem by using a link
for multiple shields, using a custom component for hipot nets, or by
enabling . *% **#0%. This will allow a cable that
has one net that is too capacitive to pass hipot testing.
•
A component in the assembly tied to the points in the overcurrent error
is not in the wirelist and should be added.
Example: +"!$""
Error during charge time
2mA Touch 1
machine limit
Test ends when 1.5mA current shutdown limit is reached
Max. Current
Setting 1.5 mA
A
B
0.1 mA
Dielectric Strength Test
Insulation Resistance Test
A: Current > 1.5ma, Vout (at that instant) < 50 volts
B: Charge delivered > 35 u Coulomb
Touch 1 User’s Manual / page 194
“Good For”
Time
Soak
Time
Hipot
Duration
Charge
Time
Zero Current
Section 9: Interpreting Cable Testing Errors / USER-ABORTED HIPOT
USER-ABORTED
HIPOT
You’ve aborted the hipot test in mid-test if this error occurs. The error will display the
last point tested. Possible causes are:
•
The 7
hipot button was pressed during the hipot test.
•
The hipot safety switch was released (opened) before the hipot test was
completed.
Example:
@" 3#"% 2# .
;/
In this case, the last point tested was J9-008 before the hipot test was aborted.
Touch 1 User’s Manual / page 195
Section 9: Interpreting Cable Testing Errors / USER-ABORTED HIPOT
Touch 1 User’s Manual / page 196
Section 10:
Multiple
Wirelists
Overview
Some cables will require more than one wirelist to test them completely. A good
example of this kind of cable is one that contains a three-position switch. The wirelist
for the cable will be different depending upon which of the three positions the switch
is set in for a given test.To test this cable with the switch in each of its three possible
positions, a total of three different wirelists will be needed. We will refer to each of
these wirelists as a “Child” wirelist. All three of these Child wirelists will be contained within what we refer to as a “Parent” wirelist. A Parent wirelist lets you make
multiple-pass tests on a single assembly using a child wirelist for each pass. Each
child wirelist can test a unique setup, such as open and closed positions of relays and
switches. Setup is both easy and fast, because Child wirelists automatically load with
the Parents so you only have to retrieve one wirelist for the entire test session. Note:
Testing with multiple wirelists is available only in Single Test mode. The Continuous
Test mode is overridden.
Parent W irelist
C hild 1
C hild 2
C hild 3
In this example, the Parent wirelist contains three individual Child wirelists.
Any number of Child Wirelists may be contained within a Parent wirelist.
Uses for multiple
wirelists
Parent/Child wirelist
rules
The Touch 1’s ability to test cables using multiple wirelists gives it a great deal of
versatility. Some of the reasons you might want to test using multiple wirelists are:
•
Testing switches. (Use a different child wirelist for each switch
position.)
•
You can use different test settings for each individual child wirelist.
•
Fault location is available on each individual child wirelist.
•
You can perform individual hipot tests on child wirelists to speed up
testing.
•
You can retry testing on individual child wirelists.
•
Using multiple wirelists, you can have multiple devices connected to the
Touch 1 at one time.
Testing with multiple wirelists is available only in Single Test mode. The Continuous
Test mode is overridden when you are testing Child wirelists.
•
SPC data is collected for each individual child wirelist if SPC is turned
Touch 1 User’s Manual / page 197
Section 10: Multiple Wirelists /
on. The Parent wirelist does not collect SPC data for individual child
wirelists. Only summary data is collected on the child wirelists. Measured values for each child wirelist will be reported as good (1), or bad
(0). Actual measured values will be collected in the individual child
wirelists. Errors will be shown as Child wirelist component error.
Detailed error information is contained in the individual Child wirelist
information.
Parent wirelists follow these rules:
•
Parent wirelists contain no low voltage or high voltage settings.
•
Parent wirelists contain no components other than Child wirelists. Child
wirelists are the only components allowed inside Parent wirelists.
•
The parameter signature for a Parent wirelist is all zeros.
•
Parent wirelists contain no four-wire information.
•
Cable counts are based on the Parent wirelist. An aborted Child wirelist
test will be counted as an overall failure.
•
SPC data collected for the Parent wirelist contains only summary information for the Child wirelists (1 for good, 0 for bad as measured data).
•
If you turn a Parent wirelist into a standard wirelist, the Child wirelists
are not deleted.
Child wirelists follow these rules:
Parent/Child wirelist
learn
•
Child wirelists are the only components allowed inside Parent wirelists.
•
When the analyzer searches for point labels, it searches Child wirelists
first, then Parent wirelists, and finally default point labels.
•
CRC signatures are based on the contents of Child wirelists. The CRC
signature is different for each Child wirelist.The CRC signature is
updated if the Child wirelist’s Time/Date stamp is more recent than the
Time/Date stamp of the Parent wirelist, or if the Parent wirelist has been
edited.
•
Child wirelists can contain Child wirelist components within them, but
it is not recommended.
Before you can test a device using multiple wirelists, you must create a Parent wirelist
and all of the necessary Child wirelists within that Parent wirelist.
To create multiple wirelists during a learn, follow these steps:
1.
Install the adapters and the device onto the Touch 1. If you are testing a switch,
put the switch into the first position.
2.
Turn on learning a Child wirelist component by:
Touch 1 User’s Manual / page 198
Section 10: Multiple Wirelists / Parent/Child wirelist learn
3.
Setup screen, touch Learn Sample
•
In the Test
•
In the Learn
•
In the View/Change Learn
Comp, then Change Comp.
Setup screen, touch Change.
Settings screen, touch More, then
In the Change Learn Components screen, touch Child Wirelists. A check
mark should appear in the Child Wirelists box. Then touch OK.
Touch here...
...then here
4.
In the View/Change Learn Settings screen, touch OK. In the Learn
Setup screen, touch Learn to begin learning each Child wirelist, then touch
Learn Child 1 in the Child Wirelist Learn screen.
Touch here
Touch 1 User’s Manual / page 199
Section 10: Multiple Wirelists / Parent/Child wirelist learn
5.
In the Name Multiple Wirelists screen, touch Common Location to select
a location for all the wirelists within the group.
Touch here
6.
In the Name Location screen, use the arrows to highlight the location where
the multiple wirelists will be stored. If you want to create a new location, touch
Add, and enter the name. When the correct location is highlighted, touch OK.
Highlight the
location...
..then touch here
7.
In the Name Multiple Wirelists screen, touch Parent Filename to give the
wirelist that contains all the Child wirelists a name. Touch Description to enter a
description for the entire group. Press Continue to begin naming the child wirelists. Note: Child wirelists cannot be named until the Parent wirelist has both a
name and a description.
Touch here
Touch 1 User’s Manual / page 200
Section 10: Multiple Wirelists / Parent/Child wirelist learn
8.
In the Name Multiple Wirelists screen, use the child wirelist name that
was automatically generated, or enter a new name.The filenames of Child wirelists are derived from the names of their Parent wirelists. The analyzer will take
the entered name of the Parent wirelist, and append 001 for the first Child wirelist. For each additional Child wirelist, the number will increment by 1. Note:
You can change these automatically generated names.
Touch Test Message to enter text that will be displayed when the Child wirelist
is tested. For example, the position of the switch or the way the device is connected could be entered. When you’re through, touch Continue.
Touch here
9.
In the Learn Child Setup screen, touch Learn to learn the connections in the
Child wirelist.
Touch here to
change the
individual
parameters
Touch here
Touch 1 User’s Manual / page 201
Section 10: Multiple Wirelists / Parent/Child wirelist learn
10. In the Child Wirelist Overview screen, scroll through the wirelist to verify
that it is correct. Touch Discard if the wirelist is wrong, and you want to re-learn
it, then go back to step 8. Touch Save to save the Child wirelist and learn another
wirelist or finish the learning process..
Check the
information...
...then touch here
11. The analyzer has now learned the first Child wirelist. Touch Learn Child to learn
another Child wirelist by repeating steps 8 through 10 until you have learned all
the Child wirelists needed to test your cable. In our example, we have three Child
wirelists; one for each of the three positions of the switch. When the last Child
wirelist has been learned, touch Done in the Child Wirelist Learn screen.
Touch here
12. In the Multiple Learn Complete screen, touch OK. The Parent wirelist and
all the child wirelists have been learned and put into the common location for
testing.
Touch here
Touch 1 User’s Manual / page 202
Section 10: Multiple Wirelists / Multi-Pass Testing
13. Save the Parent wirelist, and the Child wirelists will automatically be saved in the
same location.
Multi-Pass Testing
To test a cable with a Parent and Child wirelists, follow these steps:
1.
Retrieve the Parent wirelist (the Child wirelists will load automatically). See
page 163 for instructions on how to do this.
2.
Connect the cable to the analyzer, then touch Start Test. Note: Multiple wirelist
testing works only in Single Test mode.
3.
In the Test Child Wirelist screen, connect the device to test, and follow the
test message. In our example, the switch is put into position 1. Touch Start Test.
Connect the
cable...
...follow the test
message...
...then touch here
4.
The analyzer will test the device using the information contained in the first
Child wirelist, then bring up the Test Child Wirelist screen if the test passed.
Follow the test message for the next Child wirelist, then touch Start Test.
Follow the test
message...
...then touch here
5.
Continue testing by pressing Start Test for each child wirelist. After all the Child
wirelists have been tested, the summary screen is displayed. In the summary
screen, the overall count is for the Parent and Child wirelists as one complete
Touch 1 User’s Manual / page 203
Section 10: Multiple Wirelists / Child Wirelist Failure During a Test
group. If any of the Child wirelist tests fail, the test group will be counted as a
failure.
Child Wirelist Failure
During a Test
Create Multi-Pass
(Parent) wirelist from a
regular wirelist
If there in an error when testing a Child wirelist, a Child Wirelist Cable Error
screen is displayed. Do one of these things:
•
Touch Continue to count the current Child wirelist test as a failure, and
test the next Child wirelist. If any Child wirelist fails, the entire test is
counted as a failure.
•
Touch Display Error(s) & Fault Location to find the error so you can
correct it, then re-run the test.
•
Touch Retry to perform the test again.
•
Touch Print Err(s) to get a printout of the errors.
•
Use the probe to display test points when you are finding errors.
To create a Parent wirelist from a regular wirelist, do these things:
1.
Remove connections in the Parent wirelist by setting the advanced low voltage to
“No LV Settings”. (See page 112 for instructions.)
2.
Turn off the hipot voltage. (See page 43 for instructions.)
3.
Remove any components you have previously defined (best practice).
4.
Add the Child wirelist components.
Touch 1 User’s Manual / page 204
Section 11:
Four-Wire
Testing
What four-wire testing
is used for
The four-wire testing technique is used to accurately measure very low resistances;
typically 10 ohms or less. It extends the resistance measuring range of the Touch 1
down to the milliohm (0.001 ohm) range, and eliminates most or all of the fixturing
resistance in your test setup.
Why not just use twowire tests?
Most resistance measurements commonly made in electronics are in the range of 10
ohms or more. When you simply place the test leads of an ohmmeter across a resistance to measure that resistance, you are doing a two-wire test.
The main problem with the two-wire method is that when you are measuring small
resistances (10 ohms or less), the resistance of the test leads themselves becomes significant. Typical lead resistances range from about 0.01Ω to 1Ω. This means that
accurate two-wire resistance measurements below 10Ω are hard to get.
When you are measuring resistances using your Touch 1, the resistance of your test
fixturing can have the same effect on the measurements that the test leads of an
ohmmeter would have. If you are measuring very small resistances using the twowire method, the resistance(s) of your fixturing will greatly decrease the accuracy of
your resistance measurements. If you need to measure very small resistances with
your Touch 1, consider using the four-wire method.
How is resistance
measured?
You usually measure resistance by forcing a known amount of electrical current
(called the test current) through the resistance you want to measure. The meter then
measures the voltage drop across that resistance, and computes the resistance value
using Ohm’s Law.
R esista nce=
Two-wire test
Vo lta ge
C u rre nt
In a two-wire resistance measurement, the test current ( I ) is forced through the
resistance you are measuring by way of the same set of test leads you are using to
make the measurement. The meter measures the voltage drop across the resistance,
then computes the result. This means that the measured resistance value includes the
resistance you are trying to measure, plus the resistances of the test leads from the
ohmmeter. As long as the lead resistances are not a significant part of the total
resistance, these results are acceptable.
VM = Voltage measured by meter
RLead
HI
I
VM
VM
LO
Test Current (I)
Lead
Resistances
Rs
VR = Voltage across resistor
Measured
Resistance
RLead
Touch 1 User’s Manual / page 205
VM
= RS + (2 x RLead)
Measured Resistance =
I
VR
= RS
Actual Resistance =
I
Section 11: Four-Wire Testing / Four-wire test
Four-wire test
In a four-wire test (sometimes called the Kelvin method), the test current I is forced
through the resistance you are measuring by way of one set of test leads. The voltage
drop across the resistance you are measuring is measured using a second set of test
leads, called the sense leads. The amount of resistance in the sense leads is deliberately kept very high. Even though a very small amount of current (usually in the pA
range) may flow through the sense leads, it is generally so small that it can safely be
ignored.
Because the voltage drop across the sense leads is negligible, the voltage VM measured by the meter is essentially the same as the voltage VR across the resistance RS.
This means that the resistance value can be determined much more accurately here,
than it can be using the two-wire method. Note: You should connect the voltage
sensing leads as closely as possible to the resistance you are testing to avoid including
the effect of the test leads in the resistance measurement.
RLead
Force HI
RLead
Sense HI
I
VM
VM
Sense LO
Force LO
Force Loop (I)
Sense Loop (pA)
Lead
Resistances
VR
RS
Measured
Resistance
RLead
RLead
VM = Voltage measured by meter
VR = Voltage across resistor
Because sense current is negligible, VM = VR
and measured resistance =
VM
I
=
VR
I
Use the four-wire measurement technique under these circumstances:
Terminology we will
use
•
When you need to extend the measuring range of the Touch1 down to
0.001 ohms. (Don’t use it to measure resistances of more than about 10
ohms.)
•
When you wish to eliminate (“null out”) the resistance(s) of your
fixturing from a resistance test.
We will use a number of terms over and over as we discuss four-wire testing using
your Touch 1. We’ll explain each of them carefully, then we’ll show you how to set
up four-wire tests on your Touch 1 analyzer.
Force loop: In four-wire testing, we actually create two different testing “loops.” In
one of these (the force loop) the test current flows from the source, passes through the
resistance we are measuring (where a voltage drop occurs), then back to the source.
Since this loop provides a known amount of current to flow through the resistance we
are measuring, we call it the force loop.
Touch 1 User’s Manual / page 206
Section 11: Four-Wire Testing / Terminology we will use
Sense loop: In four-wire testing, we actually create two different testing “loops.” In
one of these, only a very small amount of current is allowed to flow. The resistance in
this loop is deliberately kept so high that little or none of the test current (provided by
way of the force loop) can flow through it. This loop is used to make the critical voltage drop measurement (across the resistance being measured) from which the resistance will be computed using Ohm’s Law. Because this loop measures (“senses”) the
critical voltage drop across the resistance being measured in much the same way as
the leads of a voltmeter would, we call it the sense loop.
Type 1 and Type 2 points: To explain what Type 1 (T1) and Type 2 (T2) points are,
let’s use a simple electrical circuit:
T1 point
T2 point
I
Current flow
In the circuit shown here, current flows into the resistance through a Type 1 (T1)
point, moves through the resistance, then flows away from the resistance through a
Type 2 (T2) point. To work properly, each of the two loops (force and sense) in a
four-wire setup must contain a T1 and a T2 point. If they don’t, current will not have
a complete path through which to flow.
Kelvin point (KP): The four-wire measuring method is sometimes called the Kelvin
method. The points at which the force and sense loops each connect to the resistance
to be measured are referred to as Kelvin points (KP’s). In other words, a Kelvin point
is a junction between the force loop and the sense loop in a 4-wire test. In the diagram
below, T1 and T2 are Kelvin points. There must be a Kelvin point at each end of the
resistance you want to measure. Let’s illustrate this:
= sense current flow (pA)
Volts
= force current flow
S ense loop
T1
T2
I
F orce loop
Net List points: These are the two points (a T1 and a T2) at which the force loop connects to the resistance to be measured. These points appear in the wirelist you use for
testing. Because they do appear in the wirelist, we call them Net List points.
Touch 1 User’s Manual / page 207
Section 11: Four-Wire Testing / Using Cirris adapters
Hidden points: These are the two points (a T1 and a T2) at which the sense loop connects to the resistance to be measured. These points do not appear in your wirelist, so
we call them hidden points. They act like the tips of the test leads on a meter.
Four-wire pairs: At each end of the resistance you want to measure using the fourwire technique, you must create a four-wire pair. Each four-wire pair consists of a
Net List point and a Hidden point. Remember, the force loop connects to the
resistance using Net List (F) points. The sense loop connects to the resistance using
Hidden (S) points.) Let’s illustrate this:
4-Wire Pair
4-Wire Pair
F1
F2
Cable Under Test
KP
S1
KP
S2
Each 4-Wire test requires two 4-Wire pairs. Each 4-Wire pair consists
of a force (F) test point, and a sense (S) test point.
Fixture: A fixture is any assembly which connects the Touch 1 to the cable you are
going to test. Fixtures are made up of paired wires which connect the Touch 1 to the
device you are going to test (sometimes referred to as the Device Under Test, or
DUT).
Using Cirris adapters
The Touch 1 can be set up to do four-wire testing using any Cirris adapter to connect
a test feature to the analyzer. However, to make things easier, we recommend that you
use AHED adapters (AHED-10 to AHED-64) if your hipot tests will be done at less
than 500 volts. Use our VME adapters (AVM2-32, AVM1-64, AVM2-64) for hipot
testing at higher voltages.
These adapters have simple, regular pin (point) counting patterns that are easy to
work with. The Touch 1 can automatically identify T1 and T2 pins for you.
Setting up 4-Wire
tests: Method 1
There are two basic methods for setting up four-wire tests on the Touch 1. We’ll discuss each of them.
In Method 1, there are three major stages:
•
First, the Touch 1 learns the four-wire pairs in the fixturing you have
installed on the analyzer.
•
Second, the Touch 1 learns the wiring pattern of the cable you are going
to test.
•
Third, you create 4-Wire components for each test.
Touch 1 User’s Manual / page 208
Section 11: Four-Wire Testing / Setting up 4-Wire tests: Method 1
Enable/Disable 4-Wire fixture learning: Before the Touch 1 can learn four-wire
pairs, you must turn on 4-Wire fixture learning. To turn on (enable) or turn off (disable) 4-Wire fixture learning, follow these steps:
Setup screen touch Learn Sample.
1.
In the Test
2.
In the Learn
3.
In the View/Change Learn Settings screen, touch More, then 4-Wire,
then Change 4-Wire. The Change Learn Four-Wire screen will appear.
4.
In the Change Learn Four-Wire screen, touch Learn Four-Wire Fixturing, so that a check mark appears in the checkbox. Then touch OK.
Setup screen, touch Change.
Touch here...
...then here
5.
In the View/Change
Learn Settings screen, touch OK.
Touch here
Stage 1: Learn the 4-Wire pairs in your fixturing: To learn the 4-Wire pairs in
your fixturing, follow these steps:
1.
In the Learn Setup screen, touch Learn. The Four-Wire Fixture Learn
screen will appear.
2.
In the Four-Wire Fixture Learn screen, follow the prompt. Be sure your
fixturing is connected to the Touch 1, but that no cable is connected to the fixtur-
Touch 1 User’s Manual / page 209
Section 11: Four-Wire Testing / Setting up 4-Wire tests: Method 1
ing yet. Then touch OK. The Touch 1 will learn the 4-wire pairs in your
fixturing.
Connect your four-wire fixturing
only...
...then touch here
Stage 2: Learn the wiring pattern of the kind of cable you want to test: To
learn the wiring pattern of the kind of cable you want to test, follow these steps:
1.
In the Start Learn screen, connect a Sample Cable of the kind you want to test
to your fixturing. Once the Sample Cable is connected, touch OK.
Connect a Sample Cable...
...then touch here
2.
In the Learn Complete screen, disconnect the Sample Cable, then touch OK.
Disconnect the Sample Cable...
...then touch here
Touch 1 User’s Manual / page 210
Section 11: Four-Wire Testing / Setting up 4-Wire tests: Method 1
Stage 3: Create 4-Wire components for each test: To create 4-wire components for each test, follow these steps:
1.
In the
4-Wire Setup Warning screen, touch Add 4-Wire Comp.
Touch here
2.
In the View/Change
Wirelist screen, touch Change Comp.
Touch here
3.
In the Add
Components screen, we’ll touch Four-Wire Wire.
Touch here
Touch 1 User’s Manual / page 211
Section 11: Four-Wire Testing / Setting up 4-Wire tests: Method 1
4.
In the
Add/Change 4-Wire Wire screen, touch From.
Touch here
5.
In the Add/Change Component screen, either use the arrows to highlight
the first point you want to use, or touch that test point with the hand-held test
probe. When the correct test point is highlighted, touch OK.If the points you
want to use are not available, print the wirelist to view the connections,and print
the four-wire pairs. See Wirelist documentation on page 273 for details.
Highlight the point...
...then touch here
6.
In the Add/Change
4-Wire Wire screen, touch To.
Touch here
Touch 1 User’s Manual / page 212
Section 11: Four-Wire Testing / Setting up 4-Wire tests: Method 1
7.
In the Add/Change Component screen, either use the arrows to highlight
the second test point, or touch that point with the hand-held test probe. When the
correct point is highlighted, touch OK.
Highlight the point...
...then touch here
8.
In the
Add/Change 4-Wire Wire screen, touch Component Value.
Touch here
9.
In the Enter
4-Wire Wire Value screen, enter the value, then touch OK.
Enter the value...
... then touch here
10. If you are adding a 4-Wire resistor, touch Tolerance Level, enter the tolerance,
then touch OK.
Touch 1 User’s Manual / page 213
Section 11: Four-Wire Testing / Setting up 4-Wire tests: Method 1
11. In the Add/Change
4-Wire Wire screen, touch OK.
Touch here
12. In the Change Components screen, either touch Add if you are going to add
more components, or OK if you are through adding components.
Touch here
13. In the View/Change
Wirelist screen,touch OK.
Touch here
You are now ready to test cables!
Touch 1 User’s Manual / page 214
Section 11: Four-Wire Testing / Troubleshooting Method 1
Troubleshooting
Method 1
There are a couple of error messages you may see when you are setting up four-wire
testing using Method 1. We’ll show you how to solve the problems here.
Error Message:
Invalid 4-Wire Kelvin Pair
More than two points connected
J1-011 J1-019 J1-010
There are two possible causes for this error. These are:
•
The Sample Cable was not disconnected before you learned the 4-Wire
fixturing.
•
The 4-wire pairs are shorted together, or have more than two wires.
To solve the problem, follow these steps:
1.
Do one of these things:
•
Disconnect the Sample Cable from the fixturing, then learn the fixturing
again.
•
Print the error for reference, then remove and re-wire the fixture.
2.
In the Four-Wire
3.
In the Learn
learn.
Fixture Errors screen, touch Cancel.
Setup screen, touch Learn to start over, or Cancel to cancel the
Error Message:
Invalid 4-Wire Kelvin Pair
Both points J1-016 and J1-020 are Type 1 points.
There is one possible cause for the error. The 4-wire pair lacks a T2 point. Both
points (as wired now) are T1 points. To work properly, each four-wire pair must have
a T1 and a T2 point.
To solve the problem, do these things:
1.
In the Four-Wire
then touch Cancel.
Fixture Errors screen, print out the error for reference,
2.
Disconnect the fixture, then re-wire it at the adapter connector so that each 4-wire
pair has a T1 and a T2 point.
3.
In the Learn Setup screen, touch Learn to begin the learn again, or Cancel to
cancel the learn.
Touch 1 User’s Manual / page 215
Section 11: Four-Wire Testing / Setting up 4-Wire tests: Method 2
Setting up 4-Wire
tests: Method 2
To set up for 4-wire testing using method 2, you convert an existing 2-wire wirelist to
a 4-wire wirelist. The process has two stages. First, you convert this wirelist to a 4wire wirelist by creating 4-wire pairs. Second, you create 4-wire components for
each test.
To set up for 4-wire testing using Method 2, load the wirelist you want to convert to
do 4-wire testing.
Stage 1: Convert the 2-Wire wirelist to a 4-Wire wirelist by creating 4Wire pairs: To convert the 2-Wire wirelist to a 4-Wire wirelist, follow these steps:
Setup screen, touch View & Change Wirelist.
1.
In the Test
2.
In the View/Change
Change 4-Wire.
3.
In the Four-Wire
Wirelist screen, touch More, then 4-Wire, then
Pairs screen, touch Add.
Touch here
4.
In the Four-Wire Pair screen, touch Net List Point (Note: This is the point
within the four-wire pair that will appear in the wirelist).
Touch here
Touch 1 User’s Manual / page 216
Section 11: Four-Wire Testing / Setting up 4-Wire tests: Method 2
5.
In the Add/Change 4-Wire Point screen, either use the arrows to highlight
the first Net List point you want to use, or touch that point with the hand-held test
probe. Once the point is highlighted, touch OK.
Highlight the point...
...then touch here
6.
In the Four-Wire
Pair screen, touch Hidden Point.
Touch here
7.
In the Add/Change 4-Wire Point screen, either use the arrows to highlight
the first hidden point you want to use, or touch that point with the hand-held test
probe. Once the point is highlighted, touch OK.
Highlight the point...
...then touch here
Touch 1 User’s Manual / page 217
Section 11: Four-Wire Testing / Setting up 4-Wire tests: Method 2
8.
In the Four-Wire Pair screen, touch OK. You have now completed creating
the first 4-Wire pair.
Touch here
9.
To begin creating the second 4-Wire pair, in the Four-Wire
touch Add.
Pairs screen,
10. Repeat steps 3 through 8 again to complete creating a second 4-Wire pair.
Remember, there must be a 4-Wire pair at both ends of each 4-wire component
you intend to test.
Stage 2: Create 4-Wire components for each test:
To create 4-Wire components for each test, follow these steps (Note: In our example,
we’ll be creating a 4-Wire wire component):
1.
In the Four-Wire
Setup Warning screen, touch Add 4-Wire Comp.
Touch here
Touch 1 User’s Manual / page 218
Section 11: Four-Wire Testing / Setting up 4-Wire tests: Method 2
2.
In the View/Change
Wirelist screen, touch More Comp.
Touch here
3.
In the Change Components screen, touch either 4-W Wire or 4-W Resistor
(we’ll add a 4-Wire wire).
Touch here
4.
In the Add/Change
4W Wire screen, touch From.
Touch here
5.
In the Add/Change Component screen, either use the arrow to highlight
the first test point where your 4-wire component is connected, or touch that point
with the hand-held test probe. Once the point is highlighted, touch OK. Note:
Touch 1 User’s Manual / page 219
Section 11: Four-Wire Testing / Setting up 4-Wire tests: Method 2
Only those points chosen as Net List points should be displayed. Those chosen
as Hidden points will not be displayed here.
Highlight the point...
...then touch here
6.
In the Add/Change
4W Wire screen, touch To.
Touch here
7.
In the Add/Change Component screen, either use the arrows to highlight
the second point where your 4-Wire component is connected, or touch that point
using the hand-held test probe. Once the correct point is highlighted, touch OK.
HIghlight the point...
...then touch here
Touch 1 User’s Manual / page 220
Section 11: Four-Wire Testing / Setting up 4-Wire tests: Method 2
8.
In the Add/Change
4W Wire screen, touch Component Value.
Touch here
9.
In the Enter 4W Wire Value screen, enter the value you want to use (in our
example we’ll enter 0.50 ohm), then touch OK.
Enter the component value...
...then touch here
10. If you are entering a 4-Wire Resistor, touch Tolerance in the Add/Change 4W Resistor screen, enter the tolerance in the appropriate box, then touch OK.
11. In the Add/Change 4W Wire screen, (with the entered points and other settings showing) touch OK.
Touch here
Touch 1 User’s Manual / page 221
Section 11: Four-Wire Testing / Final Adjustments
12. In the Change
Components screen, touch OK.
Touch here
You are ready to test cables!
Final Adjustments
When you are setting up for four-wire testing, you will have to make final adjustments to your test settings. In the View/Change Wirelist screen, scroll through
the wirelist and verify that everything is set up correctly.
Here are some things to remember:
•
The Connection Resistance threshold should be set at least 20% higher
than any 4-wire components you intend to use, if they have resistances
in the same range as wires.
•
The Component Resistance > should be set at least 20% lower than any
4-wire components you want to use to measure above the range of
wires.
•
If the Low Voltage (LV) settings need adjusting in the View/Change
Wirelist screen, touch LV, then Change. If no adjustments are
needed, touch OK.
•
Warning! If you touch Cancel before you return to the Test Setup
screen from the View/Change Wirelist screen, you’ll undo all the
changes you have just made.
Touch 1 User’s Manual / page 222
Section 12:
Security/
Passwords
Overview
The Security button in the System Setup screen takes you into a series of screens
you can use to set up and manage password security on your Touch 1 system. Security limits access to certain Touch 1 features, by using passwords which lock or
unlock the Touch 1.
Important! You must create at least one administrative-level security record. Such a
record allows you to turn security on and off, and modify security records as
necessary. Its security level is SS (Set up Security).
Security Levels
described
Touch 1 Security Levels
Screen
abbreviation
Abbreviation
stands for...
Features the security level
controls...
DU
Access Disk
Utilities
Deleting a wirelist and/or a location,
formatting a floppy disk, copying
files (wirelists and scripts).
EP
Edit Own
Password
Editing your own password without
having to edit the security record.
EW
Edit Wirelist
Learning a Sample Cable, changing
a wirelist, saving a wirelist, retrieving
a wirelist, editing adapters in the
adapter list, editing SPC data and
scripts.
RW
Retrieve Wirelist
Retrieving a wirelist.
SR
Set Up Reports
Changing cable count summary(test
summary), turning automatic printing on and off, changing date and
time, turning SPC on and off, turning
scripting on and off.
SS
Set Up Security
Setting up security records
(including assigning new passwords
and editing your own password),
turning security on or off.
SU
Software Update
Updating the software in the system,
add new features.
UC
Set Up User
Controls
Setting up test controls, setting up
digital outputs, and changing languages.
Touch 1 User’s Manual / page 223
Section 12: Security/Passwords / Creating and Editing Security Records
Touch 1 Security Levels (Continued)
Screen
abbreviation
Abbreviation
stands for...
Features the security level
controls...
TEST ONLY
Test Only
Test cables, set speaker volume,
set screen contrast, view wirelists,
view digital outputs, view test control
settings.
ALL
All
The “All” level enables all of the
Touch 1 features including the
ability to lock the Touch 1, then
require a password to unlock it for
use.
Note: To have full access to SPC and Scripting, a user must have security levels EW
(Edit Wirelist), and SR (Set Up Reports).
Creating and Editing
Security Records
To set up system security on your Touch 1, you must first create an administrativelevel record that gives the system administrator access to setting up security records
on the Touch 1.
Setting Up an
Administrative-Level
Record
In this example, we’ll set up an Administrative-level security record for the system
administrator. The user ID will be JIM BACH. His password will be VOLTMAN.
1.
In the Main Menu screen, touch System Setup. Note: The security (lock)
icon should be unlocked and disabled (grayed out) since security hasn’t been set
up on the system.
Touch here
2.
In the
System Setup screen, touch Security.
Touch here
Touch 1 User’s Manual / page 224
Section 12: Security/Passwords / Setting Up an Administrative-Level Record
3.
In the Security screen, touch Set Up Security Records& Note: Security
must be off for the Set Up Security Records button to be enabled.
Touch here
4.
In the Set Up Security Records screen, touch Add. The Delete and
Change buttons are disabled because there are no security records in the system
yet.
Touch here
5.
In the Add/Change Security Record screen, touch User Id: The SAVE
button will be disabled until all three parts of the security record are completed.
Touch here
Touch 1 User’s Manual / page 225
Section 12: Security/Passwords / Setting Up an Administrative-Level Record
6.
In the Add/Change User ID screen, enter the user ID. (We’ll enter JIM
BACH.) When all of the characters and spaces are correct in the User Id: field,
touch OK to return to the Add/Change Security Record screen. Note:
User ID’s can be up to 30 characters long, and cannot begin with a dash, numerics, or a space .
Enter your user ID...
... then touch here
7.
In the Add/Change
Security Record screen, touch Password:.
Touch here
8.
In the Assign New Password screen, enter the password (we’ll enter VOLTMANA. When all of the characters shown in the Password: field are correct,
touch OK to return to the Add/Change Security Record screen. When
you return to the Add/Change Security Record screen, the password will
not be displayed. A row of eight asterisks (********) will be shown instead.
Note: Passwords cannot contain more than eight (8) characters. No spaces are
allowed.
Enter your password...
... then touch here
Touch 1 User’s Manual / page 226
Section 12: Security/Passwords / Setting Up an Administrative-Level Record
9.
In the Add/Change
Security Record screen, touch Security Level(s):.
Touch here
10. In the Security Levels screen, touch Set Up Security to enable setting up
security records and turning security on and off, then touch OK to return to the
Add/Change Security screen. Note: Selecting the Set Up Security button
also automatically selects the Edit Own Password button.
Touch here...
... then here
Important: At least one security record must have a security level of
“Set Up Security (SS). Only a user with an administrative-level
security record can change or add security records.
11. In the Add/Change Security Record screen, Touch SAVE to return to the
Set Up Security Records screen. You’ll see the user ID and security levels
you’ve just entered are now displayed in this screen. Note: In our example, user
Jim Bach will only be allowed to set up security () and edit his own password
(). He’ll have access to none of the other system features.
Touch here
Touch 1 User’s Manual / page 227
Section 12: Security/Passwords / Setting Up an Administrative-Level Record
12. In the Set Up
Security Records screen, you have a choice to make:
•
To finish turning security on, touch OK to bring up the System Security On / Off screen (as we’ll do here).
•
To add another security record, touch ADD, then repeat the steps we’ve
just done. You’ll enter a new user ID, password, and set of security
levels.
We’ll touch here
13. In the System Security On / Off screen, touch ON to bring up the Password Entry screen. The ON button will darken when you touch it.
Touch here
Touch 1 User’s Manual / page 228
Section 12: Security/Passwords / Setting Up an Administrative-Level Record
14. In the Password Entry screen, enter your password (We’ll enter VOLTMAN),
then touch OK to complete the entry process, and bring the System Security
On / Off screen up again. Note: When you enter the password, asterisks (*)
will appear in the entry box for each character you type in.
Enter your password...
...then touch here
15. The System Security On/Off screen should now display the user ID (Jim
Bach in our example). Touch OK to operate the Touch 1 under this user ID’s
security level, and return to the Main Menu screen.
Touch here to operate
at this user’s ID level
16. In the Main Menu screen, the security (lock) icon should be enabled and
unlocked. The user ID under which the Touch 1 is currently operating will be
displayed.
Touch 1 User’s Manual / page 229
Section 12: Security/Passwords / Setting Up a User-Level Record
Setting Up a UserLevel Record
Only a user with an administrative-level security record can change or add security
records. In our example, an administrator will create a user-level record for a new
user, Mark Wayman (password AMPMAN). We’ll begin and end the process at the
security-locked Main Menu screen.
1.
First, unlock the Touch 1 using an administrative-level password. In the securitylocked Main Menu screen (grayed-out control buttons) touch the lock icon.
Touch here
2.
In the Password
touch OK.
Entry screen, enter the administrative-level password, then
Enter the password...
...then touch here
3.
The Touch 1 is now unlocked, but before we can add a security record, system
security must be turned off. In the fully-enabled (normally colored) Main
Menu screen, touch System Setup.
Touch here
Touch 1 User’s Manual / page 230
Section 12: Security/Passwords / Setting Up a User-Level Record
4.
In the System Setup screen, touch Security. Note: Only the buttons for the
functions Jim Bach has access to are colored normally. All others are disabled.
Touch here
5.
In the Security screen, touch System Security On/Off.
Touch here
6.
In the System Security On/Off screen, touch Off, then touch OK.
Touch here...
...then here
Touch 1 User’s Manual / page 231
Section 12: Security/Passwords / Setting Up a User-Level Record
7.
System security is now turned off. To begin creating a security record for a new
user, in the Security screen touch Set Up Security Records.
Touch here
8.
In the Set Up
Security Records screen, touch Add.
Touch here
9.
In the Add/Change
Security Record screen, touch User Id:.
Touch here
Touch 1 User’s Manual / page 232
Section 12: Security/Passwords / Setting Up a User-Level Record
10. In the Add/Change User ID screen, enter the new user’s ID (we’ll enter
MARK WAYMAN), then touch OK. Note: User ID’s can be up to 30 characters
long, and cannot begin with a dash, a numeric, or a space.
Enter the user ID...
...then touch here
11. In the
Add/Change Security Record screen, touch Password.
Touch here
12. In the Assign New Password screen, enter the new user’s password (we’ll
enter AMPMAN), then touch OK.
Enter the new password...
...then touch here
Touch 1 User’s Manual / page 233
Section 12: Security/Passwords / Setting Up a User-Level Record
13. In the Add/Change
Security Record screen, touch Security Level(s):
Touch here
14. Mark Wayman will be given access to edit his own password (EP), edit the
wirelist (EW), and retrieve wirelists (RW). We’ll touch the correct buttons in the
Security Levels screen (check marks will appear in the boxes for the security
levels turned on), then touch OK.
Enter security levels...
...then touch here
15. In the Add/Change Security Record screen with the information for the
new user-level record displayed, touch SAVE.
Touch here
Touch 1 User’s Manual / page 234
Section 12: Security/Passwords / Setting Up a User-Level Record
16. In the Set Up Security Records screen, the new user will be displayed.
Touch OK to save the security record and turn system security back on. Note: If
you touch CANCEL, you’ll undo the changes you’ve made.
Touch here
17. Now we’ll turn system security back on. In the System Security
screen, touch On.
On/Off
Touch here
18. In the Password Entry screen, enter the password you want the Touch 1 to
operate under (we’ll enter Jim Bach’s password, VOLTMAN), then touch OK.
Enter the password...
...then touch here
Touch 1 User’s Manual / page 235
Section 12: Security/Passwords / Editing a Security Record
19. The System Security On/Off screen will display the user ID. Touch OK to
operate the Touch 1 under this user ID’s security level and return to the Main
Menu screen.
Touch here
Editing a Security
Record
Only a user with an administrative-level security record can change or add security
records. In our example an administrator will edit user Mark Wayman’s security
record to allow him to access software updates, along with the other functions he’s
already authorized to use. We’ll begin and end the procedure at the security-locked
Main Menu screen.
1.
In the security-locked Main Menu screen, touch the lock icon in the lower
left-hand corner of the screen. This will bring up the Password Entry screen.
Note: The control
buttons are grayed
out when the system
is security-locked.
Touch here
2.
In the Password Entry screen, enter the administrative-level password, then
touch OK to bring up the Main Menu screen operating under that user ID.
Enter the password...
...then touch here
Touch 1 User’s Manual / page 236
Section 12: Security/Passwords / Editing a Security Record
3.
The Main Menu screen should now show the user ID for the administrator.
Touch System Setup to get to the security feature button.
Touch here
4.
In the System Setup screen, touch Security. Note: Because our user is set up
with access only to a few features, some controls are disabled (grayed out).
Touch here
5.
In the Security screen, touch System Security On / Off to turn security off so
that security records can be edited.
Touch here
Touch 1 User’s Manual / page 237
Section 12: Security/Passwords / Editing a Security Record
6.
In the System Security On / Off screen, touch Off to turn security off, then
touch OK to bring up the Security screen, with the Set Up Security Records
button now active (normally colored). Remember, you have to turn security off
before you can edit a security record.
Touch here...
... then here
7.
In the Security screen, touch Set Up Security Records.
Touch here
8.
In the Set Up Security Records screen, use the arrows to scroll and highlight the security record you want to edit (we’ll highlight Mark Wayman’s security file). Touch CHANGE to bring up the Add / Change Security
Record screen.
Highlight the
security file
to change...
...then touch
here
Touch 1 User’s Manual / page 238
Section 12: Security/Passwords / Editing a Security Record
9.
In the Add/Change
Security Record screen, touch Security Level(s):.
Touch here
10. In the Security Levels screen, touch the levels you want to set (we’ll touch
Access Software UpdateA. A check mark will appear in the button. Touch OK
to bring up the edited Add/Change Security Record screen.
Touch here...
...then here
11. In the Add / Change Security Record screen, the new security level (@
in our example) is displayed in the Security Level(s) field.Touch SAVE to save
the changes.
Touch here
Touch 1 User’s Manual / page 239
Section 12: Security/Passwords / Editing a Security Record
12. In the Set Up Security Records screen, you’ll now see Wayman’s security
record with the added security level. To complete the change process, touch OK
to save the changed record. Note: Touching CANCEL will discard any changes
you’ve made.
Touch here
13. In the
System Security On / Off screen, touch On.
Touch here
14. In the Password Entry screen, carefully enter the password (we’ll enter
VOLTMAN), then touch OK to bring up the System Security screen with On
highlighted.
Enter the password...
...then touch here
Touch 1 User’s Manual / page 240
Section 12: Security/Passwords / Turning System Security On
15. The System Security On / Off screen should show the user ID. Touch OK
to operate the Touch 1 under this user ID’s security level.
Touch here
16. In the Main Menu screen, the security icon (the lock) should be enabled and
unlocked (normally colored on the screen). The user ID the Touch 1 is currently
operating under should be displayed. Note: Touch the lock icon to re-lock the
system if necessary.
Touch here to
re-lock system
Turning System
Security On
Only a user with an administrative-level security record which allows setting up security can turn system security on and off. You cannot turn security on unless at least
one such security record exists. (For information on how to create an administrativelevel security record, see “Setting Up an Administrative-Level Record” on page 224.)
In our example, administrator Jim Bach (password VOLTMAN) will turn system
security on.
1.
In the
Main Menu screen (with no user ID displayed), touch System Setup.
Touch here
Touch 1 User’s Manual / page 241
Section 12: Security/Passwords / Turning System Security On
2.
In the System Setup screen, touch Security.
Touch here
3.
In the Security screen, touch System Security On/Off.
Touch here
4.
In the System Security On/Off screen, touch On.
Touch here
Touch 1 User’s Manual / page 242
Section 12: Security/Passwords / Turning System Security On
5.
In the Password
then touch OK.
Entry screen, enter the password (we’ll enter VOLTMAN),
Enter the password...
...then touch here
6.
In the
System Security On/Off screen, touch OK.
Touch here
7.
System security is now turned on, with the system operating under Jim Bach’s
security record. To lock the system, in the Main Menu screen (with the User
ID showing) touch the lock icon. The system will lock, and the control buttons
will become disabled (grayed out).
Touch here
Touch 1 User’s Manual / page 243
Section 12: Security/Passwords / Turning System Security Off
Turning System
Security Off
Only someone with an administrative-level password which allows setting up security
can turn system security off. In our example, administrator Jim Bach (password
VOLTMAN) will turn system security off. We’ll begin the process from the securitylocked Main Menu screen.
1.
In the security-locked Main Menu screen (the control buttons are grayed out),
touch the lock icon.
Touch here
2.
In the Password Entry screen, enter the administrative-level password (we’ll
enter VOLTMAN), then touch OK.
Enter the password...
...then touch here
3.
In the fully-enabled Main Menu screen (buttons are colored normally) with
the User Id displayed, touch System Setup.
Touch here
Touch 1 User’s Manual / page 244
Section 12: Security/Passwords / Turning System Security Off
4.
In the System Setup screen, touch Security.
Touch here
5.
In the Security screen, touch
System Security On/Off.
Touch here
6.
In the
System Security On/Off screen, touch Off, then touch OK.
Touch here
Touch 1 User’s Manual / page 245
Section 12: Security/Passwords / Editing Your Own Log-In Password
7.
In the Security screen (with the Edit Own Password button grayed out), touch
CANCEL to return to the now fully-enabled (buttons colored normally) System
Setup screen.
Touch here
Editing Your Own LogIn Password
You can only change your own password if your security record allows access to the
Edit Own Password function. If your security record is set to allow it, you can
change your own password without using the administration-level security record to
assign a new password.
Your security record allows you to edit your own password if the security level is
present. To get this access, someone with Set Up Security () level access will have
to set your security record’s level to .
In our example, we’ll assume that quality inspector Mark Wayman, with user ID
MARK WAYMAN, password AMPMAN, has been set up (by someone with level security access) on the system to be able to edit his own password, but not to
access setting up security. He wants to edit his own password, changing it from AMPMAN to INSPECT.
We’ll begin at the security-locked Main Menu screen, and end the procedure back
at the security-locked Main Menu screen.
1.
In the security-locked Main Menu screen (buttons are grayed out), touch the
lock icon in the lower left-hand corner of the screen.
Touch here
Touch 1 User’s Manual / page 246
Section 12: Security/Passwords / Editing Your Own Log-In Password
2.
In the Password Entry screen, carefully enter the password (we’ll enter
AMPMAN), then touch OK. This will unlock the Main Menu screen’s control
buttons (they will be colored normally). Note: When you enter the password,
asterisks (*) will appear in the entry box for each character typed in.
Enter the password...
...then touch here
3.
In the fully-enabled Main Menu screen (buttons colored normally) with the
user ID (Mark Wayman in our example) showing, touch SYSTEM SETUP.
HELP ON MAIN MENU
Touch here
4.
In the System Setup screen, touch Security. Note that only the buttons
which Wayman’s security level allows are enabled (colored normally).
Touch here
Touch 1 User’s Manual / page 247
Section 12: Security/Passwords / Editing Your Own Log-In Password
5.
In the Security screen, touch Edit Own Password. This is the only button of
the three in this screen that Wayman’s security record allows him to reach. The
others are disabled (grayed out) because this security record does not have the
security setup level.
Touch here
6.
In the Edit Own Password screen, the existing password is displayed in the
Password field. (In our example, Wayman’s existing password is AMPMAN).
Touch CLEAR to clear the password field, then carefully enter the new password
(we’ll enter INSPECT). When the displayed word is correct, touch OK.
Touch here...
...enter the new
password...
...then touch here
7.
In the Security screen, touch CANCEL to return to the System
Touch here
Touch 1 User’s Manual / page 248
Setup screen.
Section 12: Security/Passwords / Lost Administrative Password
8.
In the System Setup screen, touch CANCEL to return to the
screen.
Main Menu
Note: Because of the
security settings on
the password, all but
seven controls are
grayed out.
Touch here
9.
To re-lock the Touch 1, touch the lock icon in the lower left-hand corner of the
screen. The control buttons on the screen will gray out (become disabled), and
the system is security-locked.
Touch here
Lost Administrative
Password
If your password is part of an administrative-level security record, and you’ve either
forgotten it or lost it, do this:
1.
From the security-locked Main Menu screen (buttons are grayed out because
security is on), bring up the Index portion of the help system. Touch?, then MAIN
MENU (header darkens and changes to HELP ON MAIN MENU). This will
bring up the main help-on-help screen.
...then here
Touch 1 User’s Manual / page 249
Touch here...
Section 12: Security/Passwords / Lost Administrative Password
2.
In the main help-on-help screen, touch Index to bring up the Index screen.
Touch here
3.
In the Index screen touch OP-Pn- to display the index listings for the letter P.
Touch here
4.
Touch the Password Lost button to display the
Lost Password help screen.
Touch here
5.
Follow the instructions as given on the Lost
Password screen.
•
Call Cirris for a temporary password using the security code listed at the
bottom left-hand corner of the Lost Password screen.
•
Unlock the Touch 1 with the temporary password (see next page)
Touch 1 User’s Manual / page 250
Section 12: Security/Passwords / Deleting a Security Record
•
Important!: Assign a new administration-level password.
Note: Your security code will be different than this one!
Important! When you have unlocked the Touch 1 using the temporary password, be
sure to assign a new Administrative Password before you power down the analyzer.
If you power the Touch 1 down before you’ve assigned the new password, you’ll
have to call Cirris again, get another temporary password, and redo the rest of the process.
Deleting a Security
Record
Entering a Password
Only someone with an administrative-level security record can delete a security file.
The procedure basically the same as that given for adding or changing security
records, except that in step 8, you touch DELETE instead of CHANGE.
•
When you touch DELETE, the file will disappear from the Set Up
Security Records screen.
•
Once the File is deleted, you can turn the system security on again by
following steps 17 through 19.
When the Touch 1 is security locked, follow these steps to enter a password:
1.
Turn on the Touch 1’s main power switch, and allow the system to boot up.
You’ll see this screen. All buttons except the lock button will be disabled (grayed
out). Touch the lock button.
Touch here
Touch 1 User’s Manual / page 251
Section 12: Security/Passwords / Entering a Password
2.
Enter your password, then touch OK.
Enter your password...
...then touch here
3.
The system is now unlocked. The Main
all buttons enabled (colored normally).
Touch 1 User’s Manual / page 252
Menu screen is now displayed with
Section 13:
Digital Inputs/
Outputs
Overview
The Touch 1 can control external devices such as relays, solenoids, or LED’s by
triggering on specified events during testing, or when test results are displayed.
The limitations of what can be done are mostly up to you. We provide these inputs
and outputs on our 15-pin D-sub digital I/O connector:
Digital I/O port
location
•
Two input connections (“External Switch” and “Hipot Safety switch”).
•
Four user-programmable outputs.
•
Dedicated outputs for “good cable” and “bad cable” states.
•
There are two power outputs (+ 5 volts DC, and +12 volts DC, 100
milliamps maximum current).
•
An output intended for high-impedance audio.
•
Two grounded pin positions.
The digital I/O port on the Touch 1 is located as shown in this photo:
1500 Volt System
1000 Volt System
Touch 1 User’s Manual / page 253
Digital I/O port
Section 13: Digital Inputs/Outputs / Digital I/O Port pinout table
Digital I/O Port pinout
table
This table explains the pinout scheme for the digital input/output (I/O) port on the
Touch 1.
Digital I/O Port Pinout
Digital I/O Port pinout
diagram
Pin #
I/O?
Explanation
1
Input
External switch
2
Input
Hipot safety switch
3
Input
(reserved)
4
Input
(reserved)
5
Output
User-programmable
6
Output
User-programmable
7
Output
“Good Cable”
8
Output
“Bad Cable”
9
Power
+ 5 volts DC, 100 milliamps max.
10
Output
User-programmable
11
Output
User-programmable
12
Power
+ 12 volts DC, 100 milliamps max.
13
Output
High-impedance audio
14
Ground
15
Ground
This diagram shows the pin arrangement on the digital I/O port of the Touch 1.
Input, external switch
Power (+ 5 volts DC, 100 milliamps max.)
Input, hipot safety switch
Output, user-programmable
Input (reserved)
Output, user-programmable
Input (reserved)
Power (+ 12 volts DC, 100 milliamps max.)
Output, user-programmable
High-impedance audio
Output, user-programmable
Ground
Output, “Good Cable”
Ground
Output, “Bad Cable”
Touch 1 User’s Manual / page 254
Section 13: Digital Inputs/Outputs / Using Digital Inputs to Control the Test
Using Digital Inputs to
Control the Test
The Touch 1 has two digital inputs (switches):
•
External switch (pin 1).
•
Hipot safety switch (pin 2).
Configuring an input is a two-step process:
1.
Enable the digital input.
2.
Wire up the input to the digital I/O port.
As an example, we’re going to set up a hipot safety switch (the pin 2 input) on the
Touch 1.
When the hipot safety switch feature is turned on, the Touch 1 will not perform a
hipot test unless the hipot safety switch is closed. The safety switch acts as a “dead
man” switch on the hipot test. If the switch is opened during a hipot test, the test is
stopped within a few milliseconds
Hipot Safety Switch
To set up the hipot safety switch, proceed like this:
1.
In the Test
Setup screen, touch Test Control.
Touch here
2.
In the Test Control screen, touch Hipot Safety Switch, then touch OK. The
hipot safety switch feature is now turned on.
Touch here...
...then here
Touch 1 User’s Manual / page 255
Section 13: Digital Inputs/Outputs / External Switch
3.
Wire up the hipot safety switch as shown here:
When switch is closed, hipot
safety switch input (pin 2) goes
logic high. Hipot test will be
performed as long as this input
remains logic high.
External Switch
You can set up an external switch to duplicate the functions of the " and
0 buttons found on the touch screen. To set up the external switch proceed
like this:
1.
In the Test
Setup screen, touch Test Control.
Touch here
2.
In the Test Control screen, touch Single Test, touch External Switch (a
check mark should appear in the box), then touch OK.
Touch here...
...then here...
...then here
Touch 1 User’s Manual / page 256
Section 13: Digital Inputs/Outputs / Using Digital Outputs to Control External Devices
3.
Wire up the external switch as shown here.
When the switch is closed, the
Touch 1 behaves as though the
" or 0 button
has been touched on the touch
screen.
Pin 1
Pin 9
Pin 1 = dedicated external switch input
Pin 9 = + 5 volts DC
Using Digital Outputs
to Control External
Devices
You can control external devices such as relays, solenoids, or LED’s using the Touch
1’s digital outputs. You control the external devices by selecting triggering events
that occur during testing, or when the results of tests are displayed.
The triggering event you select changes the logic state of the output pin you’ve
chosen. Remember, controlling an external device this way requires two triggering
events. The first of these changes the logic state of the output, the second returns the
output to its original logic state.
Definition: Rising and
Falling edges
List of Triggering
Events
Rising and falling edges are defined by what a voltmeter would see if it were
connected to an unloaded output with a pull-up resistor. When the system pulls up an
output pin using a resistor (a relay, or an LED), the falling edge turns ON, the rising
edge turns OFF. The output is an open-collector output that can pull a line to ground.
It will not supply a voltage!
Here are the triggering events you can choose in the Touch 1.
Triggering Events in the Touch 1
Triggering Event
Description
Cable attached
Touch 1 detects a cable connected to it.
Cable removed
The Touch 1 confirms that a cable has been
disconnected from it.
Cable will count as
good
The Touch 1 will count this cable as “good” in its
test summary.
Failed Power-on selftest.
The Touch 1 failed its own self-test when it was
turned on. (Note: This event is reserved for
future use.)
HV test aborted
(Touching the Abort
button has the same
effect)
The hipot safety switch feature was turned on.
The hipot test was aborted when the Touch 1
detected the fact that the hipot safety switch
was in the open position.
Touch 1 User’s Manual / page 257
Section 13: Digital Inputs/Outputs / List of Triggering Events
Triggering Events in the Touch 1 (Continued)
Triggering Event
Description
HV test complete
The Touch 1 has completed the high-voltage
tests. The cable tested either as “good” or as
“bad.”
HV test delay started
The Touch 1 has started the auto-hipot highvoltage test delay.
HV test failed
The cable under test has failed the high-voltage
tests.
HV test passed
The cable under test has passed the high-voltage tests.
HV test started
The Touch 1 has started the high-voltage tests.
Intermittent
(Continuous Test
only)
The Touch 1 has detected an intermittent error
in the cable under test.
Learn complete
The Touch 1 has completed the cable learning
process.
Learn started
The Touch 1 has begun the process of learning
a cable.
LV test complete
The Touch 1 has completed the low-voltage
tests either passing or failing; one for each
continuous test.
LV test failed
The cable under test has failed the low-voltage
tests; one for each continuous test.
LV test passed
The cable under test has passed the lowvoltage tests; one for each continuous test.
LV test started
The Touch 1 has started the low-voltage tests.
Touch 1 User’s Manual / page 258
Section 13: Digital Inputs/Outputs / Controlling a Warning Light Using an External Relay
Controlling a Warning
Light Using an
External Relay
As a real-world example of how to set up a digital output, we’ll show you how to go
about making a light turn on during the hipot test. You may wish to use such a light as
a warning device when the Touch 1 performs hipot tests.
We’ll be using pin 10 (a user-programmable output) to control a relay with a 12-volt
coil. This relay will switch the 110/120 volt power that lights the light bulb in the
setup. We’ll set up the output (and select the triggering events) here.
1.
In the System Setup screen, touch Digital Outputs.
Touch here
2.
In the Digital Outputs screen, you must first choose which output pin to use
by touching that pin number. We’ll touch pin 10.
We’ll touch here...
3.
In the Set Output Pin 10 screen, scroll down until the HV Test Started
trigger event is highlighted, then touch the falling edge button. Remember, the
falling edge button turns ON in this case. We’ve just set the Touch 1 to turn on
the light when the high-voltage test begins.
...then touch here
Touch 1 User’s Manual / page 259
Scroll down...
Section 13: Digital Inputs/Outputs / Controlling a Warning Light Using an External Relay
4.
Scroll up so that the HV Test Complete trigger event is highlighted, then
touch the rising edge button. Remember, the rising edge button turns OFF in
this case. We’ve just set the Touch 1 to turn off the light when the high-voltage
test ends.
Scroll up...
...then touch here
5.
With both the rising and falling edge triggering events showing, touch OK to
accept the settings and return to the Digital Outputs screen.
Touch here
6.
In the Digital Outputs screen, touch OK& We’ve now completed setting the
Touch 1. It’s time to wire up the light setup.
Touch here
Touch 1 User’s Manual / page 260
Section 13: Digital Inputs/Outputs / Wiring the light setup to the Digital I/O port
Wiring the light setup
to the Digital I/O port
Wire the setup as shown here. Note: In our example we chose to use a Single-Pole
Double-Throw (SPDT) relay. Other types may be used. Also remember that we chose
to use the pin 10 digital output here. Any of the four user-programmable digital
outputs (5,6,10, or 11) could have been used. In this diagram, N.O. means normally
open. N.C. means normally closed. Other specifications can be used in other relay
applications.
Controlling an LED
Here we’ll show you how to wire up an LED to be controlled by the digital I/O port.
1.
Select the triggering events you want to use, like you did for controlling the
warning light (“Controlling a Warning Light Using an External Relay” on
page 259). In our example, we’ll use the pin 10 output (user-programmable) for
digital control, and pin 9 (+ 5 volts DC) for powering the LED. Remember,
when you’re entering triggering events, the falling edge turns the LED on, the
rising edge turns the LED off.
2.
Wire the LED as shown here.
Touch 1 User’s Manual / page 261
Section 13: Digital Inputs/Outputs / Scripting and Digital Input/Output
Scripting and Digital
Input/Output
When you purchase the Scripting option for your Touch 1, functions become
available that are not part of the analyzer’s standard software. There are functions
available to control the digital inputs and outputs. For more information on the Scripting package, telephone us at Cirris Systems, at 801-973-4600 or 800-441-9910.
Touch 1 User’s Manual / page 262
Section 14:
System Setup
Options
Adapter List
Adding an adapter to
the adapter list
You may need to add an adapter to the master list of adapters stored in the Touch 1 if
you get a new custom-made adapter. You cannot add an adapter to a wirelist unless it
is in the adapter list. Standard Cirris adapters are added to the adapter list by updating
the software.
To add a custom adapter to the adapters list, follow these steps:
1.
From the System Setup screen, touch Adapter List.
Touch here
2.
In the Adapter
Listing screen touch Add.
Touch here
Touch 1 User’s Manual / page 263
Section 14: System Setup Options / Adding an adapter to the adapter list
3.
In the Add
Adapter to List screen, touch Part No.:.
Touch here
4.
In the Add/Change Part No. screen, enter the part number, then touch OK.
Note: The part numbers of all custom-made adapters added to the adapter list
will begin with the letter “U.” The part number can be up to eight characters long
including the required beginning letter “U.” Lower-case letters can be entered
using a keyboard.
UH2M-SDA
Enter the part number...
...then touch here
5.
In the Add
Adapter to List screen, touch Adapter Description.
UH2M-SDA
Touch here
Touch 1 User’s Manual / page 264
Section 14: System Setup Options / Adding an adapter to the adapter list
6.
In the Add/Change Adp Descrip screen, enter the adapter description, then
touch OK. Note: This is the adapter description that can be added to a wirelist.
See page 95 for details.
1-50 POS 2 MM FEM.
Enter the adapter description...
...then touch here
7.
In the Add
Adapter to List screen, touch SAVE.
UH2M-SDA
1-50 POS 2 MM FEM.
Touch here
8.
Install the new adapter in scanner position J1, then touch Learn Adapter. Note:
An error message will display if the Touch 1 cannot find the adapter in the J1
position.
Install the new adapter
in scanner position J1...
...then touch here
Touch 1 User’s Manual / page 265
Section 14: System Setup Options / Changing an adapter in the adapter list
9.
In the Adapter Addition
Complete screen, touch CANCEL.
Touch here
10. In the Adapter Listing screen, the newly-added adapter will be highlighted.
To complete the adding process, touch OK.
Touch here
Changing an adapter
in the adapter list
Deleting an Adapter
from the Adapters List
Use the Change button if you added a custom adapter and you want a different part
number or description. Do NOT change the standard adapters in the list that came
with your Touch 1. Standard adapters are ordered and purchased from Cirris Systems
by their part numbers.
Use the delete function if you have a custom adapter you no longer use. Note: We
recommend you do not delete the standard adapters in the list that came with your
Touch 1. To delete an adapter from the adapters list, follow these steps:
1.
In the
System Setup screen, touch Adapter List.
Touch here
Touch 1 User’s Manual / page 266
Section 14: System Setup Options / Setting the choices
2.
In the Adapter Listing screen, use the arrow keys to scroll a line at a time
(hold them down to scroll quickly), or the scroll bars to scroll a screen at a time,
until the adapter you want to delete is highlighted. When the adapter is
highlighted, touch Delete, then touch OK. In our example, we’ll delete an
USBB-04 adapter that we’ve had custom-built.
Scroll to the adapter...
...touch here...
...then here
Calibration (Tester Checkout)
Tester Checkout allows you to verify that the Touch 1 is in calibration. It checks the
hardware, making sure it is running properly, including the probe and the touch
screen.
The Tester Checkout settings let you choose which tests you want the Touch 1 to
perform during the calibration process. You can select Full Calibration to run all the
tests, or you can run individual tests.
Remember, you will need the Touch 1 Performance Verification Kit to perform all
calibration tests other than the Self Test, the Touch Pad Test, and the Probe Test. The
kit contains a short manual, and Resistance, Capacitor/4-Wire, and Zero Ohm adapters. To obtain the kit, contact Cirris Systems at (801) 973-4600 or (800) 441-9910.
Setting the choices
To set up your Touch 1 system’s calibration tests, follow these steps:
1.
In the System Setup screen, touch Tester Checkout.
Touch here
Touch 1 User’s Manual / page 267
Section 14: System Setup Options / General procedure for tester checkout tests
2.
Here’s the Tester Checkout screen. We’ll explain the tests in the order they’ll be
done. Note: Make sure no serial device is connected to COM 1, or the Touch 1
will freeze at this screen. If tis happens, disconnect the device, and power cycle
the Touch 1.
•
General procedure for
tester checkout tests
Remember, you cannot perform the LV/HV Measurement, HV
Voltages, Capacitance and 4-Wire, and Scanners test unless you have
the Touch 1 Performance Verification Kit.
To set up for each of the available tests, the general procedure is as follows:
•
To switch an option on, touch the button for that test, so a check mark
appears inside it. If there is no check mark within the button, the option
is turned off.
•
To start the test, touch the Next Test button. The Touch 1 will
progress through the test, then show either a Pass or a Fail result. You
can abort any test (except the Touch pad) by touching the ABORT button.
•
To proceed to the next test you’ve selected, touch the Next Test: button.
If there are no more tests to do, touch the Show Summary button.
•
To see a summary of the test results thus far (and cancel out additional
tests), touch CANCEL. To print out the results (if you’ve installed a
printer on your system) touch PRINT. If you have no printer installed,
the PRINT button will be disabled (grayed out).
Self Test: This option turns on the same 15 tests (performed 10 times each) that the
Touch 1 does automatically as it powers up.
Touch Pad Test: This option allows you to test the analyzer’s touch screen to be sure
it’s working properly. The analyzer can run using either an analog or a digital touch
screen. The analyzer will automatically detect the screen type and run the appropriate
screen touch test. The touch screen type for your Touch 1 is displayed on the Initial
Self-Test screen at startup. A description of each of these tests follows:
•
Digital screen test (1000-volt only): A series of squares covering the
entire touch screen with an escape (ESC) button in the upper left-hand
corner will be displayed. Touch all the squares in the screen (they will
darken as they’re touched), then touch ESC. The Touch 1 will display
either a Pass or a Fail result.
Touch 1 User’s Manual / page 268
Section 14: System Setup Options /
•
Analog screen test: A screen with a calibration button in the upper lefthand corner will be displayed. Touch the center of the picture in the button
•
A screen with a calibration button in the lower right-hand corner will be
displayed. Touch the center of the picture in the button.
•
A screen with five buttons will be displayed for a final calibration
check. Each button press must occur before ten seconds elapse, or the
test will fail. If the screen is touched outside a button, a star will be
drawn under the place where the screen was touched. If the star does not
match where the screen was touched, the calibration is off. You should
let the test fail by waiting ten seconds without touching the screen, then
restart the calibration test.
•
To pass the test, all five buttons must be pressed before the screen times
out.
Probe Test: This option allows you to test the probe. It tests the probe’s ability to
identify correctly the Test Point you touch. Note: You’ll need to have a cable adapter
(any Touch 1 adapter will do) on hand to do this test.
•
The Touch 1 will prompt you to install any cable adapter in position J1
on its scanner.
•
Install the adapter, then touch the tip of the probe to any test point on the
adapter. The Touch 1 will identify the point (shown in a pop-up window) if it’s working properly. If you see no response, touch NO
RESPONSE. The Touch 1 will display a Fail message.
Touch 1 User’s Manual / page 269
Section 14: System Setup Options / Setting the Date and Time
Date / Time
The date settings you enter here will appear in most printed documentation you
prepare using the Touch 1 (error reports, test summary, tester checkout, wirelists,
four-wire pairs listing, and SPC data).In addition, the time will appear in documentation you prepare using the optional Statistical Process Control (SPC) feature. This
will make your record keeping chores easier. The Touch 1 can be set up for either of
two different date formats, MM/DD/YYYY or DD/MM/YYYY where MM is the
month, DD is the day of the month, and YYYY is the year.
Setting the Date and
Time
To set the date and time, follow these steps:
1.
In the
System Setup screen touch Date & Time.
Touch here
2.
In the Date & Time screen, touch the date format button for the format you
want to use on all your printed documentation.
Touch the date
format button...
Touch 1 User’s Manual / page 270
Section 14: System Setup Options /
3.
Once the date format is selected, the date settings can be modified. Touch the
month button so that it’s highlighted, then use the arrows to select the correct
month. (In our example, the month is June.) Note: The month and day button
locations change depending on the date format you’ve set.
Touch the month
button...
...then use
the arrows
to select the
right number.
4.
Repeat the process shown in step 3 for the day and year buttons, and for the hour,
minute, and second buttons in the Date & Time screen. Note: The seconds
will automatically update unless the seconds button is highlighted. (In our example, the date is 24 June, 1998. The time is 7:50 AM and 15 seconds. This
translates to 07:50 and 15 seconds military time.) When you have the settings as
you want them, touch OK to accept the settings.
Touch here
Note: You cannot enter any date before 1996 into the Touch 1 system.
Touch 1 User’s Manual / page 271
Section 14: System Setup Options / Formatting a Floppy Disk
Formatting Disks
Important! When you format a floppy disk, all data on that disk will be lost. We’ll
begin the formatting process from the Disk Utilities screen.
Formatting a Floppy
Disk
To format a floppy disk, follow these steps:
1.
From the Disk Utilities screen, touch Format Floppy Disk(s).
Touch here
2.
In the Format
Floppy Disk screen, touch FORMAT. Once you’re back in
Touch here
the Disk Utilities screen, you can either repeat steps 1 and 2 to format other
disks, or touch CANCEL to return to the System Setup screen.
Printing
There will be times when you’ll want to print out various information from the Touch
1. There are four types of printouts you can get from the Touch 1. These are: Test
results, wirelist documentation, file and location listings, and script contents.
Test Results:
•
You can print a test result automatically as each cable test ends by
turning on the Automatic Print After Test feature.You can use a standard, or a custom report script. See page 275 for details. There are three
different report options. Test Status prints a one-line report for
each cable tested. Errors Only prints a full-page report of errors for
each cable tested. Good Only prints a full page report which contains
a good or a bad status for each cable tested.
•
You can print out errors after a test in the error screens that appear on
the touch screen. Touch the Print Err(s) button in the individual error
Touch 1 User’s Manual / page 272
Section 14: System Setup Options / Printer Problems
screens.
•
You can print out the statistics of a testing session by printing a test
summary. Do this using the TEST SUMMARY button in the screen you
get after testing. The test summary report can be a standard or a custom
report. See page 277 for details.
•
You can print Tester Checkout summaries by touching the " button in the Tester Checkout Summary screen, after you perform one or more cable tests. For instructions, see “Calibration (Tester
Checkout)” on page 267.
•
You can print the calculated wire resistance(s) for your cable using
the Calc Sample feature. For details, see “Using CALC Sample” on
page 32.
•
You can print errors from a spreadsheet or a statistics package
using SPC Link.
•
You can create your own custom report using a test event script This
script must be attached to each wirelist. See the Scripting on the Touch 1
manual for details.
•
You can print out fault location errors from the error screen after you
do fault location.
Wirelist Documentation:
•
You can print out the wirelist currently stored in the Touch 1’s memory, using the PRINT button in the View/Change Wirelist
screen.This can be a standard or a custom report. See page 277 for
details
•
You can print out four-wire pairs using the Print button in the FourWire Pairs screen.
•
You can print the adapter list using the Print button in the Adapter
Listing screen under System Setup.
File and Location Listings:
•
You can print out the current file location and its contents from the
Import Labels from Wirelist screen, the Select Script screen,
and the Retrieve Wirelist screen.
Printer Problems
If your printer has been installed, and does not work, first check to see if the Print button is disabled (grayed out) or enabled (colored normally). If the print button is disabled (grayed out), it may be because of these things:
•
The printer is off-line.
•
The printer is turned off.
Touch 1 User’s Manual / page 273
Section 14: System Setup Options /
•
The printer is out of paper.
•
The printer’s cable has become disconnected from the Touch 1. (See
“How to Connect a Printer” on page 17 for details on connecting a
printer). You may use a serial or a parallel printer on your Touch 1.
Your printer must be able to work with DOS. Printers designed to work
only with Windows (the LexMark 1100 ColorJet for example) will not
work. Note: A serial printer may be used only with the Scripting function, sold separately.
If the " button is enabled (colored normally), and the printer still does not
work, it may be because of these things:
•
The printer cable is not completely connected to the Touch 1. Check the
seating on the connectors.
•
The #
•
If you are using a serial-type printer, the COM parameters may be set up
incorrectly.
•
Your script is calling the wrong printer port.
* button on the printer needs to be reset.
Reports
If you have a printer connected to your Touch 1, you can print test summaries, wirelists, or error lists for the cables you test. You can also automatically print reports on
individual cables as you test them. If you have purchased the Scripting feature, you
have the option of creating your own custom report, which can print on a serial or a
parallel printer. All standard reports print on a parallel printer. Note: To use custom
reports, you must have purchased the Scripting package, and have available custom
report scripts (extension.RPT) or test event scripts (extension .LUA). For details, see
the Scripting on the Touch 1 manual.
To use the report option, follow these steps:
1.
In the Main Menu screen, touch System Setup.
2.
In the System Setup screen, touch Reports.
Touch here
Touch 1 User’s Manual / page 274
Section 14: System Setup Options / Automatic test report result
3.
In the Standard/Custom Reports screen select the buttons for each report
type. You have a number of options available for printing reports. We will discuss these next. Once you’ve set the options, touch OK to return to the System
Setup screen.
Select your report type(s)
...then touch here
Automatic test report
result
If you turn on the automatic printing, the analyzer will print the results of the test on
each cable as soon as the test is complete The automatic reports are printed when each
cable is disconnected from the Touch 1, when the Cancel, or the Home button is
touched, or when the New Test button is touched (in Single Test mode)
There are three types of automatic reports available. You can select only one at a
time. They are:
•
Good and Bad, 1 Line: If this box is checked, the analyzer will print a
one-line report on each cable tested, whether the cable tested as good or
bad. Custom report scripting is not available with this type of automatic
report.
•
Good Only, 1 Page:
•
Standard Parallel Port: If this box is checked, the analyzer will print a
one-page report only on those cables which test as good. Two printout
format options are available. In the Standard Parallel Port setting, you
will get a one- page report in the standard Cirris format.
•
Custom Report: For Custom Report, select either the default
autogood.rpt, or a report script you have created, or modified.
Touch 1 User’s Manual / page 275
Section 14: System Setup Options /
•
Bad Only, 1 Page:
•
Standard Parallel Port: If the Standard Report box is checked, the
analyzer will print a one-page report only on those cables which test as
bad. The report will be printed in the standard Cirris format.
•
Custom Report: If Custom Report is checked, you must select either
the default autobad.rpt script, or a custom script you have created
or modified.
Touch 1 User’s Manual / page 276
Section 14: System Setup Options / Test Summary Report
Test Summary Report
.
You have three options for printing the Test Summary. You set the option you want
by touching the Test Summary button in the Standard/Custom Reports
screen to bring up the Test Summary Report screen. This report is printed when
you touch the Print button in the Test Summary screen. The details on each
option are:
•
All Cables, Standard Report: On this setting, the analyzer will print out
a summary report on all cables tested, whether they tested as good or
bad.
•
Good Cables, Standard Report. On this setting, the analyzer will print
out a summary report only for cables which tested as good.
•
Custom Report: Select either the default testsum.rpt script, or a
custom script you have created or modified.
A standard Test Summary report consists of:
•
•
•
•
•
•
•
•
•
Cable and parameter signatures
Cable description
Adapter signatures
Low and High voltage parameter settings
Connection or net list
Components in the wirelist
Good cables tested
Bad cables tested
Total cables tested (if all cables option is chosen)
Wirelist Report
Touch 1 User’s Manual / page 277
Section 14: System Setup Options / Errors Report
To print the wirelist in the Touch 1, you have two options. You set the option you
want by touching the Wirelist Print button in the Standard/Custom Reports
screen. This report is printed when you touch the Print button in the View/Change
Wirelist screen. Here are the details on each option:
•
Standard Parallel Port: When you choose this option, the analyzer will
print the wirelist in the standard Cirris format. The standard report may
or may not contain a cable description and adapter descriptions, depending upon the specific wirelist. The date and time format is also an
option you can modify. If your wirelist contains child wirelists, a message box will prompt you, asking if you want to print just the Parent
wirelist, or both the Parent and Child wirelists.
•
Custom Report: Select either the default wirelist.rpt script, or a
custom report script you have created or modified.
Errors Report
To print an error list on the Touch 1, you have two options. You set the option you
want by touching the Error(s) Print button in the Standard/Custom Reports
screen. This report is printed when you touch Print in any test error screen. Here are
the details on each option:
•
Standard Parallel Port: When you choose this option, the analyzer will
print the errors listed in the test screen.
•
Custom Report: Either select the default errors.rpt script, or a custom script you have created or modified.
Probe
Where you can use the
probe
The hand-held test probe is designed to help you deal with test points and their labels.
You can use it in these places:
•
In the View/Change Wirelist screen’s Connections (CON) area,
you can use the probe to identify connections when adding and deleting.
•
In the View/Change Wirelist screen’s Components (COMP) area,
you can use the probe to select the test points for the component.
•
In the View/Change Wirelist screen’s label (LABEL) area you can
Touch 1 User’s Manual / page 278
Section 14: System Setup Options /
use the probe to select a test point to label, and then to automatically
label test points.
•
In the View/Change Wirelist screen’s four-wire (4-WIRE) area,
you can use the probe to select test points for the four-wire pairs.
•
You can use the probe to help with test point identification in both the
Single Test and Continuous Test screens (in the windows you
get after testing). When you touch the tip of the probe to a test point, the
Touch 1 will identify that point, then display it for you.
•
Under Tester Checkout, you can run the probe test to verify that the
probe is working properly.
Software Updates
You may need to update the software in your Touch 1 from time to time. Note: To
determine what version of the Touch 1 software you currently have installed, in the
Main Menu screen, touch the? button twice. The main help-on-help screen will
appear with the version information. Press anywhere but inside a button to return to
the main menu screen.
You can do these things with the software update feature:
Installing a new
software update
•
Install a newer version of the software.
•
Reinstall the same version of the software you’ve been using.
•
Install an older version of the software.
To install new software updates, follow these steps:
1.
From the System Setup screen, touch
Touch here
Touch 1 User’s Manual / page 279
Software Update.
Section 14: System Setup Options / Installing a new software update
2.
Touch Install New Version in the Software Update screen. The analyzer
will prompt you to install the floppy disk containing the new software into the
floppy disk drive. Insert the floppy, then touch OK to start the installation process
for the new software. The old software is backed up first, then the software from
the update disk is copied onto the Touch 1. Note: If you install the same version
(or an older version) of the software, a message will appear asking you to ' or
cancel the update. Touch OK to begin the installation.
3.
After the installation is complete, power cycle the Touch 1 (turn it off, then on
again) to make the newly-updated software active in the analyzer.
SOFTWARE UPDATE
SOFTWARE UPDATE
COMPLETED
Power Cycle
the Touch 1
Touch 1 User’s Manual / page 280
Section 14: System Setup Options / Installing a new software update
Feature Updates
The Touch 1 has several features that can be purchased separately and enabled on the
analyzer. Before you can enable any of the features, you’ll need a Feature Access
Code. This code is based on the analyzer’s serial number. When you call Cirris to
obtain your Feature Access Code, have your analyzer’s serial number ready. Call
Cirris at 801-973-4600 or 800-441-9910 to place your order.
These features are:
•
Statistical Process Control (SPC) Note: SPC Link software is installed
on a separate computer, but the SPC feature is enabled on the Touch 1.
•
Scripting Note: Default scripts must be copied onto the Touch 1 using
Disk Utilities and the Default Scripts disk.
•
SCSI Terminator Script Package Note: You must purchase the Scripting
package to use this package. The SCSI script must be enabled using
Retrieve Wirelist.
•
AC Hipot Test
To enable a feature on the Touch 1, follow these steps:
1.
From the System Setup screen, touch Software Update.
Touch here
2.
Touch Enable Optional Features..
Touch here
Touch 1 User’s Manual / page 281
Section 14: System Setup Options / Installing a new software update
3.
In the Enter Feature Access Code screen, OK the code included in the
purchased package, then touch OK. The six-character access code is based on the
analyzer’s serial number, and must be in upper case letters.
4.
In the Feature Installation screen, make sure all the purchased features are
listed, then touch OK. In our example, the Scripting feature is being installed.
5.
Touch OK to return to the System Setup screen. The purchased features are
now available on your Touch 1.
AC Hipot Test (1500-Volt Only)
The AC hipot test is an optional feature that you must purchase separately. The 1500Volt Touch 1 can hipot test cables using AC voltages up to 1000 volts if it contains
scanners designed for 1500-volt testing. If it contains scanners intended for 1000-volt
use, AC testing at 707 volts is possible. The 1000-volt Touch 1 does not do AC hipot
testing.
Touch 1 User’s Manual / page 282
Section 14: System Setup Options / Installing a new software update
Scripting
Scripting is a set of programmable functions and default files that customize the
Touch 1 to extend its functionality. Default scripts and a scripting manual are available from Cirris Systems. Call us at 801-973-4600 or 800-441-9910 for details.
Networking
Your Touch 1 can be set up to work on a Windows NT or Novell Network. For a
complete discussion on how to do this, call Cirris at 1-800-441-9910
SPC Data Collection
Your Touch 1 can be set up to store test results by purchasing the Statistical Process
Control (SPC) package. Software and a manual for SPC data collection is available
from Cirris Systems. Call us at (801) 973-4600 or (800) 441-9910 for details. See the
setup for learning on page 75, and setup in an existing wirelist on page 149.
Signature Display
The six-digit CRC signature displays as the default in all windows and printouts that
contain signatures. The cable signature will also display in the windows with CRC
signatures if the Signature Display option is set to YES. For more information on the
types of signatures see page 90
Change Language
You can change the language in which the Touch 1 displays its prompts. As this manual is written, English, German, and Spanish are available. To change the language,
do these things:
1.
In the System Setup screen, touch Language.
Touch here
Touch 1 User’s Manual / page 283
Section 14: System Setup Options / Installing a new software update
2.
In the Language screen, use the scroll bar to highlight the language, then touch
Change Language.
Highlight the language...
...then touch here
Full-Screen Monitor
For this feature to work, you’ll need a computer keyboard, and a VGA monitor (640 x
480 resolution). If you have such a monitor and keyboard connected to your Touch 1,
you can switch the display to use a full screen monitor. Once the monitor is operating,
the keyboard must be used to operate the Touch 1. For a list of keyboard commands
see page 24. To change the monitor setting, do these things:
1.
In the System Setup screen, touch Monitor Display.
Touch here
2.
In the Monitor Display screen, hit the “m” key on your keyboard to switch to
the full-screen monitor view. To return to the standard view, hit “t” on the keyboard.
Press ‘m’ or ‘t’ on
keyboard to change
display view
Touch 1 User’s Manual / page 284
Section 14: System Setup Options / Installing a new software update
Touch 1 User’s Manual / page 285
Section 14: System Setup Options / Installing a new software update
Touch 1 User’s Manual / page 286
Section 15:
Trouble
Shooting
Learn Errors
Adapter Errors
Test Errors
Self-Test Errors
What do I do if I see an
error message?
For information on errors that occur during the process of learning a cable, see
page 78
See the section “Adapter Installation Errors” on page 173 for information on the
different possible types of adapter errors.
For information on how to interpret errors found during cable testing, see Section 9,
“Interpreting Cable Testing Errors.”
Each time you switch on your Touch 1, the analyzer goes through a complete selfdiagnostic test routine. If there’s a problem, the Touch 1 will prompt you with an
error message. We’ll discuss those in this section.
Check this section of the manual first. It may turn out that the reason for the error is
something you can easily fix yourself, such as a poorly-seated scanner daughter card.
If this doesn’t solve the problem, please contact Cirris Systems at either 1-800-4419910 or 1-801-973-4600. We’ll do whatever it takes to get your Touch 1 working
again. We may be able to give you verbal instructions that will let you correct the
problem yourself, or that will help us diagnose the problem by telephone. To help us,
when you contact one of our customer service representatives, please have this information available:
•
What model of analyzer do you have?
•
What date was the analyzer purchased (if known)?
•
What is the analyzer’s serial number?
•
What diagnostic procedures have you followed, and what prompts or
other results have you seen?
Please have the Touch 1 set up near your telephone when you call. That way, you can
work through the necessary troubleshooting steps as you talk with our customer support team.
Self-Test Errors you
cannot fix yourself
There are a number of self-test errors the Touch 1 may display, which you cannot fix
yourself. If you see one of these errors, telephone Cirris Systems at 801-973-4600 or
800-441-9910. We’ll make arrangements to have you ship the Touch 1 back to us for
repairs.
,#* , &9B &
(8 **#0% #&9
Touch 1 User’s Manual / page 287
Section 15: Trouble Shooting / Self-Test Errors you cannot fix yourself
$"% , C B
# C B
,#* 5, & B &
DDDDDDDD
(8 **#0% #&
$"% , C B
# C B
DDDDDDDD
-, .$" #$"! >*%
.$"" $(3" B
82!% B EA B B
DDDDDDDD
) # 0#"1 !#""!*6F #" !# !# # "G"
! G$*6&
) 0#"1 !#""!*6F " (2* !# !# # !*3"# "G" !F 3$ -, = !"!$
22" # 3 $ *6&
DDDDDDDD
>*% , . ). ,7
B HBH B
DDDDDDDD
>*% , ). ,7 G#" 3 ! B HBH B
DDDDDDDD
, !" 2$(2 I #$2$ 82!%& %+*#2% +#* B E($"%A B B
DDDDDDDD
>*% ,
$ !*3"#
B HBH B
DDDDDDDD
, . #$ #G #*" !
DDDDDDDD
, . 1
DDDDDDDD
# 6(("!* (8 C B (
C B
). GG #G . #$"! 8!+& BJ3 *(
#$*% 3B
DDDDDDDD
, . #$ #G #*" !
82!% BF # B
DDDDDDDD
>*% , .$"" (2",#* !*&K %
BJ ($"% B " B
Touch 1 User’s Manual / page 288
Section 15: Trouble Shooting / Self-Test Errors you cannot fix yourself
DDDDDDDD
@ *#%% ( !$"" #$"! +#* ## *#0&
B & ,
DDDDDDDD
+ .$"" .*(2&
2 ."!$ +#*&
) #$*% 3 B &
B
DDDDDDDD
(2 # "% 2"#2"
)* % G"#( *# !"%
82!% L 2$D#D#+ -
&
DDDDDDDD
+ .$"" .*(2&
) #$*% 3 B &
B
DDDDDDDD
(2 # "% 2"#2"
)* % G"#( *# !"%
82!% L 2$D#D#+D=&
DDDDDDDD
.*3" .2! ! $"( &
" * "G" !&5$>
($"% B
DDDDDDDD
6( !2! ! #$*% 3
8 B 8
8
DDDDDDDD
0%" "%0"
. I G#"!
D.@D>
D. # ,&
&9 8 &
=# B C 8
DDDDDDDD
0%" "%0"
$** %#0 ,
&
& 8 &
=# B C 8
DDDDDDDD
0%" "%0"
$** $2 ,
&
& 8&
=# B C 8
Touch 1 User’s Manual / page 289
Section 15: Trouble Shooting / Self-Test Errors you may be able to fix yourself
Self-Test Errors you
may be able to fix
yourself
If you see one of these self-test error messages, try following the procedure suggested
here to resolve the problem. If this procedure doesn’t solve the problem, or if you
need further help, telephone our customer support team at Cirris Systems. We can be
reached at 1-801-973-4600 or 1-800-441-9910. Please have your Touch 1 set up near
the telephone, so you can follow through on instructions as you talk with a member of
our team. We’ll do everything we can to get your Touch 1 up and running again.
The error messages are:
!
" (3*6 G#" "#$ I !%
Procedure: Check to be sure that the Touch 1’s scanner assembly is properly
connected.
________
! " (3*6 @ > M@.&
Procedure: Check to see that the ribbon cable going to the scanners is properly
connected.
________
*6 5 2# *#%%
Procedure: This is a warning message only. Though the Touch 1 can run with 64
points loaded, the last 4 scanner cards are missing.
________
*%" ! " + 3
G#$ % 6(&
+#* 0** 3 *(%
# +#*&
Procedure: This message indicates that your Touch 1 has at least one older-type
scanner card that is not suitable for 1500-volt use. To make the analyzer work for
1500 volt testing, you must obtain scanner cards from Cirris Systems that are
designed for 1500 volts.
________
7#8 BBBF
%$" 3#"% BBBF
2# BBB
G*% @. &
(6 3 =
@))&
Procedure: This message generally indicates that either the scanner cable or the
scanner itself has failed. Telephone Cirris Systems at 801-973-4600 or 800-441-9910.
You may be able to replace the defective component without having to ship your
Touch 1 to us for factory repair. Note: If you happen to have access to more than one
Touch 1, you may want to try swapping out either the scanner or the scanner cable to
see if this solves the problem.
Touch 1 User’s Manual / page 290
Section 16:
Glossary of
Terms
Adapter signature
Each type of adapter has a signature that’s unique to it. Adapter signatures help the
Touch 1 to “know” when you’ve installed the correct adapter for the tests you’re
doing. The format for an adapter signature is shown here:
J1 D507F1
Scanner position where
the adapter is installed
Adapter signature
Administrative
security record
An administrative security record is a security record which allows its owner to turn
the Touch 1’s security system on and off, and modify security records as needed. Its
security level abbreviation is SS.
Ampere
An ampere (often referred to as an amp) is defined in practical terms as the flow of 1
coulomb of electricity (about 6 billion billion electrons) per second past a point in a
wire. Hence, when one is measuring amperage, one is measuring the rate of flow of
electrons in an electrical conductor. The common electrical symbol for current is I.
Automatic Hipot Test
When this feature is turned on, the Touch 1 will automatically begin a hipot test (once
the preset delay time has passed) after a cable has passed the low-voltage tests. You
won’t have to touch the Start Hipot button to begin a hipot test.
“Bad” cable
A “bad” cable is a cable whose connection list and electrical properties are different
than those of the Sample Cable you’re testing against.
Cable description
You may enter any description you wish. It cannot be longer than 30 characters,
including spaces. This description will appear in the printout header of any
documentation you print. It’s useful when you’re keeping track of the part number of
the cable the wirelist relates to, or when you need to record the batch, job, lot number,
or customer ID for a given job.
Cable Signature
A cable signature is an eleven-digit alphanumeric construct that the analyzer calculates. It is displayed along with the CRC signature only if the Signature Display feature is set to YES under System Options. The first six digits in the cable signature are
unique to the cable adapters and the connection pattern of wires and components in
the cable, and are sometimes referred to as the “connection” signature. The second
five digits of the cable signature indicate the test parameter settings you’ve entered
into the system, and are sometimes referred to as the “parameter” signature.
Component
Resistance setting
This setting separates the lowest resistance of a component other than a wire or a
connector, from resistances that will be recognized as being a connector or a wire.
If you set this parameter correctly, the Touch 1 will be able to recognize a component
(resistor, diode, capacitor) other than a wire or a connector. The resistance of any
individual component must be set above the component resistance setting minimum,
to be recognized as a component.
This function is disabled when you’ve set the Touch 1 to test for wires only. It is one
Touch 1 User’s Manual / page 291
Section 16: Glossary of Terms / Connection Resistance setting
of the low-voltage testing settings.
Connection
Resistance setting
Connection signature
This setting sets the maximum resistance a connection can have, and still pass the
continuity test. This parameter is one of the low-voltage (LV) settings that you reach
through the View & Change Wirelist button in the Test Setup screen.
This is the first six digits of a cable signature. These digits represent the list of
interconnections in a cable. This is also sometimes referred to as the wirelist
signature.
Continuous test
If you turn this feature on, the Touch 1 will automatically begin testing a cable as
soon as you connect the cable to the analyzer. It will perform continuity (low-voltage)
tests, followed by a hipot test (if you’ve turned it on), then resume testing for
continuity repeatedly until you disconnect the cable. This mode helps to detect
intermittent faults in a cable.
Complex cable
A complex cable has components other than wires and connectors within it. Some
cables contain twisted pairs, 4-Wire wires, capacitors, resistors, or diodes that can be
tested using the Touch 1.
CRC Signature
The CRC Signature is the signature that is always displayed. It is a six-digit identifier
composed of the following elements contained in a wirelist: Test parameters, Adapters, Test Point Labels, 4-Wire pairs, Connections, Components, Script filename (if
feature has been installed).
Custom Test Point
Label
The Touch 1 automatically assigns “default” labels to test points. Examples would be
J1-001, J3-023, etc. You can change these labels to labels of your choice. You might
choose to relabel point as ), for instance.These custom test point labels
make reading and using your cable documentation easier.
Delay time
If you’ve turned on automatic hipot testing, you can set a delay time before the Touch
1 turns on the high voltage once a cable has passed the low-voltage tests. This delay
will give you time to get your hands clear of all connections, etc. You can bypass the
delay time by touching the Start Hipot button.
Dwell Time
Usually referred to as the Hipot Duration, this is the amount of time the Hipot
Voltage is applied to each net of test points during the hipot (high-voltage) test.
Error Signature
The first six digits of a cable signature represent the adapters, and the pattern of connections in a cable. If the first six digits in a cable you test are different than they
should be for a “good” cable, there’s something wrong in the pattern of connections
in that cable. Error signatures help you identify repeated connection-related errors.
They do not identify hipot errors, or component value errors.
External switch
When this option is turned on, control of continuity testing is turned over to an
external switch you’ve installed on your Touch 1. When you turn this option off,
control of continuity testing is done from the analyzer’s touch screen.
Filename
A filename in the Touch 1 system is the name of a wirelist file. It is a DOS-style
name. It cannot contain more than eight (8) characters. No spaces are allowed. The
Touch 1 will automatically add the. suffix to any filename you enter.
“Good” cable
A “good” cable is a cable whose connections and other electrical properties are the
same as the Sample Cable you’re testing against.
Hipot Duration
The Hipot Duration (sometimes referred to as the Dwell Time) is the amount of time
the Hipot Voltage is applied to each net of test points during the high-voltage test.
Hipot safety switch
When you want the Touch 1 to respond to an external switch you’ve installed
previously (for hipot testing safety), turn this feature on. When you do this, the
external switch becomes a “dead man” switch on the hipot test. The Touch 1 will only
hipot test if you hold the external switch in the closed position.
Touch 1 User’s Manual / page 292
Section 16: Glossary of Terms / Hipot Voltage
If you release the external switch before a hipot test begins, the Touch 1 will not
perform the hipot test. If you release the external switch while the hipot test is in
progress, the Touch 1 will shut off the high voltage.
Note: If you turn on the hipot safety switch when you don’t have an external switch
installed (or if the external switch is installed, but is not closed), and you attempt to do
a hipot test, you’ll receive a warning message, and the Touch 1 will not perform the
hipot test.
Hipot Voltage
The Hipot Voltage is the voltage the analyzer applies to the cable during the dielectric
strength test (for advanced settings), and the dielectric strength and insulation resistance tests for standard settings.
Insulation Resistance
setting
The HV Insulation Resistance (High-Voltage Insulation Resistance) setting defines
the minimum allowable resistance of insulation materials between points that should
not be connected. It sets the maximum allowable current leakage between points that
should not be connected. Warning! Decreasing the Hipot Voltage setting may make
the highest settings for this parameter unavailable (grayed out).
Link
Location
LV Insulation
Resistance setting
Resistors with resistances between 100k ohms and 1 Megohm learn as links in the
Touch 1 system. To make this link test as a resistor, you must manually modify the
component, and enter the proper resistance value.
The location, is the computer path to where a given wirelist or script is stored.
The LV Insulation Resistance (Low-Voltage Insulation Resistance) setting defines the
difference between connections that should and should not exist, and between opens
and shorts (open circuits and short circuits) that should not exist. Any connection that
has a detected resistance greater than the LV Insulation Resistance setting will be
ignored as a connection. It could cause a hipot test error, however.
This setting is one of the low-voltage testing settings. You reach it through the View
& Change Wirelist button in the Test Setup window.
Manual hipot test
Maximum Soak Time
When you have the manual hipot test option turned on (in the Test Control settings),
you’ll have to touch the START HIPOT button to begin a hipot test once a cable has
passed the low-voltage tests.
This is the maximum amount of time the Hipot Voltage is applied before the actual
Hipot Test measurements begin.
Soak time ends when no current spikes last longer than 10 microseconds during a
period of time equal to the Hipot Duration (Dwell Time) setting. Soak time helps
remove moisture from contaminants present on cables, so that any insulation leakage
is more stable during hipot tests.
MULTI parameter
signature
Parameter signature
Resistance
Sample Cable
If the parameter signature (the last five digits of a cable signature) are shown as
MULTI, the cable contains components other than wires and connectors. It is a
complex cable.
The last five digits within a cable signature. These digits represent the various test
parameters (except soak time) you’ve programmed into the Touch 1.
Resistance is measured in ohms, and is the ability of a material to resist the flow of
electrons. In a conductor, electrons may move freely; therefore conductors have low
resistance. In an insulator, electrons are tightly held; so insulators are said to have a
high resistance. Symbols for resistance are the Greek letter omega (Ω), or the letter R.
A Sample Cable is a cable that you believe is built correctly. The Touch 1 learns the
Touch 1 User’s Manual / page 293
Section 16: Glossary of Terms / Security record
pattern of connections, and the other electrical properties of a Sample Cable. It
compares the information from the cables you test with the information for the
Sample Cable. If the information for the cable you’re testing and the Sample Cable is
the same, the cable under test is a “good” cable. If the two sets of information do not
match, the cable under test is a “bad” cable.
Security record
Simple cable
Single test
Voltage
.WIR suffix on test
files
Wirelist signature
A security record is a file which contains a user’s password, and the various security
levels that he/she has access to.
A simple cable is a cable that is made up only of wires and connectors.
When you turn this mode on, the Touch 1 will perform a single set of continuity (lowvoltage tests), then a hipot test (if you’ve turned hipot testing on). Once that test is
complete, the analyzer stops testing the cable.
In simple terms, voltage may be thought of as electrical pressure. It is measured in
volts. It is the difference in electrical potential (sometimes referred to as electromotive force, or emf) between two points in a circuit. Voltage is commonly abbreviated
either as “V,” or as “E” (for electromotive force). The purpose of all voltages, however they’re delivered, is to move electrons.
The.WIR suffix automatically appears at the end of the name of each test file you
generate on the Touch 1. It indicates that this file contains a wirelist.
This signature only displays if the wirelist contains components. The first six-digit
alphanumeric is composed of the adapters, and the connection wiring pattern. It does
not contain the pattern of components. The last five-digit alphanumeric contains the
component and connection threshold settings. It does not contain the LV insulation
parameter, or any high voltage settings.
Touch 1 User’s Manual / page 294
Section 17:
Example Test
Settings
What’s in this
section?
In this section, we’ll give you some suggestions on which settings to use when you’re
testing some common types of cables. This information isn’t meant to replace your
own testing protocols or specifications. We’re including it because we hope it will
make choosing your own test settings easier. These are guidelines; not hard, fast
rules. Modify the settings as needed to meet your own requirements.
General settings
This group of settings provides a good starting point for testing many kinds of cables.
Things to keep in mind are:
•
Testing with these settings is fast. The higher the Low Voltage
Insulation Resistance setting, the longer the system takes to stabilize, so
the longer it takes to test. Settings greater than 10K ohms are slower.
Suggested Test Settings: General
Conn. Resis.
LV Insul. Resis.
Insul. Resis.
Hipot Voltage
Hipot Duration
High Cap.
Shield Allowed
1K
1K
Not applicable
Off
Not applicable
No
Settings for ribbon
cables
When you are testing ribbon cables, follow these guidelines:
Suggested Test Settings: Ribbon Cables
•
Working Voltage: 300 Volts
•
Dielectric Withstand Voltage: 500 - 1000 Volts
•
Capacitance: 48 pF / foot maximum
Cable
Length
Test Type
Conn.
Resis.
LV Insul.
Resis.
Insul.
Resis.
Hipot
Voltage
Hipot
Duration
High Cap.
Shield
Allowed
< 10 feet
Typical
5
100K
100M
500
0.01
No
<10 feet
Stringent
1
100K
500M
700
1
No
10 - 100 ft.
Typical
20
100K
50M
300
0.01
No
10 - 100 ft.
Stringent
20
100K
100M
500
1
No
> 100 ft.
Typical
200
100K
20M
300
0.01
No
> 100 ft.
Stringent
80
100K
50M
500
1
No
Touch 1 User’s Manual / page 295
Section 17: Example Test Settings / Settings for Discrete Wires (no shield)
Settings for Discrete
Wires (no shield)
When testing discrete wires without shields, follow these guidelines:
Suggested Test Settings: Discrete Wires (no shield)
•
Working Voltage: 300 Volts
•
Dielectric Withstand Voltage (DWV): 900 - 1800 Volts
•
Capacitance: 15 pF / foot
Cable
Length
Test Type
Conn.
Resis.
LV Insul.
Resis.
Insul.
Resis.
Hipot
Voltage
Hipot
Duration
High Cap.
Shield
Allowed
< 10 feet
Typical
5
100K
100M
700
0.01
No
< 10 feet
Stringent
1
100K
500M
1000
1
No
10 - 100 ft.
Typical
20
100K
50M
700
0.01
No
10 - 100 ft.
Stringent
8
100K
100M
700
1
No
> 100 ft.
Typical
200
100K
20M
300
0.01
No
> 100 ft.
Stringent
80
100K
50M
300
1
No
Settings for Discrete
Wires (single shield)
When testing discrete wires with one shield, follow these guidelines:
Suggested Test Settings: Discrete Wires (single shield)
•
Working Voltage: 300 Volts
•
Dielectric Withstand Voltage (DWV): 1000 Volts
•
Capacitance: 60 pF / foot
Cable
Length
Test Type
Conn.
Resis.
LV Insul.
Resis.
Insul.
Resis.
Hipot
Voltage
Hipot
Duration
High Cap.
Shield
Allowed
< 10 feet
Typical
5
100K
100M
500
0.01
No
< 10 feet
Stringent
1
100K
200M
500
1
No
10 - 100 ft.
Typical
20
100K
50M
500
0.01
No
10 - 100 ft.
Stringent
8
100K
100M
500
1
No
> 100 ft.
Typical
200
100K
20M
500
0.01
No
> 100 ft.
Stringent
80
100K
50M
500
1
No
Touch 1 User’s Manual / page 296
Section 17: Example Test Settings / Settings for Discrete Wires (multiple shields)
Settings for Discrete
Wires (multiple
shields)
When you are testing discrete wires with multiple shields, follow these guidelines:
Suggested Test Settings: Discrete Wires (multiple shields)
•
Working Voltage: 300 Volts
•
Dielectric Withstand Voltage (DWV): 1000 Volts
•
Capacitance: 100 pF / foot maximum
Cable
Length
Test Type
Conn.
Resis.
LV Insul.
Resis.
Insul.
Resis.
Hipot
Voltage
Hipot
Duration
High Cap.
Shield
Allowed
<< 6 feet
Typical
3
100K
200M
400
0.01
Yes
<< 6 feet
Stringent
0.8
100K
200M
500
1
Yes
6 - 20 feet
Typical
8
100K
100M
400
0.01
Yes
6 - 20 feet
Stringent
2.7
100K
100M
500
1
Yes
20 - 100 ft.
Typical
20
100K
50m
400
0.01
Yes
20 - 100 ft.
Stringent
8
100K
100M
500
1
Yes
100 - 1000
feet
Typical
200
5M
Not
Applicable
Off
Not
Applicable
Not
Applicable
100 - 1000
feet
Stringent
80
100K
50M
100
1
Yes
> 1000 ft.
(10 nF)*
Typical
> 1000 ft.
(10 nF)*
Stringent
300
* Excessive capacitance may prevent you from testing very long cables.
Settings for cables
with resistors &
diodes
Cables with components other than wires and connectors are referred to as complex
cables. They present some unusual testing problems. These guidelines may help you
decide on test settings for them.
•
Do not hipot test any cable using a voltage greater than 3 times the
manufacturer’s stated working voltage.
•
Testing these cables requires special care. When the Touch 1 is learning
a complicated cable that contains resistors, diodes, or divider networks,
the Connection Resistance refers to the resistance level that definitely
separates wires from resistors. You can set the Connection Resistance
to Calc Cable, and look at several cables to help decide what setting to
use.
•
The Connection Resistance must be set to a value greater than the
Touch 1 User’s Manual / page 297
Section 17: Example Test Settings / Settings for Single Coaxial cables
highest expected wire resistance, and lower than the lowest expected
component resistance.
Settings for Single
Coaxial cables
•
The LV Insulation Resistance should be set at 100K or greater.
•
Settings for Insulation Resistance, Hipot Voltage, and Hipot
Duration are optional.
•
The High Capacitance Shield Allowed setting is optional. No high
voltages are placed across diodes, resistors, capacitors, or links.
When you are testing Single Coaxial cables, follow these guidelines:
Suggested Test Settings: Single Coaxial cables
Cable
Length
Test Type
Conn.
Resis.
LV Insul.
Resis.
Insul.
Resis.
Hipot
Voltage
< 100 feet
Typical
8
100K
100M
700
>100 feet
Typical
80
100K
50M
200
Settings for Flex
Circuits and PC
Boards
Hipot
Duration
High Cap.
Shield
Allowed
No
1
5
No
When you are testing flex circuits or printed circuit boards, follow these guidelines:
Suggested Test Settings: Flex Circuits & PC Boards
Cable
Length
Test Type
Conn.
Resis.
LV Insul.
Resis.
Insul.
Resis.
Hipot
Voltage
Not
Applicable
Typical
8
100K
10M
100
Settings for testing
connectors without
cables
Hipot
Duration
0.1
High Cap.
Shield
Allowed
No
When you are testing connectors without cables, remember these things:
•
Do not hipot test any cable or connector at a voltage more than 3 times
the manufacturer’s stated working voltage.
•
To test a connector, you should create a connection on that connector
before you test it.
•
Connection Resistance may be set (suggested) at 0.5.
•
LV Insulation Resistance setting (suggested): 100K
•
Insulation Resistance setting (suggested): 200M. The Insulation
Touch 1 User’s Manual / page 298
Section 17: Example Test Settings /
Resistance can vary from 10 M to 500 M depending on the connection
type.
Other things you
should know
Additional Settings
•
Hipot Voltage setting (suggested): 500 volts. Hipot Voltage must not
exceed twice the working voltage of the capacitor.
•
Hipot Duration setting (suggested): 0.1 to 1
•
High Capacitance Shield Allowed: No.
•
To test a cable with multiple conductors in one net, you have to lower
the Insulation Resistance under the high voltage settings to as low as 1
M, and turn off the high voltage.
•
High capacitance of a shielded net to other nets may cause cable failures
unless High Capacitance Shield Allowed is set to No.
•
Cables with multiple shields can be hipot tested at higher voltages if the
shields are tied together.
•
The Soak Time setting is used when cables show “has leakage” errors
from humidity. Refer to the MIL specification.
•
Hipot Application is usually set to All Adapter Pins. Connections
Only is used less commonly.
Touch 1 User’s Manual / page 299
Section 17: Example Test Settings / Additional Settings
Touch 1 User’s Manual / page 300
Section 18:
Specifications
(1500 Volt
Hardware)
Test Point Capacity
Test Levels (voltage)
Connection
Resistance Sensitivity
Expandable from 128 to 1024 points in 128-point increments.
For continuity test: 5 VDC, 6 mA max. current (hard-wired).
For hipot test: Voltage 50 to 1500 VDC (1000 VAC) ±5%. Current: 0.1 mA (AC
1.5mA peak) ± 10%. Duration: 0.01 to 120 seconds (AC 1-7200 cycles).
0.1 Ω to 100 KΩ (± 1%) ± 0.1 Ω. Also 500 KΩ, 1 MΩ, 5 MΩ (± 10%).
Four-Wire
0.001 Ω to 1 MΩ(± 2%) ± 0.001 Ω. Extends continuity testing range down to 0.001
Ω.
LV Insulation
Resistance Sensitivity
0.1 Ωto 100K Ω (± 1%) ± 0.1 Ω. Also 500 K Ω, 1 MΩ, 5 MΩ (± 10%). This setting
must always be greater than the connection resistance.
Insulation Resistance
Sensitivity
5 MΩ to 1000 MΩ (± 10%). This is limited by the hipot voltage.
Test rate (typical)
Maximum number of
points per net
For continuity test: 4 milliseconds per net (128 test points in 1/4 second).
For hipot test: Limited by capacitance and hipot test parameters.
1024 test points.
Maximum capacitance
per net
For hipot test:15 nF at 1500 VDC, 2.5 nF at 1000VAC.
For continuity test: Not precisely specified. Tested to 0.1 µF.
Maximum cable length
For continuity test: Not precisely specified. Tested cables at 0.6 miles (970 meters).
For hipot test: Limited by cable capacitance and hipot voltage setting. Lengths less
than 100 feet at 1500 VDC, 120 picofarads per foot. Can test longer lengths at lower
voltage and capacitance.
Usable humidity range
The Touch 1 will test without error in environments with zero to 75% relative humidity. Relative humidity above 75% will adversely affect the analyzer’s performance.
High-voltage energy
limit
Component
Specifications
35 millijoules.
Resistor: 0.1 Ω to 1.0 MΩ, ± 1%, ± 0.1 Ω. Tolerance range 1-99%.
4-Wire Resistor: 0.001 Ω to 1.0 MΩ, ± 2%, ± 0.001 Ω. Tolerance range 1-99%.
Capacitor: Guaranteed range 5 nF to 100 µF, ± 10%, ± 0.02 nF. Tolerance 1-99%.
Extended range (relative measurement) 10 pF to 5 nF, 5%, ± 20 pF (typical).
Twisted Pair: 6 foot minimum, 3 wires minimum.
Touch 1 User’s Guide / page 301
Section 18: Specifications (1500 Volt Hardware)
Wire: 0.1 Ω to 1.0 MΩ, ± 1%, ±0.1Ω.
4-Wire Wire: 0.001 Ω to 1 MΩ, ± 2%, ± 0.001 Ω.
Diode: silicon, germanium, schottky, LED’s, zeners.
Link: Tests networks of components that don’t test alone, and links multiple nets or
components to one hipot test.
Printer output
Hand-held test probe
Memory
Accepts either parallel or serial printers that work with DOS. Printers that run only on
Microsoft Windows do not work.
The probe is standard equipment. It will help you with point identification. Useful
when editing test points, components, and for adding custom point labels.
Wirelists can be stored on the internal hard disk drive, or on floppy disks.
Power
105-135 VAC, 60 Hz, maximum 150 watts. (260 VAC 50 Hz can be set by switch.)
Display
Touch screen technology, 320 x 240 LCD type. Screen contrast is adjustable. Pass
and Fail lights are also included.
Floppy disk drive
Dimensions and
weight
31/2-inch 1.44 megabyte.
Main unit: 22 inches wide x 9 inches deep x 6.55 inches high (56 cm. x 24 cm. x
17cm.). Weight 25.4 pounds (11.25 kilograms).
Add-on expansion box (as many as seven may be used): 6.25 inches wide x 9 inches
deep x 6.55 inches high (16 cm. x 24 cm. x 17 cm). Weight 5.9 pounds (2.68 kilograms).
Warranty
One year parts and labor. Replacement modules available next working day (domestic
U.S.).
Touch 1 User’s Guide / page 302
Section 19:
Specifications
(1000-Volt
Hardware)
Test Point Capacity
Test Levels (voltage)
Expandable from 128 to 256, 384, or 512 points.
For continuity test: 5 VDC (hard-wired).
For hipot test: 50 to 1000 VDC (set by the user as Hipot Voltage).
Connection
Resistance Sensitivity
0.1 ohms to 100 KΩ (± 4%) ± 0.1 ohm. Also 500 KΩ, 1 Megohm, 5 Megohm (±
20%).
Four-Wire
0.001 ohm to 1 Megohm ( ± 4%) ± 0.001 ohm. Extends continuity testing range
down to 0.001 ohms. Resolution 1 Amp up to 1 ohm.
LV Insulation
Resistance Sensitivity
0.1 ohms to 100K ohms (± 4%) ± 0.1 ohm. Also 500 K ohm, 1 Megohm, 5 Megohms
(± 20%). This setting must always be greater than the connection resistance.
Insulation Resistance
Sensitivity
5 Megohms, 10 Megohms, 20 Megohms, 50 Megohms, 100 Megohms, 200
Megohms (± 10%), 500 and 1000 Megohms (± 20%). This is limited by the hipot
voltage.
Test rate (typical)
Maximum number of
points per net
For continuity test: 4 milliseconds per net (128 test points in 1/4 second).
For hipot test: Limited by capacitance and hipot test parameters.
512 test points.
Maximum capacitance
per net
For hipot test:100 nanofarads at 50, 100, 200, 300 volts. 70 nanofarads at 400 volts.
30 nanofarads at 630 volts. 15 nanofarads at 800 volts. 10 nanofarads at 1000 volts.
For continuity test: Not precisely specified. Tested to 0.1 µF.
Maximum cable length
For continuity test: Not precisely specified. Tested cables at 0.6 miles.
For hipot test: Limited by cable capacitance and hipot voltage setting. Lengths < 100
feet at 1000 VDC, 120 picofarads per foot. Can test longer lengths at lower voltage
and capacitance.
Usable humidity range
The Touch 1 will test without error in environments with zero to 75% relative humidity. Relative humidity above 75% will adversely affect the analyzer’s performance.
High-voltage energy
limit
The high-voltage energy limit is 10 millijoules. Current is limited to 6 milliamps for
a maximum of 10 milliseconds.
Component
Specifications
Resistor: 0.1 Ω to 1.0 Megohms, ± 4%, ± 0.1 Ω. Tolerance range 1-99%.
4-Wire Resistor: 0.001 Ω to 1.0 Megohms, ± 4%, ± 0.001 Ω. Tolerance range 1-99%.
Capacitor: Guaranteed range 5 nF to 100 µF, ± 10%, ± 0.02 nF. Tolerance 1-99%.
Extended range (relative measurement) 10 pF to 5 nF, 5%, ± 20 pF (typical).
Twisted Pair: 6 foot minimum, 3 wires minimum.
Wire: 0.1 Ω to 1.0 Megohm, ± 4%, ±0.1Ω.
Touch 1 User’s Manual / page 303
Section 19: Specifications (1000-Volt Hardware) / Printer output
4-Wire Wire: 0.001 Ω to 1 Megohm, ± 4%, ± 0.001 Ω.
Diode: silicon, germanium, schottky, LED’s.
Link: Tests networks of components that don’t test alone, and links multiple nets or
components to one hipot test.
Printer output
Hand-held test probe
Memory
Standard Epson/Centronics-type parallel interface. Pinout matches IBM-PC parallel
port.
The probe is standard equipment. It will help you with point identification. Useful
when editing test points, components, and for adding custom point labels.
Wirelists can be stored on the internal hard disk drive, or on floppy disks.
Power
105-135 VAC, 60 Hz, maximum 150 watts. (260 VAC 50 Hz can be set by switch.)
Display
Touch screen technology, 320 x 240 LCD type. Screen contrast is adjustable. Pass
and Fail lights are also included.
Floppy disk drive
Dimensions and
weight
31/2-inch 1.44 megabyte.
Main unit: 14 inches wide x 9 inches deep x 5.75 inches high. Weight 15.75 pounds
(7.2 kilograms).
Add-on expansion box (as many as three may be used): 6.25 inches wide x 9 inches
deep x 5.75 inches high. Weight 6.25 pounds (2.8 kilograms).
Warranty
One year parts and labor. Replacement modules available next working day (domestic U.S.).
Touch 1 User’s Manual / page 304
Section 20:
Statement of
Warranty
Cirris Systems Corporation warrants the Touch 1 Cable Analyzer to be free of defects
in materials and workmanship for a period of one (1) year from the date of delivery to
you, as evidenced by receipt of your warranty registration form. In the event a defect
develops due to normal use during the warranty period, Cirris Systems will repair or
replace the analyzer with a new or reconditioned unit of equal value. For this warranty to be valid you must complete and return the warranty registration card.
In the event of replacement with a new or reconditioned model, the replacement unit
will continue the warranty period of the original analyzer. Replacement units will be
returned by the same method shipped; generally within one (1) working day.
If analyzer failure results from accident, abuse, or misapplication, Cirris Systems
Corporation shall have no responsibility to replace the analyzer or refund the purchase price. Defects arising from such causes will be considered a breach of this warranty. Cirris Systems Corporation is not responsible for special, incidental, or
consequential damages resulting from any breach of warranty, or under any other
legal theory, including lost profits, downtime, goodwill, damage to or replacement of
equipment and property, and any costs of recovering materials used with the Cirris
Touch 1 Analyzer.
ANY IMPLIED WARRANTIES ARISING OUT OF SALES OF THE TOUCH 1
ANALYZER, INCLUDING BUT NOT LIMITED TO IMPLIED WARRANTIES
OF MERCHANTABILITY AND FITNESS FOR A PARTICULAR PURPOSE
ARE LIMITED IN DURATION TO THE ABOVE STATED ONE (1) YEAR
PERIOD. Cirris Systems SHALL NOT BE LIABLE FOR INCIDENTAL OR
CONSEQUENTIAL DAMAGE, EXPENSES, OR ECONOMIC LOSS.
Some states do not allow limitations on length, or implied warranty, or the exclusion
or limitation of incidental or consequential damages, so the above limitations or
exclusions may not apply to you.
This warranty gives you specific legal rights and you may also have other rights
which vary from state to state.
Cirris Systems Corporation
Salt Lake City, Utah.
PLEASE RECORD PURCHASE DATE AND SERIAL NUMBER BELOW.
DATE:________________________________
SERIAL NUMBER: ______________________
Touch 1 User’s Manual / page 305
Section 20: Statement of Warranty
Touch 1 User’s Manual / page 306
Index
Changing in
adapter list 266
wirelists 98
All Adapter Pins setting 70
Automatic Labeling, test points
Overview 120
Automatic Print After Test 275
Numerics
4-Wire
Fixture 208
4-WIRE KELVIN PAIR Error 187
4-Wire Pairs
Creating 208
Editing 114
4-Wire Resistor 144
4-Wire Wire 144
4-Wire Wires and Components
Range, limits 144
B
BAD 4-WIRE WIRE Error 190, 191
BAD CAPACITOR Error 189
BAD RESISTOR Error 188
BAD WIRE Error 190
Bar Code Scanner 18
Bicolor LED’s 144
By-Wire testing 112, 113
A
C
AC hipot feature
Capabilities 282
installing 37
AC Hipot Frequency 59
AC Mode selection 54
Adapter
Adapter List
adding an adapter to 263
changing an adapter in 266
deleting an adapter from 266
Editing 98
Error 80, 81
Identifying 95
Installation 15
Part Number Identification 14
Signatures 90
Special 14
Types
double-high 14
quad-high 14
single-high 13
Adapter Descriptions
Adding to
adapter list 263
wirelists 98
Cable Signature 90
CALC mode 31
Calibration (Tester Checkout) 268
Overview 267
Probe Test 269
Self-Test 268
Touch Pad Test 269
Capacitor 137
Child wirelist (see Multiple Wirelist) 197
Component 131
4-Wire Resistor 144
4-Wire Wire 144
Adding 132
capacitor 136
custom 144
diode 139
link 142
resistor 136
twisted pair 143
wire 140
Changing
diode 139
link 142
Custom 144
307
Scripting 262
Trigger Events 257
Diode 138, 139
Diode Errors 189
Duration
AC Mode 59
DC Mode 58
Guidelines 48
Learning a Sample Cable 58
Setting in existing wirelist 48
Dwell Time (see Hipot Duration) 48
DWV Hipot Voltage 41
DWV Max Current 55
Deleting 148
Learning 71
Component Resistance learn setting 37
Component Resistance Threshold
Guidelines 103
Setting
on learning a Sample Cable 31
Component script 144
Attaching to wirelist 145
Connection Resistance Threshold 103
in existing wirelist 106
CALC Sample mode 31
Guidlines
on learning a Sample Cable 31
Setting
for learning a cable 33
Connections
Editing 125
Connections Only setting 70
Continuity Errors 186
Contrast 22
Copying Files 165
Corona 39
CRC Signature 90
Custom component 144
Custom Reports 274
Custom Test Point Labels 115
Deleting 125
Formatting Restrictions 115
E
Editing an Adapter in a Wirelist 94
Error
4-WIRE KELVIN PAIR 187
Adapter 81, 173
BAD 4-WIRE RESISTOR 191
BAD 4-WIRE WIRE 190
BAD CAPACITOR 189
BAD RESISTOR 188
BAD WIRE 190
Child wirelist 204
HIGH RESISTANCE 187
HIGH VOLTAGE LEAKAGE 192
INTERMITTENT 187
INVALID 4-WIRE KELVIN PAIR 187
MISWIRE 186
NOT TWISTED 190
OPEN 186
OVERCURRENT 193
Printing Test Errors 185
Self-Test Errors 287
SHORT 186
USER-ABORTED HIPOT 195
Error Signature 91
Error Tones 183
Example Test Settings 295
Expansion Boxes 11
External Switch 178, 256
D
Date/Time 270
Dielectric Breakdown Voltage 42
Dielectric Strength Test 39
Dielectric Withstand Voltage (DWV) 41
Digital Input/Output 253
External Switch 256
Hipot Safety Switch 255
LED 261
Port
location 253
pinout 254
Relay 259
308
F
Hipot duration 58
Hipot Voltage 55
Insulation resis. good for 65
Insulation resistance 64
Insulation resistance test 59
Soak time 65, 66
Corona 39, 40
DC Insulation Resistance 63
DC Insulation Resistance Test 59
Dielectric Breakdown Voltage 42
Dielectric Strength Test 55
DWV Hipot Voltage 55
DWV Max Current 55
Guidelines for setting insulation test voltage 62
High Voltage Insulation Resistance setting
range, limits 45
High Voltage IR Learn Setting
standard mode 45
Hipot Application 70
guidelines for setting 48
Hipot Duration (Dwell Time)
guidelines for setting 48
Hipot Test
standard mode 41
turning on 43
Hipot Testing
advanced mode 54
Hipot Voltage
learn setting 43
Hipot Voltage (Advanced Mode)
how to set 55
Insulation Resis. Good For 65
Insulation Resistance Testing
current flow during IR test 61
Ionization 39
Maximum Current 57
Maximum Soak Time 51
Soak Time
definition 51
guidelines for setting 51
Testing
controlling parts of cable to hipot test
39
Dielectric Strength Test 39
how current flow affects results 39
Factory Defaults 29
Fast Find 155
Faults Locating 184
Feature Updates 281
File
Archiving 169
Copying 169
Deleting 170
Retrieving 163
Filename, format 157
Fixture
4-Wire 208
Definition 208
Floppy Disk
Copying files to 165
Formatting 272
Location 17
Four-Wire Testing 205
4-Wire method 1 208
Overview 205
Setting up 216
Troubleshooting 215
Full-Screen monitor 284
G
Glossary 291
Glow Discharge 40
H
Help System 19
High Capacitance Shield Allowed
Guidelines 68
Setting in existing wirelist 69
Using Links 141
HIGH RESISTANCE Error 187
High Voltage 41
Advanced Mode
AC Hipot frequency 59
DC Insulation voltage 63
Dielectric strength test 55
309
Insulation Resistance Test
Current flow during IR test 61
how it measures insulation 56
Overview 60
Insulation Test Voltage
Guidelines for setting 62
Insulation Test Voltage, Guidelines 62
INTERMITTENT Error 187
Intermittent Testing 176
INVALID 4-WIRE KELVIN PAIR Error
187
Ionization 39
Isolation Test 112
Insulation Resistance Test (IR) 39
High Voltage Insulation Resistance setting
45
HIgh Voltage IR setting 45
HIGH VOLTAGE LEAKAGE Error 192
High Voltage Settings
Hipot Application 70
Hipot Duration (Dwell Time) 48
Hipot Max. Current 56
HV Insulation Resistance 45
Soak Time 50, 51
Standard mode
hipot voltage 43
insulation resistance 43, 45
High-Speed Hipot 180
Hipot Application 70
Hipot Duration see "Duration" 48
Hipot Test
Advanced Mode 54
Standard Mode 41
Turning on Standard Mode 43
Using a hipot safety switch 181
Hipot Testing
Manual vs. Automatic 179
Standard Mode 41
Hipot Voltage
Learn Setting
range, limits 43
K
Keyboard 24
L
Label
Editing 114
Labels
Automatic labeling 120
Custom Test Point Labels
creating 115
Editing 114
Importing 118
Language, Changing 283
Last Modified Settings 28
Leakage Error 40, 192
Learn Settings
4-Wire Fixture 74
CALC mode 31
Components 71
Connection Resistance 31
Errors 78
Factory defaults 29
High voltage settings 41
Hipot Application 69
Learning a Sample Cable 77
Learning Components 72
Range, limits 71
Low Voltage (LV) 30
I
importing custom labels 114
Importing Labels 118, 120
Installation
Adapters 15
Bar Code Scanner 18
Expansion boxes 11, 15
Feature 281
Printer 17
Probe 18
Software 279
Updates 281
Insul Test Parm Signature 91
Insulation Resis. Good For
How to set 65
310
Changing 129
Deleting 130
Network Card
Location for 17
Networking 283
NOT TWISTED Error 190
Statistical Process Control (SPC) 75
Verifying a Learned Wirelist 86
Link
Adding 142
Changing 142
Deleting 148
Usage 141
Locating Faults 184
Location
Creating 165
Deleting 171
Low Voltage
Advanced 112
CALC Sample 31
Connection Resistance 106
Connection Resistance Threshold 102
Editing the Component Resistance 110
Editing the Low Voltage settings 100
Editing the LV Insulation Resistance 108
how to edit 108
Insulation Resistance 108
LV Insulation Resistance 108
Setting
on learning a Sample Cable 35
LV Insulation Resistance Setting 108
O
On-Line Help System 19
OPEN Error 186
Order of Tests 181
OVERCURRENT Error 193
P
Parallel Port 17
Parent wirelist, See multiple wirelists 197
Password
Changing 246
Editing Your Own 246
Entering 251
Lost administrative password 249
Performance Check Kit 25, 268
Port
Barcode scanner 17
Digital Input/Output 17, 253
Keyboard 17
Locations 17
Parallel printer 17
Power supply 17
Serial 17
Video 17
Printer
Installing 17
Troubleshooting 273
What kind to use 274
Printing
4-Wire pairs 273
Adapter listing 273
Automatic Print After Test 275
Errors list 278
File Location and Listings 273
Test Errors 185
M
Maximum Current (Advanced Mode) 57
Maximum Soak Time
How to set 51
MISWIRE error 186
Multiple wirelists
Child wirelist 198
Creating from existing 204
Failure during test 204
Learning 198
Parent wirelist 197
Uses 197
N
Net
Adding 127
311
Types 150
component 150
report 150
test event 150
Uses for 150
Security
Levels 223
description table 223
Overview 223
Password
entering 251
lost 249
Record
deleting 249, 251
editing 236
setting up 224, 230
Turning Off 244
Turning on 241
Self Test
Errors 287
What it does 268
Serial Number
Analyzer 25
Serial Ports
Location of 17
SHORT Error 186
Signature
Adapter 90
Cable 90
Connections 91
CRC 90
Error 91
Insul Test Parm 91
MULTI 91
Parameter Signature 91
Wirelist 91, 294
Signature Display option 283
Soak Time 51
Software
Finding version 25
Updates 279
SPC (Statistical Process Control) 149
Speaker Volume 23
Specifications 301, 303
Starting a Test
"Push-to-Start" 177
Test Results 272
Test results automatically 274
Test Summary 277
Wirelist 152, 277
Probe
Automatic Labeling Using 123
Finding errors 183
Installation 18
Testing using the probe 183
Where you can use it 278
Probe Test 269
R
Rated Operating Voltage 41
Reports
Automatic test report result 275
Custom 274
Enable printing 274
Error(s) report 278
Test Summary report 277
Wirelist report 277
Resistor 135, 136
Retrieving wirelists 163
S
Sample Cable
Learning 77
Preparing to learn 27
Saving a Wirelist 157
Scanner
"J" Positions 12
Screen Contrast 22
Script
Component 144
Custom component 144
Custom reports 274
File
copying to Touch 1 165
deleting 170
with digital Input/Output 262
SCSI Terminators 150
Turning On/Off 151
312
Software 279
USER-ABORTED HIPOT Error 195
Using a hipot safety switch 255
Automatically 176
external "Start" switch 178
Statistical Process Control (SPC)
Editing Settings 149
Learn Setting 75
Overview 149
Switches
110/230 Volt 11
External 178
Hipot Safety 181
On/Off 11
Testing 197
V
Verifying
Features installed 25
Wirelist 86, 151
Version
Hardware 25
Software 25
Video Output Port 17
Voltage Select Switch 11
T
Test
Automatic Print After 275
Order of 181
Starting
"Push to Start" 177
Automatically 176
if the "Test Cable" button is disabled
173
Using an external start switch 178
Stopping 181
Using scripts 144
Using SPC Data Collection 149
Test Errors
Printing 185
Test Mode 175
Test Point Labels
Importing 118
Importing custom labels 118
Test Summary
Described 277
Tester Checkout (Calibration)
Overview 267
Twisted Pair 143
W
Warranty 305
Wire Component 140
Wirelist
Adding an adapter to 95
Child 197
failure 204
learning 198
rules 198
Copying 165
Creating
by learning 30
from scratch 153
Deleting 170
Deleting an Adapter from 97
Editing an adapter in 98
Editing an Existing Wirelist 92
Filename 157
Finding on disk 155
Learning 27
Loading 163
Multiple
testing 203
Parent 197
rules 198
Printing 277
Retrieving 163
Saving 157
U
Update
Feature 281
Hardware 11
313
Signature 91, 294
Verifying
existing 151
Verifying a learned wirelist 86
Verifying after a learn 151
Viewing 93
Z
Zener diodes 138
314