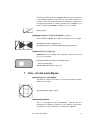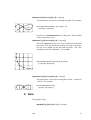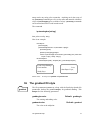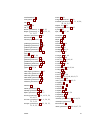
1
PSTricks:
leecheng
PostScript macros for Generic TeX.
M
g
m
Dripping Faucet
Mathematical Model for
a Dripping Faucet
User’s Guide
Timothy Van Zandt
12 March 1993
Version 0.93a
Author’s address:
Department of Economics, Princeton University,
Princeton, NJ 08544-1021, USA. Internet: [email protected]
Contents
Welcome to PSTricks
1
Part I
3
The Essentials
1 Arguments and delimiters
3
2 Color
4
3 Setting graphics parameters
5
4 Dimensions, coordinates and angles
7
5 Basic graphics parameters
8
Part II
Basic graphics objects
10
6 Lines and polygons
10
7 Arcs, circles and ellipses
11
8 Curves
13
9 Dots
15
10 Grids
17
11
Plots
19
Part III More graphics parameters
24
12 Coordinate systems
24
13 Line styles
24
14 Fill styles
27
15 Arrowheads and such
28
16 Custom styles
31
Part IV Custom graphics
32
17 The basics
32
18 Parameters
32
19 Graphics objects
33
Table of contents
1
20 Safe tricks
36
21 Pretty safe tricks
39
22 For hackers only
39
Part V
Picture Tools
41
23 Pictures
41
24 Placing and rotating whatever
42
25 Repetition
46
26 Axes
47
Part VI Text Tricks
52
27 Framed boxes
52
28 Clipping
54
29 Rotation and scaling boxes
55
Part VII Nodes and Node Connections
58
30 Nodes
59
31 Node connections
60
32 Attaching labels to node connections
66
Part VIII Special Tricks
70
33 Coils and zigzags
70
34 Special coordinates
71
35 Overlays
73
36 The gradient fill style
74
37 Adding color to tables
75
38 Typesetting text along a path
76
39 Stroking and filling character paths
77
40 Importing EPS files
78
Table of contents
2
41 Exporting EPS files
79
Help
82
A Boxes
82
B Tips and More Tricks
85
C Including PostScript code
86
D Troubleshooting
87
Table of contents
3
Welcome to PSTricks
PSTricks is a collection of PostScript-based TEX macros that is compatible with most TEX macro packages, including Plain TEX, LaTEX,
AMSTEX, and AMS-LaTEX. PSTricks gives you color, graphics, rotation, trees and overlays. PSTricks puts the icing (PostScript) on your
cake (TEX)!
To install PSTricks, follow the instructions in the file read-me.pst that
comes with the PSTricks package. Even if PSTricks has already been
installed for you, give read-me.pst a look over.
This User’s Guide verges on being a reference manual, meaning that it is
not designed to be read linearly. Here is a recommended strategy: Finish
reading this brief overview of the features in PSTricks. Then thumb
through the entire User’s Guide to get your own overview. Return to
Part I (Essentials) and read it carefully. Refer to the remaining sections
as the need arises.
When you cannot figure out how to do something or when trouble arises,
check out the appendices (Help). You just might be lucky enough to
find a solution. There is also a LaTEX file samples.pst of samples that is
distributed with PSTricks. Look to this file for further inspiration.
This documentation is written with LaTEX. Some examples use LaTEX
specific constructs and some don’t. However, there is nothing LaTEX
specific about any of the macros, nor is there anything that does not work
with LaTEX. This package has been tested with Plain TEX, LaTEX, AMSLaTEXand AMSTEX, and should work with other TEX macro packages
as well.
pstricks
The main macro file is pstricks.tex/pstricks.sty. Each of the PSTricks
macro files comes with a .tex extension and a .sty extension; these are
equivalent, but the .sty extension means that you can include the file
name as a LaTEX document style option.
There are numerous supplementary macro files. A file, like the one
above and the left, is used in this User’s Guide to remind you that you
must input a file before using the macros it contains.
For most PSTricks macros, even if you misuse them, you will not get
PostScript errors in the output. However, it is recommended that you
resolve any TEX errors before attempting to print your document. A
few PSTricks macros pass on PostScript errors without warning. Use
Welcome to PSTricks
1
PS
these with care, especially if you are using a networked printer, because
PostScript errors can cause a printer to bomb. Such macros are pointed
out in strong terms, using a warning like this one:
Warning: Use macros that do not check for PostScript
errors with care. PostScript errors can cause a printer to
bomb!
Keep in mind the following typographical conventions in this User’s
Guide.
• All literal input characters, i.e., those that should appear verbatim
in your input file, appear in upright Helvetica and Helvetica-Bold
fonts.
• Meta arguments, for which you are supposed to substitute a value
(e.g., angle) appear in slanted Helvetica-Oblique and HelveticaBoldOblique fonts.
• The main entry for a macro or parameter that states its syntax
appears in a large bold font, except for the optional arguments,
which are in medium weight. This is how you can recognize the
optional arguments.
• References to PSTricks commands and parameters within paragraphs are set in Helvetica-Bold.
Welcome to PSTricks
2
I
The Essentials
1 Arguments and delimiters
Here is some nitty-gritty about arguments and delimiters that is really
important to know.
The PSTricks macros use the following delimiters:
Curly braces
{arg }
Brackets (only for optional arguments)
[arg ]
Parentheses and commas for coordinates
= and , for parameters
(x , y )
par1=val1, …
Spaces and commas are also used as delimiters within arguments, but
in this case the argument is expanded before looking for the delimiters.
Always use a period rather than a comma to denote the decimal point,
so that PSTricks doesn’t mistake the comma for a delimiter.
The easiest mistake to make with the PSTricks macros is to mess up the
delimiters. This may generate complaints from TEX or PSTricks about
bad arguments, or other unilluminating errors such as the following:
! Use of \get@coor doesn’t match its definition.
! Paragraph ended before \pst@addcoor was complete.
! Forbidden control sequence found while scanning use of \check@arrow.
! File ended while scanning use of \lput.
Delimiters are generally the first thing to check when you get errors with
a PSTricks macro.
Since PSTricks macros can have many arguments, it is useful to know
that you can leave a space or new line between any arguments, except
between arguments enclosed in curly braces. If you need to insert a
new line between arguments enclosed in curly braces, put a comment
character % at the end of the line.
The Essentials
3
As a general rule, the first non-space character after a PSTricks macro
should not be a [ or (. Otherwise, PSTricks might think that the [ or ( is
actually part of the macro. You can always get around this by inserting
a pair {} of braces somewhere between the macro and the [ or (.
2 Color
The grayscales
black, darkgray, gray, lightgray, and white,
and the colors
red, green, blue, cyan, magenta, and yellow
are predefined in PSTricks.
This means that these names can be used with the graphics objects that
are described in later sections. This also means that the command \gray
(or \red, etc.) can be used much like \rm or \tt, as in
{\gray This stuff should be gray.}
The commands \gray, \red, etc. can be nested like the font commands
as well. There are a few important ways in which the color commands
differ from the font commands:
1. The color commands can be used in and out of math mode (there
are no restrictions, other than proper TEX grouping).
2. The color commands affect whatever is in their scope (e.g., lines),
not simply characters.
3. The scope of the color commands does not extend across pages.
4. The color commands are not as robust as font commands when
used inside box macros. See page 89 for details. You can avoid
most problems by explicitly grouping color commands (e.g., enclosing the scope in braces {}) whenever these are in the argument
of another command.1
1
However, this is not necessary with the PSTricks LR-box commands, expect when
\psverbboxtrue is in effect. See Section A.
Color
4
You can define or redefine additional colors and grayscales with the
following commands. In each case, numi is a number between 0 and 1.
Spaces are used as delimiters—don’t add any extraneous spaces in the
arguments.
\newgray{color }{num}
num is the gray scale specification, to be set by PostScript’s setgray
operator. 0 is black and 1 is white. For example:
\newgray{darkgray}{.25}
\newrgbcolor{color }{num1 num2 num3 }
num1 num2 num3 is a red-green-blue specification, to be set by
PostScript’s setrgbcolor operator. For example,
\newrgbcolor{green}{0 1 0}
\newhsbcolor{color }{num1 num2 num3 }
num1 num2 num3 is an hue-saturation-brightness specification,
to be set by PostScript’s sethsbcolor operator. For example,
\newhsbcolor{mycolor}{.3 .7 .9}
\newcmykcolor{color }{num1 num2 num3 num4 }
num1 num2 num3 num4 is a cyan-magenta-yellow-black specification, to be set by PostScript’s newcmykcolor operator. For
example,
\newcmykcolor{hercolor}{.5 1 0 .5}
For defining new colors, the rbg model is a sure thing. hsb is not
recommended. cmyk is not supported by all Level 1 implementations of
PostScript, although it is best for color printing. For more information on
color models and color specifications, consult the PostScript Language
Reference Manual, 2nd Edition (Red Book), and a color guide.
Driver notes:
The command \pstVerb must be defined.
3 Setting graphics parameters
PSTricks uses a key-value system of graphics parameters to customize
the macros that generate graphics (e.g., lines and circles), or graphics
combined with text (e.g., framed boxes). You can change the default
values of parameters with the command \psset, as in
Setting graphics parameters
5
\psset{fillcolor=yellow}
\psset{linecolor=blue,framearc=.3,dash=3pt 6pt}
The general syntax is:
\psset{par1=value1,par2=value2,… }
As illustrated in the examples above, spaces are used as delimiters for
some of the values. Additional spaces are allowed only following the
comma that separates par =value pairs (which is thus a good place to start
a new line if there are many parameter changes). E.g., the first example
is acceptable, but the second is not:
\psset{fillcolor=yellow, linecolor=blue}
\psset{fillcolor= yellow,linecolor =blue }
The parameters are described throughout this User’s Guide, as they are
needed.
Nearly every macro that makes use of graphics parameters allows you
to include changes as an optional first argument, enclosed in square
brackets. For example,
\psline[linecolor=green,linestyle=dotted](8,7)
draws a dotted, green line. It is roughly equivalent to
{\psset{linecolor=green,linestyle=dotted}\psline(8,7)}
For many parameters, PSTricks processes the value and stores it in a
peculiar form, ready for PostScript consumption. For others, PSTricks
stores the value in a form that you would expect. In the latter case, this
User’s Guide will mention the name of the command where the value
is stored. This is so that you can use the value to set other parameters.
E.g.,
\psset{linecolor=\psfillcolor,doublesep=.5\pslinewidth}
However, even for these parameters, PSTricks may do some processing
and error-checking, and you should always set them using \psset or as
optional parameter changes, rather than redefining the command where
the value is stored.
Setting graphics parameters
6
4 Dimensions, coordinates and angles
Whenever an argument of a PSTricks macro is a dimension, the unit is
optional. The default unit is set by the
unit=dim
Default: 1cm
parameter. For example, with the default value of 1cm, the following
are equivalent:
\psset{linewidth=.5cm}
\psset{linewidth=.5}
By never explicitly giving units, you can scale graphics by changing the
value of unit.
You can use the default coordinate when setting non-PSTricks dimensions as well, using the commands
\pssetlength{cmd }{dim}
\psaddtolength{cmd }{dim}
where cmd is a dimension register (in LaTEX parlance, a “length”), and
dim is a length with optional unit. These are analogous to LaTEX’s
\setlength and \addtolength.
Coordinate pairs have the form (x , y ). The origin of the coordinate
system is at TEX’s currentpoint. The command \SpecialCoor lets you use
polar coordinates, in the form (r ;a), where r is the radius (a dimension)
and a is the angle (see below). You can still use Cartesian coordinates.
For a complete description of \SpecialCoor, see Section 34.
The unit parameter actually sets the following three parameters:
xunit=dim
yunit=dim
runit=dim
Default: 1cm
Default: 1cm
Default: 1cm
These are the default units for x-coordinates, y-coordinates, and all
other coordinates, respectively. By setting these independently, you can
scale the x and y dimensions in Cartesian coordinate unevenly. After
changing yunit to 1pt, the two \psline’s below are equivalent:
\psset{yunit=1pt}
\psline(0cm,20pt)(5cm,80pt)
\psline(0,20)(5,80)
Dimensions, coordinates and angles
7
The values of the runit, xunit and yunit parameters are stored in the
dimension registers \psunit(also \psrunit), \psxunit and \psyunit.
Angles, in polar coordinates and other arguments, should be a number
giving the angle in degrees, by default. You can also change the units
used for angles with the command
\degrees[num]
num should be the number of units in a circle. For example, you might
use
\degrees[100]
to make a pie chart when you know the shares in percentages. \degrees
without the argument is the same as
\degrees[360]
The command
\radians
is short for
\degrees[6.28319]
\SpecialCoor lets you specify angles in other ways as well.
5 Basic graphics parameters
The width and color of lines is set by the parameters:
linewidth=dim
linecolor=color
Default: .8pt
Default: black
The linewidth is stored in the dimension register \pslinewidth, and the
linecolor is stored in the command \pslinecolor.
The regions delimited by open and closed curves can be filled, as determined by the parameters:
Basic graphics parameters
8
fillstyle=style
fillcolor=color
When fillstyle=none, the regions are not filled. When fillstyle=solid, the
regions are filled with fillcolor. Other fillstyle’s are described in Section
14.
The graphics objects all have a starred version (e.g., \psframe*) which
draws a solid object whose color is linecolor. For example,
\psellipse*(1,.5)(1,.5)
Open curves can have arrows, according to the
arrows=arrows
parameter. If arrows=-, you get no arrows. If arrows=<->, you get
arrows on both ends of the curve. You can also set arrows=-> and
arrows=<-, if you just want an arrow on the end or beginning of the
curve, respectively. With the open curves, you can also specify the
arrows as an optional argument enclosed in {} brackets. This should
come after the optional parameters argument. E.g.,
\psline[linewidth=2pt]{<-}(2,1)
Other arrow styles are described in Section 15
If you set the
showpoints=true/false
Default: false
parameter to true, then most of the graphics objects will put dots at
the appropriate coordinates or control points of the object.2 Section 9
describes how to change the dot style.
2
The parameter value is stored in the conditional \ifshowpoints.
Basic graphics parameters
9
II
Basic graphics objects
6 Lines and polygons
The objects in this section also use the following parameters:
Default: 0pt
linearc=dim
The radius of arcs drawn at the corners of lines by the \psline and
\pspolygon graphics objects. dim should be positive.
Default: 0
framearc=num
In the \psframe and the related box framing macros, the radius
of rounded corners is set, by default, to one-half num times the
width or height of the frame, whichever is less. num should be
between 0 and 1.
cornersize=relative/absolute
Default: relative
If cornersize is relative, then the framearc parameter determines
the radius of the rounded corners for \psframe, as described above
(and hence the radius depends on the size of the frame). If
cornersize is absolute, then the linearc parameter determines the
radius of the rounded corners for \psframe (and hence the radius
is of constant size).
Now here are the lines and polygons:
\psline*[par]{arrows }(x0 ,y0 )(x1,y1)… (xn,yn)
This draws a line through the list of coordinates. For example:
2
1
\psline[linewidth=2pt,linearc=.25]{->}(4,2)(0,1)(2,0)
0
0
1
2
3
4
\qline(coor0)(coor1)
Basic graphics objects
10
This is a streamlined version of \psline that does not pay attention
to the arrows parameter, and that can only draw a single line
segment. Note that both coordinates are obligatory, and there is
no optional argument for setting parameters (use \psset if you
need to change the linewidth, or whatever). For example:
1
\qline(0,0)(2,1)
0
0
1
2
\pspolygon*[par](x0 ,y0 )(x1,y1)(x2 ,y2 )… (xn,yn)
This is similar to \psline, but it draws a closed path. For example:
2
\pspolygon[linewidth=1.5pt](0,2)(1,2)
\pspolygon*[linearc=.2,linecolor=darkgray](1,0)(1,2)(4,0)(4,2)
1
0
0
1
2
3
4
\psframe*[par](x0 ,y0 )(x1,y1)
\psframe draws a rectangle with opposing corners (x0 , y0 ) and
(x1, y1). For example:
2
\psframe[linewidth=2pt,framearc=.3,fillstyle=solid,
fillcolor=lightgray](4,2)
\psframe*[linecolor=white](1,.5)(2,1.5)
1
0
0
1
2
3
4
7 Arcs, circles and ellipses
\pscircle*[par](x0 ,y0 ){radius }
This draws a circle whose center is at (x0 , y0 ) and that has radius
radius. For example:
2
1
\pscircle[linewidth=2pt](.5,.5){1.5}
0
-1
-1
0
1
2
\qdisk(coor){radius }
This is a streamlined version of \pscircle*. Note that the two
arguments are obligatory and there is no parameters arguments.
To change the color of the disks, you have to use \psset:
Arcs, circles and ellipses
11
\psset{linecolor=gray}
\qdisk(2,3){4pt}
\pswedge*[par](x0 ,y0 ){radius }{angle1}{angle2 }
This draws a wedge whose center is at (x0 , y0 ), that has radius
radius, and that extends counterclockwise from angle1 to angle2 .
The angles must be specified in degrees. For example:
2
1
\pswedge[linecolor=gray,linewidth=2pt,fillstyle=solid]{2}{0}{70}
0
0
1
2
\psellipse*[par](x0 ,y0 )(x1,y1)
(x0 , y0 ) is the center of the ellipse, and x1 and y1 are the horizontal
and vertical radii, respectively. For example:
1
0
\psellipse[fillcolor=lightgray](.5,0)(1.5,1)
-1
-1
0
1
2
\psarc*[par]{arrows }(x , y ){radius }{angleA}{angleB}
This draws an arc from angleA to angleB , going counter clockwise,
for a circle of radius radius and centered at (x , y ). You must include
either the arrows argument or the (x , y ) argument. For example:
2
1
\psarc*[showpoints=true](1.5,1.5){1.5}{215}{0}
0
0
1
2
3
See how showpoints=true draws a dashed line from the center to
the arc; this is useful when composing pictures.
\psarc also uses the parameters:
arcsepA=dim
Default: 0pt
angleA is adjusted so that the arc would just touch a line of
width dim that extended from the center of the arc in the
direction of angleA.
arcsepB=dim
Default: 0pt
This is like arcsepA, but angleB is adjusted.
Arcs, circles and ellipses
12
arcsep=dim
This just sets both arcsepA and arcsepB.
Default: 0
These parameters make it easy to draw two intersecting lines and
then use \psarc with arrows to indicate the angle between them.
For example:
3
2
\SpecialCoor
\psline[linewidth=2pt](4;50)(0,0)(4;10)
\psarc[arcsepB=2pt]{->}{3}{10}{50}
1
0
0
1
2
3
4
\psarcn*[par]{arrows }(x , y ){radius }{angleA}{angleB}
This is like \psarc, but the arc is drawn clockwise. You can
achieve the same effect using \psarc by switching angleA and
angleB and the arrows.3
8 Curves
\psbezier*[par]{arrows }(x0 ,y0 )(x1,y1)(x2 ,y2 )(x3 ,y3 )
\psbezier draws a bezier curve with the four control points. The
curve starts at the first coordinate, tangent to the line connecting
to the second coordinate. It ends at the last coordinate, tangent to
the line connecting to the third coordinate. The second and third
coordinates, in addition to determining the tangency of the curve
at the endpoints, also “pull” the curve towards themselves. For
example:
\psbezier[linewidth=2pt,showpoints=true]{->}(0,0)(1,4)(2,1)(4,3.5)
3
However, with \pscustom graphics object, described in Part IV, \psarcn is not
redundant.
Curves
13
showpoints=true puts dots in all the control points, and connects
them by dashed lines, which is useful when adjusting your bezier
curve.
\parabola*[par]{arrows }(x0 , y0 )(x1, y1)
Starting at (x0 , y0 ), \parabola draws the parabola that passes
through (x0 , y0 ) and whose maximum or minimum is (x1, y1). For
example:
3
2
\parabola*(1,1)(2,3)
\psset{xunit=.01}
\parabola{<->}(400,3)(200,0)
1
0
0
1
2
3
4
The next three graphics objects interpolate an open or closed curve
through the given points. The curve at each interior point is perpendicular to the line bisecting the angle ABC, where B is the interior point,
and A and C are the neighboring points. Scaling the coordinates does
not cause the curve to scale proportionately.
The curvature is controlled by the following parameter:
curvature=num1 num2 num3
Default: 1 .1 0
You have to just play around with this parameter to get what
you want. Individual values outside the range -1 to 1 are either
ignored or are for entertainment only. Below is an explanation of
what each number does. A, B and C refer to three consecutive
points.
Lower values of num1 make the curve tighter.
Lower values of num2 tighten the curve where the angle ABC is
greater than 45 degrees, and loosen the curve elsewhere.
num3 determines the slope at each point. If num3 =0, then the
curve is perpendicular at B to the bisection of ABC. If num3 =-1,
then the curve at B is parallel to the line AC. With this value (and
only this value), scaling the coordinates causes the curve to scale
proportionately. However, positive values can look better with
irregularly spaced coordinates. Values less than -1 or greater than
2 are converted to -1 and 2, respectively.
Here are the three curve interpolation macros:
Curves
14
\pscurve*[par]{arrows }(x1, y1) … (xn, yn)
This interpolates an open curve through the points. For example:
2
\pscurve[showpoints=true]{<->}(0,1.3)(0.7,1.8)
(3.3,0.5)(4,1.6)(0.4,0.4)
1
0
0
1
2
3
4
Note the use of showpoints=true to see the points. This is helpful
when constructing a curve.
\psecurve*[par]{arrows }(x1, y1) … (xn, yn)]
This is like \pscurve, but the curve is not extended to the first and
last points. This gets around the problem of trying to determine
how the curve should join the first and last points. The e has
something to do with “endpoints”. For example:
4
3
2
\psecurve[showpoints=true](.125,8)(.25,4)(.5,2)
(1,1)(2,.5)(4,.25)(8,.125)
1
0
0
1
2
3
4
\psccurve*[par]{arrows }(x1, y1) … (xn, yn)
This interpolates a closed curve through the points. c stands for
“closed”. For example:
1
\psccurve[showpoints=true]
(.5,0)(3.5,1)(3.5,0)(.5,1)
0
0
1
2
3
4
9 Dots
The graphics object
\psdots*[par ](x1,y1)(x2 ,y2 )… (xn,yn)
Dots
15
puts a dot at each coordinate. What a “dot” is depends on the value of
the
Default: *
dotstyle=style
parameter. This also determines the dots you get when showpoints=true.
The dot styles are also pretty intuitive:
Style
Example
Style
*
square
o
square*
+
pentagon
triangle
pentagon*
triangle*
|
Example
As with arrows, there is a parameter for scaling the dots:
dotscale=num1 num2
Default: 1
The dots are scaled horizontally by num1 and vertically by num2 . If
you only include one number, the arrows are scaled the same in both
directions.
There is also a parameter for rotating the dots:
dotangle=angle
Default: 0
Thus, e.g., by setting dotangle=45, the + dotstyle gives you an x, and
the square dotstyle gives you a diamond. Note that the dots are first
scaled and then rotated.
The unscaled size of the¨| dot style is controlled by the tbarsize parameter,
and the unscaled size of the remaining dot styles is controlled by the
dotsize. These are described in Section 15. The radius as determined
by the value of dotsize is the radius of solid or open circles. The other
types of dots are of similar size.4
The dot sizes are allowed to depend on the linewidth because of the
showpoints parameter . However, you can set the dot sizes to an absolute
dimension by setting the second number in the dotsize parameter to 0.
E.g.,
\psset{dotsize=3pt 0}
sets the size of the dots to 3pt, independent of the value of linewidth.
4
The polygons are sized to have the same area as the circles. A diamond is just a
rotated square.
Dots
16
10 Grids
PSTricks has a powerful macro for making grids and graph paper:
\psgrid(x0 ,y0 )(x1,y1)(x2 ,y2 )
\psgrid draws a grid with opposing corners (x1, y1) and (x2 , y2 ). The
intervals are numbered, with the numbers positioned at x0 and y0 . The
coordinates are always interpreted as Cartesian coordinates. For example:
2
1
\psgrid(0,0)(-1,-1)(3,2)
0
-1
0
1
2
3
-1
(Note that the coordinates and label positioning work the same as with
\psaxes.)
The main grid divisions occur on multiples of xunit and yunit. Subdivisions are allowed as well. Generally, the coordinates would be given as
integers, without units.
If the (x0 , y0 ) coordinate is omitted, (x1, y1) is used. The default for
(x1, y1) is (0,0). If you don’t give any coordinates at all, then the coordinates of the current \pspicture environment are used or a 10x10 grid is
drawn. Thus, you can include a \psgrid command without coordinates
in a \pspicture environment to get a grid that will help you position
objects in the picture.
The main grid divisions are numbered, with the numbers drawn next to
the vertical line at x0 (away from x2 ) and next to the horizontal line at
x1 (away from y2 ). (x1, y1) can be any corner of the grid, as long as
(x2 , y2 ) is the opposing corner, you can position the labels on any side
you want. For example, compare
1
\psgrid(0,0)(4,1)
0
0
1
2
3
4
and
0
1
2
3
4
1
\psgrid(4,1)(0,0)
0
Grids
17
The following parameters apply only to \psgrid:
gridwidth=dim
Default: .8pt
The width of grid lines.
gridcolor=color
Default: black
The color of grid lines.
griddots=num
Default: 0
If num is positive, the grid lines are dotted, with num dots per
division.
gridlabels=dim
Default: 10pt
The size of the numbers used to mark the grid.
gridlabelcolor=color
Default: black
The color of the grid numbers.
subgriddiv=int
Default: 5
The number of grid subdivisions.
subgridwidth=dim
Default: .4pt
The width of subgrid lines.
subgridcolor=color
Default: gray
The color of subgrid lines.
subgriddots=num
Default: 0
Like griddots, but for subdivisions.
Here is a familiar looking grid which illustrates some of the parameters:
1
0
\psgrid[subgriddiv=1,griddots=10,gridlabels=7pt](-1,-1)(3,1)
-1
-1
0
1
2
3
Note that the values of xunit and yunit are important parameters for
\psgrid, because they determine the spacing of the divisions. E.g., if the
value of these is 1pt, and then you type
\psgrid(0,0)(10in,10in)
Grids
18
you will get a grid with 723 main divisions and 3615 subdivisions!
(Actually, \psgrid allows at most 500 divisions or subdivisions, to limit
the damage done by this kind of mistake.) Probably you want to set unit
to .5in or 1in, as in
\psgrid[unit=.5in](0,0)(20,20)
11 Plots
pst-plot
The plotting commands described in this part are defined in pst-plot.tex/pstplot.sty, which you must load first.
The \psdots, \psline, \pspolygon, \pscurve, \psecurve and \psccurve
graphics objects let you plot data in a variety of ways. However, first
you have to generate the data and enter it as coordinate pairs (x , y ). The
plotting macros in this section give you other ways to get and use the
data. (Section 26 tells you how to generate axes.)
To parameter
plotstyle=style
Default: line
determines what kind of plot you get. Valid styles are dots, line, polygon,
curve, ecurve, ccurve. E.g., if the plotstyle is polygon, then the macro
becomes a variant of the \pspolygon object.
You can use arrows with the plot styles that are open curves, but there
is no optional argument for specifying the arrows. You have to use the
arrows parameter instead.
PS
Warning: No PostScript error checking is provided for
the data arguments. Read Appendix C before including
PostScript code in the arguments.
There are system-dependent limits on the amount of data
TEX and PostScript can handle. You are much less likely to
exceed the PostScript limits when you use the line, polygon
or dots plot style, with showpoints=false, linearc=0pt, and
no arrows.
Note that the lists of data generated or used by the plot commands cannot
contain units. The values of \psxunit and \psyunit are used as the unit.
Plots
19
\fileplot*[par]{file }
\fileplot is the simplest of the plotting functions to use. You just
need a file that contains a list of coordinates (without units), such
as generated by Mathematica or other mathematical packages.
The data can be delimited by curly braces { }, parentheses ( ),
commas, and/or white space. Bracketing all the data with square
brackets [ ] will significantly speed up the rate at which the data is
read, but there are system-dependent limits on how much data TEX
can read like this in one chunk. (The [ must go at the beginning
of a line.) The file should not contain anything else (not even
\endinput), except for comments marked with %.
\fileplot only recognizes the line, polygon and dots plot styles,
and it ignores the arrows, linearc and showpoints parameters.
The \listplot command, described below, can also plot data from
file, without these restrictions and with faster TEX processing.
However, you are less likely to exceed PostScript’s memory or
operand stack limits with \fileplot.
If you find that it takes TEX a long time to process your \fileplot command, you may want to use the \PSTtoEPS command
described on page 80. This will also reduce TEX’s memory requirements.
\dataplot*[par]{commands }
\dataplot is also for plotting lists of data generated by other pro-
grams, but you first have to retrieve the data with one of the
following commands:
\savedata{command }[data]
\readdata{command }{file }
data or the data in file should conform to the rules described above
for the data in \fileplot (with \savedata, the data must be delimited
by [ ], and with \readdata, bracketing the data with [ ] speeds things
up). You can concatenate and reuse lists, as in
\readdata{\foo}{foo.data}
\readdata{\bar}{bar.data}
\dataplot{\foo\bar}
\dataplot[origin={0,1}]{\bar}
The \readdata and \dataplot combination is faster than \fileplot
if you reuse the data. \fileplot uses less of TEX’s memory than
\readdata and \dataplot if you are also use \PSTtoEPS.
Plots
20
Here is a plot of Integral(sin(x)). The data was generated by
Mathematica, with
Table[{x,N[SinIntegral[x]]},{x,0,20}]
and then copied to this document.
\psset{xunit=.2cm,yunit=1.5cm}
\savedata{\mydata}[
{{0, 0}, {1., 0.946083}, {2., 1.60541}, {3., 1.84865}, {4., 1.7582},
{5., 1.54993}, {6., 1.42469}, {7., 1.4546}, {8., 1.57419},
{9., 1.66504}, {10., 1.65835}, {11., 1.57831}, {12., 1.50497},
{13., 1.49936}, {14., 1.55621}, {15., 1.61819}, {16., 1.6313},
{17., 1.59014}, {18., 1.53661}, {19., 1.51863}, {20., 1.54824}}]
\dataplot[plotstyle=curve,showpoints=true,
dotstyle=triangle]{\mydata}
\psline{<->}(0,2)(0,0)(20,0)
\listplot*[par]{list }
\listplot is yet another way of plotting lists of data. This time,
list should be a list of data (coordinate pairs), delimited only by
white space. list is first expanded by TEX and then by PostScript.
This means that list might be a PostScript program that leaves
on the stack a list of data, but you can also include data that
has been retrieved with \readdata and \dataplot. However, when
using the line, polygon or dots plotstyles with showpoints=false,
linearc=0pt and no arrows, \dataplot is much less likely than
\listplot to exceed PostScript’s memory or stack limits. In the
preceding example, these restrictions were not satisfied, and so
the example is equivalent to when \listplot is used:
...
\listplot[plotstyle=curve,showpoints=true,
dotstyle=triangle]{\mydata}
...
\psplot*[par]{xmin }{xmax }{function}
\psplot can be used to plot a function f (x), if you know a little
PostScript. function should be the PostScript code for calculat-
ing f (x). Note that you must use x as the dependent variable.
PostScript is not designed for scientific computation, but \psplot
is good for graphing simple functions right from within TEX. E.g.,
\psplot[plotpoints=200]{0}{720}{x sin}
Plots
21
plots sin(x) from 0 to 720 degrees, by calculating sin(x) roughly
every 3.6 degrees and then connecting the points with \psline.
Here are plots of sin(x) cos((x/2)2 ) and sin2 (x):
\psset{xunit=1.2pt}
\psplot[linecolor=gray,linewidth=1.5pt,plotstyle=curve]%
{0}{90}{x sin dup mul}
\psplot[plotpoints=100]{0}{90}{x sin x 2 div 2 exp cos mul}
\psline{<->}(0,-1)(0,1)
\psline{->}(100,0)
\parametricplot*[par]{tmin }{tmax }{function}
This is for a parametric plot of (x(t); y(t)). function is the PostScript
code for calculating the pair x(t) y(t).
For example,
3
2
\parametricplot[plotstyle=dots,plotpoints=13]%
{-6}{6}{1.2 t exp 1.2 t neg exp}
1
0
0
1
2
3
plots 13 points from the hyperbola xy = 1, starting with (1:2–6 ; 1:26)
and ending with (1:26; 1:2–6).
Here is a parametric plot of (sin(t); sin(2t)):
\psset{xunit=1.7cm}
\parametricplot[linewidth=1.2pt,plotstyle=ccurve]%
{0}{360}{t sin t 2 mul sin}
\psline{<->}(0,-1.2)(0,1.2)
\psline{<->}(-1.2,0)(1.2,0)
The number of points that the \psplot and \parametricplot commands
calculate is set by the
plotpoints=int
Default: 50
parameter. Using curve or its variants instead of line and increasing the
value of plotpoints are two ways to get a smoother curve. Both ways
increase the imaging time. Which is better depends on the complexity of
the computation. (Note that all PostScript lines are ultimately rendered
Plots
22
as a series (perhaps short) line segments.) Mathematica generally uses
lineto to connect the points in its plots. The default minimum number of
plot points for Mathematica is 25, but unlike \psplot and \parametricplot,
Mathematica increases the sampling frequency on sections of the curve
with greater fluctuation.
Plots
23
III
More graphics parameters
The graphics parameters described in this part are common to all or
most of the graphics objects.
12 Coordinate systems
The following manipulations of the coordinate system apply only to
pure graphics objects.
A simple way to move the origin of the coordinate system to (x , y ) is
with the
origin={coor}
Default: 0pt,0pt
This is the one time that coordinates must be enclosed in curly brackets
{} rather than parentheses ().
A simple way to switch swap the axes is with the
swapaxes=true
Default: false
parameter. E.g., you might change your mind on the orientation of a
plot after generating the data.
13 Line styles
The following graphics parameters (in addition to linewidth and linecolor) determine how the lines are drawn, whether they be open or
closed curves.
linestyle=style
Default: solid
Valid styles are none, solid, dashed and dotted.
More graphics parameters
24
Default: 5pt 3pt
dash=dim1 dim2
The black-white dash pattern for the dashed line style. For
example:
\psellipse[linestyle=dashed,dash=3pt 2pt](2,1)(2,1)
Default: 3pt
dotsep=dim
The distance between dots in the dotted line style. For example
\psline[linestyle=dotted,dotsep=2pt]{|->>}(4,1)
border=dim
Default: 0pt
A positive value draws a border of width dim and color
bordercolor on each side of the curve. This is useful for giving
the impression that one line passes on top of another. The value
is saved in the dimension register \psborder.
bordercolor=color
Default: white
See border above.
For example:
\psline(0,0)(1.8,3)
\psline[border=2pt]{*->}(0,3)(1.8,0)
\psframe*[linecolor=gray](2,0)(4,3)
\psline[linecolor=white,linewidth=1.5pt]{<->}(2.2,0)(3.8,3)
\psellipse[linecolor=white,linewidth=1.5pt,
bordercolor=gray,border=2pt](3,1.5)(.7,1.4)
doubleline=true/false
Default: false
When true, a double line is drawn, separated by a space that is
doublesep wide and of color doublecolor. This doesn’t work as
expected with the dashed linestyle, and some arrows look funny
as well.
doublesep=dim
Default: 1.25\pslinewidth
See doubleline, above.
Line styles
25
doublecolor=color
Default: white
See doubleline, above.
Here is an example of double lines:
\psline[doubleline=true,linearc=.5,
doublesep=1.5pt]{->}(0,0)(3,1)(4,0)
shadow=true/false
Default: false
When true, a shadow is drawn, at a distance shadowsize from
the original curve, in the direction shadowangle, and of color
shadowcolor.
shadowsize=dim
Default: 3pt
See shadow, above.
shadowangle=angle
Default: -45
See shadow, above.
shadowcolor=color
Default: darkgray
See shadow, above.
Here is an example of the shadow feature, which should look
familiar:
\pspolygon[linearc=2pt,shadow=true,shadowangle=45,
xunit=1.1](-1,-.55)(-1,.5)(-.8,.5)(-.8,.65)
(-.2,.65)(-.2,.5)(1,.5)(1,-.55)
Here is another graphics parameter that is related to lines but that applies
only to the closed graphics objects \psframe, \pscircle, \psellipse and
\pswedge:
dimen=outer/inner/middle
Default: outer
It determines whether the dimensions refer to the inside, outside or
middle of the boundary. The difference is noticeable when the linewidth
is large:
3
\psset{linewidth=.25cm}
\psframe[dimen=inner](0,0)(2,1)
\psframe[dimen=middle](0,2)(2,3)
\psframe[dimen=outer](3,0)(4,3)
2
1
0
0
1
2
3
4
Line styles
26
With \pswedge, this only affects the radius; the origin always lies in the
middle the boundary. The right setting of this parameter depends on
how you want to align other objects.
14 Fill styles
The next group of graphics parameters determine how closed regions
are filled. Even open curves can be filled; this does not affect how the
curve is painted.
fillstyle=style
Default: none
Valid styles are
none, solid, vlines, vlines*, hlines, hlines*, crosshatch
and crosshatch*.
vlines, hlines and crosshatch draw a pattern of lines, according to
the four parameters list below that are prefixed with hatch. The *
versions also fill the background, as in the solid style.
fillcolor=color
Default: white
The background color in the solid, vlines*, hlines* and crosshatch*
styles.
Default: .8pt
hatchwidth=dim
Width of lines.
Default: 4pt
hatchsep=dim
Width of space between the lines.
hatchcolor=color
Default: black
Color of lines. Saved in \pshatchcolor.
hatchangle=rot
Default: 45
Rotation of the lines, in degrees. For example, if hatchangle is
set to 45, the vlines style draws lines that run NW-SE, and the
hlines style draws lines that run SW-NE, and the crosshatch style
draws both.
Here is an example of the vlines and related fill styles:
Fill styles
27
\pspolygon[fillstyle=vlines](0,0)(0,3)(4,0)
\pspolygon[fillstyle=hlines](0,0)(4,3)(4,0)
\pspolygon[fillstyle=crosshatch*,fillcolor=black,
hatchcolor=white,hatchwidth=1.2pt,hatchsep=1.8pt,
hatchangle=0](0,3)(2,1.5)(4,3)
Don’t be surprised if the checkered part of this example (the last \pspolygon) looks funny on low-resolution devices. PSTricks adjusts the lines
so that they all have the same width, but the space between them, which
in this case is black, can have varying width.
Each of the pure graphics objects (except those beginning with q) has
a starred version that produces a solid object of color linecolor. (It
automatically sets linewidth to zero, fillcolor to linecolor, fillstyle to
solid, and linestyle to none.)
15 Arrowheads and such
Lines and other open curves can be terminated with various arrowheads,
t-bars or circles. The
arrows=style
Default: -
parameter determines what you get. It can have the following values,
which are pretty intuitive:5
5
This is TEX’s version of WYSIWYG.
Arrowheads and such
28
Value
<->
>-<
<<->>
>>-<<
|-|
|*-|*
Example Name
None
Arrowheads.
Reverse arrowheads.
Double arrowheads.
Double reverse arrowheads.
T-bars, flush to endpoints.
T-bars, centered on endpoints.
[-]
Square brackets.
(-)
Rounded brackets.
Circles, centered on endpoints.
Disks, centered on endpoints.
o-o
*-*
oo-oo
Circles, flush to endpoints.
cc-cc
Disks, flush to endpoints.
Extended, rounded ends.
Flush round ends.
C-C
Extended, square ends.
**-**
c-c
You can also mix and match. E.g., ->, *-) and [-> are all valid values of
the arrows parameter.
Well, perhaps the c, cc and C arrows are not so obvious. c and C
correspond to setting PostScript’s linecap to 1 and 2, respectively. cc is
like c, but adjusted so that the line flush to the endpoint. These arrows
styles are noticeable when the linewidth is thick:
\psline[linewidth=.5cm](0,0)(0,2)
\psline[linewidth=.5cm]{c-c}(1,0)(1,2)
\psline[linewidth=.5cm]{cc-cc}(2,0)(2,2)
\psline[linewidth=.5cm]{C-C}(3,0)(3,2)
-
c-c
cc-cc C-C
Almost all the open curves let you include the arrows parameters as
an optional argument, enclosed in curly braces and before any other
arguments (except the optional parameters argument). E.g., instead of
\psline[arrows=<-,linestyle=dotted](3,4)
you can write
\psline[linestyle=dotted]{<-}(3,4)
Arrowheads and such
29
The exceptions are a few streamlined macros that do not support the use
of arrows (these all begin with q).
The size of these line terminators is controlled by the following parameters. In the description of the parameters, the width always refers to the
dimension perpendicular to the line, and length refers to a dimension in
the direction of the line.
Default: 2pt 3
arrowsize=dim num
Width of arrowheads, as shown below.
Default: 1.4
arrowlength=num
Length of arrowheads, as shown below.
Default: .4
arrowinset=num
Size of inset for arrowheads, as shown below.
arrowsize
=
dim num
width
length
inset
=
=
=
num x linewidth + dim1
length
inset
width
tbarsize=dim num
arrowlength x width
arrowinset x height
Default: 2pt 5
The width of a t-bar, square bracket or rounded bracket is num
times linewidth, plus dim.
bracketlength=num
Default: .15
The height of a square bracket is num times its width.
rbracketlength=num
Default: .15
The height of a round bracket is num times its width.
dotsize=dim num
Default: .5pt 2.5
The diameter of a circle or disc is num times linewidth, plus dim.
arrowscale=arrowscale=num1 num2
Default: 1
Imagine that arrows and such point down. This scales the width
of the arrows by num1 and the length (height) by num2 . If you
only include one number, the arrows are scaled the same in both
directions. Changing arrowscale can give you special effects not
possible by changing the parameters described above. E.g., you
can change the width of lines used to draw brackets.
Arrowheads and such
30
16 Custom styles
You can define customized versions of any macro that has parameter
changes as an optional first argument using the \newpsobject command:
\newpsobject{name }{object }{par1=value1,… }
as in
\newpsobject{myline}{psline}{linecolor=green,linestyle=dotted}
\newpsobject{mygrid}{psgrid}{subgriddiv=1,griddots=10,
gridlabels=7pt}
The first argument is the name of the new command you want to define.
The second argument is the name of the graphics object. Note that both
of these arguments are given without the backslash. The third argument
is the special parameter values that you want to set.
With the above examples, the commands \myline and \mygrid work just
like the graphics object \psline it is based on, and you can even reset the
parameters that you set when defining \myline, as in:
\myline[linecolor=gray,dotsep=2pt](5,6)
Another way to define custom graphics parameter configurations is with
the
\newpsstyle{name }{par1=value1,… }
command. You can then set the style graphics parameter to name, rather
than setting the parameters given in the second argument of \newpsstyle.
For example,
\newpsstyle{mystyle}{linecolor=green,linestyle=dotted}
\psline[style=mystyle](5,6)
Custom styles
31
IV
Custom graphics
17 The basics
PSTricks contains a large palette of graphics objects, but sometimes
you need something special. For example, you might want to shade the
region between two curves. The
\pscustom*[par ]{commands }
command lets you “roll you own” graphics object.
Let’s review how PostScript handles graphics. A path is a line, in
the mathematical sense rather than the visual sense. A path can have
several disconnected segments, and it can be open or closed. PostScript
has various operators for making paths. The end of the path is called
the current point, but if there is no path then there is no current point.
To turn the path into something visual, PostScript can fill the region
enclosed by the path (that is what fillstyle and such are about), and
stroke the path (that is what linestyle and such are about).
At the beginning of \pscustom, there is no path. There are various
commands that you can use in \pscustom for drawing paths. Some
of these (the open curves) can also draw arrows. \pscustom fills and
strokes the path at the end, and for special effects, you can fill and stroke
the path along the way using \psfill and \pstroke (see below).
Driver notes: \pscustom uses \pstverb and \pstunit. There are systemdependent limits on how long the argument of \special can be. You may run
into this limit using \pscustom because all the PostScript code accumulated by
\pscustom is the argument of a single \special command.
18 Parameters
You need to keep the separation between drawing, stroking and filling
paths in mind when setting graphics parameters. The linewidth and
linecolor parameters affect the drawing of arrows, but since the path
Custom graphics
32
commands do not stroke or fill the paths, these parameters, and the
linestyle, fillstyle and related parameters, do not have any other effect
(except that in some cases linewidth is used in some calculations when
drawing the path). \pscustom and \fill make use of fillstyle and related parameters, and \pscustom and \stroke make use of plinestyle and
related parameters.
For example, if you include
\psline[linewidth=2pt,linecolor=blue,fillstyle=vlines]{<-}(3,3)(4,0)
in \pscustom, then the changes to linewidth and linecolor will affect the
size and color of the arrow but not of the line when it is stroked, and the
change to fillstyle will have no effect at all.
The shadow, border, doubleline and showpoints parameters are disabled in \pscustom, and the origin and swapaxes parameters only affect
\pscustom itself, but there are commands (described below) that let you
achieve these special effects.
The dashed and dotted line styles need to know something about the
path in order to adjust the dash or dot pattern appropriately. You can
give this information by setting the
linetype=int
Default: 0
parameter. If the path contains more than one disconnected segment,
there is no appropriate way to adjust the dash or dot pattern, and you
might as well leave the default value of linetype. Here are the values
for simple paths:
Value
0
Type of path
Open curve without arrows.
-1
-2
-3
Open curve with an arrow at the beginning.
Open curve with an arrow at the end.
Open curve with an arrow at both ends.
1
Closed curve with no particular symmetry.
n>1
Closed curve with n symmetric segments.
19 Graphics objects
You can use most of the graphics objects in \pscustom. These draw
paths and making arrows, but do not fill and stroke the paths.
There are three types of graphics objects:
Graphics objects
33
Special Special graphics objects include \psgrid, \psdots, \qline and
\qdisk. You cannot use special graphics objects in \pscustom.
Closed You are allowed to use closed graphics objects in \pscustom,
but their effect is unpredictable.6 Usually you would use the open
curves plus \closepath (see below) to draw closed curves.
Open The open graphics objects are the most useful commands for
drawing paths with \pscustom. By piecing together several open
curves, you can draw arbitrary paths. The rest of this section
pertains to the open graphics objects.
By default, the open curves draw a straight line between the current
point, if it exists, and the beginning of the curve, except when the curve
begins with an arrow. For example
3
2
\pscustom{
\psarc(0,0){1.5}{5}{85}
\psarcn{->}(0,0){3}{85}{5}}
1
0
0
1
2
3
Also, the following curves make use of the current point, if it exists, as
a first coordinate:
\psline and \pscurve.
The plot commands, with the line or curve plotstyle.
\psbezier if you only include three coordinates.
For example:
3
2
\pscustom[linewidth=1.5pt]{
\psplot[plotstyle=curve]{.67}{4}{2 x div}
\psline(4,3)}
1
0
0
1
2
3
4
6
The closed objects never use the current point as an coordinate, but typically they
will close any existing paths, and they might draw a line between the currentpoint and
the closed curved.
Graphics objects
34
We’ll see later how to make that one more interesting. Here is another
example
3
2
\pscustom{
\psline[linearc=.2]{|-}(0,2)(0,0)(2,2)
\psbezier{->}(3,3)(1,0)(4,3)}
1
0
0
1
2
3
4
However, you can control how the open curves treat the current point
with the
liftpen=0/1/2
Default: 0
parameter.
If liftpen=0, you get the default behavior described above. For example
3
2
\pscustom[linewidth=2pt,fillstyle=solid,fillcolor=gray]{
\pscurve(0,2)(1,2.5)(2,1.5)(4,3)
\pscurve(4,1)(3,0.5)(2,1)(1,0)(0,.5)}
1
0
0
1
2
3
4
If liftpen=1, the curves do not use the current point as the first coordinate
(except \psbezier, but you can avoid this by explicitly including the first
coordinate as an argument). For example:
3
2
\pscustom[linewidth=2pt,fillstyle=solid,fillcolor=gray]{
\pscurve(0,2)(1,2.5)(2,1.5)(4,3)
\pscurve[liftpen=1](4,1)(3,0.5)(2,1)(1,0)(0,.5)}
1
0
0
1
2
3
4
If liftpen=2, the curves do not use the current point as the first coordinate,
and they do not draw a line between the current point and the beginning
of the curve. For example
Graphics objects
35
3
2
\pscustom[linewidth=2pt,fillstyle=solid,fillcolor=gray]{
\pscurve(0,2)(1,2.5)(2,1.5)(4,3)
\pscurve[liftpen=2](4,1)(3,0.5)(2,1)(1,0)(0,.5)}
1
0
0
1
2
3
4
Later we will use the second example to fill the region between the two
curves, and then draw the curves.
20 Safe tricks
The commands described under this heading, which can only be used
in \pscustom, do not run a risk of PostScript errors (assuming your
document compiles without TEX errors).
Let’s start with some path, fill and stroke commands:
\newpath
Clear the path and the current point.
\moveto(coor)
This moves the current point to (x , y ).
\closepath
This closes the path, joining the beginning and end of each piece
(there may be more than one piece if you use \moveto).7
\stroke[par ]
This strokes the path (non-destructively). \pscustom automatically strokes the path, but you might want to stroke it twice, e.g.,
to add a border. Here is an example that makes a double line and
adds a border (this example is kept so simple that it doesn’t need
\pscustom at all):
3
\psline(0,3)(4,0)
\pscustom[linecolor=white,linewidth=1.5pt]{%
\psline(0,0)(4,3)
\stroke[linewidth=5\pslinewidth]
\stroke[linewidth=3\pslinewidth,linecolor=black]}
2
1
0
0
1
2
3
4
7
Note that the path is automatically closed when the region is filled. Use \closepath
if you also want to close the boundary.
Safe tricks
36
\fill[par ]
This fills the region (non-destructively). \pscustom automatically
fills the region as well.
\gsave
This saves the current graphics state (i.e., the path, color, line
width, coordinate system, etc.) \grestore restores the graphics
state. \gsave and \grestore must be used in pairs, properly nested
with respect to TEX groups. You can have have nested \gsave\grestore pairs.
\grestore
See above.
Here is an example that fixes an earlier example, using \gsave
and \grestore:
\psline{<->}(0,3)(0,0)(4,0)
\pscustom[linewidth=1.5pt]{
\psplot[plotstyle=curve]{.67}{4}{2 x div}
\gsave
\psline(4,3)
\fill[fillstyle=solid,fillcolor=gray]
\grestore}
Observe how the line added by \psline(4,3) is never stroked, because it is nested in \gsave and \grestore.
Here is another example:
3
2
1
0
0
1
2
3
4
\pscustom[linewidth=1.5pt]{
\pscurve(0,2)(1,2.5)(2,1.5)(4,3)
\gsave
\pscurve[liftpen=1](4,1)(3,0.5)(2,1)(1,0)(0,.5)
\fill[fillstyle=solid,fillcolor=gray]
\grestore}
\pscurve[linewidth=1.5pt](4,1)(3,0.5)(2,1)(1,0)(0,.5)
Note how I had to repeat the second \pscurve (I could have
repeated it within \pscustom, with liftpen=2), because I wanted
to draw a line between the two curves to enclose the region but I
didn’t want this line to be stroked.
The next set of commands modify the coordinate system.
Safe tricks
37
\translate(coor)
Translate coordinate system by (x , y ). This shifts everything that
comes later by (x , y ), but doesn’t affect what has already been
drawn.
\scale{num1 num2 }
Scale the coordinate system in both directions by num1, or horizontally by num1 and vertically by num2 .
\rotate{angle }
Rotate the coordinate system by angle.
\swapaxes
Switch the x and y coordinates. This is equivalent to
\rotate{-90}
\scale{-1 1 scale}
\msave
Save the current coordinate system. You can then restore it with
\mrestore. You can have nested \msave-\mrestore pairs. \msave
and \mrestore do not have to be properly nested with respect to
TEX groups or \gsave and \grestore. However, remember that
\gsave and \grestorealso affect the coordinate system. \msave\mrestore lets you change the coordinate system while drawing
part of a path, and then restore the old coordinate system without
destroying the path. \gsave-\grestore, on the other hand, affect
the path and all other componments of the graphics state.
\mrestore
See above.
And now here are a few shadow tricks:
\openshadow[par ]
Strokes a replica of the current path, using the various shadow
parameters.
\closedshadow[par ]
Makes a shadow of the region enclosed by the current path as if
it were opaque regions.
\movepath(coor)
Moves the path by (x , y ). Use \gsave-\grestore if you don’t want
to lose the original path.
Safe tricks
38
21 Pretty safe tricks
The next group of commands are safe, as long as there is a current
point!
\lineto(coor)
This is a quick version of \psline(coor ).
\rlineto(coor)
This is like \lineto, but (x , y ) is interpreted relative to the current
point.
\curveto(x1, y1)(x2 , y2 )(x3 , y3 )
This is a quick version of \psbezier(x1, y1)(x2 , y2 )(x3 , y3 ).
\rcurveto(x1, y1)(x2 , y2 )(x3 , y3 )
This is like \curveto, but (x1, y1), (x2 , y2 ) and (x3 , y3 ) are interpreted relative to the current point.
22 For hackers only
PS
For PostScript hackers, there are a few more commands. Be sure to
read Appendix C before using these. Needless to say:
Warning: Misuse of the commands in this section can
cause PostScript errors.
The PostScript environment in effect with \pscustom has one unit equal
to one TEX pt.
\code{code }
Insert the raw PostScript code.
\dim{dim}
Convert the PSTricks dimension to the number of pt’s, and inserts
it in the PostScript code.
\coor(x1, y1)(x2 , y2 )...(xn, yn)
Convert one or more PSTricks coordinates to a pair of numbers
(using pt units), and insert them in the PostScript code.
Pretty safe tricks
39
\rcoor(x1, y1)(x2 , y2 )...(xn, yn)
Like \coor, but insert the coordinates in reverse order.
\file{file }
This is like \code, but the raw PostScript is copied verbatim
(except comments delimited by %) from file.
\arrows{arrows }
This defines the PostScript operators ArrowA and ArrowB so that
x2 y2 x1 y1 ArrowA
x2 y2 x1 y1 ArrowB
each draws an arrow(head) with the tip at (x1, y1) and pointing
from (x2 , y2 ). ArrowA leaves the current point at end of the arrowhead, where a connect line should start, and leaves (x2 , y2 ) on the
stack. ArrowB does not change the current point, but leaves
x2 y2 x1’ y1’
on the stack, where (x1’ , y1’ ) is the point where a connecting line
should join. To give an idea of how this work, the following is
roughly how PSTricks draws a bezier curve with arrows at the
end:
3
\pscustom{
\arrows{|->}
\code{
80 140 5 5 ArrowA
30 -30 110 75 ArrowB
curveto}}
2
1
0
0
1
2
3
4
\setcolor{color }
Set the color to color .
For hackers only
40
V
Picture Tools
23 Pictures
The graphics objects and \rput and its variants do not change TEX’s
current point (i.e., they create a 0-dimensional box). If you string
several of these together (and any other 0-dimensional objects), they
share the same coordinate system, and so you can create a picture. For
this reason, these macros are called picture objects.
If you create a picture this way, you will probably want to give the whole
picture a certain size. You can do this by putting the picture objects in
a pspicture environment, as in:
\pspicture*[baseline](x0 ,y0 )(x1, y1)
picture objects \endpspicture
The picture objects are put in a box whose lower left-hand corner is
at (x0 , y0 ) (by default, (0,0)) and whose upper right-hand corner is at
(x1, y1).
By default, the baseline is set at the bottom of the box, but the optional
argument [baseline] sets the baseline fraction baseline from the bottom.
Thus, baseline is a number, generally but not necessarily between 0 and
1. If you include this argument but leave it empty ([]), then the baseline
passes through the origin.
Normally, the picture objects can extend outside the boundaries of the
box. However, if you include the *, anything outside the boundaries is
clipped.
Besides picture objects, you can put anything in a \pspicture that does
not take up space. E.g., you can put in font declarations and use \psset,
and you can put in braces for grouping. PSTricks will alert you if you
include something that does take up space.8
LaTEX users can type
8
When PSTricks picture objects are included in a \pspicture environment, they
gobble up any spaces that follow, and any preceding spaces as well, making it less
likely that extraneous space gets inserted. (PSTricks objects always ignore spaces
Picture Tools
41
\begin{pspicture} … \end{pspicture}
You can use PSTricks picture objects in a LaTEX picture environment, and
you can use LaTEX picture objects in a PSTricks pspicture environment.
However, the pspicture environment makes LaTEX’s picture environment
obsolete, and has a few small advantages over the latter. Note that
the arguments of the pspicture environment work differently from the
arguments of LaTEX’s picture environment (i.e., the right way versus the
wrong way).
Driver notes:
The clipping option (*) uses \pstVerb and \pstverbscale.
24 Placing and rotating whatever
PSTricks contains several commands for positioning and rotating an
HR-mode argument. All of these commands end in put, and bear some
similarity to LaTEX’s \put command, but with additional capabilities. Like
LaTEX’s \put and unlike the box rotation macros described in Section 29,
these commands do not take up any space. They can be used inside and
outside \pspicture environments.
Most of the PSTricks put commands are of the form:
\put *arg {rotation}(coor ){stuff }
With the optional * argument, stuff is first put in a
\psframebox*[boxsep=false]{<stuff>}
thereby blotting out whatever is behind stuff . This is useful for positioning text on top of something else.
arg refers to other arguments that vary from one put command to another,
The optional rotation is the angle by which stuff should be rotated; this
arguments works pretty much the same for all put commands and is
described further below. The (coor ) argument is the coordinate for
positioning stuff , but what this really means is different for each put
command. The (coor ) argument is shown to be obligatory, but you can
actually omit it if you include the rotation argument.
that follow. If you also want them to try to neutralize preceding space when used
outside the \pspicture environment (e.g., in a LaTEX picture environment), then use the
command \KillGlue. The command \DontKillGlue turns this behavior back
off.)
Placing and rotating whatever
42
The rotation argument should be an angle, as described in Section 4,
but the angle can be preceded by an *. This causes all the rotations
(except the box rotations described in Section 29) within which the
\rput command is be nested to be undone before setting the angle of
rotation. This is mainly useful for getting a piece of text right side up
when it is nested inside rotations. For example,
stuff
\rput{34}{%
\psframe(-1,0)(2,1)
\rput[br]{*0}(2,1){\em stuff}}
There are also some letter abbreviations for the command angles. These
indicate which way is up:
Letter
Short for
Equiv. to
Letter
U
Up
0
N
Short for
North
Equiv. to
*0
L
Left
90
W
West
*90
D
Down
180
S
South
*180
R
Right
270
E
East
*270
This section describes just a two of the PSTricks put commands. The
most basic one command is
\rput*[refpoint ]{rotation}(x , y ){stuff }
refpoint determines the reference point of stuff , and this reference point
is translated to (x , y ).
By default, the reference point is the center of the box. This can be
changed by including one or two of the following in the optional refpoint
argument:
Horizontal
l
r
Left
Right
Vertical
b
Top
Bottom
B
Baseline
t
Visually, here is where the reference point is set of the various combinations (the dashed line is the baseline):
Placing and rotating whatever
43
Here is a marginal note.
tl
t
tr
r
l
Bl
B
Br
bl
b
br
There are numerous examples of \rput in this documentation, but for
now here is a simple one:
\rput[b]{90}(-1,0){Here is a marginal note.}
One common use of a macro such as \rput is to put labels on things.
PSTricks has a variant of \rput that is especially designed for labels:
\uput*{labelsep}[refangle ]{rotation}(x , y ){stuff }
This places stuff distance labelsep from (x , y ), in the direction refangle.
The default value of labelsep is the dimension register
\pslabelsep
You can also change this be setting the
labelsep=dim
Default: 5pt
parameter (but remember that \uput does have an optional argument for
setting parameters).
Here is a simple example:
(1,1)
\qdisk(1,1){1pt}
\uput[45](1,1){(1,1)}
Here is a more interesting example where \uput is used to make a pie
chart:9
9
PSTricks is distributed with a useful tool for converting data to piecharts:
piechart.sh. This is a UNIX sh script written by Denis Girou.
Placing and rotating whatever
44
\psset{unit=1.2cm}
\pspicture(-2.2,-2.2)(2.2,2.2)
\pswedge[fillstyle=solid,fillcolor=gray]{2}{0}{70}
\pswedge[fillstyle=solid,fillcolor=lightgray]{2}{70}{200}
\pswedge[fillstyle=solid,fillcolor=darkgray]{2}{200}{360}
\SpecialCoor
\psset{framesep=1.5pt}
\rput(1.2;35){\psframebox*{\small\$9.0M}}
\uput{2.2}[45](0,0){Oreos}
\rput(1.2;135){\psframebox*{\small\$16.7M}}
\uput{2.2}[135](0,0){Heath}
\rput(1.2;280){\psframebox*{\small\$23.1M}}
\uput{2.2}[280](0,0){M\&M}
\endpspicture
Oreos
Heath
$16.7M
$9.0M
$23.1M
M&M
You can use the following abbreviations for refangle, which indicate the
direction the angle points:1011
10
Using the abbreviations when applicable is more efficient.
There is an obsolete command \Rput that has the same syntax as \uput and that
works almost the same way, except the refangle argument has the syntax of \rput’s
refpoint argument, and it gives the point in stuff that should be aligned with (x , y ). E.g.,
11
\qdisk(4,0){2pt}
\Rput[tl](4,0){$(x,y)$}
(x; y)
Here is the equivalence between \uput’s refangle abbreviations and \Rput’s refpoint
abbreviations:
\uput
r
u
l
d
ur
ul
dr
dl
\Rput
l
b
r
t
bl
br
tr
rl
Some people prefer \Rput’s convention for specifying the position of stuff over \uput’s.
Placing and rotating whatever
45
Letter
r
u
l
d
Short for
right
up
Equiv. to
0
90
left
down
180
270
Letter
ur
ul
dl
dr
Short for
up-right
up-left
Equiv. to
45
135
down-left
down-right
225
315
The first example could thus have been written:
(1,1)
\qdisk(1,1){1pt}
\uput[ur](1,1){(1,1)}
Driver notes:
The rotation macros use \pstVerb and \pstrotate.
25 Repetition
The macro
\multirput*[refpoint ]{angle}(x0 , y0 )(x1, y1){int }{stuff }
is a variant of \rput that puts down int copies, starting at (x0 , y0 ) and advancing by (x1, y1) each time. (x0 , y0 ) and (x1, y1) are always interpreted
as Cartesian coordinates. For example:
**
***
**
***
**
\multirput(.5,0)(.3,.1){12}{*}
If you want copies of pure graphics, it is more efficient to use
\multips{angle}(x0 , y0 )(x1, y1){int }{graphics }
graphics can be one or more of the pure graphics objects described in Part
II, or \pscustom. Note that \multips has the same syntax as \multirput,
except that there is no refpoint argument (since the graphics are zero
dimensional anyway). Also, unlike \multirput, the coordinates can be of
any type. An Overfull \hbox warning indicates that the graphics argument
contains extraneous output or space. For example:
Repetition
46
\def\zigzag{\psline(0,0)(.5,1)(1.5,-1)(2,0)}%
\psset{unit=.25,linewidth=1.5pt}
\multips(0,0)(2,0){8}{\zigzag}
multido
PSTricks is distributed with a much more general loop macro, called
\multido. You must input the file multido.tex or multido.sty. See the
documentation multido.doc for details. Here is a sample of what you can
do:
\begin{pspicture}(-3.4,-3.4)(3.4,3.4)
\newgray{mygray}{0} % Initialize ‘mygray’ for benefit
\psset{fillstyle=solid,fillcolor=mygray} % of this line.
\SpecialCoor
\degrees[1.1]
\multido{\n=0.0+.1}{11}{%
\newgray{mygray}{\n}
\rput{\n}{\pswedge{3}{-.05}{.05}}
\uput{3.2}[\n](0,0){\small\n}}
\end{pspicture}
0.3
0.2
0.4
0.1
0.5
0.0
0.6
1.0
0.7
0.8
0.9
All of these loop macros can be nested.
26 Axes
pst-plot
The axes command described in this section is defined in pst-plot.tex /
pst-plot.sty, which you must input first. pst-plot.tex, in turn, will automatically input multido.tex, which is used for putting the labels on the
axes.
Axes
47
The macro for making axes is:
\psaxes*[par ]{arrows }(x0 , y0 )(x1, y1)(x2 , y2 )
The coordinates must be Cartesian coordinates. They work the same
way as with \psgrid. That is, if we imagine that the axes are enclosed
in a rectangle, (x1, y1) and (x2 , y2 ) are opposing corners of the rectangle.
(I.e., the x-axis extends from x1 to x2 and the y-axis extends from y1 to
y2 .) The axes intersect at (x0 , y0 ). For example:
3
2
(x2 , y2 )
(x0 , y0 )
\psaxes[linewidth=1.2pt,labels=none,
ticks=none]{<->}(2,1)(0,0)(4,3)
1
0
0
1
2
3
(x1, y1)
4
If (x0 , y0 ) is omitted, then the origin is (x1, y1). If both (x0 , y0 ) and (x1, y1)
are omitted, (0,0) is used as the default. For example, when the axes
enclose a single orthont, only (x2 , y2 ) is needed:
1
\psaxes{->}(4,2)
0
0
1
2
3
Labels (numbers) are put next to the axes, on the same side as x1 and
y1. Thus, if we enclose a different orthont, the numbers end up in the
right place:
0
1
2
3
0
\psaxes{->}(4,-2)
-1
Also, if you set the arrows parameter, the first arrow is used for the tips
at x1 and y1, while the second arrow is used for the tips at x2 and y2 .
Thus, in the preceding examples, the arrowheads ended up in the right
place too.12
12
Including a first arrow in these examples would have had no effect because arrows
are never drawn at the origin.
Axes
48
When the axes don’t just enclose an orthont, that is, when the origin
is not at a corner, there is some discretion as to where the numbers
should go. The rules for positioning the numbers and arrows described
above still apply, and so you can position the numbers as you please by
switching y1 and y2 , or x1 and x2 . For example, compare
2
\psaxes{<->}(0,0)(-2.5,0)(2.5,2.5)
1
-2
-1
0
1
2
with what we get when x1 and x2 are switched:
2
\psaxes{<->}(0,0)(2.5,0)(-2.5,2.5)
1
-2
-1
0
1
2
\psaxes puts the ticks and numbers on the axes at regular intervals, using
the following parameters:
Horitontal
Vertical
Dflt Description
Ox=num
Oy=num
0
Label at origin.
Dx=num
Dy=num
1
Label increment.
dx=dim
oy=dim
0pt
Dist btwn labels.
When dx is 0, Dx\psxunit is used instead, and similarly for dy. Hence,
the default values of 0pt for dx and dy are not as peculiar as they seem.
You have to be very careful when setting Ox, Dx, Oy and Dy to noninteger values. multido.tex increments the labels using rudimentary
fixed-point arithmetic, and it will come up with the wrong answer unless Ox and Dx, or Oy and Dy, have the same number of digits to the
right of the decimal. The only exception is that Ox or Oy can always
be an integer, even if Dx or Dy is not. (The converse does not work,
however.)13
13
For example, Ox=1.0 and Dx=1.4 is okay, as is Ox=1 and Dx=1.4, but Ox=1.4 and
Dx=1, or Ox=1.4 and Dx=1.15, is not okay. If you get this wrong, PSTricks won’t
complain, but you won’t get the right labels either.
Axes
49
Note that \psaxes’s first coordinate argument determines the physical
position of the origin, but it doesn’t affect the label at the origin. E.g., if
the origin is at (1,1), the origin is still labeled 0 along each axis, unless
you explicitly change Ox and Oy. For example:
3
2
\psaxes[Ox=-2](-2,0)(2,3)
1
0
-2
-1
0
1
2
The ticks and labels use a few other parameters as well:
labels=all/x/y/none
Default: all
To specify whether labels appear on both axes, the x-axis, the
y-axis, or neither.
showorigin=true/false
Default: true
If true, then labels are placed at the origin, as long as the label
doesn’t end up on one of the axes. If false, the labels are never
placed at the origin.
ticks=all/x/y/none
Default: all
To specify whether ticks appear on both axes, the x-axis, the
y-axis, or neither.
tickstyle=full/top/bottom
Default: full
For example, if tickstyle=top, then the ticks are only on the side
of the axes away from the labels. If tickstyle=bottom, the ticks
are on the same side as the labels. full gives ticks extending on
both sides.
ticksize=dim
Default: 3pt
Ticks extend dim above and/or below the axis.
The distance between ticks and labels is \pslabelsep, which you can
change with the labelsep parameter.
The labels are set in the current font (ome of the examples above were
preceded by \small so that the labels would be smaller). You can do
fancy things with the labels by redefining the commands:
Axes
50
\pshlabel
\psvlabel
E.g., if you want change the font of the horizontal labels, but not the
vertical labels, try something like
\def\psxlabel#1{\small #1}
You can choose to have a frame instead of axes, or no axes at all (but
you still get the ticks and labels), with the parameter:
axesstyle=axes/frame/none
Default: axes
The usual linestyle, fillstyle and related paremeters apply.
For example:
3
2
\psaxes[Dx=.5,dx=1,tickstyle=top,axesstyle=frame](-3,3)
1
-1.5 -1.0 -0.5
0
0
The \psaxes macro is pretty flexible, but PSTricks contains some other
tools for making axes from scratch. E.g., you can use \psline and
\psframe to draw axes and frames, respectively, \multido to generate
labels (see the documentation for multido.tex), and \multips to make
ticks.
Axes
51
VI
Text Tricks
27 Framed boxes
The macros for framing boxes take their argument, put it in an \hbox, and
put a PostScript frame around it. (They are analogous to LaTEX’s \fbox).
Thus, they are composite objects rather than pure graphics objects. In
addition to the graphics parameters for \psframe, these macros use the
following parameters:
framesep=dim
Default: 3pt
Distance between each side of a frame and the enclosed box.
boxsep=true/false
Default: true
When true, the box that is produced is the size of the frame or
whatever that is drawn around the object. When false, the box that
is produced is the size of whatever is inside, and so the frame is
“transparent” to TEX. This parameter only applies to \psframebox,
\pscirclebox, and \psovalbox.
Here are the three box-framing macros:
\psframebox*[par]{stuff }
A simple frame (perhaps with rounded corners) is drawn using
\psframe. The * option is of particular interest. It generates a solid
frame whose color is fillcolor (rather than linecolor, as with the
closed graphics objects). Recall that the default value of fillcolor
is white, and so this has the effect of blotting out whatever is
behind the box. For example,
Label
\pspolygon[fillcolor=gray,fillstyle=crosshatch*](0,0)(3,0)
(3,2)(2,2)
\rput(2,1){\psframebox*[framearc=.3]{Label}}
Text Tricks
52
\psdblframebox*[par]{stuff }
This draws a double frame. It is just a variant of \psframebox,
defined by
\newpsobject{psdblframebox}{psframebox}{doublesep=\pslinewidth}
For example,
\psdblframebox[linewidth=1.5pt]{%
\parbox[c]{6cm}{\raggedright A double frame is drawn
with the gap between lines equal to {\tt doublesep}}}
A double frame is drawn with the
gap between lines equal to doublesep
\psshadowbox*[par]{stuff }
This draws a single frame, with a shadow.
Great Idea!!
\psshadowbox{\bf Great Idea!!}
You can get the shadow with \psframebox just be setting the
shadowsize parameter, but with \psframebox the dimensions of
the box won’t reflect the shadow (which may be what you want!).
\pscirclebox*[par]{stuff }
This draws a circle. With boxsep=true, the size of the box is close
to but may be larger than the size of the circle. For example:
You are
\pscirclebox{\begin{tabular}{c} You are \\ here \end{tabular}}
here
\cput*[par]{angle}(x,y){stuff }
This combines the functions of \pscirclebox and \rput. It is like
\rput{<angle>}(x0,y0){\string\pscirclebox*[<par>]{<stuff>}}
but it is more efficient. Unlike the \rput command, there is no
argument for changing the reference point; it is always the center
of the box. Instead, there is an optional argument for changing
graphics parameters. For example
Framed boxes
53
1
K1
0
0
1
\cput[doubleline=true](1,.5){\large $K_1$}
2
\psovalbox*[par]{stuff }
This draws an ellipse. If you want an oval with square sides and
rounded corners, then use \psframebox with a positive value for
linearc (depending on whether cornersize is relative or
absolute). Here is an example that uses boxsep=false:
At the introductory
price of $13.99, it
pays to act now!
At the introductory price of
\psovalbox[boxsep=false,linecolor=darkgray]{\$13.99},
it pays to act now!
You can define variants of these box framing macros using the \newpsobject command.
If you want to control the final size of the frame, independently of the
material inside, nest stuff in something like LaTEX’s \makebox command.
28 Clipping
The command
\clipbox[dim]{stuff }
puts stuff in an \hbox and then clips around the boundary of the box, at
a distance dim from the box (the default is 0pt).
The \pspicture environment also lets you clip the picture to the boundary.
The command
\psclip{graphics } … \endpsclip
sets the clipping path to the path drawn by the graphics object(s), until
the \endpsclip command is reached. \psclip and \endpsclip must be
properly nested with respect to TEX grouping. Only pure graphics (those
described in Part II and \pscustom) are permitted. An Overfull \hbox
warning indicates that the graphics argument contains extraneous output
or space. Note that the graphics objects otherwise act as usual, and
the \psclip does not otherwise affect the surrounded text. Here is an
example:
Clipping
54
\parbox{4.5cm}{%
\psclip{\psccurve[linestyle=none](-3,-2)
(0.3,-1.5)(2.3,-2)(4.3,-1.5)(6.3,-2)(8,-1.5)(8,2)(-3,2)}
‘‘One of the best new plays I have seen all year: cool, poetic,
ironic
\ldots” proclaimed {\em The Guardian} upon the London
premiere of this extraordinary play about a Czech director and
his actress wife, confronting exile in America.\vspace{-1cm}
\endpsclip}
“One of the best new plays
I have seen all year: cool,
poetic, ironic …” proclaimed
The Guardian upon the London premiere of this extraordi-
If you don’t want the outline to be painted, you need to include linestyle=none
in the parameter changes. You can actually include more than one graphics object in the argument, in which case the clipping path is set to the
intersection of the paths.
\psclip can be a useful tool in picture environments. For example, here
it is used to shade the region between two curves:
4
3
2
1
0
0
1
2
3
4
\psclip{%
\pscustom[linestyle=none]{%
\psplot{.5}{4}{2 x div}
\lineto(4,4)}
\pscustom[linestyle=none]{%
\psplot{0}{3}{3 x x mul 3 div sub}
\lineto(0,0)}}
\psframe*[linecolor=gray](0,0)(4,4)
\endpsclip
\psplot[linewidth=1.5pt]{.5}{4}{2 x div}
\psplot[linewidth=1.5pt]{0}{3}{3 x x mul 3 div sub}
\psaxes(4,4)
Driver notes: The clipping macros use \pstverbscale and \pstVerb. Don’t be
surprised if PSTricks’s clipping does not work or causes problem—it is never
robust. \endpsclip uses initclip. This can interfere with other clipping operations,
and especially if the TEX document is converted to an Encapsulated PostScript
file. The command \AltClipMode causes \psclip and \endpsclip to use gsave
and grestore instead. This bothers some drivers, such as NeXTTeX’s TeXView,
especially if \psclip and \endpsclip do not end up on the same page.
29 Rotation and scaling boxes
There are versions of the standard box rotation macros:
\rotateleft{stuff }
Rotation and scaling boxes
55
\rotateright{stuff }
\rotatedown{stuff }
stuff is put in an \hbox and then rotated or scaled, leaving the appropriate
Right
Down
Left
amount of spaces. Here are a few uninteresting examples:
\Large\bf \rotateleft{Left} \rotatedown{Down} \rotateright{Right}
There are also two box scaling macros:
\scalebox{num1 num2 }{stuff }
If you give two numbers in the first argument, num1 is used to
scale horizontally and num2 is used to scale vertically. If you give
just one number, the box is scaled by the same in both directions.
You can’t scale by zero, but negative numbers are OK, and have
the effect of flipping the box around the axis. You never know
when you need to do something like siht (\scalebox{-1 1}{this}).
\scaleboxto(x , y ){stuff }
This time, the first argument is a (Cartesian) coordinate, and the
box is scaled to have width x and height (plus depth) y . If one of
the dimensions is 0, the box is scaled by the same amount in both
directions. For example:
Big andlong
\scaleboxto(4,2){Big and long}
PSTricks defines LR-box environments for all these box rotation and
scaling commands:
\pslongbox{Rotateleft}{\rotateleft}
\pslongbox{Rotateright}{\rotateright}
\pslongbox{Rotatedown}{\rotatedown}
\pslongbox{Scalebox}{\scalebox}
\pslongbox{Scaleboxto}{\scaleboxto}
Here is an example where we \Rotatedown for the answers to exercises:
Rotation and scaling boxes
56
Question: How do
Democrats organize a
firing squad?
Question: How do Democrats organize a firing squad?
\begin{Rotatedown}
\parbox{\hsize}{Answer: First they get in a circle, \ldots\hss}%
\end{Rotatedown}
See the documentation of fancybox.sty for tips on rotating a LaTEX table
or figure environment, and other boxes.
Rotation and scaling boxes
57
Answer: First they get in
a circle, …
VII
pst-node
Nodes and Node Connections
All the commands described in this part are contained in the file pstnode.tex/pst-node.sty.
The node and node connection macros let you connect information
and place labels, without knowing the exact position of what you are
connecting or of where the lines should connect. These macros are
useful for making graphs and trees, mathematical diagrams, linguistic
syntax diagrams, and connecting ideas of any kind. They are the trickiest
tricks in PSTricks!
Although you might use these macros in pictures, positioning and rotating them with \rput, you can actually use them anywhere. For example,
I might do something like this in a guide about page styles:
With the myfooters page
style, the name of the
current section appears
at the bottom of each
page.
\makeatletter
\gdef\ps@temp{\def\@oddhead{}\def\@evenhead{}
\def\@oddfoot{\small\sf
\ovalnode[boxsep=false]{A}{\rightmark}
\nccurve[ncurv=.5,angleB=240,angleA=180,nodesep=6pt]{<-}{A}{B}
\hfil\thepage}
\let\@evenfoot\@oddfoot}
\makeatother
\thispagestyle{temp}
With the {\tt myfooters} page style, the name of the current section
appears at the bottom of each \rnode{B}{page}.
You can use nodes in math mode and in alignment environments as well.
Here is an example of a commutative diagram:
Nodes and Node Connections
58
$
\begin{array}{c@{\hskip 1cm}c}
& \rnode{a}{A}\\[2cm]
\rnode{b}{B} & \rnode{c}{C}
\end{array}
\psset{nodesep=3pt}
\everypsbox{\scriptstyle}
\ncline{->}{a}{b}\Bput{f}
\ncline{->}{a}{c}\Aput{g}
\ncline[linestyle=dotted]{->}{b}{c}\Aput{h}
$
A
f
B
g
h
C
There are three components to the node macros:
Node definitions The node definitions let you assign a name and shape
to an object. See Section 30.
Node connections The node connections connect two nodes, identified
by their names. See Section 31.
Node labels The node label commands let you affix labels to the node
connections. See Section 32.
30 Nodes
PS
The name of a node must contain only letters and numbers, and must
begin with a letter.
Warning: Bad node names can cause PostScript errors.
\rnode[refpoint ]{name }{stuff }
This assigns the name to the node, which will have a rectangular
shape for the purpose of making connections, with the “center”
at the reference point (i.e., node connections will point to the
reference point. \rnode was used in the two examples above.
\Rnode(x , y ){name }{stuff }
This is like \rnode, but the reference point is calculated differently.
It is set to the middle of the box’s baseline, plus (x , y ). If you omit
the (x , y ) argument, command
\RnodeRef
Nodes
59
is substituted. The default definition of \RnodeRef is 0,.7ex. E.g,
the following are equivalent:
\Rnode(0,.6ex){stuff}
{\def\RnodeRef{0,.6ex}\Rnode{stuff}}
\Rnode is useful when aligning nodes by their baselines, such as in
commutative diagrams. With \rnode horizontal node connections
might not be quite horizontal, because of differences in the size
of letters.
\pnode(x , y ){name }
This creates a zero dimensional node at the point (x , y ) (default
(0,0)).
\cnode*[par](x , y ){radius }{name }
This draws a circle and assigns the name to it.
\circlenode*[par]{name }{stuff }
This is a variant of \pscirclebox that gives the node the shape of
the circle.
\cnodeput*[par]{angle}(x , y ){name }{stuff }
This is a variant of \cput that gives the node the shape of the
circle.
\ovalnode*[par]{name }{stuff }
This is a variant of \psovalbox that gives the node the shape of
the ellipse.
The reason that there is no \framenode command is that using \psframebox (or \psshadowbox or \psdblframebox) in the argument of \rnode
gives the desired result.
31 Node connections
All the node connection commands begin with nc, and they all have the
same syntax:
\<nodeconnection>[<par>]{<arrows>}{<nodeA>}{<nodeB>}
Node connections
60
A line of some sort is drawn from nodeA to nodeB . Some of the node
connection commands are a little confusing, but with a little experimentation you will figure them out, and you will be amazed at the things
you can do.
The node and point connections can be used with \pscustom. The
beginning of the node connection is attached to the current point by a
straight line, as with \psarc.14
When we refer to the A and B nodes below, we are referring only to the
order in which the names are given as arguments to the node connection
macros.
When a node name cannot be found on the same page as the node
connection command, you get either no node connection or a nonsense
node connection. However, TEX will not report any errors.
The node connections use the following parameters:
Default: 0
nodesep=dim
The border around the nodes added for the purpose of determining
where to connect the lines.
Default: 0
offset=dim
After the node connection point is calculated, it is shift up for
nodeA and down for nodeB by dim, where “up” and “down”
assume that the connecting line points to the right from the node.
arm=dim
Default: 10pt
Some node connections start with a segment of length dim before
turning somewhere.
Default: 0
angle=angle
Some node connections let you specify the angle that the node
connection should connect to the node.
Default: 8
arcangle=angle
This applies only to \ncarc, and is described below.
ncurv=num
Default: .67
This applies only to \nccurve and \pccurve, and is described
below.
14
See page 71 if you want to use the nodes as coordinates in other PSTricks macros.
Node connections
61
loopsize=dim
Default: 1cm
This applies only the \ncloop and \pcloop, and is described below.
You can set these parameters separately for the two nodes. Just add an
A or B to the parameter name. E.g.
\psset{nodesepA=3pt, offsetA=5pt, offsetB=3pt, arm=1cm}
sets nodesep for the A node, but leaves the value for the B node unchanged, sets offset for the A and B nodes to different values, and sets
arm for the A and B nodes to the same value.
Don’t forget that by using the border parameter, you can create the
impression that one node connection passes over another.
Here is a description of the individual node connection commands:
\ncline*[par]{arrows }{nodeA}{nodeB}
This draws a straight line between the nodes. Only the offset and
nodesep parameters are used.
Idea 2
\rput[bl](0,0){\rnode{A}{Idea 1}}
\rput[tr](4,3){\rnode{B}{Idea 2}}
\ncline[nodesep=3pt]{<->}{A}{B}
Idea 1
\ncLine*[par]{arrows }{nodeA}{nodeB}
This is like \ncline, but the labels (with \lput, etc) are positioned
as if the line began and ended at the center of the nodes. This is
useful if you have multiple parallel lines and you want the labels
to line up, even though the nodes are of varying size, e.g., in
commutative diagrams.
\nccurve*[par]{arrows }{nodeA}{nodeB}
This draws a bezier curve between the nodes. It uses the nodesep,
offset, angle and ncurv parameters.
Node B
\rput[bl](0,0){\rnode{A}{\psframebox{Node A}}}
\rput[tr](4,3){\ovalnode{B}{Node B}}
\nccurve[angleB=180]{A}{B}
Node A
Node connections
62
\ncarc*[par]{arrows }{nodeA}{nodeB}
This is actually a variant of \nccurve. I.e., it also connects the
nodes with a bezier curve, using the nodesep, offset, and ncurv
parameters. However, the curve connects to node A at an angle
arcangleA from the line between A and B, and connects to node B
at an angle -arcangleB from the line between B and A. For small,
equal values of angleA and angleB (e.g., the default value of 8)
and with the default value of ncurv, the curve approximates an
arc of a circle. \ncarc is a nice way to connect two nodes with
two lines.
Y
X
\cnodeput(0,0){A}{X}
\cnodeput(3,2){B}{Y}
\psset{nodesep=3pt}
\ncarc{->}{A}{B}
\ncarc{->}{B}{A}
\ncbar*[par]{arrows }{nodeA}{nodeB}
First, lines are drawn attaching to both nodes at an angle angleA
and of lengths armA and armB. Then one of the arms is extended
so that when the two are connected, the finished line contains 3
segments meeting at right angles. Generally, the whole line has
three straight segments. The value of linearc is used for rounding
the corners.
Connect some words!
\rnode{A}{Connect} some \rnode{B}{words}!
\ncbar[nodesep=3pt,angle=-90]{<-**}{A}{B}
\ncdiag*[par]{arrows }{nodeA}{nodeB}
First, the arms are drawn using angle and arm. Then they are
connected with a straight line. Generally, the whole line has three
straight segments. The value of linearc is used for rounding the
corners.
Node A
\rput[tl](0,3){\rnode{A}{\psframebox{Node A}}}
\rput[br](4,0){\ovalnode{B}{Node B}}
\ncdiag[angleA=-90,angleB=90,arm=.5,linearc=.2]{A}{B}
Node B
Node connections
63
\ncdiagg*[par]{arrows }{nodeA}{nodeB}
This is similar to \ncdiag, but only the arm for node A is drawn.
The end of this arm is then connected directly to node B. The
connection typically has two segments. The value of linearc is
used for rounding the corners.
H
T
\cnode(0,0){4pt}{a}
\rput[l](3,1){\rnode{b}{H}}
\rput[l](3,-1){\rnode{c}{T}}
\ncdiagg[angleA=180,armA=2cm,nodesepA=3pt]{b}{a}
\ncdiagg[angleA=180,armA=2cm,nodesepA=3pt]{c}{a}
\ncangle*[par]{arrows }{nodeA}{nodeB}
The node connection points are determined by angleA and angleB
(and nodesep and offset). Then an arm is drawn for node B using
armB. This arm is connected to node A by a right angle, that also
meets node A at angle angleA. Generally, the whole line has three
straight segments, but it can have fewer. The value of linearc is
used for rounding the corners. Simple, right? Here is an example:
Node A
\rput[tl](0,3){\rnode{A}{\psframebox{Node A}}}
\rput[br](4,0){\ovalnode{B}{Node B}}
\ncangle[angleA=-90,angleB=90,arm=.4cm,
linestyle=dashed]{A}{B}
Node B
\ncangles*[par]{arrows }{nodeA}{nodeB}
This is similar to \ncangle, but both armA and armB are used.
The arms are connected by a right angle that meets arm A at a
right angle as well. Generally there are four segments (hence one
more angle than \ncangle, and hence the s in \ncangles). The
value of linearc is used for rounding the corners. Compare this
example with the previous one:
Node A
\rput[tl](0,3){\rnode{A}{\psframebox{Node A}}}
\rput[br](4,0){\ovalnode{B}{Node B}}
\ncangles[angleA=-90,arm=.4cm,linearc=.15]{A}{B}
Node B
Node connections
64
\ncloop*[par]{arrows }{nodeA}{nodeB}
The first segment is armA, then it makes a 90 degree turn to the
left, drawing a segment of length loopsize. The next segment is
again at a right angle; it connects to armB. For example:
A loop
\rnode{a}{\psframebox{\Huge A loop}}
\ncloop[angleB=180,loopsize=1,arm=.5,linearc=.2]{->}{a}{a}
\nccircle*[par]{arrows }{node }{radius }
This draws a circle from a node to itself. It is the only node
connection command of this sort. The circle starts at angle angleA and goes around the node counterclockwise, at a distance
nodesepA from the node.
The node connection commands make interesting drawing tools as well,
as an alternative to \psline for connecting two points. There are variants
of the node connection commands for this purpose. Each begins with
pc (for “point connection”) rather than nc. E.g.,
\pcarc{<->}(3,4)(6,9)
gives the same result as
\pnode(3,4){A}\pnode(6,9){B}\pcarc{<->}{A}{B}
Only \ncLine and \nccircle do not have pc variants:
\pcline*[par]{arrows }(x1, y1)(x2 , y2 )
Like \ncline.
\pccurve*[par]{arrows }(x1, y1)(x2 , y2 )
Like \nccurve.
\pcarc*[par]{arrows }(x1, y1)(x2 , y2 )
Like \ncarc.
\pcbar*[par]{arrows }(x1, y1)(x2 , y2 )
Like \ncbar.
\pcdiag*[par]{arrows }(x1, y1)(x2 , y2 )
Like \ncdiag.
Node connections
65
\pcangle*[par]{arrows }(x1, y1)(x2 , y2 )
Like \ncangle.
\pcloop*[par]{arrows }(x1, y1)(x2 , y2 )
Like \ncloop.
32 Attaching labels to node connections
Now we come to the commands for attaching labels to the node connections. The node label command must come right after the node
connection to which the label is to be attached. You can attach more
than one label to a node connection, and a label can include more nodes.
The node label commands must end up on the same TEX page as the
node connection to which the label corresponds.
The coordinate argument in other PSTricks put commands is a single
number in the node label commands: (pos). This number selects a point
on the node connection, roughly according to the following scheme:
Each node connection has potentially one or more segments, including
the arms and connecting lines. A number pos between 0 and 1 picks
a point on the first segment from node A to B, (fraction pos from the
beginning to the end of the segment), a number between 1 and 2 picks
a number on the second segment, and so on. Each node connection has
its own default value of the positioning coordinate, which is used by
some short versions of the label commands.
Here are the details for each node connection:
Connection
Segments
Range
Default
0≤ pos≤ 1
0≤ pos≤ 1
0≤ pos≤ 1
0≤ pos≤ 3
0.5
\ncbar
1
1
1
3
\ncdiag
3
0≤ pos≤ 3
1.5
\ncdiagg
0≤ pos≤ 2
0≤ pos≤ 3
0≤ pos≤ 4
0.5
\ncloop
2
3
5
\nccircle
1
0≤ pos≤ 1
0.5
\ncline
\nccurve
\ncarc
\ncangle
0.5
0.5
1.5
1.5
2.5
There is another difference between the node label commands and other
put commands. In addition to the various ways of specifying the angle
Attaching labels to node connections
66
of rotation for \rput, with the node label commands the angle can be
of the form {:angle}. In this case, the angle is calculated after rotating
the coordinate system so that the node connection at the position of the
label points to the right (from nodes A to B). E.g., if the angle is {:U},
then the label runs parallel to the node connection.
Here are the node label commands:
\lput*[refpoint ]{rotation}(pos){stuff }
The l stands for “label”. Here is an example illustrating the use
of the optional star and :angle with \lput, as well as the use of the
offset parameter with \pcline:
\pspolygon(0,0)(4,2)(4,0)
\pcline[offset=12pt]{|-|}(0,0)(4,2)
\lput*{:U}{Length}
gth
Len
(Remember that with the put commands, you can omit the coordinate if you include the angle of rotation. You are likely to use
this feature with the node label commands.)
With \lput and \rput, you have a lot of control over the position of
the label. E.g.,
el
lab
\pcline(0,0)(4,2)
\lput{:U}{\rput[r]{N}(0,.4){label}}
puts the label upright on the page, with right side located .4
centimeters “above” the position .5 of the node connection (above
if the node connection points to the right). However, the \aput
and \bput commands described below handle the most common
cases without \rput.15
15
There is also an obsolete command \Lput for putting labels next to node connections. The syntax is
\Lput{<labelsep>}[<refpoint>]{<rotation>}(<pos>){<stuff>}
It is a combination of \Rput and \lput, equivalent to
\lput(<pos>){\Rput{<labelsep>}[<refpoint>]{<rotation>}(0,0){<stuff>}}
\Mput is a short version of \Lput with no {rotation } or (pos) argument. \Lput and
\Mput remain part of PSTricks only for backwards compatibility.
Attaching labels to node connections
67
\aput*[labelsep]{angle}(pos){stuff }
stuff is positioned distance \pslabelsep above the node connec-
tion, given the convention that node connections point to the right.
\aput is a node-connection variant of \uput. For example:
H
us
ten
o
p
y
e
\pspolygon(0,0)(4,2)(4,0)
\pcline[linestyle=none](0,0)(4,2)
\aput{:U}{Hypotenuse}
\bput*[labelsep]{angle}(pos){stuff }
This is like \aput, but stuff is positioned below the node connection.
It is fairly common to want to use the default position and rotation with
these node connections, but you have to include at least one of these
arguments. Therefore, PSTricks contains some variants:
\mput*[refpoint ]{stuff }
\Aput*[labelsep]{stuff }
\Bput*[labelsep]{stuff }
of \lput, \aput and \bput, respectively, that have no angle or positioning
argument. For example:
1
\cnode*(0,0){3pt}{A}
\cnode*(4,2){3pt}{B}
\ncline[nodesep=3pt]{A}{B}
\mput*{1}
Here is another:
Label
\pcline{<->}(0,0)(4,2)
\Aput{Label}
Now we can compare \ncline with \ncLine, and \rnode with \Rnode.
First, here is a mathematical diagram with \ncLine and \Rnode:
Attaching labels to node connections
68
\[
\setlength{\arraycolsep}{1cm}
\def\tX{\tilde{\tilde{X}}}
\begin{array}{cc}
\Rnode{a}{(X-A,N-A)} & \Rnode{b}{(\tX,a)}\\[1.5cm]
\Rnode{c}{(X,N)} & \Rnode{d}{\LARGE(\tX,N)}\\[1.5cm]
\end{array}
\psset{nodesep=5pt,arrows=->}
\everypsbox{\scriptstyle}
\ncLine{a}{b}\Aput{a}
\ncLine{a}{c}\Bput{r}
\ncLine[linestyle=dashed]{c}{d}\Bput{b}
\ncLine{b}{d}\Bput{s}
\]
(X – A; N – A)
a
˜ a)
(X;
s
r
(X; N)
˜ N)
(X;
b
Here is the same one, but with \ncline and \rnode instead:
a
(X – A; N – A)
s
r
(X; N)
Driver notes:
˜ a)
(X;
b
˜ N)
(X;
The node macros use \pstVerb and \pstverbscale.
Attaching labels to node connections
69
VIII
Special Tricks
33 Coils and zigzags
pst-coil
The file pst-coil.tex/pst-coil.sty (and optionally the header file pst-coil.pro)
defines the following graphics objects for coils and zigzags:
\pscoil*[par ]{arrows }(x0 , y0 )(x1, y1)
\psCoil*[par ]{angle1}{angle2 }
\pszigzag*[par ]{arrows }(x0 , y0 )(x1, y1)
These graphics objects use the following parameters:
coilwidth=dim
coilheight=num
coilarm=dim
coilaspect=angle
coilinc=angle
Default: 1cm
Default: 1
Default: .5cm
Default: 45
Default: 10
All coil and zigzag objects draw a coil or zigzag whose width (diameter)
is coilwidth, and with the distance along the axes for each period (360
degrees) equal to
coilheight x coilwidth.
Both \pscoil and \psCoil draw a “3D” coil, projected onto the xz-axes.
The center of the 3D coil lies on the yz-plane at angle pcoilaspect to
the z-axis. The coil is drawn with PostScript’s lineto, joining points that
lie at angle coilinc from each other along the coil. Hence, increasing
coilinc makes the curve smoother but the printing slower. \pszigzag
does not use the coilaspect and coilinc parameters.
\pscoil and \pszigzag connect (x0 , y0 ) and (x1, y1), starting and ending
with straight line segments of length coilarmA and coilarmB, resp. Setting coilarm is the same as setting coilarmA and coilarmB.
Here is an example of \pscoil:
Special Tricks
70
\pscoil[coilarm=.5cm,linewidth=1.5pt,coilwidth=.5cm]{<-|}(4,2)
Here is an example of \pszigzag:
\pszigzag[coilarm=.5,linearc=.1]{<->}(4,0)
Note that \pszigzag uses the linearc parameters, and that the beginning
and ending segments may be longer than coilarm to take up slack.
\psCoil just draws the coil horizontally from angle1 to angle2 . Use \rput
to rotate and translate the coil, if desired. \psCoil does not use the
coilarm parameter. For example, with coilaspect=0 we get a sine curve:
\psCoil[coilaspect=0,coilheight=1.33,
coilwidth=.75,linewidth=1.5pt]{0}{1440}
pst-node
pst-coil.tex also contains coil and zigzag node connections. You must
also load pst-node.tex / pst-node.sty to use these. The node connections
are:
\nccoil*[par ]{arrows }{nodeA}{nodeB}
\nczigzag*[par ]{arrows }{nodeA}{nodeB}
\pccoil*[par ]{arrows }(x1, y1)(x2 , y2 )
\pczigzag*[par ]{arrows }(x1, y1)(x2 , y2 )
The end points are chosen the same as for \ncline and \pcline, and otherwise these commands work like \pscoil and \pszigzag. For example:
\cnode(.5,.5){.5}{A}
\cnode[fillstyle=solid,fillcolor=lightgray](3.5,2.5){.5}{B}
\nccoil[coilwidth=.3]{<->}{A}{B}
34 Special coordinates
The command
Special coordinates
71
\SpecialCoor
enables a special feature that lets you specify coordinates in a variety
of ways, in addition to the usual Cartesian coordinates.16 Processing is
slightly slower and less robust, which is why this feature is available
on demand rather than by default, but you probably won’t notice the
difference.
Here are the coordinates you can use:
(x ,y ) The usual Cartesian coordinate. E.g., (3,4).
(r ;a) Polar coordinate, with radius r and angle a. The default unit for r
is unit. E.g., (3;110).
(node) The center of node. E.g., (A).
([par ]node) The position relative to node determined using the angle,
nodesep and offset parameters. E.g., ([angle=45]A).
(!ps) Raw PostScript code. ps should expand to a coordinate pair. The
units xunit and yunit are used. For example, if I want to use a
polar coordinate (3; 110) that is scaled along with xunit and yunit,
I can write
(!3 110 cos mul 3 110 sin mul)
(coor1|coor2 ) The x coordinate from coor1 and the y coordinate from
coor2 . coor1 and coor2 can be any other coordinates for use with
\SpecialCoor. For example, (A|1in;30).
\SpecialCoor also lets you specify angles in several ways:
num A number, as usual, with units given by the \degrees command.
16
There is an obsolete command \Polar that causes coordinates in the form (r ,a) to
be interpreted as polar coordinates. The use of \Polar is not recommended because it
does not allow one to mix Cartesian and polar coordinates the way \SpecialCoor does,
and because it is not as apparent when examining an input file whether, e.g., (3,2) is a
Cartesian or polar coordinate. The command for undoing \Polar is \Cartesian. It has
an optional argument for setting the default units. I.e.,
\Cartesian(<x>,<y>)
has the effect of
\psset{xunit=<x>,yunit=<y>}
\Cartesian can be used for this purpose without using \Polar.
Special coordinates
72
(coor ) A coordinate, indicating where the angle points to. Be sure to
include the (), in addition to whatever other delimiters the angle
argument uses. For example, the following are two ways to draw
an arc of .8 inch radius from 0 to 135 degrees:
\SpecialCoor
\psarc(0,0){.8in}{0}{135}
\psarc(0,0){.8in}{0}{(-1,1)}
!ps Raw PostScript code. ps should expand to a number. The same
units are used as with num.
The command
\NormalCoor
disables the \SpecialCoor features.
35 Overlays
Overlays are mainly of interest for making slides, and the overlay macros
described in this section are mainly of interest to TEX macro writers who
want to implement overlays in a slide macro package. For example, the
seminar.sty package, a LaTEX style for notes and slides, uses PSTricks to
implement overlays.
Overlays are made by creating an \hbox and then outputting the box
several times, printing different material in the box each time. The box
is created by the commands
\overlaybox stuff \endoverlaybox
LaTEX users can instead write:
\begin{overlaybox} <stuff> \end{overlaybox}
The material for overlay string should go within the scope of the command
\psoverlay{string }
Overlays
73
string can be any string, after expansion. Anything not in the scope of
any \psoverlay command goes on overlay main, and material within the
scope of \psoverlay{all} goes on all the overlays. \psoverlay commands
can be nested and can be used in math mode.
The command
\putoverlaybox{string }
then prints overlay string .
Here is an example:
\overlaybox
\psoverlay{all}
\psframebox[framearc=.15,linewidth=1.5pt]{%
\psoverlay{main}
\parbox{3.5cm}{\raggedright
Foam Cups Damage Environment {\psoverlay{one} Less than
Paper Cups,} Study Says.}}
\endoverlaybox
\putoverlaybox{main} \hspace{.5in} \putoverlaybox{one}
Foam Cups Damage
Environment
Less
than Paper Cups,
Study Says.
Driver notes:
Overlays use \pstVerb and \pstverbscale.
36 The gradient fill style
gradient
The file gradient.tex/gradient.sty, along with the PostScript header file
gradient.pro, defines the gradient fillstyle, for gradiated shading. This
fillstyle uses the following parameters:
gradbegin=color
Default: gradbegin
The starting and ending color.
gradend=color
Default: gradend
The color at the midpoint.
The gradient fill style
74
gradlines=int
Default: 500
The number of lines. More lines means finer gradiation, but
slower printing.
gradmidpoint=num
Default: .9
The position of the midpoint, as a fraction of the distance from
top to bottom. num should be between 0 and 1.
gradangle=angle
Default: 0
The image is rotated by angle.
gradbegin and gradend should preferably be rgb colors, but grays and
cmyk colors should also work. The definitions of the colors gradbegin
and gradend are:
\newrgbcolor{gradbegin}{0 .1 .95}
\newrgbcolor{gradend}{0 1 1}
Here are two ways to change the gradient colors:
\newrgbcolor{gradbegin}{1 .4 0}
and
\psset{gradbegin=blue}
Try this example:
\psframe[fillstyle=gradient,gradangle=45](10,-20)
37 Adding color to tables
colortab
The file colortab.tex/colortab.sty contains macros that, when used with
color commands such as those in PSTricks, let you color the cells and
lines in tables. See colortab.doc for more information.
Adding color to tables
75
38 Typesetting text along a path
textpath
The file textpath.tex/textpath.sty defines the command \pstextpath, for
typesetting text along a path. It is a remarkable trick, but there are some
caveats:
• textpath.tex only works with certain DVI-to-PS drivers. Here is
what is currently known:
– It works with Rokicki’s dvips, version 5.487 or later (at least
up to v5.495).
– It does not work with earlier versions of dvips.
– It does not work with TeXview (to preview files with NeXTTeX 3.0, convert the .dvi file to a PostScript file with dvips -o
and use Preview).
– “Does not work” means that it has no effect, for better or
for worse.
– This may work with other drivers. The requirement is that
the driver only use PostScript’s show operator, unbound and
unloaded, to show characters.
• You must also have installed the PostScript header file textpath.ps,
and \pstheader must be properly defined in pstricks.con for your
driver.
• Like other PSTricks that involve rotating text, this works best
with PostScript (outline) fonts.
• PostScript rendering with textpath.tex is slow.
Because of all this, no samples are shown here. However, there is a test
file tp-test.tex and PostScript output tp-test.ps that are distributed with
PSTricks.
Here is the command:
\pstextpath[pos](x,y){graphics object }{text }
text is placed along the path, from beginning to end, defined by the
PSTricks graphics object. (This object otherwise behaves normally. Set
linestyle=none if you don’t want it to appear.)
text can only contain characters. No TeX rules, no PSTricks, and no
other \special’s. (These things don’t cause errors; they just don’t work
Typesetting text along a path
76
right.) Math mode is OK, but math operators that are built from several
characters (e.g., large integral signs) may break. Entire boxes (e.g.,
\parbox) are OK too, but this is mainly for amusement.
pos is either
l
c
justify on beginning of path
center on path
r
justify on end of path.
The default is l.
(x ,y ) is an offset. Characters are shifted distance x along path, and are
shifted up by y . “Up” means with respect to the path, at whatever point
on the path corresponding to the middle of the character. (x ,y ) must be
Cartesian coordinates. Both coordinates use \psunit as the default. The
default coordinate is (0,\TPoffset), where \TPoffset a command whose
default value is -.7ex. This value leads to good spacing of the characters.
Remember that ex units are for the font in effect when \pstextpath occurs,
not inside the text argument.
More things you might want to know:
• Like with \rput and the graphics objects, it is up to you to leave
space for \pstextpath.
• Results are unpredictable if text is wider than length of path.
• \pstextpath leaves the typesetting to TEX. It just intercepts the show
operator to remap the coordinate system.
39 Stroking and filling character paths
charpath
The file charpath.tex/charpath.sty defines the command:
\pscharpath*[par ]{text }
It strokes and fills the text character paths using the PSTricks linestyle
and fillstyle.
The restrictions on DVI-to-PS drivers listed on page 76 for \pstextpath
apply to \pscharpath. Furthermore, only outline (PostScript) fonts are
affected.
Stroking and filling character paths
77
Sample input and output files chartest.tex and chartest.ps are distributed
with PSTricks.
With the optional *, the character path is not removed from the PostScript
environment at the end. This is mainly for special hacks. For example, you can use \pscharpath* in the first argument of \pstextpath, and
thus typeset text along the character path of some other text. See the
sample file denis1.tex. (However, you cannot combine \pscharpath and
\pstextpath in any other way. E.g., you cannot typeset character outlines
along a path, and then fill and stroke the outlines with \pscharpath.)
The command
\pscharclip*[par ]{text } ... \endpscharclip
works just like \pscharpath, but it also sets the clipping path to the
character path. You may want to position this clipping path using \rput
inside \pscharclip’s argument. Like \psclip and \endpsclip, \pscharclip
and \endpscharclip should come on the same page and should be properly nested with respect to TEX groups (unless \AltClipMode is in effect).
The file denis2.tex contains a sample of \pscharclip.
40 Importing EPS files
PSTricks does not come with any facility for including Encapsulated
PostScript files, because there are other very good and well-tested
macros for exactly that. If using Rokicki’s dvips, then try epsf.tex/epsf.sty,
by the man himself!
What PSTricks is good for is embellishing your EPS picture. You can
include an EPS file in in the argument of \rput, as in
\rput(3,3){\epsfbox{myfile.eps}}
and hence you can include an EPS file in the \pspicture environment.
Turn on \psgrid, and you can find the coordinates for whatever graphics
or text you want to add. This works even when the picture has a weird
bounding box, because with the arguments to \pspicture you control the
bounding box from TEX’s point of view.
This isn’t always the best way to work with an EPS file, however. If the
PostScript file’s bounding box is the size you want the resulting picture
to be, after your additions, then try
Importing EPS files
78
\hbox{<picture objects> \epsfbox{<file.eps>}
This will put all your picture objects at the lower left corner of the EPS
file. \epsfbox takes care of leaving the right amount of space.
If you need to determine the bounding box of an EPS file, then you
can try of the automatic bounding box calculating programs, such as
bbfig (distributed with Rokicki’s dvips). However, all such programs
are easily fooled; the only sure way to determine the bounding box is
visually. \psgrid is a good tool for this.
41 Exporting EPS files
pst2eps
You must load pst2eps.tex or pst2eps.sty to use the PSTricks macros
described in this section.
If you want to export an EPS file that contains both graphics and text,
then you need to be using a DVI-to-PS driver that suports such a feature. If you just want to export pure graphics, then you can use the
\PSTricksEPS command. Both of these options are described in this
section.
Newer versions of Rokicki’s dvips support an -E option for creating EPS
files from TEX .dvi files. E.g.,
dvips foo:dvi – E – ofoo:eps
Your document should be a single page. dvips will find a tight bounding
box that just encloses the printed characters on the page. This works
best with outline (PostScript) fonts, so that the EPS file is scalable and
resolution independent.
There are two inconvenient aspects of this method. You may want a
different bounding box than the one calculated by dvips (in particular,
dvips ignores all the PostScript generated by PSTricks when calculating
the bounding box), and you may have to go out of your way to turn off
any headers and footers that would be added by output routines.
PSTricks contains an environment that tries to get around these two
problems:
\TeXtoEPS
stuff
\endTeXtoEPS
Exporting EPS files
79
This is all that should appear in your document, but headers and whatever
that would normally be added by output routines are ignored. dvips will
again try to find a tight bounding box, but it will treat stuff as if there
was a frame around it. Thus, the bounding box will be sure to include
stuff , but might be larger if there is output outside the boundaries of this
box. If the bounding box still isn’t right, then you will have to edit the
%%BoundingBox <llx lly urx ury>
specification in the EPS file by hand.
If your goal is to make an EPS file for inclusion in other documents,
then dvips -E is the way to go. However, it can also be useful to generate
an EPS file from PSTricks graphics objects and include it in the same
document,17 rather than just including the PSTricks graphics directly,
because TEX gets involved with processing the PSTricks graphics only
when the EPS file is initially created or updated. Hence, you can edit
your file and preview the graphics, without having to process all the
PSTricks graphics each time you correct a typo. This speed-up can be
significant with complex graphics such as \pslistplot’s with a lot of data.
To create an EPS file from PSTricks graphics objects, use
\PSTtoEPS[par ]{file }{graphics objects}
The file is created immediately, and hence you can include it in the same
document (after the \PSTtoEPS command) and as many times as you
want. Unlike with dvips -E, only pure graphics objects are processed
(e.g., \rput commands have no effect).
\PSTtoEPS cannot calculate the bounding box of the EPS file. You have
to specify it yourself, by setting the following parameters:
bbllx=dim
bblly=dim
bburx=dim
bbury=dim
Default: -1pt
Default: -1pt
Default: 1pt
Default: 1pt
Note that if the EPS file is only to be included in a PSTricks picture with
\rput you might as well leave the default bounding box.
\PSTricksEPS also uses the following parameters:
17
See the preceding section on importing EPS files.
Exporting EPS files
80
headerfile=file
Default: s
()This parameter is for specifying PostScript header files that are
to be included in the EPS file. The argument should contain one
or more file names, separated by commas. If you have more than
one file, however, the entire list must be enclosed in braces {}.
headers=none/all/user
Default: none
When none, no header files are included. When all, the header files
used by PSTricks plus the header files specified by the headerfile
parameter are included. When user, only the header files specified
by the headerfile parameter are included. If the EPS file is to be
included in a TEX document that uses the same PSTricks macros
and hence loads the relevant PSTricks header files anyway (in
particular, if the EPS file is to be included in the same document),
then headers should be none or user.
Exporting EPS files
81
Help
A Boxes
Many of the PSTricks macros have an argument for text that is processed
in restricted horizontal mode (in LaTEX parlance, LR-mode) and then
transformed in some way. This is always the macro’s last argument,
and it is written {stuff } in this User’s Guide. Examples are the framing,
rotating, scaling, positioning and node macros. I will call these “LRbox” macros, and use framing as the leading example in the discussion
below.
In restricted horizontal mode, the input, consisting of regular characters
and boxes, is made into one (long or short) line. There is no linebreaking, nor can there be vertical mode material such as an entire
displayed equation. However, the fact that you can include another box
means that this isn’t really a restriction.
For one thing, alignment environments such as \halign or LaTEX’s tabular
are just boxes, and thus present no problem. Picture environments and
the box macros themselves are also just boxes. Actually, there isn’t a
single PSTricks command that cannot be put directly in the argument
of an LR-box macro. However, entire paragraphs or other vertical
mode material such as displayed equations need to be nested in a \vbox
or LaTEX \parbox or minipage. LaTEX users should see fancybox.sty and
its documentation, fancybox.doc, for extensive tips and trick for using
LR-box commands.
The PSTricks LR-box macros have some features that are not found in
most other LR-box macros, such as the standard LaTEX LR-box commands.
With LaTEX LR-box commands, the contents is always processed in
text mode, even when the box occurs in math mode. PSTricks, on
the other hand, preserves math mode, and attempts to preserve the
math style as well. TEX has four math styles: text, display, script and
scriptscript. Generally, if the box macro occurs in displayed math (but
not in sub- or superscript math), the contents are processed in display
style, and otherwise the contents are processed in text style (even here
the PSTricks macros can make mistakes, but through no fault of their
own). If you don’t get the right style, explicitly include a \textstyle,
\displaystyle, \scriptstyle or \scriptscriptstyle command at the beginning of
Help
82
the box macro’s argument.
In case you want your PSTricks LR-box commands to treat math in the
same as your other LR-box commands, you can switch this feature on
and off with the commands
\psmathboxtrue
\psmathboxfalse
You can have commands (such as, but not restricted to, the math style
commands) automatically inserted at the beginning of each LR-box
using the
\everypsbox{commands }
command.18
If you would like to define an LR-box environment name from an LRbox command cmd , use
\pslongbox{name }{cmd }
For example, after
\pslongbox{MyFrame}{\psframebox}
you can write
\MyFrame <stuff>\endMyFrame
instead of
\psframebox{<stuff>}
Also, LaTEX users can write
\begin{MyFrame} <stuff>\end{MyFrame}
It is up to you to be sure that cmd is a PSTricks LR-box command; if it
isn’t, nasty errors can arise.
Environments like have nice properties:
18
This is a token register.
Boxes
83
• The syntax is clearer when stuff is long.
• It is easier to build composite LR-box commands. For example,
here is a framed minipage environment for LaTEX:
\pslongbox{MyFrame}{\psframebox}
\newenvironment{fminipage}%
{\MyFrame\begin{minipage}}%
{\end{minipage}\endMyFrame}
• You include verbatim text and other \catcode tricks in stuff .
The rest of this section elaborates on the inclusion of verbatim text
in LR-box environments and commands, for those who are interested.
fancybox.sty also contains some nice verbatim macros and tricks, some
of which are useful for LR-box commands.
The reason that you cannot normally include verbatim text in an LRbox commands argument is that TEX reads the whole argument before
processing the \catcode changes, at which point it is too late to change
the category codes. If this is all Greek to you,19 then just try this LaTEX
example to see the problem:
\psframebox{\verb+\foo{bar}+}
The LR-box environments defined with \pslongbox do not have this
problem because stuff is not processed as an argument. Thus, this
works:
\pslongbox{MyFrame}{\psframebox}
\MyFrame \verb+\foo{bar}+\endMyFrame
\foo{bar}
The commands
\psverbboxtrue
\psverbboxfalse
switch into and out of, respectively, a special PSTricks mode that lets
you include verbatim text in any LR-box command. For example:
19
Incidentally, many foreign language macros, such as greek.tex, use \catcode tricks
which can cause problems in LR-box macros.
Boxes
84
\psverbboxtrue
\psframebox{\verb+\foo{bar}+}
\foo{bar}
However, this is not as robust. You must explicitly group color commands in stuff , and LR-box commands that usually ignore spaces that
follow {stuff } might not do so when \psverbboxtrue is in effect.
B Tips and More Tricks
1 How do I rotate/frame this or that with LaTEX?
See fancybox.sty and its documentation.
2 How can I suppress the PostScript so that I can use my document with
a non-PostScript dvi driver?
Put the command
\PSTricksOff
at the beginning of your document. You should then be able to print
or preview drafts of your document (minus the PostScript, and perhaps
pretty strange looking) with any dvi driver.
3 How can I improve the rendering of halftones?
This can be an important consideration when you have a halftone in the
background and text on top. You can try putting
\pstverb{106 45 {dup mul exch dup mul add 1.0 exch sub} setscreen}
before the halftone, or in a header (as in headers and footers, not as in
PostScript header files), if you want it to have an effect on every page.
setscreen is a device-dependent operator.
Tips and More Tricks
85
4 What special characters can be active with PSTricks?
C Including PostScript code
To learn about the PostScript language, consult Adobe’s PostScript Language Tutorial and Cookbook (the “Blue Book”), or Henry McGilton
and Mary Campione’s PostScript by Example (1992). Both are published by Addison-Wesley. You may find that the Appendix of the Blue
Book, plus an understanding of how the stack works, is all you need to
write simple code for computing numbers (e.g., to specify coordinates
or plots using PostScript).
You may want to define TEX macros for including PostScript fragments
in various places. All TEX macros are expanded before being passed
on to PostScript. It is not always clear what this means. For example,
suppose you write
\SpecialCoor
\def\mydata{23 43}
\psline(!47 \mydata add)
\psline(!47 \mydata\ add)
\psline(!47 \mydata˜add)
\psline(!47 \mydata{} add)
You will get a PostScript error in each of the \psline commands. To see
what the argument is expanding to, try use TEX’s \edef and \show. E.g.,
\def\mydata{23 43}
\edef\temp{47 \mydata add}
\show\temp
\edef\temp{47 \mydata\ add}
\show\temp
\edef\temp{47 \mydata˜add}
\show\temp
\edef\temp{47 \mydata{} add}
\show\temp
TEX expands the code, assigns its value to \temp, and then displays the
value of \temp on your console. Hit return to procede. You fill find that
the four samples expand, respectively, to:
47
47
47
47
23
23
23
23
43add
43\ add
43\penalty \@M \ add
43{} add
Including PostScript code
86
All you really wanted was a space between the 43 and add. The command \space will do the trick:
\psline(!47 \mydata\space add)
You can include balance braces { }; these will be passed on verbatim to
PostScript. However, to include an unbalanced left or right brace, you
have to use, respectively,
\pslbrace
\psrbrace
Don’t bother trying \} or \{.
Whenever you insert PostScript code in a PSTricks argument, the dictionary on the top of the dictionary stack is tx@Dict, which is PSTrick’s
main dictionary. If you want to define you own variables, you have two
options:
Simplest Always include a @ in the variable names, because PSTricks
never uses @ in its variables names. You are at a risk of overflowing the tx@Dict dictionary, depending on your PostScript interpreter. You are also more likely to collide with someone else’s
definitions, if there are multiple authors contributing to the document.
Safest Create a dictionary named TDict for your scratch computations.
Be sure to remove it from the dictionary stack at the end of any
code you insert in an argument. E.g.,
TDict 10 dict def TDict begin <your code> end
D Troubleshooting
1 Why does the document bomb in the printer when the first item in a LaTEX
file is a float?
When the first item in a LaTEX file is a float, \special’s in the preamble
are discarded. In particular, the \special for including PSTricks’s header
file is lost. The workaround is to but something before the float, or to
include the header file by a command-line option with your dvi-to-ps
driver.
Troubleshooting
87
2 I converted a .dvi file to PostScript, and then mailed it to a colleague. It
prints fine for me but bombs on her printer.
Here is the most likely (but not the only) cause of this problem. The
PostScript files you get when using PSTricks can contain long lines.
This should be acceptable to any proper PostScript interpreter, but the
lines can get chopped when mailing the file. There is no way to fix
this in PSTricks, but you can make a point of wrapping the lines of
your PostScript files when mailing them. E.g., on UNIX you can use
uuencode and uudecode, or you can use the following AWK script to
wrap the lines:
#! /bin/sh
# This script wraps all lines
# Usage (if script is named wrap):
#
wrap < infile > outfile
awk ’
BEGIN {
N = 78
# Max line length
}
{ if (length($0)<=N)
print
else {
currlength = 0
for (i = 1; i <=NF; i++) {
if ((currlength = currlength + length($i) + 1) > N) {
printf
printf
currlength = length($i)
}
else
printf \ %s
}
printf
}
} ’
3 The color commands cause extraneous vertical space to be inserted.
For example, this can happen if you start a LaTEX \parbox or a p{} column
with a color command. The solution usually is to precede the color
command with \leavevmode.
4 The color commands interfere with other color macros I use.
Try putting the command \altcolormode at the beginning of your
document. This may or may not help. Be extra careful that the scope of
Troubleshooting
88
color commands does not extend across pages. This is generally a less
robust color scheme.
5 How do I stop floats from being the same color as surrounding material?
That’s easy: Just put an explicit color command at the beginning of the
float, e.g., \black.
6 When I use some color command in box macros or with \setbox, the
colors get all screwed up.
If \mybox is a box register, and you write
\green Ho Hum.
\setbox\mybox=\hbox{Foo bar \blue fee fum}
Hi Ho. \red Diddley-dee
\box\mybox hum dee do
then when \mybox is inserted, the current color is red and so Foo bar
comes out red (rather than green, which was the color in effect when the
box was set). The command that returns from \blue to the current color
green, when the box is set, is executed after the \hbox is closed, which
means that Hi Ho is green, but hum dee do is still blue.
This odd behavior is due to the fact that TEX does not support color
internally, the way it supports font commands. The first thing to do is to
explicitly bracket any color commands inside the box. Second, be sure
that the current color is black when setting the box. Third, make other
explicit color changes where necessary if you still have problems. The
color scheme invoked by \altcolormode is slightly better behaved if you
follow the first two rules.
Note that various box macros use \setbox and so these anomalies can
arise unexpectedly.
Troubleshooting
89
Index
\AltClipMode, 55, 78
\altcolormode, 88, 89
angle (parameter), 61, 62, 63, 72
angleA (parameter), 63–65
angleB (parameter), 63, 64
\Aput, 68
\aput, 67, 68, 68
arcangle (parameter), 61
arcangleA (parameter), 63
arcangleB (parameter), 63
arcsep (parameter), 13
arcsepA (parameter), 12, 12, 13
arcsepB (parameter), 12, 13
arm (parameter), 61, 63
armA (parameter), 63–65
armB (parameter), 63–65
arrowinset (parameter), 30, 30
arrowlength (parameter), 30, 30
\arrows, 40
arrows (parameter), 9, 11, 19, 20, 28,
\closepath, 34, 36, 36
\cnode, 60
\cnodeput, 60
\code, 39, 40
coilarm (parameter), 70, 70, 71
coilarmA (parameter), 70
coilarmB (parameter), 70
coilaspect (parameter), 70, 70, 71
coilheight (parameter), 70, 70
coilinc (parameter), 70, 70
coilwidth (parameter), 70, 70
\coor, 39, 40
cornersize (parameter), 10, 10, 54
\cput, 53, 60
curvature (parameter), 14
\curveto, 39, 39
bbllx (parameter), 80
bblly (parameter), 80
bburx (parameter), 80
bbury (parameter), 80
\black, 89
\blue, 89
border (parameter), 25, 25, 33, 62
bordercolor (parameter), 25, 25
boxsep (parameter), 52, 53, 54
\Bput, 68
\bput, 67, 68, 68
bracketlength (parameter), 30
dash (parameter), 25
dashed (parameter), 33
\dataplot, 20, 20, 21
\degrees, 8, 8, 72
\dim, 39
dimen (parameter), 26
\DontKillGlue, 42
dotangle (parameter), 16, 16
dotscale (parameter), 16
dotsep (parameter), 25
dotsize (parameter), 16, 30
dotstyle (parameter), 16, 16
dotted (parameter), 33
doublecolor (parameter), 25, 26
doubleline (parameter), 25, 25, 26, 33
doublesep (parameter), 25, 25
Dx (parameter), 49, 49
dx (parameter), 49, 49
Dy (parameter), 49, 49
dy (parameter), 49
\Cartesian, 72, 72
\circlenode, 60
\clipbox, 54
\closedshadow, 38
\endoverlaybox, 73
\endpscharclip, 78, 78
\endpsclip, 54, 54, 55, 78
\endpspicture, 41
29, 48
arrowscale (parameter), 30, 30
arrowsize (parameter), 30
axesstyle (parameter), 51
90
\endTeXtoEPS, 79
\everypsbox, 83
\file, 40
\fileplot, 20, 20
\fill, 33, 37
fillcolor (parameter), 9, 27, 28, 52
fillstyle (parameter), 9, 27, 28, 32, 33,
51, 74, 77
framearc (parameter), 10, 10
\framenode, 60
framesep (parameter), 52
gradangle (parameter), 75
gradbegin (parameter), 74, 75
gradend (parameter), 74, 75
gradlines (parameter), 75
gradmidpoint (parameter), 75
\gray, 4
\grestore, 37, 37, 38
gridcolor (parameter), 18
griddots (parameter), 18, 18
gridlabelcolor (parameter), 18
gridlabels (parameter), 18
gridwidth (parameter), 18
\gsave, 37, 37, 38
hatchangle (parameter), 27, 27
hatchcolor (parameter), 27
hatchsep (parameter), 27
hatchwidth (parameter), 27
headerfile (parameter), 81, 81
headers (parameter), 81, 81
\KillGlue, 42
labels (parameter), 50
labelsep (parameter), 44, 50
liftpen (parameter), 35, 35, 37
linearc (parameter), 10, 10, 19–21, 54,
63, 64, 71
linecolor (parameter), 8, 8, 9, 24, 28,
32, 33, 52
linestyle (parameter), 24, 25, 28, 32,
33, 51, 55, 76, 77
INDEX
\lineto, 39, 39
linetype (parameter), 33, 33
linewidth (parameter), 8, 8, 11, 16, 24,
28–30, 32, 33
\listplot, 20, 21, 21
loopsize (parameter), 62, 65
\Lput, 67, 67
\lput, 62, 67, 67, 68
\movepath, 38
\moveto, 36, 36
\Mput, 67, 67
\mput, 68
\mrestore, 38, 38
\msave, 38, 38
\multido, 47, 51
\multips, 46, 46, 51
\multirput, 46, 46
\ncangle, 64, 64, 66
\ncangles, 64, 64
\ncarc, 61, 63, 63, 65, 66
\ncbar, 63, 65, 66
\nccircle, 65, 65, 66
\nccoil, 71
\nccurve, 61, 62, 63, 65, 66
\ncdiag, 63, 64–66
\ncdiagg, 64, 66
\ncLine, 62, 65, 68
\ncline, 62, 62, 65, 66, 68, 69, 71
\ncloop, 62, 65, 66
ncurv (parameter), 61, 62, 63
\nczigzag, 71
\newcmykcolor, 5
\newgray, 5
\newhsbcolor, 5
\newpath, 36
\newpsobject, 31, 31, 54
\newpsstyle, 31, 31
\newrgbcolor, 5
nodesep (parameter), 61, 62–64, 72
nodesepA (parameter), 65
\NormalCoor, 73
offset (parameter), 61, 62–64, 67, 72
91
\openshadow, 38
origin (parameter), 24, 33
\ovalnode, 60
\overlaybox, 73
Ox (parameter), 49, 49, 50
Oy (parameter), 49, 49, 50
oy (parameter), 49, 49
\parabola, 14, 14
parameters:
Dx, 49, 49
Dy, 49, 49
Ox, 49, 49, 50
Oy, 49, 49, 50
angleA, 63–65
angleB, 63, 64
angle, 61, 62, 63, 72
arcangleA, 63
arcangleB, 63
arcangle, 61
arcsepA, 12, 12, 13
arcsepB, 12, 13
arcsep, 13
armA, 63–65
armB, 63–65
arm, 61, 63
arrowinset, 30, 30
arrowlength, 30, 30
arrowscale, 30, 30
arrowsize, 30
arrows, 9, 11, 19, 20, 28, 29, 48
axesstyle, 51
bbllx, 80
bblly, 80
bburx, 80
bbury, 80
bordercolor, 25, 25
border, 25, 25, 33, 62
boxsep, 52, 53, 54
bracketlength, 30
coilarmA, 70
coilarmB, 70
coilarm, 70, 70, 71
coilaspect, 70, 70, 71
INDEX
coilheight, 70, 70
coilinc, 70, 70
coilwidth, 70, 70
cornersize, 10, 10, 54
curvature, 14
dashed, 33
dash, 25
dimen, 26
dotangle, 16, 16
dotscale, 16
dotsep, 25
dotsize, 16, 30
dotstyle, 16, 16
dotted, 33
doublecolor, 25, 26
doubleline, 25, 25, 26, 33
doublesep, 25, 25
dx, 49, 49
dy, 49
fillcolor, 9, 27, 28, 52
fillstyle, 9, 27, 28, 32, 33, 51, 74,
77
framearc, 10, 10
framesep, 52
gradangle, 75
gradbegin, 74, 75
gradend, 74, 75
gradlines, 75
gradmidpoint, 75
gridcolor, 18
griddots, 18, 18
gridlabelcolor, 18
gridlabels, 18
gridwidth, 18
hatchangle, 27, 27
hatchcolor, 27
hatchsep, 27
hatchwidth, 27
headerfile, 81, 81
headers, 81, 81
labelsep, 44, 50
labels, 50
liftpen, 35, 35, 37
92
linearc, 10, 10, 19–21, 54, 63, 64,
71
linecolor, 8, 8, 9, 24, 28, 32, 33,
52
linestyle, 24, 25, 28, 32, 33, 51,
55, 76, 77
linetype, 33, 33
linewidth, 8, 8, 11, 16, 24, 28–30,
32, 33
loopsize, 62, 65
ncurv, 61, 62, 63
nodesepA, 65
nodesep, 61, 62–64, 72
offset, 61, 62–64, 67, 72
origin, 24, 33
oy, 49, 49
plotpoints, 22, 22
plotstyle, 19, 19, 34
pspicture, 41
rbracketlength, 30
rectarc, 54
runit, 7, 8
shadowangle, 26, 26
shadowcolor, 26, 26
shadowsize, 26, 26, 53
shadow, 26, 26, 33
showorigin, 50
showpoints, 9, 12, 14–16, 19–21,
33
style, 31
subgridcolor, 18
subgriddiv, 18
subgriddots, 18
subgridwidth, 18
swapaxes, 24, 33
tbarsize, 16, 30
ticksize, 50
tickstyle, 50, 50
ticks, 50
unit, 7, 7, 19, 72
xunit, 7, 8, 17, 18, 72
yunit, 7, 7, 8, 17, 18, 72
\parametricplot, 22, 22, 23
\pcangle, 66
INDEX
\pcarc, 65
\pcbar, 65
\pccoil, 71
\pccurve, 61, 65
\pcdiag, 65
\pcline, 65, 67, 71
\pcloop, 62, 66
\pczigzag, 71
\plotfile, 20
plotpoints (parameter), 22, 22
plotstyle (parameter), 19, 19, 34
\pnode, 60
\Polar, 72, 72
\psaddtolength, 7
\psarc, 12, 12, 13, 61
\psarcn, 13, 13
\psaxes, 17, 48, 49–51
\psbezier, 13, 13, 34, 35
\psborder, 25
\psccurve, 15, 19
\pscharclip, 78, 78
\pscharpath, 77, 78
\pscircle, 11, 26
\pscircle*, 11
\pscirclebox, 52, 53, 53, 60
\psclip, 54, 54, 55, 78
\psCoil, 70, 70, 71
\pscoil, 70, 70, 71
\pscurve, 15, 15, 19, 34, 37
\pscustom, 13, 32, 32–34, 36, 37, 39,
46, 54, 61
\psdblframebox, 53, 60
\psdots, 15, 19, 34
\psecurve, 15, 19
\psellipse, 12, 26
\psfill, 32
\psframe, 9, 10, 11, 11, 26, 51, 52
\psframebox, 52, 52–54, 60
\psgrid, 17, 17–19, 34, 48, 78, 79
\pshatchcolor, 27
\pslabelsep, 44, 50, 68
\pslbrace, 87
\psline, 7, 10, 10, 11, 19, 22, 31, 34,
51, 65, 86
93
\pslinecolor, 8
\pslinewidth, 8
\pslongbox, 83, 84
\psmathboxfalse, 83
\psmathboxtrue, 83
\psovalbox, 52, 54, 60
\psoverlay, 73, 74
\pspicture, 17, 41, 41, 42, 54, 78
pspicture (parameter), 41
\psplot, 21, 21–23
\pspolygon, 10, 11, 19, 28
\psrbrace, 87
\psrunit, 8
\psset, 5, 6, 6, 11, 41
\pssetlength, 7
\psshadowbox, 53, 60
\pstextpath, 76, 76, 77
\pstheader, 76
\PSTricksEPS, 79, 80
\PSTricksOff, 85
\pstroke, 32
\pstrotate, 46
\PSTtoEPS, 20, 80, 80
\pstunit, 32
\pstVerb, 5, 42, 46, 55, 69, 74
\pstverb, 32
\pstverbscale, 42, 55, 69, 74
\psunit, 8, 77
\psverbboxfalse, 84
\psverbboxtrue, 4, 84, 85
\pswedge, 12, 26
\psxlabel, 51
\psxunit, 8, 19
\psylabel, 51
\psyunit, 8, 19
\pszigzag, 70, 70, 71
\putoverlaybox, 74
\qdisk, 11, 34
\qline, 10, 34
\radians, 8
rbracketlength (parameter), 30
\rcoor, 40
INDEX
\rcurveto, 39
\readdata, 20, 20, 21
rectarc (parameter), 54
\red, 4
\rlineto, 39
\Rnode, 59, 60, 68
\rnode, 59, 59, 60, 68, 69
\RnodeRef, 59, 60
\rotate, 38
\Rotatedown, 56
\rotatedown, 56
\rotateleft, 55
\rotateright, 55
\Rput, 45, 45, 67
\rput, 41, 43, 43–46, 53, 58, 67, 71,
78, 80
runit (parameter), 7, 8
\savedata, 20, 20
\scale, 38
\scalebox, 56
\scaleboxto, 56
\setcolor, 40
shadow (parameter), 26, 26, 33
shadowangle (parameter), 26, 26
shadowcolor (parameter), 26, 26
shadowsize (parameter), 26, 26, 53
showorigin (parameter), 50
showpoints (parameter), 9, 12, 14–16,
19–21, 33
\SpecialCoor, 7, 8, 72, 72, 73
\stroke, 33, 36
style (parameter), 31
subgridcolor (parameter), 18
subgriddiv (parameter), 18
subgriddots (parameter), 18
subgridwidth (parameter), 18
\swapaxes, 38
swapaxes (parameter), 24, 33
tbarsize (parameter), 16, 30
\TeXtoEPS, 79
ticks (parameter), 50
ticksize (parameter), 50
94
tickstyle (parameter), 50, 50
\TPoffset, 77
\translate, 38
unit (parameter), 7, 7, 19, 72
\uput, 44, 44, 45, 68
xunit (parameter), 7, 8, 17, 18, 72
yunit (parameter), 7, 7, 8, 17, 18, 72
INDEX
95