1
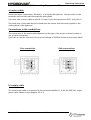
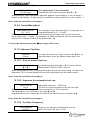
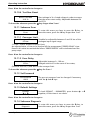
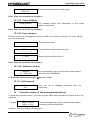
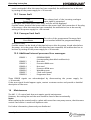
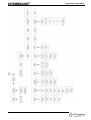
Operating Instruction
If the actual pump address 01 is not available the display does not change and you
will see again
Address 01
Lost
Then you could change the address with é and ê
and confirm the selected address with è.
Press è on the controller and you enter the INVERTERMENU
2. If the AUTOCONNECTION is enabled, following message is shown:
SCAN
CONNECTION
This message is shown during the connecting, when
AUTOCONNECTING is enabled
In this time the Hydrovar searches for the given or entered address!
Then the display changes to the 1st display
PRESS X.X bar
SPEED X.X Hz
11
The actual input value [bar] and the actual
output frequency [Hz] are displayed.
Typical applications
11.1 Setting Single Pump Constant Pressure
At the first startup, “Change Pressure” and “Autostart” of the external programming unit are
enabled. After connecting, on the display of the programming unit there is shown
Scan
Connection
This message is shown when the external
programming device is set up to the Hydrovar
and scanning a valid pump address.
After a few seconds, the display changes automatically to the 1st display
Press x.x bar
Speed x.x Hz
This window shows the actual values of the
Hydrovar (a required pressure of 3,5 bar is
previously set)
Press è on the controller to change to
Pressure
xx.x bar
To select required pressure use the
buttons é and ê.
After changing of the value, you have to confirm with the è-button. Then you will get the
message “SAVE PARAMETER” for a short time, when the new setting is saved!
After changing of the value, you have to confirm with the è-button.
Then press ç on the controller to change back to the 1st display
Press x.x bar
Speed x.x Hz
www.hydrovar.com
28