1
III
MlcraPra®
The Microcomputer Software Company
WordStar®
Installation Manual
For Release 3.3
Copyright 1983
MicroPro International Corporation
33 San Pablo Avenue
San Rafael, California 94903 USA
COPYRIGHT NOTICE
Copyright 1983 by MicroPro International Corporation. All Rights
Reserved Worldwide. This publication has been provided pursuant to an
agreement containing restrictions on its use. The publication also is
protected by federal copyright law. No part of this publication may be
copied or distributed, transmitted, transcribed, stored in a retrieval
system, or translated into any human or computer language, in any form
or by any means, electronic, mechanical, magnetic, manual, or otherwise,
or disclosed to third parties without the express written permission of
MicroPro International Corporation, 33 San Pablo Avenue, San Rafael,
California 94903 U.S.A.
TRADEMARKS
MicroPro, WordStar, WordMaster, MailMerge, SpellStar and SuperSort
are registered trademarks of MicroPro International Corporation. AllStar,
CalcStar, DataStar, InfoStar and ReportStar, are trademarks of
MicroPro International Corporation.
DISCLAIMER
,MicroPro International Corporation makes no representation or
warranties with respect to the contents hereof and specifically disclaims
any implied warranties or merchantability or fitness for any particular
purpose. Further, MicroPro International Corporation reserves the right
to revise this publication and to make changes from time to time in the
content hereof without obligation of MicroPro International Corporation
to notify any person or organization of such revision or changes.
TABLE OF CONTENTS
Introduction ................................................. v
1.
BASIC INSTALLATION ................................ 1-1
Copying WordStar ............................... 1-2
Starting Installation .............................. 1-3
Installation Menu ................................ 1-6
Selecting a Terminal ............................. 1-7
Selecting a Printer ............................... 1-9
Setting the Protocol ............................. 1-11
Setting the Driver ............................... 1-11
Leaving the Installation Program ................. 1-12
2.
CUSTOM TERMINAL INSTALLATION ................. 2-1
The Prompts .................................... 2-2
Changing a Value ............................... 2-2
Features ........................................ 2-3
3.
CUSTOM PRINTER INSTALLATION ................... 3-1
Printer Switches ................................. 3-1
The Prompts .................................... 3-2
Changing a Value ............................... 3-3
Installation . . . . . . . . . . . . . . . . . . . . . . . . . . . . . . . . . . . . . 3-4
Features ........................................ 3-4
4.
PROTOCOLS AND DRIVERS .......................... 4-1
Communication Protocols ....................... .4-1
Printer Drivers .................................. 4-5
5.
WORDSTAR FEATURES ............................... 5-1
Features you can customize ....................... 5-2
iii
WordStar
Contents, continued
6.
TESTING INSTALLATION ............................. 6-1
Check WordStar's Opening Menu ................. 6-1
Check Cursor Position ........................... 6-1
Test the Erase Function .......................... 6-1
Check Highlighting .............................. 6-2
Print Test ................................. ····· 6-2
End the Tests ................................... 6-3
APPENDICES ............................................ A-1
A.
B.
ASCII Conversion Chart. ................... A-I
Installation Quick Guide ..................... B-1
Index .. ................................................... 1-1
iv
Installation
Introduction
Installing W ordStar is easy. With this manual and
the installation program, which you received on your
distribution disk, you can install WordStar on almost
any terminal and printer in minutes. Also, experienced W ordStar users have the additional option of
customizing W ordStar by using the installation program's advanced features.
To install WordStar, you simply reply to a series of
questions presented on your screen. Onscreen directions guide you to each next step, and this manual,
organized to correspond with the progression of the
program, provides additional information. The
installation program helps you to create a W ordStar
program file tailored to your equipment (your
computer, terminal, and printer) and your needs.
Proper installation ensures top performance from
WordStar.
MANUAL
ORGANIZATION
This manual is divided into six chapters with two
appendices:
• Chapter 1, Basic Installation, contains a brief
description of the installation program's structure
and basic installation instructions. The simple procedures outlined here are sufficient for most
terminals and printers.
• Chapter 2, Custom Terminal Installation, and
Chapter 3, Custom Printer Installation, explain the
installation of terminals or printers not included
on the menus. You'll find descriptions of each
terminal and printer feature used by W ordStar. If
your equipment is not listed, you'll have to
provide the W ordStar program with additional
information.
v
WordStar
• Chapter 4, Protocols and Drivers, discusses WordStar's requirements for communicating with your
printer. This information should be particularly
helpful for beginners.
• Chapter 5, WordStar Features, explains how you
can tailor the WordStar program to your particular requirements. Once you are familiar with
WordStar, you may want to change normal operations. For example, using the custom installation
procedures described in this chapter, you can
instruct WordStar to number pages only at your
request.
• Chapter 6, Testing Installation, explains how to
make sure you've installed W ordStar properly.
• Appendix A, ASCII Conversion Chart, shows the
conversion of ASCII codes to decimal and
hexadecimal values.
• Appendix B, Installation Quick Guide, summarizes
the W ordStar installation procedure.
Everyone should begin with basic installation procedures in Chapter 1. If your system requires custom
installation, you'll be instructed to proceed to the
more advanced steps.
RE-RUNNING
INSTALLATION
LATER
You may want to run the installation program again
later. If you were to acquire a new printer or
terminal, for example, or if you simply wanted to
change a few standard features, you would use this
manual to re-install the W ordStar program.
ADDITIONAL
INFORMATION
Use the following resources to answer some of your
questions:
• Appendix A in this manual will help you convert
values into three formats: ASCII, decimal, and
hexadecimal.
vi
Installation
• The glossary at the back of the W ordStar
Reference Manual will help you understand
unfamiliar terms.
• Appendix A, "Program Specifications," in the
reference manual will answer your questions about
hardware and software requirements.
• Your terminal, printer, and computer manuals and
your dealer will supply the specific information
about your hardware requested by the installation
program.
The following symbols are used in this manual:
n
RETURN
I
RETURN KEY
REMEMBER
KEEP IN MIND
CAUTION
vii
WordStar
viii
Installation
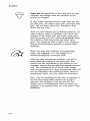
1. Basic Installation
STRUCTURE OF
THE PROGRAM
You'll work from a series of menus making selections
and responding to prompts. Your path through the
program will depend on the type of hardware you are
using. The following is a map of the menus you'll see
as you install WordStar for the first time:
tn
A> WINSTALL
"TUR'
I
INSTALLATION MENU
A
D
B
E
C
F
B
A
(CUSTOM)
MENU OF
)
TERMINAL INSTALLATION
( ~______
TE_R_M_IN_A_L_S____- , ____________~-------------~~______M_E_N_U______~
t
INSTALLATION MENU
C
(
MENU OF
PRINTERS
D
l
).
..
(CUSTOM)
PRINTER INSTALLATION
MENU
COMMUNICATIONS
PROTOCOL
MENU
(
t
DRIVER MENU
)
t
INSTALLATION MENU
t
X
I
(
EXIT OPTIONS
MENU
)
At>
1-1
WordStar
WHAT YOU'LL
NEED TO KNOW
Before you begin your WordStar installation, it's a
good idea to gather the information you'll need. Ask
your dealer or consult your terminal, printer, and
computer manuals for the following information.
Write it down for reference.
Terminal name:
Printer name:
Communications Protocol (if necessary):
Printer Driver: _ _ _ _ _ _ _ _ _ _ _ _ _ __
COPYING
WORDSTAR
Before you run the installation program for the first
time, you'll need to copy your WordStar Distribution
disk. Your distribution disk contains the following
W ordStar program files and auxiliary files:
•
•
•
•
•
•
WSU.COM
WINSTALL.COM
WS.INS
PRINT.TST
WSOVLYl.OVR
WSMSGS.OVR
NOTE: IBM and other 16-bit computer systems use
files with slightly different names. See the addendum
to the reference manual for a list of files.
The instructions included here are general; refer to
your system documentation for specific commands. If
you have already copied the disk, go on to the next
section, "Installation Procedures."
1-2
STEP 1
Turn on your computer.
STEP 2
Boot your system.
Installation
STEP 3
Place your WordStar Distribution disk in
drive A.
STEP 4
Place a formatted disk in drive B.
STEP 5
At your system prompt, type instructions
to copy the files from the distribution disk
in drive A to the disk in drive B.
You now have a copy of the WordStar Distribution
Disk in drive B. If you purchased other MicroPro
software for use with WordStar-SpellStar or
MailMerge-follow the same steps to copy them as
well. Once you have placed the original program
disks in a safe place, you're ready to run the
installation program.
NOTE: You can create a WordStar system disk,
that is, a disk that includes the WordStar program
and your operating system. This disk will enable you
to boot the system and enter W ordStar directly.
Refer to your system documentation for specific
instructions.
INSTALLATION PROCEDURES
Place the copy of the W ordStar distribution disk in
the logged disk drive and make sure the operating
system prompt is on the screen.
STEP 1
TYPE WINSTALL
SEE
STEP 2
RETURN
I
copyright information
PRESS any key
SEE
STEP 3
n
n
RETURN
Would you like to continue?
I
or TYPE Y or N
1-3
WordStar
If you choose to leave the installation program at
this point, no changes will be made to the file.
NOTE: If at some point an error message appears,
follow the instructions on your screen to correct the
problem.
SEE
STEP 4
Which MicroPro product would
you like to install?
TYPE WS
n
RETURN
I
Be sure to enter the correct code for W ordStar.
Typing the wrong code will produce an error
message.
NOTE: You can bypass steps 2-4 by typing
WINSTALL and the product code on the same line.
At the operating system prompt,
TYPE WINSTALL WS
n
RETURN
I
TYPE any key
SEE
an information screen
Be sure to read all onscreen information and instructions as you proceed through the installation
program.
STEP 5
PROGRAM EXIT
PRESS any key
You can leave the installation program at any point
by pressing "C.
SEE
1-4
disk drive name request
Installation
If some of your W ordStar installation files
(WSU.COM, for example) are located on another
disk drive, enter the disk drive name here. If all files
are located on the logged disk drive, press RETURN.
SEE
Narne of file to install or
RETURN or WSU.COM
At this screen, you first provide the name of the file
to be installed or modified and then the name for the
newly installed file. WSU.COM is the Uninstalled
version of WordStar. WS.COM is the installed version you'll use to run WordStar.
STEP 6
n
RETURN
I
SEE
File to install is : WSU .COM
NOTE: If you are re-installing WordStar you'll find
slight differences between the onscreen text and
descriptions in the manual. From this point on in the
program, simply follow the instructions on the
screen, using the manual as a reference; the steps will
be the same.
SEE
STEP 7
n
RETURN
SEE
STEPS
Enter name of file for installed
WordStar, or RETURN for
WS.COM.
I
doublecheck message
RETURN I
or TYPE Y if all information is
accurate; otherwise TYPE N. If you type
N, you'll return to the information screen.
n
SEE
INSTALL is copying the file
filename. PLEASE WAIT.
1-5
WordStar
Throughout the program, you'll be asked to confirm
your responses. This safeguard lets you check your
work and correct errors. If you type N (No), you will
return to an earlier prompt where you can make
necessary changes.
SEE
INSTALLATION
MENU
INSTALLATION MENU
From this main menu, you will make the necessary
selections to install WordStar for your computer
system. You'll return to the main menu each time
you complete a selection. Each menu item is briefly
described here:
• A, Menu of Terminals. From this menu, which
lists most terminals, you will select the terminal
you are using.
• B, Custom Installation of Terminals. If your terminal isn't listed on the Menu of Terminals, you'll
choose this option to provide WordStar with the
information it needs.
• C, Menu of Printers. From this menu, you'll select
the printer you are using.
• D, Custom Installation of Printers. If your printer
isn't listed on the Menu of Printers, you'll choose
this option to provide WordStar with the information it needs.
• E, Menu of WordStar Features. By making selections from this menu, you can modify certain
WordStar features. Wait until you have completed
the training guide and have become familiar with
the way WordStar works before you make
changes.
• F, Operating System Considerations. If you have a
multi-user operating system, tvlP1M, you'll select
this option along with the others needed for
installation.
1-6
Installation
• X, Exit from INSTALL. This option lets you
review your selections, make more changes if you
like, and then return to the operating system. Only
when you choose X are changes made to the installed WordStar file.
MULTI-USER
SYSTEMS
If your operating system is MP 1M, take step 9; if
not, bypass this step:
STEP 9
TYPE F
SEE
Is this to be installed on an
MP 1M system?
Currently ... NO (it is not).
TYPE C
SEE
NOW .•. YES (it is).
Choose this option only if your system is multi-user.
The default setting is single-user.
SELECTING A
TERMINAL
Your CRT must have a display area of at least 16
lines by 64 columns. The maximum display area
depends on the amount of RAM available in your
computer. The upper limit is about 57 lines by 120
columns.
WordStar can use the following features to enhance
the performance of your terminal:
•
•
•
•
Erase to end of line
Line insert
Line delete
Either inverse video or bright! dim
highlighting
1-7
WordStar
STEP 10 TYPE A
SEE
Is your terminal on this list?
STEP 11 TYPE Y (Yes) or N (No)
If you typed Y (Yes):
SEE
Terminal is currently : no terminal
yet selected
EXTRA TERMINAL TYPES
STEP 12 TYPE the appropriate letter for your
terminal
OR, if you typed N (No) at STEP 11:
SEE
Terminal is currently: no terminal
yet selected, followed by a list of
terminal types
STEP 12 TYPE the appropriate letter for your
terminal
If your terminal isn't listed, go on to the next menu.
If you are viewing menu #1, for example, type 2 to
see menu #2.
NOTE: If the exact name of your terminal doesn't
appear on any menu, talk to your dealer. One of the
terminals listed may be so similar to yours that
WordStar won't know the difference. Otherwise, you
will need to select B on the Installation Menu and do
a custom installation (see Chapter 2, "Custom
Terminal Installation").
STEP 13
nRETURN I or TYPE Y if correct, N if you
need to make a change
SEE
1-8
INSTALLATION MENU
Installation
STEP 14 TYPE C
SELECTING A
PRINTER
SEE
Printer is currently : no printer
yet selected
SEE
STANDARD PRINTER TYPES
WordStar works with most printers on the market
and can be installed to use most printer features,
though some require special procedures (see Chapter
4 of this manual).
If your printer is capable of backspacing or carriage
returns without line feed, you can use the following
WordStar printing features:
•
•
•
•
underlining
boldface (multi-strike method)
doublestriking
overstriking
If you have a specialty printer, that is, a printer
capable of incremental motion, you can use these
W ordStar printing features:
•
•
•
•
•
•
microspace justification
variable line height
variable character pitch
subscripts
superscripts
boldface (offset and restrike method)
The Standard Printer Types menus list several
printers. Almost any printer can be installed by selecting Standard printer. If your printer can also
backspace, select Backspacing standard printer.
However, if you have a daisy-wheel or other specialty
printer and you want to use all the print features
available with W ordStar, you must select your exact
printer name from this menu.
Check the glossary in the W ordStar Reference
Manual to better understand unfamiliar terms.
1-9
WordStar
SPECIALTY
PRINTER
CAP ABILITIES
Specialty printers (and those which are mechanically
and functionally similar) are capable of backspacing,
bidirectional printing, and spacing vertically and
horizontally in increments smaller than one line or
one character width. Specialty printers are sometimes
called letter-quality printers.
If your printer name isn't listed, you can select D on
the Installation Menu and perform a custom printer
installation. Instructions are given in Chapter 3,
"Custom Printer Installation."
Some printers have switches which must be properly
set for WordStar operation. In Chapter 3, "Custom
Printer Installation," you'll find information about
setting these switches.
STEP 15 TYPE the appropriate letter
If your printer isn't listed, go on to the next menu.
If you are viewing menu #1, for example, type 2 to
see menu #2.
STEP 16
1-10
SEE
You have chosen : your selection
SEE
further information (with some
selections)
nRETURN I or TYPE Y, if correct, N if you
want to change your selection
SEE
Communications protocol is
currently: No protocol
SEE
COMMUNICATIONS
PROTOCOL MENU
Installation
SETTING THE
PROTOCOL
At the Communications Protocol Menu, you'll tell
WordStar how to communicate with your printer. If
you are unfamiliar with protocols, turn to Chapter 4,
"Protocols and Drivers." You'll find an easy-tounderstand explanation and more detailed
instructions about how to set the communication
protocol if one is required for your printer. Also,
consult your printer manual to establish what
protocol, if any, you need.
STEP 17 TYPE A, B, C, or
SEE
STEP 18
n
RETURN
n
RETURN
I
Communications protocol is now :
your selection
I
or TYPE Y or N
Depending on your protocol choice, you will or will
not be required to give more information. If further
information is required, see Chapter 4.
SETTING THE
DRIVER
SEE
Driver is currently : No driver
yet selected
SEE
DRIVER MENU
At the Driver Menu, you'll tell WordStar how to
handle the communication between your computer
and your printer. Again, refer to Chapter 4 of this
manual and to your printer and computer manuals
for the necessary information.
STEP 19 TYPE A, B, C, or RETURN
SEE
Driver is now : your selection
SEE
further information
1-11
WordStar
STEP 20
n
RETURN
SEE
I
or TYPE Y or N
further information
If further information is required at this point, see
Chapter 4.
SEE
LEAVING THE
INSTALLATION
PROGRAM
INSTALLATION MENU
The last steps give you the opportunity to recheck
your work and to reenter the installation program if
you want to make a change.
STEP 21 TYPE X
SEE
These are your current values.
Exit options menu
STEP 22 TYPE A, B, or C
Choose A to save your modifications and
return to the operating system. Choose B
to leave the installation program without
saving the changes you've made. Choose C
to remain in the installation program and
return to the INSTALLATION MENU.
TESTING YOUR
INSTALLATION
Your installation is complete. You may want to run
a test to verify that WordStar is properly installed. In
Chapter 6, "Testing Installation," you'll find instructions for checking all aspects of the installation.
SAVING DISK
SPACE
You may want to remove the installation program
files from your disk to save space. To re-install any
features later, you'll need to restore the files from
your distribution disk copy.
1-12
Installation
2. Custom Terminal
Installation
Custom Installation of Terminals is selection B on
the Installation Menu. If you have already checked
selection A, Menu of Terminals, and have not found
the name of your terminal listed, you'll need to do a
custom installation to give WordStar information
about the codes your terminal sends and receives.
This information should be available in your terminal
manual.
Check with your dealer before you begin a custom
installation. If your terminal is similar to one listed
on the Menu, you may be able to select that terminal
for your installation.
WHAT YOU'LL
NEED TO KNOW
Before you begin your terminal installation, it's a
good idea to gather the information you'll need.
Each item is listed in the "Features" section of this
chapter. Using your terminal and computer manuals,
locate the necessary information and write it down
for reference in the space provided.
If this is the first installation of your terminal,
SEE
INSTALLATION MENU
TYPE B
SEE
TERMINAL INSTALLATION
MENU
TYPE A
SEE
Automatic installation of all
features
If you have already installed WordStar and you are
returning to the program to modify a particular
feature, select only that feature from the menu.
2-1
WordStar
THE PROMPTS
As you respond to the prompts, you'll see each
feature's current (default) values displayed. To
change a value, type C. If the value is correct, continue to the next feature by pressing RETURN. To
complete the installation of some features, you'll
have to enter more than two values. If you have
chosen A, Automatic installation, not all the current
values will be displayed at once. You must type C to
view or change each value. After each response,
you'll have the opportunity to confirm your answer
before you go on to the next prompt.
The first time you install your terminal you should
respond to every prompt because WordStar needs this
information.
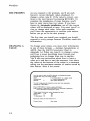
CHANGING A
VALUE
To change some values, you must enter information
in one of three formats - decimal, hexadecimal, or
ASCII. (See the ASCII Conversion Chart in
Appendix A.) When you type C, to change a value,
you'll see a screen describing these formats and
explaining how to change from one to another.
You'll also see instructions about how to leave a
value as is and how to end the sequence. Just above
the values at the bottom of the screen is a statement
telling you the maximum number of entries stored by
that feature. Here is the screen:
You can enter a value in ASCII, decimal, or hexadecimal codes.
Precede each entry with these prefixes:
ASCII
(:: A enters ASCII • A, a single value)
Hexadecimal
(,41 enters hexadecimal 41)
Decimal
#
(#61 enters decimal 61)
To enter a sequence of characters, enter each one separately,
followed by <RETURN>'
Press <RETURN> to leave a value unchanged.
Enter a period (.) and press <RETURN> to terminate a sequence
and to eliminate all subsequent values.
These special characters require hexadecimal input:
<RETURN>
eM)
,00
Period
(.)
,2E
• H (backspace: • H)
,08
Maximum entries for this function is 6.
Current Value
2-2
New Value
Installation
A value typed in ASCII may include the control key.
For example, if you press the control key and A
together, "A will be entered as a single value. To
enter a series of characters, such as "Q"Q"C, type "Q
RETURN "Q RETURN "C RETURN.
FEATURES
Name: _ _ _ _ __
Lines:
Columns: _ _ _ __
TERMINAL NAME
Select B to give WordStar a name for your terminal.
Although your response doesn't affect the program,
it does affect all messages that give the name' of the
terminal for which WordStar is installed.
SCREEN SIZE
Select C to provide the number of horizontal lines
and vertical columns available on your terminal
screen. (Defaults: 24 lines, 80 columns)
CURSOR POSITIONING
To enable WordStar to position the cursor accurately
on the screen, you must supply the following (if
required by your terminal):
Code: _ _ _ _ __
• The character, or characters, that indicate the
cursor is about to be moved
Code: _ _ _ _ __
• The characters sent between the coordinates of the
move
Code: _ _ _ _ __
• The characters sent following a move
Code: _ _ _ _ __
• The characters representing line 1 and column 1
Code: _ _ _ _ __
• The code type representing line and column
numbers: ASCII or BINARY
Code: _ _ _ _ __
• The order in which the column number and line
number are sent
2-3
WordStar
Code: _ _ _ _ _ __
Code: _ _ _ _ _ __
Code: _ _ _ _ __
Code: _ _ _ _ __
Code: _ _ _ _ __
2-4
TERMINAL START-UP
Select E if your terminal requires that a sequence of
codes be sent in preparation for WordStar. Examples
are given on the screen.
TERMINAL EXIT
Select F if your terminal also requires that a sequence
of codes be sent to leave the terminal set as it was
before you started WordStar.
HIGHLIGHTING
Select G if your terminal has highlighting capabilities
and requires a code sequence to turn highlighting
on and off. (You will need to supply the codes for
both on and off.)
ERASE TO END OF LINE
Select H to provide the code for the feature that
erases all characters from the cursor position to the
end of the line. If this feature is not available on
your terminal, WordStar will use another method to
perform the same function.
DELETE LINE
Select I to provide the code sequence for the delete
line feature, which erases the line containing the
cursor and moves the lines below up one line. If this
feature is not available on your terminal, WordStar
will use another method to perform the same
function.
Installation
Code: _ _ _ _ _ __
Code: _ _ _ _ __
INSERT LINE
Select J to provide the code sequence for the insert
line feature. This feature places a blank line at the
cursor line and pushes the text down one line on the
screen. Check your terminal manual; if your terminal
inserts the blank line below the cursor, you'll have to
precede the insertion code with a code sequence to
move the cursor up a line. If the insert line feature is
not available on your terminal, WordStar will use
another method to perform the function.
HANDLING OF LAST CHARACTER ON SCREEN
Select K and type Y at the prompt if your terminal
scrolls up a line when it encounters a character at
the bottom right of the screen. If your terminal
doesn't use this convention, type N, and WordStar
will use another method to cause the scrolling.
2-5
WordStar
2-6
Installation
3. Custom Printer Installation
Custom Installation of Printers is selection D on the
Installation Menu. If you have already checked selection C, Menu of Printers, and have not found your
printer on the list, you'll need to perform a custom
installation to take advantage of all the capabilities
of your printer. WordStar needs specific information,
which you'll find in your printer manual. If you need
more help, ask your dealer.
You'll be installing either a standard or specialty
printer. Be sure your printer has all the capabilities
outlined in Chapter 1 before you install it as a
specialty printer.
WHAT YOU'LL
NEED TO KNOW
Before you begin your printer installation, it's a good
idea to gather the information you'll need. Each item
is listed in the "Features" section of this chapter.
Using your printer and computer manuals, locate the
necessary information and write it down for reference
in the space provided.
PRINTER
SWITCHES
Some printers have switches that must be properly set
for WordStar to control printing operations. The
switches may be located on an external control panel,
on a control panel under the printer cover, or on
internal circuit boards. If your printer has any of the
following options switches, they should be set as
recommended:
• AUTO CR (CR = carriage return)
Turn this switch off.
• AUTO LF (LF = line feed)
Turn this switch off.
• FORM LENGTH
If you are using WordStar's Use form feeds print
option, set this switch to match the length of the
paper you are using.
3-1
WordStar
• LOCAL LF
Same as AUTO LF above. Turn off.
• PARITY
Check your printer manual or check with your
dealer for the correct setting for this switch.
• SET TOF
If you're using WordStar's Use form feeds print
option, press this switch after positioning your
paper at the top of the form or at the perforation.
• SPEED OR BAUD
Set this switch to match the speed at which your
computer transmits characters.
In addition, some printers have a switch that must be
set to activate a communication protocol when required. (See Chapter 4 for more information.) Check
your printer manual to see if your printer has such a
switch.
THE PROMPTS
As you respond to the prompts, you'll see each
feature's current (default) values displayed. To
change a value, type C. If the value is correct, continue to the next feature by pressing RETURN. To
complete the installation of some features, you'll
have to enter more than two values. If you have
chosen A or B, Automatic installation, these features
will not display all the current values at once. You
must type C to view or change each value. After each
response, you'll have the opportunity to confirm your
answer before you go on to the next prompt.
The first time you install your printer you should respond to every prompt. WordStar needs all the information requested.
3-2
Installation
CHANGING A
VALUE
To change some values, you must enter information
in one of three formats - decimal, hexadecimal, or
ASCII. (See the ASCII Conversion Chart in Appendix A.) When you type C to change a value, you'll
see a screen describing how to enter a value. You'll
also see instructions about how to leave a value as is
and how to end the sequence. At the bottom of the
screen is a statement telling you the maximum
number of entries that can be stored at that feature.
Here is the screen:
You can enter a value in ASCII, decimal, or hexadecimal codes.
Precede each entry with these prefixes:
ASCII
(:' A enters ASCII • A, a single value)
Hexadecimal
(,41 enters hexadecimal 41)
Decimal
#
(#61 enters decimal 61)
To enter a sequence of characters, enter each one separately,
followed by <RETURN >.
Press <RETURN> to leave a value unchanged.
Enter a period (.) and press <RETURN> to terminate a sequence
and to eliminate all subsequent values.
These special characters require hexadecimal input:
<RETURN> eM)
,00
Period (.)
,2E
• H (backspace: • H)
,08
Maximum entries for this function is 6.
Current Value New Value
A value typed in ASCII may include the control key.
For example, if you press the control key and A
together, "A will be entered as a single value. To
enter a series of characters, such as "Q"Q"C, type "Q
RETURN "Q RETURN "C RETURN.
3-3
WordStar
INSTALLATION
Begin at the Installation Menu:
TYPE D
SEE
PRINTER INSTALLATION
MENU
If you are installing your printer for the first time,
choose A, Automatic installation for specialty printer
(features C through M), or B, Automatic installation
for standard printer (features C through Hand N).
Later, if you want to modify a particular feature,
select the appropriate letter from the Printer Installation menu and respond to the prompts.
FEATURES
All Printers
WordStar must have information about all of the
following features for all printers:
Name:
PRINTER NAME
Select C to give W ordStar a name for your printer.
This name, which doesn't affect the program, is used
in all messages that specify the printer for which
WordStar is installed.
INITIALIZATION
Select D to provide the code sequences that tell your
printer to begin and end printing.
Code: _ _ _ _ __
Code: _ _ _ _ __
3-4
Installation
Code: _ _ _ _ __
Code: _ _ _ _ __
Protocol: _ _ _ __
'Driver: _ _ _ _ __
OVERPRINTING
Select E to tell W ordStar how your printer backspaces. If you are installing a backspacing printer,
you'll also have to know the code that tells the
printer to backspace.
BOLDFACING
Select F to specify how dark your boldfaced print
will be. The default value is 2, the recommended
value for specialty printers.
.
PROTOCOL MENU
Select G to set any required protocol. Refer to
Chapter 4 in this manual for detailed information
about communications protocols.
DRIVER MENU
Select H to specify a printer driver. Refer to
Chapter 4 in this manual for detailed information
about printer drivers.
Specialty Printers Only
Install all of the following features on specialty
printers to take advantage of W ordStar' sprint
features:
Code: _ _ _ _ __
RIBBON SELECTION
Select I to supply alternate and standard ribbonselection code sequences if your printer is capable of
two-color printing.
3-5
WordStar
VERTICAL MOTION
Select J if your printer is capable of the vertical
movement necessary to produce sub- and superscript.
You must supply the following values regarding the
vertical motion index (VMI):
Code: _ _ _ _ _ __
Code: _ _ _ _ _ __
• Code sequences that tell the printer to prepare to
move the platen up and down.
• Code sequences (called VMI trailer strings) that
tell the printer the movement in vertical increments
is complete. Very few printers require this
information.
• The minimum value for VMI.
Value:
Range:
• The range of valid VMI values. If you don't know
the range, subtract the minimum value from the
maximum value.
• The code sequence for line feed.
Code: _ _ _ _ _ __
• The code sequence for reverse line feed.
Code: _ _ _ _ _ __
HORIZONTAL MOVEMENT
Select K if your printer is capable of incremental
horizontal movement. You must supply the following
values regarding horizontal motion index (HMI):
Code: _ _ _ _ _ __
Increment:
• Code sequences that tell the printer to prepare to
move the print head left or right.
• The fraction (increment) in inches your printer
moves the print head for HMI, either 1/60 or
1/120 inch.
• The minimum value for HMI.
Value:
Range:
3-6
• The range of valid HMI values. If you don't know
the range, subtract the minimum value from the
maximum value.
Installation
• The code sequence for a space forward.
Code: _ _ _ _ _ __
• The code sequence for a backspace.
Code: _ _ _ _ _ __
PRINT MODES
Select L to enter the codes for both forward and
backward printing.
Forward
Code: _ _ _ _ _ __
Backward
Code: _ _ _ _ _ __
Code: _ _ _ _ _ __
Code: _ _ _ _ _ __
PHANTOM CHARACTERS
Select M if your print head contains two characters,
nicknamed phantom space and phantom rubout,that
are not represented on your keyboard. You can set
two WordStar commands to represent these characters in your printed text. Check your print head for
the characters and your printer manual for the code
sequence representing each.
Standard Printers Only
LF Code: _ _ _ _ __
112 LF Code: _ _ __
No LF Code: _ _ __
RETURN/LINE FEED
Select N to tell WordStar whether your printer is
capable of carriage returns with line feeds, with
half-line feeds, or without line feeds. If your printer
is capable of one or more of these returns, most
WordStar features such as overstriking, overprinting,
and underscoring will function. You'll need to supply
the function code sequences for each of your
printer's carriage returns.
3-7
WordStar
Optional
These features are optional on all printers and
depend on the special capabilities of your printer:
'PQ Code: _ _ _ __
'PW Code: _ _ _ __
'PE Code: _ _ _ __
'PR Code: _ _ _ __
USER-DEFINED FUNCTIONS
Select 0 to set four WordStar commands to perform
actions of your choice. If your printer supplies
another font, for example, you can set one of the
commands to toggle the font on and off. The four
commands you set are "PQ, "PW, "PE, and "PR.
You'll need to provide the code sequence for each
command you define.
Selections I, Q, and P are not strictly limited to ribbon selections and character pitch. Like the userdefined functions (selection 0), these selections let
you set the WordStar "P commands to the code sequences of your choice. You could, for example,
select I to enter a code for double-width characters
and select Q to enter a code for reduced-sized
characters. You could also use these selections to
assign the special print features of a dot matrix
printer to W ordStar commands.
Roll up
Code: _ _ _ _ __
Roll down
Code: _ _ _ _ __
3-8
CARRIAGE ROLL
Select P if your printer is capable of rolling the
platen up and down a partial line. You'll need to
enter the function code sequences for both up and
down partial rolls.
Installation
Standard
Code: _ _ _ _ __
Alternate
CHARACTER PITCH
Select Q if your printer is capable of altering the
pitch (width between characters) of your printed text.
You'll need to enter the function code sequences for
standard character width and alternate character
width.
Code: _ _ _ _ __
EXIT
Type X to return to the Installation Menu.
3-9
WordStar
3-10
Installation
4. Protocols And Drivers
This chapter presents general information about protocols and drivers and then explains the options on
both menus.
COMMUNICATIONS PROTOCOLS
A communications protocol is a system of codes that
enables your printer and computer to talk to one
another. If W ordStar were to send 200 words per
second from computer to printer, your printer, like a
person taking dictation, would need a way of saying
"Hold it! I can't transfer characters to paper that
fast. "
PRINTER BUFFER
Most printers have a good memory called the printer
buffer. When receiving new information, your printer
can use this buffer as storage space while printing information received earlier.
The size of this buffer is important. A buffer that
holds only 500 words can become filled in seconds if
WordStar is dictating 200 words per second. Any
characters sent after the buffer is full will be lost.
Communications protocols require that the computer
and printer exchange information or signals. The
computer must be able to send information to the
printer for printing, and the printer must be able to
send signals back when it's ready to receive more
information.
4-1
WordStar
DO YOU NEED A
PROTOCOL?
You probably won't need a communications
protocol if you have a specialty printer (or one with
similar capabilities) that can receive information from
the computer at 300 bits per second or less (that is,
with a serial interface set at 300 baud or less) or a
standard printer with a serial interface at 600 baud or
less. However, your printer may operate so slowly
that you will want to increase the baud rate. At a
higher baud rate, you will need a communications
protocol unless your printer is equipped with special
hardware or cabling options. (See the next section on
hardware protocol.) Without a communications protocol, you run the risk of losing characters before
they can be printed.
HARDWARE
PROTOCOL
Use a hardware protocol if one is available. A hardware protocol is a special cabling device that
regulates the exchange of information between your
computer and your printer. Many computer and
printer manufacturers routinely supply hardware protocols with their products. Your dealer will help you
select the proper protocol for your system.
To achieve a hardware protocol with certain machines (computers or printers), some rewiring may be
necessary. Such hardware protocol is still preferred
over any software protocol (see the following section). Your hardware manuals should supply the information you need. If you cannot find this information, contact your hardware dealer or manufacturer.
4-2
Installation
SOFTWARE
PROTOCOL
If a hardware protocol is unavailable, a software
protocol-sometimes called "handshaking" -can be
installed. Most printers are capable of using either
the ETXI ACK protocol or the X-ON/X-OFF protocol. Many printers allow you to choose between the
two.
Although the X-ON/X/OFF variety is generally
preferred, consult your dealer or hardware manual to
determine which software protocol is best to use with
your printer. The W ordStar program itself will
handle either kind of software protocol.
Communications Protocol Menu
The Communications Protocol Menu appears after
you choose C at the Installation Menu and then
select the letter corresponding to the name of your
printer (A - L) from the list of Standard Printer
Types. If you are performing a custom printer installation, however, the Protocol Menu appears after
you choose D at the Installation Menu and then G at
the Printer Installation Menu.
NONE REQUIRED
Select A if your printer does not need a protocol or
if the protocol is handled by the hardware. (See the
previous section on hardware protocol.)
ETX/ACK PROTOCOL
Select B if your printer uses ETXI ACK protocol.
WordStar will place a special character at the end of
each information "message" it sends to the printer.
This special character is known as an ETX (an
acronym for End of TeXt) code and is represented
by a value of 03. Once the printer has printed
everything in the message up to the ETX code (a
line, for example), it sends an ACK code
(ACKnowledge) back to the computer. The ACK
code (represented by a value of 06) tells the computer
that the printer is ready to receive the next
information message.
4-3
WordStar
Do not attempt to install or use code in the operating system to implement ETXI ACK protocol. If
WordStar is to operate under this protocol, the protocol must be executed by W ordStar.
Some specialty printers (or printers with similar
capabilities) permit the use of this protocol as an
alternative to X-ON IX-OFF . You should use
ETXI ACK protocol when other considerations require its use-for example, when other software on
your computer requires it.
When you use this protocol, WordStar must know
how many characters can be "dictated" before the
printer buffer becomes full. In addition, some
printers may require specific procedures (such as setting a switch inside the printer) to activate
ETXI ACK protocol. Check your printer manual.
After you type B and confirm your choice, the
ETXI ACK message length prompt will appear on
your screen. The number you enter must be equal to
or less than half the size of the printer buffer. WordStar will keep two messages in the buffer at any
given time. The default is 127 characters; this number
indicates that the printer buffer can hold at least 254
characters. The maximum ETXI ACK message length
is 254 characters.
Be sure to decrease this value if your printer has a
smaller buffer. Otherwise, the messages will overlap
in the buffer, and you will lose characters or print
unwanted data.
Some printers have switches that make it possible to
select two or more different buffer sizes. If your
printer has such switches, check to make sure the
switches are set to the correct buffer sizes.
4-4
Installation
X;.ON/X-OFF PROTOCOL
Select C for the X-ON/X-OFF protocol. When the
printer is ready to receive an information message, it
sends an X-ON code (transmit ON) to the computer.
The X-ON code is represented by the ASCII code
DCl (which translates to a hexadecimal value 11).
When it receives an information message, the printer
sends an X-OFF (transmit OFF, ASCII code DC3,
hexadecimal value 13) to the computer, telling it not
to send any more messages before receiving the next
X-ON code. This protocol is sometimes known as
DCl/DC3.
X-ON/X-OFF protocol is the usual selection if you
have a serial specialty printer interfaced at any rate
over 300 baud. Most, but not all printers support this
kink of protocol.
The ETXI ACK and X-ON/X-OFF protocols require
that the computer and printer be able to exchange
(i.e., transmit and receive) information. You must,
therefore, select a printer driver which allows information to be received from as well as transmitted to
the printer.
PRINTER DRIVERS
The printer driver is a program that works with the
protocol to make sure that the printer and computer
communicate properly. The driver tells them where to
do the talking and where to do the listening. Without
this information, your computer and printer couldn't
"converse." They would be like people trying to
carryon a .phone conversation with one party speaking into the earpiece and the other listening at the
mouthpiece-information could not pass between
them.
4-5
WordStar
Protocols require that the computer and the printer
be able to exchange (that is, transmit and receive)
information. Some printer drivers make this exchange
possible, whereas others permit information to be
sent only from the computer to the printer. Be sure
to select a driver that is compatible with the type of
protocol you have installed.
Your WordStar program contains several different
printer drivers. The following section, which presents
descriptions of each option on the driver menu, will
help you make the appropriate selection for your
situation.
Driver Menu
The Driver Menu appears after you have selected
your communications protocol during a standard
installation. If you are performing a custom printer
installation, however, the Driver Menu appears after
you choose H at the Printer Installation Menu.
OPERATING SYSTEM PRIMARY LIST DEVICE
Select A to send characters to your printer through
the printer driver in your operating system. If your
selection of a protocol was A (No protocol required),
the Operating System List Device is the usual
selection.
If you select A, make sure that you have set up your
operating system correctly, that is, that you have
assigned the correct physical device (a printer) to this
logical device (the list device). See your operating
system manual for the appropriate commands.
4-6
Installation
OPERATING SYSTEM SECONDARY LIST
DEVICE
Select B if the primary list device in your operating
system is assigned to a task other than printing your
WordStar files. In some operating systems, a secondary list device is available.
The list device is usually not capable of exchanging
information with the printer. That is, the list device
will send information to the printer but will not listen
for signals coming back. If you are using a software
protocol (either ETXI ACK or X-ON/X-OFF), some
adjustment will have to be made to your operating
system. Ask your dealer for help with your particular
system.
WORDSTAR'S PORT DRIVER
Select C to use WordStar's built-in Port Driver. This
driver bypasses the operating system and exchanges
information with the printer directly. If you use this
driver, you will not have to adjust your operating
system for two-way communication between computer and printer.
WordStar's port driver is recommended for use with
a software protocol because the driver contains a test
to check when the printer is busy. But to use this
driver, you will need information about your computer's printer ports and the status bits at those
ports.
Ports are logical places where your operating system
can "plug in" to other devices. A port is not the actual plug or connector itself but has a very definite
location and assigned number. Information (bits or
bytes) is sent through a port on its way to another
device (in this case, your printer). At the status port
WordStar monitors the condition of the printer, that
is, checks to see whether it's ready for more
information.
4-7
WordStar
Status bits are special bits at the status port of your
computer that change when the condition of the
printer has changed.
If your printer interface involves more than one output data port, one output status port, one input data
port, and one input status port, WordStar's Port
Driver will not work.
After you have selected and confirmed option C, you
will be asked a series of questions-first about the
numbers of the output port and output status port,
and then (unless you have chosen no protocol) about
the numbers of the input ports and input status
ports. You should be able to find in your computer
manual the information necessary to answer these
questions.
When you enter port numbers, use hexadecimal
values. See Appendix A of this manual for a
decimal/hexadecimal conversion table.
After you have entered port numbers, you will be
asked which bits change at the status port. You
should find this information in the section of your
computer manual that provides port number information. The combination of all the bits that change
must be represented as a single hexadecimal value. (If
you are unfamiliar with converting binary values to
hexadecimal values, ask your dealer for assistance.)
First, type the hexadecimal value that corresponds to
the bits that change when the port can accept a
character. For example, if the one and five bits
change, enter the hexadecimal value 22 (which corresponds to the decimal value 34 or the binary value
00100010).
4-8
Installation
After you have entered this hexadecimal value, you'll
be asked for the hexadecimal value of the bits that
change from off to on (from 0 to 1) when the printer
is ready to accept more characters for printing. For
example, if only the one bit changes, enter 2. If only
the number 5 bit changes, enter 20. If both bits
change, enter 22, just as you did before.
If you have chosen no protocol, the questions stop
here. But if you are using a communications protocol, you'll be asked another series of questions
similar to those just described-this time, about input
ports and input status ports.
The input status port and status bits are used by
W ordStar to determine whether or not a character
has been received by the printer. The number of the
input data port is frequently, though not always, the
same as that of the output data port. You will
specify the input data port, input status port, and
status bits in the same manner as you specified the
output ports and bits.
4-9
WordStar
4-10
Installation
5. Wordstar Features
Once you're familiar with WordStar, you may want
to change the way some features operate. With the
installation program, you can customize the initial
setting of 19 WordStar features. Your new settings
become WordStar defaults. These defaults, in turn,
can be altered during an editing session with a WordStar command. For example, the preset help level is
3. If you use Option A to change the level to 0,
menus will not appear when you begin writing or
editing, and you'll have a larger work area. Later, if
you need to see a menu, you can temporarily reset
the help level.
You may want to keep more than one version of
WordStar (each with a different filename) on your
disks. For example, a file called WS1.COM could
begin WordStar in document mode and another called WS2.COM could begin the program in nondocument mode. Different versions would be tailored
to different tasks.
Be sure to complete the WordStar Training Guide
before you change any feature settings. The guide
was designed for use with standard settings, and you
could easily become confused if you tried to complete
exercises using a customized version of W ordStar.
From the Installation Menu,
TYPE E
SEE
MENU OF WORDSTAR
FEATURES
5-1
· WordStar
To modify a feature, type the appropriate letter and
respond to the prompts on the screen. After each
response, you'll have the opportunity to confirm your
answer. You'll find information about each feature
both on the screen and in the following discussion of
menu choices. For additional information about all
the features, see the WordStar Reference Manual.
FEATURES
INITIAL HELP LEVEL
Select A to set the level of onscreen help. To decide
on the appropriate level of help, start WordStar and
examine the screen under each level. As you become
more familiar with the program, you'll find you need
less and less help. You can later reset the level as
needed. (Default: 3)
DECIMAL POINT CHARACTER
Select B to set the decimal point character. This
character is used for aligning columns of numbers according to the position of the decimal tab settings.
(Default: period [.1)
NON-DOCUMENT MODE
Select C to set the mode for editing a file you name
on the command line as you start WordStar (e.g.,
WS filename). You may find it useful to set this
feature to non-document mode when you are editing
primarily data files. (Default: document mode)
INITIAL DIRECTORY DISPLAY
Select D to display or suppress the file directory at
the Opening Menu. (Default: on)
5-2
Installation
INITIAL INSERTION TOGGLE
Select E to specify the initial setting for the insertion
toggle switch. With insertion off, characters will type
over previously typed text, rather than move text
right. (Default: on)
JUSTIFICATION TOGGLE
Select F to specify the initial setting for the justification toggle switch. With justification off, your text
will have an uneven right margin. (Default: on)
HYPHEN HELP TOGGLE
Select G to specify the initial setting for the hyphen
help toggle switch. With hyphen help off, WordStar
will not hyphenate words during paragraph reforming but will simply move words extending
beyond the margin to the next line. (Default: on)
OMIT-PAGE-NUMBERING
Select H to specify the initial setting of the
omit-page-numbering toggle switch. If the toggle
switch is off, the pages will be numbered during
printing. (Default: off)
TOP MARGIN
Select I to specify the number of lines to be left
blank at the top of the printed page. (Default: 3)
BOTTOM MARGIN
Select J to specify the number of lines to be left
blank at the bottom of the page. (Default: 8)
5-3
WordStar
LEFT MARGIN
Select K to adjust the left margin on the screen and
on the printed page. The left margin must not exceed
the right margin and should be set at a number less
than 240. (Default: 1)
With the left margin set at 1, your text appears at
the extreme left on your screen. When printed,
however, your text will appear to the right of the
space allocated for page offset (see selection N).
RIGHT MARGIN
Select L to adjust the right margin on the screen and
on the printed page. The right margin has no theoretical limit but does have practical limits - page width
and printer capacity. (Default: 65)
NUMBER OF LINES PER PAGE
Select M to adjust the number of lines available
on a page for printing W ordStar documents.
(Default: 66 lines, the setting for 11 inch paper)
PAGE OFFSET
Select N to adjust the number of columns left blank
at the left side of the printed page. The left margin
will begin to the right of this setting. For example, a
page offset of 8 and a left margin of 10 will cause
printing to begin in column 18 on your paper.
(Default: 8)
FORM FEEDS TOGGLE
Select 0 to set the form feed toggle switch. The
value you set becomes the default answer to the question, "Use form feeds?" This question appears prior
to printing files with W ordStar or MailMerge. When
this toggle switch is on, form feeds are used; when
off, line feeds are used. (Default: form feeds off)
5-4
Installation
DATA FIELD SEPARATOR
Select P to specify the character to be used to
separate fields in a datafile. You can choose any
character. This feature applies only to the MailMerge
option of WordStar. (Default: comma [,])
VARIABLE NAME SYMBOL
Select Q to specify the characters to be used before
and after variable names inserted into a file being
merged. You can choose any character. This feature
applies only to the MailMerge option of W ordStar .
(Default: ampersand [&])
SYSTEM DISK DRIVE
Select R to specify the disk drive where your .OVR
files are stored. WordStar looks first for the files on
your currently logged drive, which is the drive indicated by your operating system when you start a
program. If your files are not found there, WordStar
looks for them on the system drive.
EXIT
Type X to return to the Installation Menu.
5-5
WordStar
5-6
Installation
6. Testing Installation
This chapter contains a few, simple tests that will
help you determine if your terminal and printer are
correctly installed to work with WordStar.
CHECK
To t~st your installation, start WordStar running on
WORDSTAR'S
your computer. At the system prompt,
OPENING SCREEN
TYPE WS nRETURN I
SEE
Program version and serial
number, copyright information,
and the terminal, printer, communications protocol, and printer
driver selections you made during
installation
The display will remain on your screen for a few
seconds (or until you press any key). Then you will
see the WordStar Opening Menu.
CHECK CURSOR
POSITIONING
The cursor should be positioned at the lower
right of the Opening Menu. If lines run together on
your screen and punctuation appears at random, the
cursor positioning function codes are incorrect for
your terminal. Check your terminal manual and the
settings of all option switches on the terminal. Reinstall W ordStar or correct your terminal settings.
TEST THE ERASE
FUNCTION
With the Opening Menu on the screen, open a
document file:
TYPE D
SEE
Name of file to edit?
6-1
Installation
If information from the Opening Menu remains on
your screen, the erase to end-of-line function is not
working correctly. Re-install your WordStar program
with the correct function codes.
PRESS ESCape
CHECK
HIGHLIGHTING
To check the highlighting feature, look at the
Opening Menu. If highlighting is installed, the list of
commands and the title < < < OPENING MENU> > >
will appear brighter (or dimmer) than other
characters on the screen or in inverse video. The type
of highlighting depends on your installation.
First, check the contrast or brightness control on
your terminal to be sure the screen is properly
illuminated. If highlighting is not installed correctly,
you'll see no contrast in brightness on the Opening
Menu. Re-install the function codes correctly.
PRINT TEST
From the Opening Menu, you should be able to print
a file. Make sure your printer is on and ready to
print.
TYPE P
SEE
N arne of file to print?
TYPE PRINT. TST
PRESS ESCape
The PRINT. TST file should print, exhibiting many
of the print features available in WordStar. If
printing doesn't begin or if the features you've installed don't operate correctly, you'll need to
re-install your printer.
6-2
WordStar
END THE
TESTS
After the file finishes printing, the Opening Menu
will return to the screen. Return to your operating
system:
TYPE X
SEE
your operating system prompt
You can now be assured that W ordStar is ready to
go to work. If you are new to word processing, you
should go on to the W ordStar Training Guide now.
Otherwise, use the W ordStar Reference Manual to
learn the fine points of the WordStar program.
Enjoy!
6-3
WordStar
6-4
Installation
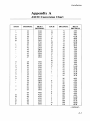
Appendix A
ASCII Conversion Chart
ASCII
DECIMAL
HEXA
DECIMAL
ASCII
DECIMAL
HEXA
DECIMAL
!
33
34
35
36
37
38
39
40
41
42
43
44
45
46
47
21H
22H
23H
24H
25H
26H
27H
28H
29H
2AH
2BH
2CH
2DH
2EH
2FH
G
H
I
J
K
L
M
N
0
71
72
73
74
75
76
77
78
79
80
81
82
83
84
85
86
87
88
89
90
91
92
92
94
95
47H
48H
49H
4AH
4BH
4CH
4DH
4EH
4FH
50H
51H
52H
53H
54H
55H
56H
57H
58H
59H
5AH
5BH
5CH
5CH
5EH
5FH
96
97
98
99
100
101
102
103
104
105
106
107
108
109
110
60H
61H
62H
63H
64H
65H
66H
67H
68H
69H
6AH
6BH
6CH
6DH
6EH
"
#
$
0,10
&
,
(
)
*
+
,
/
0
1
2
3
4
5
6
7
8
9
:
;
?
48
49
50
51
52
53
54
55
56
57
58
59
60
61
62
63
30H
31H
32H
33H
34H
35H
36H
37H
38H
39H
3AH
3BH
3CH
3DH
3EH
3FH
A
B
C
D
E
F
64
65
66
67
68
69
70
40H
41H
42H
43H
44H
45H
46H
=
P
Q
R
S
T
U
V
W
X
y
Z
[
/
]
~
-
,
a
b
c
d
e
f
g
h
i
j
k
1
m
n
- continued -
A-J
WordStar
ASCII
DECIMAL
HEXA
DECIMAL
ASCII
DECIMAL
HEXA
DECIMAL
0
111
6FH
p
q
112
113
114
115
116
117
118
70H
71H
72H
73H
74H
75H
76H
w
x
y
z
119
120
121
122
123
124
125
126
127
77H
78H
79H
7AH
7BH
7CH
7DH
7EH
7FH
r
s
t
u
v
A-2
DEL
Installation
A-3
Installation
INDEX
A
1
16-bit computer systems, 1-2
program, 1-4
with X option, 1-7
Extra Terminal Types Menu, 1-8
B
F
Baud,4-2
Boot, 1-3
Features
printer, 3-4, 3-7, 3-8
terminal, 2-3
WordStar, 1-6, 5-1
Files
distribution disk, 1-2
installed, WS.COM, 1-5
uninstalled, WSU.COM, 1-5
C
Codes, product, 1-4
Communications protocols, 4-1
ETXI ACK, 4-3, 4-5
none required, 4-3
X-ON/X-OFF, 4-3, 4-5
Confirm responses, 1-6
Copying WordStar, 1-2
CRT, 1-7
Custom installation of printers, 1-6, 3-1
Custom installation of terminals, 1-6, 2-1
Customizing WordStar features,
5-1, 5-2, 5-3, 5-5
D
Data port, 4-9
Disk drive name, 1-5
Disk space, saving, 1-12
Distribution disk
copying of, 1-2
files on, 1-2
Document mode, 5-2
Driver Menu, 1-11, 4-6
operating system primary list
device, 4-6
operating system secondary list
device, 4-7
W ordStar' s port driver, 4-7
Driver, selecting of, 1-11
E
Error messages, 1-4
ETX/ ACK, message length, 4-4
Exiting
from Installation, 1-7
H
Horizontal motion (HMI), 3-6
I
IBM, 1-2
Incremental motion, 1-9
Installation
basic procedures for, 1-3
custom, of printers, 1-6, 3-1
custom, of terminals, 1-6, 2-1
Installation Menu, 1-6
Installation Program
leaving, 1-12
structure of, 1-1
Installation testing, 1-12, 6-1, 6-2
L
Letter-quality printers, 1-10
Logical device, 4-6
M
Menu
Communications Protocol, 1-10, 4-3
Driver, 1-11, 4-6
Extra Terminal Types, 1-8
Installation, 1-6
Printer, 1-6
Printer Installation, 3-4
Standard Printer Types, 1-9
1-1
WordStar
M (continued)
Terminal, 1-6
Terminal Installation, 2-1
WordStar Features, 1-6, 5-1
Menu Map, 1-1
MP/M, 1-7
Multi-user operating systems, 1-7
p
Physical device, 4-6
Platen, 3-8
Printer buffer, 4-1
Printer Drivers, 4-5
Printer features, 3-4, 3-5, 3-7, 3-8
boldfacing, 3-5
carriage roll, 3-8
character pitch, 3-9
double-width characters, 3-8
driver menu, 3-5
horizontal motion, 3-6
initialization, 3-4
overprinting, 3-5
phantom characters, 3-7
print modes, 3-7
printer name, 3-4
protocol menu, 3-5
reduced-sized characters, 3-8
return/line feed, 3-7
ribbon selection, 3-5
user-defined functions
("PQ, "PW, "PE, "PR), 3-8
vertical motion, 3-6
Printer interface, 4-8
Printer switches, 3-1
auto carriage return, 3-1
auto line feed, 3-1
form length, 3-1
local line feed, 3-2
parity, 3-2
set top of form, 3-2
speed or baud, 3-2
Printers
backspacing standard, 1-9
daisy-wheel, 1-9
dot matrix, 3-8
letter-quality, 1-9
1-2
Menu of, 1-6
selecting of, 1-9
specialty, 1-9
standard, 1-9
switches on, 1-10
Product codes, 1-4
Program, exiting from, 1-4
Prompts, responding to, 2-2, 3-2
Protocols
communications, 1-11
handshaking, 4-3
hardware, 4-2
selecting of, 1-11
software, 4-3
R
RAM, 1-7
Re-installing WordStar, 1-5
S
Screen size, 2-3
Specialty Printers, capabilities of,
1-10
Status bits, 4-7, 4-8, 4-9
Status port, 4-7, 4-9
Structure, Installation Program,
1-1
Switches, printer, 3-1
System disk drive, 5-5
System disk, WordStar, 1-3
T
Terminal display area, 1-7
Terminal features, 2-3, 2-5
cursor positioning, 2-3
delete line, 2-4
erase to end of line, 2-4
handling of last character on
screen, 2-5
highlighting, 2-4
insert line, 2-5
scrolling, 2-5
terminal exit, 2-4
terminal start-up, 2-4
Terminal name, 2-3
Installation
Terminals
and WordStar features, 1-8
maximum display area on, 1-7
Menu of, 1-6
selection of, 1-7
similar to yours, 1-8
Testing Installation, 1-12, 6-1,
6-2
Two-color printing, 3-5
V
Values
ASCII, 2-2, 3-3
changing, 2-2, 3-3
decimal, 2-2,·3-3
entering a series of, 2-3, 3-3
hexadecimal, 2-2, 3-3
Vertical motion (VMI), 3-6
W
WordStar
features, 1-7
system disk, 1-3
WordStar features, 5-1, 5-2, 5-3,
5-5
bottom margin, 5-3
customizing of, 5-1, 5-3, 5-5
data field separator, 5-5
decimal point character, 5-2
directory display, initial, 5-3
form feeds toggle, 5-4
help level, initial, 5-2
hyphen help toggle, 5-3
insertion toggle, initial, 5-3
justification toggle, 5-3
left margin, 5-4
menu of, 1-6, 5-1
non-document mode, 5-2
number of lines per page, 5-4
omit-page-numbering toggle, 5-3
page offset, 5-4
printing, 1-9
right margin, 5-4
system disk drive, 5-5
top margin, 5-3
variable name symbol, 5-5
1-3