1
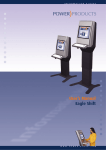
I N F O R M A T I O N
K I O S K S
User’s Manual
Eagle Magnum
W W W . P O W E R - K I O S K . C O M
WARNING
To prevent fire or shock hazards, do not expose this kiosk to rain or moisture.
To reduce risk of electric shock, do not remove cover from installed devices
inside.
Refer servicing to qualified service personnel only.
Declaration
Declaration of the manufacturer
We hereby certify that the EAGLE Magnum kiosk is in compliance with mentioned directives:
ČSN EN 60439-3:95, + A1:97 + A2:02, ČSN EN 60439-1 ed2:00 + A1:04
ČSN 35 7030
The product is marked with CE.
Contents
1) Information kiosk with electrical accessories and installed devices:
- LCD Touchscreen monitor
- Personal Computer DELL (optional)
- Customized version (optional) can be equiped with the following devices:
• coin validator with cash box
• bank note accceptor with cassete
• card- and barcode reader
• thermal printer or laser printer
• UPS unit
• additional monitor
2) User‘s Manuals and Drivers on CD-ROM:
- Quick installation guide for Touchscreen monitor with drivers on CD-ROM
- Operating manual for DELL computer with the licence MS Windows XP Professional/OEM
- User‘s Manual for information kiosk EAGLE Magnum
- Manuals from customized version devices
2
I. Description
Front view
Built-in speakers
LCD monitor with
Touchscreen sensor
Upper door space
Bank Note Acceptor Slot
Coin Validator Slot
Printer Slot
Lower door space
3
Open door view
Bank Note Acceptor
with cassette
Thermal Printer
Coin Validator with cash box
POWER supply
for Bank Note Acceptor
(AC/DC)
POWER supply for Printer
Circuit breaker
POWER distribution plug
Amplifier for speakers
Holder for UPS unit
Holder for PC
4
Lower door space
Circuit breaker
Amplifier for speakers
POWER distribution plug
Holder for UPS unit
Holder for PC
5
1) Speakers with amplifier
Two 3W speakers are positioned above the monitor the speakers are connected to an amplifier fixed
at the bottom of the kiosk (lower door space). The amplifier must be connected to the AUDIO plug-in
of the PC. The amplifier is powered by the power distribution plug.
For volume setup use the buttons on the amplifier
2) LCD monitor with Touchscreen sensor
The kiosk is equipped with an LCD including installed Touchscreen sensor. The monitor can be
from 15“ up to 19“ size and the displayed resolution depends on the technical parameters
of the installed monitor.
For setup of the monitor use the control panel with On-Screen Displayed menu on the back side
of the monitor. You can find the exact technical parameters, controls and recommended use
in the enclosed User‘s Manual for installed monitor.
Touchscreen sensor
The LCD monitor has an installed Touchscreen sensor on the front. It could be a capacitive, acoustic
or with vandal-proof technology.
The Touchscreen sensor communicates with the PC through an inside mounted RS232 or USB
controller. Touchscreen monitors are connected via RS232 or USB cable with the PC.
Touchscreen drivers
If the information kiosk is delivered with a PC all drivers for the Touchscreen have been
installed.
In other case the user must install the necessary Touchscreen drivers from the enclosed
CD ROM. Please follow the instructions on the installation CD-ROM.
6
3) Climate control of the kiosk interior
The kiosk is equipped with 2 circular fans on the back side. A nearly installed thermostat controls
both fans. If the temperature inside the kiosk reaches the adjusted level, both fans will switch on for
optimal ventilation of the kiosk.
WARNING:
Please check the correct temperature setup on the thermostat. Recommended temperature
level is 30°C. If the interior temperature increases the fans will be activated .
4) Circuit breaker and Power distribution plug
Use this circuit breaker for switching-on and switching-off the infomation kiosk. The circuit breaker
is located at the bottom of the kiosk.
The Power distribution plug is connected to this circuit breaker. The Power fixed cord is wired to
the central circuit breaker as well.
WARNING:
Wire the Power fixed cord in accordance with the safety standards of your country.
7
5) Customized version devices
The kiosk can be equipped with some special built-in devices according to customer request.
The following devices are installed into the space of upper or lower door.
Built-in customized devices:
• coin validator with cash box
• bank note accceptor with cassette
• card- and barcode reader
• thermal printer or laser printer
• UPS unit
• additional monitor
Follow the instructions in the User´s manual for installed equipment during control
and maintenance. User´s manuals are enclosed at delivery of the kiosk.
Built-in Thermal printer and Bank Note acceptor with cassette
in upper door space
8
Customized kiosk versions (optional)
coin validator - thermal printer
- bank note acceptor
card reader - coin validator
- bank note acceptor
thermal printer
thermal printer
- bank note acceptor
laser printer
additional monitor
9
II. Operating instruction and Safety precautions
•
•
•
•
•
•
•
•
•
Do not spill any liquids into the kiosk or use the kiosk near water.
Do not insert any objects of any kind into the cabinet slots, as they may touch dangerous voltage
points. This can be harmful or fatal or may cause electric shock, fire or equipment failure.
Do not place any objects onto the kiosk.
Allow adequate ventilation around the kiosk, do not block ventilation slots or place the kiosk near
a radiator or other heat sources.
Do not cover ventilation slots and holes.
Connect the kiosk to power supply with correct parameters and follow the safety standards of your
country.
Be careful and respect the safety standards, In case of opening the kiosk and servicing
the installed equipment. Do not touch the parts marked with the caution label.
Do not remove the cover of the installed equipment in the kiosk.
Refer servicing to qualified service personnel only.
Immediately unplug your kiosk from the power supply and refer servicing to qualified service
personnel under the following conditions:
•
•
•
•
•
•
When the power supply cord or plug is damaged.
If liquid has been spilled or objects have fallen into the kiosk.
If the kiosk has been exposed to rain or water.
If the kiosk cabinet or installed equipment is damaged and there is the risk of shock hazards.
If the monitor is broken, do not come in contact with the liquid crystal and handle with care.
If the kiosk does not operate normally according to the following operating instructions.
III Maintenance
•
Check regularly the permeability of ventilation slots. Remove dust and other impurities
immediately. The lack of ventilation can overheat the kiosk interior and damage
the installed equipment.
•
Check the reliable operation of internal blow-out fans on the back side of the kiosk.
•
Follow the instructions in the User‘s manual for installed equipment (monitor, PC, printer, etc.)
during control and maintenance. User‘s manuals are enclosed at delivery of the kiosk.
•
Unplug the kiosk from the power supply before cleaning. Clean the kiosk cabinet with a soft
dampened cloth with water and neutral detergent. Some plastics are used on the surface of the
kiosk. DO NOT clean with benzene, thinner, alkaline detergent, alcoholic systém detergent etc.
These types of fluids and fabrics can cause the paint to deteriorate, crack or peel.
•
Do not rub the displayed monitor with coarse or hard materials during cleaning. Dampen a soft
cloth with water and a neutral detergent and clean gently.
10
IV. Technical specifications
Input
Power supply
Maximum current
Circuit breaker
Power supply cord
230 V AC/ 50 Hz
4A
10A/1N/C/003
fixed, length 1,8 m
Environment
Operating temperature
Humidity:
Storage temperature
Humidity:
Protection:
+5ºC to +35ºC
30% - 80%
-10ºC to +60ºC
10% - 85%
IP 20
Dimensions
Height x width x depth:
Weight
1565 x 500 x 405 mm
60 kg (without foot stand)
11
I N F O R M A T I O N
Y O U R
K I O S K
K I O S K S
P A R T N E R
POWER products s.r.o.
Sedmidomky 457
101 00 Prague 10
Tel: +420 272 760 365
Fax: +420 272 760 366
Web: www.power-kiosk.com
Email: [email protected]
W W W . P O W E R - K I O S K . C O M