1
Installation Tips
• Many guitar cavities are coated with either electrically conductive paints or
foil tapes to help isolate the circuitry from interference. When installing the
Acousti-Phonic Intelligent Pre-amp it is very important to make sure that the
pre-amp is completely isolated from this electrically conductive material.
• Do not attempt to install the pre-amp by using screws through the two holes in
the pre-amp, as they are there only for manufacturing purposes. Double sided
adhesive tape or hot glue should be used.
• Make sure that all plug-in connections are properly in place.
• If you are using a wireless system for the Acousti-Phonic Pre-amp sound
you need to have your control cavity well shielded with foil tape to stop RF
interference.
For more installation tips, please visit our website at www.graphtech.bc.ca
Wire Color Code for Pickup Installation
E 1st - Black. B 2nd - Blue. G 3rd- Green. D 4th - Yellow. A 5th- Red.
E 6th - White.
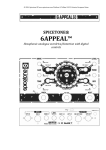
Wire Color Code for Pre-amp Installation
PIN: Teflon cable from piezos. NOTE: Blue teflon lead is always ground.
Mid: Blue 7” lead to on/on type Mid/Dark switch or volume pot.
GHOST: Purple 7” lead to on/on type Mid/Dark switch or volume pot.
Volume: Yellow 7” lead piezo volume return.
Mag: Green 7” lead input from magnetic pickups post volume and tone pots.
Ring: Red 7” lead to the ring post on the stereo switched jack.
Tip: Blue 7” lead to the tip post on the stereo switched jack.
SW: White 7” lead to the switch post on the switchcraft “littel j” series stereo
jack. Ensure ground is connected to sleeve.
PWR: Red positive out.
BATT: Red battery connector.
21