1
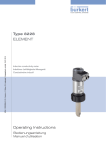
Type 8045
Insertion electromagnetic flowmeter
Magnetisch-induktives Durchfluss-Messgerät, Insertion
Débitmètre électromagnétique à insertion
Operating Instructions
Bedienungsanleitung
Manuel d‘utilisation
We reserve the right to make technical changes without notice.
Technische Änderungen vorbehalten.
Sous réserve de modification technique.
© Bürkert SAS, 2012 - 2014
Operating Instructions 1408/2_EU-ML 00559778 / Original FR
Type 8045
1.
ABOUT THE MANUAL .......................................................................................................................................................................4
1.1.
Symbols used ..........................................................................................................................................................................4
1.2.
Definition of the word "device" .......................................................................................................................................4
2.
INTENDED USE ....................................................................................................................................................................................5
3.
BASIC SAFETY INFORMATION ....................................................................................................................................................6
4.
GENERAL INFORMATION................................................................................................................................................................8
5.
6.
7.
4.1.
Manufacturer's address and international contacts ............................................................................................8
4.2.
Warranty conditions ..............................................................................................................................................................8
4.3.
Information on the Internet...............................................................................................................................................8
DESCRIPTION .......................................................................................................................................................................................9
5.1.
Area of application ................................................................................................................................................................9
5.2.
General description ..............................................................................................................................................................9
5.3.
Description of the name plate ........................................................................................................................................9
5.4.
Available versions ...............................................................................................................................................................10
TECHNICAL DATA.............................................................................................................................................................................11
6.1.
Conditions of use................................................................................................................................................................11
6.2.
Conformity to standards and directives .................................................................................................................11
6.3.
General technical data .....................................................................................................................................................11
6.3.1.
Mechanical data.......................................................................................................................................11
6.3.2.
General data .............................................................................................................................................14
6.3.3.
Electrical data...........................................................................................................................................15
6.3.4.
Electrical connection ..............................................................................................................................16
INSTALLATION AND COMMISSIONING ...............................................................................................................................17
7.1.
Safety instructions .............................................................................................................................................................17
7.2.
Installation onto the pipe ................................................................................................................................................18
7.3.
7.2.1.
Recommandations for installing the 8045 on the pipe ..................................................................18
7.2.2.
Installation into the pipe of a 8045 with a G2'' nut .........................................................................20
7.2.3.
Installation into the pipe of a 8045 with a clamp connection .......................................................20
Wiring.........................................................................................................................................................................................21
7.3.1.
Equipotentiality of the installation ........................................................................................................22
English
1
Type 8045
8.
7.3.2.
Mounting the cable clamp .....................................................................................................................23
7.3.3.
Terminal assignement and use of the selectors ...............................................................................24
7.3.4.
Wiring the AO1 current output ............................................................................................................25
7.3.5.
Wiring the DO1 transistor output ........................................................................................................26
7.3.6.
Wiring the DI1 digital input ...................................................................................................................26
7.3.7.
Wiring the DO2 and DO3 relay outputs ............................................................................................26
OPERATING AND FUNCTIONS .................................................................................................................................................27
8.1.
Safety instructions .............................................................................................................................................................27
8.2.
Operating levels of the device .....................................................................................................................................27
8.3.
Description of the navigation keys and the status LEDs ..............................................................................29
8.4.
Using the navigation keys ..............................................................................................................................................30
8.5.
Details of the Process level ..........................................................................................................................................30
8.6.
Details of the Parameters menu.................................................................................................................................31
8.6.1.
Choosing the display language............................................................................................................32
8.6.2.
Choosing the flow rate units, the number of decimals and the units of the totalizers.............32
8.6.3.
Entering the K factor of the fitting used: ............................................................................................34
8.6.4.
Determining the fitting K factor using a teach-in procedure .........................................................34
8.6.5.
Configuring the outputs (general diagram) .......................................................................................37
8.6.6.
Configuring the AO1 current output...................................................................................................38
8.6.7.
Configuring the transistor output DO1 as a pulse output .............................................................39
8.6.8.
Configuring the transistor output DO1 to switch a load depending on two threshold
values .........................................................................................................................................................40
8.6.9.
Configuring the transistor output DO1 to switch a load when the fluid direction changes ..42
8.6.10. Configuring the transistor output DO1 to switch a load when a warning message is
emitted by the device .............................................................................................................................43
8.6.11. Configuring the DO2 and DO3 relay outputs ..................................................................................43
8.6.12. Configuring the DI1 digital input..........................................................................................................46
8.6.13. Configuring the filter of the measured flow rate ...............................................................................49
8.6.14. Resetting both totalizers ........................................................................................................................50
8.6.15. Configuring the electric network frequency ......................................................................................51
8.6.16. Parameterizing the cut-off flow rate ....................................................................................................51
8.6.17. Setting the brightness of the display and how long it stays ON, or deactivating the
backlight ....................................................................................................................................................52
8.7.
Details of the Test menu .................................................................................................................................................53
8.7.1.
Adjusting the current output .................................................................................................................54
2
English
Type 8045
8.8.
9.
8.7.2.
Calibrating the flow zero point .............................................................................................................55
8.7.3.
Checking the outputs behaviour ..........................................................................................................56
8.7.4.
Setting the Kw coefficient of the flow sensor ...................................................................................57
8.7.5.
Monitoring the flow rate in the pipe. ...................................................................................................57
Details of the Information menu .................................................................................................................................59
MAINTENANCE AND TROUBLESHOOTING.......................................................................................................................60
9.1.
Safety instructions .............................................................................................................................................................60
9.2.
Cleaning the device ...........................................................................................................................................................60
9.3.
Cleaning the flow sensor ................................................................................................................................................60
9.4.
Replacing the seal on a 8045 with G2" nut...........................................................................................................61
9.5.
If you encounter problems ............................................................................................................................................62
9.5.1.
Resolution of problems when the device status LED is OFF .......................................................62
9.5.2.
Resolution of problems without message generation but device status LED ON ...................62
9.5.3.
Resolution of problems without message generation and device status LED green ..............64
9.5.4.
Resolution of problems without message generation and device status LED red ..................65
9.5.5.
Resolution of problems without message generation and device status LED orange............66
10.
SPARE PARTS AND ACCESSORIES ......................................................................................................................................67
11.
PACKAGING, TRANSPORT..........................................................................................................................................................68
12.
STORAGE..............................................................................................................................................................................................68
13.
DISPOSAL OF THE PRODUCT ..................................................................................................................................................68
3
English
Type 8045
About the manual
1.
ABOUT THE MANUAL
This manual describes the entire life cycle of the device. Please keep this manual in a safe place, accessible to all
users and any new owners.
This manual contains important safety information.
Failure to comply with these instructions can lead to hazardous situations.
• This manual must be read and understood.
1.1.
Symbols used
DANGER
Warns against an imminent danger.
• Failure to observe this warning can result in death or in serious injury.
WARNING
Warns against a potentially dangerous situation.
• Failure to observe this warning can result in serious injury or even death.
ATTENTION
Warns against a possible risk.
• Failure to observe this warning can result in substantial or minor injuries.
NOTE
Warns against material damage.
• Failure to observe this warning may result in damage to the device or system.
Indicates additional information, advice or important recommendations.
Refers to information contained in this manual or in other documents.
→ Indicates a procedure to be carried out.
1.2.
Definition of the word "device"
The word "device" used within this manual refers to the flowmeter type 8045.
4
English
Type 8045
Intended use
2.
INTENDED USE
Use of the device that does not comply with the instructions could present risks to people, nearby
installations and the environment.
• The 8045 flowmeter is intended exclusively to measure flow rate in liquids.
• This device must be protected against electromagnetic interference, ultraviolet rays and, when installed outdoors, the effects of climatic conditions.
• This device must be used in compliance with the characteristics and commissioning and use conditions
specified in the contractual documents and in these operating instructions.
• Requirements for the safe and proper operation of the device are proper transport, storage and installation, as
well as careful operation and maintenance.
• Only use the device as intended.
→ Observe any existing restraints when the device is exported.
5
English
Type 8045
Basic safety information
3.
BASIC SAFETY INFORMATION
This safety information does not take into account:
• any contingencies or occurences that may arise during installation, use and maintenance of the devices.
• the local safety regulations for which the operating company is responsible including the staff in charge of
installation and maintenance.
Danger due to high pressure in the installation.
• Stop the circulation of fluid, cut off the pressure and drain the pipe before loosening the process connections.
Danger due to electrical voltage.
• Shut down the electrical power source of all the conductors and isolate it before carrying out work on the
system.
• Observe all applicable accident protection and safety regulations for electrical equipment.
Danger due to high temperatures of the fluid.
• Use safety gloves to handle the device.
• Stop the circulation of fluid and drain the pipe before loosening the process connections.
Danger due to the nature of the fluid.
• Respect the prevailing regulations on accident prevention and safety relating to the use of aggressive fluids.
Various dangerous situations
To avoid injury take care:
• not to use the device for the measurement of gas flow rates.
• not to use the device in explosive atmospheres.
• not to use the device in an environment incompatible with the materials it is made of.
• not to use fluid that is incompatible with the materials the device is made of.
• not to subject the device to mechanical loads (e.g. by placing objects on top of it or by using it as a step).
• not to make any external or internal modifications to the device.
• to prevent any unintentional power supply switch-on.
• to ensure that installation and maintenance work are carried out by qualified, authorised personnel in possession of the appropriate tools.
• to guarantee a defined or controlled restarting of the process, after a power supply interruption.
• to use the device only if in perfect working order and in compliance with the instructions provided in these
operating instructions.
• to observe the general technical rules when installing and using the device.
6
English
Type 8045
Basic safety information
NOTE
The device may be damaged by the fluid in contact with.
• Systematically check the chemical compatibility of the component materials of the device and the fluids likely
to come into contact with it (for example: alcohols, strong or concentrated acids, aldehydes, alkaline compounds, esters, aliphatic compounds, ketones, halogenated aromatics or hydrocarbons, oxidants and chlorinated agents).
NOTE
Elements / Components sensitive to electrostatic discharges
• This device contains electronic components sensitive to electrostatic discharges. They may be damaged if
they are touched by an electrostatically charged person or object. In the worst case scenario, these components are instantly destroyed or go out of order as soon as they are activated.
• To minimise or even avoid all damage due to an electrostatic discharge, take all the precautions described in
the EN 61340-5-1 and 5-2 norms.
• Also ensure that you do not touch any of the live electrical components.
7
English
Type 8045
General information
4.
GENERAL INFORMATION
4.1.
Manufacturer's address and international contacts
To contact the manufacturer of the device, use following address:
Bürkert SAS
Rue du Giessen
BP 21
F-67220 TRIEMBACH-AU-VAL
You may also contact your local Bürkert sales office.
The addresses of our international sales offices are available on the internet at:www.burkert.com
4.2.
Warranty conditions
The condition governing the legal warranty is the conforming use of the 8045 in observance of the operating conditions specified in this manual.
4.3.
Information on the Internet
You can find the user manuals and technical data sheets regarding the type 8045 at:www.burkert.com
8
English
Type 8045
Description
5.
DESCRIPTION
5.1.
Area of application
The 8045 flowmeter is intended exclusively to measure flow rates in liquids.
The device makes it possible to switch a solenoid valve or activate an alarm thanks to a transistor output and,
for some versions, by means of two relay outputs, fully configurable and to establish a control loop thanks to a
4-20 mA current output.
The versions also equipped with a digital input make it possible to remotely activate a function.
5.2.
General description
The device comprises both a flow sensor operating on Faraday's law and a transmitter with display.
The device is equipped with a 4-20 mA current output (analogue output, called AO1), a digital output (configured
as a pulse output by default, called DO1) and two totalisers.
Some versions are equipped with two relay outputs (called DO2 and DO3) and one digital input (called DI1).
The device operates on a 3 wire system and needs a 18-36 V DC power supply.
The electrical connection is made on the terminals blocks of the electronic board within the transmitter, through
two M20 x 1,5 cable glands.
5.3.
Description of the name plate
2
Made in France
1
3
4
FLOW 8045 SST LONG
DO1: 5-36V= 100mA
DI1: 18-36V= 10mA
IP65
5
SUPPLY: 18-36V 300 mA
DO2/3:250V 3A Max
Fluid: PN16:-15/110°C
S/N 11 162
00449673
13
12 11
W43M
10 9
8
7
6
1.
Measured value and type of the device
2.
Specification of the flow sensor
3.
Specification of the DO1 digital output
4.
Specification of the DO2 and DO3 relay outputs
5.
Electrical power supply and current
consumption
6.
Manufacturing code
7.
Conformity logo
8.
Warning: Before using the device, take into
account the technical specifications described
in these operating instructions.
9.
Fluid temperature range and fluid nominal
pressure
FLOW
14
10. Protection class of the device
11. Specification of the DI1 digital input
12. Serial number
13. Order code
14. Shows the flow direction
Fig. 1:
Name plate of the 8045 flowmeter
9
English
Type 8045
Description
5.4.
Available versions
The following versions of the 8045 flowmeter are available.
These versions all have a 4-20mA current output (AO1) and a digital output (DO1).
Relay
Digital input
outputs
(DI1)
(DO2, DO3)
-
Material
of the
housing
PC
2
1
-
-
2
1
-
-
PC
2
1
PPA
PPA
PPA
Specification of the flow
sensor
Material of the
electrodes
short, in PVDF
long, in PVDF
short, in PVDF
long, in PVDF
short, in stainless steel
long, in stainless steel
short, in stainless steel
long, in stainless steel
short, in PVDF
long, in PVDF
clamp, short, in stainless steel*
clamp, short, in stainless steel*
Stainless steel
Stainless steel
Stainless steel
Stainless steel
Stainless steel
Stainless steel
Stainless steel
Stainless steel
Alloy C22
Alloy C22
Stainless steel
Stainless steel
*) Only with S020 for devices with a clamp connection.
10
English
Order code
426498
426499
426506
426507
449670
449672
449671
449673
558675
558676
567797
567798
Type 8045
Technical data
6.
TECHNICAL DATA
6.1.
Conditions of use
Ambient temperature
-10 to +60 °C
Air humidity
< 85%, non condensated
Height above see level
max. 2000 m
Protection class acc. to
EN 60529
IP65, device wired and cable glands tightened and cover lid screwed tight.
6.2.
Conformity to standards and directives
The device conforms to the EC directives through the following standards:
• EMC: EN 61000-6-2, EN 61000-6-3
• LVD: EN 61 010-1
• Vibration: EN 60068-2-6
• Shock: EN 60068-2-27
• Pressure: article 3§3 of the Pressure Directive 97/23/CE. Acc. to the Pressure Directive 97/23/CE: the device
can only be used in the following cases (depending on the max. pressure, the DN of the pipe and the fluid)
Type of fluid
Fluid group 1, par. 1.3.a
Conditions
Forbidden
DN ≤ 32
Fluid group 2 par. 1.3.a
Fluid group 1 par. 1.3.b
or DN > 32 and PNxDN ≤ 1000
PNxDN ≤ 2000
DN ≤ 200
Fluid group 2 par. 1.3.b
or PN ≤ 10
or PNxDN ≤ 5000
6.3.
General technical data
6.3.1.
Mechanical data
Part
Housing / seal
Cover with lid / seal
Front foil
M20x1,5 cable glands / seal
Screws
Nut
Flow sensor (exposed to the fluid)
Material (8045 with flow sensor in Material (8045 with flow sensor in
PVDF)
stainless steel)
PC / NBR
Black PPA / NBR
PC / silicone
PSU / silicone
Polyester
PA / neoprene
Stainless steel
PC
PPA
PVDF
Stainless steel 316L (DIN 1.4404)
11
English
Type 8045
Technical data
Material (8045 with flow sensor in Material (8045 with flow sensor in
PVDF)
stainless steel)
FKM
8045 with a G2" nut: FKM
Stainless steel 316L (DIN 1.4404) or Alloy C22
PEEK
Stainless steel 316L (DIN 1.4404) or Alloy C22
Part
Seal
Earth ring of the flow sensor
Electrodes holder
Electrodes
88
113
123
218
181
21
91
180
ENTER
88
116
Dimensions of flowmeter 8045 with a G2" nut [mm]
H
Fig. 2:
T-fitting
DN6
DN8
DN15
DN20
DN25
DN32
DN40
DN50
DN65
DN80
DN100
DN110
DN125
DN150
DN180
DN200
DN250
182
182
187
185
185
188
192
198
198
12
English
Saddle
223
222
226
231
227
234
244
268
280
Spigot, in plastic
Welding tab with
radius, in stainless
steel
206
212
219
188
193
199
204
214
254
261
225
236
282
300
257
317
Type 8045
H
Technical data
T-fitting
Saddle
Spigot, in plastic
312
325
340
DN300
DN350
DN400
Fig. 3:
Welding tab with
radius, in stainless
steel
336
348
Dimension H in mm of the flowmeter 8045 with a G2" nut and inserted into an S020 fitting
88
189
153
21
91
180
88
116
Fig. 4:
Dimensions of flowmeter 8045 with a clamp connection [mm]
H
DN32
DN40
DN50
DN65
DN80
DN100
Fig. 5:
T fittings for measuring devices with a
clamp process connection
200
205
210
218
224
230
Welding socket for measuring devices with
a clamp connection
200
205
210
218
224
230
Dimension H in mm of the flowmeter 8045 with a clamp connection and inserted into an S020 fitting
13
English
Type 8045
Technical data
A
P (bar)
10
9
8
7
6
5
4
3
2
1
0
PVDF (PN10) / Metal
PVC + PP
PP (PN10)
PVC (PN10)
0
+20
+40
+60
+80
T (°C)
8045 with flow sensor in PVDF
P (bar)
16
15
14
13
12
11
10
9
8
7
6
5
4
3
2
1
0
1)
A
Metal
(PN16) 1)
DN100 for measuring
devices with a clamp connection (PN10)
PVDF
PVC + PP
PVDF (PN10)
PVC (PN10)
PP (PN10)
-20
0
+20 +40 +60 +80 +100 +120
T (°C)
Except DN100 for measuring devices with a clamp connection
8045 with flow sensor in stainless steel
A: range of use
Fig. 6:
Fluid pressure /temperature dependency for a 8045 with PVDF flow sensor or stainless steel flow sensor and
a fitting S020 in metal, PVC, PVDF or PP
6.3.2.
General data
Pipe diameter
Type of fitting
Min. fluid conductivity
Fluid temperature
DN6 to DN400
S020
20 µS/cm
The fluid temperature may be restricted by the fluid
pressure, the material the flow sensor is made of and
the material the S020 fitting used is made of. See “Fig.
6”.
• 8045 with flow sensor in PVDF
• 0 to +80 °C
• 8045 with flow sensor in stainless steel
Fluid pressure
• -15 to +110 °C
The fluid pressure may be restricted by the fluid
temperature, the material the flow sensor is made of,
the material the S020 fitting used is made of and the
DN of the S020 fitting. See “Fig. 6”.
• 8045 with flow sensor in PVDF
• PN10
• 8045 with flow sensor in stainless steel
• PN16
14
English
Type 8045
Technical data
Flow rate measurement
• Measurement range
• 0,2 to 10 m/s
• Measurement deviation ("measurement bias", as
defined in the standard JCGM 200:2012):
• ±0,5 % of the measured value 1)
- after a teach-in calibration has been made;
- with the K factor of the fitting used
• Linearity
• ±3,5 % of the measured value 1)
• ±0,5 % of the full scale 1)
• ±0,25 % of the measured value
• Repeatability
Determined in the following reference conditions: fluid = water, water and ambiant temperatures = 20 °C, upstream and
downstream distances respected, appropriate pipe dimensions.
1)
6.3.3.
Electrical data
Power supply
Current consumption
Transistor output DO1
• 18-36 V DC, filtered and regulated
• oscillation rate: ±5 %
300 mA max. (at 18 V DC)
• type
• NPN / PNP (wiring dependent), open collector
• function
• pulse output (by default), user configurable
• frequency
• 0-250 Hz
• Electrical data
• 5-36 V DC, 100 mA max.
• duty cycle if f > 2 Hz
• 1/2
• min. pulse duration if f < 2 Hz
• 250 ms
• protections
• galvanically isolated, and protected against overvoltages, polarity reversals and short-circuits
Relay outputs (DO2 and DO3)
• operating
• hysteresis (by default), configurable, normally open
• electrical data of the load
• 250 V AC / 3 A or 30 V DC / 3 A (resistive load)
• max. breaking capacity
• 750 VA (resistive load)
• life span
• min. 100000 cycles
Current output AO1
• specification
• 4-20 mA, sink or source (wiring dependent), 22 mA
to indicate a fault
• max. loop impedance
• 1300 W at 36 V DC, 1000 W at 30 V DC, 700 W at
24 V DC, 450 W at 18 V DC
15
English
Type 8045
Technical data
Digital input DI
• supply voltage
• 18-36 V DC
• input impedance
• 15 kW
• min. pulse duration
• 200 ms
• protections
• galvanically isolated, and protected against polarity
reversals and voltage spikes
6.3.4.
Electrical connection
Type of connection
Cable specifications
Through two M20x1,5 cable glands
• cable type
• shielded
• Cross section
• 0,5 to 1,5 mm2
• Diameter of each cable:
- if only one cable is used per cable gland
- if two cables are used per cable gland
16
English
- 6...12 mm
- 4 mm, with the supplied multi-way seal
Type 8045
Installation and commissioning
7.
INSTALLATION AND COMMISSIONING
7.1.
Safety instructions
DANGER
Risk of injury due to high pressure in the installation.
• Stop the circulation of fluid, cut off the pressure and drain the pipe before loosening the process connections.
Risk of injury due to electrical voltage.
• Shut down the electrical power source of all the conductors and isolate it before carrying out work on the system.
• Observe all applicable accident protection and safety regulations for electrical equipment.
Risk of injury due to high fluid temperatures.
• Use safety gloves to handle the device.
• Stop the circulation of fluid and drain the pipe before loosening the process connections.
Risk of injury due to the nature of the fluid.
• Respect the prevailing regulations on accident prevention and safety relating to the use of aggressive fluids.
WARNING
Risk of injury due to non-conforming installation.
• The electrical and fluid installation can only be carried out by qualified and skilled staff with the appropriate
tools.
• Install appropriate safety devices (correctly rated fuse and/or circuit-breaker).
• Respect standard NF C 15-100 / IEC 60364.
• Respect the assembly instructions for the fitting used.
Risk of injury due to unintentional switch on of power supply or uncontrolled restarting of the
installation.
• Take appropriate measures to avoid unintentional activation of the installation.
• Guarantee a set or controlled restarting of the process subsequent to any intervention on the device.
WARNING
Danger due to non-conforming commissioning.
Non-conforming commissioning could lead to injuries and damage the device and its surroundings.
• Before commissioning, make sure that the staff in charge have read and fully understood the contents of the
manual.
• In particular, observe the safety recommendations and intended use.
• The device / the installation must only be commissioned by suitably trained staff.
Protect this device against electromagnetic interference, ultraviolet rays and, when installed outdoors, the
effects of the climatic conditions.
17
English
Type 8045
Installation and commissioning
7.2.
Installation onto the pipe
DANGER
Risk of injury due to high pressure in the installation.
• Stop the circulation of fluid, cut off the pressure and drain the pipe before loosening the process connections.
Risk of injury due to the nature of the fluid.
• Respect the prevailing regulations on accident prevention and safety relating to the use of aggressive fluids.
The 8045 flowmeter has to be inserted into an S020 fitting mounted on a pipe.
7.2.1.
Recommandations for installing the 8045 on the pipe
→ Choose an S020 fitting appropriate to the velocity of the fluid inside the pipe: refer to the graphs below:
Example:
Flow rate
US gpm l/min m3/h
100000
5000
20000
10000
5000
2000
1000
500
200
100
50
20
10
5
2
1
0.5
0.2
0.1
0.05
DN 400
DN 350
DN 300
DN 250
50000
30000 2000
20000
10000
1000
DN 200
500
DN 150
DN 125
5000
DN 100
3000 200
2000
1000
DN 50 (DN65)*
50
DN 40 (DN50)*
DN 32 (DN40)*
DN 25 (DN32)*
20
100
DN 20 (DN25)*
10
DN 15 (DN15 / DN20)*
5
50
20
10
Example
2
DN 8
1
DN 6
0.2
1
* For the fittings:
• with external thread connections acc. to
SMS 1145,
• with welding end connections acc. to
SMS 3008, BS 4825 / ASME BPE or
DIN 11850 Rg 2,
0.5
5
2
• Solution: intersection between flow rate and
flow velocity in the graph gives the appropriate pipe diameter, DN40 (or DN50 for
the asterisked fittings).
DN 80 (DN100)*
DN 65 (DN80)*
100
500
200
• Specification: if the nominal flow rate is
10 m3/h, the ideal flow velocity is between
2 and 3 m/s.
• with Clamp connections acc.
to SMS 3017 / ISO 2852,
BS 4825 / ASME BPE or DIN 32676.
0.1
0.05
0.5
0.02
0.2
0.01
0.1
0.3 0.5
0.3
1
0.5
1
3
3
5
5
10 m/s
10
30 fps
Fluid velocity
→ Install the device on the pipe in such a way that the upstream and downstream distances are respected
18
according to the design of the pipes, refer to standard EN ISO 5167-1 and Fig. 7 :
English
Type 8045
Installation and commissioning
flow direction
50 x DN 5 x DN
With control valve
25 x DN 5 x DN
Pipe with 2 elbows at 90°
20 x DN 5 x DN
Pipe with 1 elbow at 90° or 1
T-piece
18 x DN 5 x DN
With pipe expansion
Fig. 7:
40 x DN 5 x DN
Pipe with 2 elbows at 90° in 3
dimensions
15 x DN 5 x DN
With pipe reduction
Upstream and downstream distances depending on the design of the pipes.
→ Respect the following additional mounting conditions to ensure that the measuring device operates correctly:
- Preferably install the device at a 45° angle to the horizontal centre of the pipe to avoid having deposits on the electrodes and false measurements due to air bubbles (see “Fig. 8”);
45°
45°
Fig. 8:
Mounting angle on the pipe
- Ensure that the pipe is always filled in the section around the device (see Fig. 9).
- When mounting vertically ensure that the flow direction is in an upward direction (see Fig. 9).
Horizontal mounting
Correct
Incorrect
Vertical mounting
flow direction
Correct
Fig. 9:
Incorrect
Filling of the pipe
- Prevent the formation of air bubbles in the pipe in the section around the device (see Fig. 10).
English
19
Type 8045
Installation and commissioning
- Always mount the device upstream a possible injection point in the pipe of a high-conductivity fluid (for
example: acid, base, saline,...).
Incorrect
Correct
Correct
Fig. 10:
flow direction
Incorrect
Air bubbles within the pipe
→ If necessary, use a flow conditioner to improve measurement precision.
7.2.2.
Installation into the pipe of a 8045 with a G2'' nut
In order to ensure a high accuracy of the measurements and good stability of the „flow zero“ point, install
the device into the processed medium at least 24 H before calibration.
→ Install the S020 fitting into the pipe taking into
account the recommendations in chap. “7.2.1”.
FLOW
→ Check that there is a seal (see mark 6, Fig. 11) on
the flow sensor.
1
→ Insert the nut (see mark 3, Fig. 11) on the fitting.
6
Electrodes
flow direction
2
→ Insert the snap ring (mark 2, Fig. 11) into the
groove (mark 5, Fig. 11).
→ Position the device in order the arrow on the side of
3
the housing indicates the direction of the flow. the
totalizers will increment.
5
4
→ Insert the device (mark 1, Fig. 11) into the fitting.
→ Tighten the nut (mark 3, Fig. 11) by hand on the
device.
Fig. 11:
Installation into the pipe of a 8045 with a G2'' nut
7.2.3.
Installation into the pipe of a 8045 with a clamp connection
Observe the installation recommendations described at chap. 7.2. and in the operating instructions of the
S020 fitting.
In order to ensure a high accuracy of the measurements and good stability of the „flow zero“ point, install
the device into the processed medium at least 24 H before calibration.
20
English
Type 8045
Installation and commissioning
→ Install the S020 fitting on the pipe.
→ Install the seal (mark 3“Fig. 12”) on the S020 fitting.
1
→ Make sure that the polarizing pin (mark 4 “Fig. 12”) is
on the fitting.
→ Insert the device (mark 1, “Fig. 12”) into the fitting.
2
3
4
Position the device in order the arrow on the side of
the housing indicates the direction of the flow: the
totalizers will increment.
→ Tighten by hand the clamp collar (mark 2 “Fig. 12”).
→ Charge the pipe to make sure the installation is tight.
flow direction
Fig. 12:
Installation into the pipe of a 8045 with a clamp connection
7.3.
Wiring
DANGER
Risk of injury due to electrical voltage.
• Shut down the electrical power source of all the conductors and isolate it before carrying out work on the
system.
• Observe all applicable accident protection and safety regulations for electrical equipment.
NOTE
The device is not tight if at least one cable gland is not used
• Seal the unused cable gland with the supplied stopper gasket:
→ Loosen the nut of the unused cable gland.
→ Remove the transparent disk.
→ Insert the supplied stopper gasket.
→ Screw the nut of the cable gland.
21
English
Type 8045
Installation and commissioning
• Use a high quality electrical power supply (filtered and regulated).
• Make sure the installation is equipotential. See chap. “7.3.1”.
• Use shielded cables with a temperature limit of 80 °C minimum.
• Do not install the cables near high voltage or high frequency cables; If this cannot be avoided, observe a
min. distance of 30 cm.
• Protect the power supply by means of a 300 mA fuse and a switch.
• Protect the relays by means of a max. 3 A fuse and a circuit breaker (depending on the process).
• Do not apply both a dangerous voltage and a safety extra-low voltage to the relays.
If two cables are used in the same cable gland, first insert the supplied multi-way seal.
To wire the device:
→ Loosen the screw from the lid.
→ Flip the lid.
→ Loosen the 4 screws from the cover of the housing.
→ Remove the cover.
→ Loosen the nuts of the cable glands.
→ Insert the cable through the nut then through the cable gland.
→ Make sure the earth cable coming from the housing and, on a version with stainless steel sensor, the cable
coming from the flow sensor, are connected as shown in Fig. 19, chap. 7.3.3.
→ Wire acc. to chap. 7.3.1 to 7.3.7.
7.3.1.
Equipotentiality of the installation
To ensure the equipotentiality of the installation (power supply - device - fluid):
→ Connect together the various earth spots in the installation to eliminate the potential differences that may
occur between different earthes.
→ Observe faultless earthing of the shield of the power supply cable, at both ends.
→ Connect the negative power supply terminal to the earth to suppress the effects of common mode currents. If
this connection cannot be made directly, a 100 nF/50 V capacitor can be fitted between the negative power
supply terminal and the earth.
→ Special attention has to be paid if the device is installed on plastic pipes because there is no direct earthing
possible. Proper earthing is performed by earthing together the metallic instruments such as pumps or valves,
that are as close as possible to the device. If no such instrument is near the device, insert metallic earth rings
inside the plastic pipes upstream and downstream the device and connect these parts to the same earth. The
earth rings must be in contact with the fluid.
22
English
Type 8045
Installation and commissioning
Power cable shield
18-36VDC
+
-
Power supply
1)
Pipe in plastic
Valve, pump,... (or metallic earthing rings, not supplied,
inserted within the pipe)
If a direct earth connection is not possible, fit a 100 nF / 50 V capacitor between the negative power supply terminal and
the earth.
1
Fig. 13:
Equipotentiality skeleton diagram with pipes in plastic
Power cable shield
18-36VDC
+
-
Power supply
1)
Metal pipe
If a direct earth connection is not possible, fit a 100 nF / 50 V capacitor between the negative power supply terminal and
the earth.
1
Fig. 14:
Equipotentiality skeleton diagram with pipes in metal
7.3.2.
Mounting the cable clamp
→ Before wiring the device, insert the supplied cable clamp into the
notches of the electronic board.
Fig. 15:
Mountign the cable clamp
23
English
Type 8045
Installation and commissioning
7.3.3.
Terminal assignement and use of the selectors
1
A
2
CURRENT Iout L+ L- PE P+ PPULSE
SINK SOURCE AO1 Supply
18...36 Vdc
4 pin ribbon cable coming from
the flow sensor
B
OFF ON
DO2
PE
+
DO1
DI1
PE
3
DO3
Terminal block 4 wiring the DO2 relay output
Terminal block 5 wiring the DO3 relay output
Selector A : see Fig. 17
Selector B : see Fig. 18
Fig. 16:
Terminal block 2
PE: shieldings of both the power supply cable and
the AO1 and DO1 output cables
Terminal block 3
PE: functional earth of the DI1 digital input
-: negative signal of the DI1 input
+: positive signal of the DI1 input
4
5
Terminal block 1
Iout: 4-20 mA output (AO1)
L+: V+ (positive voltage)
L-: 0V (power supply ground)
PE: functional earth, wired in the factory (see Fig.
19)
P+: positive transistor output (DO1)
P-: negative transistor output (DO1)
Terminal assignment
Use switch A to configure the wiring of the 4-20 mA current output in sinking or sourcing mode.
A
CURRENT
SINK SOURCE
Wire the current output in sourcing mode.
Fig. 17:
CURRENT
SINK SOURCE
Wire the current output in sinking mode.
Using the sink/source switch
Use the switch B to lock/unlock the
device.
ENTER
key to prevent unauthorized access to the configuration of the
B
OFF ON
OFF ON
ENTER
The
Fig. 18:
ENTER
key is unlocked (default position).
Using the ENTER key lock/unlock switch
24
English
The
key is locked.
Type 8045
Installation and commissioning
1 2 3 4
5 6
Earth cable coming from the housing.
On a version with stainless steel flow sensor, a second cable
is coming from the sensor.
Fig. 19:
Terminal block 1 connecting the earth wire coming from the housing (made in the factory)
7.3.4.
Wiring the AO1 current output
For safety reasons, secure the cables using a non-conducting cable clamp.
The 4-20 mA output can be wired in either sourcing or sinking mode.
Position the
A
+
4-20mA input at external
device
Position the
switch to the right.
18-36 V DC
+
-
300 mA
(*)
I
Power supply
4-20mA input at external
device
switch to the left.
18-36 V DC
+
-
300 mA
+
-
(*)
I
Power supply
A
A
CURRENT Iout L+ L- PE P+ PPULSE
SINK SOURCE AO1 Supply
CURRENT Iout L+ L- PE P+ PPULSE
SINK SOURCE AO1 Supply
18...36 Vdc
Fig. 20:
A
DO1
18...36 Vdc
PE
Wiring of the 4-20 mA output (AO1) in
sourcing mode
Fig. 21:
DO1
PE
Wiring of the 4-20 mA output (AO1) in sinking
mode
*) If a direct earth connection is not possible, fit a 100 nF/50 V capacitor between the negative power supply terminal and the
earth
25
English
Type 8045
Installation and commissioning
7.3.5.
Wiring the DO1 transistor output
18-36 V DC
+
-
Power supply
18-36 V DC
+
-
+
5-36 VDC
-
300 mA
+
(*)
Power supply
300 mA
+
5-36 VDC
-
+
(*)
-
-
PLC
PLC
Iout L+ L- PE P+ PAO1
Fig. 22:
Supply
18...36 Vdc
PULSE
DO1
Iout L+ L- PE P+ PAO1
PE
NPN wiring of the DO1 transistor output
Fig. 23:
Supply
18...36 Vdc
PULSE
DO1
PE
PNP wiring of the DO1 transistor output
*) If a direct earth connection is not possible, fit a 100 nF/50 V capacitor between the negative power supply terminal and the
earth
7.3.6.
Wiring the DI1 digital input
Power supply
18-36 V DC
+
-
18-36 V DC
+
-
(*)
Power supply
CURRENT Iout L+ L- PE P+ PPULSE
SINK SOURCE AO1 Supply
18...36 Vdc
PE
+
DO1
CURRENT Iout L+ L- PE P+ PPULSE
SINK SOURCE AO1 Supply
PE
DI1
(*)
18...36 Vdc
PE
+
Switch
DO2
DI1
DO1
PE
Switch
DO2
DO3
DO3
Fig. 24:
Possible wirings of the DI1 digital input
*) If a direct earth connection is not possible, fit a 100 nF/50 V capacitor between the negative power supply terminal and the
earth
7.3.7.
Wiring the DO2 and DO3 relay outputs
m
230 VAC
DO2
3A
3A
230 VAC
DO3
26
Fig. 25:
Wiring of the DO2 and DO3 relay outputs
English
Type 8045
Operating and functions
8.
OPERATING AND FUNCTIONS
8.1.
Safety instructions
WARNING
Risk of injury due to non-conforming operating.
Non-conforming operating could lead to injuries and damage the device and its surroundings.
• The operators in charge of operating must have read and understood the contents of this manual.
• In particular, observe the safety recommendations and intended use.
• The device/installation must only be operated by suitably trained staff.
8.2.
Operating levels of the device
The device has two operating levels: the Process level and the Configuration level.
The Process level makes it possible:
• to read the flow rate measured by the device, the value of the current transmitted on the 4-20 mA analogue
output, the values of both the daily and main totalizers.
• to reset the daily totalizer.
• to access the Configuration level.
The Configuration level comprises three menus (Parameters, Test and Information) and makes it possible:
• to set the device parameters.
• to test some device parameters.
• to calibrate the device.
• to read, when the status LED of the device is orange or red, the warning and fault messages generated by the
device.
Table 1:
Default settings of the device
Function
LANGUAGE
Default value
English
UNIT of the flow rate
l/min.
3-= 0.000
UNIT of the totalizers
litre
3+= 0.000
K-FACTOR
1.000
Not inverted
OUTPUT AO1
4mA= 0.000
OUTPUT DO1
Function
OUTPUT DO3
Default value
Hysteresis
20mA= 0.000
INPUT DI1
time delay = 0
disable
pulse
FILTER
5, slow
PU= 0.00 litre
FREQUENC.
50Hz
27
English
Type 8045
Operating and functions
Function
OUTPUT DO2
Default value
Hysteresis
Function
CUT-OFF
Default value
0.000
2-= 0.000
BACKLIT
level 9, activated for 30s
2+= 0.000
K-SENSOR
Kw= 1.000
Not inverted
FLOW-W.
W-= 0.000
W+= 0.000
time delay = 0
Configuration level
Process level
12.6 L/S
>2s
>5s
ENTER
16.45 MA
0......9
0......9
87654 L
Parameters menu
ENTER
Test Menu
Information menu 1)
LANGUAGE
CAL AO1
MEAS. OVF
UNIT
CALIB 0
CAL. FAIL
>5s
231 L.
K-FACTOR
0......9
+
>2s
To reset the daily totalizer
(identified by a dot after the
volume units).
0......9
FLOW
0......9
OUTPUT
K-SENSOR
INPUT
FLOW-W.
0......9
FILTER
NEG. FLOW
END
TOTAL
END
ENTER
or
2)
FREQUENC.
CUT-OFF
BACKLIT
END
SAVE N/Y
1)
Accessible when the device status LED is orange or red (see chap. “8.3”).
2)
If the ENTER key is unlocked.
28
English
Process
level
Type 8045
Operating and functions
8.3.
Description of the navigation keys and the status
LEDs
• Scrolling up the
parameters
• Selecting the displayed
parameter
• increment the figure
selected
• Confirming the settings
Status LED of relay DO3 (LED ON
= contact closed)
Device status LED: see
following table.
Status LED of relay DO2 (LED ON
= contact closed)
• Reading the messages
• Scrolling through the parameters
• Selecting the figure on the left
Device status
LED
Status of the device
Green
The device operates correctly.
Orange
A warning message is generated.
→ Press the
key for 2 seconds in the Process level to access the message. See chap.
“9.5.5” for the meaning of the message.
Red
Furthermore, a relay output (DO2 or DO3) or the transistor output DO1 switches if it is
configured in the "WARNING" mode (see Fig. 39 or Fig. 42)
A fault message is generated and a 22 mA current is sent on the current output.
→ Press the
Blinking,
whatever the
colour
key for 2 seconds in the Process level to access the message. See chap.
“9.5.4” for the meaning of the message.
• the DI1 digital input is active,
• or a check for the correct behaviour of the outputs is running (see chap. “8.7.3”)
• or a flow zero point calibration procedure is running (see chap. “8.7.2”),
• or the daily totalizer is kept at zero.
29
English
Type 8045
Operating and functions
8.4.
Using the navigation keys
You want to...
move between parameters within a level or a menu.
Press...
•
•
access the Parameters menu
to go the next parameter.
to go to the previous parameter.
0......9
ENTER
+
simultaneously for 5 s, in the Process level
access the Test menu.
ENTER
0......9
+
+
simultaneously for 5 s, in the Process
level
access the Information menu.
for 2 s, in the Process level, when the device status
LED is orange or red.
reset the daily totalizer.
simultaneously for 2 s, when the daily totalizer
+
is displayed in the Process level
0......9
select the displayed parameter.
ENTER
confirm the displayed value.
ENTER
modify a numerical value.
•
0......9
to select the digit at the left of the blinking digit.
•
•
8.5.
to increase the blinking digit.
0......9
+
to move the decimal point.
Details of the Process level
This level is active by default when the device is energized.
12.6 L/S
or
0 L/S.
The displayed flow rate is set to 0 (a dot is displayed after the
flow rate units if the "CUT-OFF" function is active) because
the measured flow rate is below the threshold value defined in
the "CUT-OFF" parameter of the Parameters menu. See chap.
“8.6.16”.
Value of the measured flow rate, displayed in the unit chosen in the "UNIT" parameter
of the Parameters menu.
0......9
16.45 MA
Value of the current output, proportional to the measured flow rate.
87654 L
Value of the main totalizer, volume of fluid counted by the device since the last reset.
231 L.
Value of the daily totalizer (identified by a dot after the volume units), volume of fluid
counted by the device since the last reset.
+
0......9
>2s
30
English
Resetting the daily totalizer.
Type 8045
Operating and functions
8.6.
Details of the Parameters menu
ENTER
To access the Parameters menu, simultaneously press keys
for at least 5 s.
This menu comprises the following configurable parameters:
0......9
LANGUAGE
Choosing the display language
UNIT
Choosing the flow rate unit, the number of decimals and the unit the totalizers are
displayed in.
K-FACTOR
Entering the K factor of the fitting used or have it defined through a teach-in
procedure.
OUTPUT
Parameterize the 4-20 mA current output (AO1) and configure the transistor output
(DO1) and, if the device is equipped with, the 2 relay outputs (DO2 and DO3).
INPUT
Configuring the ON/OFF digital input (DI1), if the device is equipped with.
FILTER
Choosing the filter level of the measured flow rate, on the displayed flow rate and the
AO1 current output.
TOTAL
Resetting both totalizers.
FREQUENC.
Setting the electric network frequency.
CUT-OFF
Entering the measured flow rate value below which the device sets the measured flow
rate to 0 with effect on the display and the outputs.
BACKLIT
Setting the brightness of the display and how long it stays ON, or deactivating the
backlight.
END
SAVE N/Y
Saving the changes made within the Parameters
menu or not. If the changes are saved, the device
operates with the new settings.
Fig. 26:
12.6 L/S
Process level
Diagram of the Parameters menu
31
English
Type 8045
Operating and functions
8.6.1.
Choosing the display language
When the device is energized for the first time, the display language is English.
LANGUAGE
ENGLISH
DEUTSCH
0......9
FRANÇAIS
→ Confirm the displayed language: The
selected language is immediately active.
ITALIANO
ESPANOL
UNIT
Fig. 27:
Diagram of the "LANGUAGE" parameter of the Parameters menu
→ If you do not want to adjust another parameter, go to the "END" parameter of the Parameters menu and press
ENTER
to save the settings or not and go back to the Process level.
8.6.2.
Choosing the flow rate units, the number of decimals and
the units of the totalizers
When changing the flow rate unit, only the totalizers are automatically converted.
• If necessary, manually convert the parametered flow rate values.
The max. flow rate that can be displayed depends on the number of decimals chosen:
• 9999 if the number of decimals = 0 or AUTO,
• 999,9 if the number of decimals = 1,
• 99,99 if the number of decimals = 2,
• 9,999 if the number of decimals = 3.
The "UNIT" parameter makes it possible to choose:
• the flow rate units.
• a fixed number of decimals (choose 0, 1, 2 or 3) to display the flow rate in the Process level, or a floating
decimal point (choose "AUTO"): the device automatically adjusts the position of the decimal point depending on
the chosen unit and the measured flow rate.
• the volume units of the totalizers if the unit previously chosen is in litres or in m3.
32
English
Type 8045
Operating and functions
FLOW
UNIT
LIT/SEC
→ Choose the flow rate
LIT/MIN
→ Confirm
unit.
LIT/H
M3/MIN
M3/H
0......9
→ Choose the
number of decimal
positions.
US GAL/S
AUTO
US GAL/M
DEC PT 3
US GAL/H
0......9
→ Confirm
DEC PT 2
0......9
IMP GA/S
DEC PT 1
IMP GA/M
DEC PT 0
GA/H
If the chosen unit is in litres or m3.
TOTAL
LITRE → Choose the totalizer unit..
→ Confirm
0......9
If the chosen
unit is in
gallons.
M3
RETURN
Fig. 28:
Diagram of the "UNIT" parameter of the Parameters menu
→ If you do not want to adjust another parameter, go to the "END" parameter of the Parameters menu and press
ENTER
to save the settings or not and go back to the Process level.
33
English
Type 8045
Operating and functions
8.6.3.
Entering the K factor of the fitting used:
The device determines the flow rate in the pipe using the fitting K factor.
The K factor of the fitting used can be entered here. The device may also determine the K factor using a teach-in
procedure: see chap. “8.6.4”.
The device will use the new K factor as soon as "SAVE YES" is confirmed when leaving the Parameters
menu.
K-FACTOR
K=10.000
The display shows the K factor of the
fitting, may it have been entered or
determined by a teach-in procedure; this
K factor is currently used by the device
K=2.8500
→ Enter the K factor (value between 0,0001
and 9999,9) of the fitting used.
→ Confirm the displayed value.
→ Edit the parameter.
OUTPUT
RETURN
VALID N/Y
Is only displayed if the K factor has been changed.
→ Confirm the entered K factor or not.
Fig. 29:
Entering the K factor of the fitting used
→ If you do not want to adjust another parameter, go to the "END" parameter of the Parameters menu and press
ENTER
to save the settings or not and go back to the Process level.
8.6.4.
Determining the fitting K factor using a teach-in procedure
Before any teach-in procedure, do the following:
• Calibrate the flow zero point of the device. See chap. 8.7.2.
• Check that the Kw coefficient of the sensor has not been disturbed. See chap. 8.7.4.
The device determines the flow rate in the pipe using the fitting K factor.
The "TEACH V." or "TEACH F." parameter allows the device to determine the fitting K factor using a teach-in procedure. The K factor may also be directly entered: see chap. “8.6.3”.
The teach-in can be done either depending on a known volume ("TEACH V.") or depending on the flow rate
("TEACH F.") in the pipe that has been measured with a reference device.
34
English
Type 8045
Operating and functions
Determine the fitting K factor using a teach-in procedure depending on a volume ("TEACH V.")
The device will use the new K factor as soon as "SAVE YES" is confirmed when leaving the Parameters
menu.
→ Prepare a tank with a known volume.
→ Stop the fluid circulation.
→ confirm "TEACH V.": "FILL END." is displayed.
K-FACTOR
K=2.8500
TEACH V.
The display shows the K factor of the fitting, may it have been entered
or determined by a teach-in procedure.
FILL END
→ Charge the pipe to fill the tank.
→ When the tank is full, confirm "FILL END":
0......9
0000.0 L
TEACH F.
→ Enter the volume (value between 0,1 and 9999,9) of fluid
that passed in the circuit. Confirm.
The device calculates the K factor of the fitting
K=2.9000 and displays it.
→ Confirm the displayed value.
OUTPUT
RETURN
VALID N/Y
→ confirm the K factor determined through teach-in or not.
Fig. 30:
Teach-in procedure depending on a volume
→ If you do not want to adjust another parameter, go to the "END" parameter of the Parameters menu and press
ENTER
to save the settings or not and go back to the Process level.
35
English
Type 8045
Operating and functions
Determine the fitting K factor using a teach-in procedure depending on a volume ("TEACH F.")
The device will use the new K factor as soon as "SAVE YES" is confirmed when leaving the Parameters
menu.
→ Charge the pipe.
→ Wait for the flow rate to be stable.
→ confirm "TEACH F.": "MEASURE \" is displayed.
K-FACTOR
K=10.000
The display shows the K factor of the fitting, may it have been entered
or determined by a teach-in procedure.
TEACH V.
TEACH F.
MEASURE \
The device calculates the mean flow rate in the pipe, during
approximately 50 s.
0.000 L/S
→ Enter the value of the flow rate in the pipe (value
0......9
between 0,001 and 9999). Confirm.
The device calculates the K factor of the fitting and displays
it.
K=2.8500
→ Confirm the displayed value.
OUTPUT
Fig. 31:
RETURN
VALID N/Y
→ confirm the K factor determined through teach-in or not.
Teach-in procedure depending on the flow rate
→ If you do not want to adjust another parameter, go to the "END" parameter of the Parameters menu and press
ENTER
to save the settings or not and go back to the Process level.
36
English
Type 8045
Operating and functions
8.6.5.
Configuring the outputs (general diagram)
OUTPUT
AO1
Parameterizing the 4-20 mA analogue output, AO1. See chap. “8.6.6”.
DO1
PULSE
Configuring the transistor output DO1 as a pulse
output. See “Fig. 34”, chap. “8.6.7”.
HYSTERES. Configuring the transistor output DO1 to switch a load
WINDOW
depending on two threshold values. See “Fig. 36” and
“Fig. 35”, chap. “8.6.7”.
0......9
0......9
DIRECTIO.
Configuring the transistor output DO1 to switch a load
when the fluid direction changes. See “Fig. 38” chap.
“8.6.7”.
WARNING
Configuring the transistor output DO1 to switch a load
when a warning message is emitted by the device.
See “Fig. 39” chap. “8.6.7”.
If the device is equipped with relays, configuring the
DO2
HYSTERES. relay output DO2 or DO3 to switch a load depending
DO3
WINDOW
on two threshold values. See “Fig. 36”, chap. “8.6.7”
and “Fig. 40” chap. “8.6.11”.
DIRECTIO.
If the device is equipped with relays, configuring the
relay output DO2 or DO3 to switch a load when the
fluid direction changes. See “Fig. 41” chap. “8.6.11”.
WARNING
If the device is equipped with relays, configuring the
relay output DO2 or DO3 to switch a load when a
warning message is emitted by the device. See “Fig.
42” chap. “8.6.11”.
0......9
RETURN
Fig. 32:
Diagram of the "OUTPUT" parameter of the Parameters menu
37
English
Type 8045
Operating and functions
8.6.6.
Configuring the AO1 current output
The current output gives a 22 mA current when the device shows an operation fault, even if the current
output is disabled.
The 4-20 mA output provides an electrical current, the value of which reflects the flow rate measured by the
device.
Example of relation between the measuring range and the current output:
mA
20
4
20
180
l/min
→ To invert the output signal, give a lower flow rate value to the 20 mA current value than to the 4 mA current
value.
→ To disable the current output, set both range bounds, 4 and 20 mA, to zero. In this case the output delivers a
constant current of 4 mA.
OUTPUT
AO1
4 = 28.00
→ Enter the flow rate associated to a 4 mA current value, in the unit
chosen in the "UNIT" parameter.
→ Confirm.
DO1
20 = 6.000
→ Enter the flow rate associated to a 20 mA current value, in the unit
chosen in the "UNIT" parameter.
→ Confirm.
Fig. 33:
Parameterizing the current output
38
English
Type 8045
Operating and functions
8.6.7.
Configuring the transistor output DO1 as a pulse output
When the DO1 transistor output is configured as a pulse output, a pulse is transmitted on the output each time
the parametered volume of fluid has been measured by the device.
OUTPUT
DO1
PULSE
LITRE
Is only displayed if the unit chosen in
the "UNIT" parameter is in litres or m3.
→ Choose the volume unit of a pulse.
0......9
M3
DO2
PU=01.000
→ Enter the volume of fluid (value between 0,000 and 9999,9)
for which a pulse is transmitted on the transistor output. If
the unit chosen in the "UNIT" parameter is in gallons, enter a
pulse in gallons.
→ To deactivate the pulse output, set PU to zero: the output is
always open and no pulse is transmitted.
→ Confirm
Fig. 34:
Configuration of the transistor output DO1 as a pulse output
39
English
Type 8045
Operating and functions
8.6.8.
OUTPUT
Configuring the transistor output DO1 to switch a load
depending on two threshold values
DO1
HYSTERES.
1-= 0.000
WINDOW
→ Enter a flow rate value 1), associated to the low
threshold, in the unit chosen in the "UNIT" parameter.
→ Confirm.
1+= 0.000
→ Enter a flow rate value 1), associated to the high
threshold, in the unit chosen in the "UNIT" parameter.
→ Confirm.
INV YES
0......9
INV NO
→ Choose the operating, inverted or not inverted, of the
transistor output.
DO2
On a version WITH relay outputs
DEL. 1= 00
→ Enter the time delay before switching value (value
between 0 and 99 s).
→ Confirm.
RETURN
On a version WITHOUT relay
outputs
If hysteresis operating: value set for 1- ≤ value set for 1+. If window switching: value set for 1- < value set for
1+.
1)
Fig. 35:
Configuration of the DO1 transistor output with switching thresholds
40
English
Type 8045
Operating and functions
Hysteresis switching
The output status changes when a threshold is reached:
• by increasing flow rate, the output status changes when the high threshold X+ is reached.
• by decreasing flow rate, the output status changes when the low threshold X- is reached.
Not inverted
Contact
ON
OFF
Inverted
Contact
ON
X-
X+
flow rate
OFF
X-
X+
flow rate
X- = low switching threshold of the transistor or the relay (1-, 2- or 3-)
X+ = high switching threshold of the transistor or the relay (1+, 2+ or 3+)
Window switching: the output status changes as soon as any threshold (X- or X+) is reached.
Not inverted
Contact
ON
OFF
Inverted
Contact
ON
flow rate
X-
OFF
X+
X-
X+
flow rate
X- = low switching threshold of the transistor or the relay (1-, 2- or 3-)
X+ = high switching threshold of the transistor or the relay (1+, 2+ or 3+)
Fig. 36:
Window or hysteresis switching
Flow rate
High switching threshold
Low switching threshold
2s
2s
2s
t
DO
Hysteresis switching
DEL= 0s
DEL= 2s
Window switching
DEL= 0s
ON
Not inverted OFF
ON
Inverted
OFF
ON
Not inverted OFF
Inverted ON
OFF
ON
Not inverted OFF
ON
Inverted
OFF
ON
OFF
ON
Inverted
OFF
Not inverted
DEL= 2s
Fig. 37:
Operation example of the transistor output with switching thresholds
41
English
Type 8045
Operating and functions
8.6.9.
Configuring the transistor output DO1 to switch a load
when the fluid direction changes
The DO1 transistor output can be configured to indicate the fluid circulation change.
When the measured flow rate is in the cut-off flow range (see chap. “8.6.16”), the flow rate is set to
0 and positive. The following diagram shows the behaviour of the DO output when it is configured to
indicate the fluid circulation changes, when the CUT-OFF function is used.
measured flow rate
flow rate
displayed flow rate
+CUTOFF
0
t
-CUTOFF
DO output active
DEL
DEL
DO output inactive
As long as the measured flow rate is lower than "-CUTOFF", the device status
LED is orange and the message "NEG. FLOW" is added to the warning message
list.
OUTPUT
DO1
DIRECTIO.
INV YES
0......9
INV NO
→ Choose the operating, inverted or not inverted, of the
transistor output.
DO2
On a version WITH relay outputs
DEL. 1= 00
→ Enter the time delay before switching value (value
between 0 and 99 s).
→ Confirm.
RETURN
On a version WITHOUT relay
outputs
Fig. 38:
Configuration of the DO1 transistor output to indicate the fluid circulation changes
42
English
Type 8045
Operating and functions
8.6.10. Configuring the transistor output DO1 to switch a load
when a warning message is emitted by the device
When the device generates a warning message, the device status LED is orange.
The generation of a warning message can also be indicated by the switching of the transistor output.
OUTPUT
DO1
WARNING
INV YES
0......9
INV NO
→ Choose the operating, inverted or not inverted, of the
transistor output.
DO2
On a version WITH relay outputs
DEL. 1= 00
→ Enter the time delay before switching value (value
between 0 and 99 s).
→ Confirm.
RETURN
On a version WITHOUT relay
outputs
Fig. 39:
Configuration of the DO1 transistor output to indicate the generation of a warning message
8.6.11. Configuring the DO2 and DO3 relay outputs
Any DO relay output can be configured either:
• to switch a load depending on two thresholds. See “Fig. 36”, chap. “8.6.7” and “Fig. 40”.
• to switch a load to indicate the fluid circulation changes. See “Fig. 41”.
• to switch a load when a warning message is generated by the device. See “Fig. 42”.
43
English
Type 8045
Operating and functions
OUTPUT
DO2
HYSTERES.
2-= 0.000
WINDOW
→ Enter a flow rate value 1), associated to the low
threshold, in the unit chosen in the "UNIT" parameter.
→ Confirm.
2+= 0.000
→ Enter a flow rate value 1), associated to the high
threshold, in the unit chosen in the "UNIT" parameter.
→ Confirm.
INV YES
0......9
INV NO
→ Choose the operating, inverted or not inverted, of the
relay output.
DO3
DEL. 2= 00
→ Enter the time delay before switching value (value
between 0 and 99 s).
→ Confirm.
1)
If hysteresis switching: Value set for 2- ≤ 2+ or 3- ≤ 3+ . If window switching: Value set for 2- <2+ or 3- <3+.
Fig. 40:
Configuration of the DO2 or DO3 relay output with switching thresholds
44
English
Type 8045
Operating and functions
When the measured flow rate is in the cut-off flow range (see chap. “8.6.16”), the flow rate is set to
0 and positive. The following diagram shows the behaviour of the DO output when it is configured to
indicate the fluid circulation changes, when the CUT-OFF function is used.
measured flow rate
flow rate
displayed flow rate
+CUTOFF
0
t
-CUTOFF
DO output active
DEL
DEL
DO output inactive
As long as the measured flow rate is lower than "-CUTOFF", the device status
LED is orange and the message "NEG. FLOW" is added to the warning message
list.
The DO2 or DO3 relay output can be configured to indicate the fluid circulation change.
OUTPUT
DO2
DIRECTIO.
INV YES
0......9
INV NO
→ Choose the operating, inverted or not inverted, of the
relay output.
DO3
DEL. 2= 00
→ Enter the time delay before switching value (value
between 0 and 99 s).
→ Confirm.
Fig. 41:
Configuration of the DO2 or DO3 relay output to indicate the fluid circulation changes
45
English
Type 8045
Operating and functions
When the device generates a warning message, the device status LED is orange.
The generation of a warning message can also be indicated by the switching of the relay output.
OUTPUT
DO2
WARNING
INV YES
0......9
INV NO
→ Choose the operating, inverted or not inverted, of the
relay output.
DO3
DEL. 2= 00
→ Enter the time delay before switching value (value
between 0 and 99 s).
→ Confirm.
Fig. 42:
Configuration of the DO2 or DO3 relay output to indicate the generation of a warning message
→ If you do not want to adjust another parameter, go to the "END" parameter of the Parameters menu and press
ENTER
to save the settings or not and go back to the Process level.
8.6.12. Configuring the DI1 digital input
The DI1 digital input makes it possible to remotely trigger one out of four device functions.
INPUT
DI1
0......9
DISABLE
Choosing not to use the digital input.
CALIB. 0
Configuring the digital input to trigger the calibration
of the flow zero point. The calibration can also be
done in the Test menu. See “Fig. 44”.
HOLD
Configuring the digital input to freeze the flow rate
measurements. See “Fig. 45”.
SET FLOW
Configuring the digital input to control the status of
the outputs and the display depending on a preset
flow rate. See “Fig. 46”.
HOLD TOT.
Configuring the digital input to freeze the totalizers.
See “Fig. 47”.
RES. TOT.
Configuring the digital input to trigger the reset of the
daily totalizer. See “Fig. 48”.
0......9
RETURN
46
Fig. 43:
Diagram of the "INPUT" parameter of the Parameters menu
English
Type 8045
Operating and functions
Calibration of the flow zero point is described in chap. 8.7.2.
INPUT
DI1
CALIB 0
INV YES
0......9
INV NO
→ Choose "INV. NO" to trigger the calibration of the
zero flow point on the leading edge.
→ Choose "INV. YES" to trigger the calibration of the
zero flow point on the trailing edge.
→ Confirm
RETURN
Fig. 44:
Configuration of the digital intput to trigger the calibration of the flow zero point
The HOLD mode is ignored if there is a running check for the correct behaviour of the outputs (see
chap. “8.7.3”).
The Hold mode is used to carry out maintenance work without interrupting the process.
In practice, when the device is in Hold mode:
• the device status LED flashes.
• the current transmitted on the 4-20 mA is frozen to the value of the last measured flow rate.
• the displayed flow rate is frozen to the value of the last measured flow rate.
• each relay or transistor output is frozen to the status it had when the Hold mode was activated.
• the totalizers do not increment any more.
• the device is in the Hold mode until the digital input switches again.
INPUT
DI1
HOLD
INV YES
0......9
INV NO
→ Choose "INV. NO" to trigger the input on the leading
edge.
→ Choose "INV. NO" to trigger the input on the trailing
edge.
→ Confirm
RETURN
Fig. 45:
Configuration of the digital input to trigger the Hold mode of the device
47
English
Type 8045
Operating and functions
The preset flow rate is ignored if there is a running check for the correct behaviour of the outputs (see
chap. “8.7.3”).
This function makes it possible, like the Hold mode, to freeze the flow rate maesure, but to a preset value set by
the user.
When the digital input is activated:
• the device status LED flashes.
• the current transmitted on the 4-20 mA is frozen to the preset value of the flow rate.
• the displayed flow rate is frozen to the preset value of the flow rate.
• each transistor or relay output behaves depending on the preset flow rate.
• the totalizers do not increment any more.
• the preset flow rate is active until the digital input switches again.
INPUT
DI1
SET FLOW
SF= 0.000
→ Enter the flow rate value, in the unit chosen in the
"UNIT".parameter.
→ Confirm
INV YES
0......9
INV NO
→ Choose "INV. NO" to trigger the input on the leading
edge.
→ Choose "INV. NO" to trigger the input on the trailing
edge.
→ Confirm
RETURN
Fig. 46:
Configuration of the digital input to trigger the status of the outputs depending on a preset flow rate
48
English
Type 8045
Operating and functions
The Hold Tot. mode is used to freeze the totalizers while carrying out maintenance work.
In practice, when the device is in Hold Tot. mode:
• the totalizers do not increment any more.
• the device status LED flashes.
• the displayed flow rate, the current transmitted on the 4-20 mA and each transistor or relay output behaviours
correspond to the normal value of the measured flow rate.
• the device is in the Hold Tot. mode until the digital input switches again.
INPUT
DI1
HOLD TOT.
INV YES
0......9
INV NO
→ Choose "INV. NO" to trigger the input on the leading
edge.
→ Choose "INV. NO" to trigger the input on the trailing
edge.
→ Confirm
RETURN
Fig. 47:
Configuration of the digital input to freeze the totalizers
The daily totalizer is maintained to zero until the digital input switches again.
INPUT
DI1
RES. TOT.
INV YES
0......9
INV NO
→ Choose "INV. NO" to trigger the input on the leading
edge.
→ Choose "INV. NO" to trigger the input on the trailing
edge.
→ Confirm
RETURN
Fig. 48:
Configuration of the digital input to trigger the reset of the daily totalizer
→ If you do not want to adjust another parameter, go to the "END" parameter of the Parameters menu and press
ENTER
to save the settings or not and go back to the Process level.
49
English
Type 8045
Operating and functions
8.6.13. Configuring the filter of the measured flow rate
This parameter makes it possible to dampen the fluctuations:
• of the display,
• of the AO1 current output.
Ten filters are available.
When the "fast" filter is active and the flow rate varies for ±30 % (for example when charging the pipe or
stopping the flow), the filter is disabled: the new flow rate is immediately taken into account by the device.
If a too high filter is chosen, the device does not detect the sudden flow rate changes thus the flow rate in
the pipe may strongly defer from the displayed flow rate or the flow rate transmitted to the current output.
FILTER
FILTER 0
SLOW
0......9
FAST
0......9
FILTER 9
→ Choose the filter.
→ Choose the slow or fast filter.
→ Confirm
→ Confirm
TOTAL
Fig. 49:
Diagram of the "FILTER" parameter of the Parameters menu
The following table shows for each filter, the response times (10% to 90%):
Filter
0
1
2
3
4
Response time
1s
2s
3s
4s
5s
Filter
5
6
7
8
9
Response time
8s
15 s
28 s
70 s
145 s
slow
Filter 0: measured
flow rate
Filter 3
Filter 6
Filter 9
fast
Fig. 50:
Available filters
→ If you do not want to adjust another parameter, go to the "END" parameter of the Parameters menu and press
50
ENTER
to save the settings or not and go back to the Process level.
English
Type 8045
Operating and functions
8.6.14. Resetting both totalizers
This parameter makes it possible to reset both totalizers.
Both totalizers are reset upon confirmation of "SAVE YES" when leaving the Parameters menu.
TOTAL
RESET N
0......9
RESET Y
→ Choose to reset both totalizers or not.
→ Confirm
FREQUENC.
Fig. 51:
Diagram of the "TOTAL" parameter of the Parameters menu
The daily totalizer can be reset from the Process level or via the digital input.
→ If you do not want to adjust another parameter, go to the "END" parameter of the Parameters menu and press
ENTER
to save the settings or not and go back to the Process level.
8.6.15. Configuring the electric network frequency
This parameter makes it possible to configure the electric network frequency so that the device can filter the interfering signals of the power supply.
Adjust this parameter even if the device operates with a DC voltage.
FREQUENC.
F = 50HZ
0......9
F = 60HZ
→ Choose the electric network frequency.
→ Confirm
CUT-OFF
Fig. 52:
Diagram of the "FREQUENC." parameter of the Parameters menu
→ If you do not want to adjust another parameter, go to the "END" parameter of the Parameters menu and press
ENTER
to save the settings or not and go back to the Process level.
51
English
Type 8045
Operating and functions
8.6.16. Parameterizing the cut-off flow rate
This parameter makes it possible to set the flow rate value to 0 if the measured value is less than the set cut-off
value:
• the display then shows a flow rate = 0 (a dot is displayed after the flow rate units).
• the outputs and the totalizers react as if the actual flow rate was = 0.
CUT-OFF
CO=0.000
→ Enter the measured flow rate value below which the device considers that the flow rate
is = 0.
→ To disable the function, set CO=0.
→ Confirm
BACKLIT
Fig. 53:
Diagram of the "CUT-OFF" parameter of the Parameters menu
→ If you do not want to adjust another parameter, go to the "END" parameter of the Parameters menu and press
ENTER
to save the settings or not and go back to the Process level.
52
English
Type 8045
Operating and functions
8.6.17. Setting the brightness of the display and how long it stays
ON, or deactivating the backlight
This parameter makes it possible:
• to adjust the brightness of the display and how long the display is backlit after a key press.
• to deactivate the backlight.
BACKLIT
BKLG= 1
→ Set the display brightness, from 1 to 9.
BKLG= 9
DELAY= 30
0......9
→ Set the duration the display is backlit after a key press
(00 s: the display is constantly backlit).
→ Confirm
END
BKLG OFF
→ Or, deactivate the backlight.
→ Confirm
END
Fig. 54:
Diagram of the "BACKLIT" parameter of the Parameters menu
→ If you do not want to adjust another parameter, confirm the "END" parameter to save the settings or not and
go back to the Process level.
53
English
Type 8045
Operating and functions
8.7.
Details of the Test menu
ENTER
To access the Test menu, simultaneously press keys
0......9
for at least 5 s.
This menu comprises the following configurable parameters:
0......9
CAL AO1
Adjusting the 4-20 mA output
CALIB. 0
Calibrate the flow zero point of the device.
FLOW
Checking the correct operating of the outputs
K-SENSOR
Setting the coefficient Kw of the flow sensor to adjust the device accuracy.
FLOW-W.
Setting the flow rate range outside which a warning message is generated.
END
SAVE N/Y
Saving the changes made within the Test menu or
not. If the changes are saved, the device operates
with the new settings.
Fig. 55:
Diagram of the Test menu
54
English
12.6 L/S
Process level
Type 8045
Operating and functions
8.7.1.
Adjusting the current output
This parameter makes it possible to adjust the value of the current transmitted on the analogue output.
CAL AO1
OFFSET
OF= 4.05
→ The device generates a 4 mA current.
→ Measure the current given on the 4-20 mA output using a multimeter.
→ Enter the value displayed by the multimeter. The permitted offset range is 3 to
5 mA.
→ Confirm.
SPAN
SP= 19.95
→ The device generates a 20 mA current.
→ Measure the current given on the 4-20 mA output using a multimeter.
→ Enter the value displayed by the multimeter. The permitted span range is 18,50 to
21,50 mA.
→ Confirm.
VALID N/Y
→ Confirm the entered values or not.
CALIB. 0
Fig. 56:
Diagram of the "CAL AO1" of the Test menu
→ If you do not want to adjust another parameter, go to the "END" parameter of the Test menu and press
ENTER
to save the settings or not and go back to the Process level.
55
English
Type 8045
Operating and functions
8.7.2.
Calibrating the flow zero point
Adjust this parameter:
• before carrying out a teach-in procedure of the K factor.
• after maintenance work.
• if the measured flow rate is not zero whereas the fluid circulation has been stopped.
Make sure there are no bubbles in the pipe.
Before calibrating the flow zero point:
• at first commissioning the device, immerse the sensor in fluid for 24 hours before calibration.
• after maintenance work, immerse the sensor in the fluid for 1 hour before calibration.
During the calibration:
• the device status LED flashes.
• the outputs are frozen to the last measured flow rate value.
• the device cannot be configured.
The flow zero point calibration can be:
• either remotely triggered via the digital input. See chap. “8.6.12” and “Fig. 57”.
• either carried out using this parameter in the Test menu; See “Fig. 58”.
→ Charge the pipe.
→ Stop the fluid circulation.
→ Make sure the fluid is still.
→ Make sure the device status LED is green.
→ Make sure the device is in the Process level and not in the Configuration level.
→ Activate the digital input configured to trigger the flow zeo point calibration.
The device calibrates the flow zero point during approximately
MEASURE / 30 seconds.
Process level
0.000 L/S
• if the device status LED remains green, the calibration of the flow zero point has
succeeded.
• if the device status LED is orange, the calibration of the flow zero point failed: the
message "CAL. FAIL" is displayed in the warning message list. Restart the calibration.
Fig. 57:
Flow zero point calibration via digital input
56
English
Type 8045
Operating and functions
→ Charge the pipe.
→ Stop the fluid circulation.
→ Make sure the fluid is still.
CALIB. 0
CALIB N
0......9
CALIB Y
→ Choose "CALIB Y".
MEASURE /
The device calibrates the flow zero point.
FLOW
The calibration has
succeeded.
CAL. FAIL
ENTER
The device has detected a non nil
flow rate in the pipe.
The device status LED becomes
orange.
Fig. 58:
Flow zero point calibration using the "CALIB 0" parameter of the Test menu
→ If you do not want to adjust another parameter, go to the "END" parameter of the Test menu and press
ENTER
to save the settings or not and go back to the Process level.
8.7.3.
Checking the outputs behaviour
This parameter makes it possible to check that the outputs are behaving as expected by the configuration made.
• The totalizers are incremented depending on the measured value of the flow rate and not the simulated
value.
• The device status LED flashes during the running check of the output behaviour.
57
English
Type 8045
Operating and functions
FLOW
SIM=12,50
→ Enter a flow rate value.
→ Confirm by pressing the
ENTER
key.
→ Check that the outputs are behaving as expected.
→ To test another value, press
→ To exit the checking, press
Fig. 59:
ENTER
.
or
0......9
.
Diagram of the "FLOW" parameter of the Test menu
→ If you do not want to adjust another parameter, go to the "END" parameter of the Test menu and press
ENTER
to save the settings or not and go back to the Process level.
8.7.4.
Setting the Kw coefficient of the flow sensor
This parameter makes it possible to adjust the accuracy of the device.
Modifying the Kw coefficient has consequences for determining the fitting K factor using a teach-in procedure. See chap. “8.6.4”.
K-SENSOR
KW= 1.000
→ Enter the Kw coefficient of the flow sensor. Value between 0,850 and 1,150.
→ Confirm.
FLOW-W.
Setting example: to increase the measured flow rate value by 1,5 %, enter KW= 1,015.
Fig. 60:
Diagram of the "K-SENSOR" parameter of the Test menu
→ If you do not want to adjust another parameter, go to the "END" parameter of the Test menu and press
ENTER
to save the settings or not and go back to the Process level.
8.7.5.
Monitoring the flow rate in the pipe.
A malfunction in your process or the flow sensor may be indicated either by too low or too high a flow rate.
This parameter makes it possible to monitor the flow rate and configure the behaviour of the device if the parametered range is exceeded.
• To disable the flow rate monitoring, set W- = W+ = 0.
• To disable one of the limits, set it to 0.
58
English
Type 8045
Operating and functions
FLOW-W.
W-= 0.000
→ Enter a flow rate value (in the unit chosen in the "UNIT" parameter),
below which a "WARN LO" warning message is generated by the
device.
→ Confirm.
W+= 0.000
→ Enter a flow rate value (in the unit chosen in the "UNIT" parameter)
such as W+ > W-, above which a "WARN HI" warning message is
generated by the device.
→ Confirm.
END
Fig. 61:
Diagram of the "FLOW-W." parameter of the Test menu
To be warned when the flow rate is too low or too high, parameter the flow rate range (in the units that have
been chosen in the "UNIT" parameter of the Parameters menu), outside which the device generates a warning
message, "WARN LO" or "WARN HI", and turns the device status LED to orange.
When a warning message, "WARN LO" or "WARN HI", is generated by the device:
→ check the process.
→ if the process is not faulty, check the flow sensor condition and clean it if necessary.
→ if the flow rate measurement is still faulty, contact the Bürkert retailer.
• The transistor output or either relay output can be configured to switch when a warning message is generated by the device. See chap. 8.6.5.
• See also "If you encounter problems" in chap. “9.5”
→ If you do not want to adjust another parameter, confirm the "END" parameter to save the settings or not and
go back to the Process level.
59
English
Type 8045
Operating and functions
8.8.
Details of the Information menu
• This menu is available when the device status LED is orange or red.
• For the meaning of a message, go to chap. “9.5.4” and “9.5.5”.
To access the Information menu, press the
key for at least 2 s, in the Process level.
In this menu read the fault and warning messages generated by the device.
MESSAGE 1
MESSAGE 2
0......9
MESSAGE Z
ENTER
END
1)
or
Process
level
1)
If the ENTER key is unlocked.
Fig. 62:
Diagram of the Information menu
60
English
Type 8045
Maintenance and troubleshooting
9.
MAINTENANCE AND TROUBLESHOOTING
9.1.
Safety instructions
DANGER
Risk of injury due to high pressure in the installation.
• Stop the circulation of fluid, cut off the pressure and drain the pipe before loosening the process connections.
Risk of injury due to electrical voltage.
• Shut down the electrical power source of all the conductors and isolate it before carrying out work on the
system.
• Observe all applicable accident protection and safety regulations for electrical equipment.
Risk of injury due to high fluid temperatures.
• Use safety gloves to handle the device.
• Stop the circulation of fluid and drain the pipe before loosening the process connections.
Risk of injury due to the nature of the fluid.
• Respect the prevailing regulations on accident prevention and safety relating to the use of aggressive fluids.
WARNING
Risk of injury due to non-conforming maintenance.
• Maintenance must only be carried out by qualified and skilled staff with the appropriate tools.
• Ensure that the restart of the installation is controlled after any interventions.
9.2.
Cleaning the device
The 8045 flowmeter can be cleaned with a cloth dampened with water or a detergent compatible with the materials the device is made of.
Please feel free to contact your Bürkert supplier for any additional information..
9.3.
Cleaning the flow sensor
NOTE
• use a cleaning product that is compatible with the materials the flow sensor is made of.
• Do not use any abrasive acting materials.
61
English
Type 8045
Maintenance and troubleshooting
NOTE
After cleaning of the flow sensor:
• Rince the flow sensor.
• Check the seals and replace them if necessary.
• Before commissioning calibrate the flow zero point.
To prevent any measurement error due to deposits on the electrodes, clean the wetted parts regularly (cleaning
frequency depends on the process).
9.4.
Replacing the seal on a 8045 with G2" nut
NOTE
Do not scratch the seal groove.
1
2
Seal
3
Fig. 63:
Dismounting of the flowmeter and location of the seal
→ Loosen the nut of the flowmeter (mark 2).
→ Remove the flowmeter (mark 1) from the fitting.
→ Remove the seal from the groove.
→ Clean the seal groove.
→ Insert the new O-ring seal in the groove (see chap. 10).
→ Insert the flowmeter into the fitting.
→ Tighten the nut (mark 2) by hand on the flowmeter.
62
English
Groove
Type 8045
Maintenance and troubleshooting
9.5.
If you encounter problems
9.5.1.
Resolution of problems when the device status LED is OFF
Device
status
LED
OFF
Current
output
AO1
0 mA
Output DO1
and/or DO2
and/or DO3
low level
Message
displayed
Possible cause
Recommended action
"PWRFAIL"
The supply voltage is too
low.
→ Check that the supply
The device does not
function.
voltage is between 18 and
36 V DC.
→ If the problem occurs again,
take contact with Bürkert.
OFF
0 mA
not switched
-
→ Check the wiring.
The device is not
energized.
→ Check the fuse of the
installation and replace it if
necessary.
→ Check that the installation is
not shut-down.
→ Check that the power source
is working properly.
9.5.2.
Resolution of problems without message generation but
device status LED ON
Device
Current
status LED output
AO1
any colour 4-20 mA
any colour
0 mA
Output DO1
and/or DO2
and/or DO3
depending on
the thresholds
or switched 1)
Problem
Recommended action
Access to the Parameters and Test menus is
impossible.
→ Check the position of the "ENTER key
depending on
the thresholds
or switched 1)
The current output
transmits 0 mA.
→ Check the wiring of the current output.
lock/unlock" switch. See chap. “7.3.3”.
→ Check the fuse of the installation and
replace it if necessary.
→ Check the position of the sink/source
switch. See chap. “7.3.4”.
→ If the problem occurs again, take contact
with Bürkert.
The current output
transmits a value
between 0 and 4 mA.
→ Switch the device power supply off then
on.
→ If the problem occurs again, take contact
with Bürkert.
63
English
Type 8045
Maintenance and troubleshooting
Device
Current
status LED output
AO1
any colour 4 mA
any colour
any colour
any colour
any colour
any colour
20 mA
Output DO1
and/or DO2
and/or DO3
depending on
the thresholds
or switched 1)
Problem
Recommended action
The current output
transmits 4 mA
whatever the displayed
flow rate value.
→ Check the configuration of the current
depending on
the thresholds
or switched 1)
The current output
transmits 20 mA
whatever the displayed
flow rate value.
→ Check the configuration of the current
The current output
transmits a value
between 22 and
30 mA.
→ Switch the device power supply off then
depending on
the thresholds
or switched 1)
The current output
transmits a value >
30 mA.
→ Check the wiring of the current output.
depending on
the thresholds
or switched 1)
The current value transmitted on the AO1
current output does not
correspond to the displayed flow rate.
→ Check the configuration of the current
22-30 mA depending on
the thresholds
or switched 1)
30 mA
4-20 mA
4-20 mA
The DO2 and DO3 outputs do not
switch whatever the displayed flow rate
value.
output. See chap. “8.6.6”.
output. See chap. “8.6.6”.
on.
→ If the problem occurs again, take contact
with Bürkert.
→ If the problem occurs again, take contact
with Bürkert.
output. See chap. “8.6.6”.
→ Check the OFFSET and SPAN param-
eters of the current output. See chap.
“8.7.1”.
→ Check the parameters of the DO2 and
DO3 relay outputs. See chap. “8.6.11”.
→ Check the flow rate unit.
→ Check the behaviour of the outputs. See
chap. “8.7.3”.
1)
If the output is configured to switch when a warning message is generated. See chap. 8.6.5.
64
English
Type 8045
Maintenance and troubleshooting
9.5.3.
Device
status
LED
green
Resolution of problems without message generation and
device status LED green
Current
output
AO1
4-20 mA
Output DO1
and/or DO2
and/or DO3
depending on
the thresholds or
switched 1)
Possible cause
Recommended action
The device does not properly
measure the flow rate.
→ Check that the K factor corresponds to the fitting used.
→ Check that the Kw coefficient has
not been disturbed.
→ Carry out a teach-in procedure
green
4-20 mA
depending on
the thresholds or
switched 1)
to determine the K factor of the
fitting used.
The displayed flow rate is not → Check that the flow rate in the
nil but the flow rate in the pipe
pipe is nil.
is.
→ Check that there are no bubbles in
the pipe.
→ Check the filter chosen.
green
4-20 mA
depending on
the thresholds or
switched 1)
The displayed flow rate is
always nil.
→ Calibrate the flow zero point.
→ Check that the flow rate in the
pipe is not nil.
→ Check that the K factor or the Kw
coefficient are not too low.
→ Check that the electrodes are perpendicular to the flow direction.
→ Choose a smaller flow rate unit or
green
green
1)
4-20 mA
4-20 mA
depending on
the thresholds or
switched 1)
The displayed flow rate is not
stable.
depending on
the thresholds or
switched 1)
The displayed flow rate
changes very slowly.
increase the number of displayed
decimals..
→ Check that there is fluid in the pipe.
→ Choose a higher filter.
→ Check that there is fluid in the pipe.
→ Choose a lower filter.
If the output is configured to switch when a warning message is generated. See chap. 8.6.5.
65
English
Type 8045
Maintenance and troubleshooting
9.5.4.
Device
status
LED
red
Resolution of problems without message generation and
device status LED red
Current
output
AO1
22 mA
Output DO1 Message
and/or DO2 displayed
and/or DO3
depending on "ERROR3"
thresholds
Possible cause
Recommended action
The user parameters and
the factory calibration are
lost.
→ Start the device again.
The device measures
wrong values.
red
22 mA
depending on "ERROR4"
thresholds
The totalizer values are
lost.
The values saved upon
the next to last power
down are retrieved.
→ If the problem occurs again,
take contact with Bürkert.
→ If the "LIN.LOST" message is
also generated, take contact
with Bürkert.
→ Start the device again.
→ If the problem occurs again,
take contact with Bürkert.
red
22 mA
depending on "ERROR5"
thresholds
Both "ERROR3" and
"ERROR4".
→ Take contact with Bürkert.
red
22 mA
depending on "ERROR6"
thresholds
Totalizers definitely lost.
→ Start the device again.
Both totalizers are reset.
→ If the problem occurs again,
take contact with Bürkert.
red
22 mA
depending on "ERROR7"
thresholds
Both "ERROR3" and
"ERROR6".
→ Take contact with Bürkert.
red
22 mA
depending on "MEAS.
thresholds
OVF"
The flow rate in the pipe
is > 12 m/s.
→ Check the flow rate in the
pipe.
→ If necessary, adjust the flow
rate.
→ If the problem occurs again,
take contact with Bürkert.
red
22 mA
depending on "BAD
thresholds
MEAS."
The measuring signal is
disturbed.
→ Check if there is liquid in the
The device does not
measure the flow rate
correctly.
→ Check the liquid does not
pipe.
contain any air bubble.
→ Check the equipotentiality of
the installation.
→ If the problem occurs again,
take contact with Bürkert.
66
English
Type 8045
Maintenance and troubleshooting
9.5.5.
Device
status
LED
orange
orange
orange
orange
orange
orange
orange
1)
Resolution of problems without message generation and
device status LED orange
Current
output
AO1
4-20 mA
Output DO1
and/or DO2
and/or DO3
Switched 1)
4-20 mA Switched 1)
4-20 mA Switched 1)
4-20 mA Switched 1)
4-20 mA Switched 1)
4-20 mA Switched 1)
4-20 mA Switched 1)
Message
displayed
Possible cause
Recommended action
"PULS.
OVF"
The value parametered
for the pulse output is
wrong (generated frequency is > 250 Hz).
→ Increase the value of the
"NEG.
FLOW"
The measured flow rate
is negative (although the
display shows a positive
flow rate).
→ Check that the reverse fluid
"WARN.
LOW"
"WARN.
HIG"
The measured flow rate
is below the authorized
low limit.
This message appears
when the flow rate
is monitored (see
chap. 8.7.5).
The measured flow rate
is above the authorized
high limit.
This message appears
when the flow rate
is monitored (see
chap. 8.7.5).
"DISP. OVF" The real flow rate cannot
be displayed (display is
saturated).
"LIN. LOST"
"CAL. FAIL"
Except the display,
the device operates
depending on the earl
flow rate.
The factory calibration is
lost.
The device measures
wrong values.
The flow zero point calibration failed.
PU parameter (see chap.
“8.6.7”).
circulation has no consequences on the process.
→ Else, mount the device on
the pipe such as the arrow
on the housing indicates the
flow direction.
→ Check the flow rate in the
pipe and its consequences
on the process.
→ If necessary, clean the flow
sensor then calibrate the flow
zero point.
→ Check the flow rate in the
pipe and its consequences
on the process.
→ If necessary, clean the flow
sensor then calibrate the flow
zero point.
→ Adjust the unit or the number
of decimals in the UNIT
parameter of the Parameters
menu so that the display can
show higher values.
→ Take contact with Bürkert.
→ Follow the calibration conditions described in chap.
8.7.2.
If the output is configured to switch when a warning message is generated. See chap. 8.6.5.
67
English
Type 8045
Spare parts and accessories
10.
SPARE PARTS AND ACCESSORIES
ATTENTION
Risk of injury and/or damage caused by the use of unsuitable parts.
Incorrect accessories and unsuitable replacement parts may cause injuries and damage the device and the surrounding area.
• Use only original accessories and original replacement parts from Bürkert.
Spare part
Cover in PC, with lid, incl. window, screws and sticked foil
Cover in PPA, with lid, incl. window, screws and sticked foil
Set including:
Order code
553189
553190
• 2 M20x1.5 cable glands
• 2 CR flat seals for cable glands or screw plugs
449755
• 2 M20x1.5 screw plugs
• 2 multiway seals 2x6 mm
Set including:
• 2 M20x1,5 / NPT 1/2" reductions (mounted o-ring)
• 2 CR flat seals for the screw plugs
551782
• 2 M20x1.5 screw plugs
Set including:
• 1 stopper gasket for an M20x1.5 cable gland
• 1 multiway seal, 2x6 mm, for cable gland
558102
• 1 green FKM seal
• 1 mounting instruction sheet
Snap ring
PC nut for PC housing
PPA nut for PPA housing
Set including:
619205
619204
440229
• 1 green FKM seal
552111
• 1 black EPDM seal
EPDM seal (for a 8045 with a clamp connection)
FEP seal (for a 8045 with a clamp connection)
Clamp collar
Set of:
730837
730839
731164
565384
- 1 stopper gasket for an M20 x 1,5 cable gland
- 1 multi-way seal, 2 x 6 mm, for a cable gland
68
English
Type 8045
Packaging, Transport
11.
PACKAGING, TRANSPORT
NOTE
Damage due to transport
Transport may damage an insufficiently protected device.
• Transport the device in shock-resistant packaging and away from humidity and dirt.
• Do not expose the device to temperatures that may exceed the admissible storage temperature range.
• Protect the electrical interfaces using protective plugs.
12.
STORAGE
NOTE
Poor storage can damage the device.
• Store the device in a dry place away from dust.
• Storage temperature of the device: -20 to +60 °C.
13.
DISPOSAL OF THE PRODUCT
→ Dispose of the device and its packaging in an environmentally-friendly way.
NOTE
Damage to the environment caused by products contaminated by fluids.
• Keep to the existing provisions on the subject of waste disposal and environmental protection.
note
Comply with the national and/or local regulations which concern the area of waste disposal.
69
English
Type 8045
Packaging, Transport
70
English
www.burkert.com