Transcript
Design
MIDDLETON SINGLE
HANDLE TUB &
SHOWER FAUCET
Models 545772, 545764, 545756
House
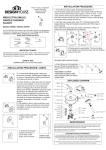
1. Shut off main water supply. Preparation/Assembly of
recommended component locations: Valve depth should be front of
valve to front of the finished wall of approx. 2-3/16" (1=7/8" - 2-1/2"
max); Shower and/or spout outlet hole should be 1-1/4" diameter,
and Valve access hole should be 6" diameter. Caution: Allow at least
2" between the tub outlet and tub rim.
2. Connect water supply lines using 1/2” threaded pipes and 90
degree elbows. Wrap all threaded connections with Teflon tape or
joint compound.
Note: water limit screw stops are preset at the factory if they are
present on valve. Modification is not required.
m)
00m mm)
0
(12
48” ”(150
0
6
-
m)
.2m
203
8”(
Pipe should stick outside
finished wall by 4”
3. Plaster guard is preinstalled. The front surface
of the plaster guard should sit flush with the finished
surface of the wall.
Wrap threaded connections (except where o-ring or rubber sealant are present)
with Teflon tape available from your local hardware or plumbing supply store.
Always wrap in a clockwise direction.
INSTALLATION PROCEDURE, CONTD.
5
6
) )
mm m
(35 0m
/8” 6”(8
1 1 3/1
-3
5.
Pipe should stick outside
finished wall by 4”
4.
4
4
4
Thread shower head onto shower
arm.
6. Slip the spout onto the pipe
and tighten the screw to hold
spout in place.
7
7. To remove the plaster guard, loosen and
remove the 2 screws. Pull the guard straight out
to remove. Discard before installing escutcheon.
Trim sleeve will remain in place.
7a. Place handle on valve stem and turn handle to full on mixed
position. Turn on hot and cold water lines to full open for one minute
each. Check for leakage. Shut off water at faucet. Remove the
Handle. REMARK: Adjust the water temperature by adjusting the
red rotational limit. Remove the rotational limit stop from the valve
by sliding it off the stem. Rotate counter clockwise to increase
temperature or clockwise to reduce temperature. Re-install in
correct position.
8
8. With gasket in place, slide escutcheon over
trim sleeve. Fasten escutcheon to faucet body
and tighten to finished wall surface using two
mounting screws.
Handle
01
Screw
02
Color button
03
Cover
04
Escutcheon
05
25
08
Screw
24
Plaster
Screw
20
Spout
26
Washer
27
Plug
23
Gasket 06
Shower
Trim sleeve 07
Nut 13
O-ring 14
Valve stem 15
O-ring 16
Spring 17
09
Cartridge
10
O-ring
11
Body
12
Diversion valve
22
Shower arm
21
Flange
Spool 18
Washer 19
9
10
9. Slide handle onto
shaft.
10. Insert screw through
handle and thread to
faucet body. Insert
button over set screw.