1
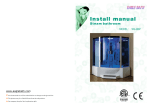
STEAM BATHROOM
MODEL : WS-9090K
Your best choice!
No advanced advice will be submit before we change our design and size.
The pictures may be a little different from the real products.
Our company keep the final explanation right.
TECHNIQUE PARAMETER
Voltage
Frequency
Water Volatge
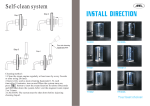
Self-clean system
Power of steam generator
Step 2
Step 1
Ac110 V
60H Z
0.1~0.2Mpa
2.65KW
CONSTRUCTION SKETCH
Pour into cleaning
liquid from here
Handrail
Step 3
Step 4
Moveable shower
Glass door
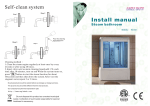
Cleaning method:
1.Clean the steam engine regularly at least once by every 2weeks
or after using 20 times.
2.Inject citric acid as main cleaning liquid,add 1.5L each
time.after 10 minutes, turn on and When the system turns on,
press“
”button to start the steam function for about 30seconds
and then shut down the system.After vent the stagnant
water,repeat 2 or 3 times.
3.CAUTION: The system must be shut down before injecting
SIZE:920x920x2170 mm
36.2″x3 6 . 2″x 8 5 . 4″
14
CONSTRUCTION SKETCH
Packing list
Packing 1
Packing 2
two pieces of glass body,two pieces of fixed glass
door,two pieces of sliding glass door, two pieces of
aluminum column , two pieces of U shaped plastic seal ,
four pieces of water resist strip.
1
11
12
one tray,one roof, two pieces of up and down bended
aluminum column with eight pieces of wheels.
13
2
one piece of post,one pieces of steam pipe.
Packing 3
Spare parts list
3
one set shower,two pairs of “ ” shaped handle,eight
pieces of wheel with cover,one set of glass towel shelf,
M6*25 screws(1),M6*35 screws(2),ST4*20
screws(3),ST4*25 screws(4), ST4*20 screws(5),one
instruction.
4
15
5
6
7
SCREW (1)
M6x25
4pcs
8
SCREW (2)
M6x35
4pcs
9
SCREW (3)
St4x20
4pcs
SCREW (4)
St4x25
St4x20
8pcs
SCREW (5)
14
10
20pcs
16
17
1、e x haust f a n
2、r o o m body
3、mirror
4、temperature sensor
5、c o n trol p a n e l
6、shift switch
13
WS-9090K
7、c o ld/h o t w a t er swit c h e
8、n o zzle
9、s e at
13、b a c k light
1 0、s team o u t
14、m o v eabl e s h o w er
1 1、t op show e r
15、h a n dril
1 2、r oof lam p
16、d r a inag e
17、b o t tom tray
WS-9090K
02
ATTENTION
INSTALLATION SKETCH
2 1 7 0 ( 8 5.4″)
150 ″)
(5.9
The socket
of power and
the socket
of telephone
Cold water pipe
Hot water pipe
1800
(70.9″)
1250
(49.2″)
160 (6.3″)
32
7(
12
.9
″)
32
7(
12
.9
)
″
92
0(
″
)
.9
12
7(
32
36
.2
″
)
Other screws
32
7(
M4x15 M4x25
12
.9
92
″
)
0(
36
.2
″
)
Install the screw
M6x25
Active chain wheel of glass
SIZE:920x920x2170 mm
3 6 . 2″x36.2″x85. 4″
ILLUSTRATION OF INSTALLATION
1.The products should be installed by technical guy who are got
the certificate or those technical who are assign by dealers. The
main power switch and electronic leakage device should be
installed.
2.The plug of electronic should be installed above the steam
generator and the length of electronic wire not less then
1800MM from the earth.
3.There are should be with main power switch for hot and cold
water pipe of steam room and the water pipe should be connect
to drainage water pipe.
4.Install the products according to the diagram of installation
When fixed the place for the products.
03
1.In order to be tripped and fell down, pay more attention when get into the
steam room. Please don't shut the finger in the door in order to be hurt.
2.In order to avoid damaging the surface of products please do not use hardness
and sharpness tool to curve the products.
3.In order to course fire, no smoking inside the bathroom.
4.the jets of steam and drainage pipe both are high temperature when products
working, in order to be hurt please be careful.
5.In order to be tripped and fell down please keep clear of the bathtub after
taking shower each time.
6.It will be leaking if the glass glue plastic sheet be off then please add some
more for recover.
7.If there are marks of water please clear with soft cloth and toothpaste.
8.In order to be blocked of drainage device please keep clean of the surface of
bathtub.
9.Please do not hang up heavy things on the steam room or the handle of steam
room.
10.Please deal with the products according to the local laws when it is no longer
be use.
11.Any request please contact with local dealer.
ATTENTION FOR USAGE
1 check if power and cold/hot water switch be turn on or be turn off each time before use
this product.
2 check if power of electronic leakage device be get through or not.
Checking way:
Press testing button, light of power be off, press button of restart then light of power be
on.It is not being what mentioned above after operated step by step,then that shows
the electronic protection device out off control or there is something wrong with the
electronic leakage device,so should ask professional to check and maintain the
product.
3
Turn off the main power of control panel after stop usage. The plug of power should be
pull out because only turn off all the functions of control panel that is not stop the
power.
4
People with hypertension or drunk are not allowed to have sauna steam bath.
5
Children should have sauna steam bath under adult's instruction.
6
Please don't shut the finger in the door in order to be hurt when get into the steam
room.
7
In order to be tripped and fell down, pay more attention when get into the steam room.
8
keep clean of the tray in order to be tripped and fell down.
9 Pay attention to the steam sprayer and water tank drainage, they are in high temperature
while working.
-۹٠۹٠WSK
12
Attention:
The machine must be fixed in the circuit which protected
by creepage protectionand should be well-connected with the
ground. Nontechnical people can not be fixed or removed at
random.
INSTALLATION PROCESS
1.Assembly of tray
If the ground is not smooth,please adjust
the nail under the tray to keep the balance
of the tray and ground.
STEP 1
6、Technical parameter
Model
Voltage
Current
KL-824
110V
25A
Fan
3.5W
Top light
20W
AC12V
Sidelight
5W
AC12V
DC12V
Power
2650W
protecting electrifying
I
Waterproof Grade
Ip4
Water inlet valve Water drain valve
6W
DC12V
7W
DC12V
2 Install the shower body
Follow the installation process install
the left and right side shower body,fix
it with ST4*20 screws.
STEP 2
M6X35
3. Install the shower body onto the tray
Put the shower body onto the tray,fix it.
11
STEP 3
-۹٠۹٠WSK
04
4. Assembly of fixed glass door.
STEP 4
4X25
Active chain wheel of glass
5. Assembly of sliding door
put the sliding door onto the up
and down aluminum track to keep
it balance.
(1) The electrical pitch
Press
pitch can open the machine, the temperature
is the room temperature.The time will show 30m. At the same
time, it will open the ceiling lamp.Press again will close all the
functions. (After the closure of the machine, the water case
will drainfor 2 minutes)
(2) The application of the back lamp
Press
,the sidelight is on. Press
again, the ceiling
lamp is out, press
a third press, the sidelight is out too.
3) The steam function
Press
,startup the steam function, the water case
will pump water automati-cally. After 60minutes or so, it
will generate steam. (When the water case is lack ofwater,
the controller will replenish automatically)
(4) The air draft function
Under the condition of turnning on, press
can start
up air draft function, pressagain will colse it.
(5) The setting of time or temperature
1. Press
pitch can adjust the time from 1-99.
2. Press
pitch can adjust the temperature from
30-60 .
C
05
C
STEP 5
-۹٠۹٠WSK
10
6. Install the glass door onto the tray
Put the plastic pad onto the aluminum
post of glass door,if the length of the
plastic is not suitable for the aluminum
post,you can cut it in suitable size,then
put it on the tray,screw with bolts.
4X20
1
4
2
5
3
6
7
8
C
M6X25
St4X20
C
1
Time adjustment pitch+
5
Temperature adjustment pitch-
2
Temperature adjustment pitch+
6
Fan Pitch
7
8
Steam Pitch
St4x20
3
CeilingLamp/Back Lamp pitch
4
Time adjustment pitch-
09
STEP 6
Main Cock Pitch
STEP 7
7. install the roof
Leave the roof onto the top of shower
body,then fix tightly with bolts.Then
install spare parts.
A. Finish assembling the whole set,in
order to aviod water and steam
leaking,except the position of sliding
glass door do not use the silicone, the
silicone should be used on all else
connecting position .
B. While connecting the cold and hot
water pipe,wipe the silicone on the
connecting mouth to make it will be
connected very well.
C . S k e t c h m a p o f p i p e
connection(show as the picture).
D. Assembly of spare parts(shower
and so on)
Afer all spare parts have been
installed well,put on the power
supply and cold/ hot water switch to
check whether all functions work
06
DRAWING OF WATER CONNECTION
ELECTRIC CIRCUIT SKETCH
nstructions :
1.You should install the water heater yourself.
2.As the“ ”“ ”from the picture,please make the
connection according to the serial number
v1,v2,etc.
clean system
steam outlet
water inlet
Power
Top shower
Water
heater
clean system
Acupuncture sprayer
Steam
generator
Earth line
07
Drainage
Steam out
water outlet
Moveable shower
Water in
Control
panel
Light
(AC12V)
Fan
(DC12V)
08