Transcript
MSCL12
Installation Instructions
IMPORTANT INSTALLATION TIPS
- The sub-floor must be level or floor could flex. In addition to causing squeaking, over
time the locking system could weaken or the tongues may crack causing gaps or loose
boards.
- Like all wood floors, a floating (glueless) floor expands and contracts with seasonal
changes. Do not put fasteners (nails, screws, etc) through the floor or “pinch” the floor
under doorways, etc. This could cause the floor to pull apart or buckle because it is not
allowed to “float” freely.
- All wood floors require a relative humidity level between 35-55% to perform optimally
without gapping, cupping, etc. A humidifier may be required during the winter in some
homes to achieve these humidity levels.
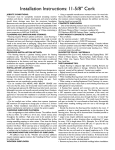
-To disengage boards, lift long side to a 45-degree angle and remove (see figure 4).
- PLEASE NOTE THESE ARE IMPORTANT TIPS TO REMEMBER: PLEASE READ THE
INSTALLATION INSTRUCTIONS THOROUGHLY BEFORE BEGINNING INSTALLATION.
PRE-INSTALLATION GUARANTEE
Although each board is subject to stringent quality assurance checks before it leaves
our factory, the installer should inspect again before installation. Any defects should
be reported, and we will immediately arrange for replacements to be provided.
We offer a pre-installation guarantee of our products returned unused/unopened.
PRE-INSTALLATION PLANNING (REQUIREMENTS)
-Engineered flooring can be installed on grade, above grade or below grade. Glue down
installation are available by contacting Technical Services at 1-800-258-5758.
-Prior to installing the floor, the building must be structurally enclosed, including
installation of exterior windows and doors.
-Heating and cooling systems must be fully operational at least 14 days prior to
flooring installation, maintaining a minimum room temperature of 60 degrees F.
-Gutters, downspouts and exterior grading, should direct drainage away from the
structure’s foundation.
-Basements and crawl spaces must be dry and well ventilated. A 6-mil polyethylene
(poly) film must cover the ground of all crawl spaces; seams must be overlapped and
taped.
-Decide the direction the flooring will be installed. Planks should be installed
perpendicular to the flooring joists. Flooring will be accented best, if installed parallel
to windows (if possible).
-Preplan the number of rows (base off of board width) required to finish the installation.
The final row will normally be narrower and have to be ripped lengthwise. If possible, the
last row should be wider than 2”. You may want to rip both the first and last rows to balance
the installation. If a row must be narrower than 2”, it is recommended to use carpenters
glue to secure the narrow boards to the adjoining full row. Remove any base, or shoe
moldings and interior thresholds. These can be replaced after the floor has been installed.
Undercut doorjambs to allow for expansion, and avoid difficult scribe cuts. This can be
easily done by using a small piece of the flooring as a guide for your handsaw. (Figure 1)
-Do not use flooring planks or stair nose moldings to build stair treads. Stairnose
moldings are designed to transition the floor to a step down or set of stairs, not for
individual stair construction.
- The use of putty to fill small gaps or correct minor defects should be considered
normal in any hardwood installation. When using putty on a low gloss (sheen) finish,
apply putty with a plastic putty knife and remove excess immediately with a soft cloth
to prevent gloss up of finish.
-Always install from various boxes to ensure accurate mix of color and grade. This is
extremely important when working with wood species or grades that have natural color
variation.
- Never install Engineered Flooring flush to any vertical obstruction. For 3/8” products
allow at least 3/8” expansion and for 1/2” products allow at least 1/2” expansion
space around all vertical surfaces. In areas measuring more than 24 lineal feet in either
direction (width or length), use an additional 1/4” expansion for each additional 12 linear
feet (i.e. for a 3/8” product, in a room that measures 36’ x 36’ you would leave 5/8”
expansion around all vertical surfaces which can be covered by your choice of molding).
-Your Engineered Floor flooring is NOT guaranteed if it is installed in a full bath.
Subfloor Requirements
-The subflooring must be flat, firm, structurally sound, clean and dry prior to installation.
The subfloor should be flat to within 3/16” in 8’.
- Note: Subfloor Irregularities that cause wood flooring installations to develop
movement or hollow spots between the subfloor and the wood flooring, are
NOT the result of manufacturing defects and are not covered by warranty.
- Wooden Subfloors should be checked for moisture using a reputable manufacturer’s
moisture meter, designed for use with wood flooring. In general, wood or
plywood subflooring should not exceed 14% moisture content, with a maximum
moisture variance not to exceed 4% difference between the flooring and subfloor.
3.75”, 4.25” & 4.75” Click Floors
Suggested Tools and Materials
- 6 mil polyethylene film (if needed)
- Roberts Tongue & Groove Adhesive #1406
- Foam underlayment
- 3/8” wood or plastic spacers
- Measuring tape
- Safety glasses
- Chalk line
- Square
- Pencil
- Wood chisel
- Circular or rip saw
-Jamb saw
For Concrete Subfloors
When flooring is installed directly to a concrete subfloor, one of the moisture tests
(below) is recommended. Keep documentation of all moisture testing. In any situation
when test results indicate moisture exceeding the guideline for that test DO NOT INSTALL
THE FLOORING. Most excessive moisture issues can be corrected easily (sealing,
etc.) When corrected, retest your floor to insure moisture guidelines have been met.
Concrete Test Methods
- Calcium Chloride Test (maximum 3.0 pounds)
- Tramex Moisture Meter (maximum reading of 4.5)
- Delmhorst BD 2100 Moisture Meter (reading of green/dry)
Installing Floor
- Roll out foam underlayment (follow instructions inside packaging). If you are
using an underlayment that does not have a vapor barrier attached; loose lay
6 mil poly sheeting with the seams overlapped 8", taped with clear packaging
tape and lapped up the wall but not touching the sheetrock. Then roll out
underlayment butting edges. For installations over a plywood subfloor it is not
necessary to use an underlayment with a vapor barrier attached or poly sheeting.
- Begin laying the floor in the left corner of the room.
ALL BOARDS SHOULD BE INSTALLED WITH THE TONGUE SIDE FACING THE WALL.
(Figure 2) Note: slightly bowed (curved) boards can be installed and are
not considered defective.
- Begin installing the first row by laying a board down flat on the subfloor (Figure 2).
Apply a thin bead of glue to the short end of the first board, align the end of the second
board with the first and join the two boards together by simply pushing it straight down
on top of the first board Repeat this step to install the remaining boards in the first &
last rows only. Subsequent rows do not require end gluing. (It is recommended to weigh
the first row down until the glue has time to set) If leftover piece is 12" or longer, use
it to begin the next row.
- Insert spacers between the first row and the walls in order to maintain the
appropriate amount of expansion space around the perimeter of the floor. (Fig. 3)
- Always stagger the end joints of adjacent rows a minimum of 12".
- Start the second row by holding the long side of the board at approximately a
45-degree angle to the first board in the first row. Engage the sides by rotating
the board towards the floor while pushing it against the edge of the first board.
- You cannot force the boards together. If boards are not lying flat, they were not
aligned evenly during engagement. Start this step over. Insure the edges of both
boards meet evenly by applying equal pressure while rotating the board down.
- Continue installing the second row and cut the last board to size just as you did in the first.
- Install the third row in the same manner as described above. Once three
rows have been installed, re-check the spacers to ensure they are tight against
the wall. If necessary, adjust the floor to ensure the installation is square.
- When working under doorjambs or toe kicks of cabinets, there will not be enough
clearance to achieve the 45-degree angle required to engage the sides. It will be
necessary to trim away the raised portion on the groove side using a wood chisel and
glue the boards together using a high quality carpenter's glue. (Figure 5)
- The boards in the last row will need to be cut to the necessary width. Remember to
allow the appropriate expansion space between the last row and any vertical surface it
adjoins. Mark the board to the correct width and contours of the wall.
- After the floor is completely installed, remove spacers, install molding and thoroughly
clean the floor with an approved wood floor cleaner. Never cover a newly installed floor
with plastic. Always use a breathable material such as craft paper or cardboard.
Groove Side
Figure 1
Figure 3
Figure 2
For glue down installation
instructions call 1-800-258-5758
THIS PRODUCT CANNOT BE STAPLED/NAILED DOWN
WARNING Installation of wood products may create wood dust, which is known to the
State of California to cause Cancer. Avoid inhaling wood dust or use a dust mask or other
safeguards for personal protection.
Figure 4
Figure 5
01042011MSCLK
