1
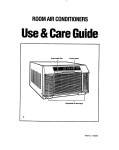
ROOMAIRCONDITIONERS
Use& CareGuide
1. Air louvers
2. Air direction tab
3. Front panel (some models have
a different style front panel)
4. Control panel
5. Side curtains (on some models)
PART NO. 1166976
Contents
Page
Page
2
A Note to You ...................................................................
Safety ....................................................
Air Conditioner
Important
Safety Instructions
Operating
Instructions
Starting
.........................................
....................................................
...................................
your air conditioner
Using the exhaust
control
(on some models).
Changing
air direction
Cleaning
3
Cleaning
.............................................
6
......................................................
Instructions
3
6
the front panel ...........................................
the air filter ................................................
6
4
Performing
...................................
7
4
paint damage ...........................................
Normal operating sounds ........................................
..............................................................
Troubleshooting
6
...... 5
Using the ENERGY SAVER settings
(on some models) .....................................................
Cleaning
Annual
Maintenance
Repairing
5
Requesting
5
Ordering accessories .............................................
Warranty .........................................................................
Assistance
or Service.. .............................
6
9
11
1-i
12
A Note to You
Thank
you for buying
this
appliance.
Please
record
your
model’s
information.
To ensure you enjoy years of trouble-free operation, we
developed this Use and Care Guide. It contains valuable
information about how to operate and maintain your
appliance properly and safely. Please read it carefully.
Also, please complete and mail the Product Registration
Card provided with your appliance. This card helps us
notify you about any new information on your appliance.
Whenever you call to request service on your appliance,
you need to know your complete model number and
serial number. You can find this information on the model
and serial number label. (See fnstallation Instructions for
model and serial number location.)
Please record the model and serial number information
below. Also, record the purchase date of your appliance
and the store’s name, address, and telephone number.
Model Number
Store Name
Serial Number
Store Address
Purchase Date
Store Phone
Keep this
2
book
and sales slip together
in a safe place for future
reference.
Air Conditioner
Your
safety
is important
Safety
to us.
This guide contains safety symbols and statements.
Please pay special attention to the symbols and follow any
instructions given. Here is a brief explanation of the use of
the symbol:
IMPORTANT
q
This symbol alerts you to hazards such as
fire, electrical shock, or other injuries.
f
0
SAFETY INSTRUCTIONS
WARNING - To reduce the risk of fire, electric shock, or injury when using your air conditioner, follow these
basic precautions:
l Plug into a grounded 3 prong outlet.
l Do not remove ground prong.
l Do not use an adapter.
l Do not use an extension cord.
l
l
l
Unplug air conditioner before servicing.
Use two or more people to move or install
air conditioner.
Do not drink water collected inside the cabinet.
- SAVE THESE INSTRUCTIONS
It is your
l
l
l
responsibility
-
to:
Install the unit in a window that will hold the weight and
secure it according to the Installation Instructions.
Connect the unit only to the proper kind of outlet, with the
correct electrical supply and grounding. (Refer to “Meeting electrical requirements” in the Installation Instructions).
Make sure the unit is the correct size for the area you
want to cool.
3
Operating
Instructions
Electrical Shock Hazard
Plug into a grounded 3 prong outlet.
Do not remove ground prong.
Do not use an adapter.
Do not use an extension cord.
Failure to follow these instructions
can result in
death, fire, or electrical shock.
Starting
your air conditioner
See Figures
1-6 for control panel variations. This manual
covers several different models. The model you have purchased may have all or some of the control panel variations
shown here, and they may not match the illustration exactly.
1. Set the Fan or System Control to the desired setting.
HI/HIGH COOL/
QUICK COMFORT ......................... for maximum cooling
MED/MEDIUM COOL ......................... for normal cooling
LO/LOW COOL ............................... for sleeping comfort
FAN ONLY (on some models) ............ .. for circulating air
without cooling
The Fan or System Control settings determine the
amount of cool air coming from the louvers.
NOTES:
Set the Exhaust Control (on some models) to
CLOSED or maximum cooling.
l Set the control switch to COOL (on some models) for
cooling.
2. Turn the Thermostat to a mid-setting. For maximum
cooling, turn the Thermostat clockwise. For less cooling,
turn the Thermostat counterclockwise. Experiment and
find the setting that suits you best.
l
NOTES:
l
l
4
If you turn the air conditioner off, wait at least 3 minutes
before turning it back on. This prevents the air conditioner from blowing a fuse or tripping a circuit breaker.
Do not try to operate your air conditioner when
the outside temperature is below 65°F (18%). The
inside evaporator coil may freeze up and the air
conditioner may not operate properly.
Using
the exhaust
(on some
models)
control
The Exhaust Control allows you to circulate room air or
exhaust stale/smoky air.
l To circulate
room air (Figure 7) set Exhaust Control to
CLOSED.
l To exhaust
stale/smoky air set Exhaust Control to
OPEN.
Exhaust
l
l
control
tips
For maximum cooling efficiency, set the Exhaust Control
to CLOSED.
The Exhaust Control will only function when the System
or Fan Control is turned to an “on” setting.
Using the ENERGY
settings
(on some
SAVER
models)
The ENERGY SAVER settings are located on the System
Control (QUICK COMFORT/HI, MED, and LO). See
Figures 8 and 9. When these settings are selected, the
fan will cycle on and off as the Thermostat Control turns
the compressor on and off. This saves the cost of electrical
energy that would be used to run the fan continuously.
It is normal for the fan to turn on and off in the ENERGY
SAVER settings. The amount of time the unit will be off
depends on the room temperature and Thermostat
Control setting.
Energy
saving
tips
You can help save energy by reducing
conditioner’s
work load:
l
l
l
l
l
l
l
l
l
your air
Improve your home’s insulation. Seal doors and windows. Close fireplace flue.
Close blinds or drapes on the sunny side of your house.
Add awnings.
Check air filter often to make sure it is clean.
Do not block airflow with drapes or furniture.
Ventilate your attic. High temperatures in the attic add to
the cooling load of your air conditioner.
Try not to use heat-producing appliances during the
hottest part of the day.
Turn lights and appliances off when they are not needed.
Keep heat registers and cool-air returns closed.
Use exhaust/venting fans while cooking, bathing, and
doing laundry.
Changing
air direction
The louvers in the top of the front panel allow you to control
the direction of the cooled air. Use the tabs to direct the air
right, left, or straight ahead. See Figure 10.
r
Cleaning
Instructions
It is necessary to clean your air filter and front panel properly
for top performance and cleaner air.
Cleaning
the front
panel
1. Unplug the power cord.
2. Remove the front panel from the cabinet for easy cleaning. Press down on the top of the front panel and tilt
forward. Lift the front panel up and away from the bottom
spring clips. See Figure 11.
3. Remove the air filter and clean it separately if needed.
(See “Cleaning the air filter” below.)
NOTE: On some models with a slide-out air filter, you can
remove the air filter without removing the front panel.
4. Using a soft cloth, clean the front panel with warm water
and a mild soap or detergent. Rinse and dry thoroughly.
Wipe the control panel with a soft, dry cloth.
5. Replace the front panel. Set the bottom of the panel on
the cabinet spring clips. Push down and forward into the
cabinet to secure upper tabs.
6. Plug in the power cord.
Cleaning
the air filter
Your air conditioner’s air filter is removable for easy cleaning. A clean filter helps remove dust, lint, and other particles
from the air and is important for best cooling and operating
efficiencv. Check the filter everv 2 weeks to see if it needs
cleaning: Do not operate the ai; conditioner without the filter
in place.
For models with built-in filters (see figure 12):
1. Unplug the power cord.
2. Remove the front panel from the cabinet. (See “Cleaning
the front panel” above.)
3. Remove the elastic band holding the air filter in place.
Then remove the air filter.
4. Wash the air filter with warm water and mild detergent.
Do not wash the air filter in the dishwasher or use any
chemical cleaners. Air dry thoroughly before
replacing
to ensure
maximum
efficiency.
5. Replace the filter, elastic band, and front panel.
6. Plug in the power cord.
For models with slide-out
filters
(see figure
13):
4. Slide out the air filter up and out the top of the front panel.
2. Clean the filter using a vacuum cleaner attachment or
wash it in warm water and a mild detergent. Do not wash
the air filter in the dishwasher or use any chemical
cleaners. Air dry thoroughly before replacing to
ensure
maximum
efficiency.
3. Slide the air filter back down in the opening in the top of
the front panel.
Air filter
l
l
6
tips
Your air filter should be replaced once a year.
For information on ordering a new filter, see page 11.
Performina
Annual
Maintenanvce
Excessive Weight Hazard
Use two or more people to move and install
air conditioner.
Failure to do so can result in back or other injury.
Electrical
Shock Hazard
Unplug before doing any maintenance.
Do not drink water collected by the air conditioner.
Failure to follow these instructions
can result in
death, electrical shock, or sickness.
Your air conditioner needs annual maintenance to help
ensure steady, top performance throughout the year. Call
your local authorized dealer to schedule annual maintenance. The expense of this service is the consumer’s
responsibility.
068
If you are familiar with electrical appliances, you can do
the maintenance yourself. If you choose to do so, follow
these steps:
NOTE: Do not lift, push, or pull any gray Styrofoam from
inside the air conditioner.
1. Unplug the power cord.
2. Remove the air conditioner from the window.
continued
on next page
3. Remove the front panel. (See “Cleaning the front
panel” on page 6.)
4. Remove the side curtains (on some models). Slide
curtains out to fullest width. From the back side,
remove the Phillips-head screws which attach the
curtain to the cabinet (A). See Figure 14.
5. Remove slotted-hex head screws (B) holding top
channel. See Figure 14.
6. Remove slotted-hex head screws (C) on sides of
cabinet. See Figure 14.
7. Holding the cabinet on both sides, carefully lift cabinet
off base. Watch out for the sharp metal fins on the
front and rear coils.
8. Wrap the fan motor (E), capacitor terminals (F),
electrical control panel (I), and compressor terminals (J),
in plastic film and make sure no water or other liquid
gets inside any of these parts. It could damage the
insulation and cause serious mechanical problems.
See Figure 15.
9. Carefully clean and hose out the base (K), condenser
coil (D), evaporator coil (G), and condensate pan (H).
Clean at least once a year or more often if the condenser and evaporator coils and pan collect dirt, sand,
leaves, insects, or algae. Also, clean if you detect an
odor coming from the air conditioner. SW Figure 15.
10. Remove the plastic film from the motor and electrical
parts.
11. Replace the cabinet on the air conditioner and reattach
the front panel, top channel, and side curtains. Tighten
all screws.
12. Plug in the power cord.
NOTE: It is a good idea to wait 24 hours before starting
the air conditioner again. This allows time for all areas
to dry out.
Repairing
paint
damage
Check once or twice a year for paint damage. This may
occur, especially in salty environments (near oceans, etc.)
or where rust is a problem. If needed, touch up with a good
grade enamel paint.
NOTE: To reduce paint damage during the winter, install
a heavy-duty cover on your air conditioner’s cabinet. For
information on ordering a heavy-duty cover see page 11.
Normal
operating
sounds
When your air conditioner is operating normally, you may
hear such sounds as:
l A “pinging” sound caused from water droplets hitting the
condenser. This is an energy efficient design whereby
the water cools the condenser.
l Air movement from the fan.
l Clicks from the thermostat cycling on and off.
l Vibrations or noise due to poor wall or window
construction.
l A high pitched hum or pulsating noise caused by the
modern high efficiency compressor cycling on and off.
8
Q
Troubleshooting
You can solve many common air conditioner problems easily, saving you the cost of a service call. Try the suggestions
below to see if you can solve your problem without outside help.
Your
h
air conditioner
will
not operate
Then .. .
Firmly plug the cord into a live outlet with proper voltage.
A household fuse
has blown or circuit
breaker has tripped.
Replace the fuse or reset the circuit breaker. Make sure the air conditioner is plugged into a
properly grounded outlet as described in the Installation Instructions.
The Fan Control is
turned to the OFF
Turn the Fan Control to an active setting.
The local power has
Wait for power to be restored.
The unit
blows
fuses
or trips
circuit
breakers
your local utility company for the correct capacity.
conditioner too soon
The air conditioner
seems
to run too
much
Check if .. .
Then .. .
The current air
conditioner replaced
an older model.
The use of more efficient components may cause the air conditioner to run longer than
an older model, but the total energy consumption will be less. Newer air conditioners do not
emit the “blast” of cold air you may be accustomed to from older units, but this IS NOT an
indication of lesser cooling capacity or efficiency. Refer to the efficiency rating (EER) and
capacity rating (in BTUs/hr.) marked on the air conditioner.
The unit is in a
heavily occupied
room or heatproducing
appliances are in
use in the room.
Use exhaust vent fans while cooking or bathing and try not to use heat-producing appliantes during the hottest part of the day. A higher capacity air conditioner may be required
depending on the size of the room being cooled.
9
The unit
turns
on and off too much,
or does
not cool
room
e room you are
Adjust the Thermostat to a cooler setting by turning the knob clockwise.
Turn Fan Control to HIGH.
loner In a more s
installed on the sunny
Water
drips
from
Check if . . .
The air conditioner is
not properly leveled.
The air conditioner
should slope slightly
downward toward the
outside.
10
cabinet
into
your
house
1 Then .. .
Level the air conditioner to provide a 77 downward slope toward the outside (l/2 bubble
on a carpenter’s level [or 1.l degrees]) to ensure proper drainage. See the Installation
Instructions for an illustration. Reposition or shim the cabinet as necessary.
NOTE: Do NOT drill a hole in the bottom of the metal base and condensate pan.
Requesting
Assistance
Service
l
or
Before calling for assistance or service, please check
“Troubleshooting” on pages 9-10. It may save you the
cost of a service call. If you still need help, follow the
instructions below.
1. If you
need
assistance*
...
Call the Consumer Assistance Center telephone
number. Dial toll-free from anywhere in the U.S.A.:
1-800-253-l 301
and talk with one of our trained consultants. The consultant can instruct you in how to obtain satisfactory
operation from your appliance or, if service is necessary,
recommend a qualified service company in your area.
If you prefer, write to:
Consumer Assistance Center
c/o Correspondence Dept.
2000 North M-63
Benton Harbor, Ml 49022-2692
Please include a daytime phone number in your
correspondence.
2. If you
need
service*
...
We have a nationwide network of authorized service
companies. Our service technicians are trained to fulfill the
product warranty and provide after-warranty service,
anywhere in the United States. To locate an authorized
service company in your area, call our Consumer
Assistance Center telephone number (see Step 1) or look
in your telephone directory Yellow Pages.
3. If you
need
replacement
parts*
l
how
l
When asking for help or service:
and the purchase date. (See page 2.) This information
will help us respond properly to your request.
Ordering
the
Contact the Major Appliance Consumer Action
Program (MACAP). MACAP is a group of independent
consumer experts that voices consumer views at the
highest levels of the major appliance industry.
accessories
You can order the following accessories for your air
conditioner from your local authorized dealer or by calling
l-800-253-1301 from anywhere in the U.S.A. You will hear
a recording. Follow the instructions to place an order.
Replacement
air filters
A good, clean air filter is important for best cooling with
least energy consumption. Your air filter should be cleaned
regularly. See page 6 for cleaning instructions. We suggest you replace your air filter once a year.
Installation
kits
A standard installation kit is included with your air conditioner. These special installation kits are available:
l Outside Sill Bracket Kit
l Wide-Window Kit
Heavy-duty
...
To locate replacement parts in your area, refer to Step 2 or
call the Consumer Assistance Center number in Step 1.
4. If you are not satisfied
with
problem
was solved* . . .
l
Contact MACAP only when the Consumer Assistance
Center and authorized service company have failed to
resolve your problem. Please write to:
Major Appliance Consumer Action Program
20 North Wacker Drive
Chicago, IL 60606
MACAP will in turn inform us of your action.
cover
If you decide to leave your air conditioner installed during
the winter, a heavy-duty cover will help protect your air
conditioner and reduce drafts. The cover protects against
cold drafts through the unit’s air passages and protects the
cabinet from snow, rain, sleet, rust, and dust.
For a heavy-duty cover, sized to fit your air conditioner,
order part # 484069.
11
Warranty
LENGTH OF WARRANTY
WE WILL PAY FOR
FULL ONE-YEAR
WARRANTY
Replacement parts and repair labor to correct defects in materials or workmanship.
Service must be provided by an authorized service company.
FROM DATE OF
PURCHASE
FULL FIVE-YEAR
WARRANTY
FROM DATE OF
PURCHASE
Replacement parts and repair labor to correct defects in materials or workmanship in the
sealed refrigeration system. These parts are:
4. Drier-Strainer
1. Compressor
2. Evaporator
5. Connecting Tubing
3. Condenser
Service must be provided by an authorized service company.
WE WILL NOT PAY FOR
A. Service calls to:
1. Correct the installation of your air conditioner.
2. Instruct you how to use your air conditioner.
3. Replace house fuses or correct house wiring.
4. Clean or replace the air filter.
B. Pickup and delivery. Your air conditioner is designed to be repaired in the home.
C. Damage to your air conditioner caused by accident, misuse, fire, flood, acts of God, or use of products not
mentioned in this manual.
D. The removal and reinstallation of your air conditioner if it is installed in an overhead or other inaccessible location
or is not installed in accordance with published Installation Instructions.
E. Repairs to parts or systems caused by unauthorized modifications made to the appliance.
e&6
WHIRLPOOL
CORPORATION
SHALL NOT BE LIABLE FOR INCIDENTAL
OR CONSEQUENTIAL
DAMAGES.
Some states do not allow the exclusion or limitation of incidental or consequential damages, so this exclusion or limitation
may not apply to you. This warranty gives specific legal rights, and you may also have other rights which vary from state
to state.
Outside
the United States a different
warranty
may apply. For details,
please contact
your authorized
dealer.
If you need service, first see the “Troubleshooting” section of this book. After checking “Troubleshooting,” additional help
can be found by checking the “Requesting Assistance or Service” section, or by calling the Whirpool Corporation
Consumer Assistance Center telephone number, l-800-253-1301, from anywhere in the U.S.A.
PART NO. 1168978
0 1996 Whirlpool
12
Corporation
l
Registered
Trademark
of Whirlpool,
U.S.A.
Printed
Iv96
in U.S.A.
Table of Contents
Introduction
Page2
Requirements
Page3
Preparation
Page3
Installation
steps
Filler board: Page4
Curtain:Page5
Important:
l
l
l
PartNo. 1168978
Installer: LeaveInstallationInstructionswith the homeowner.
Homeowner: KeepInstallationInstructions for future reference.
Save InstallationInstructionsfor local electrical inspector’suse.
Window opening measurements
Excessive Weight Hazard
Use two or more people to move
and install air conditioner.
Failure to do so can result in back
or other injury.
Important: Observe all governing codes
T
16”
r
I
I
and ordinances.
Checkthe location where air conditioner will be
installed. Proper installation is your
responsibility,Mcakesure you haveeverything
necessaryfor correct installation.
The location should provide:
Grounded electrical outlet within four feet
of the window. Do not usean extensioncord.
Free movement of air to rooms to be
cooled.
l
l
A large enough opening for the air
conditioner. Installation parts are supplied
for double-hungwindowsup to 38” wide.
Adequate wall support for weight of air
conditioner. Air conditioner weighsbetween
55 and 65 pounds.
Do Not install the air conditioner in an area
where the front panel will be exposedto heat
sourcesthat will raise the panel surface
temperatureabove120°F.
l
l
Tools needed:
m
Tools needed:
tape measure
utility knife
utility knife ,Q,
,
a
r(/
9
hex nut driver
For#8 screw
drill & 3/32” or
smaller bit
y glasses
Parts supplied:
Parts supplied:
0
foam blocks
window-lock bracket
3, 318” seal strips
gum-type sealer
0
@
window-lock bracket
2 side-mounting angles
2 filler boards
3,8 x 314” round-head metal screws
2 side-mounting slides (right and left)
4, 8 x l/2” hex-head metal screws
4, 8 x 3/8” round-head metal screws
3,8 x 3/4” round-head metal screws
model and serial label
Electrical Shock Hazard
Plug into a grounded 3 prong outlet.
Do not remove ground prong.
Do not use an adapter.
Do not use an extension cord.
Failure to follow these instructions
can result in death, fire, or
electrical shock.
If codes permit and a separate grounding
wire is used, it is recommended that a
qualified electrician determine that the
grounding path is adequate.
Checkwith a qualified electricianif you are not
sure the air conditioner is properly grounded.
model and serial label
A three-wire,single-phase,60.HZ,
hC-only,
electrical supplyis required on a separate
circuit, A 15-amptime-delayfuseor circuit
breakeris required.Copperwire (# I4 gauge)
is required.The fusesizemustnot exceedthe
circuit rating specifiedon the model and serial
label.
The modeland serial kibef is locatedon the left
sidepanel,or behind the front panel abovethe
coil area.
Recommended
method
grounding
For your personalsafety,this air,conditioner
must be grounded.This air conditioner is
equippedwith a power supplvcord havinga 3prong groundingplug. To minimize possible
shockhazard,the cord must be pluggedinto a
mating,3-prong grounding-typewall receptacle,
groundedin accordancewith all local codes
and ordinances.If a matingwall receptacleis
not available,it is the customer’sresponsibility
to havea properly grounded,i-prong wdu
receptacleinstalled by a licensedinstaller.
It is the customer’sresponsibility:
. To contacta qualified efectricafinstaller.
To ‘assurethat the electrical installation is
adequateand in conformancewith National
ElectricalCode,ANSVNFPA
70 - latest
edition*, *andaUlocal codesand ordinances.
l
Copies of IIE standards bed may be oblained from
* National Fire Prolect~on hsocrdlion
~k~dl
Park
Quincy, MassaclmseNs OL260
Specificelectrical requirementsare listed in the
chart. Follow the requirementsfor the typeof
plug on the power supply cord.
Plug Type
typewall receptacle
115~volt103.5~min.,
126.5~
max.
7.5~amprating or lessa double outlet is
acceptable.
7.6-through 12-ampratingsuse only a single outlet and a
separatecircuit.
Follow the instructionsfor your typeof air conditioner.
Handle air conditioner with care. Watch out for sharp metal fins on the front and rear coils.
1
1
m Pushdown on front panel and pull
panel towardsyou to removefrom cabinet.
Goto Page5 for installation steps.
m Pushdown on front panel and pull
paneltowardsyou to removefrom cabinet.
3 n Placethe right, side-mountingangle
over sealstrip so that Rangefacescabinetfront.
lnsert 8 x 3/8” sheetmetalscrewsstartingwith
bottomslot. Slidemountingangledownward
until screwsare in top of slots,Tightenscrews.
Repeatfor left, side-mountingangle,making
sure flangefacescabinetfront. (Note:Side
mountinganglesmaybe factory-installedon
somemodels.)
Goto Page4 for installation steps.
7
2 Startingat bottomedgeof cabinet,
attachsealstrip over centerfine of predrilled
n
holeson right and left sidesof air conditioner
cabinet.
Be sure your air conditioner doesnot fall out of the openingduring installation
NOTE: Maintaina firm hold on the ai1
conditioner cabinetto preventit from falling
out of the openingduring installation
Air conditioner should be placedno more
than four feetfrom a groundedoutlet.
the same.Whenthe air conditioner is centered
m thewindow.write down this mezurement.
Add l/8” to thatfor final measurementto cut
filler boards.
3
1’
m Centerair conditioner in window.
Lowerwindow sah to hold cabinetin place.
Measurethe distancefrom the right sideof the
cabinetto the inside of thewindow channel.
Repeatfor the left side.Adjustthe air
conditioner until the distanceon eachside is
H Usea utility knife to cut fdler boardsto
thefinal measurement
size.Makecut at the
centerof the boards,so theoutsideedgesof filler
boardswill havescrewholes.
Top view:
n
Apply 3/K sealstrips to bottomand
outsideedgesof filler boards.The top seaI
goeson back side of filler boards.
Top view:
foam block
right
filler
side-mounting angle
board
1I-
window channel
left filler board
filler
hex-headscrew
1-1
4
w Fromthe outside,pushMer boardsa
far forward in thewindow channelsaspossible.
Measurethe distancebetweenthewindow
channeledgeand filler boards.
window
annel
1
-“I
w Pull air conditioner part wayout of the
window.Attachright filler board to front of a
side-mountingangleusing 8 x l/2” hex-head
screws.Do Not tightenscrewsat this time.
2
n
Placeair conditioner backinto the
window with the filler board tight against
window channel.
g. Insert left filler boardinto window
3
channel.Pushfiller board againstside-mounting
angleand attachwith 8 x l/2” hex-headscrews.
Do Not tightenscrewsat this time.
cut foamblocks
1/4 inch wider.
Insert foam
blocksinto
channelbehind
filler boards.
foam
block
mounting hole
window
channel
filler
board
1
4
Hold air conditioner to preventit from
n
falhng.Raisewindow sash.Placesidemountingslidesinto top mountingchannel.
Extendmountingslidesoutward into window
channels.Pull air conditioner slightly forward
until slides are tight againstwindow channels,
Mark hole locationsand usea 3132”drill bit to
drill starterholes for wood screws.Usewood
screwsto attachslides to window channels.Do
Vattighten screwsat this time. Lowerwindow
<ashbehind top mountingchannel.
wi
n
Placebottomedgeof front panel on
clips and push down. Pushpanel into cabinet
until panel snapsinto place.Plugpower
supply cord into groundedelectrical outlet.
br
NOTE:Install window-lock bracketto prevent
air conditioner from falling out of window.
2
w Check that air conditioner
cabinet is tilted to the outside so that
water will run to the outside.
Placelevel on top of right side of air
conditioner. Thereshould be a tilt to the
outsideof approximatelyl/2 bubble.Place
level on left side and check.If cabinetis not
properly positioned,repositionor shim the
cabinetto provide the proper tilt.
Tightenfiller board and side-mountingslide
screws.
3
w Insert window rail sealbehind top of
lower window sashand againstglassof upper
window. Placewindow-lock bracketon top of
lower window and againstthe upper window
sash.Usea 342” drill bit to drill a starterhole
through the hole in the bracket.Attachwindowlock bracketwith wood screw.Sealsmall
openingsaround thewindow with gum-type
sealer.
Congratulations!
You have successfully
installed your new air
conditioner. To get the most
efficient use from your new
air conditioner, read the
Use and Care Guide section
of this book.
Be sure your air conditioner
installation
handle
does not fall out of the opening during installation.
1
curtain
I
Pull left curtain out until it fits into the
window channel. Repeatwith right curtain.
1
n
Centerair conditioner in window.
Checkthat lower rail of air conditioner is
behind and againstbackside of window seal.
Lowerwindow sashto hold cabinetin place
while usinginstallation handleto keepfingers
out of the way.
Do not block louvers in air conditioner
cabinet.
Check that air conditioner cabinet
is tilted to the outside so that water will
run to the outside.
Placelevelon the top, right side of air
conditioner cabinet.Thereshould be a tilt to the
outsideof about l/2 bubble.Placelevel on left
side of air conditioner and check.If cabinetis
not properly positioned,repositionor shim
cabinetto provide the proper tilt.
alternate hole
I .
n
Insert one of the round-headscrews
through left curtain and into the window
channelor through alternatehole at the top of
the curtain and into the window channelto
fastenthe curtain to the window. Repeatfor
right curtain.
Congratulations!
2
You have successfully
installed your new air
conditioner. To get the most
efficient use from your new
air conditioner, read the
Use and Care Guide section
of this book.
n
PlacebottomedEeof front panelon
clips and push down. Then push panel into
cabinetuntil panel snapsm place,
1
n
Insert window rail sealbehind the top
of the lower window sashand againstthe glass
of the upper window. Placewindow-lock
bracketon top of lower window and against
upper window sash.Usea S/32” drill bit to
drill a starterhole through the hole in the
bracket.Attachwindow-lock bracket.Sea.1
small openingsaround window with gum-type
sealer.
-I L