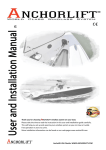
1
USER GUIDE
4CH TRIPLEX
DIGITAL VIDEO RECORDER
Version. 3.0
Design and specifications are subject to change without notice.
SAFETY PRECAUTIONS
EXPLANATION OF SYMBOLS
This symbol is intended to alert the user to the presence of important
operation and maintenance (servicing) instructions in the literature
accompanying the appliance.
This symbol is intended to alert the user to the presence of
unprotected “dangerous voltage” within the product’s enclosure that
may be strong enough to cause a risk of electric shock persons.
CAUTION
THIS PRODUCT IS MULTIPLE RATED VOLTAGES (110V AND 220V).
SEE INSTALLATION INSTRUCTIONS BEFORE CONNECTING TO THE SUPPLY
THIS PRODUCT BEARS LITHIUM BATTERY.
RISK OF EXPLOSION IF THE BETTERY ON THE MAIN MOARD IS REPLACED BY AN INCORRECT TYPE.
DISPOSE OF USED BATTERIES ACCORDING TO THE INSTRUCTIONS.
THIS EQUIPMENT IS INDOOR USE AND ALL THE COMMUNICATION WIRINGS ARE LIMITED TO INSIDE OF THE
BUILDING
TO REDUCE THE RISK OF FIRE ELECTRIC SHOCK, DO NOT EXPOSE THIS APPLIANCE TO RAIN OR MOISTURE.
2
Table of Contents
1. Features .......................................................................................................................................................................... 8
2. Name, Function and Connection..................................................................................................................................... 9
2-1. Front View........................................................................................................................................................... 9
2-2. Remote Control................................................................................................................................................. 11
2-3. Rear View ......................................................................................................................................................... 12
2-4. Specification...................................................................................................................................................... 13
2-5. Packing List....................................................................................................................................................... 13
3. Factory Default.............................................................................................................................................................. 14
4. Setup............................................................................................................................................................................. 17
4-1. Initial menu........................................................................................................................................................ 17
4-2. LIVE .................................................................................................................................................................. 17
4-2-1. Channel Rotation .................................................................................................................................. 17
4-2-2. Channel Info ......................................................................................................................................... 17
4-3. RECORD .......................................................................................................................................................... 19
4-3-1. Select Recording Mode (QUAD, MUX, SCHEDULE) ........................................................................... 19
4-3-2. QUAD Recording Mode ........................................................................................................................ 20
4-3-3. MUX Recording Mode .......................................................................................................................... 24
4-3-4. SCHEDULE Recording Mode............................................................................................................... 28
4-4. SYSTEM ........................................................................................................................................................... 30
4-4-1. ADMIN PASSWORD............................................................................................................................. 30
4-4-2. USER PASSWORD .............................................................................................................................. 31
4-4-3. FACTORY DEFAULT ............................................................................................................................ 31
4-4-4. DATE FORMAT .................................................................................................................................... 31
4-4-5. CURRENT DATE.................................................................................................................................. 32
4-4-6. CURRENT TIME................................................................................................................................... 33
4-4-7. GMT AREA ........................................................................................................................................... 33
4-4-8. DYALIGHT SAVING.............................................................................................................................. 34
4-5. INFO ................................................................................................................................................................. 36
4-5-1. SITE ID ................................................................................................................................................. 36
4-5-2. LOG ...................................................................................................................................................... 36
4-5-3. SYSTEM ............................................................................................................................................... 37
4-5-4. CAPTURED IMAGE ............................................................................................................................. 37
4-5-5. SEND MAIL (IP ADDRESS Mailing) ..................................................................................................... 38
4-5-6. BUZZER ............................................................................................................................................... 39
4-6. PTZ ................................................................................................................................................................... 40
3
4-7. NETWORK........................................................................................................................................................ 40
4-7-1. CLIENT ACCESS ................................................................................................................................. 40
4-7-2. LAN....................................................................................................................................................... 41
4-7-3. LAN –DHCP (Dynamic Host Configuration Protocol) ........................................................................... 41
4-7-4. ADSL..................................................................................................................................................... 42
4-8. STORAGE ........................................................................................................................................................ 43
4-8-1. STORAGE OVERWRITE ..................................................................................................................... 43
4-8-2. HDD FORMAT ...................................................................................................................................... 43
4-8-3. AUTO ERASING (30DAYS).................................................................................................................. 44
4-8-4. CD-RW BACKUP (Available only in model with CD-RW)..................................................................... 44
4-8-5. S/W UPGRADE W/ CD-RW (Available only in model with CD-RW) .................................................... 44
5. OPERATIONS............................................................................................................................................................... 45
5-1. Power ON/OFF ................................................................................................................................................. 45
5-1-1. Power ON ............................................................................................................................................. 45
5-1-2. Power OFF ........................................................................................................................................... 45
5-2. LIVE Display ..................................................................................................................................................... 45
5-2-1. QUAD Screen Setup ............................................................................................................................ 45
5-2-2. Individual Full Screen Setup................................................................................................................. 46
5-2-3. Auto Channel Rotation.......................................................................................................................... 46
5-3. OSD ICON ........................................................................................................................................................ 46
5-3-1. OSD ICON on LIVE Screen.................................................................................................................. 46
5-3-2. Show/Hide OSD ICON on LIVE Screen ............................................................................................... 47
5-4. LED Information ................................................................................................................................................ 47
5-5. Recording.......................................................................................................................................................... 48
5-5-1. MANUAL Recording ............................................................................................................................. 48
5-5-2. SCHEDULE Recording......................................................................................................................... 48
5-5-3. SENSOR Recording ............................................................................................................................. 48
5-5-4. MOTION Recording .............................................................................................................................. 48
5-5-5. CONTINOUS Recording....................................................................................................................... 48
5-6. PLAYBACK ....................................................................................................................................................... 48
5-6-1. Search when DVR has one HDD ......................................................................................................... 48
5-6-2. Search when DVR has two HDD .......................................................................................................... 50
5-6-3. Playback buttons .................................................................................................................................. 50
5-7. Still Image Capturing, Viewing, and Backup ..................................................................................................... 51
5-7-1. Capturing Still Image ............................................................................................................................ 51
5-7-2. Viewing Captured Image ...................................................................................................................... 51
4
5-7-3. Still image Backup in USB flash memory stick ..................................................................................... 52
5-8. PTZF ................................................................................................................................................................. 52
5-8-1. PTZF Operation .................................................................................................................................... 52
5-8-2. PTZF Camera link to RS-485 ............................................................................................................... 54
5-9. Brightness, Contrast, Hue, Saturation & Alpha-blending Adjustment ............................................................... 56
5-10. OSD position and Screen size Adjustment ..................................................................................................... 57
5-10-1. Adjusting OSD Ceiling & Bottom Line................................................................................................. 57
5-10-2. Adjusting Screen size ......................................................................................................................... 57
5-11. Motion Detection Region Setup ...................................................................................................................... 57
5-11-1. Region Setup ...................................................................................................................................... 57
5-11-2. Deleting Region .................................................................................................................................. 59
5-12. Audio ............................................................................................................................................................... 59
5-12-1. Audio Setup and Connection .............................................................................................................. 59
5-12-2. Playback ............................................................................................................................................. 60
5-13. External Terminal Information ......................................................................................................................... 61
5-13-1. RS-232C ............................................................................................................................................. 61
5-13-2. RS-422/485......................................................................................................................................... 61
5-14. Sensor Installation .......................................................................................................................................... 62
5-15. Video back up in CD (Available only in model with CD-RW) .......................................................................... 62
5-15-1. Back up in CD..................................................................................................................................... 62
5-15-2. Playback Data in CD........................................................................................................................... 63
6. HDD Installation ............................................................................................................................................................ 64
6-1. Installing HDD in removable HDD rack............................................................................................................. 64
6-2. HDD Jumper Setting ......................................................................................................................................... 65
6-3. HDD Indicator ................................................................................................................................................... 66
7. NETWORKING ............................................................................................................................................................. 67
7-1. NETWORK CLIENT S/W Main Features .......................................................................................................... 67
7-2. Computer System Requirements...................................................................................................................... 67
7-3. Network Setup in DVR ...................................................................................................................................... 67
7-3-1. Network ACCESS ON/OFF .................................................................................................................. 67
7-3-2. For LAN Users ...................................................................................................................................... 68
7-3-3. For LAN –DHCP Users......................................................................................................................... 68
7-3-4. For ADSL (Dynamic IP address) Users ................................................................................................ 69
7-4. NETWORK CLIENT S/W Installation and Start Up........................................................................................... 70
7-4-1. NETWORK CLIENT S/W Installation.................................................................................................... 70
7-4-2. NETWORK CLIENT S/W Start Up – Static IP Address......................................................................... 70
5
7-4-3. NETWORK CLIENT S/W Start Up – Dynamic IP Address ................................................................... 71
7-5.LIVE ................................................................................................................................................................... 72
7-6. SETUP .............................................................................................................................................................. 73
7-6-1. RECORD .............................................................................................................................................. 73
7-6-2. LIVE ...................................................................................................................................................... 76
7-6-3. SYSTEM ............................................................................................................................................... 76
7-6-4. NETWORK ........................................................................................................................................... 77
7-6-5. BACKUP ............................................................................................................................................... 78
7-6-6. Saving and Uploading Settings ............................................................................................................ 78
7-7. SEARCH ........................................................................................................................................................... 79
7-7-1. Buttons in Search menu ....................................................................................................................... 79
7-7-2. Search when DVR has two HDD .......................................................................................................... 80
7-8. BACK UP .......................................................................................................................................................... 80
7-8-1. Video BACKUP during LIVE DISPLAY ................................................................................................. 80
7-8-2. STILL IMAGE capture during LIVE DISPLAY....................................................................................... 81
7-8-3 Video BACKUP during Playback ........................................................................................................... 81
7-8-4. STILL IMAGE capture during Playback ................................................................................................ 81
7-8-5. Downloading Still Images from DVR..................................................................................................... 82
7-8-6. BACKUP through Time Setting............................................................................................................. 82
7-8-7. Converting <nsf> CD backup format to <avi> format ........................................................................... 83
8. Networking by Web Browser......................................................................................................................................... 84
8-1. Download Web Brower Viewer and Connection ............................................................................................... 84
8-2. Main Features ................................................................................................................................................... 85
8-2-1. LIVE ...................................................................................................................................................... 85
8-2-2. SEARCH............................................................................................................................................... 85
8-2-3. BACKUP ............................................................................................................................................... 86
9. Networking by DDNS (Dynamic Domain Name Server) ............................................................................................... 86
10. Playback of local HDD in Network Client S/W ............................................................................................................ 87
11. Network access beyond Rauter .................................................................................................................................. 87
6
WARNING
The authorized expert must install DVR. When connecting a camera, audio, or sensor cables
DVR should be turned off first.
Please be aware that the company is not responsible for the damages caused from using
unauthorized goods and not following the instructions from the manual.
The company is also not responsible for the errors caused after the user has opened up DVR
for an arbitrary fix or the user has removed Warranty seal.
7
1. Features
4 channels real-time video display and 4 channels real-time video recording
TRIPLEX – Simultaneous record, playback and network transfer
Individual channel recording and playback with different frame rate
High-quality live and playback resolution
High-quality images with MPEG-2 video compression
Network features: Remote searching or playback, remote live-monitoring, remote
settings change, remote camera control, and remote upgrade
Network via LAN (DHCP), ADSL (Dynamic and Static IP address)
4 channels audio recording
Various recording triggers: Motion detection, manual recording button, sensor, and
schedule
Search menu geared with graphic user interface, which provides fast, simple, and
detailed information
User-friendly setup menu with graphic user interface
Easy to schedule a complicated weekly recording plan
Convenient search menu that displays recording status
The OSD icons on screen provide various helpful and well-explained information
Up-to-date motion-detection that offers 4 area-setup for each channel
USB ports for JPEG data backup and software upgrade using USB flash memory stick
Still image capture and review as JPEG format
Internal Pan/Tilt/Zoom/Focus controller
Easy operating with the buttons on the front and the remote controller
User verification by password certification
Video loss detection
Web-viewer
CD-RW (Option): Backup, S/W upgrade
8
2. Name, Function and Connection
2-1. Front View
A. PLAYBACK BUTTONS
REW, REW JUMP/STEP, PLAY/PAUSE, JUMP/STEP, and FF buttons are used for
playing recorded videos.
B. POWER
Press this button to power on/off DVR. A red light appears when the power of DVR is
turned on.
C. CAPTURE
Press this button to save a captured still-image during playback as a JPEG file.
D. RECORD
Press this button to start/stop manual recording. A red light appears during the
recording.
E. REMOVABLE HDD RACK
Removable HDD rack to install default hard disk drive
F. NETWORK LED
A red light appears when the network client is connected to DVR.
G. RECORD LED
A red light appears during DVR is recording.
9
H. SENSOR LED
A red light appears when sensor perceives event.
I. MOTION LED
A red light appears when DVR detects motion.
J. IR RECEIVER
Remote Controller signal receiver
K. SEARCH
Press this button to begin searching the recorded video.
L. SETUP
Press this button to begin changing DVR setup.
M. LOCK
Press this button to lock/unlock the buttons of DVR.
N. MISC
Press this button once to show or hide the status icons on live screen and playback
screen,
Press twice to move to “1.Brightness 2.Contrast 3.Alphablending 4.OSD Position”
adjustment menu of each channel,
Press triple to move to “1.Pan/Tilt 2.Zoom/Focus 3.Camera Initial” control menu of
each channel.
O. AUTO
Press this button to activates/deactivates channel rotating function during full screen
display of single channel.
P. QUAD/MUX
To switch the display from 1-channel video to 4-channels video in live display, and vice
versa.
Q. DIRECTION / “SEL” BUTTON
These can be used as arrow keys and number key.
buttons are used as 1,
2, 3, and 4, respectively.
button: Used to change possible values in Setup menu
button: Used to move items in Setup menu
“SEL” button in the middle is used for various purposes.
“SEL” button: Used to enter each sub menu. Also used to select number values.
R. ESC
Press this button to go back to the previous menu
10
2-2. Remote Control
11
2-3. Rear View
A. CAMERA INPUT
BNC Input Connectors for camera
B. LOOPBACK OUTPUT
BNC Loop-back Output Connectors for cameras
C. AUDIO IN
RCA Audio Input Terminals
D. AUDIO OUT
RCA Audio Output Terminal
E. VIDEO OUT
BNC Monitor Out Connector
F. S-VHS
S-VHS Monitor Out Connector
G. RS-232C
Connector for DVR Control and Upgrade
H. RS-485
Camera Control
I. USB PORT
J. NTSC/PAL SWITCH
K. ALARM OUT
L. POWER FAN
M. SENSOR IN (Power input: DC 10~12V)
N. POWER IN
O. 10 BASE T ETHERNET
Connector for Network Connection
12
2-4. Specification
VIDEO
AUDIO
ALARM
RECORD
INPUT
OUTPUT
INPUT
OUTPUT
INPUT
OUTPUT
COMPRESSION
VIDEO FORMAT
RESOLUTION
QUAD MODE
MUX MODE
FRAME SIZE
ARCHIVING
MULTI TASK
CONTROL UNIT
SERIAL PORT
NETWORK
HDD
BACKUP
PHYSICAL
ELECTRICAL
STILL IMAGE CAPTURE
MODE
METHOD
MOTION DETECTION
TRIPLEX
CONSOLE
CAMERA CONTROL
TCP/IP (LAN INTERFACE)
FUNCTIONS
AVAILABLE CAPACITY
STILL IMAGE BACKUP
VIDEO BACKUP
DIMENSIONS (W x L x H)
NET WEIGHT
PACKAGE WEIGHT
POWER SOURCE
POWER CONSUMPTION
4 composite BNC (NTSC/PAL) – 1.0Vp-p
1 composite BNC (NTSC/PAL) – 1.0Vp-p
1 S-VIDEO
4 composite loop-back
4 Line In (RCA)
1 Line Out (RCA)
4 (Power input: DC 10~12V)
2
MPEG-2
NTSC
PAL
360x240, 720x480
360x288, 720x576
120fps/4CH(360x240/CH)
100fps/4CH(360x288/CH)
120fps/4CH(360x240/CH)
100fps/4CH(360x288/CH)
30fps/4CH(720X480/CH)
25fps/4CH(720X576/CH)
2~3KB(360x240),
2~3KB(360x288),
10~16KB(720x480)
10~16KB(720x576)
720x480/360X240 (JPEG)
720x576/360X288 (JPEG)
Manual, Motion, Sensor, Motion & Sensor
By Resolution, fps & Quality
4 Areas setup per channel
Record, playback and transfer
IR Type Remote Control and Front key pads
1 RS-232C (9pin male DSUB connector)
1 RS-485 (9pin male DSUB connector)
1 10-base T Ethernet
Live, Search, Setup, Backup, P/T/Z/F
40, 60, 80, 120, 160, 200, 250GB
2 USB1.1 for USB Flash memory stick
CD-RW (Option)
38cm x 30cm x8.5cm
5.5Kgs (without HDD)
7.2Kgs (with HDD)
AC115/230V, 50-60HZ
30W (approximately)
2-5. Packing List
CONTENTS
1. DVR
2. MANUAL
3. POWER CODE
4. REMOVABLE-HDD RACK KEY & SCREW
5. REMOTE CONTROLLER
6. BATTERY
7. CD - CLIENT SOFTWARE
13
3. Factory Default
LIVE
CHANNEL ROTATION
CHANNELS--------------------------------------------------------------- 1 2 3 4
DURATION-----------------------------------------------------------------5 SECONDS
CHANNEL INFO-----------------------------------------------------------------1 2 3 4
LABEL---------------------------------------------------------------------- CH1
STATUS DISPLAY-------------------------------------------------------------- SHOW
ALPHA BLENDING------------------------------------------------------------- 10%
RECORD
QUAD
GENERAL
QUALITY--------------------------------------------------------HIGH QUALITY
SAVE EVENT LOG-------------------------------------------OFF
NET FRAME DROP------------------------------------------ON
CHANNEL
FRAME----------------------------------------------------------------AVAILABLE=116
RATE-------------------------------------------------------------------1 FRAME/SEC
RECORDED BY
SENSOR------------------------------------------------------OFF
MOTION-------------------------------------------------------OFF
MANUAL------------------------------------------------------ OFF
CONTINUOUS-----------------------------------------------ON
AUDIO------------------------------------------------------------------1 2 3 4
SENSOR
SENSOR NUMBER------------------------------------------------ 1
TYPE----------------------------------------------------------- NORMAL OPEN
RELAY OUTPUT
ALARM------------------------------------------- 1 2
CHANNEL------------------------------------- ON
DURATION------------------------------------ 5 SECONDS
MOTION
REGION--------------------------------------------------------------- FULL
RELAY OUTPUT
ALARM NUMBER------------------------------------------ 1 2
14
SENSITIVITY------------------------------------------------------- L 1 2 3 4 5 6 7 8 9 H
POST RECORD--------------------------------------------------- 2 SECONDS
MUX
GENERAL
RESOLUTION -------------------------------------------------------360 X 240
QUALITY-------------------------------------------------------------- HIGH QUALITY
SAVE EVENT LOG--------------------------------------------------OFF
NET FRAME DROP------------------------------------------------ON
CHANNEL
CHANNEL NUMBER ---------------------------------------------CH1
FRAME RATE ---------------------------------------------- AVAILABLE=116
RATE-----------------------------------------------------------1 FRAME/SEC
RECORDED BY
SENSOR---------------------------------------- OFF
MOTION----------------------------------------- OFF
MANUAL--------------------------------------- OFF
CONTINUOUS--------------------------------ON
AUDIO--------------------------------------------------------- 1 2 3 4
SENSOR
SENSOR NUMBER----------------------------------------------- 1
TYPE---------------------------------------------------------- NORMAL OPEN
RELAY OUTPUT
ALARM----------------------------------------- 1 2
CHANNEL------------------------------------- 1 2 3 4
DURATION------------------------------------ 5 SECONDS
MOTION
CHANNEL NUMBER ---------------------------------------------CH1
REGION------------------------------------------------------ FULL
RELAY OUTPUT
ALARM NUMBER--------------------------------- 1 2
SENSITIVITY------------------------------------------------ L 1 2 3 4 5 6 7 8 9 H
POST RECORD--------------------------------------------------- 2 SECONDS
SCHEDULE
SYSTEM
ADMIN PASSWORD--------------------------------------------------------- SELECT
USER PASSWORD----------------------------------------------------------- SELECT
15
FACTORY DEFAULT------------------------------------------------------- SELECT
DATE FORMAT--------------------------------------------------------------YYYY/MM/DD
CURRENT DATE------------------------------------------------------------YYYY/MM/DD
CURRENT TIME------------------------------------------------------------- HH:MM:SS
GMT AREA-------------------------------------------------------------------- [GMT+0:00]
DAYLIGHT SAVING--------------------------------------------------------- OFF
INFO
SITE ID------------------------------------------------------------------------- DVR
LOG----------------------------------------------------------------------------- SELECT
SYSTEM -----------------------------------------------------------------------SELECT
CAPTURED IMAGE-------------------------------------------------------- SELECT
SEND MAIL -------------------------------------------------------------------OFF
PTZ
PTZ CHANNELS ------------------------------------------------------------ 1 2 3 4
CAMERA TYPE ------------------------------------------------------ - - CAMERA ID------------------------------------------------------------ 1
NETWORK
CLIENT ACCESS -------------------------------------------------------------ON
PORT NUMBER -------------------------------------------------------------- 4456
NETWORK TYPE-------------------------------------------------------------LAN
DHCP-------------------------------------------------------------------OFF
DDNS--------------------------------------------------------------------ON
DDNS SERVER IP--------------------------------------------------- xxx.xxx.xxx.xxx
IP ADDRESS ---------------------------------------------------------xxx.xxx.xxx.xxx
GATEWAY--------------------------------------------------------------xxx.xxx.xxx.xxx
SUBNET MASK------------------------------------------------------ xxx.xxx.xxx.xxx
STORAGE
STORAGE OVERWRITE-------------------------------------------------- ON
HDD FORMAT---------------------------------------------------------------- MASTER
AUTO ERASING (30DAYS) ---------------------------------------------- OFF
CD-RW BACKUP ----------------------------------------------------------- SELECT (CD-RW version only)
S/W UPGRADE W/ CD-RW ---------------------------------------------- SELECT (CD-RW version only)
16
4. Setup
4-1. Initial menu
Press the Setup button, then Setup menu will appear.
4-2. LIVE
4-2-1. Channel Rotation
1. Select LIVE and press SEL button to show LIVE setup screen.
2. Select a live display rotation channel among channel 1,2,3,4 with SEL button. (Yellow
means that the channel is included in channel rotation during live display. The only
yellow colored channels will be appeared in channel rotation during live display. White
means that the channel is not included in channel rotation during live display.)
3. Select a channel for channel rotation, move the cursor to “Duration” to set the rotation
time of display screen. (Duration time varies 2, 3, 5, 10, 15, 20, & 30 seconds)
4-2-2. Channel Info
4-2-2-1. LABEL
1. Select LIVE and press SEL button to show LIVE setup menu
2. Go to CHANNEL INFO and select the channel you wish to change the channel name of.
The name of the chosen channel shows up at LABEL field.
17
3. Press SEL button when the cursor is LABEL field (channel name). A keyboard will
appear for you to type in a new name.
4. Name the label (channel name) by using
buttons and SEL button. Press
enter to save. The name is changed in LABEL field.
4-2-2-2. Status Display
1. Select LIVE and press SEL button to show LIVE setup menu
2. Select whether to <Show> or <Hide> the status Information by using
buttons.
<SHOW> shows the status information on the live screen (channel name, HDD Status,
Current Time, LOCK, NETWORK)
<HIDE> hides the status information on the live screen. When <Hide> is checked, press the
MISC button to show the status information.
4-2-2-3. ALPHABLENDING
1. Select LIVE and press SEL button to show LIVE setup menu.
2. Adjust Alpha Blending from 0% to 90% by using
18
buttons.
4-3. RECORD
In Record Setup, you can choose from QUAD, MUX, and SCHEDULE recording mode. In each mode, the
recording quality, recording frame, audio, sensor, motion detector, and other details can be customized.
4-3-1. Select Recording Mode (QUAD, MUX, SCHEDULE)
1. Select RECORD and press SEL button to go to the recording mode select screen.
2. Move the cursor to SELECT MODE bar and press SEL button.
The current recording mode is highlighted in colors.
3. Use
buttons to move the cursor to the desired mode (QUAD, MUX or
SCHEDULE) and press SEL button.
19
4. The selected mode becomes highlighted. Press ESC button to go back to LIVE mode,
and from then the selected recording mode will be applied to recording sessions.
4-3-2. QUAD Recording Mode
<Screen and Resolution Setting in QUAD Mode Recording>
1. Select RECORD and press SEL button to go to Select Mode for recording.
2. Select QUAD on the Select Mode screen to go to QUAD setup screen.
20
4-3-2-1. GENERAL Setup
In QUAD Setup screen, select GENERAL to go to the GENERAL setup screen.
QUALITY – Press
button to select recording quality.
DVR supports three types of recording quality in QUAD recording mode.
<LOW QUALITY> offers somewhat harsh picture quality and small file size.
<NORMAL QUALITY> offers average picture quality and medium file size.
<HIGH QUALITY> offers fine picture quality but file size is the largest.
The user should choose the appropriate quality level considering his/her purpose.
SAVE EVEN LOG – Press
button to set ON or OFF
<ON> - LOG will be recorded when events occur.
NET FRAME DROP - Press
button to set ON or OFF
<ON> - When network bandwidth is not sufficient for transmitting all frames, DVR
transmits only I frame, dropping B and P frame.
4-3-2-2. CHANNEL Setup
Select CHANNEL in QUAD setup screen to go to CHANNEL setup screen.
FRAME RATE – It shows the available frame rate.
RATE –Press
button to select the recording speed.
The QUAD recording mode supports
NTSC: 1, 4, 8, 15, 22, and 30FPS
PAL: 1, 4, 7, 13, 18 and 25FPS
21
SENSOR – Press
button to set <ON> or <OFF>.
<ON>: Video will be recorded when the sensor is activated.
Please refer to “4-3-2-3. SENSOR Setup”.
MOTION – Press
button to set <ON> or <OFF>.
<ON>: Video will be recorded when the motion is detected.
Please refer to “4-3-2-4. MOTION Setup”.
MANUAL - Press
button to set <ON> or <OFF>
<ON>: Video will be recorded when the user press RECORD button.
CONTINUOUS - Press
button to set <ON> or <OFF>
<ON>: Video will be ALWAYS recorded when DVR is in operation.
AUDIO – Move the cursor on the one of <1>, <2>, <3>, and <4> and press SEL
button to select the audio port that will be recorded. The selected audio channels
will be highlighted in Yellow.
4-3-2-3. SENSOR Setup
In QUAD setup screen, select SENSOR to go to SENSOR setup screen.
5 seconds of Pre-Record will be applied to all channels as default.
SENSOR NUMBER – Press
button to select sensor that one want to set and
link with the recording channel.
TYPE - Press
button to select the type of sensor to be activated.
Select the right sensor type according to the type of installed sensor with DVR.
NORMAL OPEN – Normal Open type sensor
NORMAL CLOSE – Normal Close type sensor
ALARM - Press
button to select the port on which an alarm out is made
22
when sensor is activated.
CHANNEL - Press
button to set <ON> or <OFF>
<ON>: Video will be recorded when the sensor is activated.
DURATION - Press
button to select the duration of alarm output and the
recording time of the linked channel.
Available alarm output and channel recording duration – 5, 10, 15, 30, 60, 120, and 180
seconds.
4-3-2-4. MOTION DETECTION Setup
In QUAD setup screen, select MOTION to go to MOTION setup screen.
REGION – FULL
In QUAD mode, the motion detection is applied to full screen region only.
ALARM NUMBER - Press
buttons to select the port on which an alarm out is
made when motion is detected.
SENSITIVITY – Move the cursor on the field of SENSIVITY “L 1 2 3 4 5 6 7 8 9 H”
and select sensitivity using
buttons. The selected sensitivity will be highlighted
in Yellow color.
SENSITIVITY “1” - Only reacts to big movements (low sensitivity).
SENSITIVITY “5” - Reacts to average movements (medium sensitivity).
SENSITIVITY “9” - Reacts even to small movements (high sensitivity).
POST RECORD – Using
buttons, select the duration of post-recording.
23
4-3-3. MUX Recording Mode
<RESOLUTION: 360X240>
<RESOLUTION: 720X480>
Difference in recording resolution depending on image resolution setting in MUX mode
1. Select RECORD and press SEL to move to RECORD select mode.
2. Select MUX in RECORD select mode screen to go to MUX setup screen.
4-3-3-1. GENERAL Setup
In MUX setup screen, select GENERAL to move to GENERAL select mode.
24
button to select recording resolution.
RESOLUTION – Press
QUALITY – Press
button to select recording quality.
DVR supports four types of picture quality in MUX recording mode.
<LOW QUALITY> offers somewhat harsh picture quality but small file size.
<MEDIUM QUALITY> offers average picture quality and average file size.
<HIGH QUALITY> offers fine picture quality and big file size.
User should choose the appropriate picture quality considering his/her purpose.
SAVE EVEN LOG – Press
button to set ON or OFF
<ON> - LOG will be recorded when events occur.
NET FRAME DROP - Press
button to set ON or OFF
<ON> - When network bandwidth is not sufficient for transmitting all frames, DVR
transmits only I frame, dropping B and P frame.
4-3-3-2. CHANNEL Setup
In MUX setup screen, select CHANNEL to go to CHANNEL setup screen.
CHANNEL NUMBER - Press
button to select the channel.
FRAME RATE – It shows the available frame rate.
RATE –Press
button to select the recording speed of the channel.
The MUX recording mode supports
NTSC: 360x240 - 1 to 30FPS / 720X480 - 1, 4, 8, 15, 22, and 30FPS
PAL: 360X288 - 1 to 25FPS / 720X576 - 1, 4, 7, 13, 18 and 25FPS
25
SENSOR – Press
button to set <ON> or <OFF>.
<ON>: Video will be recorded when the sensor is activated.
Please refer to “4-3-3-3. SENSOR Setup”.
MOTION – Press
button to set <ON> or <OFF>.
<ON>: Video will be recorded when the motion is detected.
Please refer to “4-3-3-4. MOTION Setup”.
MANUAL - Press
button to set <ON> or <OFF>
<ON>: Video will be recorded when the user press RECORD button.
CONTINUOUS - Press
button to set <ON> or <OFF>
<ON>: Video will be ALWAYS recorded when DVR is in operation.
AUDIO – Move the cursor on the one of <1>, <2>, <3>, and <4> audio inputs and
press SEL button to select the audio port that will be recorded. The selected audio
channels will be highlighted in Yellow.
4-3-3-3. SENSOR Setup
In MUX screen, select SENSOR to go to SENSOR setup screen.
5 seconds of Pre-Record will be applied to all channels as default.
SENSOR NUMBER – Press
button to select sensor that one want to set and
link with recording channel.
TYPE - Press
button to select the type of sensor to be activated
Select the right sensor type according to the type of installed sensor with DVR.
NORMAL OPEN – Normal Open type sensor
NORMAL CLOSE – Normal Close type sensor
ALARM - Press
button to select the port on which an alarm out is made
26
when sensor is activated.
CHANNEL - Press
button to select the channel to record when sensor is
activated.
DURATION - Press
button to select the duration of alarm output and the
recording time of the linked channel.
Available alarm output and channel recording duration – 5, 10, 15, 30, 60, 120, and 180
seconds
4-3-3-4. MOTION DETECTION Setup
In MUX setup screen, select MOTION to go to MOTION setup screen.
CHANNEL NUMBER - Press
buttons to select the channel to set the motion
detection.
REGION – Press
buttons to select the process of the motion detection area
setup.
<FULL>: The motion detection is always applied to full screen region.
<INDIVIDUAL>: The user can set 4 motion detection areas per channel. Please refer to “5-11.
Motion Detection Region Setup” for individual motion detection area setup.
ALARM NUMBER - Press
buttons to select the port on which an alarm out is
made when motion is detected.
SENSITIVITY – Move the cursor on the field of SENSIVITY “L 1 2 3 4 5 6 7 8 9 H”
and select sensitivity using
buttons. The selected sensitivity will be highlighted
in Yellow color.
SENSITIVITY “1” - Only reacts to big movements (low sensitivity).
SENSITIVITY “5” - Reacts to average movements (medium sensitivity).
SENSITIVITY “9” - Reacts even to small movements (high sensitivity).
POST RECORD – Using
buttons, select the duration of post-recording.
27
4-3-4. SCHEDULE Recording Mode
SCHEDULE supports the weekly recording plan. The default recording mode of schedule is
MUX recording mode and recording frame rate set in MUX recording mode is applied. (Please
refer to “4-3-3-2. CHANNEL setup”)
1. Select RECORD and press SEL to move to RECORD select mode.
2. Select SCHEDULE to go to the screen where recording schedule can be set. The
screen will show the plan chart of one day of the week.
4-3-4-1. Applied Function with Respect to the Cursor’s Location
TIME: Applies to the whole region
CH1: Applies only to the CH1 column
CH2: Applies only to the CH2 column
CH3: Applies only to the CH3 column
CH4: Applies only to the CH4 column
1~23: Applies only to the specified time slot
PREV: Move to the previous day of the week
NEXT: Move to the next day of the week
COPY PREV: Copy schedule of current day to the previous day of the week and
move to that day.
COPY NEXT: Copy schedule of current day to the next day of the week and move to
that day.
28
4-3-4-2. Mapping Recording methods and Front Buttons
Front Buttons
REW
BACK JUMP/STEP
PLAY/PAUSE
JUMP/STEP
FF
CAPTURE
Recording Method
SENSOR
MOTION
RECORD
MOTION & SENSOR
NONE
QUAD
Detailed Feature
Record when the sensor is activated
Record when motion is detected
Record continuously
Record by sensor and motion detection
No recording
Record in QUAD mode
When the recording setups in QUAD and MUX mode differ from what is used in schedule, DVR
records by using the method that would record more.
(E.g. If MUX channel 1 is set to record by MOTION and it is to be recorded by SENSOR in
SCHEDULE, channel 1 will be recorded by both SENSOR and MOTION.)
4-3-4-3. Schedule setup as QUAD recording mode
To set QUAD recording mode, place the cursor on TIME and 0 to 23 and press
CAPTURE button then QUAD passage will appear on each cell.
When Schedule is set as QUAD recording mode, recording frame rate and settings in
QUAD setup will be applied. (Please refer to “4-3-2-2. CHANNEL setup”)
29
4-4. SYSTEM
Select SYSTEM and press SEL button to go to SYSTEM setup menu.
4-4-1. ADMIN PASSWORD
ADMIN PASSWORD can be edited here.
1. Place the cursor on “Select” in the field of ADMIN PASSWORD and press SEL button.
2. CURRENT PASSWORD: Enter the current password using 1,2,3, and 4 and press SEL
button.
3. NEW PASSWORD: Enter a new password using 1,2,3, and 4 and press SEL button.
4. CONFIRM PASSWORD: Retype the new password and press SEL button to confirm the
new password. When “Password Changed” appears as bellow, press “YES” using SEL
button to confirm the change.
The factory default password is “1111”.
To delete password, just press SEL button without typing any numbers in the NEW
PASSWORD and CONFIRM PASSWORD field.
Applied region and authorization of ADMIN PASSWORD & USER PASSWORD
ADMIN – All setting changes and other features are accessible
USER – Making setup changes and turning off the power is disallowed
The user can make Password (ADMIN PASSWORD & USER PASSWORD) ONLY using the
numbers of “1”, “2”, “3”, and “4”. The available figures of the password (ADMIN PASSWORD
& USER PASSWORD) are 8 figures.
30
4-4-2. USER PASSWORD
USER PASSWORD can be edited here.
1. Place the cursor on the “Select” and press SEL button.
2. CURRENT PASSWORD: Enter the current password and press SEL button.
3. NEW PASSWORD: Enter a new password and press SEL button.
4. RETYPE PASSWORD: Retype the new password and press SEL button.
The default password is “1111.”
To delete password, just press SELECT without typing any numbers in the NEW PASSWORD
and CONFIRM PASSWORD field.
4-4-3. FACTORY DEFAULT
Reset DVR to factory default settings.
1. When the system is reset with factory default settings, all customized settings shall be
removed.
2. Users can maintain the user defined and customized settings very easily with network client
S/W, please refer to “7-6-5. Saving and loading settings.”
4-4-4. DATE FORMAT
It display format of the date and the user can changed the format of date.
31
Supported date formats and examples
YYYY-MM-DD
2003-07-11
MM-DD-YYYY
07-11-2003
DD-MM-YYYY
11-07-2003
YYYY/MM/DD
2003/07/11
4-4-5. CURRENT DATE
It displays current date, which can be edited.
1. Place the cursor on the Current Date field and press SEL button. This will highlight
the first part of the date (one of year, month, or day depending on the display format)
in yellow.
2. Press
buttons to set the date in the shown date format.
3. Press SEL button to apply the changed date.
4. If there are existing data on the date of editing, DVR display “If yes, the recorded
data will be deleted.” as shown below.
32
5. Press “YES” to delete the related data or press “NO” to keep the data and cancel the
date change.
WARNING
If the user selects <YES>, all the data from the changed date will be deleted.
4-4-6. CURRENT TIME
Displays the current time, which can be edited.
1. Place the cursor on the Current Time field and press SEL button. This will highlight
the front part of the displayed time yellow.
2. Use
buttons to set the time in hr/min/sec format.
3. Press SEL button to apply the changed time.
4. If there are existing data at the time of editing, DVR display “If yes, the recorded data
will be deleted.”
5. Press “YES” to delete the related data or press “NO” to keep the data and cancel the
time change.
WARNING - If the user selects <YES>, all the data from the changed time will be deleted.
4-4-7. GMT AREA
Press
buttons to add or lessen to adjust the time of DVR in accordance with GMT time
zone of the country or territory. Then the time in the field of CURRENT TIME will be changed.
NOTICE
To apply DAYLIGHT SAVING function properly, GMT AREA setting should be done before
DAYLIGHT SAVING setting. Please refer to WORLD TIME ZONE MAP.
33
4-4-8. DYALIGHT SAVING
1. Press
buttons to decide whether to apply DAYLIGHT SAVING or not by selecting
<ON> or <OFF>.
2. After selecting <ON>, move the cursor to BEGIN (MM/DD/HH) field and press SEL
button. This will highlight the front part of the displayed date in yellow.
3. Use
buttons to set the date in MM/DD/HH format.
4. Press SEL button to apply the changed time.
5. When CURRENT DATE and CURRENT TIME is located between BEGIN and END,
DLS (DAYLIGHT SAVING) is applied and operated.
NOTICE
-
The Northern Hemisphere: The date and time in BEGIN is earlier than END.
-
The Southern Hemisphere: The date and time in END is earlier than BEGIN.
EXCEPTION
-
DLS can’t start from 23:00.
-
DLS can’t be applied, if the date of BEGIN and END is same.
34
35
4-5. INFO
Select INFO from the SETUP menu and press SEL button to go to INFO setup screen.
4-5-1. SITE ID
Site description of DVR is shown and can be edited here.
Enter in the site description by using
buttons and SEL button and press the
ENTER key on the keyboard to save and apply the new description.
4-5-2. LOG
LOG files are shown here.
Place the cursor “Select” LOG field and press SEL button. The window will appear as
bellow.
1. Select date using
button and SEL button on the left window. Then the cursor
will be shifted to the right window.
36
2. Press
buttons and SEL button to open the LOG list.
4-5-3. SYSTEM
Displays DVR information such as name of tools.
SYSTEM NAME – It shows the model name of DVR.
SERIAL ID – It shows the serial ID of DVR.
SOFTWARE VERSION – It shows the software version of DVR.
HARDWARE VERSION – It shows the hardware version of DVR.
CURRENT IP ADDRESS – It shows, if available, the assigned IP address that is in
use by DVR.
HDD CAPACITY – It shows the HDD capacity of DVR.
4-5-4. CAPTURED IMAGE
The images that were captured during playback can be displayed here.
37
Captured images are sorted by date/time, which indicates the time of recording. Select a
file from the list to view the captured image.
To capture a still image and view, please refer to “5-8. Still Image Capturing, Viewing, and
Viewing.”
4-5-5. SEND MAIL (IP ADDRESS Mailing)
If the network is linked with LAN-DHCP or ADSL, which support dynamic IP addresses, DVR
can send out the dynamic allocated IP addresses by mails. It is unnecessary for a distant user
to confirm the IP address when he/she connects to the network since he/she can view it after
receiving it by email.
1. Press
buttons to decide whether to send mail or not by selecting <ON> or
<OFF>.
Move the cursor to MAIL ADRESS field and press SEL button to type in the mail address on
the keyboard that appears.
To type @, press “Caps Lock” button. Then @ will appear on the top line.
38
2. Press
buttons and SEL button to type an email address on the keyboard,
and use “ENTER” button on the keyboard to save and apply the changed e-mail
address.
3. Move the cursor under Mail Server IP field and press SEL button to select the IP
number. Then the first part should turn into yellow color as bellow.
Press
buttons to modify the IP address. The other parts of the IP address can be
modified as same as the first part.
4. Press SEL button to apply the modified IP Address.
IMPORTANT
To receive e-mail with Dynamic IP address from DVR, User has to apply IP address of Mail Server
run by Manufacturer on the field of “MAIL SERVER IP”.
4-5-6. BUZZER
User can turn ON or OFF the sound of inter buzzer.
39
4-6. PTZ
In order to use the PTZF function, the same camera type as the PTZF camera that is connected
to the chosen channel should be selected as follows.
1. Select DEVICE and press SEL button to show DEVICE setup menu.
2. On the field of <PTZ Channel>, select the channel on which you wish to change the
PTZF type of the camera. The field of <Camera Type> will show the camera type that is
currently selected for that channel.
3. After selecting the channel, move the cursor to the field of <Camera Type> using
buttons. Select the camera type, using
buttons.
4. If the camera has a specific camera ID, move the cursor on the field of <Camera ID>
and select the camera ID using
buttons.
4-7. NETWORK
Select NETWORK from the SETUP menu and press SEL button to go to NETWORK setup
screen.
4-7-1. CLIENT ACCESS
The access from NETWORK CLIENT S/W can be turned off.
<OFF> - The access between NETWORK CLIENT S/W and the system will be blocked up.
40
4-7-2. LAN
Users connected to LAN network, which uses static IP addresses, should follow the setup
described below.
1. Press
buttons to set network type to <LAN>.
2. Press
buttons to set DHCP to <OFF>.
3. Press
buttons to set DDNS to <ON>.
4. Use
buttons to edit DDNS SERVER IP Address. And press SEL button to
apply the changed DDNS SERVER IP address.
NOTE
To use DDNS function, the DVR Serial number and Domain Name should be registered at
DDNS Server.
5. Place the cursor on the IP Address field and press SEL button. This will highlight the
first part of IP address in yellow color.
6. Use
buttons to edit the IP Address. And press SEL button to apply the
changed IP address.
7. Edit GATAWAY and SUBNET MASK using the same method as above.
4-7-3. LAN –DHCP (Dynamic Host Configuration Protocol)
Users connected to LAN – DHCP network, which uses dynamic IP addresses, should follow the
setup described below.
41
1. Press
buttons to set network type to <LAN>.
2. Press
buttons to set DHCP to <ON>.
3.
Press
buttons to set DDNS to <ON>.
4. Use
buttons to edit DDNS SERVER IP Address. And press SEL button to
apply the changed DDNS SERVER IP address.
NOTE
To use DDNS function, the DVR Serial number and Domain Name should be registered at
DDNS Server.
5. When DVR is rebooted, the newly assigned IP address appears in the CURRENT IP
ADDRESS field.
For setting a mail address that will receive the assigned IP addresses that are frequently
changed, please refer to “4-5-5. SEND MAIL (IP ADDRESS Mailing).”
4-7-4. ADSL
Users connected to ADSL network, which uses dynamic IP addresses, should follow the setup
description below.
1. Press
buttons to set network type to <ADSL>.
2. Place the cursor on “default” in the SERVICE ID field and press SEL button to type the
ADSL service ID. Then the keyboard will appear.
42
buttons and SEL button to type the ADSL service ID on the keyboard,
3. Press
and use “ENTER” button on the keyboard to save and apply the saved ID.
4. Edit PASSWORD using the same method as editing SERVICE ID.
8. Press
5. Use
buttons to set DDNS to <ON>.
buttons to edit DDNS SERVER IP Address. And press SEL button to
apply the changed DDNS SERVER IP address.
6. The assigned IP address appears in the CURENT IP ADDRESS field.
For setting a mail address that will receive the assigned IP addresses that are frequently
changed, please refer to “4-5-5. SEND MAIL (IP ADDRESS Mailing).”
4-8. STORAGE
Select STORAGE and press SEL button to go to STORAGE setup screen.
4-8-1. STORAGE OVERWRITE
Set up storage overwriting of the hard disk.
<ON>: The oldest data will be deleted and replaced with new data if the hard disk has
fully been recorded.
4-8-2. HDD FORMAT
You can format the hard disk by deleting all stored data.
1. Place the cursor on “SELECT” and press SEL button. DVR will show “All data will
be deleted from HDD.” to confirm the procedure.
43
2. If you select “YES,” DVR will reconfirm the formatting procedure, showing “Do you
really want to delete all data?”
3. Formatting will proceed when you select “YES”. If you select “NO”, the hard disk
formatting will not proceed and all saved data will be maintained.
WARNING
Formatting the hard disk by deleting all saved data will delete the captured images
as well. If you wish to preserve the captured images, please save those images by
network client S/W before proceeding of HDD formatting.
4-8-3. AUTO ERASING (30DAYS)
<ON>: The data prior 30days from the temporary date will be automatically deleted.
4-8-4. CD-RW BACKUP (Available only in model with CD-RW)
This menu is to be enabled only when DVR has CD-RW.
Please refer to “5-15. Video back up in CD”.
4-8-5. S/W UPGRADE W/ CD-RW (Available only in model with
CD-RW)
This menu is to be enabled only when DVR has CD-RW. The upgrade guide will be provided by
another material.
44
5. OPERATIONS
5-1. Power ON/OFF
5-1-1. Power ON
A. Connect the camera input cables to the camera input port on the back of DVR.
B. Connect the monitor cable to the video output port on the back of DVR.
C. Connect the power cable to the power input port on the back of DVR.
D. Press the POWER button only after DVR and other equipments have been fully
connected. The LED on the POWER button and SENSOR, MOTION, RECORD, and
NETWORK LED on the front right view will light up when DVR starts up.
E. The graphic image (with logo or without logo) will appear while DVR is being booted.
F. After the logo disappears, a divided screen shows up on the monitor.
G. The LOCK function is automatically activated when DVR is initially started up. To use
the ‘LIVE screen viewing’ and other functions, press the LOCK button and enter in the
password. (The factory default password is ‘1111’.)
H. The LED on the POWER button stays lit up while DVR is being operated.
5-1-2. Power OFF
A. DVR cannot be turned off using the POWER button when the LOCK function is on.
Deactivate the LOCK function by pressing LOCK and entering the password.
B. Turn off DVR by pressing the POWER button on the front view of DVR.
C. When DVR is being turned off, the LED on the POWER button and SENSOR,
MOTION, RECORD, and NETWORK LED on the front right view stay on for a while.
D. The LED is no longer lit when DVR is turned off.
5-2. LIVE Display
5-2-1. QUAD Screen Setup
You can switch from Quarterly Divided Screen Setup from Full Screen mode and vice versa
by pressing QUAD/MUX button.
45
5-2-2. Individual Full Screen Setup
Press the channel buttons on DVR to select a channel. The selected channel is highlighted
as yellow. Press SEL button to display the channel in full screen.
5-2-3. Auto Channel Rotation
This function is useful when viewing each of the channels in full screen one by one. To set
time interval and channels to rotate, please refer to “4-2 LIVE Setup/ A. Channel Rotation”
5-3. OSD ICON
5-3-1. OSD ICON on LIVE Screen
OSD Icon shows the operation status of DVR on the LIVE screen.
46
(1)
Channel Name
(2)
It shows the recording trigger.
R – When recording is triggered by Manual record button.
M – When recording is triggered by Motion detection.
S – When recording is triggered by Sensor.
(3)
Remaining space in Hard Disk
(4)
Date
(5)
Time
(6)
LOCK, AUTO, NETWORK Status
– When NETWORK CLIENT is connected.
- DVR is locked by a password.
– Auto Channel Rotation is turned on
5-3-2. Show/Hide OSD ICON on LIVE Screen
You can hide OSD Icon by pressing MISC button. Press MISC button again and press ESC
button to show OSD Icon.
Please refer to “4-2. LIVE Setup / B. STATUS INFO”.
5-4. LED Information
A. MOTION – LED lights up when motion is detected.
B. SENSOR – LED lights up when sensor is activated.
C. RECORD – LED lights up when recording is in progress
D. NETWORK – LED lights up when Network client is connected.
47
5-5. Recording
5-5-1. MANUAL Recording
In Manual Recording, manually press the buttons on DVR to record. This method is
useful when recording is necessary while monitoring live channels. The recordable
channels are limited to the channels that its Record By Manual function is turned on.
This is explained under “4-3-2-2. CHANNEL Setup (QUAD) / 4-3-3-2. CHANNEL Setup
(MUX)”. When the RECORD button is pressed, the LED on the RECORD button, the
RECORD LED, and “R” icon on the screen lights up and starts recording. Press the
RECORD button again to stop recording.
5-5-2. SCHEDULE Recording
In Scheduled Recording, DVR automatically records at the specified time. Please refer
to “4-3-3. SCHEDULE Record Mode” for Scheduled Recording Setup.
5-5-3. SENSOR Recording
When SENSOR is operated, SENSOR LED, RECORD LED and “S” on the screen light
up and the channel that is connected to the Sensor starts to record. Please refer to “43-2-3. SENSOR Setup (QUAD)” / “4-3-3-3. SENSOR Setup (MUX)”.
5-5-4. MOTION Recording
When motion is detected, MOIITON LED lights up, RECORD LED and “M” on the screen
light up and the channel that is connected to the motion is recorded. Please refer to “4-32-4. MOTION Setup (QUAD)” / “4-3-3-4 MOTION Setup (MUX)”)
5-5-5. CONTINOUS Recording
DVR is always recording, when DVR is running. Please refer to “4-3-2-2. CHANNEL
Setup (QUAD)” / “4-3-3-2. CHANNEL Setup (MUX)”.
5-6. PLAYBACK
5-6-1. Search when DVR has one HDD
A. Press the SEARCH button to go to the Search Menu.
B. Select the date firstly with
buttons. Press SEL button to move to select channel.
48
The selected date is highlighted yellow.
C. Select a desired channel with
buttons. Selected channel is highlighted yellow.
Press SEL button to set the time. Refer to Audio Recording and SENSOR & MOTION
related recording information.
D. Move the TIME BAR (Red Vertical Bar) to select time at the bottom of the Recording
Information Columns. Move the time bar using
buttons. The time bar moves by
7, 15, 22, 30, 37, 45, 52, 00 minutes. The selected time is shown up on the upper part
of the Select Channel field.
E. To change the date again, move to Date by pressing SEL button.
F. After completing time selection, move to the playback screen by pressing the
PLAY/PAUSE button.
<Displayed types depending on different recording modes during play>
QUAD – 4 channels are displayed at once
MUX (Resolution: 360 X 240) – The selected channel is displayed.
The channel is
played in full screen mode. Press SEL button to playback with the original recording
resolution during playback.
MUX (Resolution: 720 X 480) – The selected channel is displayed.
49
<SHOW/HIDE OSD ICON during play>
During playback, press the MISC button to hide the OSD ICON (date, channel name, time,
playing speed, time bar).
5-6-2. Search when DVR has two HDD
A.
At first you need to set removable HDD as SLAVE and fixed HDD as master. The
installation guide will be provided by another material.
B.
Press the SEARCH button to go to the Search Menu. Then the window for HDD
selection will be appeared.
C.
Select HDD that you want to search and playback. And then the next steps are the
same as “5-6-1. Search when DVR has one HDD”.
5-6-3. Playback buttons
A. PLAY/PAUSE
Press the button to play channels in normal speed (X1).
Press it again to pause.
B. FF
Press the button to play channels faster than the normal speed (X1)
The fast-forwarding speed is shown up on the upper right corner of the display screen.
i.
X2 – twice as fast
ii.
X4 – 4 times as fast
iii.
X16 – 16 times as fast
C. JUMP/STEP
When playback is paused, press the button to step forward to the next frame.
During play or fast-forward, it jumps 2 minutes forward from the current spot.
D. REW
Press the button to reverse play channel faster than the normal speed ( - X1).
The speed is shown up on the upper right corner of the display screen.
i.
- X2 – twice as fast
ii.
- X4 – 4 times as fast
50
iii.
- X16 – 16 times as fast
E. JUMP/STEP
When playback is paused, press the button to step backward to the previous frame.
During play or fast-forward, it jumps 2 minutes backward from the current spot.
5-7. Still Image Capturing, Viewing, and Backup
5-7-1. Capturing Still Image
During playback, press the Pause PLAY/PAUSE button to pause playing screen at desired
spot and press the CAPTURE button. It saves 3 consecutive frames as one file.
You must press the Play/Pause button to pause the screen, then press the Capture button in
order to capture images.
5-7-2. Viewing Captured Image
Select a list to play the images. Saved frames can be viewed in order by pressing SEL
button. The image that is saved in 360X240 is played in 360X240 in the middle of the
monitor screen. The image that is saved in 720X480 is played in 720X480 in full of the
monitor screen.
51
5-7-3. Still image Backup in USB flash memory stick
1.
Connect an USB flash memory stick into USB port.
2.
Select the still image that you want to backup in an USB flash memory stick. Please
refer to “5-8-2. Viewing Captured Image”.
3.
Press SEL button. Then the still image will be stored in an USB flash memory stick.
NOTICE
Please contact to the supplier or installer of DVR in order to confirm the compatible models of
USB flash memory stick.
5-8. PTZF
5-8-1. PTZF Operation
To control the PTZF functions of the camera, connect the controller to the RS-485 port.
For speed dome cameras that supports RS-485, connect them directly to the RS-485 port. But if
the camera is controlled with RS-232C, one needs to use Signal Converter (RS-485 to RS-232C).
1. In PTZ from the SETUP menu, set the protocol type of the camera for the channel you
wish to control to be the same as the camera that is installed. If the camera has a specific
camera ID, move the cursor on the field of <Camera ID> and select the camera ID using
buttons.
2. Press the MISC button in triple to go to the screen where PTZF can be adjusted.
52
3. PAN/TILT – to pan or tilt the selected channel
4. ZOOM/FOCUS – to zoom or focus the selected channel
5. CAMERA INITIAL – to go to CAMERA INITIAL settings for the selected channel
This menu is to initialize the PTZ setting of the camera.
Although the camera is initialized, no message will be appeared.
53
5-8-2. PTZF Camera link to RS-485
54
55
5-9. Brightness, Contrast, Hue, Saturation & Alphablending Adjustment
Press the MISC button twice to go to the screen where brightness, contrast and alpha-blending
can be adjusted.
1. BTIGHTNESS – to adjust the BRIGHTNESS of the selected channel using
buttons.
2. CONTRAST – to adjust the CONTRAST level of the selected channel using
buttons.
3. HUE – to adjust the CONTRAST level of the selected channel using
buttons.
4. SATURATION – to adjust the CONTRAST level of the selected channel using
buttons.
5. ALPHABLENDING – to adjust the ALPHABLENDING of the selected channel’s status icon
using
buttons.
56
5-10. OSD position and Screen size Adjustment
The position of OSD on LIVE screen can be adjusted up and down.
Depending on the characteristics of the monitor, being able to adjust the position of OSD and
Screen Size may be a very useful feature.
5-10-1. Adjusting OSD Ceiling & Bottom Line
Place the cursor on CEILING/BOPTTOM LINE and then use
and SEL button, and the
dark horizontal line across the top/bottom of the screen to adjust the OSD position.
5-10-2. Adjusting Screen size
If your monitor does not display verges of screen, you can make the screen size shrunk.
Select SCREEN SIZE menu and then set screen size with SEL button.
5-11. Motion Detection Region Setup
MUX recording mode not only allows full screen motion detection but also lets you assign 4
motion detection regions per channel.
5-11-1. Region Setup
1. Select INDIVIDUAL on REGION field in the MOTION menu and press SEL button to go
to Motion Region Setting screen.
57
2. From 1. GREEN 2. ORANGE 3. MINT 4. VIOLET, select the region you wish to adjust.
Place the cursor on “1.Set” and press SEL button to obtain a box that lets you select a
region.
3.
Move the cursor using
buttons to select the desired region.
4. After selecting a region, press SEL button and save the region data.
5. Press the ESC button to go back to Motion Region Setting screen.
58
5-11-2. Deleting Region
1. Select INDIVIDUAL for REGION in the MOTION menu and press SELECT button to go
to Motion Region Setting screen.
2. From 1. GREEN 2. ORANGE 3. MINT 4. VIOLET, select the region you wish to delete.
Place the cursor on “2.DELETE” and press SEL button. When DVR asks “Do you Delete
This Region Data?” select “YES” to delete the selected region. A mode for setting a new
region will proceed.
5-12. Audio
5-12-1. Audio Setup and Connection
1. Connect the audio input and audio output cable to the audio connection port on the back
of DVR.
2. In CHANNEL menu of MUX menu, select the desired audio input channel for each video
channel by highlighting it yellow.
3. When recording by sensor, motion detection, manual or schedule begins, on a channel
that the audio is linked to, audio recording begins automatically.
59
4. In MUX recording mode, if you wish to listen to the audio of a channel live, select the
channel from live screen using the number buttons. (The channel label becomes
highlighted yellow as bellow). Audio live is not available for listening when the SETUP
menu is being set up.
5-12-2. Playback
1. Connect the audio cable to the audio output port on the back of DVR.
2. Check the status part where audio is recorded (highlighted in yellow) from the SEARCH
menu. (Audio field will be highlighted in yellow even when only one channel is
recorded.)
3. Use
buttons and SEL button to select the date, channel and time you wish
to play. Press the PLAY/PAUSE button to play the audio with video.
60
5-13. External Terminal Information
5-13-1. RS-232C
Name
No
1
2
3
4
5
DCD
RxD
TxD
DTR
GND
Description
Data Carrier Detect
Receive Data
Transmit Data
Data Terminal Ready
Signal Ground
No
Name
6
7
8
9
DSR
RTS
CTS
RI
5-13-2. RS-422/485
No
1
2
3
4
5
6
7
8
9
Name
NC
RxD+
TxD+
TxDGND
RxDNC
NC
NC
Description (RS-422)
Not Connected.
Receive Data+
Transmit Data+
Transmit DataSignal Ground
Receive DataNot Connected.
Not Connected.
Not Connected.
No
1
2
3
4
5
6
7
8
9
Name
NC
NC
TxD+
TxDGND
NC
NC
NC
NC
Description (RS-485)
Not Connected.
Not Connected.
Transmit Data+
Transmit DataSignal Ground
Not Connected.
Not Connected.
Not Connected.
Not Connected.
61
Description
Data Set Ready
Request to Send
Clear to Send
Ring Indicator
5-14. Sensor Installation
DVR can connect up to 4sensors. There are two simple steps to install the sensors.
Connect THE SENSOR SIGNAL LINE
Connect the sensor power line (10~12V)
Warning
Vice versa connection of Positive and Negative will occur a fatal error or a malfunction of DVR.
5-15. Video back up in CD (Available only in model with CD-RW)
5-15-1. Back up in CD
1. Please go to “STORAGE” in the SETUP menu.
2. And then go to CD-RW BACKUP and place the cursor “SELECT” and press SEL button.
The window for CD back up will appear as bellow. Please set the channels and time to
backup.
62
3. If the recorded data on DVR is QUAD mode, you need to select Q on VIDEO. If you do
not select Q, QUAD mode will not be backed up on the CD.
4. If the selected data volume exceeds CD media size, you need to put another CD in. And
then DVR automatically proceeds backing up from the end of the data of the previous
CD.
5. BACKUP is completed, the following message will appear.
6. BACKUP is failed, the following message will appear.
Warning
When user proceeds CD-RW BACKUP, all the other functions such as networking and
recording will be on hold.
5-15-2. Playback Data in CD
1. Please put CD in CD-RW in PC.
2. Please start Network Client S/W.
3. Please go to SEARCH and select PLAYBACK VIDEO button.
And then Search
window will pop-up.
4. Please select and open the backed up data.
The file format of the backed up data is *.nsf. You can review and playback the backed
up data on CD only in Network Client S/W.
63
6. HDD Installation
6-1. Installing HDD in removable HDD rack
For DVR, the hard disk, on which images are saved, is installed into the RACK.
The hard disk is installed into DVR as shown in the following instructions.
1. Prepare a hard disk and rack as shown below.
2. Set the hard disk to master. (Refer to the JUMPER SETTING of the hard disk being
installed)
3. Open the upper cover of the rack and connect the power cable and data cable of the
hard disk and the rack.
4.
Put the cover back on as shown.
5.
Tighten the clamping screws on both sides of the rack.
64
6.
Assemble the rack containing the hard disk into DVR while holding up the handle.
7.
Have the rack fixed in using the key of the rack. Otherwise, “HDD INSTALLATION
FAILURE” message will pop-up.
8.
If the hard disk is not formatted and recognizable by DVR, an automatic formatting will
be done when the power of DVR is turned on. The notice “FORMATING” will appear on
the screen as shown below during formatting.
6-2. HDD Jumper Setting
DVR allows on one hard disk to be assembled into the REMOVEBLE HDD RACK and a new
hard disk’s JUMPER SETTING should be set to either SINGLE or MASTER. All hard disks
provide information needed for JUMPER SETTING on the hard disks’ exterior. Please beware
that DVR will not run properly without a proper JUMPER SETTING.
Refer to the following homepages of major hard disk manufacturers of additional information on
JUMPER SETTING.
WESTERN DIGITAL: www.westerndigital.com
SEAGATE: www.seagate.com
HITACHI: www.hgst.com
MAXTER: www.maxter.com
65
6-3. HDD Indicator
When the POWER is on, the hard disk indicator is displayed as the chart shows.
ITEM
POWER
HDD ACCESS
INDICATOR
GREEN LED
YELLOW LED
WARNING
1. DVR must be turned off when one installs a hard disk into DVR.
2. DVR must be turned off when changing hard disk.
3. The system will recognize HDD installed only when the key of the rack must
be locked.
66
7. NETWORKING
DVR can be connected to LAN or ADSL network and supports functions and additional features
that are available on remote DVR.
7-1. NETWORK CLIENT S/W Main Features
Remote real-time monitoring
Remote search and playback of saved data in DVR
Various BACKUP functions – Image data backup during remote live display or remote
playback, directly download image data from a remote DVR.
Remote setup
Remote camera control
Supports dynamic IP addresses
7-2. Computer System Requirements
Operating System: Microsoft Windows 98/SE, Microsoft Windows ME, Microsoft
Windows 2000, or Microsoft Windows XP
CPU: Pentium III (Celeron) 1.6GHz or higher
RAM: 128MB or higher
NETWORK CLIENT S/W may not operate if the VGA card in PC is outmoded or is not wellknown brand.
7-3. Network Setup in DVR
To make regular use of NETWORK CLIENT S/W, the network type of DVR must be set same as
the connected network after setting Network Access “ON”. DVR supports various types of
network including dynamic IP and static IP environments.
For details regarding network environments and related numbers, please consult the network
administrator of the installed site.
7-3-1. Network ACCESS ON/OFF
1. Select NETWORK in the SETUP menu to set up your network.
2. CLIENT S/W ACCESS can be turned ON/OFF. CLIENT ACCESS must be turned ON for
network to be connected from CLIENT to DVR.
67
7-3-2. For LAN Users
Select LAN for NETWORK TYPE using
buttons. Edit the IP address assigned from
LAN as well as LAN’s GATEWAY and SUBNET MASK. Use
numbers and use
buttons to edit the
buttons to move from field to field.
For details regarding IP ADDRESS, GATEWAY, and SUBNET MASK, please consult the
network administrator of the installed site.
7-3-3. For LAN –DHCP Users
1. If LAN is using DHCP, set DHCP to “ON”.
For DHCP installation, please refer to “4-7-3. LAN Setup –DHCP (Dynamic Host
Configuration Protocol)”.
2. Set up the email address that will send out the assigned IP address of DVR, and the
related Mail Server’s IP address in the INFO menu.
68
For setting up an email address for sending out assigned IP addresses to the client user,
please refer to “4-5-5. SEND MAIL (IP ADDRESS Mailing)”.
IMPORTANT
To receive e-mail with Dynamic IP address from DVR, User has to apply IP address of Mail
Server run by Manufacturer on the field of “MAIL SERVER IP”.
7-3-4. For ADSL (Dynamic IP address) Users
1.
If you are using ADSL, change the NETWORK TYPE to ADSL.
Enter the service ID and password of ADSL using the keyboard shown below.
Consult the ADSL service administrator for ID and password.
3. Set up the email address that will send out the assigned IP address of DVR, and the
related Mail Server’s IP address in the INFO menu.
69
For setting up an email address for sending out assigned IP addresses to the client user, please
refer to “4-5-5. SEND MAIL (IP ADDRESS Mailing)”.
IMPORTANT
To receive e-mail with Dynamic IP address from DVR, User has to apply IP address of Mail
Server run by Manufacturer on the field of “MAIL SERVER IP”.
7-4. NETWORK CLIENT S/W Installation and Start Up
7-4-1. NETWORK CLIENT S/W Installation
Do the following before starting installation.
Close all programs that are operating on the computer before installing Network Client
S/W.
If there is an existing Network Client S/W on the computer, uninstall the older version.
Insert the enclosed CD-ROM into the PC’s CD-ROM, and run the file named ‘DVR.exe’ to begin
the installation of Network Client S/W. The icon shown below is created when the installation of
Network Client S/W is completed.
7-4-2. NETWORK CLIENT S/W Start Up – Static IP Address
1. Run CLIENT S/W and press the SITE button. A dialogue box for entering IP address and
password appears.
70
2. Enter the assigned IP address from DVR setup menu into the IP ADDRESS field and enter
the password if DVR is using a password. After pressing OK, the LIVE screen appears after
it has been connected to the network.
7-4-3. NETWORK CLIENT S/W Start Up – Dynamic IP Address
1. If DVR is connected to LAN-DHCP or ADSL, identify the IP address that has been sent to
the established email address.
2. Run NETWORK CLIENT S/W and press the SITE button. A dialogue box for entering IP
address and password appears.
3. Enter the IP address received through the established email address into the IP ADDRESS
field and enter the password if DVR is using a password. After pressing OK, the LIVE screen
appears after it has been connected to the network.
71
7-5.LIVE
1.
Enlarge Channel
2.
QUAD Screen ROTATE Screen
3.
Display Live Images on Full-screen without any control tools
4.
IP Address Displayed
5.
Date and Time Displayed
6.
SITE
7.
SEARCH
8.
SETUP
9.
Remote Camera Control
10. Camera Channels ON/OFF
11. CONTROL (ALARM OUT)
12. SENSOR Indicator
13. Video backup during Live display
14. Still Image backup during live display
15. Select Audio
16. Terminate Network Client S/W
17. Hard Disk in Use
72
7-6. SETUP
Press the SETUP button on the upper right of GUI to go to remote DVR SETTING menu.
7-6-1. RECORD
A. SELECT MODE
You can select your recording mode here; the selected mode is inversed.
MUX – Record in MUX mode (inversed during MUX recording)
QUAD – Record in QUAD mode
SCHEDULE – Record in SCHEDULE mode
Please refer to “4-3-1. Selecting Recording Mode (QUAD, MUX, SCHEDULE)”.
B. MUX SETTING
RESOLUTION: Select from 720 X 480 and 360 X 240
QUALITY: Select quality among LOW / NORMAL / HIGH
AUDIO: Setup Volume Control and INPUT GAIN
CH1 / CH2 / CH3 / CH4
CHANNEL
FRAME RATE: Select recording frame rate
RECORDED BY: SENSOR, MOTION, MANUAL
RECORD AUDIO: NONE, 1, 2, 3, 4
NET FRAME DROP
MOTION
FULL MOTION REGION: Full-screen Motion Detect Mode
SET REGION: Inversed when motion detection region is being setup
RELAY OUTPUT - ALARM: Select alarm
73
SENSIVITY – Select from LOW, NORMAL, and HIGH
SENSOR1 / SENSOR2 / SENSOR3 / SENSOR4
TYPE: Select from NORMAL OPEN / NORMAL CLOSE
RELAY OUTPUT
ALARM: Select alarm to be set off when the sensor is activated
CHANNEL: Select channel to be recorded when the sensor is activated
DURAITON: Select the duration of recording when the sensor is activated
Please refer to “4-3-3 MUX Recording Mode”.
C. QUAD SETTING
QUALITY: Select quality among LOW / NORMAL / HIGH
AUDIO: Setup Volume Control and Input Gain
CHANNEL & MOTION
AVAILABLE FRAME RATE: Usable Frame
FRAME RATE: Select recording frame rate
RECORDED BY: SENSOR, MOTION, MANUAL
SENSOR PRERECORD
RECORD AUDIO: NONE, 1, 2, 3, 4
NET FRAME DROP
RELAY OUTPUT - ALARM: Select alarm to be set off when motion is detected
SENSIVITY – Select from LOW, NORMAL, and HIGH
SENSOR1 / SENSOR2 / SENSOR3 / SENSOR4
TYPE: Select from NORMAL OPEN / NORMAL CLOSE
RELAY OUTPUT
74
ALARM: Select the alarm to be set off when Sensor is activated
CHANNEL: Select the channel to be recorded when Sensor is activated
DURATION: Select the duration of alarm and recording time when Sensor is
activated
Please refer to “4-3-2. QUAD Recording Mode”.
D. SCHEDULE SETTING
The schedule setup and usage instruction are the same as DVR.
Please refer to “4-3-4. SCHEDULE Recording Mode” for more
instructions.
75
7-6-2. LIVE
D. CH1 / CH2 / CH3 / CH4
LABEL: Show the selected channel name
P/T/Z/F TYPE: Select the appropriate camera protocol for the channel
E. ROTATION SETTING
CHANNEL: Select a channel to rotate
DURATION: Select the time interval between each channel for automatic channel rotation.
Please refer to “4-2. LIVE”
7-6-3. SYSTEM
A. SYSTEM INFORMATION
SITE DECSRIPTION: Edit DVR information of DVR that is connected to network.
IP ADDRESS: Show IP Address of the appropriate site
SERIAL ID: Show the serial number for DVR that is connected to network
S/W VERSION: Shows the S/W version of DVR that is connected to network
H/W VERSION: Shows the H/W version of DVR that is connected to network
Client VERSION: Show the client S/W version
B. USER PASSWORD (PASSWORD Edit Menu)
OLD PASSWORD
NEW PASSWORD
COMFIRM PASSWORD
C. TIME ZONE
D. DAY LIGHT SAVING (DLS) SETTING
76
ADMIN password can’t be amended on Network Client S/W.
7-6-4. NETWORK
A. ADSL SETTINGS
SERVICE ID: Enter ADSL service ID
PASSWORD: Enter ADSL password
B. LAN SETTING
USE DHCP: Select to use DHCP
IP ADDRESS:
GATEWAY
SUBNET MASK
C. NETWORK UPGRADE
77
7-6-5. BACKUP
Available backup file format
*.nsf – This format can be playback only in network client S/W.
*.avi – This format can be playback only in Media Player.
7-6-6. Saving and Uploading Settings
1. Saving Settings
If you wish to use the current settings later on, customize the settings and press the
SAVE button at the bottom left corner. Save the file on the computer. (File Format: ndc)
2. Uploading the saved settings
If you wish to use the saved setting, press the LOAD button on the bottom left corner.
Select the setting you wish to use and the setting is applied to DVR.
78
7-7. SEARCH
7-7-1. Buttons in Search menu
1. Enlarge the selected channel on display
2. The Graphic Bar shows the recorded part for the day in Pink (MUX Record) and
Green (QUAD).
3. Time Select Bar (Move the bar to the part you wish to play).
4. AUDIO, SENSOR, MOTION – Each bar shows audio, sensor, and motion in
recording
5. PLAY button
6. PAUSE button
7. Indicate the 1,2 graphic by hour
8. Disconnect
9. Button to go to Live window
10. Button to go to SETUP window
11. Select Date for Search button
12. Video BACKUP during playback
79
13. Still image capture during playback
14. Playing audio of selected playback channel
15. 4channels simultaneous playback
16. Browsing and playback the backup video
17. Download still images from DVR
18. BACKUP through Time Setting from DVR
7-7-2. Search when DVR has two HDD
1. Press SEARCH button. Then the window will appear.
2. Select HDD to search and playback.
7-8. BACK UP
7-8-1. Video BACKUP during LIVE DISPLAY
1. During LIVE DISPLAY, press the channel button you wish to backup. The button will
turn red and starts backup is proceeded.
2. Press the same button again at the point where you wish to stop BACKUP. A window
where you can save the Backup Data in DVR will appear.
3. Enter file name (file format: avi) and press “Save”.
NOTE
To save audio data along with video data, press and activate Audio button before pressing
Video Backup button.
80
7-8-2. STILL IMAGE capture during LIVE DISPLAY
1. During LIVE DISPLAY, press the channel button you wish to backup.
2. A window for saving the image will appear.
3. Enter file name (file format: bmp or jpg) and press “Save”.
7-8-3 Video BACKUP during Playback
1. From the SEARCH Menu, press the channel button you wish to back up. The channel
button will turn red and backup is proceeded.
2. Press the same button again at the point where you wish to stop BACKUP. A window
where you can save the Backup Data on the computer will appear.
3.
Enter file name (file format: avi) and press “Save”.
7-8-4. STILL IMAGE capture during Playback
1. During Playback, press the channel button you wish to backup.
2. A window for saving the image will appear.
81
3. Enter file name (file format: bmp) and press “Save”.
7-8-5. Downloading Still Images from DVR
1. Press the following button to download the still image, which is saved in DVR, through
the network.
2. When the Download window appears, select the desired file from the list on the left and
move it to the list on the right. Select the folder to save from DIRECTORY and press
SAVE to start downloading.
7-8-6. BACKUP through Time Setting
1. Press the following button to backup by setting a specified time.
2. A window for where you can select the time period will appear.
3. Select the desired time.
4. Select a folder and make a file name of backup data by pressing the BROWSE button.
82
5. Select the channel to backup.
6. Backup starts when you press START
7. When BACKUP is completed, “Backup complete” will appear.
7-8-7. Converting <nsf> CD backup format to <avi> format
1. Search and playback backup file in “nsf” format.
2. During playback, press the channel button when you wish to convert. Then button color
becomes Red.
3. Press the channel button when you wish to finish converting.
4. A window for saving the image will appear.
5. Enter file name and press “Save”.
83
8. Networking by Web Browser
8-1. Download Web Brower Viewer and Connection
1. Enter the DVR IP address. Then the window will appear as bellow. Click “YES” to
download Web Browser Viewer from the server run by the manufacturer.
NOTE
Web Browser Viewer is to be downloaded from the server run by the manufacturer, not from DVR.
In other words, PC and DVR should be linked with Internet in order to use Web Brower networking.
2. Web Browser Viewer will be downloaded and installed. A dialogue box for entering IP
address and password will appear.
3. Enter IP address and the password and click the “Connect” button.
84
8-2. Main Features
8-2-1. LIVE
8-2-2. SEARCH
85
8-2-3. BACKUP
9. Networking by DDNS (Dynamic Domain Name
Server)
1. Check the serial number of DVR from SETUP>INFO>SYSTEM>SERIAL ID.
2. Please contact a distributor or an installer to register the DVR on DDNS Server.
3. Register your own domain name on DDNS Server.
NOTE
If your own domain name and serial ID of DVR are registered at DDNS server run by
manufacturer, IP address of DDNS Server run by Manufacturer should be applied on DDNS
SERVER IP filed.
If your own domain name and serial ID of DVR are registered at DDNS server run by
distributor, Please ask the distributor IP address of DDNS Server and apply it on DDNS
SERVER IP filed.
4. After your own domain name and serial ID of DVR are registered at DDNS server, user
can access network with your own domain name.
86
10. Playback of local HDD in Network Client S/W
1. Take HDD out from DVR and connect it to PC as Slave.
2. Please go to CMOS setup and confirm that CMOS recognizes HDD and its size or not.
3. Save CMOS setting and boot PC.
4. Run Network Client S/W.
5. Press SEARCH button and then SITE button of Network Client S/W.
6. Type “127.0.0.1” in IP field of window.
7.
All functionality of playback is the same as remote HDD search.
11. Network access beyond Rauter
In order to access beyond Rauter (Firewall), user must open 20 TCP ports for Command level,
Live channels, and Storage channels. If these all ports are not open properly, user can not
access DVR beyond a rauter.
If DVR sets port number with 4456 as bellow, user has to open 20 TCP ports from 4456 to
4475.
If DVR sets port number with 1111, user has to open 20 TCP ports from 1111 to 1130.
In order to access network, user has to enter “External IP Address:xxxx” (Ex.
111.222.333.444:4456) in the field of “Server address”
87