1
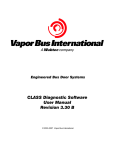
BZNP-100 Ver.2.00 Quick Start Manual
Try to create the following demonstration program.
Overview of This Manual
This Quick Start Manual explains how to carry out the most basic operations of
the Sony BZNP-100 series Network Player Management Software.
The
contents include the essential setup that you have to do before starting to use
the software, and how to create a small demonstration program as shown on
the right.
You can create the same program by using the following sample
materials that are copied to your PC when you install this Quick Start Manual.
Sample Materials and Playist:
• Video (AVI and NSP format files)
Video_Sample_1, Video_Sample_2, and Video_Sample_3
• Graphics
Graphic_Sample_1, Graphic_Sample_2, and Graphic_Sample_3
• Text
Text_Sample_1, Text_Sample_2, Text_Sample_3
• Playlist
Playlist_Sample
All the materials and a playlist needed to play the demonstration program.
Some of them may not be used in the procedure.
Note on Viewing the Online Help
During operation, pressing the F1 key on the keyboard displays information
(help) related to the window/dialog box currently having the focus.
To see task-oriented information, click the Help Topics button or the "Table of
Contents of This Help" link in the online help window.
Microsoft and PowerPoint are registered trademarks of Microsoft Corporation in the
United States and/or other countries.
© 2003 Sony Corporation
1
3-748-162-11(1)
Operation Flowchart
Starting the Software
The following chart shows an example of the flow of normal operation of this
Double-click the shortcut icon of the BZNP-100 series software on your
system to play demonstration videos on the street or presentation videos in the
Windows desk top.
office.
[Program] – [BZNP-100] – [BZNP-100E].
Operations written in blue are covered in this Quick Start Manual.
Either of the following main menus appears.
If there is no shortcut icon, click the Start button, then click
The main menu is always displayed while the software is operating, and you
can use any function of the software by clicking the corresponding button on the
Startup
Start the software.
menu displayed.
Note: Power on your NSP-100 Network Player, too.
Setting up
Set up the software.
Presentation Application Main Menu
(Upon installation)
Register the NSP-100 Network Players
that manage playout, and define groups.
Buttons to launch the
functions of the software.
Clicking a button opens a
new window/dialog box.
Modify settings of the NSP-100s.
Preparation
Prepare materials.
(Routine operation)
Calendars used to send playlists and materials.
See “Sending Playlists and Materials” (page 10)
for details.
Create playlists.
Send playlists and materials to the group
of NSP-100s.
Playout
Checking
(Playout on the NSP-100s)
Urgent playout
Destination group of
the NSP-100s used to
send playlists and
materials.
Check NSP-100 status and logs.
Scheduling Application Main Menu
2
Setting Up the Software
Note: If you change the application mode or video format, a message appears
Before creating materials and playlists, there is some setup necessary: setup of
after step 4, asking whether you would like to restart the software.
the software and registration related to the NSP-100.
For the software, you have to open the Setup dialog box, then check and modify,
Next, you have to register an NSP-100 and a network player group.
if necessary, the following setup items.
1 Click [Setup] on the main menu.
2 Select “Schedule” to use the Scheduling
Application.
3 Select your video signal
format, NTSC or PAL.
4 Click [OK].
3
Click [Yes].
groups.
Defining an NSP-100 and a Group
The following chart shows how to register an NSP-100 named “Tokyo” and a
The system features group-based playlists and content distribution.
You can
network player group named “Japan.”
define network player groups, and put each network player in one or several
The online help explains the procedure
for registering more than one NSP-100 and network group.
1 Click [Group Setup] on the main menu.
2 Click [New].
4 Click [Edit Group].
5 Click [New] in the Edit Group dialog box.
3 Enter the name of the NSP-100,
“Tokyo,” and its IP address in the
respective text boxes, then click
[OK].
6 Enter the name of the group,
“Japan,” then click [OK].
7 Click [OK] in the Edit Group dialog box.
8 Click the “Tokyo” NSP-100, then click [Add>>].
“Tokyo” moves to the right.
Note: Check that “Japan” is selected in the Group drop-down
list box, so that the right-hand list is the place where the
NSP-100s in “Japan” are shown. In this case, the left-hand
list shows the NSP-100s that do NOT belong to “Japan.”
9 Click [OK] in the Group Setup dialog box.
4
Tip: There is a capturing function that enables you to create AVI files from DV
Preparing Video Material
video.
See “Capturing DV Video” (page 11) for details.
Convert the supplied AVI file corresponding to "Video_Sample_1" into the NSP
format by yourself using the following procedure.
1 Click [Material Management] on the main menu.
2 Select the Video tab.
4 Click [Browse] and specify the “AVI”
folder under the folder where the
software has been installed.
The bit rate can be changed
using this dialog box.
Prepared material is listed here.
Files to be converted that are
stored in the selected folder
appear on the upper list.
Converted files (material) appear
on the lower list on a blue
background.
3 Click [Convert Material].
5 Select the “Video_Sample_1.avi” sample file on the
upper list, then click [Start].
Alternatively, move the file to the lower list using a drag
& drop operation.
5
Preparing Graphics Material
The maximum size varies depending on the video signal and the display
Convert the supplied bmp file corresponding to "Graphic_Sample_1" into the
when defining the page size in PowerPoint.
size used, either under-scan (full) or over-scan (88%).
NSP format by yourself using the following procedure.
Notes on Using Microsoft PowerPoint Slides
• Microsoft PowerPoint of Office 2000 exports full color JPEG files and
256-color bmp files. To use full color graphics files, you must convert the
• The following table shows the maximum size (W x H) of the graphics
materials managed by the system.
1 Select the Graphics tab of the Material Management window.
If this window is not open, click [Material Management] on the
main menu.
Signal
Display Size
Size (pixels)
Size (inches)
NTSC
Under-scan (Full)
720 x 480
10.00 x 6.67
Over-scan (88%)
630 x 420
8.76 x 5.84
Under-scan (Full)
720 x 576
10.00 x 8.00
Over-scan (88%)
630 x 504
8.76 x 7.00
PAL
JPEG files into bmp files using a graphics converter.
Check this table
3 Click [Browse] and specify the “BMP”
folder in the folder where the software
has been installed.
Files to be converted that are
stored in the selected folder
appear on the upper list.
Converted files (material) appear
on the lower list on a blue
background.
Prepared material is listed here.
4 Select the “Graphic_Sample_1.bmp”
sample file on the upper list, then click
[Start].
Alternatively, move the file to the lower
list using a drag & drop operation.
2 Click [Convert Material].
6
Preparing Text Material
Tip: The system provides some text editing functions, such as allowing you to
Create a piece of blinking text that is the same as the text in "Text_Sample_1"
Refer to the online help for details on the text editing function.
use a text file instead of typing text.
using the following procedure.
1 Select the Text tab of the Material Management window.
If this window is not open, click [Material Management] on the
main menu.
4 Select the NSP-100 built-in font.
Prepared material is listed here.
2 Click [New].
5 Select [Blink] from the Text Type drop-down
list box, and specify the other settings as shown
in the figure, then click [OK].
3 Click [Properties].
6 Type the following sentence:
“NETWORK PLAYER NSP-100 & BZNP-100”
7 Click [Save].
The new piece of text material appears in the
Material Management window.
7
screen, as well as scheduling data.
Creating a Playlist
Note: The sample playlist is available if you are using the group named "Japan"
Now, arrange the materials to make the same playlist as the sample.
A playlist
referred to earlier.
also has information on the positions of the video and text materials on the
1 Click [Edit Playlist] on the main menu.
5 Click [Properties], and set the properties of
the playlist.
See the next page (page 9) for details.
2 Select the pieces of material and move
them to the playlist, one by one, using a
drag & drop operation, so that they are
listed as shown.
Material List
3 Right-click the top line, click [Display
Setup], then specify the positions of the
video and text on the screen.
Repeat this for the second and third lines.
See the next page (page 9) for details.
Playlist
7 Click [OK].
4 Double-click the start time “00:00:00” of the
top event, specify the desired start time, then
press the Enter key.
6 Check that the desired destination group,
“Japan” is selected.
If not, select it.
8
Creating a Playlist - Continued
5 - Continued
In the Properties dialog box, select today’s date
in the Start Date drop-down list box, and a date
10 days later in the End Date drop-down list box.
Then click [OK].
3 - Continued
Select the video positions and sizes, and the text positions in the respective
Display Setup dialog boxes, as shown in the figures.
Then click [OK].
Tip: [Default Display Setup] in the Edit Playlist window is used to specify the
default positions of the video and text.
For the top line
For the second line
9
For the third line
Sending Playlists and Materials
Tip: You can select the desired playlist and send it with the necessary materials
You can easily send a playlist and the necessary materials to NSP-100 network
available for the Presentation Application, too.
players.
details.
on the Playlist tab of the Material Management window.
Use the main menu as shown in the following illustration.
This method is
Refer to the online help for
2 Click today’s date (or any playout date for
the playlist to be sent).
A gray frame appears.
3 Click [Send].
The playlist and the materials are sent to
the group of network players.
1 Select the destination group, “Japan.”
Colors used on the calendar
Background
Date color
Meaning
White
Gray
Green
Light Blue
Blue
Yellow
Red
Gray or Brown
Black or Red
Black or Red
Black or Red
Black or Red
Black or Red
Black or Red
Non-playout day.
Playlist not yet created.
Playlist being edited or already edited.
Playlists and materials are being sent.
Playlists and materials successfully sent.
Necessary materials not yet sent.
A transfer error occurred.
Now you have finished the operations necessary to show the demonstration
The network player “Tokyo” in the group "Japan" will automatically start playout
program.
at the time you specified in the playlist.
10
Supplement-1 - Capturing DV Video
If you have a DV VCR or camcoder, you can use video recorded on a tape as
Note: These operations are not necessary to create the demonstration program
AVI file, so you can convert it into NSP format using the same procedure shown
shown at the beginning.
in “Preparing Video Material” (page 5).
video material.
The following procedure captures DV video and creates an
Upon Conversion
1 Connect the VCR and PC using an
i.LINK cable, power the VCR on, and
insert the desired DV cassette.
Captured AVI files are
shown here in the
Convert Material
window.
Click [Browse], then
select the folder
specified in step 3, if
necessary
2 Click [Capture] on the main menu.
You can check the video here.
3 Click [Folder], then select the folder in
which the AVI files should be stored.
[Live REC] is for live recording.
Clicking this button immediately starts capturing.
It stops when you click [Stop].
VCR control section
6 Click [REC].
Capturing starts. It automatically ends at the
specified Out point.
4 Cue up the desired In point using the
buttons of the VCR control section, then
click [In].
The time code of the point appears.
5 Cue up the desired Out point, then click [Out].
The time code of the point and the duration of the clip appear.
It is also possible to directly enter the time codes of the In and
Out points. Clicking the corresponding cueup button on the
right cues the specified point up, in such a case.
11
Supplement 2 - Urgent Text Playout
playlist.
The system supports “urgent playout” that overrides ongoing playout and forces
text scrolling over the bottom of the ongoing playout screen.
the network player to play a specific video/graphics/text piece of material or a
online help for details on urgent playout.
This manual explains how to do “urgent text playout” to show a specific piece of
Refer to the
1 Click [Material Management] on the main
menu to open the Material Management
window.
2 Select the Text tab.
6 Select the NSP-100 Built-in
font, [Scroll], and [Lower], then
click [OK].
5 Click [Properties].
3 Select the group where urgent text
playout will be performed.
4 Click [New].
7 Type the text to be displayed.
8 Click the play button.
The typed text is sent to the network players of the
selected group, then displayed.
Click the stop button when urgent playout finished.
12