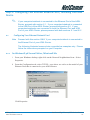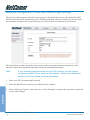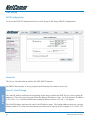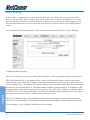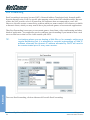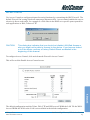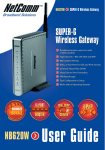
1
Legal & Regulatory Information
This manual is copyright. Apart from any fair dealing for the purposes of private study, research, criticism or review, as
permitted under the Copyright Act, no part may be reproduced, stored in a retrieval system or transmitted in any form, by
any means, be it electronic, mechanical, recording or otherwise, without the prior written permission of NetComm
Limited. NetComm Limited accepts no liability or responsibility, for consequences arising from the use of this product.
NetComm Limited reserves the right to change the specifications and operating details of this product without notice.
NetComm is a registered trademark of NetComm Limited.
All other trademarks are acknowledged the property of their respective owners.
Customer Information
ACA (Australian Communications Authority) requires you to be aware of the following information and warnings:
(1) This unit shall be connected to the Telecommunication Network through a line cord which neets the requirements of
the ACA TS008 Standard.
(2) This equipment has been tested and found to comply with the Standards for C-Tick and or A-Tick as set by the ACA.
These standards are designed to provide reasonable protection against harmful interference in a residential
installation. This equipment generates, uses, and can radiate radio noise and, if not installed and used in
accordance with the instructions detailed within this manual, may cause interference to radio communications.
However, there is no guarantee that interference will not occur with the installation of this product in your home or
office. If this equipment does cause some degree of interference to radio or television reception, which can be
determined by turning the equipment off and on, we encourage the user to try to correct the interference by one or
more of the following measures:
•
Change the direction or relocate the receiving antenna.
•
Increase the separation between this equipment and the receiver.
•
Connect the equipment to an alternate power outlet on a different power circuit from that to which the receiver/
TV is connected.
•
Consult an experienced radio/TV technician for help.
(3) The power supply that is provided with this unit is only intented for use with this product. Do not use this power
supply with any other product or do not use any other power supply that is not approved for use with this product by
NetComm. Failure to do so may cause damage to this product, fire or result in personal injury.
NetComm NB5 Ethernet/USB Modem Router
2
YML717 Rev1
www.netcomm.com.au
Contents
Overview .................................................................................................................................................................. 6
NB5 Package Contents Note .............................................................................................................. 7
Minimum System Requirements ......................................................................................................... 8
Front Indicators ................................................................................................................................... 9
Back Panel ........................................................................................................................................ 10
Resetting Factory Defaults ................................................................................................................ 10
Do I need a Micro filter? ................................................................................................................... 11
Default Settings ................................................................................................................................ 12
Quick Start Guide .................................................................................................................................................. 13
Connecting your NB5 ADSL Modem via ETHERNET .................................................................... 13
Connecting your NB5 ADSL Modem via USB ................................................................................. 14
Setting up your ADSL Router ........................................................................................................... 15
Log into your ADSL Router ....................................................................................................... 15
Quick Start Menu ....................................................................................................................... 16
Connecting your ADSL Router ............................................................................................................................... 17
Step 1: Connecting the ADSL Router to Your Computer/Notebook .................................................
Step 1.1
Connecting to the Ethernet/USB ...........................................................................
Step 1.2
Connecting to the ADSL Line ...............................................................................
Step 1.3
Connecting to the Power Outlet ............................................................................
Step 1.4
Powering On .........................................................................................................
Step 2: Configuring Your Ethernet Network Card / Installing Your USB Device .............................
2.1
Configuring Your Ethernet Network Card .............................................................
2.2
Installing the USB Device Driver .........................................................................
Step 3: Configuring Your Internet Browser ......................................................................................
17
17
20
20
20
21
21
24
29
Step 4: Connecting to the Internet .................................................................................................... 30
Firewall Configuration ........................................................................................................................................... 31
Introduction to Firewalls ................................................................................................................... 31
Network Address Translation and Port Mapping .............................................................................. 31
Dedicated Firewalls .......................................................................................................................... 31
Advanced Configuration of your ADSL Router ..................................................................................................... 33
Log into your ADSL Router .............................................................................................................. 33
Advanced Configuration of your ADSL Router-Login Settings ......................................................... 34
Advanced Menus ................................................................................................................................................... 35
Introduction to Setup and Advanced Menus ...................................................................................... 35
Configuring the ADSL Connection .................................................................................................... 36
YML717 Rev1
www.netcomm.com.au
NetComm NB5 Ethernet/USB Modem Router
3
The Setup Menu ..................................................................................................................................................... 37
WAN Setup .......................................................................................................................................
PPPoE Connection .....................................................................................................................
PPPoA Connection Setup ...........................................................................................................
DHCP Connection Setup ...........................................................................................................
Static Connection Setup .............................................................................................................
Bridged Connection Setup .........................................................................................................
CLIP [Classical IP over ATM] Connection Setup ......................................................................
LAN Setup ........................................................................................................................................
DHCP Configuration ..................................................................................................................
Management IP ..........................................................................................................................
37
38
40
42
44
46
48
50
50
52
The Advanced Menu .............................................................................................................................................. 53
UPnP ................................................................................................................................................. 53
SNMP ............................................................................................................................................... 54
IP QoS ............................................................................................................................................... 55
LAN Clients ...................................................................................................................................... 56
MAC Filter Control ..........................................................................................................................
Enable/Disable MAC Filtering ..................................................................................................
Create MAC Filter Rules ...........................................................................................................
Edit or Delete MAC Filter Rules ...............................................................................................
Hidden MAC Filter Rules ..........................................................................................................
Multicasting ......................................................................................................................................
57
57
58
58
58
59
Static Routing .................................................................................................................................... 60
Dynamic Routing .............................................................................................................................. 61
Port Forwarding ................................................................................................................................ 62
Access Control ................................................................................................................................. 65
IP Filters ............................................................................................................................................ 67
DMZ Configuration ........................................................................................................................... 68
Tools Menu ............................................................................................................................................................ 69
System Commands ............................................................................................................................ 69
User Management ............................................................................................................................. 69
Update Firmware .............................................................................................................................. 70
Ping Test ........................................................................................................................................... 70
Modem Test ...................................................................................................................................... 70
Reboot .............................................................................................................................................. 70
Log Out ............................................................................................................................................. 70
Status Menu ........................................................................................................................................................... 71
Network Statistics ............................................................................................................................. 71
Connection Status ............................................................................................................................. 71
DHCP Clients ................................................................................................................................... 71
Modem Status ................................................................................................................................... 71
NetComm NB5 Ethernet/USB Modem Router
4
YML717 Rev1
www.netcomm.com.au
Product Information ........................................................................................................................... 71
System Log ....................................................................................................................................... 71
Appendix A: Troubleshooting ................................................................................................................................ 72
The ADSL Router is not functional ................................................................................................... 72
I can't connect to the ADSL Router. .................................................................................................. 72
The DSL Link LED continues to blink but does not go solid ............................................................ 73
The DSL Link LED is always off ...................................................................................................... 73
Appendix B: ADSL Router terms ........................................................................................................................... 74
What is a firewall? ............................................................................................................................ 74
What is NAT? ................................................................................................................................... 74
What is a DMZ? ............................................................................................................................... 74
What is a Gateway? .......................................................................................................................... 75
Appendix C: Features ............................................................................................................................................ 76
ADSL/ATM Support ......................................................................................................................... 76
Encapsulation Support ...................................................................................................................... 76
Network Support ............................................................................................................................... 76
Management Support ........................................................................................................................ 77
Security Support ............................................................................................................................... 77
External Connectors: ......................................................................................................................... 77
Appendix D: Cable Connections ............................................................................................................................ 78
RJ-45 Network Ports ......................................................................................................................... 78
Twisted pair cables ........................................................................................................................... 78
Straight and crossover cable configuration ........................................................................................ 79
RJ11 connector and cable ................................................................................................................. 79
605 to RJ-11 adapter ......................................................................................................................... 80
USB cable ......................................................................................................................................... 80
9 Pin (RS-232 ) Serial Cable ............................................................................................................. 80
Appendix E: Registering your NetComm Product .................................................................................................. 81
Contact Information .......................................................................................................................... 81
Legal & Regulatory Information ........................................................................................................ 82
Product Warranty .............................................................................................................................. 83
YML717 Rev1
www.netcomm.com.au
NetComm NB5 Ethernet/USB Modem Router
5
Overview
Overview
Thank you for purchasing the NetComm NB5 ADSL/ADSL2 Modem Router. NetComm brings
you the Next Generation of ADSL technology with ADSL-2*, which boosts ADSL's performance,
improves interoperability, and supports new applications, services and deployment conditions.
NetComm’s implementation of ADSL-2* and ADSL-2+* ensures that the NB5 operates with
existing ADSL services while delivering optimal performance in all modes of operation. Powered by
the latest ADSL-2* TI chipset, NetComm’s NB5 increases downstream data rates by up to 50%
(12Mbps) and 100% (25Mbps) for ADSL2 Plus* mode ensuring that you can surf the net or
download your files quicker than ever before.
With support for RE-ADSL-2* (Reach Extended), NB5 caters for those users who are outside of the
current range of an ADSL exchange by providing greater reach of ISP services. NB5 is truly there
for your ADSL future.
Security is a key issue with Broadband users and NetComm’s NB5 does not leave you exposed.
Employing the latest Active Firewall technology, NB5 checks every packet of data that comes in
ensuring your defenses are rock-solid against hackers, unauthorised entries, probes and even Denial
of Service attacks. What’s more, NB5 is equipped with a VPN pass-through feature allowing you to
use a standard VPN client for Point-to-Point communication even while your Firewall is active.
NB5 delivers the connection versatility needed to cater for today’s ADSL users. You can simply
attach the NB5 to a single PC by using the USB port. Alternatively, should you wish to share your
internet connection with up to 253 users, the NB5 is equipped with an in-built Router and a 10/100
Ethernet port for connection to a network system.
The NB5’s Port Forwarding and UPnP functions have made it easier for today’s Internet users to
configure and setup the myriad of Network Port Rules needed by internet applications such as OnLine Gaming, Peer-To-Peer file sharing and Messenger services to operate. NB5 has a number of preconfigured rules for several games, just click on the game you wish to play on-line and the rest is
done for you.
Added to this, NB5 introduces a QoS (Quality of Service) feature that gives you control over which
types of outgoing data are given priority by the router. With QoS you can tailor your router settings
to ensure that you can keep gaming or browsing even though your upstream bandwidth may be
saturated by applications such as Peer-To-Peer file sharing.
* Your ISP must support and provide you with an ADSL-2, ADSL-2+ or RE-ADSL-2 service for these features to be
available. This product will operate as a standard ADSL Modem Router when an ADSL-2 service is not available. The
NB5 may require a firmware upgrade to support ADSL-2, ADSL-2+ or RE-ADSL-2.
This reference manual assumes that the reader has an installed Ethernet card in the computer to be connected and has
basic to intermediate computer and Internet skills. However, basic Computer Networking, Internet, and Firewall
technology information is available from the NetComm Web site. See www.netcomm.com.au.
NetComm NB5 Ethernet/USB Modem Router
6
YML717 Rev1
www.netcomm.com.au
NB5 Package Contents Note
Your NB5 Package contains the following items:
Overview
■ The NB5 ADSL/ADSL-2 Modem Router
■ Telephone cable (RJ-11)
■ RJ11 to 605 Adaptor
■ USB Cable
■ CAT-5 UTP Straight Ethernet Network cable
(RJ-45)
■ Power adapter (DC 9V)
■ Driver and Manual CD
■ NB5 Quick Start Guide and
Package Contents Note
If any of the above items are damaged or missing, please contact your dealer immediately.
YML717 Rev1
www.netcomm.com.au
NetComm NB5 Ethernet/USB Modem Router
7
Minimum System Requirements
Overview
Before continuing with the installation of your NB3, please confirm that you comply with the
minimum system requirements.
■ Pentium® MMX 233MHz
■ A CD-ROM Drive
■ Ethernet card installed with TCP/IP Protocol (required only if you are connecting to the
ETHERNET port of your ADSL Router)
■ USB Port (required only if you are connecting to the USB Port of your ADSL Router)
■ Host Operating Systems support for USB:
■ Windows® 98 Second Edition
■ Windows® 2000
■ Windows® Me
■ Windows® XP (recommended)
■ OS independent for Ethernet
■ Web Browser support:
■ Microsoft Internet Explorer 5.0 (or later versions)
■ Netscape® Navigator 4.0 (or later versions)
■ Most popular browsers
NetComm NB5 Ethernet/USB Modem Router
8
YML717 Rev1
www.netcomm.com.au
Front Indicators
Overview
Connected PPP
Lights up when the Internet (PPP) connection is established.
Power
Lights up when power is supplied to the Router.
DSL Link
Lights up when the ADSL connection is established.
Flickers when the ADSL Router is trying to establish a connection with the
ADSL Service Provider.
ETH/ACT
Lights up when the Ethernet cable is properly connected from your Router
to the Ethernet Card.
USB
Lights up when the USB device driver is successfully installed in your
Computer/ Notebook.
YML717 Rev1
www.netcomm.com.au
NetComm NB5 Ethernet/USB Modem Router
9
Overview
Back Panel
ADSL
Telephone jack (RJ-11) to connect to your Telephone Wall Socket (ADSL
line).
USB
USB port to connect to the USB port on your computer/notebook.
ETHERNET
10/100 Base-T Ethernet jack (RJ-45) to connect to your Ethernet Network
card or Ethernet Hub / Switch.
RESET
To reset your ADSL Router to factory default settings. (All customised
settings that you have saved will be lost!)
Please refer to the section below on how to use the reset function.
DC
Connect the Power Adapter that comes with your package.
Resetting Factory Defaults
The restore to factory defaults feature will set the ADSL Router to its factory default configuration
by resetting the ADSL Router. You may need to place the ADSL Router into its factory defaults; if
the configuration has changed, you lose the ability to configure the ADSL Router via the web
interface, or following a software upgrade. To reset the ADSL Router:
■
Ensure that your ADSL Router is powered on (for at least 10 seconds).
■
Use a paper clip or a pencil tip to depress the reset button for five seconds and release. At
this point, the reset is in progress. Do not power off the unit at this point.
■
When indicator lights return to steady green, reset is complete. The default settings are now
restored.
NetComm NB5 Ethernet/USB Modem Router
10
YML717 Rev1
www.netcomm.com.au
Do I need a Micro filter?
Splitters may be installed when your ADSL line is installed or when your current phone line is
upgraded to ADSL. If your telephone line is already split you will not need to use a Microfilter check with your ADSL service provider if you are unsure.
Each micro filter is connected in-line with your telephone or fax machine so that all signals pass
through it. Telephones and/or facsimiles in other rooms that are using the same extension will also
require Microfilters. The following diagram gives an example of connecting your ADSL Modem/
Router using a Microfilter.
A suitable Microfilter can be purchased from NetComm or your Service Provider, if required.
YML717 Rev1
www.netcomm.com.au
NetComm NB5 Ethernet/USB Modem Router
11
Overview
Micro filters are used to prevent common telephone equipment, such as phones, answering
machines and fax machines, from interfering with your ADSL service. If your ADSL enabled phone
line is being used with any other equipment other than your ADSL Modem then you will need to
use one Micro filter for each phone device.
Default Settings
Overview
LAN (Management)
Field
Setting Details
Static IP Address:
192.168.1.1 ❖
Subnet Mask:
255.255.255.0 ❖
Default Gateway:
blank
WAN (Internet)
Field
Setting Details
User Name:
username
Password:
****
Protocol:
PPPoE
VPI:
8❖
VCI:
35 ❖
IP Address:
192.168.1.1 ❖
Subnet Mask:
255.255.255.0 ❖
Default Gateway:
0.0.0.0 ❖
Bridge mode:
Enabled
Modem Access
❖
Field
Setting Details
User Name:
admin
Password:
admin
Default Setting. Although in most cases you will not be required to alter
these default settings for your NB5, your ISP may identify specific settings
to enable connection to their service. Please refer to your ISP or Network
Administrator for further information.
NetComm NB5 Ethernet/USB Modem Router
12
YML717 Rev1
www.netcomm.com.au
Quick Start Guide
The NB5 can be connected via a USB cable or an Ethernet cable or both. The reason for this is that
the USB connection is simply an ethernet simulation, as far as your computer is concerned the USB
connection is an Ethernet connection, hence DHCP and other protocols will work the same as for
Ethernet.
To connect to your ADSL Router, you need to have either an Ethernet Port or a USB Port present on
your Computer/Notebook.
1. Connect your NB5 to either a computer directly or a network hub or switch using cat5 ethernet
cables.
2. Connect the power pack to the NB5 ADSL Modem and switch on the power switch.
3. Ensure that there is a LAN link light on the NB5.
4. Ensure that the computer you intend to use has an IP address in the same subnet as the NB5
ADSL Modem. (e.g. the NB5’s default IP is 192.168.1.1 - your computer should be on
192.168.1.100 or similar.) If you have DHCP enabled on your computer, the NB5 will assign
your computer a suitable IP address.
5. Ensure that your computer has a LAN link light.
6. Connect one end of the ADSL phone line to the NB5 ADSL Modem and the other end to the
wall socket.
YML717 Rev1
www.netcomm.com.au
NetComm NB5 Ethernet/USB Modem Router
13
Quick Start Guide
Connecting your NB5 ADSL Modem via ETHERNET
Quick Start Guide
Connecting your NB5 ADSL Modem via USB
1. Connect the power pack to the NB5 ADSL Modem and switch on the power switch.
2. Connect your NB5 to a computer directly via USB cable.
3. When the computer is booted, the Add New Hardware Wizard will launch and prompt you to
provide a driver for your NB5 ADSL Modem. Insert the CD ROM provided.
4. Follow the on-screen prompts to load the driver. Refer to the section below for more detailed
information. (You may need to restart your computer).
5. Connect one end of the ADSL phone line to the NB5 ADSL Modem and the other end to the
wall socket.
Installing the USB driver (Windows 98/Me/2000/XP only)
When you install the USB driver on your computer it creates a Virtual Ethernet Adapter, which can
be configured in the same way as a Network Interface card with DHCP or static IP address. To install
the USB driver please follow the steps below:
1. Boot your machine into Windows 98/Me/2000/XP.
2. Insert your NetComm NB5 CD ROM into your CD-ROM drive.
3. Plug power up to your NB5 and switch ON.
4. Plug a USB cable from the back of the unit into a spare USB socket on your computer.
5. The Windows “Add New Hardware Wizard” should appear. Click Next to continue.
6. Ensure the option “Search for the best driver….” is chosen and click Next.
7. When prompted where you would like to look for the drivers choose “Specify location” and
untick any other boxes. Then click the browse button to select the CD-ROM drive which you
inserted you NetComm CD-ROM into. Then choose the ‘USBdriver’ folder.
NetComm NB5 Ethernet/USB Modem Router
14
YML717 Rev1
www.netcomm.com.au
Setting up your ADSL Router
This section will guide you through your ADSL Router's configuration. Before continuing, please
ensure that your ADSL line is connected to your NB5 ADSL Router and that your router is
connected to your computer.
Log into your ADSL Router
To access the NB5 ADSL Router configuration screens:
2. Type the default IP address http://192.168.1.1 and press Enter to open the Log In screen.
3. Enter the NB5 Username and Password (or Modem Authentication)
The default user name is ‘admin’ (case sensitive) and the password is ‘admin’ (case sensitive).
Note:
You should have your computer(s) configured for DHCP mode and have
proxies disabled on your browser.
TIP:
if you access the ADSL Router, and instead of getting a login screen, the
browser instead displays a login redirection screen, check your browser
settings and verify that JavaScript support is enabled. If the screen still does
not appear, you may need to flush the your cached web pages; consult your
browser help screens for how to do this if necessary.
YML717 Rev1
www.netcomm.com.au
NetComm NB5 Ethernet/USB Modem Router
15
Quick Start Guide
1. Open your web browser.
Quick Start Menu
Quick Start Guide
The first screen that appears (after the log in screen) is the Quick Start screen. By default the NB5
ADSL Router has been configured to use a PPPoE connection, and you usually only need to enter
the username and password (as specified by your ISP) to make a connection to the internet.
The Quick Start wizard is meant for basic users to allow easy and seamless connectivity to the
internet without worrying about any other advanced configuration settings.
Note:
If your Internet connection does not use PPP protocol you will need to
configure the NB5 Router using the Setup Menu. Refer to the Advanced
section of the User Guide for more information.
1. Enter your ISP Username and Password.
2. Select the PPP Protocol used by your ISP and click Connect.
3. After clicking on Connect, please be sure to "Save Settings" to register the username / password
or any other changes.
NetComm NB5 Ethernet/USB Modem Router
16
YML717 Rev1
www.netcomm.com.au
Connecting your ADSL Router
Step 1: Connecting the ADSL Router to Your Computer/Notebook
To connect to your ADSL Router, you need to have either an Ethernet Port or a USB Port present on
your Computer/Notebook.
Step 1.1 Connecting to the Ethernet/USB
(See the note on the following page if you are not sure of what the Ethernet and USB Port looks like)
1.1.1
For Single-User Connection
The following shows a typical single-user connection.
■
If an Ethernet Port is present, please proceed to section 1.1.2(a) Connecting to the
Ethernet.
■
If an Ethernet Port is not present, locate the USB Port on your Computer/Notebook
and proceed to section 1.1.2(b) Connecting to the USB.
Locating the USB Port on your Computer/Notebook
The USB Port on your Computer/Notebook can often be identified by the label USB or the
icon.
YML717 Rev1
www.netcomm.com.au
NetComm NB5 Ethernet/USB Modem Router
17
Connection
Check if your Computer/Notebook has an Ethernet Port.
1.1.2
For Multiple User Connections
Connection
You may connect one computer/notebook to the Ethernet Port and another one to the USB
Port on the ADSL Router at the same time. Refer to both section 1.1.2(a) Connecting to the
Ethernet and section 1.1.2(b) Connecting to the USB for the connections.
For more than 2 Computers/Notebooks connections, you may also expand the Ethernet
connection by connecting the ADSL Router to an Ethernet Switch/Hub.
For details on the connection and types of Ethernet Network cable to use with the Ethernet
Switch/Hub, please refer to the documentation that comes with your Ethernet Switch/Hub.
Proceed to Step 1.2.
NetComm NB5 Ethernet/USB Modem Router
18
YML717 Rev1
www.netcomm.com.au
1.1.1(a) For Single User Connection
(This connection is not required if you are connecting to an Ethernet Switch/Hub for
multiple user connections).
1.1.1(b) Connecting to the USB
NOTE:
Your computer should be powered down before insertion of the USB cable.
For a single user connection, you may now proceed to Step 1.2.
YML717 Rev1
www.netcomm.com.au
NetComm NB5 Ethernet/USB Modem Router
19
Connection
For single-user connection, you may now proceed to Step 1.2
Step 1.2 Connecting to the ADSL Line
Connect your ADSL Router to the ADSL line with the telephone cable. If you are connecting a telephone or facsimile to the same line, refer to the section on Microfilters for more
information.
Step 1.3 Connecting to the Power Outlet
Connect your ADSL Router to the Power Outlet via the Power adapter (that comes with
your ADSL Router package).
Step 1.4 Powering On
Power on the Power Outlet that is connected to your ADSL Router.
Power on your Computer(s)/Notebook(s).
Connection
Please proceed to Step 2.
NetComm NB5 Ethernet/USB Modem Router
20
YML717 Rev1
www.netcomm.com.au
Step 2: Configuring Your Ethernet Network Card / Installing Your USB
Device
✎
2.1
If your computer/notebook is connected to the Ethernet Port of the ADSL
Router, proceed with section 2.1. If your computer/notebook is connected
to the USB Port of the ADSL Router, proceed with section 2.2. If your
computers/notebooks are connected to both the Ethernet Port and USB
Port of your ADSL Router, please proceed with both sections 2.1 and 2.2!
Configuring Your Ethernet Network Card
Note
Proceed with this section ONLY if your computer/notebook is connected to
the Ethernet Port of your ADSL Router.
The following illustrated screen shots a provided as examples only. Please
follow the instructions prompted on your Computer.
For Windows® 98 Second Edition / Windows® Me
i
From your Windows desktop, right-click on the Network Neighborhood icon. Select
Properties.
ii
From the Configuration tab, select TCP/IP-> xxx where xxx refers to the model of your
Ethernet Card that is connected to your ADSL Router.
Click Properties.
YML717 Rev1
www.netcomm.com.au
NetComm NB5 Ethernet/USB Modem Router
21
Connection
2.1.1
iii Click the IP Address tab.
Click the option Obtain an IP address automatically and click OK to save the settings.
Connection
Ensure that your ADSL Router is powered on. Restart your system.
Proceed to Step 3.
2.1.2 For Windows® 2000 / Windows® XP
Windows® 2000:
a) From your Windows desktop, right-click on the icon My Network Places and select
Properties.
b) At the Network and Dial-up Connections window, right-click on the Local Area
Connection icon and select Properties.
Windows® XP:
Note that instructions are based on the default Start menu.
a) From your Windows desktop, click Start > All Programs > Accessories > Communications > Network Connections.
b) Right-click on the Local Area Connection icon that reflects the model of your Ethernet
Card that is connected to your ADSL Router and click Properties.
NetComm NB5 Ethernet/USB Modem Router
22
YML717 Rev1
www.netcomm.com.au
Ensure that the field Connect Using indicates the model of your Ethernet Card that is
connected to your ADSL Router.
(This is important especially if you have more than one Local Area Connection icons
displayed at the Network and Dial-up Connections / Network Connections window.
Ensure that you have selected the correct one.)
Select the option Obtain an IP address automatically and click OK.
Click OK again to close.
Ensure that your ADSL Router is powered on. Restart your system.
Proceed to Step 3.
YML717 Rev1
www.netcomm.com.au
NetComm NB5 Ethernet/USB Modem Router
23
Connection
Select Internet Protocol (TCP/IP) and click Properties.
2.2
Installing the USB Device Driver
1. Proceed with this section ONLY if your computer/notebook is connected
to the USB Port of your ADSL Router!
2. The following screen shots illustrated serve only as examples. For any
dissimilarities, please follow closely the instructions prompted on your
Computer/Notebook.
3. For Windows® 98 Second Edition users, you may be prompted for your
Windows CD-ROM. Have it ready by your side.
2.2.1
Installing the USB Device Driver - For Windows® 98 Second Edition
i
Power on your computer to start Windows.
ii
Place the Installation CD into your CD-ROM Drive
Connection
iii At the following promp click Next.
iv Select ‘Search for the best driver for your device (Recommended)’ and click Next.
NetComm NB5 Ethernet/USB Modem Router
24
YML717 Rev1
www.netcomm.com.au
Click CD-ROM drives option and click Next.
vi
Select ‘The updated driver (Recommended) DSL Router USB Remote NDIS
Network Device’ and click Next.
vii
Click Next to proceed installation with the indicated driver.
Connection
v
Depending on your system configurations, you may be prompted for your
Windows CD-ROM during installation. At the prompt, replace the
Installation CD in your CD-ROM Drive with your Windows CD-ROM and
click OK.
At the Copying Files dialog box, enter the path of your Windows CD-ROM
and click OK. This is usually x:\win98, where 'x' is the letter of your CDROM drive.
viii
Click Finish to complete the USB driver installation.
xi
Restart your system when prompted.
Proceed to Step 3.
YML717 Rev1
www.netcomm.com.au
NetComm NB5 Ethernet/USB Modem Router
25
Connection
2.2.2
Installing the USB Device Driver - For Windows® Me
i
Power on your computer to start Windows.
ii
Place the Installation CD into your CD-ROM Drive.
iii
At the following prompt, select ‘Specify the location of the driver (Advanced)’ and
click Next.
iv
Click the ‘Removable Media’ option and click Next.
v
Click Next again to proceed installation with the indicated driver.
vi
Click Finish to complete the USB driver installation.
vii
Restart your system when prompted.
Now proceed to Step 3.
NetComm NB5 Ethernet/USB Modem Router
26
YML717 Rev1
www.netcomm.com.au
2.2.3
Installing the USB Device Driver - For Windows® 2000
Power on your computer to start Windows.
ii
Place the Installation CD into your CD-ROM Drive.
iii
At the following prompt, click Next.
iv
Select ‘Search for a suitable driver for my device (recommended)’ and click Next.
v
Click CD-ROM drives option and click Next.
vi
At the next prompt, click Next to proceed installation with the indicated driver.
vii
You may encounter a 'Digital Signature Not Found' dialog box during installation.
Click 'Continue Anyway'.
Connection
i
YML717 Rev1
www.netcomm.com.au
NetComm NB5 Ethernet/USB Modem Router
27
Click Yes to proceed with the installation.
viii
2.2.4
Click Finish when prompted. Upon completion, proceed to Step 3.
Installing the USB Device Driver - For Windows® XP
Power on your computer to start Windows.
ii
Place the Installation CD into your CD-ROM Drive.
iii
At the following prompt, select Install from a list or specific location (Advanced)
option and click Next.
iv
Click ‘Search removable media’ and click Next.
v
Click Finish, then proceed to Step 3.
Connection
i
NetComm NB5 Ethernet/USB Modem Router
28
YML717 Rev1
www.netcomm.com.au
Step 3: Configuring Your Internet Browser
3.1
Microsoft® Internet Explorer™ (based on IE 5.5)
i
From your Windows desktop, double-click on your Internet Explorer icon to launch
your Browser.
ii
From the Menu, click Tools and select Internet Options... .
iii
Select the Connection tab. Click the field, 'Never dial a connection'. (This option
will be grayed off if you have not installed an analog modem on your computer/
notebook before. Proceed with 3.1 iv).
iv
Click the LAN Settings... button. Ensure that your Proxy Server is not enabled.
v
Click OK to close the dialog box.
3.2
Netscape® Navigator
i
From your Windows desktop, double-click on your Navigator icon to launch your
Browser.
ii
Depending on your Netscape versions, carry out one of the following instructions:
Click Options > Network Preferences.
Select Proxies. Ensure that the No Proxies option is selected.
OR
Click Edit > Preferences.
Select Advanced and click Proxies. Ensure that the option Direct Connection to the
Internet is enabled.
iii
Click OK for changes to take effect.
You may now proceed to Step 4 to establish your Internet connection.
YML717 Rev1
www.netcomm.com.au
NetComm NB5 Ethernet/USB Modem Router
29
Connection
You may now proceed to Step 4 to establish your Internet connection.
Step 4: Connecting to the Internet
i
NOTE:
From your Internet Browser, type in http://192.168.1.1 and hit <Enter>.
The NB5 Admin username and password is not the same as the
username and password provided by your ISP to connect to the Internet
ii
You will be prompted for the username and password to login to the Web Management.
Enter admin for both the username and password field .
Click OK.
(Note that this username and password is not the same as the username and password
given by your ADSL Service Provider to connect to the Internet).
Connection
iii Click Quick Start and then follow by Easy Login
iv Enter the username and password provided by your ISP and chose the connection
protocol from the drop-down menu; the Wizard will test, and if successful, verify the
connection.
v
Be sure to click on 'Save Settings' to save your settings.
NetComm NB5 Ethernet/USB Modem Router
30
YML717 Rev1
www.netcomm.com.au
Firewall Configuration
Introduction to Firewalls
The NB5 is equipped with advanced Firewall features to provide security from malicious attack,
hacking or eavesdropping across the Internet. The following information is provided as an introduction to firewalling and to the techniques that can be used to selectively enable services across the
firewall while still maintaining security.
Network Address Translation and Port Mapping
The NB5 is a NAT router. NAT stands for Network Address Translation, a process which converts
private IP addresses of a computer on the internal private network to one or more public IP addresses for the Internet. NAT changes the packet headers to the new address and keeps track of each
session; when packets come back from the Internet, it performs the reverse conversion to the IP
address of the client machine.
NAT acts as a firewall by keeping internal IP addresses hidden from the Internet. Web applications
operate through 'open ports' on devices attached to the Internet by initiating a query which opens a
'communication session' with the host through the open port. The presence of the NAT device
prevents this process from occurring, as the NAT only admits incoming packets that have been
elicited by an outgoing request; other packets are discarded.
However this causes connectivity problems, as any requests originating from applications on the
other side of the NAT device - such as requests generated by network gaming and conferencing
applications - will not be able to locate a port, and therefore a host, with which to communicate, as
their requests are discarded by the NAT. Hence the terms 'opening', 'forwarding' and 'mapping' ports:
these processes add information to the NAT table which allows it to direct incoming requests from
selected applications to the appropriate port.
Dedicated Firewalls
The Firewall function is technically different to NAT in that its sole purpose is to separate, or
'firewall', the internal network from the Internet. It does this by a variety of means, including SPI, or
Stateful Packet Inspection. SPI checks incoming packets against outgoing requests and blocks
packets which have not been requested.
YML717 Rev1
www.netcomm.com.au
NetComm NB5 Ethernet/USB Modem Router
31
Firewall
So Port Mapping tells the NAT router: 'when a request arrives which is intended for TCP port 1357,
don't discard it, but direct it to such-and-such a port'. The port-mapping process invokes advanced
routing functionality to 'bind' the Port Mapping request to the LAN client from which it originated.
This process is automated by the NB5 interface, and is covered in the Port Forwarding section
below.
The Default Setting of the NB5 does not provided access from the Internet to any services hosted on
the LAN. In other words, by default the firewall function is fully enabled and the only incoming
packets allowed are those elicited by a request from a LAN client.
The NB5 Access Control function allows selective access to services through the Firewall,
categorised by service type (Web, FTP, Telnet, etc) and optionally filtered by IP address. So, for
example, you are able to provide Telnet access to your LAN to anonymous users, or for a particular
IP address, or for a list of IP addresses.
The DMZ configuration directs all anonymous internet traffic to an IP address which you can
allocate to a computer dedicated to that purpose, thereby providing another controlled method of
providing access through the firewall.
Firewall
Finally, IP filtering provides a fine-grained method for controlling the flow of data to and from the
Internet and also between LAN clients.
NetComm NB5 Ethernet/USB Modem Router
32
YML717 Rev1
www.netcomm.com.au
Advanced Configuration of your ADSL Router
This section will guide you through your ADSL Router's configuration. Before continuing, please
ensure that your ADSL line is connected to your NB5 ADSL Router and that your router is
connected to your computer.
Log into your ADSL Router
To access the NB5 ADSL Router configuration screens:
1. Open your web browser.
2. Type the default IP address http://192.168.1.1 and press Enter to open the Log In screen.
3. Enter the NB5 Username and Password (or Modem Authentication)
The default user name is ‘admin’ (case sensitive) and the password is ‘admin’ (case sensitive).
Note:
You should have your computer(s) configured for DHCP mode and have
proxies disabled on your browser.
TIP:
If you access the ADSL Router, and instead of getting a login screen, the
browser instead displays a login redirection screen, check your browser
settings and verify that JavaScript support is enabled. If the screen still does
not appear, you may need to flush the your cached web pages; consult your
browser help screens for how to do this if necessary.
Advanced
YML717 Rev1
www.netcomm.com.au
NetComm NB5 Ethernet/USB Modem Router
33
Advanced Configuration of your ADSL Router-Login Settings
The first screen that appears (after the log in screen) is the Quick Start screen. By default the NB5
ADSL Router has been configured to use a PPPoE connection, and you usually only need to enter
the username and password (as specified by your ISP) to make a connection to the internet.
The Quick Start wizard is meant for basic users to allow easy and seamless connectivity to the
internet without worrying about any other advanced configuration settings.
Note:
If your Internet connection does not use PPP protocol you will need to
configure the NB5 Router using the Setup Menu. Refer to the Advanced
section of the User Guide for more information.
1. Enter your ISP Username and Password.
2. Select the PPP Protocol used by your ISP and click Connect.
Advanced
3. After clicking on Connect, please be sure to "Save Settings" to register the username / password
or any other changes.
NetComm NB5 Ethernet/USB Modem Router
34
YML717 Rev1
www.netcomm.com.au
Advanced Menus
Please note: Throughout this manual the term 'WAN' - Wide Area Network - will denote
the ISP side of a broadband internet connection, and the term 'LAN' - Local
Area Network - will refer to the home/office side of the connection.
In cases where the default is marked 'recommended' this indicates that the default value is pre-set to
conform to general local requirements, however if your ISP requires another value or if you are
certain of the reason for entering an alternative value, then the default may be changed.
Introduction to Setup and Advanced Menus
The Setup and Advanced Menus provide access to further configuration and customisation options
for the NB5. While the Quick Start connection is all that is required for many installations, the Setup
and Advanced menus enable you to create multiple connection profiles, set up routing options,
assign port forwarding, enable Access Control, configure the firewall, and more. The Setup menu is
shown in the figure below.
Advanced
YML717 Rev1
www.netcomm.com.au
NetComm NB5 Ethernet/USB Modem Router
35
Configuring the ADSL Connection
ADSL connections can be configured in a variety of ways depending on the ISP/WAN configuration, and the requirements of your home or office LAN. The NB5 supports the following ADSL
connection types:
■ PPPoE [RFC2516]
■ PPPoA [RFC2364]
■ DHCP
■ Static
■ Bridged [RFC1483]
■ CLIP [RFC1577]
Configuring the NB5 to match these connection types may require entry of some or all of the
following values:
■ ISP Account Username and Password
■ VPI/VCI [Defaults are 8/35, recommended]
■ Encapsulation type/multiplexing [either LLC or VC, check with ISP]
■ DSL Training Mode [default = MMODE, recommended]
■ Network Settings for Bridged Mode operation:
For Bridged Mode connections [RFC1483], the ISP will need to provide the following information:
■ DSL Fixed Internet IP address
Advanced
■ Subnet Mask
■ Default Gateway IP Address
■ Primary DNS IP address.
The next sections will describe in detail how to set up each of these connection types and save them
as Connection Profiles.
NetComm NB5 Ethernet/USB Modem Router
36
YML717 Rev1
www.netcomm.com.au
The Setup Menu
The NB5 can be configured to maintain up to eight Connection Profiles. Different Connection
Profiles may be required if you connect to more than one ADSL service provider, or if you vary the
connection type you use, or if your NB5 is used in different locations. The NB5 Interface provides a
function under the WAN Setup Menu to enable the user to create, save and select Connection
Profiles as required. (Note than in many cases, only one connection profile will be required.)
WAN Setup
The Setup Menu is divided into two sections: LAN Setup and WAN Setup. WAN will be dealt with
first. Possible WAN configurations will be detailed sequentially commencing with PPPoE.
Click on Setup>WAN Setup>New Connection. This will reveal the Connection Setup Screen in the
default configuration of PPPoE.
Advanced
YML717 Rev1
www.netcomm.com.au
NetComm NB5 Ethernet/USB Modem Router
37
PPPoE Connection
Point-to-Point Protocol [=PPP] is a method of establishing a network connection between network
hosts. PPPoE, also known as RFC 2516, adapts PPP to work over Ethernet for ADSL connections.
Among other things, PPPoE provides a mechanism for authenticating users by providing User Name
and Password fields and is a connection type provided by many ISPs.
To setup PPPoE, select WAN Setup >New Connection. From Type: select PPPoE [already selected
by default]
Enter the PPPoE connection name: the name must be unique, must not contain spaces and must not
begin with a number [e.g. PPPoE_1].
Advanced
NAT Option: Network Address Translation is on by default [recommended].
Firewall [SPI]: Firewall is on by default [recommended].
Allow Incoming Ping: Unchecked by default [recommended]. Check only if this function is required
for testing purposes.
Select the Quality of Service [QoS] type; if in doubt leave as default
NetComm NB5 Ethernet/USB Modem Router
38
YML717 Rev1
www.netcomm.com.au
Select the encapsulation type [LLC or VC]; if in doubt leave as default.
Select the VPI and VCI settings: 8/35 is default [recommended].
Username: Your ISP account ID e.g. <[email protected]>
Password: ISP Account Password
On-Demand: Enables on-demand mode. The connection will be dropped if no activity is detected
after the specified idle timeout value [see next].
Idle Timeout: Specifies that PPPoE connection should disconnect if the link has no activity detected
for n seconds [see above]. If the link is to remain always active, enter 0 in this field.
Keep Alive: When the On-Demand option is not enabled, this value specifies the time to wait
without being connected to your provider before terminating the connection. To ensure that the link
is always active, enter 0 in this field.
Set Route: Check box to make this the default connection
MRU: This field sets the Maximum Receive Unit for the DSL connection. It is a negotiated value that
specifies the packet size of the data being sent from the DSL provider. This can be set from a
minimum 128 to maximum 1500.
Enforce MRU: Check this box if you experience problems accessing the Internet over a PPPoE
connection. This feature will force all TCP traffic to conform with PPP MRU by changing TCP
Maximum Segment Size to PPP MRU.
To complete and save the Connection Profile, click the Apply button, and then click on Save Settings
at the bottom of the menu list on left.
Advanced
YML717 Rev1
www.netcomm.com.au
NetComm NB5 Ethernet/USB Modem Router
39
PPPoA Connection Setup
Point-to-Point Protocol [=PPP] is a method of establishing a network connection between network
hosts. PPPoA, also known as RFC 2346, adapts PPP to work over ATM cells for ADSL connections.
Among other things, PPPoE provides a mechanism for authenticating users by providing User Name
and Password fields. Many ISPs support PPPoA connection types.
To setup PPPoA, select WAN Setup >New Connection. From Type: select PPPoA. This will reveal
the PPPoA Connection Setup screen.
Enter the PPPoA connection name: the name must be unique, must not contain spaces and must not
begin with a number [e.g. PPPoA_1].
Advanced
NAT Option: Network Address Translation is on by default [recommended].
Firewall [SPI]: Firewall is on by default [recommended].
Allow Incoming Ping: Unchecked by default [recommended]. Check only if this function is required
for testing purposes.
Select the Quality of Service [QoS] type; if in doubt leave as default.
NetComm NB5 Ethernet/USB Modem Router
40
YML717 Rev1
www.netcomm.com.au
Select the encapsulation type (LLC or VC) according to information is provided by the ISP.
Select the VPI and VCI settings: 8/35 is default [recommended].
Username: Your ISP account ID e.g. <yourname@your_isp.com.au>
Password: ISP Account Password
On-Demand: Enables on-demand mode. The connection will be dropped if no activity is detected
after the specified idle timeout value [see next].
Idle Timeout: Specifies that PPPoA connection should disconnect if the link has no activity detected
for n seconds [see above]. If the link is to remain always active, enter 0 in this field.
Keep Alive: When the On-Demand option is not enabled, this value specifies the time to wait
without being connected to your provider before terminating the connection. To ensure that the link
is always active, enter '0' in this field.
Set Route: Check box to make this the default connection
MRU: This field sets the Maximum Receive Unit for the DSL connection. It is a negotiated value that
specifies the packet size of the data being sent from the DSL provider. This can be set from a
minimum 128 to maximum 1500.
Enforce MRU: Check this box if you experience problems accessing the Internet over a PPPoE
connection. This feature will force all TCP traffic to conform with PPP MRU by changing TCP
Maximum Segment Size to PPP MRU.
To complete and save the Connection Profile, click the Apply button, and then click on Save Settings
at the bottom of the menu list on left.
Advanced
YML717 Rev1
www.netcomm.com.au
NetComm NB5 Ethernet/USB Modem Router
41
DHCP Connection Setup
Dynamic Host Configuration Protocol (DHCP) allows the ADSL Router to automatically obtain the
IP address from the server. This option is commonly used in situations where the IP address is
dynamically assigned and is not known prior to assignment.
To setup DHCP, select WAN Setup >New Connection. From Type: select DHCP. This will reveal the
DHCP Connection Setup screen.
Enter the DHCP connection name: the name must be unique, must not contain spaces and must not
begin with a number [e.g. DHCP_1].
NAT Option: Network Address Translation is on by default [recommended].
Advanced
Firewall [SPI]: Firewall is on by default [recommended].
Allow Incoming Ping: Unchecked by default [recommended]. Check only if this function is required
for testing purposes.
Select the Quality of Service [QoS] type; if in doubt leave as default.
Select the encapsulation type (LLC or VC) according to information provided by the ISP.
NetComm NB5 Ethernet/USB Modem Router
42
YML717 Rev1
www.netcomm.com.au
Select the VPI and VCI settings: 8/35 is default [recommended].
If your DSL line is connected and the Service Provider is providing DHCP, click the Renew button
and the gateway will retrieve the IP Address, Subnet mask, and Gateway address. At any time, you
can renew the DHCP address by clicking on the renew button but this is not generally necessary as
the process runs automatically.
To complete and save the Connection Profile, click the Apply button, and then click on Save Settings
at the bottom of the menu list on left.
Advanced
YML717 Rev1
www.netcomm.com.au
NetComm NB5 Ethernet/USB Modem Router
43
Static Connection Setup
Most Internet users are provided with a dynamic IP address by their ISP for each session, however
certain situations call for a Static IP address. This is typically when you want to host a website, or
use VoIP or video-conferencing applications where other users must regularly connect to your
computer. Static IP numbers are generally made available by ISPs for these purposes for an
additional fee. The following instructions will allow you to set up your NB5 to manage a Static IP
connection.
Select WAN Setup>New Connection. From Type: Select Static.
Advanced
Enter the Static connection name: the name must be unique, must not contain spaces and must not
begin with a number [e.g. static_1]
NAT Option: Network Address Translation is on by default [recommended].
Firewall [SPI]: Firewall is on by default [recommended].
Allow Incoming Ping: Unchecked by default [recommended]. Check only if this function is required
for testing purposes.
NetComm NB5 Ethernet/USB Modem Router
44
YML717 Rev1
www.netcomm.com.au
Static Settings
Encapsulation: LLC or VC: provided by ISP.
Enter the Static IP Address provided by the ISP
Enter the Subnet mask and the Default Gateway as specified by the ISP.
Up to three Domain Name Server (DNS) addresses can also be specified.
For static configuration, you can also select a bridge connection or a routed connection. Since a
Static IP address is typically used to host WEB servers, Bridged connection is usual however Routed
is provided also: check with ISP for confirmation.
To complete and save the Connection Profile, click the Apply button, and then click on Save Settings
at the bottom of the menu list on left.
Advanced
YML717 Rev1
www.netcomm.com.au
NetComm NB5 Ethernet/USB Modem Router
45
Bridged Connection Setup
A Bridged connection basically disables the routing, firewall and NAT features of the NB5. In a
Bridged connection, the NB5 acts as a modem or hub, and just transmits packets between the WAN
interface and the LAN interface. A Bridged connection assumes that another device is providing the
routing functionality that is now disabled in the NB5.
To setup a Bridged Connection, select WAN Setup >New Connection. From Type: select Bridge.
This will reveal the Bridged Connection Setup Screen.
Enter the Bridge connection name: the name must be unique, must not contain spaces and must not
begin with a number [e.g. Bridge_1].
NAT Option: Network Address Translation is on by default [recommended].
Advanced
Firewall [SPI]: Firewall is on by default [recommended].
Allow Incoming Ping: Unchecked by default [recommended]. Check only if this function is required
for testing purposes.
Select the encapsulation type (LLC or VC); if in doubt leave as default.
Select the VPI and VCI settings; 8/35 is Australian default [recommended].
NetComm NB5 Ethernet/USB Modem Router
46
YML717 Rev1
www.netcomm.com.au
Select the Quality of Service [QoS] type; if in doubt leave as default.
To complete and save the Connection Profile, click the Apply button, and then click on Save Settings
at the bottom of the menu list on left.
Advanced
YML717 Rev1
www.netcomm.com.au
NetComm NB5 Ethernet/USB Modem Router
47
CLIP [Classical IP over ATM] Connection Setup
The Classical IP over ATM (CLIP) support provides the ability to transmit IP packets over an ATM
network, CLIP support will encapsulate IP in an AAL5 packet data unit (PDU) frame using
RFC1577and utilizes an ATM-aware version of the ARP protocol.
To setup a CLIP connection, select WAN Setup >New Connection. From Type: select CLIP. This will
reveal the CLIP Connection Setup Screen.
Enter the Clip connection name: the name must be unique, must not contain spaces and must not
begin with a number [e.g. Bridge_1].
NAT Option: Network Address Translation is on by default [recommended].
Advanced
Firewall [SPI]: Firewall is on by default [recommended].
Allow Incoming Ping: Unchecked by default [recommended]. Check only if this function is required
for testing purposes.
Select the encapsulation type (LLC or VC); if in doubt leave as default.
Select the VPI and VCI settings; 8/35 is Australian default [recommended].
NetComm NB5 Ethernet/USB Modem Router
48
YML717 Rev1
www.netcomm.com.au
Select the Quality of Service [QoS] type; if in doubt leave as default.
Clip Settings: IP Address, Mask and Default Gateway: Provided by ISP
ARP Server: Leave as Default [0.0.0.0] unless advised by ISP.
Modifying or Deleting a Saved Connection
To modify a previously-defined Connection Profile, select WAN Setup>Connection. Click on the
Connection Name that you wish to modify or delete. Follow the procedures outlined in the relevant
section above to modify the connection, or click 'Delete' to delete a connection.
To save changes or to make the deletion permanent, click on Save Settings on the left.
Advanced
YML717 Rev1
www.netcomm.com.au
NetComm NB5 Ethernet/USB Modem Router
49
LAN Setup
DHCP Configuration
To access the DHCP Configuration Screen, click Setup>LAN Setup>DHCP Configuration.
Server On
The Server On radio button enables the NB5 DHCP function.
For DHCP functionality to work properly the following rules must be observed.
Advanced
Start IP - End IP Range
The Start IP Address indicates the beginning of the range at which the DHCP server starts issuing IP
addresses. This value must be greater than the Routers IP address value. So if the Routers IP address
is 192.168.1.1 (i.e. the default) than the starting IP address must be 192.168.1. 2 or higher.
The End IP Address indicates the end of the IP address range. The ending address must not exceed a
Subnet Limit of 253; hence the maximum value that can be entered in this example is 192.168.1.254.
NetComm NB5 Ethernet/USB Modem Router
50
YML717 Rev1
www.netcomm.com.au
If the total number of network nodes is greater than the range of available IP addresses, the DHCP
server will run out of DHCP addresses, and some users will not get access to network resources. If
this happens you can either (1) increase the Ending IP address (to the limit of 255) or (2) reduce the
Lease Time. (see below)
Caution:
If you change the Start IP or End IP values, ensure the values are still within
the same subnet as the Routers' IP address. In other words, if the Routers'
IP address is 192.168.1.1 (default) and you change the DHCP Start/End IP
addresses to be 192.128.1.2/192.128.1.100, you will not be able to
communicate with the ADSL Router if your PC has DHCP enabled.
DHCP Lease Time
The Lease Time is the amount of time a network user will be allowed connection to the ADSL
Router with their current dynamic IP address. The amount of time is in units of minutes; the default
value is 3600 minutes (60 hours). In a situation where a number of casual users need to be connected
for relatively short periods this default value is frequently set at a lower value.
DHCP Relay
DHCP relay allows requests and responses between a DHCP client and DHCP server to traverse the
Router between the LAN and WAN subnets. The DHCP relay is positioned on the LAN (DCHP
client) side. This will allow LAN DHCP clients to be assigned DHCP information (IP Address,
Subnet Mask and Default Gateway) from a DHCP server on the WAN (usually at the ISP).
Enable/Disable DHCP
YML717 Rev1
www.netcomm.com.au
NetComm NB5 Ethernet/USB Modem Router
51
By default, your ADSL Router has DHCP server (LAN side) enabled. This function will allocate
DHCP numbers to any network node on your LAN as required according to the settings above.
However, if you already have a DHCP server running on your network, you must disable one of the
two DHCP servers as the presence of two DHCP servers on one LAN will create conflicts and lead
to network problems.
To disable the DHCP function on the NB5, select the Server and Relay Off radio button. Caution: if
this function is disabled careful attention must be paid to the IP address setup of each computer on
the LAN as IP addresses will no longer be allocated automatically.
To save changes, click on Apply, then click on Save Settings.
Management IP
This will reveal the Management IP Address Screen. Caution: if you change the NB5 Default IP
Address, you will not be able to open the device in your browser using the previous IP address. You
will also need to Renew the DHCP Lease using the DHCP Configuration Screen to enable
reconnection of your Web session.
Static IP Address Assignment
Your NB5 Routers default IP Address and Subnet Mask are 192.168.1.1/255.255.255.0. This subnet
mask setting will allow the ADSL Router to support 254 users.
If you want to support a larger number of users the Subnet Mask can be changed but bear in mind
the DHCP server is defaulted to only give out 255 IP addresses.
If you have been allocated a Static IP by your ISP enter it in this field.
Caution:
DHCP Configuration and Management IP: If you change your Router IP
address while DHCP is enabled, the DHCP configuration must reside within
the same subnet.
Default Gateway: is the routing device used to forward all traffic that is not addressed to a station
within the local subnet. The Default Gateway Address is provided by the ISP.
Hostname: can be any alpha-numeric expression that does not contain spaces. The domain name is
used to in conjunction with the host name to uniquely identify the gateway. To access the ADSL
Router's web pages the user can type 192.168.1.1 (the default IP address) or type mygateway.ar7.
To save changes, click on Apply, then click on Save Settings.
NetComm NB5 Ethernet/USB Modem Router
52
YML717 Rev1
www.netcomm.com.au
The Advanced Menu
The Advanced Menu provides access to advanced networking and routing capabilities including
security, port configuration and UPnP
UPnP
Universal Plug and Play [UPnP] is a protocol which automates connectivity between network
devices, including computers, game consoles, digital cameras, PDAs and other systems which
connect via TCP/IP. Applications which implement the UPnP protocol are able to negotiate a
connection with a UPnP-enabled device without requiring manual device configuration.
To enable UPnP, click on Advanced>Advanced Features>UPnP. This will reveal the Enable UPnP
screen.
UPnP can only be enabled on a saved Connection Profile (see WAN Setup for information on
creating Connection Profiles.)
Select the required Connection Profile by clicking on the radio button adjacent to the Connection
Profile name; then click on the Enable UPnP Checkbox.
To save changes, click on Apply, then click on Save Settings.
Advanced
YML717 Rev1
www.netcomm.com.au
NetComm NB5 Ethernet/USB Modem Router
53
SNMP
Simple Network Management Protocol is a system which allows management of multiple remote
devices from a central location.
To access SNMP, click on Advanced>Advanced Features>SNMP.
Advanced
To save changes, click on Apply, then click on Save Settings.
NetComm NB5 Ethernet/USB Modem Router
54
YML717 Rev1
www.netcomm.com.au
IP QoS
ABOUT: IP Quality of Service (QoS) prioritises data streams to ensure that basic connectivity is
maintained when running multiple services over one connection. For example, if you are using a
peer-to-peer file-sharing program at the same time as performing normal web browsing, you can
configure QoS to limit the resources dedicated to the peer-to-peer session in order to ensure web
browser connectivity. QoS is often vital to maintain VoIP session quality.
To access IP QoS, click on Advanced>Advanced Features>IP QoS
To save changes, click on Apply, then click on Save Settings.
Advanced
YML717 Rev1
www.netcomm.com.au
NetComm NB5 Ethernet/USB Modem Router
55
LAN Clients
ABOUT: LAN Client names are a way of applying specific Port-forwarding, Access Control and
QoS rules to individual computers on the LAN. If DHCP is used, all DHCP clients are automatically
assigned and are designated as a LAN client.
Advanced
To add a LAN client, click Advanced>Advanced Features>LAN Clients.
NetComm NB5 Ethernet/USB Modem Router
56
YML717 Rev1
www.netcomm.com.au
MAC Filter Control
MAC filtering enables rules to be defined which allow or deny data to pass through the Router based
on the source and destination MAC address and data type of each data frame.
To access MAC Filters Control, click on Advanced>Advanced Features>MAC Filters .
Usage examples of MAC Filter Rules are: to specify which computers on a network are allowed
Internet access; or to determine which particular computers are allowed to access services provided
by the Router (the last point is particularly relevant for routers serving Wireless Networks as it can be
used to prevent freeloaders from attaching themselves to a wireless LAN).
Enable/Disable MAC Filtering
If the check box is selected, MAC filtering is enabled according to the list of MAC Filter Rules that
has been created.
If the box is de-selected, MAC Filtering will not be enabled, even if MAC Filter Rules have been
created.
YML717 Rev1
www.netcomm.com.au
NetComm NB5 Ethernet/USB Modem Router
57
Advanced
To enable MAC filtering, navigate to the MAC Filter Control Screen and select the Enable MAC
Filters check box.
Create MAC Filter Rules
Enter the Source MAC and Destination MAC details. Entering zeros or
blanks into the Source or Destination fields enters a null value.
'Protocol' provides the choice of protocol type for the rule.
'Mode' provides the choice of Allow or Deny for the rule.
When all selections are made, click on Add to add the rule to the list of
rules. A maximum of 20 MAC Filter Rules can be defined and saved.
To save changes, click on Save Settings on the left-hand menu.
Edit or Delete MAC Filter Rules
To edit an existing MAC Filter Rule, click the radio button adjacent to the Filter Rule name. The
Rule will then appear in the top half of the MAC Filter control screen where it can be edited. When
editing is complete, click 'Add' to return the Rule to the list of existing rules.
To delete MAC Filter Rules, click on the 'Delete' tick box; multiple deletions can be made by shiftclicking Delete tick boxes; Select All will select every rule. When the desired selections are made,
effect deletion by clicking on Apply.
To save changes, click on Save Settings on the left-hand menu.
Hidden MAC Filter Rules
The MAC filter table contains three hidden rules. These rules are built into the Router to ensure the
user does not become locked out by entering a rule which prevents further access to the router.
The first rule allows any and all ARP frames through the system.
The second rule allows all IPv4 frames with the destination MAC address of the bridge to go
through.
Advanced
The third rule allows all IPv4 frames with the source MAC address of the bridge to go through.
TIP: To find the MAC address of a Windows-based computer, at the DOS prompt type: ipconfig /all.
NetComm NB5 Ethernet/USB Modem Router
58
YML717 Rev1
www.netcomm.com.au
Multicasting
IGMP [=Internet Group Management Protocol] Multicast enables communication between a single
sender and multiple receivers on a network. It is used when data needs to be sent from one to many
devices. Typical uses might include the updating of mobile personnel from a home office or the
periodic publishing of an online newsletter. Multicasting provides efficiencies which enable it to use
less network bandwidth than the sending of the same data by other means [e.g. SMTP].
To access Multicasting, click on Advanced>Advanced Features>Multicast.
To enable Multicast, open the multicast screen and select the Enable IGMP Multicast.
Advanced
YML717 Rev1
www.netcomm.com.au
NetComm NB5 Ethernet/USB Modem Router
59
Static Routing
If the Router is required to serve more than one network, you will need to set up a Static Route
between the networks. Static routing can be used to allow users from one IP domain to access the
Internet through the Router in another domain. A Static Route provides the defined pathway that
network information must travel to reach the specific host or network which is providing Internet
access .
To access the Static Routing controls, click on Advanced>Advanced Features> Static Routing.
Configuring Static Routing:
Advanced
Choose a Connection: presents list of Saved Connections. Select appropriate connection from list.
The New Destination IP is the address of the remote LAN network or host to which you want to
assign a static route. Enter the IP address of the host for which you wish to create a static route here.
For a standard Class C IP domain, the network address is the first three fields of the New Destination
IP, while the last field should be 0. The Subnet Mask identifies which portion of an IP address is the
network portion, and which portion is the host portion. For a full Class C Subnet, the Subnet Mask
is 255.255.255.0. The Gateway IP address should be the IP address of the gateway device that allows
for contact between the Gateway and the remote network or host.
Gateway: IP address refers to the IP address of the near device that is to connect with the remote
network or host. If the NB5 is fulfilling this function then its IP address will be entered in this field.
To save changes, click on Apply, then click on Save Settings.
NetComm NB5 Ethernet/USB Modem Router
60
YML717 Rev1
www.netcomm.com.au
Dynamic Routing
Dynamic Routing makes use of the RIP Protocol to allow the ADSL Router to automatically adjust
to physical changes in the network. The NB5, using the RIP protocol, will determine the network
packet route based on the fewest number of hops between the Source and the Destination. The RIP
protocol regularly broadcasts routing information to other ADSL Routers on the network and is part
of the IP Suite.
To access Dynamic Routing click Advanced>Advanced Features>Dynamic Routing.
Enable RIP: if this box is checked, Dynamic Routing is enabled.
Protocol: choice is dependent upon the network environment. Most networks support Rip v1. If RIP
v1 is selected, routing data will be sent in RIP v1 format. If Rip V2 is selected, routing data will be
sent in RIP v2 format using Subnet Broadcasting. If Rip V1 Compatible is selected, routing data will
be sent in RIP v2 format using Multicasting.
Select 'In': the Router will only incorporate received RIP information.
Select 'Out': the ADSL Router will only send out RIP information.
Select 'Both': the ADSL Router will both incorporate received RIP information and send out updated
RIP information.
YML717 Rev1
www.netcomm.com.au
NetComm NB5 Ethernet/USB Modem Router
61
Advanced
Direction: determines the direction that RIP routes will be updated.
Port Forwarding
Port Forwarding is necessary because NAT [=Network Address Translation] only forwards traffic
from the Internet to the LAN if a specific port mapping exists in the NAT translation table. Because
of this, the NAT provides a level of protection for computers that are connected to your LAN.
However, this also creates a connectivity problem when you want to make LAN resources available
to Internet clients, which you may want to do to play network games or host network applications.
Thus Port Forwarding is necessary to run certain games, chat clients, video-conferencing and other
kinds of application. You might also need to configure port-forwarding if you intend to host a web
server or mail server that is to be visible outside your LAN.
Advanced
TIP:
In situations where you are hosting a Web Site or, for example, setting up a
regular NetMeeting link, it is advisable to consider implementing a Fixed IP
address, otherwise the dynamic IP address allocated by DHCP will need to
be communicated prior to every user session.
To access Port Forwarding, click on Advanced>Firewall>Port Forwarding
NetComm NB5 Ethernet/USB Modem Router
62
YML717 Rev1
www.netcomm.com.au
Easy Port Forwarding: Applying Pre-Defined Rules
WAN Connection: refers to the active Connection Profile.
LAN IP: refers to the local Router IP address; the NB5 Default IP is shown in this example.
New IP: If you wish to manually add a LAN client so that you can apply rules to it, click on the New
IP Button and enter Host Name and IP Address.
Available pre-defined rules are categorised according to the application type. Click the Radio Button
adjacent to the appropriate Category, and then select the required application name. Click on the
Add button to move the application into the Applied Rules box. In the example shown on the
previous page, 'Delta Force' has been selected from the list of Available Rules and is about to be
copied to Applied Rules. In the example, this will configure the NB5 ports to use with 'Delta Force' .
To remove a rule from the Applied Rules box, select the Rule and click on the Remove Button.
To save changes, click on Apply, then click on Save Settings.
Advanced Port Forwarding: Creating Custom Rules
If there is no pre-defined Port Forwarding Rule for a particular application, a User Rule can be
created which defines the required Port(s), Protocol(s) and Internal Port forwarding rules.
Note than in this section, 'inside port' is indicated by the port map field and corresponds to the port
number on the LAN Client. 'Outside ports' refer to the WAN port numbers and are designated by the
'port start' and 'port end' fields.
To create a custom rule you will need to know the specific port number(s) and port type [UDP or
TCP] that the application requires. These will be the outside port numbers. Some applications
specify a range of ports in which case you will need to know both the starting and ending port
numbers in the range, which are mapped by the start port and end port fields.
YML717 Rev1
www.netcomm.com.au
NetComm NB5 Ethernet/USB Modem Router
63
Advanced
The Port Map field specifies the internal port that the data will be directed to on the LAN Client.
When dealing with port ranges, the Internal Port (designated by the Port Map field) will be the same
as the first port in the range. When you simply want to forward a single port from outside (i.e. WAN
side) to inside (i.e. LAN side), then all three fields (Port Start, Port End and Port Map) will have the
same port number.
To create a New Port Forward Rule:
On the Port Forwarding page shown in the figure above, click on the User radio button, then on the
New Button.
Rule Name: enter a name that identifies the rule; for the sake of clarity this will usually be the name
of the application. The name must be unique, must not contain spaces and cannot begin with a
number.
Protocol: can be either TCP or UDP, or both.
Port start…port end: These will be the same if you are forwarding only a single port. If there is a
range, then port start is the first number in the range, and port end will be the last number.
Port Map: this is the port number that the data should be forwarded to on the specified LAN IP (i.e.
the inside port). This is usually the same as the port start figure.
TIP: It is possible to map outside port numbers, or ranges [i.e. port start…port end] to a different
inside port numbers [port map] for reasons of security or convenience.
Click 'Apply'
The Port Rule settings defined by this process will then be displayed in a table at the bottom of the
Rule Management panel.
If you wish to add more ports to this rule, leave the text name in the Rule Name field and enter the
new port settings. Click 'Apply' and the new settings will be added to the list.
Advanced
Adding Custom Rules to Applied Rules List
When you have assigned all necessary ports to the Rule and they appear in the table, click on the
Port Forwarding menu item to return to the main Port Forwarding screen.
User-created rules will be shown in the Available Rules list when the User Category radio button is
selected. You can now apply the rule(s) by selecting it and clicking Add. This will add the rule to list
of applied rules.
Click on Save Settings on the left-hand menu to make changes permanent.
NetComm NB5 Ethernet/USB Modem Router
64
YML717 Rev1
www.netcomm.com.au
Access Control
Use Access Control to configure advanced security functions by customising the NB5 Firewall. The
default 'Firewall On' setting blocks all anonymous Internet traffic. Access control enables the user to
selectively direct such traffic, for example to a Web Host in the DMZ or to specific ports opened for
such applications as Web, Telnet or FTP.
CAUTION:
This dialog box indicates that you should not disable LAN Web Access or
else you might not be able to connect to the device. If you become locked
out of the device perform a Factory Default Reset as detailed in the
beginning of this manual.
To configure Access Control, click on Advanced>Firewall>Access Control
This will reveal the Enable Access Control screen.
Advanced
The default configuration enables Telnet, Web, FTP and SSH access FROM the LAN TO the WAN.
Access FROM the WAN to the LAN is not available in the default configuration.
YML717 Rev1
www.netcomm.com.au
NetComm NB5 Ethernet/USB Modem Router
65
Enable Access Control: check this box to enable selective access from the WAN to your LAN for
applications of the class indicated by the relevant check boxes. If Access Control is not enabled, the
individual check boxes cannot be checked.
If Access Control is enabled, and an Enable WAN checkbox is selected, then WAN access to the
matching service is enabled. In other words, for example, if your were to enable Telnet access on the
WAN you could then manage and configure your NB5 from anywhere on the Internet via Telnet.
Caution:
Enabling WAN access to the NB5 reduces security…
Advanced
IP Access List: This enables you to specify which LAN/WAN IP addresses are allowed access to the
NB5 configuration services specified.
NetComm NB5 Ethernet/USB Modem Router
66
YML717 Rev1
www.netcomm.com.au
IP Filters
The IP filters page allows you to specify Normal Port Forwards, Block ALL traffic to specific LAN
Clients or specify Custom IP filters that will control the flow of data across the router.
Custom IP filters (Often also refered to as 'Access Control Lists' ) allow you to specify individual
rules that will deny traffic by defining the following;
■ Source IP address or IP Subnet
■ Destination IP address or Subnet
■ Port or Port range
■ Protocol
Customer IP filter are different from Port forwards, or Block All traffic because they allow greater
scopes of IP addresses to be included in the block.
To access IP Filters, click on Advanced>Firewall>IP Filters.
You must have at least one LAN Client in your LAN clients table before IP
filters can be created. To create a LAN Client, see the section above on LAN
Clients under the Advanced Menu.
YML717 Rev1
www.netcomm.com.au
NetComm NB5 Ethernet/USB Modem Router
67
Advanced
NOTE:
DMZ Configuration
A DMZ (demilitarized zone) is a computer host or small network inserted as 'neutral territory'
between a private LAN and the Internet. It prevents outside users from getting direct access to LAN
computers while still being able to access services hosted on the designated DMZ Computer. When
using NAPT to share your internet connection, LAN computers will still be able to access the
Internet when the DMZ host is enabled. Any direct communication to the WAN port of the NB5 that
is not a reply to the original NAPT request is forwarded to the DMZ host.
Select Advanced>Firewall>DMZ. Check box 'Enable DMZ'.
Advanced
New IP: Click on New IP to add a LAN Client which can be specified as DMZ Host; for more info
on adding LAN Clients see 'Adding LAN Clients' above.
NetComm NB5 Ethernet/USB Modem Router
68
YML717 Rev1
www.netcomm.com.au
Tools Menu
System Commands
To access System Commands, Click on Tools>System Commands.
Save All: Press this button in order to permanently save the current configuration of the Gateway. If
you do re-start the system without saving your configuration, the Gateway will revert back to the
previously saved configuration.
Restart: Use this button to re-start the system. If you have not saved your configurations, the
Gateway will revert back to the previously saved configuration upon re-starting.
NOTE:
You will be redirected to the NB5 Homepage after the unit has successfully
rebooted.
Restore Defaults: Use this button to restore factory default configurations.
NOTE:
You will be redirected to the NB5 Homepage after the unit has successfully
been restored to factory default configurations.
User Management
To access User Management, click on Tools>User Management.
This screen enables you to change your User Name and/or Password. It is recommended that you
change the User Name and password from the default 'admin' to ensure the security of the NB5.
CAUTION:
TIP:
If you forget your user name and password, access to the NB5 interface can
only be gained by resetting the unit to factory defaults. In this case, all userconfigured settings will be lost and will need to be re-entered.
Your NB5 Username and Password fields are NOT the same fields as the
Username and Password for your ISP account.
Advanced
YML717 Rev1
www.netcomm.com.au
NetComm NB5 Ethernet/USB Modem Router
69
Update Firmware
'Firmware' is the software that controls the NB5 and also provides the user interface that is the
subject of this manual. The Firmware resides in the NB5 internal memory; currently loaded
firmware version can be found under Status>Product Information. Firmware upgrades may be
offered from time to time by NetComm Ltd. as required. It is strongly recommended that you only
upload firmware that is supplied by NetComm Ltd. Available firmware updates will be posted on
www.netcomm.com.au.
To access Firmware Updates, click on Tools>Update. Click on the Browse…button to locate the
firmware file on your computer's hard drive. When the file has been selected and appears in the
'Open' field of the Choose File dialog box, click on Open. This will automatically install the
firmware. The system will be restarted automatically after the firmware image is successfully
uploaded. You will need to reconnect again to configure your setup.
Ping Test
To access the Ping Test, click on Tools>Ping Test
Ping Test: provides an easy way to ping the NB5 without invoking the command line interface.
Modem Test
To access the Modem Test, click on Tools>Modem Test.
Modem Test: This test can be used to check whether your Modem is properly connected to the
Network. This test may take a few seconds to complete. To perform the test, select your connection
from the list and press the Test button. The value returned will either be Success or Fail
Reboot
To reboot the NB5, click on Tools>Reboot. This will restart the modem.
Log Out
Advanced
To log out of the Admin screens, click on tools>log out.
NetComm NB5 Ethernet/USB Modem Router
70
YML717 Rev1
www.netcomm.com.au
Status Menu
About: The Status Menu provides dynamically-updated information about your DSL connection,
modem and network performance.
Network Statistics
To access network statistics, click on Status>Network Statistics.
Select Network Interface type to peruse statistics for each type of connection.
Connection Status
To access Connection Status, click on Status>Connection Status.
This display summarizes the status of the current active connection
DHCP Clients
TO access DHCP Clients, click on Status>DHCP Clients
This display indicates the MAC address, IP address, Host Name and lease time for each DHCP client
connected to the NB5.
Modem Status
To access Modem Status, click on Status>Modem Status.
This displays Upstream (=Us) and Downstream (=Ds) connection speed in Kbps.
Product Information
To access Product Information, click on Status>Product Information.
This displays various parameters of the NB5 including Firmware Version
Advanced
System Log
To access the System Log, click on Status>System Log
This maintains a dynamic display of System Log information.
YML717 Rev1
www.netcomm.com.au
NetComm NB5 Ethernet/USB Modem Router
71
Appendix A: Troubleshooting
Below is a list of commonly asked questions. Before calling technical support, please look through
these issues to see if they help to solve your problem.
The ADSL Router is not functional
1. Check to see that the power LED is green and than the network cables are installed correctly.
Refer to the easy start guide for more details.
2. Check to see that the ETH/LAN and PPP/WAN LEDs are green.
3. Check to see that the DSL LED is green
4. Check the settings on your PC. Again, refer to the easy start guide for more details
5. Check the ADSL Router's settings.
6. From your PC, can you PING the ADSL Router? Assuming that the ADSL Router has DHCP
enabled and your PC is on the same subnet as the gateway, you should be able to PING the
gateway.
7. Can you PING the WAN IP? Your ISP should have provided the IP address of their server. If
you can ping the ADSL Router and your protocols are configured correctly, you should be able
to ping the ISPs network. If you cannot PING the ISPs network, make sure you are using the
correct protocols with the correct VPI/VCI values.
8. Make sure NAT is enabled for your connection. If NAT is disabled the ADSL Router will not
route frames correctly (except in Bridge connection).
I can't connect to the ADSL Router.
1. Check to see that the power LED is green and that the network cables are installed correctly; see
the easy start guide for more details.
2. Make sure that your PC and the ADSL Router is on the same network segment. The ADSL
Router's default IP address is 192.168.1.1. If you are running a Windows based PC, you can
open a DOS window and type IPCONFIG; make sure that the network adapter that is connected
to the gateway is within the same 192.168.1.x subnet.
3. Also, your PC's Subnet Mask should match the gateways subnet mask. The gateway has a
default subnet mask of 255.255.255.0.
NetComm NB5 Ethernet/USB Modem Router
72
YML717 Rev1
www.netcomm.com.au
4. If this still does not work, press the reset button for 10 seconds. This will place the gateway into
its factory default state. Go through the above procedures again.
5. Make sure NAT is enabled for your connection. If NAT is disabled the ADSL Router will not
route frames correctly (except in Bridge connection).
The DSL Link LED continues to blink but does not go solid
1. This means that the DSL line is trying to train but for some reason it cannot establish a valid
connection. The main cause of this is that you are too far away from the central office. Contact
your DSL service provider for further assistance.
2. Verify that the phone line is connected directly to the wall and to the line input on the ADSL
Router.
3. Make sure that for every parallel phone line connected to telephone or fax to install with a micro
filter.
The DSL Link LED is always off
1. Make sure you have DSL service. You should get some kind of information from your ISP that
states that DSL service is installed. You can usually tell if the service is installed by listening to
the phone line; you will hear some high-pitched noise. If you do not hear high-pitched noise,
contact your ISP.
2. Verify that the phone line is connected directly to the wall and to the line input on the ADSL
Router. If the phone line is connected to the phone side of the ADSL Router or you have a
splitter installed on the phone line, the DSL light will not come on.
YML717 Rev1
www.netcomm.com.au
NetComm NB5 Ethernet/USB Modem Router
73
Appendix B: ADSL Router terms
What is a firewall?
A firewall is protection between the Internet and your local network. It acts similarly to the firewall in
your car, protecting the interior of the car from the engine. Your car's firewall has very small opening
that allow desired connections from the engine into the cabin (gas pedal connection, etc), but if
something happens to your engine, you are protected.
The firewall in the ADSL Router is very similar. Only the desired connections that you allow are
passed through the firewall. These connections are normally originating from the local network; such
as web browsing, checking your email, downloading a file, and playing a game. However, in some
cases, you can allow incoming connections so that you can run programs like a web server.
What is NAT?
NAT stands for Network Address Translation. Another name for it is Connection Sharing. What does
this mean? Your ISP provides you with a single network address for you to access the Internet
through. However, you may have several machines on your local network that want to access the
Internet at the same time. The ADSL Router provides NAT functionality that converts your local
network addresses to the single network address provided by your ISP. It keeps track of all these
connections and makes sure that the correct information gets to the correct local machine.
Occasionally, there are certain programs that don't work well through NAT. Some games, and some
applications have a bit of trouble. The ADSL Router contains special functionality to handle the vast
majority of these troublesome programs and games. NAT does cause problems when you want to
run a SERVER though. When running a server, please see the DMZ section below.
What is a DMZ?
DMZ really stands for Demilitarized Zone. It is a way of separating out part of your local network so
that is more open to the Internet. Suppose that you want to run a web-server, or a game server.
Normal servers like these are blocked from working by the NAT functionality. The solution is to
"isolate" the single local computer into a DMZ. This makes the single computer look like it is directly
on the Internet, and others can access this machine.
Your machine isn't really directly connected to the Internet, and it really has an internal local network
address. When you provide the servers network address to others, you must provide the address of
the ADSL Router. The ADSL Router "fakes" the connection to your machine.
You should use the DMZ when you want to run a server that others will access from the Internet.
Internal programs and servers (like print servers, etc) should NOT be connected to the DMZ
NetComm NB5 Ethernet/USB Modem Router
74
YML717 Rev1
www.netcomm.com.au
What is a Gateway?
The Internet is so large that a single network cannot handle all of the traffic and still deliver a
reasonable level of service. To overcome this limitation, the network is broken down into smaller
segments or subnets that can deliver good performance for the stations attached to that segment.
This segmentation solves the problem of supporting a large number of stations, but introduces the
problem of getting traffic from one subnet to another.
To accomplish this, devices called routers or gateways are placed between segments. If a machine
wishes to contact another device on the same segment, it transmits to that station directly using a
simple discovery technique. If the target station does not exist on the same segment as the source
station, then the source actually has no idea how to get to the target.
One of the configuration parameters transmitted to each network device is its default gateway. This
address is configured by the network administrators and it informs each personal computer or other
network device where to send data if the target station does not reside on the same subnet as the
source. If your machine can reach all stations on the same subnet (usually a building or a sector
within a building), but cannot communicate outside of this area, it is usually because of an incorrectly configured default gateway.
YML717 Rev1
www.netcomm.com.au
NetComm NB5 Ethernet/USB Modem Router
75
Appendix C: Features
ADSL/ATM Support
■ ANSI T1.413 issue 2, ITU-T G.992.1 (G.dmt) and G.992.2 (G.lite) compliant
■ ADSL2, ADSL2+, RE-ADSL compliant
■ Rate Adaptive modem at 32 Kbps steps
■ Dynamic Adaptive Equalisation to improve Carrier's service area
■ Bridge Tap Mitigation support
■ ATM Layer with Traffic shaping QoS Support (UBR, CBR, VBR-rt, VBR-nrt)
■ AAL ATM Attributes - AAL5
■ Multiple PVC up to 8 support (Bridge Support)
■ Spectral compatibility with POTS
■ F5 OAM Loopback/Send and Receive
Encapsulation Support
■ RFC2684 Bridge and Routed LLC and VC Mux support
■ RFC2364 PPPoA Client support
■ RFC2516 PPPoE Client support
■ RFC2225/RFC1577 Classical IP Support
■ Transparent Bridge Support
Network Support
■ Static IP, Dynamic RIP routing support
■ IP/TCP/UDP/ICMP/ARP/RARP Application Support
■ Network Address Translation (NAT)
■ Port Mapping/Forwarding
■ Easy setup of Port Forwarding rules for popular Games/Application
■ NAT Application Level Gateway for popular applications
■ DHCP Server/Relay/client
■ DNS Relay Agent
■ DMZ support
NetComm NB5 Ethernet/USB Modem Router
76
YML717 Rev1
www.netcomm.com.au
■ Single Session IP Sec and PPTP/L2TP VPN pass through support
■ PPP Always on with configurable timeout
■ PPP Dial on Demand
■ Universal Plug and Play Support
Management Support
■ Web Based HTTP management GUI
■ TFTP/FTP Support for Firmware Upgrade
■ Web Based Firmware Upgrade (Local)
■ Soft Factory Reset Button via Web GUI
■ Diagnostic Test (DSL, OAM, Network, Ping Test)
■ Telnet/CLI (Read Only)
■ Syslog Support
Security Support
■ NAT for basic Firewall support
■ Packet Filtering Firewall Support
■ Stateful Packet Inspection Support
■ Protection against Denial of Service attacks
■ Password Authentication to Modem
External Connectors:
■ 1 x RJ-11 Telephone socket for ADSL line
■ 1 x RJ45 for 10/100Base-T Ethernet (MDI-X)
■ 1 x USB 1.1 Type B
■ 1 x DC Jack for Power Input
■ 1 x Factory Default Reset Button
YML717 Rev1
www.netcomm.com.au
NetComm NB5 Ethernet/USB Modem Router
77
Appendix D: Cable Connections
This cable information is provided for your reference only. Please ensure you only connect the
appropriate cable into the correct socket on either this product or your computer.
If you are unsure about which cable to use or which socket to connect it to, please refer to the
hardware installation section in this manual. If you are still not sure about cable connections, please
contact a professional computer technician or NetComm for further advice.
RJ-45 Network Ports
RJ-45 Network Ports can connect any networking devices that use a standard LAN interface, such as
a Hub/Switch Hub or Router. Use unshielded twisted-pair (UTP) or shield twisted-pair (STP) cable
to connect the networking device to the RJ-45 Ethernet port. Depending on the type of connection,
10Mbps or 100Mbps, use the following Ethernet cable, as prescribed.
10Mbps: Use EIA/TIA-568-100-Category 3, 4 or 5 cable.
100Mbps: Use EIA/TIA-568-100-Category 5 cable.
Note: To prevent loss of signal, make sure that the length of any twisted-pair
connection does not exceed 100 metres.
RJ-45 Connector
Pin Assignment
1
2
3
6
4,5,7,8
Normal Assignment
Input Receive Data +
Input Receive Data Output Transmit Data +
Output Transmit Data Not used
Figure 1
Twisted pair cables
Figures 1 and 2 illustrate the use of straight-through and crossover twisted pair cables along with the
connector.
RJ-45 plug
attached to cable
Figure 2
NetComm NB5 Ethernet/USB Modem Router
78
YML717 Rev1
www.netcomm.com.au
Straight and crossover cable configuration
Figure 3
Figure 4
RJ11 connector and cable
An RJ-11 connector is the small, modular plug used for most analog telephones. It has six pin slots
in the head, but usually only two or four of them are used.
RJ-11 Connector
Pin Assignment
1
2
3
4
5
6
Normal Assignment
Signal Ground
CTS
RXD
TXD
+5 Volts In
Signal Ground
Figure 5
YML717 Rev1
www.netcomm.com.au
NetComm NB5 Ethernet/USB Modem Router
79
605 to RJ-11 adapter
The 605 to RJ-11 adaptor is provided to comply with the older 610 Telstra
wall socket. The 605 to RJ-11 adapter may be used to convert the supplied
RJ-11 cable, if the older connection is required.
USB cable
A typical USB cord has an "A" connection (“upstream” to plug into the computer) and a “B”
connection (“downstream” to plug into the device).
“B” Connection
“A” Connection
By using different connectors on the upstream and downstream ends, cable connection is simplified.
The “B” connection will fit a into the “B” socket of any USB device. Similarly, any "A" connector
can be plugged into any "A" socket, such as on a computer.
If it is a new device, the operating system auto-detects it and asks for the driver disk. If the device
has already been installed, the computer activates it and starts talking to it. USB devices can be
connected and disconnected at any time.
9 Pin (RS-232 ) Serial Cable
A 9 Pin (RS-232) Serial Cable may be used to connect to a serial console terminal or a PC running a
terminal emulation program, such as Hyper Terminal.
Male Connector
Pin No
Name
Notes/Description No.
1
DCD
Data Carrier Detect
2
RD
Receive Data (a.k.a RxD, Rx)
3
TD
Transmit Data (a.k.a TxD, Tx)
4
DTR
Data Terminal Ready
5
SGND
Ground
6
DSR
Data Set Ready
7
RTS
Request To Send
8
CTS
Clear To Send
9
RI
Ring Indicator
NetComm NB5 Ethernet/USB Modem Router
80
YML717 Rev1
www.netcomm.com.au
Appendix E: Registering your NetComm Product
All NetComm Limited (“NetComm”) products have a standard 12 month warranty from date of
purchase against defects in manufacturing and that the products will operate in accordance with the
specifications outlined in the User Guide. However some products have an extended warranty
option (please refer to packaging). To be eligible for the extended warranty you must supply the
requested warranty information to NetComm within 30 days of the original purchase by registering
on-line via the NetComm web site at:
www.netcomm.com.au
Contact Information
If you have any technical difficulties with your product, please do not hesitate to contact
NetComm’s Customer Support Department.
Email:
[email protected]
Fax:
(+612) 9424-2010
Web:
www.netcomm.com.au
YML717 Rev1
www.netcomm.com.au
NetComm NB5 Ethernet/USB Modem Router
81
Legal & Regulatory Information
This manual is copyright. Apart from any fair dealing for the purposes of private study, research,
criticism or review, as permitted under the Copyright Act, no part may be reproduced, stored in a
retrieval system or transmitted in any form, by any means, be it electronic, mechanical, recording or
otherwise, without the prior written permission of NetComm Limited. NetComm Limited accepts no
liability or responsibility, for consequences arising from the use of this product.
NetComm Limited reserves the right to change the specifications and operating details of this
product without notice.
NetComm is a registered trademark of NetComm Limited.
All other trademarks are acknowledged the property of their respective owners.
Customer Information
ACA (Australian Communications Authority) requires you to be aware of the following information
and warnings:
(1) This unit shall be connected to the Telecommunication Network through a line cord which neets
the requirements of the ACA TS008 Standard.
(2) This equipment has been tested and found to comply with the Standards for C-Tick and or ATick as set by the ACA . These standards are designed to provide reasonable protection against
harmful interference in a residential installation. This equipment generates, uses, and can radiate
radio noise and, if not installed and used in accordance with the instructions detailed within this
manual, may cause interference to radio communications. However, there is no guarantee that
interference will not occur with the installation of this product in your home or office. If this
equipment does cause some degree of interference to radio or television reception, which can be
determined by turning the equipment off and on, we encourage the user to try to correct the
interference by one or more of the following measures:
•
Change the dirtection or relocate the receiving antenna.
•
Increase the separation between this equipment and the receiver.
•
Connect the equipment to an alternate power outlet on a different power circuit from that to
which the receiver/TV is connected.
•
Consult an experienced radio/TV technician for help.
(3) The power supply that is provided with this unit is only intented for use with this product. Do
not use this power supply with any other product or do not use any other power supply that is
not approved for use with this product by NetComm. Failure to do so may cause damage to this
product, fire or result in personal injury.
NetComm NB5 Ethernet/USB Modem Router
82
YML717 Rev1
www.netcomm.com.au
Product Warranty
The warranty is granted on the following conditions:
1.
This warranty extends to the original purchaser (you) and is not transferable;
2.
This warranty shall not apply to software programs, batteries, power supplies, cables or other accessories supplied
in or with the product;
3.
The customer complies with all of the terms of any relevant agreement with NetComm and any other reasonable
requirements of NetComm including producing such evidence of purchase as NetComm may require;
4.
The cost of transporting product to and from NetComm's nominated premises is your responsibility; and,
5.
NetComm does not have any liability or responsibility under this warranty where any cost, loss, injury or damage of
any kind, whether direct, indirect, consequential, incidental or otherwise arises out of events beyond NetComm's
reasonable control. This includes but is not limited to: acts of God, war, riot, embargoes, acts of civil or military
authorities, fire, floods, electricity outages, lightning, power surges, or shortages of materials or labour.
6.
The customer is responsible for the security of their computer and network at all times. Security features may be
disabled within the factory default settings. NetComm recommends that you enable these features to enhance your
security.
The warranty is automatically voided if:
1.
You, or someone else, use the product, or attempts to use it, other than as specified by NetComm;
2.
The fault or defect in your product is the result of a voltage surge subjected to the product either by the way of
power supply or communication line, whether caused by thunderstorm activity or any other cause(s);
3.
The fault is the result of accidental damage or damage in transit, including but not limited to liquid spillage;
4.
Your product has been used for any purposes other than that for which it is sold, or in any way other than in strict
accordance with the user manual supplied;
5.
Your product has been repaired or modified or attempted to be repaired or modified, other than by a qualified
person at a service centre authorised by NetComm; and,
6.
The serial number has been defaced or altered in any way or if the serial number plate has been removed.
Limitations of Warranty
The Trade Practices Act 1974 and corresponding State and Territory Fair Trading Acts or legalisation of another
Government ("the relevant acts") in certain circumstances imply mandatory conditions and warranties which cannot be
excluded. This warranty is in addition to and not in replacement for such conditions and warranties.
To the extent permitted by the Relevant Acts, in relation to your product and any other materials provided with the product
("the Goods") the liability of NetComm under the Relevant Acts is limited at the option of NetComm to:
■
Replacement of the Goods; or
■
Repair of the Goods; or
■
Payment of the cost of replacing the Goods; or
■
Payment of the cost of having the Goods repaired.
All NetComm ACN 002 490 486 products have a standard 12 months warranty from date of purchase. However some
products have an extended warranty option (refer to packaging). To be eligible for the extended warranty you must supply
the requested warranty information to NetComm within 30 days of the original purchase by registering on-line via the
NetComm web site at www.netcomm.com.au.
NetComm reserves the right to request proof of purchase upon any warranty claim.
YML717 Rev1
www.netcomm.com.au
NetComm NB5 Ethernet/USB Modem Router
83