1
A Word to Mazda Owners
Thank you fo. choosing
a Mazda. We at
Mazda design andbuild vehicles with
complete customer satisfaction in mind.
An Authorized Mazda Dealer knows
yourvehicle best. So when maintenance
or seNice is necessary, thafs the place to
go.
To help ensure enjoyable and trouble free
operation ofyour Mazda. read this
manual carefully and follow ils
Our nationwide network of Mazda
professionals is dedicated to providing
you with the bestpossible service.
We assure you that all of us at Mazda
have an ongoing interest in your
motoring pleasure and in your full
satisfaction with your Mazda product.
Mazda Motor Corporation
HIROSHIMA, JAPAN
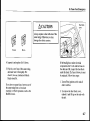
Impoflant Notes About This Manual
Keep this manual in the glove box as a handy reference for fte safe and enjoyable use of your Mazda. Should you resell the
vehicle.leave lhis nanuai with
iifor
the nexl owner
Please be aware that this manual applies to all models. equipment.rnd options. As aresult, you may find some explanations
for equipmentnot installed on yourvebicle.
A1l specifications and descriptions are accurate al the time ofprinting. Because improvement is a constanl goal at Mazda, we
resen'e the rightto make changes in specifications at any time without notice and without obligatron.
Air Conditioning and the Environment
Your Mazda's genuine air conditioner is filled witb Rl34a. a refrigerant that has been found not to damage lhe eanh\ ozone
layer. If the air conditioner does not operate properly, consult an Authorized Mazda Dealer.
02000 Mazda Motor Corporation
Printed in Japan Oct.2000 (Printi)@
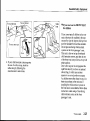
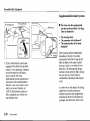
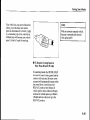
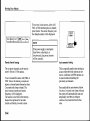
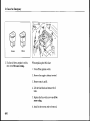
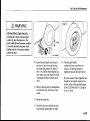
How to Use This Manual
We want to help you get rhe most driving
pleasure from your vehicle. Yourowner's
manual, when read from cover to cover.
can do that in many ways.
Illusrations complement the words of the
manual to best explain how to enjoy your
Mazda By reading yourmanual, you can
find out about the features, imponant
safety infonnation, and driving under
s
various road conditions.
The above symbol in this manual means
''Do not do this " or "Do not let this
happen".
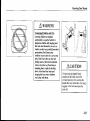
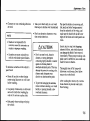
A warurnrc
Index: A good place to start is the Index,
an alphabetical listing of all information
in your manual.
Sections: This inanual has eleven
sections. Sections 1 through l0begin
with a brief list of contents, so you can
usually tell at a glance if thal section has
the information you want.
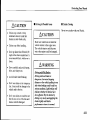
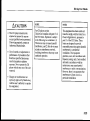
A }yARNING indicates a situation in
tehich serious i j ry ot death coud
nsuk ifthe *arni s k isnored.
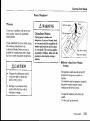
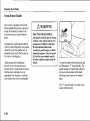
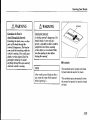
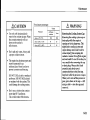
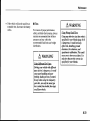
Ac,turroN
You'lt find several WARNINGS.
CAUTIONS, and NOTES in the manual.
A CALITION indicates a situation in
which bodily injury or damage to
]our vehicle, orboth, could result if
lhe caution is ignored.
NOTD
A NOTE proYides information and
sometimes suggests how to make
better us€ ofyour vehicle.
How to Use This Manual
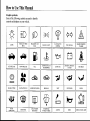
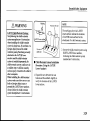
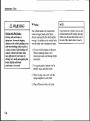
Graphicsymbols:
Some of the following symbols are used to identify
controls and displays on lourvehicle.
.4,
zt)
-,\-/, ..
;o o:
.*'""".^
n
ff
til
e'
€+
trwlIM{'\
4
^E
*
-
(O)
*
CS
-
BRAKE
7
\;,
**
-
w
*
W
Nl:M
ff)
}@
w,
a
*
)tr
^
'r___ru
CHECK
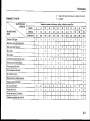
Table of Contents
Your Vehicle at a
Glance
E
----
Maintenance
E
--
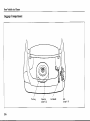
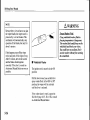
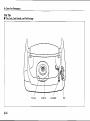
Your Vehicle at a Glance
YaM Ma?ia h d cohplerwhi.le, but the
design throushout coksi.lets taar sdfert and
.ahlbrt partuount.
This rcq4ifts
naht
.antroh, lotks, sraphic srnbok, nechanitus
and anenities that need ta be understaod
for
Se.tion I iIustrctes this infomalion to
faftilidnze lou with what iee.ls ta be knovn
to help ndke toff tuabnnq safet ond easier,
Interior
Dashboard
Luggage
Oveniew t
Overview I
Doors 1
Companment l-
2
3
4
6
l-l
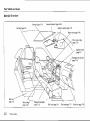
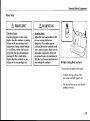
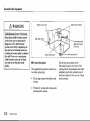
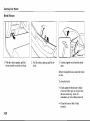
Your Vehicle at a Glance
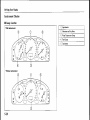
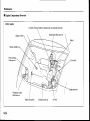
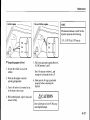
Interior Overview
slnroof swnchcs* (page 3-24)
ReNieq miror (pag. 3
23)
vrn)
minorlprge 5 4lJ
(page 2 30)
shilt lever
t-2
(paBe 5
6)
Front ear (page 2
2)
Clove box (pa8e 5-39)
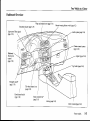
Your Vehicle at a clance
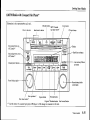
Dashboard Orerview
wiper and ssher leeei (Fge 5 35)
In{rumenr cluster eage 5 :0)
Lighi conrol/Tun signah
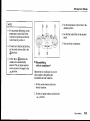
Hazard Naming
fa)her!{'Lh
(p,ge b 2)
Andio systen (pa8e s-s6)
cenler console (t!ge 5-4o)
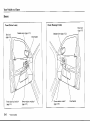
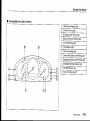
Your Vehicle at a Glance
Froot (Passenger's side)
OuGde mircrlprge
I
2l
I
Power aindow switches*
Outside
nimr
(paBe 3-21)
Your Vehicle at a clance
Your Vehicle at a Glarce
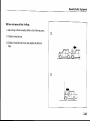
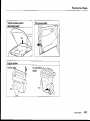
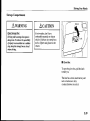
Luggage Compartment
Essential Safety Equipment
P.rsanat salery ani coaJort are ||hat nake
.lrivins tour Mavla d pleasurdble
erpendce. Sectioh 2 describd esehtidl
inJbmatia Ji, optihal sqfe divins incLl.line
seats, seat bek stslhs and the supplenehtal
Sears 2 2
Rearsear 2- 5
SeatBelt Systems 2- I
Child ResEaint 220
LAICH Child-Restrainl Systens 2 21
Supplemental Restnint Systems 2 30
Front
2-l
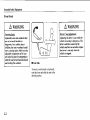
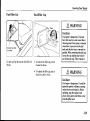
Essential Safety Equipment
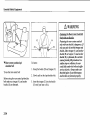
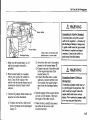
Front Seats
A
AwtnNmc
waRlrnrc
Secuin! seats:
Adjustable seats a d seatbacks that
are not securetr tatched arc
Driv e r's
dangero s.In a s dde stot or
couhion, the seat or seatbackcould
now,caasing
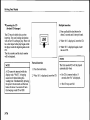
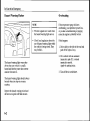
Ad i ustme nt:
whick and have an occident. Adj|st
dtuet's seat onlr whenthe
i jut!.
Make sure the
odjustable conpon.nts of the seat
are lo.ked in place br attenpting to
sline the seatforward and backwa
and rocking the seatb.ck.
S e at
Adjusting the bit'er\ seat v,hile the
whicle is mo'ing is dangenus.The
divet couA bse contrct oJ the
the
I
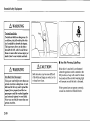
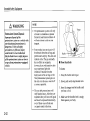
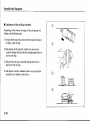
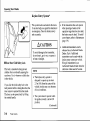
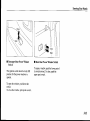
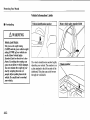
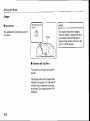
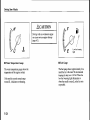
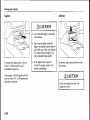
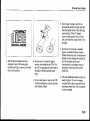
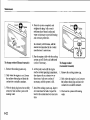
Seat Slide
To move a seat forward or backward.
raise the lever and slide the seat to the
desired position.
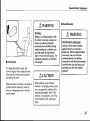
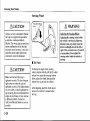
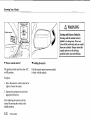
Essentbl Safety Equipment
AwenNmc
Reclinins:
Sittins in a nclined position while
it nofing is dangerous
lou tlon't get the full
the rehicle
because
protection from seat behs. During
sunnen brukins ot a cotlision, )ou
can sline under the lap belt and
suffet seious intemat injudes. For
I
Duxinun pdecnon, sit u'ell back
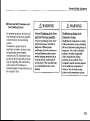
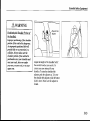
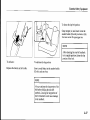
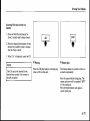
Seat Recline
To change lhe sealback angle. lean
fonvard slightly while raising the l€ver
Then lean back to the desired position
and release ihe lever.
Make sure the leverreturns to its original
position and the seatback is locked in
place by attempting to push it fo.ward
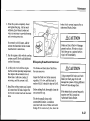
ACAUTION
When retuming a real reclined
seatback to its upright position, make
sure you support lhe seatback while
operating lbe seatback lever Ifthe
seatback is nol supporled, irwill flip
forward suddenly and could cause
lnjufy.
I
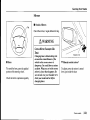
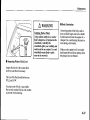
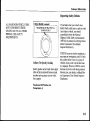
Head Restraint
A wanlrnrc
Head Restraints
Adj stme t:
Driying with the head rcstrahtti
adjusted too low or rcnoved is
dangerous. With no support behitul
rour head, rour ne.k could be
sedoustr injured in a collision.
Alwars dnre with the heotr rcstraints
insetledwhen seats arc beine used
and ,nake surc thet a.e prcperl!
adjusted.
Bssential
Sfety Eqnipmeni
\t--l
G-6\
@
@
\:+:lb_
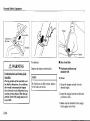
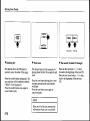
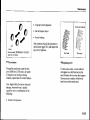
V Height adjustment
I
To raise a head restraint. pull it up to the
The seat bottom angle can be adjustedby
rotaiing rhe dial. Th€ front dial lilts ihe
Seat
Tilt* (Driver's
Seat)
front of $e seat bottom upward.
To lowe. lhe head reslrainl. press the
stop-catch release. $en push rhe head
Adjust tbe head restraint so tha! the top
parallels the top of the passenger's earsi
never lhe passenger's neck.
2-4
'sonemodels.
The seat bottom angle can be adjusted by
rotating the dial. The rear dial tihs the
rear of the seal bottom upward.
Eslential Safety Equipment
Rear Seat
Aw,cnMNc
Sta.kingCaryo:
Sta.king luggage ot other cargo
higherthatt the seatbacks ol puttine
things on the real package trat is
dansercus. Durins sunden brukins
ot aco ision,objectt can becone
projectiles thrt nar hit and injurc
passengers. Don't stack things
higher tha the seatbdcks or put
things on the rcar package trat.
Awtnumc
Securing Seats:
Adjustable seats a d seatbacks thal
arc not securcb latched arc
dangerou,'.In a sudden stop or
collision,the sedt or seatback coukl
now, causins injury Make surc the
alljustable tonponen* of the seat
are lo&ed in place bJ attenpting to
sude the seatfotwa and backword
and rccking the seatback.
I
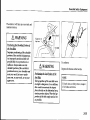
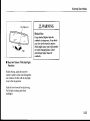
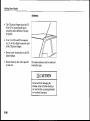
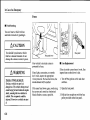
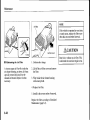
Split-Folding Rear Sealback
To provide nore space in the lrunk:
l.
Unfasten lhe Iap porlion ofihe
rear center seat belt (page 2 16).
2. Pull the lock release up and fold the
seatback forward.
Essential Safety Equipment
ACAUTION
To relum the seatbacks !o their original
NOTE
W})en you return ihe seatbacks io
Don'r ler the seat belt orbuckle get
caughibetween the seat botlom and
seatback when tblding the seat. The
seatbelt and buckle could be
oamageo.
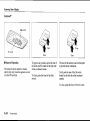
1
. Lift the seatback and pusb it firmly
their original position:
.
2. Fasten ihe lap portion of the
rear center sear beit (page 2,16).
.
NOTE
.
.
2-6
Unlock the sealback before you
fold it forward (page 2-8).
Wben folding the rear,right
sealback, the rear center seat belt
doesnl have to be unfasiened.
AcaurroN
Don't let the rear-center
seat
t€lt
tongues or buckles g€l caught
between th€ seatback and the rear
package tray.
Make sure the seatbacks are
securely latched by rocking the
Make sure lhe rear seat belts can be
pulled out of the retmctors. If a belt
is iocked, firmly pull and release it.
then slowly pull it out again.
Essential SafetJ Equipment
A
A
wanlvnvc
waRlrlvc
qsralLLfu ldalslalbaeL!
Unk'cked Seatback:
Pa sse n
A seatback plart an irynrtant rola i,t
rour prctection in a rehi.le. Leavirrg
Driving with
the seatback unlocked is dangerout as
it can alloui passengers to be ejeded or
thmvn aroutrd a d baggage to stike
occupa ts a suAkn stop or
collbi
i
,
rcsuxing in sewre injwr.
Afrer rctuming th? seat at anf line,
even when there are no other
passengers,
ro.k ttu
swe itis locked
i
seatbeck to nnke
place.
passe ger on the
is danserous.
fotded
'eatback
Auor)ing
a child to sit up on the
foued seatbatk rrhile the whicle is
moving k particulaflr dangerour. In
a su.Uen stop or ewn a minor
.o ision, a chiU not in
oper seat
or chiu-restraint srstem and seat
bett could be thnwn fonra , back
or eye out of the ca. .esultins in
senous injuries or death.The chiu
or othel objecs itt the baggage ana
could be thrcwn into otheroccupants
&nd cause senous injur!. Never
alk'|| a passengerto sitor stand on
the fotded seatbock v,hile the vehicle
a
a
AWARNING
Childft
and the Fotding Rear
Js46i
Plaring vith
the
folding reot
seats is
dangercus. 1:he foldiig rcar
seatbacks cannot be folded doi'tl
Jion inside the luggage
comparlment Do not give the car
kers to chidrc and do not a otr
then to plar in the whi.lc.
Essential Safety Equipment
Seat Belt System
Sealbelts help to decrease the possibility
of severe injury during accidents and
sLrdden stops. Mazda recommends ihat
lhe driver and all passengers always wear
All of the seat belt retractors
are designed
to keep rhe lap/shoulder belts out oi the
way when not n use.
I
Rear S€atback
Inck
To lock orunlock a seatback, move ihe
NOTE
The seatback locks are part of the
lrunk security systen (page 3- I ,1).
2-8
The driver's seatbelthas no provisions
fo! child-restraint syslems and has only
an emergency locking mode. The driler
nay wear ir comfortably, and iiwill lock
during
a
collision.
However, the front passenger\ seat and
rear lap/shoulder belt retractors oper4te in
two modes, energency locking mode and
for child'resrainr systens, automatic
Emergency locking mode
the belt has fully rerracled, il will
always be in ihe emergency locking
mode until you move it into automatic
locking node by pulling the belt all the
way oul io its full leng$.In the
emergency locking mode, the bell
remains comfortable on the occupant and
the retractorwill lock in position during a
lf
If
the belt feels tight and hinders
comforoble movement while rhe vehicle
is slopped or in motion. you may be in
the aubmatic locking mode because you
have pulled the belt too far out. To reiurn
to the more comfonable emergency
locking mode, wait until you can stop the
vehicle in a safe area, retract the belt
fully to convert it back to emergency
locking mode and then again extend it
Ess€ntial Safety
Automatic locking mode
keep the child restajnt system from
shifting to an unsafe position in the event
of an accident. To get the seat bell imo
lhe automaric locklng nrode. pull irall rhe
way out and connect it as instl-ucted on
the child-resaaint system. hwill retract
down to tle child'restraint system and
slay locked on it. See the section on chlld
restraint (page 2-20).
Not Weafing Seat Belts:
Not *'ean g a seat bek is ext emelr
s. Dunng a co ision,
occuqants not wearing reat belts
could hit someone or things ride
the rehi.le or even be thrown out oI
the rehicle.Ther could be seiourlr
injurcd ot even kilted.In the sane
collision, occupants treaing seat
belts \|oua be nuch sder Atwars
dengerc
i
weartoo seatbelt and ruke surc
a occupants arc prcpe r
pment
A warurnrc
Awannmc
Always use the automalic locking mode
1()
Eq
Seat Belt
Danared Duing an
Accident:
Usins a danaged seat belt is
dangerous.
accident.ould
danage the belt webbing in use. A
danaged seat belt cannot proride
a.lequate protection in a collision.
A
a Authorized Mazla Dealer
inspe.tall seatbelt slstems in use
Hare
during an accident before the!
.re
2-9
Ess€ntial Safety Equipm€nt
A
z
wan-rrrylrc
Tr-
T\'isted Seat Belt!:
T*isted seat belts an dange.ous.In
a cotLsion, the fuU
hofthebeh
isn't tvailable toabsorb the inryct.
This puts nore force on the bones
beneath the belt,t!'hich co A break
themot cause other seious injury o.
death. Don'twear tvisted seat bel^.
t'i
I\
WARN/NG
One Belt.One Passenser:
Usins one seat bell for n ore than one
person ot a time is .lange.ou!. A seat
belt uted in this wor can't ryrcad the
inpact forces prcpertr and the two
passengerc coud be crushed together
and senoufu injuled or ewn ki .d.
Never use one belt for norc than one
2-to
-O-li
\
AclurroN
Belt relraclion may become difficult
ifdre belts and rings are soiled. so try
I
__/
\
,-/ \.- _/ .
S€at Belt Warning LighvBeep
Ifthe driver\
seat belt is not fasrened
when ihe ignilion switch is lumed to the
ON position, abeep will sound for about
6 seconds and the seat bell warning light
willremain on llnlil the belt is faslened.
If the
system does not operate correc y,
consult an Aulhorized Mazda Dealer
Essential Safety Equipment
I
[roni
Seat Belt Pr€tensioner and
Load Limiting SJstems
Awtnuwe
Awnnumc
For oprimum protection, the driver and
front passenger seat belts are equipped
I nc o ne ct P ositioni seltlLLDlb3!
and Front Passenger Seat BeI^:
with pretensioner and load limiting
Incofiect posi.tioning ofthe
In moderute or greai€r frontal or
near-frontal accidents, the froni air bag
and pretensioner sysiems deploy
simulianeously. The preiensioners take
up slack in the front seat belts as ihe air
bags are expanding. The load limiring
systen releases belt webbing in a
controlled manner 1o reduce beit force on
the occupan!'s chest.
d
'er
and front passenger seat behs is
da ge.ous. lryithout pmryr
positioning,
the front pretensioner
liniting systems .Mnot
provide a.Ieq ate pfttection in an
a.cident and this coud result itl
senous injury. Wear seat belts onlr
and load
as recommended
in this orjner's
Modilicarion or resnng of the
Pntensioner S!stem:
Modihing the components or wiing
i
of the pretensioner srstem, cluding
the use of electronic testi g derices is
dangercus. You couw accidenblr
actbate il or make it inoperablc
trhich
act
Fevent
i1
fron
"'ould
ating
in an accine t. Front
occupants couu be seriouslr injwed.
Neyer modify the compo ents or
vinng, or use electrcnic testi g
deices on the prctensinner swkm,
2-tl
Essential Safety Equipment
A wamrnrc
P rcte nsion e r Sr ste n Di spalal:
I nproper disposal of the
prctensione. s!ttem or a tehi.le with
non4eatti'ated prcte sioners i!
dange,ous. Unless all saf.t!
injur!
Authoi$d
prccedures ore Iottoved,
couu result.
Ask an
Mazila Dealer how to safel! .lispose
of the pretensioner srsten or hov to
scrap
a
front pntensioner-equipped
NOTE
The pretensioner system will only
aclivate in a moderale or greater
fronral or neaFfrontal collision. It
will not aclivate in side or rear
Some snoke (non-toxic gas) will
be released when the air bags and
pretensioners deploy. This does not
indicate
a
fire. This gas normally
has no effect on occupants,
howevet those with sensilive skin
may experience light skin
iritation. If r€sidue from the
deployment of the air bags or the
front pretensioner system gets on
the skin or in the eyes. wash it off
I
Front Seat Belts
To fasten:
l
Grasp the buckle and tongue.
2. Slowly pull out the lap/shoulder belt.
3. Insen the tongue into the buckle until
The seat belt pretensioners will
only function once. Aft.-r they are
expended. they will not work again
and must be replaced immediately,
even if tbere was no front seat
occupant seated at the time.
2-12
4. Make sure tbe shoulder belt is snugly
fitted against your body.
Essential Safety Equipment
AwtnMNc
Positioning the Shoul4er Portion
ol
the Seat Belt:
I nproper positioniag oI the shouder
poftion of the seat belt is dangerous.
An inproperry positio ed belt wiA
prcvide liale or no protection i a
co ision. Abears nake sure the
shouAer portio of the seat beh is
positioned across Jol1r shouuer an l
naar rour neck, but newr under
Jour am,onrowneck,or on rour
Adjust ihe height of $e shoulderbelrif
|he seat belttouches your neck, if it
crosses your am instead ofyour
shoulder. To raise the shoulder belt
adjuster, push the adjuster up. To lower
the sboulder belt adjuster push rhe button
slide it down. Make sure the ddjuster is
2-t3
Essential Safety Equipment
A
P osition
Sea,
I
I,yARNING
ing the
Depress lhe button on the buckle.
V Outboard
The lap portion of the seat belt wom
too high is da gerous.In a co ision,
this would concentrate the impact
the abdoninal arca,
lorce directlr
cauting teiow injury. Wear the lap
po.tion of ,he beh snuglr and as lotr
o
positions
la/
shoulder belt
LaLPortioa4l\hc
Belt:
Rear Seat Belts
NOTE
To fasten:
If
I
a
belt does not fully retract, inspect
ii for kinks and twists-
. Cmsp the tongue and pull it to the
desiredlength.
2. Insert this tongue into the buckle unril
you hear a click.
3. Make sure the shoulder belt is snugly
fitted against your body.
2-t4
Ess€ntisl Safety Equipment
T}e retractor will take up excess belr and
Awtnvlryc
Posinonina the Shotaer Pottion
o!
the Seat Belt:
Inpnper positioning of the shoddet
poftion of the seat beh is dangercus.
An improperlr positioned belt.tell
proyide liUle or no prckction in a
comsion. Alwars nuke rethe
thouder ponion o! the seat belt is
positioned acnss Jour shouider and
near Jour neck, but newt un ler
lour arm, on lour neck, or on lour
i
A
To unfastenr
w,mlrasc
Depress the button on the buckle.
Positioning the LaLPation of the
Seat
Belt:
The lap portinn of the seat belt wom
too high h dangercus.Ina collision,
thir wouu co centrate the impact
Jbrce dircctlr on the abdoninal ffea,
ca sinS senous injury. Wear the lap
portion of the belt snuglr and as low
NOTE
If
a
belt do€s not fully r€rract, jnspecl
ii for kinks and twists.
2-15
Ess€ntial Safett Equipment
A wamrnrc
Fanenins the Rear-Centel Seat Belt
Onl! with one BueHe:
Fastening the .eat-ce ter seat belt
onlr with one buckte is dangerous. If
onlr one pair oI seat bett tongue .n l
buckle, either tongue (A) and a chor
buckle (B) or tonsue (C) and.nchor
buckle (D), is faste ed, the seat belt
V R€aHent€r position lap/
cannot
To fasten:
shoulderbelt
1. Grasp ihe buckle (D) and longue (C).
To use the rear-center belt:
2. Slowly pull our the lapshoulder bett.
Before using the rear-cenler lap/shoulder
belt make sure tongue (A) and anchor
buckle (B) are fastened.
2.16
3. lnsert the tongue (C) inro the buckle
(D) unlil you hear a click.
providefu protection. In
a
su(Aen stop or collision, the user
couu slide un.ler the belt and suJfer
s.nous injunes. Al','ars nake sure
that both pain of seat belt tongues
and buckles aslaste ed properlr.
Essential Safety Equipment
To fasten the lap bet portion:
Grasp tongue (A) and jnsen it into the
anchor buckle (B) unlil you hear aclick.
It is now secure for passengeruse.
NOTE
After retuming lhe rear-left seatback
upright position. fasten the lap
portion of the belt.
10 i1s
To unfasten the lap portion:
Depress the button on the buckle.
Insen a small object in the anchor buckle
(B) slot. such as a key.
NOTE
Always unfasten the lap portion of the
beli before folding the rearleft
seatback. kaving the lap portion of
the belt fastened could cause damage
2-17
Frsential Safety Equipment
I
Seat Belt Extender
lfyour seat belt is not longenough, even
when fully extended, a seatbelt extender
may be available to you at no charge
from your Authorized Mazda Dealer.
This exienderwill be only for you and
for ihe panicula.r vehicle and seat. Even
if it plugs into other seat belts. it may not
hold in the critical momentofa crash.
When ordering an extender, only order
one ftat provides the necessary additional
length to fasten the seat belt properlyPlease conlact your Authorized Mazda
Dealer for more information.
2-r8
Awtnvtuc
Unnecessarr Ute ofa Exte der:
Usi g a seatbelt ertendq when not
ecesrary is dtngercus-The seat belt
wiA be bo long a d notfrt properb|
In an accdent, the seat belt rill not
prcride adequate prcte.tion and fou
couu be senouslt injured. Onlr use
the extender when i.t is rcquircdto
fasten the s.at belt prcperlr.
AWARNING
Usino an InpropcrE landq:
Asing a seat belt extendet that it fo"
another peno,t ot a different rehicle
or seat is dtnge0us.The seat belt
will not provide adequate pmtection
a d the usercoua be serioustr
inj red in an accident. Onlr use the
extender prcvided for rou and for the
particular rehicle and seat. NEVER
use the extenderin a
diliennt
Essentiai Safet! Equipmenr
A
waruurlrc
Usin! an Extender Thtit ir Too Lone:
Using an efiender that is too lotg is
dangercus. The seat belt will notfit
properl). In an accident, the seat ber
wi not protiide adequate protection
aul lou could be seiousl! injured.
use the ertendet or choose o e
shorter in length if the distutnce
betwee the extender's bucklc a d
the cente. of the user's bodJ is kss
Don't
I
Pregnsnt Women and Persons with
Serious Medical Condltions
Pregnan!wonen should wear
seat belts.
Ask your doctor foi specific
recommendations. The lap belt should be
worn SNUGLY AND AS LOw AS
POSSIBLE OVER TI{E HIPS.
Persons with serious medical conditions
also should wear seatbelts. Check wiih
your doctor for any special instnrctions
regarding sp€cific medical condjtions.
2-19
Ess€niial Safety Equipment
Child Restraint
NOTE
Your Mazda is equipped with LATCH
lower anchors for allachment of
specially designed LATCH
child-restraint systens in $e outboard
rear seats. Anachment of LATCH
child restralnt sysiems should all fil
the oulboard positions. A child
restrainl system with LAICH
anachments cannor be installed in the
rear center positionunless the seat
belts are used instead. When using
these anchors to secure a
child-resiraini syslem, refer to
"LATCH Child-Restraint Systens"
(paze 2-21).
I
Child Restraint Precautions
Statistics confirm that the rear seai is the
best place for all children up io 12 years
of age-tbe more so with a supplenental
restraint system (air bagt.
2-20
A wanlrnrc
Holding a Chia white the Vehicte
A wamrnrc
it
Moing:
Hodins a chiu in rour atms vhile
tha whicle is noins is ext.enelr
dangercus. No nutter ho$, strong the
person nut be,he or she cannot hou
onto a chiU
asudden stop or
tolision and it coud res ltin
seious injury or death to the child or
other o.cupants. Ewn in a moalerate
accident, the child mar be exposed to
ab bas Iorces that couA nsult in
serious injury or daath to the child,
or the chiu nat be slanned into the
adult, injuing the adult. Altrolt
i
secuft a chid in
c hild-re
a
ptupe.
straint sr ste n.
One BeIt- One Passenger:
Using o e seat belt|br more than
e person ata tine is dangercus. A
seat belt used i,t this Ha! can't
spread the impactforces ploperry
onil the twopassengers couu be
crushed together attd seriouslr
injured ot even ki ed. Neret use one
beltlor nore than one person at a
o
Essential Safety Equipm€nt
A
P I opcdize
Ac.lurroN
wanlunyc
lf eltild.R
est
ruht
For eJfective prctection in r.hicle
seat
the
s dden
stops, a child
prcperlr rcsbained using a
belt or chiA-restraint s}ste,l
accidents and
be
dependins
seat
bel!or child-restralnt sys|em
can become very hot in a closed
SJst rr..
nust
A
o
ase and ske.
chid coud
be seriouslr
If
not,
injured
or eren killed in an accident.
vehicle during warm weafter. To
avoid burning yourselfor a child,
check them before you oryourchild
V
Small children
You are required by law to use a
child'restr3int system for childrcn in the
U-S. and Canada. Small children,
generally those who are four years old or
)ounger and who weigh under l8 kg (4O
1b). riding in your vehicle. rnus! be
protected by child-restraint systems made
especially forchildrcn. Check your local
and state or provincial laws for specific
requirenents regarding $e safety of
children riding in tour vehicle.
V Older children
A child who has outgrcwn child-restraint
systems should sit in the rear and use seat
belts, both lap and shoulder.Ifthe
shoulder belt crosses the neck orface.
move lhe child closer to the center ofrhe
vehicle in the outboard seats. and rowards
the buckle on the right if rhe child is
seated in the cenier sea!.
2-21
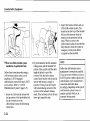
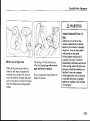
Essential Safety Equipnent
I
A
Child-Restraint Syst€ms
Wlatever child resrrarnr system you
consider. please pick fte appropriat€ one
for the age and size ofthe child, obey
state law and follow the inslructions tha!
come with the individual child-rcstraint
A rear facing child-restraint
sysl,em
should NEVER be used in the front seat
because ii would be too close to the air
bag. The front passenger's seat is also the
least prefened seat fbr other
child-restraint systems.
Fo
ow the
Manufacturcr\
Instructions and Alwa\s Keep the
C hid-Restraint Slstem Bucued
Dp!4!
sefious injury ordeathtothe chiu or
Make sure the child-.estraint sJsten
proryrb secured in pLace
according to the
chiuaestni t
srstem ma ufacturer's instructions.
When not in use, nmore itlrom the
whicle o4.tun it with a seat belt, or
bt.h i! dogn to BOTH LATC H
2-22
wenlgr.r'rc
C hild- Re etuint S! ste n :
Rearfacins child-lestnint srst ns
Reaft F ac ing
on the
tont
dan ge rcu
An unsecured chiA-rcstraint srsten
is dangerous.In a sadden stopora
co ision it could now caasing
is
A
waRlrnrc
seat are partic
ul4rlr
t. The c hiuae straint
srstem can be hit br a deploring air
bag and moved iole tlr ba.krard
rcsulting in seious injury or death to
the chid. NEVER use a rcarfacins
chiu-restruint srsten in thefrcnt
seat $,ith an air bag that coLA
Ess€ntial Safety Equipment
I
Awtnu^tc
Installing Child-Restraint Slstems
Awenumc
Accident statistics reveal that achild is
safer in the rear sea1. The front
passengeas seat is cl$fly rhe worst
choice for any child under 12, and with
rearfacing child-restraint systems il is
clearly unsafe due to airbags.
Some child-restraint systems now come
with tethers and therefore must be
instdled on lhe seais thai take tethers to
be effective. In your Mazda. tethered
child-restraint systems can only be
accommodated in tbe three positions on
Sorne child-restraint systems also emplo]
specially designed LAfCH attachmenls;
refer to "LATCH Child-Restraint
Stslems" (page 2 27).
Tethercd C hia-Resttuint S$tems
wo* Onb on Rear Seat:
Insto ation of a tether equipped
chiu-rcstraint ststem in the fuo t
Ntsenger\ seat delbats the safetr
des;gn ofthe srsten and wi result
in an incleased chonce ofseious
inju.r if the chiaaestruint srsten
soes
foNad
without benefit
of
being tethercd. Place tether equipped
.hild-restruint slstens wherc therc
Seating Positiotr t!,ith S le Ab Bag:
owing anrone to lean orer or
A
against the front door is dangercus.
If the yehicle b equrrped h,ith side
air boes, the inpact of an infuting
side ab bag could cause serious
Wury or death to the percon.
Chiuren arc norc likelr to sleepin
the vehicle; when ther do,ther aR
nofe
sk in the ffont passenge.'s
seat that has a side air bag because
the! nu! slump owr i,tto th. poth oI
the seatba.k-nounted air bag. If a
chiucan't be seated in the rear, do
not a oh, the chid to lean ovat or
agdinst the front door, eve if the
at
chid is seated in a chiA-ftstraint
2.23
Essential Safety Equipment
3. Inspect this function before each use
of lhe child-restraint system. You
should notbe able to pull the sboulder
beh outofthe relracior while the
system is in rhe auromatic locking
mod€. When you remove tbe
child restraint system. be sure the belt
fully retracts lo retum the system to
emergency locking mode before
occupants use ihe seal belts,
V
Rear seat child-r€straint system
installation (Lap'/shoulder belt)
Follow lhese instructions when using a
child restraint syslem, unless you are
auaching a LATCH equipp€d
child-restrain! system to the rear LATCH
lower anchors. Refer to "LATCH
Child-Restraint Systems" (page 2-27).
l.
Secure the child-restraint sysien with
the lap podon of the I adsboulder belt.
See
fte instructions on the
child restraint system for beli routing
2- To gel ihe
retraclor inlo the automatic
locking mode. pull the shoulderbell
porrion of the seat belt until the entire
length of the belt is out of ihe
retractor Push the child restraini
system firmly into $e vehicle seat. Be
sure lhe belt retracts as snugly as
possible. Clicking from the retracior
be heard during retra.iion ifthe
slslem is in the aulomatic locking
mode. If the belt does noi lock the seat
down tight. repeat th's step.
will
NOTE
Follow the child resiraini syslem
manufacturer's instructions caref ully.
lf you are not sure whetber you hav-- a
LATCH system or tether, check in the
child-restraint system manufacturer's
instructions and fbliow them
accordingly. Depending on the type of
child resiraint system. itmay not
employ seat belts which are in
automaric locking mode.
Essential Safety Equipment
For
earngbl
sal
ror
rear len
$d
V If you must
use th€
FRONT SEAT
for children
Ifyou cannot put ali children in the rear
seal. al least put lhe smallest in the rear
sea! and be sure the largest child up fronr
uses lhe shoulderbelt over rhe shoulder
4. Ifyour child restrainisysiem requires
the use ofa |elher strap, hook the
l,ether strap by following the
nranulacturer's inslructions.
Do not put reaFfacing cbjld,resrrainr
systems on the fronr passenger's seat.
This seat is also not set up for tetber€d
cbild-restraint sysrems. put them in one
of the tbree rear seat posirions set up wiih
Don't allow anyone 10 sleep against the
right front door if you have an optional
side airbag. itcould cause serious
injuries to an out ofposition occupant.
As children more often sleep in cars, it is
betler to put them in the rear seai_ If
ins(alling tbe child-restraint system on
the front seat is unavoidable, follow rhese
nstruclions when using a front-facing
child reslraint system in the front
:sone
modek. 2-25
Essential Safety Equipment
To check ifyour Mazda front seats have
side air bags'every Mazda side air bag
will have a"SRS Air Bag" label on the
ou$oard shoulder of the liont seats.
AwtnNuvc
Re ar- F acing C hild-Re
rl^wl,nr,uuc
sttuint S! ste n :
Rearfacing child-restraint srstens
A
o
the
lront
seat are
particula
j
Frcnt Passenger's Seat Posuion:
tot whicle has front air bags and
dange rcu s. T he c hild-re straint
srstem can be hit b! a deploring air
bag and nowd violentlr backwa
resulting in senous i jury or death to
the chid. Newt use a rear-locing
side ab bass, a
seat eilh
wanlunvc
As
!oa. whi.le
frcnt-tacins
doublr so becaue
has
.hu-restraint slsren shouu be pa on
front seat onry ,'ehen it is
the
unavotlable- Ahta]s mow the seat as
Iar ba*
as possibla, because the
force
of a deploJing oir bag cou.lt cause
serb s injuq or daath to the chiw
child-rcstraint trsten in
the
frcnt
anair bae thatcould
Seatins Position vith Side Air Bag:
oeing anrone to lean orq o.
aeainst the front door is dangercus.
If the t'ehi.le b equipped with side
air bags, the impact of an i,tlating
side ab bag couu cause senous
injury or deoth to the person.
Children are more likelt to sleep in
the t'ehick; h,hen the! do, the! are
more at .isk in the front passenger's
seat thet has a side ab bag because
into the path of
thej mal slump
the seatback-nounted 4h bae. If a
chu can't be seated in the nar, do
A
o't
not dlow the chiA
chiu k
2-26
b kan
over or
against the fmnt door, eren if the
seated
in
a
.hid-.estraint
Eslential Safe!] Equipment
LATCH Child-Restraint
Systems*
3. To gel the reEaclor into dle automatic
locking mode, pull dre sboulder tElt
ponion of the seat belt unhl fte entire
length of lbe belt is out of ine retactor
Push ille child resfaint system finirly
into he vehicle seat Be sure the belr
rctracts as snugly 3s possible. Clicking
from dre reu?clor will be heard during
rchction if lhe syslem js in aubmatic
locking rnode. If dre belt does not l(rk
dle seat down righ! reFat rhis srep.
4. hspec! ihis lincrion before each use of
V Front
pass€ng€r's seat
child-restraint system installation
(Laplshoulder belt)
l.
Slide $e seatas far back as possible.
2.
Secure the child reshaint system
wih the
lap poiion of lhe lapshoulder beli. See
the insmctions on the chlld restrainr
system for bell routing instructions.
dre child restrain! sysrem. You should nor
be able to prtl the shoulder b€lt out of
lhe reu€clcr while
fie
system is in ihe
auircmatic lffking mode. When you
rcmove the ciild restsaint system, be
sure tlle belt fully rctracrs io letum the
system trc emelgency locking mode
before ecuparts use the seat belts.
Your Mazda is equipped wilh LATCH
lower anchors for attachment ofspecially
designed LATCH clrild restraint systems
in the outboard rear seats. Attachment of
LAICH child-restraint slstems should all
fit the outboard positions. Achild
reslraint system with LAICH
altachments cannot be installed in the
rear cenler position unless the seat behs
Both anchors must be used, otherwise rhe
seatwillbounce around and pur the child
in danger. Some LATCH child,restraint
systems must also be used in conjuncrion
wirh a tether to be effecrive. If they have
a tether you must use it to better assure
your child's safety.
NOTE
Follow the child resmint sysem
manulacnnef s instuctions carefu lly.
Depending on lhe type of child-restraint
system. 11 may not employ seat belrs
which arc in automatic lftking mode.
son. n.oer
.
2-27
Ess€ntial Safety Equipment
M an ufactu.e r's I n s tru.tion s for
Child-Rertnint S!sten:
An unsecured chiu-.est.aint ststem
is dangercus.In a sudden stop
ora
collision it coud nove causing
serious injur! ot de.th tothe.hiA or
Make sun the chid-rcstruint srsten
is ptupe
sec red in place
according to the child-rcstnint
s! ste m ma n ufac tu rc r' \ in t truc tion r.
t
A
Aw,qnNuc
Awz^nxmc
waR.rrnrc
Attachins T||o Chiu-Restmi t
Slstens to the Sane LATCH Lower
a nsecurcd C hid-Resttuint Slsten:
An unsecurc.l child-restrai t sJstem
An.hor:
is dangerous.
Attaching tt'o child-restraint slstemt
to the sane LATCH lover anchor is
co ision it could nove ceusing
serious injury or death to the child or
dangerous. In
a.olision,
na!
a sudden stop or a
one
an.hor na! not be strong enough to
hold two child-nst,aint slsten
attachnents an.I
I
break, causing
serious Wury or death.Ifrou use
the seat position for another
child-restraint s$ten when ot
outboard LATCH position is
occupie.l, use the cente. reat belts
instead, and the tether iftether
Fo oi'
the chiA-restroint sfstem
nanufacturet's instructions on beU
.outing to secure the seat just as lou
woud vith a child in it so that
nobod) ii tempted to put a chiu in
inprowrb secured seot later on.
When ot ]n use, rcnove it|ronthe
vehicle or fatten it h'ith a seat beh, or
latth it dovn to BOTH LATCH
an
Essential Safety Fiquipment
Awl.nr,rilvc
LATC H C hi ld- R e s traint S! ste ns :
N ot foltov ing the chiH- rc stnht
sr s te n nan ufac tarer's instructions
when instaling the thid-rertnint
srstem ts dangerous. If seat belts ot a
forcisn object p.erent the chiaresbai t slstemfron behg secwel!
auached to the LATCH lowet
anchors and the chiLl-restraint
srsten it insta ed inprcpe )', the
chiu-restftint tlstem couA mow in
. sudden stop or.o ition cauiing
seious injury or death to the thid or
When instaling the chiu-restraint
slstem, make sure therc are no seat
betts .rrforcign objects near ot
+
.{-
I
NOTE
The markings above the LATCH
lower anchors indicate the locations
of LAICH lower anchors for the
attachment of a child resrraint system.
2. Secure the child-restfaint system using
BOTH LATCH lower anchors,
following the child-restraint system
manufacturer's instruction.
Child-Restraint System lnstallation
Procedure (Using the LATCH
L
Expand the area belwe€n rhe seat
bottom and the seatback sligbdy to
verify the iocalions of the LATCH
around the LATCH lower anchors.
Alwars fo0ow the chiu-resttuint
sr stem manufactule r's in struction s.
t-tq
Bssential Safety Equipment
Supplemental Restraint Systems
I
.
.
.
The fmnt and side supplemental
restraint systems include 4 dr bags.
They are located in:
The steering wheel
The passeng€r side dashboard*
The outbosrd sid€s of th€ fmnt
These systems operale independendy
depending on the lype ofaccideni
3. Ifyour child-restraint system cane
equipped with a tether, tbatprobably
means it is very impotanr to properly
secure the tether for child safety,
please carefully follow the
child-restraint system manuf ac!urer's
instruclions when installing tethers.
Only lhe 3 rear seatpositions on lhis
vehicle are set up for tethers, all
LATCH child-restraint systems are
fully compatible only witlr the two
rear oumoalo sea6.
2-30
*sone nodeh.
ercounteredi botb side air bags are not
likely to deploy ln the same accident
because a vehicle is not often hit from
bolh sides. The front and side air bag
sysiems will not normally deploy during
the sane type of accident unless a
combinalion of frontal and side impacts
a front end or side impact, the air bag
supplemental restraint systems are
designed to provide only supplemenlal
protection for the driver and front seat
passenger. seat bells must still be wom.
In
Essential Safery Equipment
Without seat beli usage. the air bags
cannot provide adequate proteclion
du'ng an accident. Seaibelt usag-. is
.
.
Keep the passenger away from an
inflating air bag.
Reduce the possibility of injuries
during an accident that is nol designed
fbr air bag inflation. such as roll-over
Reduce the possibility ofinjuries in
fronlal or side collisions that a.re not
severe enough to activate the air bagsReduce the possibility ofbeing thrown
Awz.nutue
Aw,qn^til,{c
Air Bags without Seat Bela:
Dependi g onlr on the air bags for
p.otettion duing an accident is
dangerous. Alone, air bags ma! not
prcvent seious
inider.
The
awropnak ab bags can be erye.ted
to in|tate onlr during atontal, sine
or neat-ftontal collision of at least
noderate force. Uehicte occupants
shouA al'vars wear seat beks.
Small children, those under 18 kg (10 lb),
should be protected by a child restraint
systen (page 2-20).
Child in the Frcnt Seat:
Placing a chiu, 12 rears or under, in
thefn
t seat is dangercus.The child
be hit br a deploti gairbag
and be seiouslt injurcd or ewn
couu
ki
ed. A sleeping chiA is morc likelr
to lean agdinstthe doot and be hit br
the side air bag in a moderate,
right-sine c ollis ion. Whenever
possible,al|'ars secure a ehid 12
rears and under on the /ea. seat with
an apprcpriate chil.l4estruint slstem
for the child's age and size.
Never use a rear-facins
child-restruint sytem on the hont
seat with an ab bag that could
Reduce the possibiliry ofinjuries to
lower body and legs during an
accident because the airbags allows
no protecnon to trrese parts.
Hold the driver in a position which
allows better control of the vehicle.
2-3I
Essential Safety Equipment
AwtnNnte
C hild- Re straint S $te n P ositioning :
Rea*faci g child-restraint srstenr
on thefront seat are patticula r
danee rous. T he c hiu-re straint
srsten cM be hit br a deploti g air
bag and noved iolentl| batkvard
rcsuttins in serious injurr or death to
the cdld. Net'er se a rcar-facing
child-nstraint srsten in the ftont
seat *ith & air bag that couu
a
System D€scription
The supplemental restraint systems have
two basic subsyst€ms:
.
The air bag sysl,em with inflalors and
arr bags.
.
The electic system with cmsh sensors
and dlagnostic module.
The air bags are mounted in the
following locations: the center of the
steering wheel, the passenger side ofthe
dashboard. and in tbe outbodrd sides of
ihe fronl seatbacks. They are out of sight
Essential Safety Equipmenr
Awnnt'tme
Seanng Positiotr with Front
Ait
E!c$
Sittinq too close to the ait baq
storage compatlme nts or placing
hands orfeeton then is extremelr
dangenus. Flont ab bass infute
|'ith grcatforce and speed.
Seious injunes couu otcut if
I
How the Air Bags Work
When airbag cr3sh sensors detect a
frontal or side impact of greater ihan
modera!€ tbrce. an electrical curent is
sent to the inflators. Nitrogen and argon
gases are produced to inflate the airbags.
Alter the inflalion, the airbags quickly
The airbags will functjon only once.
After that. the air bags will not work
again and must be replaced.
someone is too close.The
of the steerins vheel. The ftont seat
passenger shouu keep both feet on
floor Front seat occupants
shoutd sdjust thet sea^ as fff back
as possible and alwars sit upnght
ryainst the seatbacks with seat beAs
the
Only an Authorized Mazda Dealer can
direr
shouu alwars hold onto onb the rim
Essential Safety Dquipment
NOTE
AIryARNlNG
Seating Positionwith Side Air Bags:
w})en an air bag deptoys. a loud
inflation noise canbe heard and some
Sitting too ctose to the sde air bag
storage conpa4ments or plecing
hands on them is extrenel!
dangerous. A side air bag inllates
vith gnat for.e and speed dircctl|
out of the outboard sho Aer of the
smoke will be relersed.
Neidrer is likely to cause injury.
however. lhe texture of the air bags
may cause light skin injuries on body
parls not covered with clothing
through friction.
front teat and.rpandt atons the
ftont door on the side the cat h hit.
Sefious injur! coutd occut if
soneone is sitting too ctose to the
door orleaning agai sta wi dotr itt
the frcnt seats or if rcat seot
occ pants srab the sines ol
the
fronl
seatbacks. Furthemorc, sleeping up
against the .loor ot hanging out the
diver\aide wi,tdow while driring
could block the side air bag and
elininate the adra
tages
of
sqrplemental prctectinn. Give the
sae abbags room to vork br sifting
in the centerofthe seat whil. the
whi.Ie is moving vith seat belts
A
waRlsnrc
Hot Ai Bag I llaton:
Hot ab bag inJlaton are dangero
s.
InmediatelJ altet inflation, the
inflators in the skenng wheel,
doshboad ot the seatbacks are very
hot, Youco aget bumed. Don't
touch the inte al conponents ofthe
ai bag storase anas after the bags
Ess€ntial Safety Equipment
Awz.nxmc
Awl.nrylr,tc
Modification of the Suppkraea@!
Insta ation o! Front-End
Restraint Srsten:
Eqaitaeal:
Insta ation offto t-end equipnent,
such as frontal pntection bal
(kangoroo bar, bul bar, push ba\
etc.), snoflplo*, or $'i ches, is
Modifring the co,nponents o. wbing
of the Mpplenental restruitt srstem
is da gerolts. you couu accidentall!
actfuate it or make it inoryrable-
Don't nake an! nodi|ications to the
supplemental rcsttuint slstem. This
or near slstem components or
dangerous. The air bag cnsh sensor
srsten couhl be affected. This co A
.ause ab bags to infute
eryectedlJ, or it co A prevent lhe
air bass fron intladns dudns an
accident. Front occupants could be
senounr injured. Never install anr
wiring.
front"end equipnent to Jow vehicte.
tnn, badges,
eke overthe ab bag
storage arcas. It alx' inclu./les
includes instaling
or
anrthi g
instolling extru electic equipment o
An Authorized Maz.la Dealer can
prori.le the special cdrc needed in
renowland i stalanon offrottt
seats.It is inpoiant to pntect the
the
side oi. bag witins and connections
to assure that the bags do not
accidentlr deplo) and that the seats
letain an undanaged ab bae
Awantawc
Front Air Bag Storage Arcas:
Attachins an object to a front ab bas
storuge area or placing sonething in
front of it is danserous.ln an
accident, the object could intedere
vith ftont ab bas infiation and
Wurc the oecuponts.
Ali'ars keep the frcnt ail bag sto.age
aftasftee of objects.
Essential SafetJ Equipment
Awtnumc
Aw,qnl,{tuc
Side Ab Bag Storage Arcas:
Attachi,tg things to the s.at in such a
Using SeatCorers:
Using a seat covet on the front seats
var os to corer the outboard side of
the seat
a ! va! it.langerous.In
an accident the object cou.Id intederc
the site air bag, vhith i futes
'a,ith
lmn the ouJboad sine of the frot't
seats, inpeding the added protection
of the side ab bag srsten or
redirccting the air bag nt a ear that
is dangercus. Funhermorc,the bag
could be cut open sw$,hg a&autL
i
Do not hang netbags,nry pouches
or back pads vith sde rtaps on the
front seats. AIwaJt keep the sde air
ba8 stonSe areas in rowfrcnt seats
free to deplor in the erent of a sAe
b dansercus.In a severc sde
colisiott, the seat coten couA
inteterc with the sine ab bas
inflanon and seious it'junes coua
rcrult. Never use seat.owrs on the
Awnnrymc
Danoged Air Bag Sensors:
D,irins with danaged air hag
sensors is dansercus. A co ision,
one ot st.ong e ough to inJlate
at brys,couudanuge the
even
the
se sors.Iftherevas a subsequent
collision, a dantged sensor wouu
not ittfiate the air bagt. Abals have
an Authonzed Mazda Dealel inspect
the s upplzmental restraint srstens
Ess€ntial Safety Equipment
Awlnr,uuc
S
ustlatiglA4ja!fucntr
Adjusnns the rehicle suspension is
dangercLs.
If
the
whick's height or
th. suspension is changed, the
whicte w'll be unable to a.cu teIJ
detect a collision rcsulting in
incorrcct or unexpected air bag
deplornent and the possibiuq
of
ACAUTION
To prevent damage to the side air bag
wiring. don'!place Iuggage or other
objecis under the front seats.
Essential Safety
I
Eq ipment
Front Air Bag Activation
A greater than moderate impact will cause the front air bags
to inflale in tbe following cases:
O Hitting a solid wall straight on at greater lhan about 22
kn/h (l.l mph).
O Frontal impacl within about a 30 degree range frorn head
@
Hitting
@
Driving inlo
@
Landing hard or the vehicle falling.
2-38
a
curb, pavement edge or hard object.
a
big hole or bitting the far side of
a
hole.
Essential Safety Equipment
I
Limitations to Front Air Bag Activation
Depending on the severity ofimpacr, fte front air bags may
not inflate in the following casesi
aD
Impacts involving trees orpoles cause severe cosmetic
damage but may nothave enough impacr to aciivate the air
bag
O Rear-ending or running under
a truck's tail gate may not
provide the stopping force necessary for air bag
@
Frontal offset impactto the vehicle may not provide the
sbpping tbrce necessary for airbag deployment.
2-39
Essenrial Safeb Equipment
I
Non-ActiYation of Front Air Bags
Frcnt ajr bags will not normally inflate in the following casesi
O Collision from the rear.
O Vehicle roll over, may deploy the side air bag(s) bul notthe
front air bags.
O Impacl to ihe side, bul iirnay deploy
2-40
a
side airbag.
Essential Safety Equipment
I
Side Air-Bag Activation
Greater than moderate jmpact to one side of rhe vehicle
(driver orpassenger side areat will cause aside airbag ro
inflate, but itwill notnormally deploy lhe fronl airbags.
Essential Safety Equipment
I
Limitations to Side Air Bag Activation
Depending on ihe severily of impact, a side air bag may noi
inflaie in the following cases:
O Fronlal olTset impact may not provid€ enough side impact
to deploy a side air bag.
O Side impacts involving trees or poles can cause severe
cosmedc damage but may not have enough impact force to
activate a ail bag,
O Vehicle roll-over may not provide €nough side force ro
deploy the side air bags.
@
Side impacts wilh two-wheeled vehicles may not provide
enough force to deploy a side airbag.
@
2-42
Ess€ntial Safety Equipment
I
Non-Acttvation ofside Air-Bags
A
side air bag
will not normally inflare in
the following casesi
O Collision from the rcar.
@
Collision from the front, bul it may deploy tbe front air
bags.
Essential Safety Equipment
I
Awtnuwc
Constant Moniloring
The following components of th€
supplemenral reslraint systems are
monitored by a diagnoslic systen:
.
.
.
.
.
S e V- S e r v i c i n
SAS unit
Airbag modules
Side air bag crash sensors*
Front se3t belt pretensioners
V Supplemental restraint
system
wa.ning light
Relai,ed wiring
If
A diagnoslic module continuously
nronilors the systems' readiness. This
begins when lhe ignjtion switch is lumed
to the ON posilion and continues while
the vehicie is being driven.
system malfunction js indicated when
the SRS warning light conslantly flashes,
siays on or doesn t come on at all. If any
of these occur, consult an Authorized
MazdaDealer as soon as possible. The
system may not work in an accident.
A
2-44
"so.".oaa'.
the supplemental restaint system is
OK, the SRS wsming llghl cones on
when the ignition switch is tumed to the
ON position or after the engine is cranked.
After aboui 6 seconds it go€s out.
s th e
S
upnle4ealaL
Restruint S!stems:
Self-senicing or tampeing with the
sqpkmental resttuint sistems is
dsngercus, An ab bag couA
accidenta r acti,ate or becone
disabkd. This couU .ause seiout
i junes. Never tanper with the
suppleme tal rcstruint slstems and
alwars how a Authoized Mazla
Dealer
pe4om.
semi.ins and
B$€ntial Safety Equipment
A
waRlrnrc
Renoving InknolParts:
Remot ing the ftont seat, front
dashboard, the steering $'heel or
pafts co taining ab bag sensors is
dangercus. These Wrrs contain
essentialair bag pafts. The air bag
couuo.cidenta r actiwte and cause
serious injuries. A,
'ats hav..n
Authorked Mazda Deater rcnove
Aw,qnumc
Ai
Bao Disposal:
Inpropet disposol of an air bag or a
vehicle with lire ab bags in it can be
extremelr .Iangercus. Unless aI
saletr prceedures are fonowed,
injury can rcsult Ask an Authoized
Mazda Dealer ho|| to safelr dispose
of an air bas or how to scnp an air
bag equipped vehicle.
I
Maintenance
The supplemenlal reslraint system is
maintenancejiee. But if any of the
following occurs, iake your vehicle to an
Authorized Mazda Dealer as soon as
possible:
.
.
The supplemental restmint system
warning light flashes.
The supplemental restraint system
warning ligbt stays on.
The suppiemental restraint system
$,aming ligbt stays off when the
igniiion switch is turned to the ON
posltlon.
The air bags inflate
NOTE
Should you sellyour Mazda. we urge
you 1() tell ihe new ownerofits
supplemental rcsraint systems and
thal familiarizarion with all
instructions about them. from the
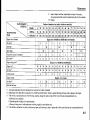
Owner\ Manual. is important.
2.45
Knowing Your Mazda
Secutu, tokes ftanr foths and b very
ituportant to a\9aer aad tc4pants. Sedioh 3
descibes the saJe \|a! to use roul Mazda:
kq,s, locks, ||indows aa.l intetiot lightiag.
Kels 3- 2
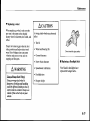
D@rlocks 3- 2
Keyless En|r) Slstem 3 6
Powerwindows 3ll
Trunk Lid
3-14
Trunk Release Handle 3 16
Hood Release
Fuel'FillerLid
3'18
3- 19
Fuel-FiUercap 319
wheel
MiroF
Sunroof
Interior Lights
Map Lights
Trunkl-i8ht
srer'ng
3-20
3-21
3-24
3-26
3-28
3 28
3-l
Knowins Your Mazda
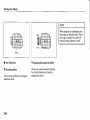
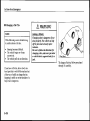
Door Locks
Keys
A
Kers
E
rcy
coae numUer pure
wanlvnrc
andChiuren:
Leaving chiurcn in a vehicla with
the ienition ker is da gercus.Thk
could rcsult in soneone being badlt
i jurcd or eren kilkd. TheJ couu
plat pith power,'indovs or other
controls, or even make the whicte
move. Don'tleave the kert in Jour
t'e hicle v' ith c hiure
The keys operate all locks.
A code number is stamped on the plate
attached ro rhe key sel; detach this plate
and store it in a safe place (not in the
vehicle) for use if you need to make a
Also wriie down $e code number and
keep ir in another safe and handy place,
but not in the vehicle.
Ifyour key is lost, consult your
Authorized Mazda Dealer with the code
1-t
n.
I
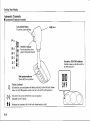
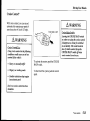
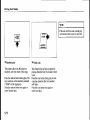
Locking Unlmking with KeJ
Any front door can be locked or unlocked
with a key.
Turn the key towaJd the front to unlock.
toward the back to lock.
Knowing Your Maz da
$'-q,
---+1/
*(#ll
I
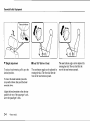
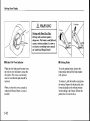
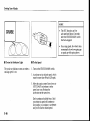
Locking, Unlockine with Door-Lock
Button
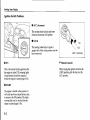
To lock any door from the inside, push
down tbe door-lock button.
To unlock. puil it up.
To lock any door with the doorlock
button trom the outside, push down the
doorlock bution and close the door.
NOTE
W})en locking ihe doors this way, be
careful not to leave the key inside lhe
Knowing Your Mazda
A
wanlvnvc
Unatten.led C hid.en and Pets:
ora animal
pa*ed vehicle h
dangercus. In hot veathet
Leav; g a thiA
unattendedin
a
te,nperat res i side a t,ehide can
becone hish enoush to cause brain
danage o. ete,t deoth. Alwars take
a childrcn and aninuts vithlou or
kave a rcsponsible person vith then.
NOTE
*K
Always renove the key from the
ignition switch, clos€ all windows,
and lock all doors when leaving your
vehicle unattended. This discourages
intruders and thieves.
L-r'-'I
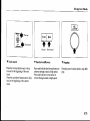
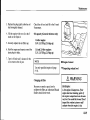
Porer Door Locks*
V Locking, unlocking with key
Aw.qnr,w,{c
Unlocked Doors:
Untocked doory in a novins yehicle
aft dansercus. Passensen canfa
out ifa door is accidentoll! opened
and can nore easilt be throtrn out in
an accident. So keepa doots locked
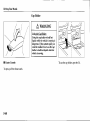
All doors lock automatically when any
door is locked wilh a key. AIIdoors
unlock wben the driver's door is
unlocked and ihe key is held in the
unlock position. Also, all doors unlock
when the passenger's door is unlocked.
Knowing Your Mazda
NOTE
A wanlrnrc
Holding $e key in the unlocked
position in the driver's door iock for
Kers
andChituen:
Leavingchiuft in a yehicle u)ith
the ig tion ker is daneerous. This
about a second trnlocks all doors. To
unlock only the driver's door, insert a
key into the driver's door lock and
tum the key briefly to the unlock
position and then immediately retum
it to the center position.
couu resAlt in soneone being bafly
injhndoreten kitted- TheJ coua
pla! with power windows or other
co,ttrols, or even make the whicle
nove. Don't leave the kels in
rehicle with child.en.
V Locking, unlocking wilh doorJock
switch
Ail doors lock automatically when
LOCK is pushed. They all unlock lvhen
the unmarked pan of
tle doorlock
rour
Knosing Your Mazda
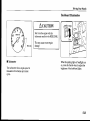
Keyless Entry System*
This system locks and unlocks the doors.
It can also help you signal for attention in
an emergency. Press ihe bulton siowly
AclurroN
To avoid damage to the transmiiter,
do not drop ii, get ll wet, or expose it
to heat or sunlighl.
I
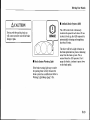
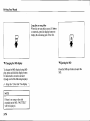
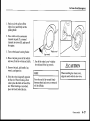
Rear Door Child Safety Lock
This lock is intended to help prevent
children from accidentalll op€ning $e
rear doors. Use it whenever a child rides
in the vehicle.
lfyou
slide ihe child safety lock to ihe
lock posiiion before closing that door, the
door cannot be opened from the inside.
The door can be opened only by lifting
the outside handle.
sonc doder,.
when pressing a button or the
operation range becomes too small,
the bali,ery may be dead. To install
a new battery, refbr to Maintenance
(page 3 9).
Addilional transmitters can be
obtained at an Authorized Mazda
Dealer Up to 3 additional
rransmilters can be used wirb the
keyless entry system per vebicle.
Bring all aansmitters to an
Authorized Mazda Dealer when the
electronic codes need to be res€t.
NOTE
Tbe keyless entry system is
designed to operate up to about
2.5 n (8 ft) from the center of dre
vehicle, but this may vary because
of local conditions.
The system doesn t operate when
the ignition switch is in tbe ON
(Continued)
3-6
If the transmilter does not operate
Knosing Your Mazda
NOTE
V Irck button
This device conplies wiih pari 15 of
the FCC Rules and wirb RSS-210 of
lndustry Canada. Operation is srbject
to the following two conditions: (l)
This device may noicause harrntul
interference, and (2) this device must
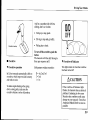
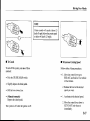
To lock the doors, press the LOCK
accept dny interf€rence received.
including interference thai may cause
I
undesired operation- (Outside
transmisslons may rnomentarily
Ttansmitter
To confirm rhat all the doors have been
locked, press the LOCK button again
wilhin 5 s€conds.Iflbey are closed and
locked, the horn will sound.
NOTE
interfere widl the device\ operation.)
Confirm thal all the doors are locked
visually or aurally by use of the
double click.
Knowins Your Mazda
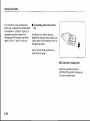
V Unlock button
V ! Panic button
To unlock the driver's door, press the
UNLOCK button.
You can use the ! bufton to rum on the
alarm. wbich allows you to signal for
attention in an emergency.
To unlock all the doors, press .he
UNLOCK butlon again within 5 seconds.
NOTE
The alarm will work whether any
door is open or closed.
NOTtr
NOTE
When all doors and the boot are
closed, push the LOCK buuon. The
hazard waming flasher will flash
one time to indicate thal the doors
and ibe boot are locked.
wlen ihe UNLOCK butun is
pressed. the hazard waming flasher
will flash twice to indicate rhat tbe
After unlocking with the transmitler.
all doors will automatically lock
if
one is not opened wilhin about 30
Il
Pressing the ! button once will sound the
hom intermittendy and flash lhe
headlights and hazard warning lights for
abou12 minutes and 30 seconds.
hazard waming flasher may not
flash correcily.
Turning off the alarm
Press any button on the transmitter
3-8
the LocK and uNLocK button
afe pressed sequentially, tbe tum
and lane chang€ indicalors and the
Turning on the alarm
Knowing Your Mazda
I
Mainlenance
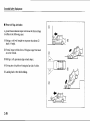
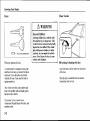
AclurroN
Make sure the batlery is installed
with the correcl pole facing
upward. Battery leakage could
occur if it is not insralled conectly.
When repiacing the bartery. be
carelirl notto bend $e elecrrical
terminals or get oil on them. Also
be careful not to gel din in the
lransmjtter as it could damage it.
AcaurroN
Danger ofexplosion if battery is
incorreclly replaced.
Replace only with the same type
battery (page 3-10).
Dispose of used batFries according
ro the fbllowing instructions.
.
.
.
,
Insulate lhe ptus and ninus
terminal of the battery by using
cellophane or equivalent tape.
Never disassemble.
Never throw rhe balteries into
Never deform or crush.
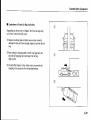
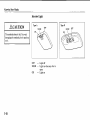
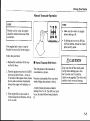
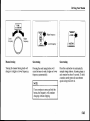
V Replacing the *ansmitte. batiery
L
Insen a small screwdriver inlo the slot
and gently pry op€n the transmilter
Knowing Your Mazda
AclurroN
B
Do notpress any butlons when
replacing the batiery. The electronic
code could be aliered and cause the
keyless entry system to malfunction.
If the keyless entry syslem fails to
operat€, coniact an Aulhorized Mazda
Dealer.
2. Press the portion of the baltery
indicaled bt A and remove the baltery
3-10
3. Install
a new ballery (CR2025 or the
equivalent) into the front portion of
ihe holder witb the positive pole (+)
facing up. Press on the B portion of
lhe battery io set the bati,ery.
4. Align the fronl and back covers and
snap the transmitter shur.
Knowing You. Mazda
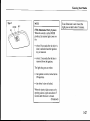
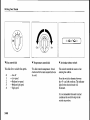
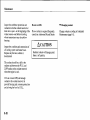
Power Windows*
V Service
Awnnume
Ifyou have a problem wiih the keyless
entry system. consult an Aurhorized
MazdaDealer.
Ifyour transmitteris losr or stolen, bring
all remaining transmilt€rs to an
Authorized MazdaDeaier as soon as
possible for a replacenenl and to make
the lostor stolen transmitier inoperative.
AclurroN
.
Changes or modificalions could
void your right to operate the
keyless entry system.
.
Damage to youl keyless
syst€m
willaffect
enry
the vehicle
warramy coverage.
C losinq
Pay er Windotr s :
Ctosing power vi dows arc
dangerous. A penon\ han^, head,
or even neck co A be caught br the
vindoe and rcsultin setious injury
or even deatL This waning applies
especialr to chiuren, Make sure the
openinS is cleal befo.e closing a
I
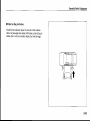
Driver's Door Power Window
Switches
The ignition switch must be in the ON
position for the power windows to
All windows nay be opened or closed by
the power window master control
switches on the driver's door.
To open the windou push down ihe
swilch.
To close. pul] up the swilch.
.so..,noaa.. 3-11
Knowing Your M^z da
V Auto-opening (Driver's window)
<Q:
To fully open the window aulomatically,
push rie switch completely down.
To stop the window panway. pull up tbe
switcb and then release it.
e
I
waRlrnrc
Ani te tional
Window Operation:
Unintentional windofl operution is
dangerous. A peryon's hands, head,
or neck coud be caught br the
window and.esult in senou: injury,
Unkss a wssenger needs to operate
a h,indo\9, kcep the power ,'indov
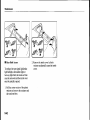
lock svilch
i
the locked position.
Po$er Windo$ Lock Switch
Vr'ith the lock switch in the unlocked
position. all power windows on each door
with
the lock switch in tbe locked
position, only the driver's door power
window can be operated.
3-t2
A
Aclurron
To prevent burning out the fuse and
damaging the power wmdow system.
donl open orclose more than lwo
Knowing Your Mazda
I
Passense.-Door Pow€r Window
I
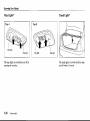
Rear Door Powe. Window Switch
Switch
The ignition switch must be in the ON
position for tbe power windows to
To open a window, push the lower part
its switch inward. To close, push the
of
To open the window, push down the
To close the window. pull up the switch.
3-13
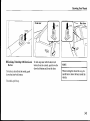
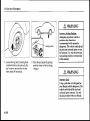
Knowine Your Mazdt
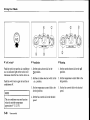
Tfunk Lid
Awtnumc
opcaAryafuBdE Laast@
Ethaust gas in the cabin of a
'ehicle
is dangerous. This g.s co tains
CO
(..tfion nonoide), $'hich is
colorletr, odo ess, and highlf
poisonous. If inhaled, it ca cause
loss of consciousness and death.
Because erhaustgas can
I
Key-Opemted T|unk
the trunk ctosed
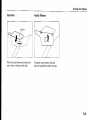
To open the trunk lid, ins€rt the key into
the slot and tum itclockwise.
To close, use both hands to pusb tbe lid
down until lhe lock snaps shul. Don't
slam it.
Then pull up on it to make sure
3-14
it\
geti
to the
ope trunk, keep
when diving.
cabin through an
I
Remote Ttunk Lid Release
To release the trunk lid from inside the
vehicle. pull up the release levernext to
Knowing Your Mazda
I
lhunk S€curit]
In some situalions you may want to
prevenl the trunk from being opened with
the remote trunk release lever,
Give your key only to someone you rrusr.
ffi._r
To secure ihe trunk iid,lock the rear
seaibacks (page 2-8). push ihe trunk lock
lever up, and close the trunk.
To cancel the secuity feaiure, insen the
key inio the lock, lum the key clockwise.
and push the trunk lock lever down.
3-15
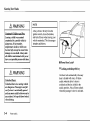
Knowing Your Mazda
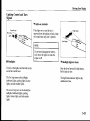
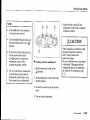
Trunk Release Handle
Your vehicle is equipped with
a
trunk
release handle that provides a means
escape for children and adults in the
of
event they become locked inside the
A
ope4lrs4Llitu4dlli
Leaving the
No mauer how careful adulb might be
with keys and locking theircars, parents
should be aware rhat children nay be
empted to play lroud vebicles and use
rhe trunk as a hiding place.
Adults are advised to faniliarize
themselves with the operation and
location of the release hardle so tbat all
children can be told abou! it in an
appropriale way, keeping ln rnind that
most vehicles don t have such handles.
waRlrnrc
tnnk lid
open
o.leating
childnn in the vehide irith the ke),s
is dangercus. Childrcncoud own
the tt nk nn and climb insde
res lting in possible inj ryordeath
fron heat eqosurc. Close the trunk
lirl,Io.k the ftar seatba(ks and do
not allow chiurcn to pla! insida the
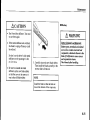
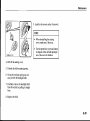
To open the trunk lid from the inside, pull
the illuminated "T" slapedhandle. Tbe
handle is made ofmaterial tbat will glow
for hours in th€ darkness of the trunk
following a brief exposure to ambient
light-
"T" shaped handle is located on the
inside of tlle trunk lid.
The
3-16
Knowing Your Mazda
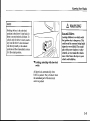
Awtnumc
Unanended C hildnn and Pets:
Letring chidren or animals
unattendzd in a parked vehicle is
dansero s. Babies teft neepins and
kids ||ho lock thenselves in cars or
t unks can die very quicklr hon heat
prostntion. Don't leaw y r
chidren ot pets abne in t car a! anr
time. Don't leave the carj the rear
folding seats or the trunk anlocked.
Alwats keep the carfron being a
tunpn g place to plar br locking
doo.s, trunk and reqr seats and
keeping the kers ||h.re children
von't pla! trith them.
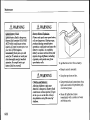
AcaurroN
Always keep the handle finnly
altached to the holder and in the
recessed position. No! securing the
handle this way could allow itto snag
luggage in the trunk and open the
trunk lid.
3-17
Knowing Your Mzz da
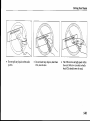
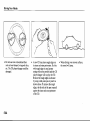
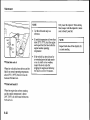
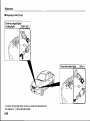
Hood Release
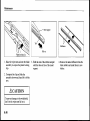
1
. with the vehicle parked. pull the
release handle
1()
2. Puli the safery catch up and lift the
3- Use the support rod to hold ihe hood
unlock the hood.
Before closing the hood, secure the rod in
its clip.
Check under the hood aJea to make
ce(ain all filler caps are in place and
atl loose icms (e.g. tools, oil
containers, etc.) have b€en removed.
Close the hood so ihat it locks
3-18
Knowing Your Mazda
Fuel-Filler Lid
Fuel-Filler Cap
Awanume
F uel
SpBy
sprar is dangercus. Fuel catt
ski and eres andcause ness
vhen inqested. F uel sprar h rclcased
N'hen therc is pressurc in the fuel
tank and the fuel cap is nnoved too
qui.kry. Whe renot'i g the fuel cap,
loosen the cap slightlr and wait fo.
ary hissing to stop. Then remove it.
F uel
bu
To open. pull up the remote tuel filler lid
To remove the filler cap, tum
it
To replace lhe filler cap. tum
it
clockwise until it clicks-
i
Awanr,tmc
FuelUapor
Fuel yapor X dangerous.It coud be
ignit.d br spa*s orflames; causilg
senous bftns and injunes. Betorc
nfuelins, stop the ensine. A d
alvars keep sparks and funes awar
frcm the friler neck.
3-19
Kno*ing Your Mazda
Steering Wheel
AcaurroN
Aw,qnvruc
Alivays use only a designated Mazda
fuel cap or an approved equivaleni.
available a! Authorized Mazda
Dealers. The wrong cap can result in a
serious malfunction of the tuel and
emission control systems.It may also
cause the checkengine lighi in the
instrument cluster to illuminate.
Adjusting the Steefins Wheel:
Adjustinq the steeing wheel $,hile
the whitle is moving is dtngercus.
Mot'ing it can wrr easib cause the
diyer to abnptlr tur,t to the left or
right. This can lead to loss of untlot
or an accident. Newr adjust the
steenng *heel white the vehicle is
I
Ac.qurroN
Make sure the fuel-filler cap is
tightened securely. The check engine
light cones on when the cap isn't
tightened securely. If the light rernains
on (even after you have tightened the
cap securely, driven, and restarted the
engine several timet. it may indjcate
a different problem. Conlact an
Auftorized Mazda Dealer as soon as
possible.
3-20
Tilt Whe€l
To change the angle of tbe steering
wheel. stop the vehicle, pull the tili wheel
release lever under the steering column
down, adjus! lhe wheel. lhen push the
release lever up to lock the column.
Afler adjusting. pusb tbe whe€l up and
down to be certain it's locked before
driving.
Knowing Your Mazda
Mirrors
I
Outside Mirrors
Check the mirrors' angles before driving.
Awarurnrc
C ont'e x
Mirror (Passenger Sine
Trpd;
I
Horn
To sound the bom, press the padded
portion of the steering wheel.
Check the hom's operation regularly.
Changing lanes with.'ut taking ittto
account the attual distance of the
rehicle nt he conver nitor is
danserc s. You coud have a serious
accident. What lou see in the conwt
nir.oris closer tha,t itappean. Be
iu.e to look ove. )oarshouder or to
check
inside niftot before
V Manual control
mirrof
To adjust, move the mirror's control
Iever,just inside the door
rot
so...oa.r'
3-21
Knowing Your M6zda
AwtnNntc
7-
tl_
-- -.4
Driving with Minors Folded In:
Dtit'ing t'ith the ourside niftors
-_-,/
folded in is dtnsercus. Yow nar
viev, will be rcstricted, and rou could
haw an accident. AleaJS rcturn the
outside mirrors to the diving
posinon beforc rou sta dnvins.
----1--),nL
)24\w
V Power control mirror*
V Folding the mirror
The igniiion switch must be in lbe ACC
or ON position.
Fold the outside minor rearward until
is flush with tbe vehicle.
To adjust:
l.
Move the selector switch to tbe left or
right to choose tle miror.
2. Depress the perineter switch in the
appropriate direction.
After adjusting the mirror,lock the
control by moving the switch to the
middle position.
3-22
.somenoaers.
ii
Knowing Your Mazda
Awz.nNntc
Btocked View:
Caryo stacked higher thdn the
seathacks is dangerous. It can hlock
view in the rcaniew ninor,
night cause rou to hit another
't'hich
car
vhen changing lanes. Don't
sta.k things higher tha the
pu
I
Rearview Mirror (With Day/Night
Function)
Before driving. adjust the reaNiew
mirror to center on the scene lhrough the
rear window- Do tlris with the day/nigh!
lever in lhe day position.
Push rbe lever forward for day driving.
Pull it back to reduce glare from
headlighis.
l-tl
Knowing Your Mazila
Sunroof*
I
Sunrcof Operation
The sunroofcan be opened or closed
electrically only when the ignirion swilch
is in the ON position.
To open to any posiiion, press the rear of
the slide switch located on tle righl side
of the overhead console.
To close, press the front of the dide
The rear of the sunroof can be tilted open
to provide more ventilation,
To tilt, push dle rear of fte tilt switch
located on fte left side of the overhead
To close, push the front ofthe
3-24
.sone moaeu
tilt switch.
Knowing Your Mazda
Aw,qnutxc
ExtendinqlkLqcalLlr
Arns Th.ough the Sunroof:
Extending the head, an$, or other
pafts of th. bodr throuqh the
sunrool is dangerous.The heod or
ams .ould hit sonething while the
rehicle is noin* This.oald cause
death or tedous injury. Don\let
passengen stand up or extend
anrthing through the oryn sunroof
white the vehicle is novine.
Aw,qnumc
Closins the Sunrcof:
A.loring sunrcofb dangercus. The
hands, head, or ewn eckofa
person - erpeci0 rachiA'couldbe
cauSht in itas it closes,causing
seno
s
i jury orerendeath. Make
surc the openntg is clear before
closing the sunrcof.
I
NOTE
After washing your Mazda or after a
rain, wipe the water off tbe sunrcof
before operating i!.
Sunshade
The sunshade canbe opened and closed
by hand when ihe sunroof is closed.
Tle
sunshade opens automatically when
the sunroofis opened. butmustbe closed
by hand.
Knosing Your Mazda
Interior Light
ACAUTION
'ripe A
ON
The sunshade do€sn'1rilr. To avoid
danaging the sunshade, don'tpush up
3-26
OFF DOOR
Light oft
Light on when any door is
ON
Light on
Knowing Your M^zda
NOTE
EYen if the door is not closed, the
(With Illuminated Entry System)
W}len the swirch is in dre DOOR
position. lhe interior iightcomes on
.
.
about 30 seconds after rhe driver's
door is unlocked and the ignition
about 15 seconds after the key is
removed from the ignition.
The light also goes out when:
.
.
ihe ignition switch is lumed to the
ON position.
the driver's door is locked.
When the interior light comes onby
openlng a door. it goes out about 15
seconds after the door is closed.
(Conlinued)
lightgoes out afrer about 5 minutes.
Knowing Your Mazda
Map Lights*
Trunk Light*
T)pr A
The map ljghls are switcled on or off by
pressing the switches.
3-28
some
nodd!.
The trunk light is on when tbe lid is open
and off when it\ closed.
Protecting Your Mazda
lik to sde norer. With an
autatuobile rehicle, that cah be done in
sererat vars ?ah ns lrst dar ofopetutioft.
Mostpeople
Prcbablr tops on the li ofcosrefrciercr is
using the risht kiad oJIuel .h1l usine that fuel
Se.tioh 1 explains how ta do this. l'uther, n
discusses proper loadihe atul how to rcspond
ta wrsual divihg cordnia6.
hako
illusltutes wherc inportant rehicl.
inJomation labe ls tur be Joun.l.
Fuel
Requhenents 4-
2
System 4- 3
Engine Exhaust + 4
Beforo Driving + 6
Break{D Period + 6
Enission Control
Money-Saving
Suggesions 4- 7
Condilions + E
Special Driving
vehicle Infomation
Labels
+12
4-l
Protecting Your Mazda
Fuel Requirements
Vebicles with catalyiic converte$ mus!
use ONLY UNLEADED FLEL, which
will reduce exhaust emissions and keep
AclurroN
spark plug fouling to a minimum.
NEVER USE LEADED FUEL
Your Mazda wiil perform best wirll
regular unleaded fuel havinS an octane
rating (antiknock index) ofat least 87
It is harmful to the cataiytic convener
The lead will accumulate on the
oxygen sensor and the catalyst inside
[(R+M)/2 method].
Fuel with alower rating could cause ihe
emission conirol system to lose
effectiveness.It could also cause engine
knocking and serious engine damage.
This will result in a malfunction of
ihe emission control system, causing
Gasoline blended wlth oxygenaies such
as alcobol or ether compounds are
generally referred to ai oxygenated fuels.
The common gasoline blend that can be
used with yourvehicle is ethanol blended
al no more than 109,.
Casoline containing alcohol, such as
etbanol or methanol, may be morkeled
under the name "Gasohol".
Ac.turroN
Yofi vehicle
U.S. federal law requires thatoctane
ratings be posted on gasoline station
4-2
can only use oxygenated
fuels containing no more than 1090
ethanol by volume. Damage to your
vehicle may occur when ethanol
exceeds this recommendation, or if
the gasoline conlains any methanol.
Stop using gasohol of any kind ifyour
vehicle engine js perfonning poody.
Protecting Your Mazda
Emission Control System
AcnurroN
Never add fuel system additives.
Never add cleaning agents other than
those specified by Mazda. Other
cleaning agents and additives may
damage the system. Consult an
Autborized Mazda Dealer
Vehicle damage and drivability problens
resuiting from the use ofthe following
may notbe covered by tbe Mazda
I
Your vehicie is equipped wirb an
emission control system (the catalytic
convener is pan of this system) that
enables your vehicle to comply wilh U.S.
ex}laust emissions rcquirements.
Under U.S- federal law. any nodification
to the original,equipment emission
control system before the first sale and
registration of a vehicle is subject to
tr€nalties. ln some staies, such
modification made on a used vehicle is
also subject to penalties.
Aw,qnnmc
Pafiing OwrThin?s That Burn:
Pa*ins over or neat anfihing
infiannable, such et dry gra$, is
dongerous. Et)en with the e gine
turned ofi, the exhaust srstem couw
igfite it because the exhaust srsten
gets vry hot duing nornal use. A
ftsulting frrc couu cause serious
Wury or death. Newr park over or
near a tthing i,ttlamnrbte.
) Gasohol containing more rhan I 07.
2) Gasotine or gasohol coniaining
3) L€aded fuel or leaded gasohol
4-3
Proiecting Your Mazda
Engine Exhaust
(Carbon Monoxide)
AcaurroN
Ignoring lhe following precautions
could cause lead to accumulate on the
catalyst inside the converteror cause
tbe conve(erto getvery hot. Either
condition will damage the convener
and cause poor perfomance.
.
USE ONLY UNLEADED FUEL.
Don't drive your Mazda with any
sign of engine nalfunclion.
Don't coast wiih the ignltion
Don'tdescend steep grades in gear
widr the ignition switch turned off.
Don't operate the engine athigh
idle for more than 5 minutes.
(Continued)
.
Don'! tamper with the emission
conlrol syslem. All inspections and
adjustments must be made by a
qualified technician.
.
Don'1try to push start orpull-shn
A
waRlrnsc
Cafto Monoxde:
E gine erhaust is danserous.This
sas contains cafion nonoxAe GO),
trhich is colorless,odo ess,and
poisonous. When inhaled, it can
cause loss ofconsciousness and
death. If rou sneA exhaust gas
inside ron whicle,keepa vindows
full! open and co tact dn Authorized
M azda D e ale r im n e diat e lr.
Protecting Your Maz da
Awnnvtuc
ExhaustGas in Enclosed Area:
Running the engine inside a,t
enclosed arca,such as a garuse, is
dangercus. Exhaust gas, which
eontains poisono us ca.bon
honoidq couu easil! enter the
cabin. Loss of consciousness or ewn
death coul.l o.cur. Do,t't run the
etgine when side an encloseduea.
i
AwlnNnlc
Idling *'ith the Windows Chsed:
Ethaust gas is dangerout. When
jour
vehicle is stopped with the
wittdotrs closed and the engine
runnins fot a lons nne in an open
area, ethaust gas, which contains
pohonous carbon monoidq couw
e
ter the cabi . Loss of
consciousness or even death couw
occur. OWn the windows or anjust
the heatirg o. tooling srstem to druw
A warurnrc
Snov, Blocking the EfidustGas:
Running the engine when a vehick
is stopped in deep snow is dangetuus.
The exhaust pipe couA be blocked bt
the Nno\ alloving exhaust gas to
enter the cabin. Becawe exhoust gas
contains pokono s cafton
no oxide, anrone in the cabin couw
be injurcd ot kitkd. Cteat the snot
fron underneath a d around rour
rehicle b.forc sbrting the engine.
Protecting Your Mrzdg
Before Driving
I
.
.
.
.
Belore Getting
Break-In Period
In
Be sure the windows, outside
mirror(s), and outside lights a.re clean.
Inspect inllation pressures and
condition of tires-
Look under the vebicle for any sign of
If you plan to back up, make
nothing will be in your way.
sure
I
.
.
.
.
.
.
NOTE
Engine oil, engine coolanl,
brake/clutch fluid, washer fluid. and
other fluid levels shouldbe inspected
daily, weekly, or at refueling,
dependjng on the fluid. See
Maintenance, Section 8.
4-6
After Getting In
Are all doors closed and locked?
Are tbe inside and outside mirors
adj'rsGd?
.
Don'trace the engine.
Is everyone\ seat belt faslened?
.
Don't maintain one consiantspeed for
long.
Do all the lights work?
.
Donl drive constantly
.
Avoid unnecessary hard stops.
.
Avoid full throule starts.
Check all gauges.
Check all waming lights when the
ignition switch is lumed 1() the ON
posirion.
.
No special break-in is necessary, but a
few precautions in the firs! 1,000 km
(600 miles) may add to the peformance.
economy, and life of your Mazda.
Release ihe parking brake and make
sure the brate waming lighlgoes off
Always be lhoroughly f:rmiliar with your
Mazda.
at full th.ottle
or high engine rpm for exlended
Protecting Your Mrzda
Money-Saving Suggestions
How you operate your Mazdadetermines
how far it will travel on a tank offuel.
Keep tbe wheels in correct alignment.
Use these suggestions 1o help save noney
Keep windows closed at high speeds.
Awantur,te
Coasting:
.
Slow down when driving in
Avoid long warm ups. Once rhe
engme runs smoothly. begin driving.
Keep the engine tuned. Follow the
mainlenance schedule (page 8-3) and
have an Authorized Mazda Dealer
pefbrm inspections and sewicing.
crosswinds and headwinds.
Tuning off the engine to coast down
b dangercus.Thk causes the
ahi
toss oI power steenng and power
bruke control. AnJ lnss of stee.ing or
bruking contnl could @use an
actident New. turn off the engine
and coast dot'n a hill.
Use the air condiiioner only when
Slow down on rough roads.
Keep the lires properly inflated.
Don'l carry unnecessary weight.
Don't rest your foot on tbe brake pedal
while driving.
4-7
Protecting Your Mazda
Special Driving Conditions
I
Hazardous Driving
When driving on ice or in water. snow.
mud, sand, or similar bazard:
.
.
.
.
Downshi[tine
o
Slipp4rLs]!4heell
Do*nshifting into lowet geor while
Be cautious and allow extra dislance
forbraking.
.
I
Awenvmc
Avoid sudden braking and quick
ddvins on slipper| swfaces is
dansercus.The sunnen .hanse in
tirc speed c/ruld couse the tirer to
ski.d. This co A kad to loss of
Rocking the Vehicle
Ifyou must rock
the vehicle to free it
from snow, sand, ormud. depress the
accelerator slightly and...
(Automatic transa{e)
il
steering.
vehicle co nol and an accident. If
is necessary to doenshi.ft on slippery
Brake witlr the pedal by using a light
up-down motion. Don'thold the pedal
sudaces, be wry csrcfut.
Slowly move the shift lever back and
fonh from D to R(Manual transaxle)
Slowly move the shift leverback and
forth from I 1() R.
Ifyou
get stuck. sbif! to I or 2 and
accelerate slowly. Don'i spin the front
For more traction in starting, use sand,
rock sali, chains, carpeting, or other
nonslip material under tbe front
4-8
Protecting Your Mazda
Aw,qntaxo
spiatiaglLcMElls:
When the vehicle b stuck, spinni g
the wheels tt high speed h
ddngetuus.The spinning tirc couw
orefieat and explode.This couu
cause seioui injuies. Don't spin the
wheels at nore than 56 kt tlh (35
nph), ond don't allot!' anlone to
sta d behi d a wheel when pushing
I
.
.
.
Winter Driving
Carry emergency gear. including tlre
chains. window scraper. flares, a snall
shovel,jumper cables, and a small bag
Ask
a
Donl
use the parking brake if il might
freeze. Insiead. shifr to P wirh an
automatic transaxle and to I orR with
a manual iransaxle. Block the rear
Mazda dealer !o pedorm the
following precautions.
.
.
AcaurroN
.
Too much rocking nay cause engine
overheating, transaxle failure, and lire
damage.
.
.
Have the proper ratio of dntifreeze in
Inspecl rhe battery and irs cables. Cold
reduces battery capacity.
Use only cold-wea$er engine
(page 8 16).
oil
Inspect ihe ignition systen for damage
and loose conneclions.
Use washerfluid made wiih
antifreeze-but don t use engine
coolanl antifreeze for washer fluid
(page 8 27).
4-9
Protecting Your Mtzda
V
pressure label (driver's doot, but never
Snow tires
nore
1.6 and 2.0-liter engines
I.8-liter engine
Your vehicle is originally equipped with
summer iires designed for optimurn
traclion on wet and dry roads. If your
vehicle is to be used on snow and ice
covered roads, you may find it necessa.'y
10 replace the original equipnenl lires
lith snow lires, during the winter monfts.
Use snow tircs on all four wh€€ls.
npl).
Inflate snow tires 28 kPa (0.3 kgflcmz, 4
psi) more tlran reconnended on the tire
4-10
V Tire
chains
rnaxinun cold-tire
pressure sbown on lhe tires-
Your vehicle is originally equipped witi
all season radials designed to be used all
year around.In some exfeme c]imates
you may find itnecessary to replace them
with snow ftes during the winier monlhs
to furlher improve tr3ction on snow and
Don't go faster than 120 km/h (75
than the
Awlnlutle
MLri eTire Trtet:
Using tircs dwrent in size orDpe k
dangercus. Yow vehicle\ hatu ittg
coul.l be greatl! affected an.l resuh
in an accident. Use onlt the sane
size a d trpe nfts (snow, radial, or
no -rudiat) on a iour vheets.
NOTE
Check out local regulaiions befbre
using studded tires.
Check tocal regulations befbre using tire
Install the chains on the front lires.
Don't
use chains on the rear tires.
Use only sAE Class
"S" chains, and
To install the chains:
1. Remove the wheel covers, or the chain
bands will scratch ihem.
2. Secure the chains on the front rires as
tightly as possible. Always tbllow the
chain manufacturer\ instructions.
3. Retighten the chains after driving
l/2-l km (1/4 l/2 mile).
Protecting Your Mazda
AclurroN
Chains may scratch or chip
alurninum wheels. lnstall tire
chains.on steel wheels only.
Chains may affect handling.
Don t go faster than 50 knr,/h (30
mph) or tbe chain manufacturerk
recomm€nded limit. whichever is
Drive carefully and avoid bumps,
holes. and sharp tums.
Avoid locked wheel braking.
Don ! use chains on the temporary
tire; it may result in damage to fte
vehicle and 10 ihe tire.
Don ! use chains on roads tha! are
free ofsnow or ice. The tires and
chains could be darnaged-
I Drivi.s
in Flooded A.eas
AclurroN
I
Ttailer Towing
Never tow a trailer with your M.zda.
Make sure water does not enter the
vehicle interior or fte engine area,
The vebicle interior could become
wet or the engine could be damaged.
AWARNING
Dririnp with W.t Brakes:
Diving v'ith wet brukes is
dangerc s. I ncrcased stopping
dittunce or the vehicle pulling to one
side hen braki g could.esultin a
serious accident Light braking will
indicate vhether the brakes haw
been a|Jected Dry the brakes bt
driring rery slovtr ond applring the
brakes ligh r until brake
peiotnance fttu.ns
to
norn.l.
4-11
P.otecting Yo r Maz.la
Vehicle Information Labels
I
OYerloading
A
waR^rnrrc
Uehicle Load Weisht:
The gross afle wigtu tunne
(GAWR) and the srcss vehicte weisht
rating (GWYR) of row vehicle arc
on the Motor Uehicle Safetr
Standad Lnbel on the diver's .Ioor
ftune. Exceeding
these rutings can
cause an accident otvehbte danuse.
You can estinate the wight of !ou.
Ioad br t'eighing the items (or
peopk) beforc puttins then in the
whicle. Be careful not to ot eioan
4-12
Th€ vehicle iden.ification number legally
identifiesyour vehicle. The number is on
a plate attached ao ihe left top side of tbe
dashboard. This plate can easily be seen
$rough the windshield.
Chassis number
Pmtecting Your Mazda
Vehicle emission control
information label*
1A and 2.o-liter
Driving Your Mazda
Opetutine
Ignidon SwilchPosirions 5- 2
StaninS the
4
ManualTransaxte Operanon 5, 5
Engine 5
ra,r vehick
requnes a good
understan lifts of the naty cofttrols !a, nusl
kfto\9 and use. Se.tioh 5 describes
thb in
a
step'byrt.p infomatian Iron
af the
isnition s||it.h ta ctuise .artol"seantl brdkjne.
Alsa highlishted ate th. Bearchil ahd shi.tin?
nodes, porer steerin4, ihsrtutuents ann
Sauges, wamings ahtl indicatars. \|ih.lshield
vipets, and intenor ftaturcs. you' ll lhd
canplete details dbout the advan edardio
Aulonatic
Transaxle
System
Steering
Control
Insfument Cluster
cau8es
Brake
Power
Cruise
Dashboard
Illuminanon
Waminglights/Beeps
Lighnng Control and Tum
Signah
Washer
5- 6
5-t I
5-14
5
15
5-20
5-22
5 25
5-26
5-33
Windshieid wipe6 and
Rear Window Def.osre!
5 35
Lighter
5-38
Ashlray
Srorage Codpartmenrs
5-38
Cup
Holdes
5-39
5-40
Sunvisos
5,.11
Vaniry Miror
Clinrte Control Systen
Radio Reception
Safely Cenification
AN'/FM Radio
ANTFM Radio wirh CompactDisc Player
5,4t
5-56
5-57
Antnna
586
5-A
552
554
5-1
Driving Your Mazda
Ignition Switch Positions
I
ACC (Accessory)
The steering wheel unlocks and some
electrical accessories will operate.
I
LOCK
ON
The steering wheel locks to pro@ct
against theft. only in this posidon can the
ACC
toN
V Manual transaxle
This is lhe normal runningposition after
rhe engine is statted. The waming lights
Wlen tuming
(except brakes) should be inspected
before the engine is started (page 5-26).
ACC position.
I
START
The engine is started in this position. It
wiil crank until you release the key; then
it retums 1() the ON position. The brake
warning light can be checked aft€r lhe
engine is started (page 5-26).
{.t
the ignilion switch to the
LOCK position. push the key in at the
Driving Your Mazda
NOTE
Aw,cm,{tuc
tfte key is difficult, jiggle
the steering wheel from side to side-
If tuming
Aw,cnullc
Renoving the Ke!:
V Automatic transaxle
When tuming the ignition switch to the
LOCK position, keep the shift lever in P
It's d4 gerous to remow the ke!
fiom the lgnitiott switch tthile the
vehicle is moting. Remoi gtheker
allows the steenng wheel to lock. vou
reill lose skenng contnl and a
Not SexinLthe Parking Bmke:
Leaving the .livet's seat withou1
setting the pa*ing brcke is
dange rcus. U nexpe cted w hicle
noyenent coua occu.t'ifthe
pa*ins
bmke is not set.This eouuca se a,t
ac.ident. Beforc tearins the driver's
seat, alvors set the parking brake
and nuke surc the sNft lerer is in P
\)ith an aulonmti.
tra saieolinI
or R with a manual transaio.
seious acctuIent coud oceui
Redove the ker only when the
NOTE
If the ignition switch is in ille LOCK
orACC position. abeep will sound
when any door is opened.
Driring Your Mn da
Starting the Engine
1. Occupanls should fasten their seat
NOTE
6. After slaning the engine, lel it idle for
about 10 seconds.
be1ts.
The starter will nol operate.-.
2. Make sure the parkingbrake is on.
.
If
.
Ifthe clutch pedal
the shift lever is not in P or N
NOTE
3. Depress ihe brake pedal.
4. (Manu6l transaxle)
is not pushed
down all lhe way (manual).
Depress the clutcb pedal all the way
and shifl into neutral.
K€ep $e pedal depressed while
cranking the engine.
5. Tum th€ ignition switch to the START
position and hold (up to l0 seconds at
a
tirne) until ihe engine shns.
(Automatic rransaxle)
Put the vehicle in park (P). Ifyou must
resiart the engine whjle ihe v€hicle is
moving, shifi into neutral (N).
Ac.turroN
Don't try the slari,er for more ihan
10
seconds at a time.Ifthe engine stalls
or fails to start, wait 10 seconds
before trying again- Olherwise, you
may damage the starler and drain the
5.4
In extremely cold wealhe! below
18"C (0'F), or after the !'ehicle has
stood idle several days, le! lhe engine
warm up without operating the
Driving Your Mazda
Manual Transaxle 0peration
NOTE
135
Whethercold or warm, the engine
FfrI
should be staned witlout use of the
If the engine fails to start, it may
?/4 e
NOTE
.
.
Make sure the vehicle is stopped
befoie shiiting to R.
If shiftinC into reverse is difficult.
shift into neutral, release the clutch
p€dal, and try again.
be
flooded (excessive fuel in the engine).
Follow this procedure:
I
- Depress the accelerator all the way
and hold it there.
2. Tum the ignition switch to the START
position and hold iithere forupto
l0 seconds. If the engine starts, release
lhe key and accelerator immediacly
because the engine will suddenly rev
up.
3. Ifthe engine fails to start, crank it
without using ihe accelerator-for up
I
Manual Transa\le Shift Pattern
The shift pattem of the iransa{le is
conventional, as shown,
Press the clutch pedal
all the way down
while sbifting; then release il slowly.
AcaurroN
Keep your foot off the clutcb pedal
except wben shifting gears. Also,
donl use the clutcb ro hold the
vehicle on an upgrade. This will avoid
needless clutch wear and damage.
A safely feature prevents accidentai
shifling from 5 to R. The shifi lever must
be pu! in neulral before being shifted to
R,
5-!
Driving Your Mszda
Automatic Transaxle
I Automatic Tla saxle Controls
Shift lerer
To prevenr unsafe shifting
Pa -^h v-
.lll o*".,*,rii
fl^
-tr)
Forsele!rmBerherathre-
VI
No
\Peed or
rns \need
rr
.dle
:: ir
Overdrive (O/D) OFI indicato.
This lieht codes on *hen lhe overdnve
1O
Shift pattern indicator
Shows shift
leler positjon
Indicates that you must depress the bnke pedal and. hold in the lo.k rlease
button to shift (The ignilion swiich nustbe in tne ACC orON position.)
+o
tl
5.6
The shiftlevercan be sbifted fteely into any position
indicated by the 1l arow.
Indicates irrat you musthold in the lock-release burcn to shift.
0/D
OFF
ooo
Driving Your Mazda
I
Transexle Rang€s
The shifl lever mustbe in P or Nro
AcaurroN
shifting into P orR while fte
V
vehicle is moving can damage your
P (Park)
In N, the wheels and transaxle are not
locked. The vehicle will roll freely even
on the slightest incline unless the parking
brake or brakes are on.
P locks the aansaxie and prevenrs rhe
fiont wheels from roiaring.
Shifiing into
a
driving gear or
reverse wh€n the engine is running
faster than idle can damage rhe
Awtnwwc
HoUing the Vehicle with P:
Setting the shift lewr to the P
position without using the pa*ing
brake to hoA the vehicle is
dansenut. If
V N (Neutral)
P
faik
to how, the
whicle couA move and ca tean
accdent. To hou the vehick, set the
shift lever to P AND set the parkins
V R (Reverse)
In posiiion R, the vehicle moves only
backward. You mustbe at a complere
stop before shifting from R, excepr as
explained under Rocking rhe Vehicle
(page 4-8).
AWARNING
Shiftine.from N ot P:
It\ danselou' to shilt ton N ot P
into a driring eear when the engine
is runni g faster than Ule. If this is
done, the vehi.le couu move
s dde l!, causing an accident or
seioLt inju.r. If the e gi eis
running faster than ink, don't shilt
frcmN orP
i
toadriyitggear,
Driving Your Mazda
VD(D
ve)
D is the nonnal driving position. From a
stop, the transaxle will automatically
shift through a 4-gear sequence.
V
2 (Second)
The 2 position is helpful when driving in
heavy, slow'moving traiTic and climbing
hills, for engine braking assistwhen
going downhills, or for stariing on slick
surfaces and other situations where gende
acceleration may be necessary. Do not
exceed 100 knth (62 rnpb) in the 2
posrhon.
I
Drivins Tips
V Passing
For extra power when passing anoiher
vehicle or climbing steep grades, depress
the acceleraior fu]Iy. The transaxle will
shift 10 a lower gear, depending on
vehicle speed.
V Climbing
steep grades from a stop
To climb a steep grade from a stopped
1. Depress the brake pedal.
VI
(Low)
Use the I position for maximum power in
hard-pulling siiuations. or for clirnbing
and descending very sleep grades. Do not
exceed:18 knr./h (30 mph) in the I
5-8
2. Shift !o D or 1 depending on the load
weighl and grade steepness.
3. Release all brrles while gradually
V
Descending steep grades
Wben descending a sleep grade, shif! to 2
or l, depending on load weight and grade
steepness. Descend slowly, using the
brakes only occasionally lo prevent them
from overheating.
Driving Your Mazda
And fbr a smoother rid€ with less
shifting, don't use ir when:
.
.
.
Going up a steep grade.
Driving in slop and go traffic.
Pullinc heavy loads.
To turn off the overdrive, push the
buiton.
0/D
OFF
ooo
I
Overdrive
The transaxle will then shift through a
three gear sequence in D.
V Overdrive-off indicator
V
OYerdrive operation
Shifl pa(ems without overdrive:
This lightcomes on when the overdrive
In D, the transaxle automatically slifts to
overdrive. which irnp.oves fuel econorny
To allow engine braking when going
down a steep grade, nake sure the
overdrive butlon is in the offposition.
D
-
lst,2nd, 3rd
2:2ntl
l-lst
AclurroN
If fte overdrive-off indicator light
flaslres, lh€ transaxle has an electrical
problen. Continuing
10
drive your
Mazda in this condition could cause
damage to your transaxle- Consult an
Authorized Mazda Deaier as soon as
possible.
5-9
Driving Your Mazda
To
turn it on, push lhe button again.
Shift pattems rvith overdrive:
D
:
I
st. 2nd, 3.d, 4th
2-2I],d
l-lsi
I
Shift-Irck Syst€n
For your safety. the automatic transaxle
has a shift-lock, which preYents
shlfting out of P unless the brake pedal
is depr€ssed.
To shif! from Pi
To be sure the vehicle is in park.
the ignition key cannot be
r€moved unless the shift lever is
l.
in P,
Depress and hold the bral(e pedal.
2. Start fte engine.
3- Push and hold the lock-release button.
4. Move the shifl lever.
5-10
When the ignition switch is in the
LOCK position, the transaxle
cannot be shifted from P.
Drivins Your Mazda
Brake System
I
Foot Brake
Awnnutxc
Your Mazda has power-assisted brakes
thar adjust aulomalicalty through normal
Riding the Brakes:
Divins'a,ith rourfoot continuoustr
on the brake pedalor steadilr
Should power-assist fail, you can stop by
applying greater force than normal to the
brake pedal. But tbe distance rcquired io
stop will be greater than usual.
Awl'nutue
Dnring with the Engine Off:
Continuing to d.ive when the engine
applyins the brakes for tons
distances is dtngercus.This causes
ot'e.heated brakes, resulting irl
longer stoppilg tlbtanees or even
total bruke failure. This couu ca6e
loss of vehicle contrcl and a seious
ac cide nt. Av oid contin uo us
appticanon of the bnkes. Shift to a
lo\'ers.ar when going down st ep
Awl.nume
Dritine flith Wet B kes:
Driving with wet brakes is
dangero us. I nc.e as e d stopping
distance ot the vehicle puling to o e
sine when brakins couu rcsult in a
seious accident. Lisht brakinc wilt
indicate whather the bnkes h0ve
been alfected. Dr! the brakes b!
driving very slowlt and applJing the
brakes lightlr untit brake
peiomance
is
nonut.
hills.
is stalled or turned oJf is drrngerout.
B.dking
$'i
rcquire more efoft, ann
the brake's pover-assist couu be
depleted if rou punp the brake. This
caure toneer stopping dkti ces
or eyen
accident. Don't coatinue
diving when the engine is stalled or
tuned off, frnd a safe pla& to rtop,
vi
a
5-11
Driving Your Mazda
Awl.ntuNc
Dtit'ins $'ith Wom Disc Pads:
Drivins wilh wom disc pans is
dansercus. The brukes couulail and
cause a seious acci.dent. As soon as
oise consult
lou hear a screeching
an Authoriaed Maula Deolei
I
Brake Pad Wear Indicator
wlen
the disc brake pads become wom,
the built-in wear indicators contact the
disc plates. This causes ascreeching
noise to warn that rhe pads should be
replaced.
When ]ou be3r this noise. consult an
Authorized Mazda Dealer as soon as
5-12
I
Parking Brake
To set the parking brake, depress ihe
brake pedal; lhen pull ihe brake handle
fully upward.
To release i!. pull the handle up and press
the bunon. Depress the brake pedal: then
lower tbe handle to the release position
while holding in $€ butlon. Release the
pedal when it's safe to do so.
Drivins Your Mazda
AclurroN
Driving wiih the pa*ing brake on
(o)
will
BRAKE
cause excessive lvear of the brake
linings or pads.
\__/\,/\__/.
I
^.-)^1,
Brake System Warning Light
I
Antilock Brake Syst€n (ABS)
The ABS control unil continuously
nonitors the speed of each wheel. If one
is about lo lock up, r}le ABS responds by
automatically releasing and reapplying
The driver will feel a slight vibraiion in
the brake pe&al and may bear a chattering
noise from ihe brake system. This is
normal when the ABS operates. Don't
pump fte brakes, continue to press down
on the brake pedal.
If fte brake waming iighi sLays on after
the parking brake is fully released. $e
brake system has amalfunction. Refer to
(page 5 26).
w:ming LightYBeeps
5-r3
Driving Your Mazdr
Power Steering
NOTf,
If
the ABS waming light stats on
wbile you're driving. the ABS
Awl^nNmc
4rg
conlrol unithas detecled a system
malfunction. If ftis occurs, your
brakes will function normally as if
$e vehicle hadno ABS. Should
tbis happen, consull an Authorized
The ABS canrct conpensate for
unsafe and .eckless driving,
excessn e speed, .^itgati s (fottor)ins
Mazda Dealer as soon as possible.
and rcad contact because of watet on
the rcad surface). You can sn have
Braking distances may b€ longer
on loos€ surfaces (snow or gravel.
for example) which usually have a
haJd foundation. A vehicle with a
normal braking sysl,em may require
less dislance to stop under these
conditions because the tires will
build up
a wedge of surface layer
when the wheels skid.
a
othe. whicle tooclosel!),a d
htdroplrnins (rcduced
a
tire
acdden . So don't relr
a substitutefor safe
dni
ftiction
o
ABSas
g.
NOTI
is jump-started, an
unevenness of rpm occurs and the
ABS warning light comes on. This is
w}len lhe engine
due to a lack of baltery capaciry and
doesn't indicaie a malfunction.
Have the battery recharged as soon as
possible.
5.r4
Power steering is only operable when the
engine is running. If the engine is off or
if the power steering system is
inoperable. you can still sieet but it
requires more physical effort.
If ihe steering feels rigid during normal
driving, consuli an Authorized Mazda
Dealer.
AcaurroN
Never hold the steering wheel to the
extreme left or right for more than
five s€conds widr the engine runnine.
This could damage th€ power steeing
Driving Your Mazda
Cruise Control*
With cruise control, you can set and
automalically maintain any speed of
more than abour.l0 knvh (25 mph).
Awnnumc
Cruise Main Switch:
Leavi gthe CRUISE MAIN su,itch
Aw,qnuNc
d;+=!1.;,Ti
Cruise Cont.ol Use:
Using cruise controlin the fo owing
conditions .ould couse rou to lose
.ontrot ofthe vehicle:
.
.
.
Heatt ot unsteonr tuJIic
Slippery or winding
rcah
Sinilar rcstri.tions that reCube
o
when ot using the cruise contftl
it da gerous as it mar be si'itched
on accitentb. This couw resuh in
loss of tiehicle contnl. Keep the
CRUISE MAIN switch oJJ when
crube control is not in use.
To activar,e ihe sysr,em, push the CRUISE
MAIN switch.
To deactivate the system. push rhe swirch
agaln,
inconsiste tspeed
Don't
se
cruise control in these
tsome
n.dcls. 5.15
Driving Your Mazda
NOTE
CRUISE
^*$l;=ltr;;ff;
ooo
I
C.uise Set Indicator Light
The cruise set indicator comes on when a
cruising speed is set.
On a sieep grade, the vehicle may
momentarily slow down going up
or speed up while going down.
I
To Set Speed
1. Turn on the CRUISE MAIN switch.
2. Accelerate to the desired speed, whicb
nustbe nore than 40 kdh (25 nph).
3. Move the cruise control lever down to
SET/COAST and release il at the
speed you wanl. Release the
accelerator at the same lime.
to hold lhe lever Until
you relea-ce it, speed will continue !o
drop (unless you continue to accelerate)
Donl continue
and you'tl miss tlte desired speed.
5.16
The SET function can't be
activated unlil about 2 seconds
after ihe CRUISE MAIN switch
has been engaged.
Drivine Your Mazda
NOTE
Cruise control will cancel at about 15
kr/h (9 mph) below t})e presel speed
or b€low 40 kn/h (25 mph).
-"$t*
1a.,,?
stk
I
I
To Cancel
To tum off the system, use one ofthese
.
.
.
.
Follow either of these procedures.
.
Push the CRUISE
To Increase Cruising Speed
l.
MAIN swirch.
Move the conlrol lever up ro
RES/ACC and hold it. Your vehicle
will accelerate.
Sligh y
depress the brake pedal.
2. Release the leverat rhe desired
speed you wani.
Pull the lever towaJd you.
(Manual transsrle)
.
L
Accelerate to the desired speed.
Depress lhe clutch pedal.
The system is off when lhe ignilion is off-
2. Move the control lever down to
SET/COAST and release it
immediately.
5-17
Driving Your Maz
d!
Your vehicle has a tap up feature that
allows you to increase your cunent speed
in increments of 1.6 km/h (1 mph) by a
momentary tap of the control lever
Multiple taps will increase yourvehicle
speed 1 .6 knth ( I mph) fo. each tap.
I
Accelemting with C.uise Control
On
Accelerat€ if you want to speed up
temporarily when the cruise control is on.
Greater speed will not interfere with it or
change
fte
d';T
1I;;:;
set speed.
Take your foot ofi the accelemtor to
relum to the set speed.
I
To Decrcase Cruising Speed
Move the control lever down to
SET/COAST andhold it. Release the
lever at the desired speed.
5-18
Driving Your Mazda
Your vehicle has a tap-down feature that
allows you to decrease your current
sp€ed in decrements of 1.6 krth (l mph)
by a momentaJy tap of the control lever.
NOTtr
With an automatic lransaxle vehicle.
the gear is automatically elected
=_\i
Multiple taps will decrease yourvehicle
speed 1.6 knth (1 mph) for each tap.
when going uphill.
#t&
1a.#
I
To Resume Cruising Speed at
More Than 40 km^ (2s nph)
Il someihing
besides the CRUISE
MAIN
was used to cancel ffuising speed and the
sysiem is slili activated, the most rccent
set sp€ed will automaaically resume when
the control lever is moved up to rhe
RES/ACC position, then released. If
vehicle speed is below 40knh (25mph),
rncrease the vehicle sp€ed up to 40kn/h
(25nph) and rnove the lever up to the
RES/ACC position.
5.19
Driving Your Mazda
Instrument Cluster
I
Gauge Location
Odoner€r md Tnp MeEr
':L,-
J
Z
5
.P;
,E
_'
$
5.20
-
9i
eln
'PD
waler
TenFrllue
Gauge
Driving Your Mazda
I
Wa.ning[ndicato. Light Locations
Bmke System Wming Light
2
3
ChrreingSrnem Wm'nB Lighr
Eneine Oil
lrssuR wm'nC tighr
5
6
1
DooFAjarwam'ns tisht
8
Anddk Bnre Syscm (ABS) wding Lishr
9
supplmrrl
R$Fainl Sysl.n wming Lieht
Headlight High Beam Indicator Lieh!
O/D OFF Ind'caLor L ghr
Cruise Set Indicator
Light:
,some
moders. 5-21
Driving Your Maz da
Gauges
I
NOTE
Speedometer
ro)
\Y/
The speedometer indicates the speed of
lhe vehicle.
I
Odometer and Thip Meter
The ignilion swilch must be in the ON
The display node can be changed from
odometer to trip meter A to trip meter B
and ihen back to odometerby pressing
lhe selector. The selec&d mode will be
displayed.
The display mode can be changed
while the vehicle is stopp€d for about
a l0 minute period after the door is
opened or the ignition switch is in the
ACC or LOCK position.
Driving Your Mazda
When trip meter A is selected, TRIP
will be displayed. When meler B is
selectred,
oDo
A
TRIP B wjll be displayed.
The trip meter records the rolal distance
thevehicle is driven until ihe meter is
again rcset. Retum it ro "0.0" by bolding
the selector depressed for more than I
second. Use this meter to measure trip
distances and in to compute fuel
E
V Odom€ter
V Tfip meter
When this mode is selectred, ODO will be
displayedThe odometer recods the rotal distance
fte vehicle
has been driven.
NOTE
The trip meier can record rhe total
distance of two trips. One is recorded in
arp meter A, and the other is recorded in
tnp meter B.
For instance, trip meter A can rccord the
distance from ihe point of origin, and rrip
meter B can record the dislance from
where the fuel tank is filled.
Wlen trip meter A is selected. pressing
the seiector again wi6in one second
change to trip meierB mode.
will
Only the lrip meters record ienths
of kiloneiers (rniles).
The trip record will be erased
.
.
The power supply is intefiupted
(blown fuse orthe baltery is
The vehicle is driven over 999.9
km (mite).
s-23
Ddving You. Marda
.\
H
AclurroN
Driving wift
=
I
Water T€mperature Gauge
til
st
= //'->)
an overheated engine
?
can cause serious engine damage
(page 6-2).
.Y') /
-""'-4-r^-*-"
=
I
Fuel Gauge
The water lemperature gauge sbows lhe
temperature of the ergine coolant,
The fuel gauge shows approximately how
much fuel is i!1the lank. We recommend
keeping ihe tant over 1/4 full. When the
If the
low fuel waming light illuminates or
when the needle is near E, refuel as soon
aspossible.
needie exceeds normal range
toward H, it indicates overheating.
5-24
Drivine Your Maz da
Dashboard Illumination
Ac.lurroN
Don't run ihe engine wirh dle
tachoneter needle in the RED ZONE.
This may cause severe engine
damage.
I
Tbchometer
The lachom€ler shows engine sp€ed in
thousands of revolutions per minute
When the parking lights orheadlighrs are
on, rotate th€ thumb-wheel to adjust the
brighhess of lhe dashboard lighrs.
(ryrn).
5-25
Drit ing Your Mazda
Warning LightVBeeps
I
Warning Lights Inspection
I
Brak€ System Wsming
Low brake fluid level warning
Light
Inspect lhe waming lights by turning the
ignilion switch !o the ON position with
th€ engine offand the parking brake on.
Consult an Authorized Mazda Dealer
about any light thai doesn't come on.
system waming light is off
when dre ignition switch is in the START
position, have the system inspectedby an
If the brake
This waming lightcomes on when the
ignition switch is tumed to the ON
position. Wlen the parking brake is not
applied. itgoes out after about2 seconds.
This waming has the following functions:
V Parking brak€ warning
Authorized Mazda Dealer
After starting the engine, make sure all
warning lights are off.Ifone stays on. it's
signaling for attenlion.
The brake syslem waming lighr sbould
go off when the parking brake is released.
the vehicle.
l.
With the engine stopped. check the
brake fluid level immediately and add
fluid as required (page 8 23).
2. After adding fluid, check the light
The light cones on when the parking
brake is applied with fte ignition switch
in the START orON position.Ilgoes off
when $e parking brake is fully released.
warning/Elect.onic b.ake force
distribution system warning
the light stays on after the parking
brake is fully released, you may have a
Drive to $e side of the road and park
the right
of way.
again.
Ifthe waming light remains on, or if
the brakes do not operate properly, do
not drive the vehicle. Have it towed to
an Authorized Mazda Dealer.
V Low brake fluid level
lf
5-26
You may notice that ihe pedal is harder to
push or tlat it may go closer to the floor.
Ineirher case, jt will take longer to stop
off
Even ifihe light goes off, have your
brake system inspected as soon as
possibte.
Driving Your Mazda
A
Electronic brake forc€ distribution
sysrcm warnmg
Iftbe electronic brake force distribution
control unit determines that some
components ar€ operating incorreciiy, the
control unit may tum tbe brake system
waming light on.
In this case, the ABS warning light
comes on at the same time. (page 5 30)
Aw,cmuvc
Bratu Waming Light:
Diring vith the brake srstehl
I
wanlvnuc
ABS waning
Ligh,
Beep
ABS Warn;ng Light and Bruke
Waming Light on at the Same Time:
Dtiving when the bmke ststen
vaning light and
S€at Belt Waming
light
are on at the tante time h dange.ous.
When both lighs are o , the nar
vheels cottld lock nore quicklr in an
emerSen.r stop than nder nornul
If
the driver\ seat belt is not fastened
when the ignition switch is ium€d to the
ONposition,
a beep
will
sound for about
6 seconds and the seat belt warning light
will remain on until the belt is fastened.
If the system
does not operate conectly,
consult an Authorized Mazda Dealer
Don'td
ye with both liqhts on, and
tact an Authoized Mazde Dealer
to htve the brukes inspected as soon
.o
varni g liehr on is dangerous. It
in.licates that Jour btukes ma! not
wo* ttaA ot that thet coua
tonpletel! fail at onr 6ne. this
nght rcmains on, have the brukes
inspe.led innediatelr. Don't dite
with this light on, and contact an
Authorized Mazda Dealer to hate the
bmkes inspectedas soon as possible.
I
5-27
Driving Your Mazda
I
Charging System warning
Ligbt
This waming light indicates a
maifunction of the allemalor or of the
cnargrng sys€m.
Ac.turroN
Don't drive with
a loose or broken
altemator belt. The engine could
overheat because thisbelt aiso drives
I
Ensine Oil Pressure
Warning Light
This waming light indicates low ergine
oil pressure.
If
Ifthe ligbt
the lightcomes on while driving:
comes on while driving:
1
1
t;]
. Drive to the side of the road and park
off the right of way.
2. Tum off the engine. Inspect the
alternator drive belt for looseness and
. Drive to the
side of ihe road and park
off the right-of-way.
2. Tum off the engine and insp€ct the
engine oil level (page 8-16). If il's
low, add oil.
3. Check the lighr.
3.
Ifit's
OK, the charging system has a
problem. Consull an Authorized
Mazda Dealer as soon as possible.
lf
the light remains on even after you
add oil, have yourvebicle towed to lhe
nearest service station or to ar
Authoriz€d Mazda Dealer.
5-28
Driving Your Mazda
AclurroN
Don't run the engine if oil pressure is
low.I! could result in extensive
I
Low Fuel Warning Lisht
The checkengine light may come on in
the fbllowing cases:
This warning light in the fuel gauge
signals that the fuel tank will soon be
.
Celfuel
.
I
as soon as possible.
Tbe fuel tank level being very low or
approaching emply.
The engine's electrical system has a
problem.
Check Engine Light*
Ifthis lightcomes
on while driving. the
vehicle Inay have a problem. It is
imporiant to nole the driving conditions
when the light came on and consult an
Authorized Mazda Dealer
.
.
If
The emission control systemhas a
The firel filler cap is missing or not
tightened securely.
the check engine light flashes
continuously, decrease you! speed and
consult an Authorized Mazda Dealer as
"su...oa"r,. 5-29
Driving Your Mazda
I
Door-Aiar warnine
Lieht a- I
4+
This warning light comes on when any
door isn't securely closed.
I
Antilock Brak€
I ABsr warning
Svstem f^ l
iight
L(q9/
The waming lighl slays on for a few
seconds when lhe ignition swilch is
turned io the ON position.
If the ABS warning light
stays on while
you're driving. lhe ABS control unithas
detected a system malfunction. If this
occurs, your brakes will function
normally as jfthe vehicle had no ABS.
Should this happen. consult an
Authorized Mazda Dealer as soon as
Possible.
5-30
Awnnumc
ABS Warning Light and
Bnke
Waning Light on at the Sane Tine:
Driring when the bruke tltten
wanins lisht and ABS u'amins lisht
ale on at the same time is dangerous.
When both lights are on, the rear
wheels couu bck nore quicktr in tn
emerge t! stop than under nornul
Don't dnve with both Aghb on, and
contact an Authoized Mazla Dealer
to hare the braket inspected as soon
NOTE
When the engine isjump slarled to
charge the battery, uneven rpm occurs
and the ABS waming lighl comes on.
This is due to a weak battery, not a
malfunction.
Recharge the barcry.
Dri!ing Your Mazda
I
A wanlsnrc
Supplemental Restraint
System Warning Light
lf-S en icing the
uarkacala!
Iflhe supplementat restraint system is
Se
OK, the warning light comes on when the
ignition switch is turned to the ON
position or after the engine is cranked.
ResttuintSrstem:
Seryaenicittg o. tatnpe.i g ||ith the
tupplemental restraint slstem is
da geftus.The ab bags could
Afler about 6 seconds it
go€s out.
A system malfunction is indicated when
lbis light constantly flashes. stays on or
doesn'lcome on at ail.lfone of these
occur. consult an Authorized Mazda
Dealer as soon as possible. The slstem
may not work ln an accident.
S
accinentaltr acnvatu or becone
disabled. This could couse vious
Wunes. Nerer tanper with the
supplemental restraint srstem and
alwars have an Authoized Ma.la
Dealet peiom alt senicins and
I
Ignition Key Reminder
If the ignition swnch is in
ACC position,
I
a beep
the LOCK or
wiU sound when
Lights-On Reminder
Iflights
are on and the key is remov€d
from the ignition switch, a beep will
sound when any door is opened.
5-31
Driving Your Mazda
I
Hish-Beam E^I I O/DOFF Indicetor Lighr 0/D I Cruise Ser Indicator Lishr* [J
Light
Auromatic Transa\ler off
l-'--=\)
This light comes on lvhen a cruising
This ligbt indicates one oftwo thingsr This light comes on when the overdrive speed is ser.
has been tumed off.
. Tbe higb-beam headlights are on.
. The tum signal lever is in the
Heedlight
lndicator
(
Ac.quuoN
flash to pass position.
If
the overdrive-off indicator
lighi
flashes, the trarsaxiehas an eleclrical
problem. Continuing ro drive your
Mazda in this condition could cause
damage to tour rransaxle. Consultan
Autho.ized Mazda Dealer as soon as
possibl€.
5-32
'so-" ^oo.r'.
Driving Your Mazda
Lighting Control and Turn
Signals
V Lights-on r€minder
the lights :re on and rhe key js
removed fiom the ignition switch. abeep
will sound when any dooris opened.
If
NOTE
I
To prevent discharging the battery,
don'tleave the lights on while the
engine is off.
Headlights
V Headlight highnow beam
To 1um on the lights, turn the knob on rhe
end of the control leve.
Push ihe lever iorward for high beams.
The firs! stop turns on rhe taiiligbtsdashboard lights. parklng lights, license
Iights, and side-maJker lights.
The high-beam indicator light on the
dashboard is blue.
Pull it back for low.
The second stop turns on the headlights,
taillights, daslboard lighrs, parking
lighls, license lighls, and side-marker
tigh!s.
5-33
Driving Yotrr Mazda
V Lane-change signals
Move $e lever slightly towaJd the
direction of th€ change-unlit th€
indicator flashes andhold it drere.lt
will r€tum io the offposition when
NOTE
Ifan indicatorlighl
V Flashing the headlights
I
To flash the headlights, pull the lever
fully toward you. The headlight switch
need notb€ on, and the leverwill relurn
to the normal position when released.
V T|lrn signal
The high-beam indicaior light on $e
dashboard is blue.
Tirrn and Lsne-Change Signals
Move ihe signal lever down (for a left
tum) or up (for a right lurn) to fte stop
position. The signal will self-cancel after
the turn is completed.
Green indicalors on $e dashboard show
which signal is workiry.
lfthe indicator light continues !o flash
after a tum, manually retum the lever to
its original position.
5-34
stays on without
flashing or jf il flashes abnormally.
$e tum signal bulb tnay be burned
Driving Your Mazda
Windshield WiDers and
Washer
I
Fog Lights+
Use this switch lo 1um on the fog lights.
They help you to see as well as to be
I
Windsbi€ld Wipers
The ignition switch nusi be in the ON
V One-touch wipers
a single wiping cycle, push the lever
up to MIST.
For
Turn the wipen on by pulling the lever
To turn on the fog lights, first turn on the
headlight switch. Then press the fog ligh!
switch. To turn ihe fog lights off, pr€ss
the fog light switch again or turn ihe
headljght switch off.
INT
I
2
lntermittent
Normal
Fast
"sonenoders. 5-35
Driving Your Mazda
A wamrnrc
NOTE
Because heavy ice and snow can jam
Froze
the wiperblades, the wiper motor is
protected by a circuit breaker. This
mechanism will automalically stop
operadon offie blades, but only for
Washer
FtuA:
asinc windshied washer fluin in
freezing temperuturcs is da gemuL
1:he
vashetluid couu frceze
on the
windshieA and block your vision.
If this happens, turn off
You coud hore on accident.
use the flashet *'ithoutfrrst
the wiper
switch and park off the right-of'way.
After 5 mlnules, tum on lhe switch
and the blades should op€rate
normally. If lhey don't, consult an
Authorized Mazda Dealer as soon as
I
Windshield Wasber
The ignition switch musibe in the ON
possible.
Pull the levertoward you and hold
itto
spray washer fluid.In rhe OFFor INT
position, the wipers will be actrvated
untilthe lever is released.
Ifthe
washer doesn 1 work. inspect ihe
fluid level (page 8-27).Ififs OK. consult
an Authorized Mazda Dealer
5-36
Don't
waming
Driving Your Mazda
Rear Window Defroster
AclurroN
Don't use sharp inslruments or
window cleaners with abrasives ro
clean the inside of the rear window
surface. They mal damage tbe
defroster grid inside the window
NOTE
The rear defroster clears frost, fog, and
thin ice from the rearwindow
The ignition switch must be in the ON
Push lhe switch to lurn on $e rear
window defroster; rhe indicator lighr
Push the switch again to turn it
This defroster is not designed for
melting snow Ifthere is an
accumulation of snow on the rear
window, brush il off before using ihe
will
off.
5-37
Driving Your Mazda
Lighter
Acaurron
Don't hold the lighr,e! in because
Donl
use the
it
lighFr socket for
plug-in accessories such as shavers
and cofiee pots. They may danage
it or cause eleclrical failure. Use
only a genuine Maz da ligbter
To operate the lighter. press it in and
release it. Wlen ready for use, it
automatically pops out.
the engine is off.lhe ignition swilch
must be in lhe ACC or ON position fbr
the lighter to operate.
If ihe lighter
doesr
\
pop out
within 30 seconds. remove it lo
To remove, op€n and push down on the
lock spring.
prevent oYerlreatmg.
Ac,tuuoN
If
Donl
use ashtrays for trash. You
might start a fire.
5-38
Driving Your Mazda
Storage Compartments
A wamrnrc
Open Storaee Box:
Diving with
a storage box open is
dangerous. To rcduce the possibiury
of injury in an accident or a sudden
AclurroN
In hot weather, don't leave
combustible ma|erials or objects
which witl deforn in exlreme heat
such as lighters and glasses in the
stop, keep the storagc boxes closed
I
Glove Box
To open the glove box. pull the latch
The door has a lock. insert the key and
tum ir clockwise to lock.
counterclockwise to unlock,
5-39
Driving Your Mazda
Cup Holder
Awtnnnte
UsingtheCup HoU.r:
Asing the cup holder to hod hot
liquids v'hile the vehicle is novins is
danserous. II the contents spilt, rou
could be scaded. Never use the cup
holder to hou hot liquds while the
I
Center Console
To open, pull the release catch.
5-40
To use the cup holder, op€n the lid.
Dri!ing Your Mazda
Vanity Mirrors
Sunvisors
>'''.''...''''..'. 4*-aai
'--......?-......-,
When you need a sunvisor.lower it
use in front or swing jt 1() the side.
fol
rl
To use the vanity lnirror. iower the
sunvisor and pull the mirror cover up.
5-4r
Driving Your Mazda
Climate Control System
I
Op€rating Tips
V Operating
the climate control
Op€rate the climate control system with
the engine tunning.
V Outside/Recirculated air position
V
Use the outsid€ air position in nornal
conditions. The recirculated air position
can be used temporarily when driving on
dusty roads or for quick cooljng of the
Have the air coditioner checked before
the weather gets hot. Lack of refrigeranl
may make the air conditioner less
efficient. Consult an Authorized Mazda
Dealer for refrigerant inspectron.
V Clearing the air inlet
V Parking in dir€ct sunlight
Clear all obstructions like leaves, snow
and ice from dre bood and the air inl€t in
$e cowling grille to improve iie system
Iflhe vebicie
efficiency.
has been parked in direct
sunlight during hotweathe! open ihe
windows 10 let warm air escape. then nrn
the climate control system.
V
V
Foggy windows
The windows may fog upeasily in hunid
weather, Use the climate control syslem
to defrost lhe windows,
To help defrost the windows. operate the
air conditioner ro dehumidify the air.
5.42
Check the rcfrigerant before
weather gets hot
Not using for a long period
Run the air conditioner at least once a
month to keep internal paJts lubricated.
The optional air conditioner is filled with
R I 3 4a, a refrigeranr that will not damage
If ihe air conditioner is low on refrigerant
or has a malfunction, consult an
Authorized Mazda Dealer.
Driving Your Mazda
I
Selectins the Airflow Mode
When lou want air to When you want air to
the face and the floor:
Whe[ you want air
W})en you wanr air
mainly to tbe floor:
the floor and defrosl defrost the
the windshield:
windshield:
10
Mode
Airflow
'some
nodek. 5-43
Driving Your Mazda
N.OTE
When using fte air conditioner. mist
may come out from the vents. This is
not a sign of trouble but a result of
humid air being suddenly cooled.
/l.]i==T=m..
tnl-r--lil
rl\\
LUflffit
tctrmrr-t7/
---f---
I
Vent Operation
V Aqiusting the amount of airftow
V Directins airflow
These vents can be opened by rotaiing
the vertical wheels up or closedby
You can direct air flow by moving the
rotating lhem down,
Driving Your Mazda
I
Control Plnel
Fan conuoldial(pase 5 46r
Pear windos LlefrosEr stritch ipage 5.17r
(
O
TenpedtuE conrol djal (page 5 46)
G.,ztG o
An i.hke sehrorswn.h (page 5.46)
Mode selectoi dial (page 5 ,1?)
*sonenoaers. 5.45
Driving Your Mazda
/6f
cord
\\
r7i
v___/
O€,,z.GO
Hd
V tran control dial
V Tempe.aturc control dial
V Air intake
This dial allows variable fan speeds.
This dial controls temperature. Tum it
clockwise for hot and counterclockwise
This switch controls the source of air
ente ngthe vehicle.
0
I
2
3
,l
Fan
sel€cto. switch
off
-Low
speed
low speed
-Medium
Mediurn high speed
-High
speed
Press the switch to alternate between
fte
ra
and
6
positions. The indicator
light for the selected mode will
illuminate.
It is recommended that under normal
conditions the switch b€ kept in lhe
5-46
Driving Your Mazda
.6
Outslde air position
A wenlrnrc
Outside air is taken into the vehicle. Use
this position for normal venrilation and
nearng.
6
Recirculated air position
Outside air is shu!
ofl Air within
th€
vehicle is recirculacdThis position can be used when driving
on a dusly road or in similar conditionsIt also helps to provide quickercooling of
The Recirculated Air Position:
a
position in cow
Using the
i)eather will cause the elass to fog
up. Your vision viA be hamper.d,
which couu kad to a senout
accdenL Do not use the.6 positinn
@
V Mode selector dial
Turn the mode selector dial to select
airflow rnode (page 5-43).
5-47
Driving Your Mazds
lA
\ A/C i/
Y
V Arc switch*
V Ventilation
Push $e switch io lurn the air conditioner
on. An indicator light on tbe switch will
illuminate when the fan control dial is on.
l
Ser the mode selector
P'
V Heating
dial to the
.l
2. Set ihe temperature control dial to the
hotposition.
3. Set lbe temperatLrre control dial to the
desired position.
3. Set the fan control dial ro ihe desired
NOTE
5-48
Sel the mode selector dial to the
2. Sel rhe air intake selector switch ro ihe
Push tbe switch once again to tum the air
The air condinoner rnay not function
when the outside temperature
approaches 0 'C (32 "F).
l
Posnion.
4. Set rhe fan conlrol dial to the desired
speed.
Driiing Your Mazda
??
NOTtr
ln the
rs
iposrlion.
the outside air
automatically selected.
.@-*M@)
If
the windshield fogs up easily. ser
the mode selector dial tothe
iri
Ifcooler air is desired
?
l(,
at face level.
set the mode seleclor dial at
position and adjusi ihe
lhe
r'
temperature conlrol dial to
V Cooling (with air conditioner)+
maintain maximum comforr.
l.
The air to the floor is wa.rmer than
air to the face (except wben dle
temperalure control dial is set at
the extr€me hot orcold position).
Set the mode seleclor dial to the
,
Posrlion.
5. Adjust the fan control dial and
temperature control dial to mainrain
maximum comfori.
Ac.q.urroN
Wben using the air conditioner while
driving up long hills or in heavy
lraffic, closely monitor the
tempefalure gauge,
The air conditioner may cause engine
overheating. If the gauge indicares
overheating, tum lhe air condilioner
ofi (Refer io Overbeating on page
6 2.)
2. Set the i,emperarure conrol dial to rhe
desired position.
3. Set the fan control dial to the desired
.1.
Turn on the air conditioner.
5.49
Driving Your Mazda
Awl'nnmc
NOTE
.
Wlen maximum cooling is desired,
set $e tempenture conrrol dial io
Fosev Windshieu:
Using the @ potition |'ith the
temperutun cond set to the cold
position wilt couse the odsiAe ol the
glass to fog up. Your yhion wiv be
hanpercd, r'hich could lead toa
the extreme cold posiiion and set
the air intake selector swiich to the
position, then set the fan
conlrol dial to the position 4.
6
.
If warmer air
is desired at
serious accAent. Set the tenryraturc
contrcl to the hot or varm position
floor
level, set the mode selector dial at
position and adjust the
the
t€mperature control dial til
maintain maximum comfort.
.'
.
The air to $e floor is warmerthan
vhen usittg the
V Windshield dehosting and
defogging
L
Set tbe mode selector dial to the
@
a;
to the face (excepl when the
temp€ranre control dial is set at
tbe exrreme hor or cold posirion).
2. Set rhe temperature control dial to the
desired position.
3. Set the fan contol dial to the desired
speed.
5-50
@ positiott.
Driving Your Mazda
3. Set the temperature control dial to rhe
desir€d position.
For maximum d€frosting. ser tbe
temperature control dial to ihe
extreme hot position and the fan
control dial to position 4-
If warm air is desired
ar the
4. Sel ihe fan control dial ro the desired
5. Tum on the air conditioner.
floot
s€t the mode selector dial ro the
rp
rcsition.
In the
@or lPposition, rhe
outside air is automalically
selected. The air intake selector
switch camor b€ changed to the
V Dehumidifying
(with air couditioner)*
Operate the air conditioner in cool or
cold weather to help defog lbe
windshietd and side windows.
L
Sei the mode selector dial ro ihe
desired position.
2. Set the air intake selecror switch ro r}le
"sonenoaers. 5-51
Driving Your Mazda
Radio Reception
100
I
AM Characteristics
I
V
Station mixing
An FM broadcasirange is usually about
4G-50 km (25-30miles) from the
source. Because ofextra coding needed
AM signalsbend around
such tbings as
buildings or mountains and bounce off
the ionosphere. Therefore. lhey can reach
longer distances than FM signals.
Because oflhjs. lwo stations may
somedmes be picked up on the same
frequency at the same time.
FM Characteristics
to break ihe sound into two channels,
siereo FM has even less range t}an
monaural (non stereo) FM.
200
rm i60-120niles
Signals from an FM ransmitter ale
similar to beams oflightbecause they do
not bend around corners. but they do
reflect. Unlike AM signals, FM signals
cannot iravel b€yond the horizon.
Therefore. FM stations cannot be
received al the great distances possible
with AM reception.
Al'nospheric conditions can also affect
FM receplion. High humidity will cause
poor receplion. However, cloudy days
may provide beller r€ception than clear
days.
5-52
Driving Your Mazda
V Multipath
noise
Since FM signals can be reflected by
obstructions, ii is possible to receive both
the direci signal and rhe reflecred signal
at the sane time. This causes a slight
delay in reception and may be heard as a
broken sound or a distortion. This
problem may also be encountered when
jn close proximity to tbe transmittrer.
V trlutter^kip noise
V Weak signal noise
Sjgnals from an FM transmitlermove in
straighl lines and become weal( in valleys
between tall buildings, mountains. and
other obstacles. Wlen a vehicle passes
lhrough such an area. lhe recepiion
conditions may change suddenly.
resulting in annoying noise.
In suburban areas, broadcast signals
become weak because of distance from
the lransmitter. Reception in such fringe
areas is chaJacterized by sound breatup.
5-5-t
Driiing Your Mazda
Safety Certification
This CD player is made and lested to
meel exacting safety standards.
It meets FCC requirements and complies
wiih safety perfonnance standards of the
U.S- Deparlment ofHea h and Human
Services.
V Stmng signal
V Station drift nois€
nois€
This occurs very close to
a
transmilter
tower The broadcast signals are
extremely slrong, so the result is noise
and sound breakup at the radio receivet
5-54
When a vehicle reaches the area of two
slrong stations broadcasting at similar
frequencies. the original siadon may be
temporaJily lost and ihe second station
picked up. At this tine tbe.e will b€ some
noise from this disturbance.
Driving Your Mazda
AclurroN
This CD player should not be
adjusr€d or repaired by anyone
except qualified service personnel.
If serv icing required, contacr an
Authorized Mazda dealer.
Use of controls or adjustmenls or
performance of procedures other
than those specified herein may
result in hazardous radiation
exposur€- Never operal€ the CD
player with the top case of the unit
Changes or modifications not
expressly approved by Maz da rnay
void the user's authority to operate
this equipment.
NOTE
NOTT]
For CD player section:
This device complies with part 15 of
the FCC Rules. Operarion is subject
to the following two condilions: ( I )
This device may nor cause harmfut
inierference, and (2) this device must
accept any interference received,
including interference that may cause
undesired op€ration.
This equipmenthas been rested and
found to comply with rhe limits for a
Class B digital device. pursuant to
part 1 5 of rhe FCC Rules. These
limits are designed to proyide
reasonable protection againsr harmful
incrference in a rcsidenlial
installation. This equipmenr
genelates, uses, and can ndiate radio
frequency energy and, if not insialled
and used in accordance with the
mstruchons, may cause harmful
interfbrence to radio communicaaions.
However, there is no guaraniee that
inrertarence will not occur in a
particular installation.
Driving Your Mazda
AM/FM Radio+
Illustration is ofa Eprcsenrative audio unit.
SeeIL
tuning/Ttuk down* r/
flifl&9ffi8lHffffiE &ffi
*r
Use tbh
5-56
buton if
.s....oaet'.
a cassete tape player,
trB,K"
MD player, cD player or cD changer is connecred ro this unit.
Driving Your Mazda
AM/FM Radio with ComDact Disc Plaver*
Illustration is of a representative audio unit.
urlstst'8,ffiHHs.Bgg.B"
/
*r
Use
ftis bunon if
3 cassette tape
Dis
trpbuuon.
Repeat butron
Progranlr/R$dom button Fast lorwdd buuon
player, MD plaler or CD changer is connected to this unit.
'Some
nodek. 5-5/
Driving Your Mazda
f$l_l
I PaPowEi \
A
Y
I
Power ON/OFF
Tum the ignilion swirh !o the ACC or ON
Press the power/volum€ knob to lum tbe
audio slstem on. Press the power/volume
knob again 1<) tum the audio system off.
NOTE
To prevent the baitery from being
discharged. do not leave the audio
syscm on for a long period when the
engine is not running.
5.58
r
V
Volume adjustment
Turn the power/volume knob to adjusi
V Audio
9
i-r
I
9
9
l
sound adjustment
1. Press the audio control knob to select
bars, mid range, treble, fade ot
balance control. The selected funclion
will be indicated.
Driving You. Mazda
NOTE
Bass
About 5 seconds after selecting any
mode, ihe volume funciion will be
automatically selected. To reset bass,
mid-range, a€ble, fade, and balance,
press the audio control knob for 2
seconds. The unit will beep and "CL"
To adjusl the bass, selectBASS by
prcssing the audio conlrol knob. "BASS"
will
will
control
be dnplayed.
Tum lhe audio control knob to the right
to increase bass, to the l€ft 10 decrease it,
The level will be displayed.
R€lease ihe audio conirol knob wben the
desired level bas been reached.
be displayed.
2. Tum the audio control knob to adjust
the selecled tunction; bass, mid raflge,
treble, fade or batance.
Mid-rang€ conhol
To adjust the mid-range, selecl MID by
pressing the audio control knob. "MID"
will be displayed.
Turn the audio control knob to the right
to increas€ mid-range, to the left to
decrease it. The level will be displayed.
Release the audio control knob when the
desired level has been reached.
s-59
Ddving Your Mazda
Tr€ble conlrol
Balance control
To adjust the treble. select TREB by
pressing the audio controi knob. "TREB '
will be displayed.
To adjusr the sound dislribuiion belween
Tum the audio contol knob io ihe right
to increase rreble, to the left lo decrease
it. The level will be displayed.
Release the audio control knob when the
desired level has been reached.
Fader control
To adjust the sound distribution between
fiont and rear speakers. select FADE by
pressing ihe audio control knob. "FADE'
will be dispiayed.
Turn the audio control knob to the right
to shift the sound to the rear, to the left ro
shift $e sound to the front. The level will
be displayed.
Rel€ase the audio control knob when lhe
desired level has been reached.
5-60
left and right speakers, select BALby
pressing the audio control knob.
will be displayed.
tc."*-l
'BAL"
-+-
Turn tbe audio conrol knob to the rigbt
to shift the sound to the righl, to the left
to shift the sound !o lhe left. The level
will
be displayed.
Release the audio control knob when lhe
desired level has been reached-
I
Clock
V Setting the time
The clock cln be set at any time when lhe
ignition switch is in lhe ACC or ON
I
. To
adjusr the lime, press the clock
butlon for about 2 seconds until abeep
2. Tbe clock s cunenitime will flash
unlil the time is set.
Driving Your Mazda
l_--'---------a-::---
f---]-
i/"
**
lt-
/*orto."frl
3. To advance the hours, press ihe hour
sel button ( H ) to advance the
mjnules, press the minute setbutton
( M ) while the time is flashing.
4. Press the clock button again to start
|
'{.J H I I
ln
Itl
\,,
'{H(a
fc.o"*-i
V Changing the display mode
NOTE
If the time is not adjusted while the
clock's current time is flashing (if
neilber the H nor M is pressed). and
th€ clockbutton ispressed a second
time, the minut€s will be set to 00.
If
lf
the power supply to the unit is
intrerrupred (if the fuse blows or fte
vehicle's battery is disconn€cted), the
clock will need
1()
be reset.
-+-
\,2
f-J.-=frn- T---.El!-frI
fte clock
NOTE
I
current time selting is
within the lauer pan of dle hour (from
30 to 59 min). tbe hour se$ing will
automatically advance one hour.
s
The disptay on the unit can be changed
by pressing the clock bution. This
altemates the dhplay between tirne and
audio. When the clock mode has been
s€lechd, the time will be displayed.
NOTE
Ifaudio operarion is selected while
tle time mode is on, the selected
audio mode will be displayed for ten
seconds, then the display
will revert
5-61
Driving Your Mazda
V Tbning
Choos€ AM by pressing the AM button
and FM by pressing the FM1/2 button.
The selected mode will be indicated.
IfFM stereo is being received, "ST"
be displayed.
will
The radio has the following tuning
rnethods: Manual, Seek. Scan, Preset
chann€I, and Auto memory luning.
The easiest way to tune stalions is to set
them on preset channels.
NOTtr
NOTD
If
I
Operating the Radio
To operate the radio. tum the ignition
switch to the ACC orON position.
V Radio ON
Press the AM or FM1/2 button io tum th€
5-62
If
the FM broadcast signal becomes
weak, reception automatically
changes from STEREO to MONO for
reduced noise, and the "ST" indicator
will go out.
the power supply is interrupted
(fuse blows or the battery is
disconnected), the presel channels
Driving Your Mazda
-rulu_l
/ru{Auo0coMl
!t\
i'** lF
tl
/
#,x"*4l::iH.,
MAUTGM
V
Manual tuning
Seek
tnning
Turning the manuat tuning knob will
change to a bigher or lower frequency
Pressing the seek tuning button will
cause the tuner to se€k ahigher or lower
ff€quency automalically.
NOTE
I
Scan tuning
Press the scan button to automatically
sample strong slations. Scanning stops at
each station for about 5 rconds. To hold
a staiion, mereiy press the scan butlon
again during this interr'al.
If you continue to press and hold the
bunon, the frequency will continue
changing without stopping.
5-63
Driving Your Mazdt
To tune one jn fie memory, selectAM.
FMl, or FM2 and then press its chann€l
prese! button. The station frequency and
the channel number will be displayed.
/ HscAN
II
NOTE
/,*t"u
I
ft
If
the power supply is interrupted
(fuse blows or the battery is
disconnected). the preset channels
Preset cbannel tuning
Auto memor! tuning
The six preset channels can be used to
store 6 AM and 12 FM stations.
This is especially useful when driving in
an area wbere the local stalions are not
known- Addiiionat AI4/FM slations can
be stored wirhout dislurbing the
previously set channels.
To set a channel first selecr AM, FMl. or
FM2. Tune to lhe station you want and
depress a channel preset button for about
2 seconds uniil abeep is heard. The
preset channel number and siation
frequenc! will be displayed.
The station is now held in lbe memory.
Repeat this operation for the other
slations and bands you wan110 slore.
5.64
Press and hold the auto memory buiton
for about 2 seconds until a beep is heard;
the system will automatically scan and
temporarily store the six strongest
stations of each selected band in that
Driving Your M^zda
After scanning is completed. ihe
can be tuned after
scanning operatjons,
displayed.
"A" wiii be
Operating the Cassette Tsp€
Player*
I
6)
Y
NOTE
If no stations
I
vor-l
f-sPowEF
\
strongest station will be luned and its
frequency displayed.
Press and release the auto memory bulton
io recall stations from the auto siored
stations. One stored station will be
selected each time; its frequency and
channel number will be displayed.
To operate the cassette tape player, tum
the ignition switch to the ACC or ON
V
Inserl the cassette tape into the slot, open
edge to lhe right and casseue tape will
begin play and "TAPE will be
displayed. At $e end of iie cassere rape.
V Radio OFF
Press the power/volume knob to tum
the radio.
Cassette tape insert
off
the unit automatically reverses cassette
tape plat
When
is lir. the cassette tap€t top side
is playing. Wlen V is lii, the bottom side
is on,
NOTE
Press lhe power/volum€ knob again to
listen to the frequency last tuned to.
NOTE
W}jen a metal rape is inserted, the
player will automatically compensate
for it and "MTL" will be displayed.
"sonenoaets 5-65
Driving Your Mazda
til;l
t-;-l
-fi
?"'
V Playing
V Dolby
Press the casselc tape play button to
staltplaying when a cassette tape is in
the unit.Ifthere isn't a cassette tape in
$e unit wben lhe cassette tape play
button is pressed. "NO TAPE'will flash
on and off in sequence.
When using a tape with Dolby NR+,push
the D0 button. The DO symbol will be
displayed. To play a tape without Dolby
NR, push the bulton once again.
5-66
*
noise reduction
Noise reduction system manLrfactured
under license fiom Dolby Laboratories
V Fast forward/Rewind
Press lhe fast forward button 1<)
fast-forward.
Press rhe rewind button to rewind.
To stop this operation and play ihe
cassetie tape, press the button again.
Licensing Corporation.
NOTE
Dolby and the double D syrnbol DO
are trademarks of Dolby Laboratories
Licens jng Corporation.
Vften the cassette tap€ ends during
fa$ forward or rewind, it
autonatically stops and starts playing.
Driving Your Mazda
If APC det€cts
15 s€conds of blank space
it will automatically advance ihe tape to
I:lft
-f
I
F,"B",Fl
SEEK
\-
tE_,t
V Reversing
V APC (Automatic Program Control)
Press the program bulton to change
cassette rape-playing direction.
APC is used to find the beginning of
either the n€xt prograrn or the one being
NOIT
APC may not operate properly
.
.
.
.
if
tape was recorded at atow level.
tape has long, silena intervals.
tape is alive recording.
tape has very short intervals of
less than 3 seconds.
A
A
A
A
played.
NOTE
When lhe cassette tape ends, the unit
auiomatically reverses play.
Press the APC button ( A ) to the
beginning of ihe next selection.
Press the APC button ( v ) to the
b€ginning ofthe one being played.
To stop ahis op€ration and play th€
cassetie lape, press the button again.
5-67
Driving Your Mazda
NOTtr
RPI may not operate properly
.
.
.
.
FI
-f
repeatedly.
a
level.
A tape has 1ong, silent intervals.
A tape is a live recording.
A tape has very short intervals of
V Stopping
listen
Press lhe repeat bulton during play. The
cunent selection playing will be repealed
("RPT" will be displayed).
Press the rep€at butlon once agajn to
5-68
t"'"""'-l
if
tape was recorded at a low
less than 3 seconds.
V Repeat play
This operation makes itpossible to
to a selecfion
A
Press the power/volume knob to srop
cassette tape play.
Driving Your Mazda
I
Operating Tips for Cassetle Tape
player
V
V Ejecting the
Cleaning the cassette tape player
ry
The tape head, capsbns, and pinch rollers
will gather oxide residue from cassetre
tapes. This can caus€ weak or wavering
cassette tape
sounds and damage to the cassetG tapes
and player Use a good quality
h€ad cleaning rape or a liquid cleaner
cassette tape to remove it,
Should the unit not opemte normally,
Prcss the cassette tape eject button 10
elect the cassette tap€.
NOTE
The cassene rape can be ejected when
the ignition switch is in the OFF
.
Do not spill any liquid on the audio
consult an Aulhorized Mazda Dealer
Never aatempt 10 repai it or ins€lr a
screwdriver or anything else.
V Handling the
cassette tape player
The following precautions should be
5.69
Driving Your Mazda
Do not leave a cassette tape in the tap€
player slot when not in use. Remove it
completely to perml the slot door 1()
close and to protect the mechanism
from dust.
Store cassette tape away from extreme
heat, magnetic fields, and direct
sunlight. Protect the exposed cassette
tape from dirt and damage. Store
cassettre tapes intheioriginal cases or
.
other protective cases.
Do not insert any objects, other than
cassette tap€, into the slot,
If
the casselG lape is loose, it may
produce poor sound or Pertormance
during playback. Use a p€ncil or
sometbing similar to remove any
slack.
Only cassette tapes that play no longer
than 90 minutes should be used.
Cassette tape exceeding 90 ninutes are
thin and rnay easily br€ak.
5-70
Insert only cassette tapes into the do1.
If objects other than cassetie tapes are
inserted. iley may damage the player.
Driving YouI Mazda
I
Operating the Mini Disc (MD)
Plsyer*
;l
t*
-+-
To operate the MD player lum the
jgnition switch to ihe ACC orON
V Inserting
the MD
Inser! the MD. label-side up with the
arrow poinGd ro the slor. Tbe
auto loading mechanism will set ihe MD
andbegin play. There will be a shon
lapse before play begins while ihe player
reads the digital signals on the MD.
FI
-f
V Plaling
V Repeat play
Press the MD play button 10 starl playing
when aMD is in the unit.
This feature makes itpossible ro listen to
a
selection repeatedly.
Press the repeatbulton during play. The
cunenrselection will be repealed (.RPT"
witl
be
dispiayed).
Press the repeat button once again ro
cancel repeat play.
so.".r^r.r'. 5-71
Driving Your Mazda
NOTE
[,"
r---^
oc-l
/"**
tl
*;=
/
VRandom
play
to
songs.
Press the random button during play. The
next selection wiil be randomly selected
("RDM" wiU be displayed).
Press the rundom button once again to
cancel random play.
This feaMe aliows the MD player
randomly select the order of the
5-72
3
sAuTo'M
I
V Music scan
This feature helps to find a program by
playing about the first 10 seconds of each
track.
Press the scan button during play ao start
scan play operation (the lrack number
will flash).
Press the scan button once again to
cancel scan play.
If lhe unil is left in scan, normal play
will resume where scan was sel€cted.
Driving Your Mazda
voi_f
fI Rseov,EF \
A
V
tf
V Tfack search
V Faslforward/Reverse
V Stopping
Press the track up button once ro skip
forward 1() the beginning of the next
Press and hold the fasi-forward bunon to
advance through a track al high speed.
Press and hold $e reverse button to
reverse lhrough a aack at high speed.
Press the
Press the tack down button once {o skip
back to the beginning of rhe cuffeni
power/volume knob to siop MD
plav.
5-73
Drivins Your Mazda
Long disc or song titles
When disc or song ritlesexceed l0letters
or numerals, press ihe display button to
display the remaining part of$e title.
l;1
17
#
#
V
Changing the MD display
To change the MD display during MD
play, press and hold the djsplay buton
for about half a second to advance
through each of the following dispiays:
-
Song title
'Disc title 'No display I
NOTE
Ifftere
is no song or disc title
recorded on the MD, 'NO TITLE"
will be displayed.
V Ejecting the MD
Press the MD ejecr button to e.iect lhe
MD.
Driving Your Mazda
I
I
Error Indications
If you
see an e|ror indication on the
display, find the cause in the charl. If you
cannot clear the error indication, take the
vehicle to an Authorized MazdaDealer.
Operating the Compact Disc (CD)
Player*{n-Dash CD Changer*
To operale the CD player/in-dash CD
changer. tum lhe ignilion switch to rhe
ACC or ON position.
V Inserting
lnsert the MD prcperly. If the code does not
disappee, consuh an Authorized Mazda Deale.
CHECK MD
MD is defadve
Check the MD for scmtches ando. soiling
the CD (CD player)
Ins€n the CD into the slot,label-side up.
The autoloading mechanism will ser the
CD rnd begin play. There will be a shon
lapse before play begins white the player
reads the digital signals on the CD.
The disc in indicator wilt illuminate and
ihe track number will be displayed.
Some
models. 5-
/5
Ddvine Your M^zda
V Inserting th€ CD
Multipl€ inse ion
(In-dash CD chane€r)
E4
ll LoAD |
L-+-r
The CD must be label side up when
inserting. The autoloadjng mechanism
will set the CD and begin play. There wiu
be a shon lapse before play begins while
the ptayer reads the digital signals on the
\
1
. Press and hold the load button for
about 2 seconds until a beep is heard.
2. when "ln" is displayed. insert the CD.
3. w1len "In" is displayed again, insert
CD.
the next CD.
The disc number and th€ track number
will be displayed.
NOTE
Normal insertion
NOTE
1
A CD cannot be insert€d white rhe
display reads "WAIT." A beeping
sound can be heard during this
waiting time. Simullaneously pressing
the power/volume knob and the toad
button for about 2 seconds will tum
this beeping sound ON or OFF.
5-76
. Press the load button.
2. Wlen "ln" is displayed, insert lhe CD.
The firsr-inserted CD
automatically when:
.
.
willbe played
No CD is inserted within 15
s€conds afcr "In" is display€d.
The CD trays aie full.
Driving Your Mazda
Inserting CDs into desired tray
L
Pr€ss and hold the load button for
aboul2 seconds until a be€p is heaid.
F]
-f
T----t
L---J
-+-
2. Press tbe channel preset button for the
desired tray number within 5 seconds
after the beep is h€ard.
3. Wlen "ln" is displayed, inserl the CD.
NOTE
The CD can not be inserled to the
desired tray nurnber if the number is
already occupied.
V Playing
V
Press the CD play button to stanplaying
when a CD is in the unit.
This feaiure makes itpossible to listen to
Repeat play
a selection r€peairedly.
Press the repeat bulton during play. The
cunenr selection will be repeated
will be displayed).
c'RPr"
Press the repeat button once again to
cancel repeat play.
Driving Your Mazda
/'"* al
f,"r*l
-f
|]']-l
II
/ MAUTo
I
V Random play
V Music scan
V
This fealure allows the CD player to
randomly select lhe ord€r of the songs.
This feature helps to find a prograrn by
playing about the first 10 seconds of each
Press the disc up button
Press the random button during play. The
next selection will be randomly selecled
("RDM" wiu be displayed).
Press the random button once again to
Press the scan button during play to stan
scan play operation (the track number
will flash).
Press the scan button once again to
NOTE
If the unit is lef. in scan, normal play
will resume where
5-78
scan was selected.
Disc s€arch (In.dash CD changer)
(
) to skip
foRard to ahe beginning of^ the next CD.
Press the disc down buaton ( V ) to skip
back ao the beginning of the previous
CD.
Driving Your Mazda
l--/or_l
PBTWEF \
A
Y
I
ffi"--"'
lE-S"***
V
Thack search
Press the track up button once to skip
forward to the beginning of the nexi
Press
tle track down bulon
once ro skip
back to the beginning of the cunenl
V Fast-forward,/Reverse
V Stopping
hold ihe fast forward button to
advance through a lrack at high speed.
play.
Press and
Press and hold tbe reverse button to
reverse through a lrack at high speed.
Press the
power/volume knob to stop CD
Driving Your Mazda
CD
changer)
Normsl ejection
V Ejecting the
Ej€cting CDs from desir€d tray
(ln-desh CD
|i:l ^ ti
L--+:l
I.
Press th€ CD eject buuon.
The disc number and "OUT"
displayed.
nunber
l.
will
be
Press and hold the CD eject bution for
about 2 seconds until a beep is heard.
2. Press the channel prese! bulton for the
desired CD number within 5 seconds
afrer ahe beep is beard.
2. Pull out rhe CD.
3. Pull out the CD.
V Ejecting
the CD (CD player)
Press th€ CD eject butlon to eject the CD.
NOTE
When lhe CD is ejected during play,
the next CD will be played
automatically.
5.80
Ddving Your Mazda
I
Multiple ejection
I
.
Press and hold the CD eject bunon for
about 2 seconds until abeep is heard.
2- Wait 5 seconds or press the CD eject
button again within 5 seconds after the
beep is heard.
3. Pull out the CD, ihen the next CD will
Operating the CD Changer*
(Except In-Dash) wilh Contmls on
the Msin Audio Unit
The CD changer can be connected to the
main audio unit and operated by the
controls on lhe main unit. Regarding
operation of the cD changer irself, please
refer to the instructions altached to ihe
changef.
be ejected.
NOTE
V Disc search
Operating fte CD changer is
generally the same as that of the CD
player except for the insert and eject
tuncnons (pases 5-7s 5 79).
Press the disc up button
NOTE
CDs will be ejected staning with
the one with tbe lowest number
All CDs in the tray will
be ejeci,ed
( A ) to skip
forward to lhe beginning of the next CD.
Press the disc down butaon ( V ) to skip
back lo the beginning of the previous
CD.
CDs can be ejected when ihe
ignition switch is off. Press and
hold the CD eject button for aboui
2 seconds and all CDs will ejecl.
+sone
frodeh. 5-81
Driving Your Mazda
I
Ermr Indications
I
Operating Tlps for CD
Player^n-Dash CD Changer
V
Cond€nsation phenomenon
If you
see an enor indication on the
display, find tle cause in the chart.Ifyou
cannot clear the enor indication. take rhe
vehicle to an Auihorized Mazda Dealer.
CD is insefted upside down
Insen the CD propedy. If the code does nol
disappear, consuh an Authorized Mazda Dealer
CD is defecnve
Check the CD for scEtches and/orsoiling
CHECK CD
Immediaiely after tuming on the heater
when the vehicle is cold, the CD or
opdcal components (prism and lens) in
the CD player/changer may become
clouded with condensation. At this time.
tl]e CD will ejecr immediately when
placed in the unit. A clouded CD can be
conected simply by wiping it wi$ a soft
cloth. Clouded optical componenls will
clear naturally in about an hour. Waii for
normal operation to rctum before
attempting to use the unit.
V Handling the CD player/tn-dash CD
cnanger
The following precautions should be
5-U
Driving Your Mazda
.
Do not spill any liquid on the audio
.
Do not insert any objects, other than
CDs, into the sloi.
.
The CD revolves at high speed wiihin
the unit. Def€ctive (cracked or badly
bent) CDs should never be used.
5-83
D
.
ving Your Mrzda
Do not use non-conventional discs
such as heart-shaped, octagonal discs,
etc. The CD player/changer could be
darnased.
5-84
.
A new CD may have rough edges on
its inner and outer perirneteis. If a disc
witl rough edges is used. proper
setting will not b€ possible and the CD
player/changer will not play the CD.
Remove the rough edges in advance
by using aball point pen orpencil as
shown above. To remove the rough
edges, rub the side of the pen or pencil
against tle inner and outer peimeter
of the cD.
.
wlen driving over uneven surfaces.
the sound willjump.
Driving Your Mazda
*h
,\S --
NCOMPACT
reJ[5G
AUDIO
OIGITAL
.
The CD player/changer has been
designed 1() play CDs bearing the
identification logo as shown. No other
discs can be played.
6&
,,
B€ sure neYer to toucb ihe signal
surface when handling the CDs. Pick
up a CD by grasping the outer edge or
the edge of lhe hole and the outer
Dust, finger smudges, and din can
decrease ine amount of light reflecr,ed
from the signal surface, thus affecting
sound quality. If ibe CD should
become soiled. gendy wip€ il with a
soft cloth from lhe cenrer of the CD to
dle edse.
Do not use r€cord sprays. antistatic
agents, or household spray cleaners.
Volatile chemicals such as benzine and
ihinner can also damage th€ surface of
the CD and must not be used.
Anything that can damage, warp, or
fog plaslic should never be used to
clean CDs.
edge.
Do not siick paper or tape on the CD.
Avoid scratching the reverse side (the
side without a label).
CDs. like traditional audio records, are
made of plastic. To avoid warping,
keep the CDs in their cases and do not
store lhem where they will be exposed
to direct sunlight.
5-85
Driving Your Mszda
Antenna
The CD player/changer ejects the CD
if the CD is inserted upsid€ doirn.
Also dirly an{Vor defective CDs may
8 cm (3 in) CDs and CD accessories
(e.g. 8 cm disc adapter) cannot be used
in the CD player/changer
Do not insertcl€aning discs in the CD
player/changer.
Do not inserl any disc with a peel-off
The manual antenna must be raised and
lowered by hand.
Acaurron
To prevent from damagiqg the
antenna. retract it before entering a
car wash facjlity or passing beneath a
low ov€rhead cleamnce.
5-86
In
Case of an Emergency
B?cause an eheryek !can occw anltine,w.
stMgtt urse lou to becofte JMiliar vith this
se.tid af torr Mnual.]t provides helpful
inlbrution on \rhat ta do if the engine
arerheats, if lou have
a
||at tite, and
t
the
You wilt alsolnd out,hat to do iJrou
contont a probleft in the ekctti.ot slsten:
and, therc's sone guidance anthe correcl
ral
ta
tot lour Mada.
Hazmd
wamingFlsher
6-
Staning
Fuses
Towing
Flat Ilrc
6-
Olerbeatin-e 6
Emergency
2
2
6- 4
6
6-12
6-14
6-1
In
Case of an Em€rg€ncy
Hazard Warning Flasher
Overheating
NOTE
The tum signals don't work when
the hazard waming lights are on.
Check local regulations about tbe
use of hazard waming lights while
ihe vehicle is being towed. They
may forbid it.
If the temperature
gauge indicates
overheating, you experience power loss,
or you hear a loud knocking or pinging
noise, the engine is probably too hot.
If this happens:
l
Drive safely ro the side of the road and
park off the right-of-way.
a vehicle with an automatic
rransaxle in park G), a rnanual
transaxle in neutral.
Apply the parking brake.
2. Put
The hazard warning lights wam other
drivers ihat your vebicle is a traffic
hazard and that they musl take extreme
caution when near il.
The hazard warnins ligbts should always
be used when you stop on or near a
Depress the hazard warning swirch and
all four tum signals willflash at once.
6.2
3. Tum offthe air conditioner
ln
A
5. Check th€ coolant level.
low.look for leaks in the
wARNlNc
rou.Open the
hood ONLY after steam is no longer
ercapi gf.om the engine.
Dealer
lrom Owrheated Engine:
Ste.nfron
an overheated eneine
dangerous. The esuping steam
Awl^nNntc
Ifit\
radiator hoses and connections, heater
hoses and connections, radiator, and
warcr pump.
If you find a leak or oiher damage, or
ifcoolant is still leaking, stop the
engine and call an Authorized Mazda
Stean
6
cou.ld senouslt bum
Ca5€ of an Emergenry
C oo lin e:SrtlelLtcaps:
When the engine and radiator are
hot, scalding coolant an,l steam nu!
shoot out uttder pntswe and cause
lerious
i jury.
Don't.emove either
coolinS srstem cap when the engi e
and ndiator are hot.
If you find
4. Check whethercoolant or steam is
escaping trom under lhe hood or from
the engine compartment.
If
steam is coming from rhe engine
comp.nmeni. donit go near the front
of the vehicle. Stop the engine. Then
tum rhe ignition switch to the ON
position without sGning lbe engine.
will st2n to
no problems, the engine is
cool. and no leaks are obvious,
carefully add coolant as requir€d (page
8,19).
Ac.lurroll
If
the engine contirues to overheat or
frequently overheats, have the cooling
sysiem inspected. The engine could
be seriously damaged unless repairs
The radiator cooling fans
lf neither coolant nor steam is
escaping, open the bood and idle the
engine until it cools.If this doesn't
lower the temperature, stop the engine
and let i! cool.
6-3
In
Ca5€
ofan Enereency
Emergency Starting
I
Jump-Starting
Jump-starting is dangerous if done
incoffectly. So follow the procedure
carefully. If you feel unsure aboul
jump'starting, we strongly recommend
ftat you have a competent seNice
iechnician do the work.
Ac.rurroN
Awarumvc
Batte n -Re late d E tolosio :
Flames and sparks near open baftery
cels are dangemus. Hrdrogen gas,
produced daing no.nal battery
owration, couu ignite a dcausethe
battery to explode. An exploding
bafterr can cau:e seriou: b rns and
nes. Keep a funes, it'ctudins
ctsatettes, and sparks awa| fron
inj
Use only a 12 V booster system. You
can damage a 12 V start€r, ignition
sysiem, and other electrical parts
wi$ a 24 V power
supply (two 12 V batteries in series or
a 24 V motor g€neralor set).
beyond repair
Awtnuntc
.l unp.Studiaz,
J unpntading a frozen battery
one t'ith a lo* fluid lel'el
k
.Iangenus.It hu! rupture or
or
explode, cawing sedous i jury.
Don'tjunp-staft afrozen batterr o.
one with a Iofl fluid lewl.
6-4
In
Case of an Emergency
Awamrnrc
Comect cables in nDnerical order
dd di$onnect in EveN orde.
l.
Make sure the boosier battery is 12
and ftat its negative rreminal is
V
grounded.
2.
If
booster battery is in another
vehicle, don'tallow the vehicles to
touch. Turn off the engine of tl)e
vehicle with the booster battery and all
unnecessary electrical loads in both
re
3. Connect llle jumper cables in the exact
sequence as in the illustration,
(1) Connectone end ofa cable to the
positive terminal on the discharged
battery
('.
(2) Auach dle o$er end to $e pos_irive
terminal on fte boosler batEry (E).
(3) Connect one end of the oth€r cable
to the negative lerminal of the
booster battery (9.
(4) Connect the orher end to a solid,
starionary, exposed melallic point
(for example, dre engine hanger)
away from the discharged battery
4. Stan the engine of the booster vehicle
and run it a f€w minul€s- Then start
lbe engine of the other vehicle.
Connecting to Negative Terminal:
Comecti g the end of the second
cable to the nesatn'e Q teminat of
the distharged batteA is dangemus.
A spark couu.aase the gas sround
the battery to explode and injure
someone. Connect the cable to a
poi t awa! from the battery.
Awlnr,uNe
Co,tecting.IvnpelteabkJba
Moing Pad:
Connecting ajumper cablz ear or
to a moving part is dangemus. The
cable couu get caught when the
engine starts and cause seious
i4urr, Never connect a jumper coblc
to o. near on! parl that motes.
5. W}len finished, carefuliy disconnect
lhe cables in the reverse order
described in Step 3.
6-5
In
Cas€ of an
En€.sency
Fuses
I
Push-Starting
You can't start a vehicle with an
automatic transaxle by pushing it.
AclurroN
You shouldn't push-start a vehicle
that has a manual transaxle, It can
damage the emission control system,
Your vehicle's electrical system is
A wamrnrc
Towinqal?LieklalaalL
Towing a ,ehicle to start it is
dangercus. The vehi.le being towed
couuswsefotwa vrhen its ensine
starts, causinq the t$,o vehictes to
co ide. The occupantt couu be
i jured- Never to*' a I'ehble to staft
x.
6-6
I
Fuse Replacement
If
If any lighls,
accessories, or controls
don't work, inspect the appropdaie
circuit protector. If a fuse has blown. the
inside element will b€ melted.
tf
the sarne fuse blows asain, avoid using
that system and consull an Authorized
Mazda Dealer as soon as possible.
the electricai sysrem doesn 1 work, first
inspect fuses on the driver's sid€.
I
- Tum off the ignilion switch and other
2. Open the fuse panel.
3. Pull rhe fuse straightoutwith rhe fuse
puller provided on.he fuse panel.
ln Cas€ ofan Emergency
AcluuoN
Always replace a fuse with one of the
same rating. Otherwise you may
damage the electric system.
ffi ffi
.{. lnspect it and replace
ifit\
If
blown.
5. Push in anew fuse of the same rating,
and make sure it fits tightly. If it
doesn't, have an Authorized Mazda
Dealer insiall it.
If you have no
1. Tum off the ignition switch and all
spare fuses, borrow one
of
the same rating from a circuit not
essential to vehicle operation. such as the
RADIO c;cuit.
the headlights or other electrical
componenls don\ work and lhe iuses in
the cabin are OK. inspect rhe fuse block
under the hood.Ifafuse is blown, il must
be replaced. Follow th€se steps:
2. To remove the fuse btock cover,
unhook it a:rd lift up on tbe side with
dle tab.
6-7
ID Case of an Emergency
€
W
3.
Ifa
fuse is blown, replace it with a
new one of the srune rating.
When replacing the 100A fuse:
l.
Turn off the ignilion switch.
2. Renove the negative baatery terminal.
3. Remove nuts A and B.
zl.
Lift fte
fuse block and remove the C
bolts-
5. Replace the fuse with a new one of the
same
mting.
6. Install in the reverse order of removal.
6.8
In
I
Case of an Emergency
Fuse Panel DescriDtion
V
Fuse block (Engin€ compartment)
DESCRIPTION
FUSD
RA1.ING
PROTECIED COMPONDNT
HEATER
EE
E
tr88
E80
HBE
HEE
HEE
F'H
2
(ABS)
l
IC KEY
5
(CLOw)
For pmrection of vanons
ci(uirs*
lor pole.lio of veious cimiB
6
COOLINC
BTN
30A
Inlerior lights, Power dooi lock+
Addrtronrl rool,ng lan for r'r rondirion.r'
9
INJORFIP
(r'JC)
(sTsrc)
HORN
TAIL
(HEADC U)
(FOC)
Foi piote.rion of
vfjos
c;cuits
For protecion of vdious cncuns
'sune
nodek. 6-9
In
Case of an Emergency
DESCRIPIION
FUSE
RATING
PROTECTED COMPONENT
STOP
20
HEAD R
21
HEAD.L
22
23
24
6-10
MAIN
For pmErim ofall circuis
In
V
Fuse panel (Driver's side)
DESCRIPNON
IAISD RATING
(s/\rRM)
000
ooo
o8o
^n
'd u n
3nt
Case of an Emergency
2
(wcLN)
l
(RADIO)
5
(R.WIPER)
PROTECTED COMPONENT
For pmleclion of vdious .ircuirs
20A
For proleclion of vrious
ci(uiti
(A/C)
Fo! prolection of ! anous circu i ts
Inlenor
teis, Tnni lighc
(DOOR LOCX)
12
tl
(" wtND)
WIPER
windshield wipes and wdher
ENCINE
t5
METER
(P/WIND)
"s"...oa"rs. 6-11
In
Case of an Emergency
Towing
We recommend thal towing b€ done only
by an Authorized MazdaDealer ora
commercial tow truck service.
Proper lifting and towing are necessary to
prevent damage to the vehicle. Sta€ and
local laws nust be followed.
A towed vehicle usually should have its
front wheels off the ground. Ifexcessive
damage or other conditions prevent ihis,
Wlen towing with
the rear wheels on lhe
ground. release the parking brake.
6-r2
AclurroN
Ac.rurroN
Don't 1ow the vehicle backward with
dnving wheels on the ground. This
Donl tow with sling tlpe equipnent-
may cause internal danage to the
This could damage your vehicle. Use
wheel lift or flatbed equipment.
In
AclurroN
The towing hook should be used
only in an emergency (to get tbe
vehicle out ofaditch or a snow
bank, for example).
When using the towing book,
always pull ihe cable or chah in a
slraighl direclion *ith respeci to
the hook. Apply no sideways force.
AcaurroN
Don't
use the hook loops und€r ihe
ftont and rear for lowing. They are
designed ONLY for tying down the
vehicle when it's being transported.
Using th€m for towing will damage
Case of an Emergency
ln Cas€ ofan Emergency
Flat Tire
I
Tire, Jack, Jack Handle, and Tool Storage
In Cas€ ofan Emerg€ncy
V
To rcmove
thejack
Turn the wing bolt counterclockwise.
V
To secure the
V
To remove the spare
tire
Tum the tire hold-down bolt
counterclockwise wift dre lug wrench.
jack
Perform the remoyal proc€dure in
6-15
In
Case of an Emeryency
I
Changing a Flat Tire
Awamrnrc
NOTE
If the following occurs while dril,ing,
it could indicate
a
flat tire.
.
.
Sl€ering becomes difficutt.
The vehicle begins to vibrate
.
The vehicle pulls in one direction.
.Iackin" a Uehicle:
Chansins a tte is dansenus if not
do e pnperlr. The whicle can sW
of the jack and senoustr injwe
Be su.e
tofo
o|| the directionsfor
changine a tire, and nevet get under
a whicle that it st ppofied onry br a
To change a flat tire, follow procedure
If you have a flat tire, drive slowly to
tbrough 15 carefully.
a
level spot that is lvell off the road and out
of the way of iraffic to change the tire.
Stopping in lraffic or on the shoulder of a
busy road is dangerous.
6-16
1
In
I
Case of an Emergency
/..uJ
/n\
. Park on a level surface off the
right of,way and firmly set the
vl-
parking brake.
2. Pul avehicle with an automatic
transaxle in pa.k (P), a manual
transaxle in reverse (R), and turn off
D
Qla
3. Tum on the hazard warning flasher
4. Have everyone getoutofthe vehicle
and away from the vebicle and traffic.
7. Pry off the wheel cover* with the
beveled end of the lug wrench.
5. Remove lhejack,jack handle,lug
lvrench, and spare rire.
Wlen installing the wheel covet
NOTE
6. Block the wheel diagonally opposite
the flat tire. When blocking a front
wheel, place the block in fronr of rhe
tire. When blocking a rear wheel,
place the block behind the tire.
Ac.rurroN
align the norch wiih the tire valve.
Force the end of the wrench firmly
between wheel and cover, or removal
will
be
difficult.
*so...od.h. 6-17
In Case of aD Emergency
Awtnvme
I nc orrc ct.l ackin g P osition :
Attenptilg tojack the rehicle in
positions other than those
ded inthk Iu ual is
dansenus. The rehicle couu slip off
thejack and senoustr injure or even
kill someone. Use onlr the front and
rcarjacking positioN recomme ded
nconne
8. Loosen $e lug nuts by turning them
counterclockwise one tum each. but
don't remove any until ihe tire has
been raised off the
9. Place tbe jack under the jacking
position closest io tbe tire being
cbanged.
A
groud.
waRlrnsc
Inuapcr,latk
Using a jack that isn't desiened for
r Mazda codd be dengercus. The
rehick coua snp olf the jack a d
seiouslr inj rc someone. Use o
yo
lt
thejack ptovided dth
6-18
rou
Mozda.
ln Case of an Em€rgency
A
''-^,/A)
wLR.nrnyc
Pla.ing Objects Under
the .Iack:
iith
an object
J.ckins
u derthejack it dangerous. The
jack coutd sup a d soneone coud be
senousl! injured br the jack or the
fathns vehicte. Nert place objects
the vehicte
@
10. Insenthejack handle into thejack
and turn ir clockwise until the tire
just clears the ground, less than 25
rnm (l in). Betore removins the lug
nuts, make sure your Mazda is fimly
in position and thal it cannot dip or
11. Remove the lug nuts by turning rhem
counterclockwise; then remoYe the
14. Tum the jack handle
counterclockwise and lower the
vehicle. Use the lug wrench to
iighten lhe nuis in the order shown.
If you're unsure of how lighl
the nuN
should be, have them inspected at a
service station. The specified torque
is 9010 120 N.m (9.0 to 12.0 kgf.rn.
65 ro 87 ft.lbo.
12. Mount ihe spare tire.
13. Install the lug nurs with the beveled
edge inward; tighten them by hand.
6-19
In
Case of an Emergency
A wanlrnrc
AwtnNmc
Loose Lug Nuts:
InproperlJ or looselr tighte
ed
lug
nuts arc da gerous. The i'heel $uld
t!'obble or cone off. This coud nsult
in loss of whicle co,ttnl and cause a
serious accinent. AI$'aJ! sec rcIr
and coftectlj dghten the lug nuts.
Incornct Tire Air Prcssure:
Diving on tir.s with incorrect air
p.esrure ls dangercus.Tircs with
inco
ect pressure
.oua affe.t
handling and resnlt in an accinent.
Don't.live vith any tires that hate
incoftect air prcssure. When you
check the rcsuhrnrc's air pressure,
check the sparc tire, too.
AwaR^rrnrc
Metdc St(dl and Lug NulJ:
Becauw the wheel studs and
l
g nuts
lour Mazda hare netri. thrcads,
usntg a o -netric nut is
on
On a metric stu,l, it
the wheel and
t'ould danage the stud, which codd
cause the ,heel to slip olf and cause
an accident. Be swe to reinstall the
same n ts tou remored or replace
them with metric nuts of the same
dongetu
s.
vo A not secu.e
ln Cas€ ofsn Emergency
,6
I
(@).:)F
ri'e (rame
15. Store the damaged tire, using the
convenlional tire hold-down bolt
supplied in (he tool bag 1() hold ir in
place. Tum the tir€ clarnp upside
down liom ahe temporary spare tire
position. Repair the damaged tire and
replace ihe spare with it as soon as
possible.
Locking Lug Nuts*
Ifyour vehicle
has optional antitheft
wheel lug nuas, one on each wheel will
lock and you must use a special key to
unlock them. This key is attached to the
lug wrench and is stored with the spare
lire. Regisler ihem with the lock
nanufaclurer by filling out lhe card
provided in rbe glove box and mailing it
in the accompanying envelope. If you
lose your key, consult an Authorized
Mazda Dealer or use tle lock
manufacturer's order form, which is widr
lhe registration card.
d--Gffi
V
Tb rcmove an antith€ft lug
L
Get the key for the locking lug nut.
nut
2. Place it on top of the nut, and be sure
to hold the key square to it. If you hold
the key at an angle, you may damage
both key and nut. Don't us€ apower
NOTE
To prevent $ejack,jack handle, and
tool bag from rattling, store them
properly.
3. Place the lug wrench on top ofthe key
and apply pressure. Tum the wrench
counterclockwise.
.soD€
modeh. 6-21
In
Case of sn Emergency
V
To replace the nut
I
l
Place the key on top of the nut.
Your Mazda has a temporary spare tire.
Ii\ lighier and smaller than a
conventional tir€, is designed only for
emergency use and should be used only
for VERY shon periods. Temporary
spares should NE\.ER b€ used for long
drives or extended periods.
2. Place ihe lug wrench on top of the key.
apply pressure, and tum itclockwise.
6.22
Spare
fir€
A wamrnrc
Diving with a Tenpotury Spa&n&
on Ic. or Snow:
Dit'ing with a sparc nrc on th. ftont
(dtivins) wheek on ice or sno$,is
dancerous- Handlins N'iA be
affected. You couu bse contot of
the vehicle and hat'e an accident. Put
the spa.e tirc on the rcar axle an,l
nove a rcgubr tbe to the Imnt.
In
AclurroN
To avoid damage 1o the temporary
spare or to the vehicle, observe the
following:
.
.
Donlexceed
80
k,r/h (50 nph).
Avoid driving over obstacles. Also.
donl drive through an automatic
car wash- This tire\ diameter is
smaller than a conventional tire's,
so the ground cl€aranc€ is reduced
about 25 mm
.
.
.
(l
in).
Don't use atire chain on this tire
because it won't fi t properly.
Don t use your t€mporary spare on
any other vehicle; it has been
designed only for your Mazda.
Use only one temporary spare dr€
on yourvehicl€ at the same time,
Case of an Emerg€ncy
Appearance
Thk sectian.features care, ihside aftd out. of
Ma.da...haw b.st to kep r.leananrl
,a"t
Ae awarc thdt appedrdrce is not the anly
rcasan Iar cleanliness. Road Btine tends to
eat owal at the fteML sa keeping loar
tehi.le tlean in the wat SectianT presclibes
will help prerent its ea r deteriorotion and
Danage
Ca.e
lnterior Care
How to Minimize Envircnmental Paint
Eiterior
7- z
7- 4
7
7-l
How to Minimize
Environmental Paint Damage
The paintwork on your Mazda represents
the lates! technical developments in
composition and methods of application.
Environmental hazards, however. can
barm the paint\ protective properties.
proper care rs nor uKen.
Here are some examples of possible
damage, \rith lips on how to prevent
if
I
Etching Caused by Acid Rstn or
Industrial Fallout
I
Dsmrge C6us€d by Bird Dropping,
Insects, or Tf€e Sap
Industrial pollutants and vehicle
Bird droppings contain acids.If these
emissions drift into the air and mix witt)
rarn or dew to form acids. Thes€ acids
can settle on a vehicle's finish. As the
water evaporates, the acid becomes
concentrated and can damage the finish.
And the longer ihe acid remains on the
surface, lhe greater $e chance is for
damage,
aren't removed they cao eat away the
clear and colorbase coatofihe vehicle\
It is necessary io wash and wax your
vehicle to preserve its finish according to
the instructions inlhis section. These
steps should be taken immediately after
you suspectthat acid rain has settled on
yourvehicle's finish.
When insects stick lo the paint surface
and decompose, corrosive compounds
form. These can erode rhe clear and color
base coat of the vehicle's painlwork
they are not removed.
if
Tree sap will harden and adhere
permanently to the paint finish. If you
scratch rhe sap off while it is hard, some
vehicle paintcould come off with it.
Appesrance Care
I
I
Water Marks
Paint Chippins
It
is necessaJy to have yourMazda
washed and waxed to preserve its finish
according to the instructions in this
section. This should be done as soon as
Rain. fog, dew, and even tap waier can
contain harnful minerals such as sali and
lime.lf noisture containing
Bird droppings canbe removed with a
soft sponge and waier. If you are
traveling and these are not available. a
moistened tissue may also take care of
the problem. The cleaned areashould be
waxed according to the instructions in
can darnage yourvehicle's finish.
V Prevention
is necessary to wash and wax your
vehicle to preseNe its finish according to
the instructions in ihis section. These
steps should be taken imnediately afrer
you find water marks on your vehicle\
finish.
Ano{her method is to cover the affected
area with dampened newspaper for one to
lwo hours. Afterremoving the
newspapet rinse off the loosened debris
V
How to avoid paint chipping
Keeping a safe distance between you and
the vehicle ahead reduces the chances oi
having your painl chipped by flying
gravel.
It
Insects ,nd tree sap are best removed
with a soft sponge and water or a
commercially available chemical cleaner
these
minerals se(les on the vehicle and
evaporates, lbe minenls wiil concentrate
and harden to form white rings. The nngs
Paint chipping occurs when gravel is
thrown in ihe airby another vehicle's
tires hits your vehicle.
Appearance Car€
Exterior Care
NOTE
The paint chipping zone varies
with the speed of the vehicle. For
example, when traveling at 90
km/h (56 mph), fte paintchipping
zone is 50 m (164ft).
In low temperatures
a
Follow all label and container dircctiofls
I
Mainhining the Finish
when using a chemical cleaner or polish.
Read aU wamings and cautions.
V
Washing
To help proGct the finish from rust and
dete omtion, wash your Mazda
thoroughly and frequently, at least once a
month, with lukewarm or cold water.
vehicle's
finish hardens. This increases the
chance of paid chipping.
If
the vehicle is washed improperly, the
paint surface could be scmtched. Here are
some examples ofhow scmtching could
Chipped paint can lead io rust
fbrming on your Mazda. Before
ihis happens, repair lhe damage by
using Mazda touch-up paint
according 10 the instructioN in this
s€ction. Failure to repair the
alTected area could lead to serious
rusting and expensive repairs.
Scratches occur on lhe paint surface
.
.
.
7-4
The vehicle is washed withoul first
insing ofi din and other foreign
The vehicle is washed wirh a rough,
dry, or dirty cloth.
The vebicle is washed at a car wash
ihat uses brush€s ihat are diny or too
.
Cleansers or wax containing abrasives
NOTE
.
.
Mazda is not responsible for
scratches caused by aulomatic car
washes or improper washing.
Ac.rurroN
Don't use steel wool, abrasive
cleaners, or strong detergents
Rinse off any dirt or other foreign
malterusing lukewarm or cold water
Use plenty of lukewarm or cold water
and a soft cloth when washing th€
Yehicle. Do not lse a nylon cloth.
.
that contain abrasives.
vehicles with darker painr finishes.
paintfinish:
.
Don't use abrasiv€ cleans€rs orwax
Scratches are more noticeable on
To minimize scraiches on the vehicle's
.
Take your vehicle only to a car wash
that keeps its brushes well maintained.
Rub gently when washing or drying
$e vehicle.
containing highly alkaline or causnc
agents on chrome-plaled or
anodized aluminum paris. This may
damage the protective coating; also,
cleaners and detrerg€nts may
discolor or deteriorate the paint.
To Fevert damaging the antenna,
retract it before entering a car wash
facility or passing beneath a low
Pay special attention to removing salt,
dirt, mud, and other foreign material
from dre underside of the wings. and
make surc the drain holes in the lower
edges of the doors and rocker panels are
Insects, tar, tree sap, bird droppings,
indusidal fallout, and similar deposits
can damage the finish if noi removed
immediately. When prompt washing with
ptajn warer is inetrective, use a mild soap
made for use on vehicles,
Thoroughly rinse off all soap with
lukewarm or cold water. Don't allow
soap to dry on the finish-
After washing the vehicle, dry il with a
clean chamois
from forming.
0o
prevent water spots
A
wanlsnsc
Diyins dth
Brakes:
Driving with wet brukes is
Wet
dang e rc us. I nc rc a s e d s topping
distance or the vehicle pulling to one
sLle rhe btukittg coud rcsultin a
serious a.cilent. Light braki g N)iIL
indicate whether the brukes hat e
been alIe.ted. Dry the brakes bt
diving very slovlr and applying the
brakes Eshtlr until brake
peforntnce ir nornat.
V Waxing
NOTE
Your vehicle needs to be waxed when
A
water no longer beads on the finish.
Always wash and dry lhe v€hicle before
waxiog it.In addition to dre yehicle body,
wax ihe metal trim to mainrain ils lusier.
1
. Us€ wax whicb contains no abrasives.
waxes containing abrasive will
remove paint and could damage bright
metal parts.
2. Use
a good grade of natural wax for
metallic. mica. and solid colors.
3- When waxing. coatevenly with the
sponge supplied ora soft cloth.
4. Wipe off lhe wax wilh
7-6
a
sofl cloih.
spoa remover to remove oil, tar. and
similar materials will usually also take
off the wax, Rewax these areas even if
the rest of the vehicle doesn't need it.
I
Repairing Damage to the trinish
Deep scratches or chips on the finish
should b€ repaired prompdy. Exposed
metal quickly rusts and can lead to major
I
.
If your
Maz da is damaged and needs
metal parts repaired or replaced, make
sule the body shop applies
anti-corosion materials to ali palls,
both repaired and new. This will
prevent them from rusting.
I
Use tar remover to remove road tar
and insects. Never do this with a knife
Road chemicals and salt used for ice and
snow removal and solvents us€d for dust
contol may collect on the underbody. ff
not removed, they will speed up rusting
and deterioration of such unde$ody parts
as fuel lines, frame, floor pan, and
exhaust system, even though these parts
may be coated with anti-corrosive
or similar tool.
.
AclurroN
Bright-Metal Maintenance
.
To preyent corrosion on brighl-m€tal
surfaces, apply wax or chrome
preseraative and rub it to a high luster.
During cold weaiher or
ir
coastal
areas, cover bright metal parts wiih a
coating of wax or preservative heavier
than usual. It would also help to coat
them with noncorrosive petroleum
some other protective
jelly or
UnderbodyMaintenance
material.
Thoroughly flush ihe underbody and
wheel housings with tukewam or cold
waier at the end of each winter. Try also
ro do this ev€ry month.
Pay special attention io dtese areas
because they easily hjde mud and dirt.It
will do morc harm than good to w€t
down lhe road g.ime without r€moving
The lower edges of doors, rocker panels,
and frame members have drain boles that
should not be clogged. Water trapped
there
will
cause rusting.
Appearance Care
A
waRlrnrc
Dn inr flith
Brukes:
Drhing with wet brukes is
dang e rcus. I nc rc a s e.l s topping
dbtance or the l'ehicle p IIi gtoo e
sde vhen brukins couA result in a
Wet
serinus accident. Light bruking wil
indicate whether the b&kes haye
bee allected- Dry the brakes br
diring w.r slowlr and appbing the
btukes ligh r u til bruke
perlomance k notnaL
I
Aluminum Wheel Mainr€nance
A protective coating is provided over the
aluminun wheets. Special care is needed
to prot€ct this coating.
NOTE
a wire brush or any
abrasive clear,er. poiishing
compound. or solvent on aluminum
wheeh. They may damage tbe
coanng,
Don't use
only
use a mild soap or neutral
detergent and always use a sponge
or soft cloth to ciean the wheels.
Rinse $oroughly with lukewarm
or cold water. Also, be sure to
clean ihe whe€ls after driving on
dusty or salted roads. This helps
Avoid washing your vehicle in an
automatic car wash that uses
high-speed or hard bnrshes.
If your aluminum whe€ls lose
lustet wax lhe wheels.
7-8
App€arance Care
Interior Care
I
Dashboard Precautions
I
Cleaning the Upholstery and
Interior Thim
Prevent caustic solutions such as perfume
and cosmetic oils from contacting the
dashboa.rd. They'll damage and discolor
it. If ihese solutions g€1 on rhe dashboard,
wipe rhem off immediately.
V Vinyl
Remove dust and loose dirt from vinyl
with a whisk broom ot vacuum cleaner.
Clean vinyl with a leather-and-vinyl
To keep the fabric looking clean and
fresh, take care of it. Otherwise its color
willbe affected, itcan be stained easily,
and its fire-resistance may be reduced.
AclurroN
Use only recommended cleaneN and
V Leather
procedures. Others may affect
appearance and fire-resistance.
Real leather isnl uniform and may have
scars, scratches, and wrinkles. Clean it
with a leather cleanerormild soap.
Wipe it with a damp sofr cloth; tben dry
and buff it with a dry soft cloth.
V Fabric
Remove dust and loose dirt from fabric
with a whisk broom or vacuum cleaner
Clean it with a mild soap soluaion good
for upholstery and carpets. Remove fresh
spots immedialely with a fabric spot
7-9
Appearance Care
I
Cleaning the Lap/Shoulder
Webbing
Belt
I
Cl€sning the Window Interiorc
If th€ windows become covered with an
Clean the webbing with a mild
oily. greasy, or waxy film, clean them
with glass cleaner Follow the directions
solution recommended for upholstery
carp€ts. Follow instructions. Don't bleach on rhe container
or dye the webbingt this may weaken it.
soap
or
Afler cleaning th€ belts, thoroughty dry
tbe belt webbing and make sure there is
no renaining moisture before retracting
A
waRlsnsc
Dantaoed Seat Belr:
Using danaged seat belts is
dansercus.In a collision, danused
belts cannot prov le adequate
lot r Authorized
prctettion. Haw
Mazdo Dealer rcplace danaged belts
7
-t{)
AclurroN
Don,t scrap€ or scnlch the inside of
the rear window. You may damage the
rear window defroster grid.
Maintenance
Because
rorr Mazld h
ihtitute nachinery, it
the
lom aJMintenance
owers prekt b
.1o
a larse pie.e
of
needs rcguLat carc
in
atul senicins. Mony
nuth of
this
wtk
So Se.tioa 8 has beeh prepared as a
SuAeJol
the operata/ ||ho wdnts ta self seni.e such
hind jobs as chansins the ensine oil.
replacihS balbs antl wipet blada, chdrying
the batter!,ahd ntatiag the ties-ALl
nainteance sche.lules arc iaclude.l, alohg
tutth i$tructions ak how to nake regrlar
inspectians af su.h things
as
fuid
levels.
Scheduled
Owner
InlrodDction 8- 2
Maintenance 8, 3
Maintenance 8-12
8-1
Maintenance
Introduction
Be exlremely careful to prevent injury to
yourself and otlers and damage to your
vehicle when using this nanual for
inspection and maintenance.
Tbe owner should retain evidence that
proper maintenance has b€en performed
A claim againsl
a
warranly will not
qualify if it results from lack of
maintenance and not from defective
material or authorized Mazda
workmanship.
Ifyou're
unsure about any procedure
it
describes, we strongly urge you to have a
reliable and qualified service shop
Any auto repair shop using parts
equivalent to your Mazda's original
perform the work, preferably an
Autl]orized Mazda Dealer
equipment may perform maintenance.
But we .ecomm€nd that it always be
done by an Authorized Mazda Dealer
using genuine Maz da parts.
Factorylrained Mazdatechnicians and
genuine Mazda parts are best for your
vehicle. Without this expertise and the
parts that have been designed and made
especially for your Mazda, inadequale,
incomplete, and insufficienl s€rvicing
may result in problems. This could lead
to vehicle damage or an accident and
injuries.
For expert advice and quality servic€,
consult an Authorized Mazda Dealer.
a-2
Maintenance
Scheduled Maintenance (Except Chile)
Follow Schedule I if $e vehicie is operated mainly where rcne of the foltowing conditions appl,.
If any do apply, follow Scbedule 2 (Puerto Rico residents follow Schedule 2).
.
.
.
.
.
.
.
Repeated short-distance driving
Driving in dusty conditions
Driving with extended use ofbrakes
Driving in areas where salt or orher corrosive materials are us€d
Driving on rougb or muddy roads
Extended periods of idling or low-speed operation
Driving for long periods in cold temperarur€s or extremely humid climat€s
NOTE
Afi,er the described period, continue ro follow ihe described maintenance at ihe recommended intervals_
8-3
Schedule
-.-.-
I:
I
--,--_
Ins pec t
dd
re pa
n cled,
adju sl. or Eplace i l necessary,
ITEM
-".\
-'\
air filr€r
c
md
b€ cleaned u sing the
Nunbe. of dontLs o. tiloneters iniles). vhicherer coms
MAINTENANCE
INTERVAL
MAINTDNAXCE
(Oil temear.d
30
18
(7.s)
o5)
(.2L5)
li6t
4
36
x
t2
air blow nethod. )
72
(s25)
(37.s)
{30)
(60)
I
Inspect at 96,000 kn (@,00o nil€6)
Replrce €rerr 168,000 tn (105,000 ntle,
I
I
R
R
R
R
R
R
R
R
R
R
R
R
R
R
R
R
I
Replace at ffret 72,000
aft€r thar, erer'.|l|,004
I
kn
*n
(,15,000
nil6) o.
(30,000 nil€s)
36 nonths i
or 24 months
I
T
R
R
t
I
R
R
I
I
I
I
I
I
I
H6es dd iub.s ror e6hsion*l
B6k
lines. hoses and
conadons
Accordina lo state ed federal Egulalions, failure to p€rfom nairtendce on lhese ilens will .ot loid your enissions wmlies. Howeler, Meda
ecombends lhal all mainlendce seFices be pedomed at tne Fcomnended dne or lilonetrage (bil€ag.) p.riod to ensuE lons-tem eliability.
8-4
Mainlenance
Schedule
----_
I:
I (Cont'd)
Numb€r of monahs or kflomelts (miles).
MAINTENANCE
--_--_
TNTERVAL
ITEM
(7.5)
18
36
48
60
os)
(.2r5)
(30)
(37.s)
!rcnt susFnsion ball.joints
rd
body
Erhaust system heat shields
L
Refrigerdr anounr (if i,nalled)
Cofrpre$or operadon (it installcd)
epllce if necessdy.
42
L
I
L
L
I
I
:18
84
(.rsl
(60)
I
I
I
I
I
I
Steering operalioo and linkages
BolK and nuts on ch6sn
*hicheu on€s firet
l0
t6
t2
tz
MAINIENANCE -..\
Inspect and €pair, cl€an, adjun. or
L
L
I
I
L
I
I
I
I
L
I
I
8-5
Maint€nance
Insp€ctodEpan.ckm,adjust,orEplaceiine.essary.(Oil-pemeatedaifiliercannolbecleanedusingrheai.
blowbelndl.)
Schedule 2
-..\
..-.-
Nunber ol monlhs or kilometers (niles). whichercr con4 li.st
MAINIENANCE
INTERVAL
MAINTENANCE
IIEM
---\
4
t2
l6
-.\
(10)
os)
I2T)
(25)
23
36
48
56
72
80
i30)
(3s)
i4s)
(s0)
aa
96
(60)
I
Ispe.t
ot 96,00{ km (60,000 mlles)
Replace €rery 163,000 km ir0500{ niles)
I
R
R
R
R
R
R
I
R
R
R€plaaev€r! 5!d,0 tm ll,0{,0 mil€t
R
R
R
R
R
url
R
R
R
R
R
R
R
R
nonlhs
R
I
I
Repl&e l( ti.sl 72,00{ kn (45,000 nil6) or 36 monlhs ;
afae. that, eve.y 48,000 km 130,00i) niles) or 24 nonths
I
I*r
I
I
I
R
I
I
I
I
I*r
T
Holes
dd
rubes to.
enrronti
R
I
T
R
Accodinglo state dd fedenl Egulations. failure to Dedom bainlenmce on $e* iteds will not void tour emi$ions waruries. Ho*ever, Muda
econnends drat all naintenmce senices be p€rfomed ar $e @onnended ijme or kilonelrage (nilease) period to ensue long tem @liabiht
Ir lhe vehiclc is opemtei in cold dislricts { below l8 degreDs C (0 degEes F) }, Eplace tne limin8 bell al96-010 lin (60,000 niles).
8-6
I
R
Mrintenance
InsFe.r and Epair, cled. adjust, o.
Schedule 2 (Cont'd)
-..\
---.-
Nunber or monlhs or lilomete.s inilesl. whicheve. .ones li.st
MAINTENANCE
INTERVAI-
MAINTENANCE
repl-e if n{essary.
8
-.-\.
t2
l6
20
l6
(s)
(r0)
I
Bnke and clrtcb lluid lelel
Tte innation prcssle
(15)
28
36
48
56
(30)
(35)
(.10)
(20)
(25)
t
I
T
I
I
I
I
I
I
I
I
I
I
I
I
t,
L
I
T
(4s)
(s0)
(ss)
I
I
I
I
T
I
I
I
I
Bnke lines, hoscs and conections
and
fie rcar
Stee ne operalion md linkages
Powei sGerine nuid lelel
I
T
I
L
L
I
Front suspension ball joinrJ
Bohs and nurs on chr$is
dd
body
Exhausl syslem hear shi€lds
Rerrigeimr amount (if installed)
conp€sor opcnrion (ir
insralled)
L
L
L
I
L
I
L
L
L
I
L
Maintenance
Scheduled Maintenance
Services (Chile)
After the described period,
continue to fbllow the described
maintenance at the recommended
As ihe resull of visual examinalion
or functional measurement of a
systen's operanon (perfornance),
correct. clean, or replace as
required. (Inspecl, and if necessary
replace the air filter)
Emission control and related systems
The ignilion and fuel systems are highly
imponant to the emission control system
and to efficienlengine operation. Don't
tanper with them.
All inspections
and adjustments mustbe
rnade by aqualified technician. we
strongly recommend that all servicing
related to these syslems be done by an
Authorized Mazda Dealer.
8-8
Maintenance
lnspal: lnsp{t and
.lm,
(Oil-pemear€d aif filter
Epair, adjnn. or Eplace if necessary .
beclemedusing lhe air blow nelnod.)
cNor
Number ol monrns or km (mileO. shicherer comes lirst
MAINTENANCE
INTERVAL
MATNTENANCD
ITEM
l:
l3
.t0
20
3{
50
(12)
(13)
36
:13
6{)
ll0
t
I
R
R
R
R
84
90
ts0
T
I
I
Repbce
R
R
R
R
R
R
R
R
I
I
I
R
I
I
R
ekrJ
I
I
R
R
R
I
I
I
I
7A
r30
(:a) (30) (36) g2) (.r8) (s4) (60) (66) o2) (?8) (34) (e0) (96)
I6pect €re.J 100,000 kn (60,000 nil€6) o. 60 nonlhs
R
Elaporative srslen (if insraued)
12
120
100,000
kn
R
I
I
I
I
(60,00{ miles)
R
R
R
R
R
R
R
R
R
R
R
R
R
R
R
R
R
R
R
R
I
T
t
R
R
R
I
T
Also inspecl md adjust rhe powei steering and aircondition€r dnle belts. ifinslalled.
"2: ReplacementottheriningbcllisrequiB!ateveryl00,000k6(60,000niler.Fail!reloeplacethetidingbeltnayFsultindanagetorhe€nsinc.
If the rehicle is openled under el of lne follo*ing conditions, chdee lne enAinc oil dd oil filrei 6orc onen dd Econnended inreNals.
a) Drivins in dusty cdditions.
b) Extended percds of idling oi low speed operation.
c) Drivin-s ior long pqiod in cold Gmperatues o.driving rcgularly al shon distance only.
I f the veh icle is operated in lcry d! sry or s andy areas, inspect ard il nc.e$aiy.
cle o or e place rhe
lir
fi lter
noe
onen rhan lhe Hom mend€d inten als.
8-9
t:
(Cont'd)
MAINTENANCE
(6)
(12)
(r3) \A)
(if insralled)
I
I
I
I
I
I
I
T
I
I
I
I
I
I
I
I
I
t
I
Power bralie unil and hoses
Slc€ring lrnkae€,lie rod e.ds and
ms
I
I
I
I
(s)
T
R
Bdke lines, hoses and com{tions
Srering op€ralion md gar housing
{36) (42) (4r)
I
I
I
I
I
(3iJ)
80
t
t
t
I
t
I
Batery electrollte level and spaific gnvity
Powr serina fluid dd lircs
cle@, rcpair, adjust, or Eplme if naessdy
9l
l3
s0
ITDM
ud
Numbe. of months or km (miles). whichev€r @m€s
MAINTENANCE
INTDRVAL
E.C.R. syslen
Insp€cr Insped
I
T
I
R
I
I
I
I
t
lirsi
72
7a
100
110
tm
130
l.t0
150
160
(60)
(66)
(:12)
(78)
(84) (90)
(96)
t
I
I
I
I
I
I
I
I
I
I
I
I
I
I
I
I
I
I
I
I
I
I
I
I
I
I
I
I
T
I
T
I
I
I
I
I
t
I
I
I
I
R
I
Aulonaic tmsaxk nuid
Fronr md rear suspension
35: Ifrhe
8-10
R
dd
ball joinls
brakes !@ uedextensively (foi eranple.
lhe bE\e
fllid
R
I
R
Autonalic lrmsxle nuid lelel
.
annually,
I
coinuous had driving orbountain dnvine) oririhe vehicle h
I
op€rated in exlEmely
hunid climales, cndge
Maintenance
I: Inspccr: Inspect @d cled. epair,
L: LubricaF T: Tighten
(cont'd)
MAINTENANCD
INTERVAL
MAINTENANCI]
ITEM
Nnmbe. of months or km lnlles). whichever
6
t2
l8
10
20
30
o2)
(13)
u
(a)
30
42
50
70
(30)
(36)
54
80
(12) (48)
60
66
100
110
(s4) (60) (66)
I
Bults
eJ
nuL on
T
T
chsesrd bftlt
T
T
T
I
I
T
I
Body condition (for rust, corcsion
(including spae dE,
*idl inflation pEsue adjusmeno
I
This h
a
.
fNt
7a
8il
90
96
1J0
140
150
160
o2J (78)
(84)
(901
(96)
120
T
T
T
T
T
T
T
T
1
T
I
I
I
I
I
I
bd Frioniion)
L
"6i
replee ir necessary
I
I
I
Exhaust sy$en hcar shields
con6
adjust, or
full function check ofelcctrical sts|eds such
as lights,
I
I
I
L
I
L
I
L
I
I
I
I
T
L
L
L
I
T
L
I
qiper and washer sysGns (including riper bladet, md poser*indows.
8-ll
Owner Maintenance
I
Owner Maintensnce Schedule
The owner or aqualified service
i,echnician sbould make thes€ vehicle
inspections at lhe indicated inteNals to
ensure saf€ and dependable operation.
Bring any problem to fte attention of an
Authorized Mazda Dealer or qualified
seNice technician as soon as possible.
V
.
.
.
.
When refueling
Brake and clutch fluid level
(page 8'23)
Engine coolantlevel
(page 8 19)
Engine oil level
(page 8 17)
Washerfluid lev€l
(page 8-27)
8-12
V At
.
least monthly
Tire inflation pressures
(pase 8-34)
V At
least twice a Jear
(for example, every spring and fall)
.
.
Automatic transaxle fluid level
(page 8-2s)
Power steering lluid level
(page 8 2a)
You can do lhe following scheduled
maintenance items if you have some
nechanical ability and a few basic tools
and ifyou closely follow the directions in
ihis manual.
.
Air filter
(page 8-28)
.
.
Engine coolani
(page 8 19)
Engine oil and oil
(page
8
18)
filter
Maintenance
I
Owner Maintenance Precautions
Inproper or incomplete service may
result in problems. This secrion gives
instructions only for items easy to
Improper owner maintenance during the
warranty period may affect warranty
coverage. For details, read the separate
Mazda Warranty statement provided with
t})e vehicle.Ifyoule unsure about any
servrcjng or mainGnance procedure, have
it done by an Authorized Mazda Deater
Awl.ntuve
AwnRlrnrtc
M ainte nance Procedures :
P.torning nuintenance
u,ork on a
vehicte is da,'serous if not done
properlr. You can be seriouslr
it'jwed *'hile petormins sone
naintena ce ocedure. II tou tack
sufrcient knob,kdse and experience
or the proper tools and equipment to
do the work, heve it
do e br a
quawed technician.
Running the Enoine:
Working under the hood l.t'ith the
runni g iN dangercu'It
becones even norc da ge.ous vhen
)ou weorjewelry or loose clothi g.
Either can become entanglcd in
noving Wrts e d rcsuh in ir.jurr.
Therclorc, if rou nust run the
e gine while wo*ing under the
hood, make ce ain that yu remore
engine
aa
As explained in the Introduction (page
8 2), s€veral procedure can b€ done
only by aqualified service technician
Awz.ntuue
Ekdncal
Fa a d Engine
Inspection:
Inspecting the e gi e viththe
ignition switch in the ON positiott is
dangercus. The cooling fal couV
come on unexpectedly et)en vhen the
engine isn't running. You couu be
senouslr injurcd br the fan. Tum the
igfiition switch off and rcnoye the
key fron the ignition rwitch when
lou ittspect the engine.
jevelry kspecialb
bracelets, watches, and''nss,
necHaces)
and alt ne.kries, scaryes, and similar
loose clothing before getting near the
ensi e or coolins Ian.
8.13
Maintenance
I
Engine Compartnent Overview
1.6-liter engine
Autonaric
8-14
rderle
nuid lerel dipsti.t (only for aulonatic ttusaxle)
Maintenanc€
1.8 and
2.0-liter ergines
Auronam
tdsdle
unid-level dipsrict (only for aulonaric
rrdsdle)
Bmte/Clntch nuid
a/
ftsnon
Maintenance
".u{,-
oil
0LsAc)
I
Engine Oil
V Recommended oil
Oil container labels provide important
The quality designation "SG", "SH",
"SJ". or "ILSAC" rnustbe on the label.
Engine oil viscosity. or thickness. has an
effect on fuel economy and cold-weathe!
op€ration (starting and oil flow).
Low-vjscosity engine oils can provide
8-16
improved tuel econony and cold-weaher
But high iemperature weather condilions
requirehigher viscosity engine oils for
satisibctory lubrication.
When choosing an oil. consider tbe
temperature range your vehicle will
operar,e in before rie next oil cbange.
Then selecr the recommended viscosily
AclurroN
Using oils ofviscosiry besides those
recommended for specific
temperalure ranges could result in
engine damage.
Energy conserving oils are
recommended. A chief contribulion they
make to fuel economy is reducing the
amount of fuel necessary to overcome
engine friction.
Maintenance
NOTE
The distance belween L and F on the
dipstick .epresents the fouowing
A
'"" -tltl
.,,
A
LN
Low
---Ll-l
*lllfl=l
oKll
-Lli
U
V Inspecting engine oil level
1. Be sure the vehicle is on
a
lev€l
2. Warm up the engine to normal
operating temperature.
3. Tum it offand wai!5 ninutes for the
oil to return to fte oil pan.
4. Pull outthe dipsrick, wipe it clean, and
reinsert it iully.
1.0 L (1.05 US
qt,0.87lmp q0
U
5. Pull it out again and examjne fte level.
It's OK between L and F.
But ifit's near at or below L, add
enough oil to bring the level to F.
6. Male sure the O'ring is posirioned
properly before reinsening tbe
dipstick.
Ac.luuoN
Don't add engine oil overF. This may
cause engine damage-
8-17
Maintenance
V
Changing engine oil and
filter
engines
Change engine oil and filter according to
Scheduled Maintenance (page 8-3).
Please act
responsibll protect the
environment and ta.ke used oil to a
recycling faciliiy. Ask yourdealer or a
s€rvice stalion for information.
A
wnRlrnrtc
E
gine Oil:
Continuous contact with used engine
oil is dangerous. It coud cause skin
cancer Alwars wash with soap and
water innediateb after chansins oil
Handling Used
8-18
Changing engine oil
I
. warm up the engine for a few minutes
and ium ir off. Remove the oil-filler
2. Remove the drain plug and drain fte
oil into a suitable container.
AwnnNme
Checkins orChansins Ensine Oil:
Hot ensine oil is dansercus. II the
engine h^s been running, the engine
oit becomes very hot. You could be
seiousl! bur
ed. Don't check or
change the engine oil when the
Maintenence
3. Replace the plug iighdy after the oil
has thoroughly drained.
Fill
the engine with new oil to the F
Check the oil level and
fitl to the F mark
ifnecessary,
Oil capacity (General reference only.)
mark on the dipstick.
5. S€curely replace the oil-filler cap.
Slart the engine and inspecl around the
drain plug for leaks.
1. Tum il off and wait 5 minutes for the
oil to reiurn to ihe oil pan.
1.6-liter engine:
L (3.2 US qt, 2.6 ftnp qt)
3.0
1.8 and 2.o-lit€r ensines:
3.3
L (3.5 US qt,2.9Imp qt)
NOTE
I
Use only specified engine oil (page
8 16).
V Inspeciing coolant level
Changing oil fflter
Because you need a special tool to
retighten the filter, an Authoriz€d Mazda
Dealer should do the work.
Engine Coolant
A
waruvnrc
Hot Engine:
A hot ensine h danserous. I! the
ensine has been runnins, pa.ts of
the engine compartment can become
yery hot. You couu be b rned. Don't
inspect the coolant slstem or add
coola t r'hen the engine is hot
8-19
Maint€nance
and
Inspect the antifreeze protection
Do not overlill,
coolant level in the coolant reservoir at
leasl once a year at the beginning of the If new coolan! is required fiequently,
winter season-and before traveling
consult an Authorized Mazda Dealer
where temperatures may drop below
freezlng.
Inspect the condition and connections
all cooling system and heaterhoses.
Replace any ihat are swollen or
of
The coolanr should be at fuil in the
radiator and between the FULL and
LOW marks on the coolant r€s€rvoir
when the engine is cool.
Ifit's ator near LOW add enough
coolant to the coolant reservoir to
provide freezing and corrosion proiection
and to bring the level to FULL.
8-20
AclurroN
Radiator coolant will damage paint.
Rinse ll offquickly.
V
Changing coolant
Change coolant according to Sch€duled
Maintenance (page 8-3).
Maintenance
Ac.turron
Use only soft (demineralized)
waler in the coolant mixturc. Water
ihat conlains minerals will cut
down on the coolant's
Don't add only water. Aiways add
a
proper coolant mixiure.
The engine has aluminum parts and
must be protected by an
ethylene-glycot-based coolant to
prevent conosion and freezing.
DO NOT USE alcohol or melh3noi
anlifreeze. DO NOT MIX alcohol
ormethanol with lhe coolant. This
could damage the cooling system.
Don't use
a
For mixture percenlage:
Awnnvnve
Removing the Cooling SrstemCap,
Removing the cooling srsten capor
drain plug while the engine is
runnins or hot is dansenus.This
might lead to cooling slstem an.l
eng;ne danage and couA rcsulti
senous injury fron escapins hot
coolant or steam.Tum off the engine
and wat unfl it\ cool. Eren then, be
verr careful when nnovins the cap
or dtuitt plug. Wrap a thitk cloth
around it and slowlr tun it
countenbckwise to the frst stop.
Step back
vhile
the Uessure escapes.
When Jou'rc sure
a
theprcss.eis
still
gon., pr.ss .lown on the cap
using a cloth
-
tun
-
the cap, and
solution that contains
more than 60
Eo
aniifreeze.
This would reduce effectiveness.
8-21
Msintenance
4. Drain the sysi,em cornpletely and
retighten the plug. Add as much
ethylene'glycol-based coolani and
water as necessary to provide freezing
and corrosion protection.
t'"n,."!_.-
$\".,*
In extremely cold climates, add the
amount recommended in the coolant
manufacturer\ instruciions.
trans
Ib
change coolant (Manual
I.
Remove the cooling system cap.
5. Run lhe engine at idle with the cooling
system cap off. Slowly add additional
le)
2. Only when the engine is cool,loosen
the radiator drain plug and drain the
coolaflt into a suitable container.
3. With the drain plug loose but not fully
removed, flush out the system with
funning waier.
8.22
Ib
coolant ifnecessary,
change coolsnt
(Automatic transaxle)
6. At this point, wait unlil the engine
reaches normal operating tempenture;
then depress the accelerator two or
three times. Add more coolant, if
necessary, until lhe system is
full.
l
Remove the cooling system cap.
2. Only when the ergine is cool, remove
lhe radiator drain plug and drain the
coolant into a suitable container.
7. Install the cooling system cap. Inspect
all connections for leaks. Inspect the
level in dre coolant res€rvoir one more
3. Flush out the system with running
Maintenance
4. Drain the system completely. Insert
and tighten ihe plug. Add as nuch
ethylene gllcol,bas€d cootant and
water as necessary to provide ffeezing
and corrosion prot€clion.
brake/clutch system inspectred by an
Authorized Mazda Dealer.
AcaurroN
In exlremely cold climates. add the
amount rccommended in lhe coolant
manufacturcr's instructions.
Brake and clutch fluid will damage
painted surfaces. If brake or clurch
fluid does get on a painted surface,
wip€ it off immediately.
5. Run the engine at idie with the cooling
systen cap off. Slowly add additional
coolant if necessary.
I
6. At this point, wait until the engine
The brakes and clutch draw fluid from
Inspecting Brakerclutch Fluid L€v€l
reaches normal operating temperaturei
then depress the accelerator two or
tbree times. Add more coolant. if
necessary, until rhe system is full.
Inspect the fluid level in the reseNoir
reguiarly. If it's low, add flriid until it
reaches MAX. It should be kepl at MAX.
7. Install the cooling system cap. Inspect
all connections for leai(s. Inspecr the
level in the coolant reservon one more
Before adding fluid, thoroughly clean the
The l€vel normally drops with
accumuiated distance. a condirion
associated with wear of brake and clutch
linings.Ifit isexcessively low. have the
Aclurror,l
Using nonspecified brake and clutch
fluids Gee chan, page 10,2) will
damage the systems. Mixing different
fluids will also damage thern.
If
the brakdclutcb system frequently
requires new fluid, consult an
Authorized Mazda Dealer
4.23
A
Ifnew fluid is required frequendy,
waruvnsc
consult an Authorized Mazda Dealer.
SpilkdB!4Lc4uidr
Spi zd bmke lluid is dangercur. If it
AclurroN
!o0 eles, thef co ld be
seria ib inj red- Il thit hawn\
gets in
To avoid damage to the power
steering pump. donl operate the
vehicle for long periods when the
power steering fluid level is low.
imnediatelr iush lour eres wirh hnter
and get nedical attentio,L Brake
id
spilbd on a hot engine couu cause a
l
Be careftl n., to spi bmke
on rowself or on the engine.
fft.
fiuu
A wanrrnrc
Low Brakelclutch Fluid Levets:
Lou' brakelclutch Jluid lewls could
be
datgetuus. Low levels could
signal btuke Ii ine ,'ear or a brake
srsten teak. Your brckes couA fail
and c.use an accident lfroufrnda
loia' fluid lerel, hate the bnkes and
8.24
I
Insp€cting Power Steering Fluid
Level
Inspect lhe fluid level in &e reservoir at
each engine oil change with the engine
off and cold. Add fluid ifnecessary: it
does not require periodic changing.
The level must be keptbetween MIN and
MAX.
Visually examine the lines and hoses for
NOTE
Use specified power steering flujd
(chart, page l0-2).
Maintenance
I
L
lnspecting Automatic Transaxle
Fluid Level
The automatic transa{le fluid level
should be inspected regularly. Measure
Park on a level surface and set the
parking brake flnnly.
2. Idle ihe engine aboul two minucs.
it
Push down on tbe brake pedal.
3. Move ihe shiftlever through alt ranges
The volume offluid changes with ihe
temperature. Fluid mustbe checked at
idle without driving at normal operating
and set it at
P
Awl^nvme
More nent:
Shiftins the shift tevet $,ilhout first
depressing the bmke pedal k
da gerous.The whicle coud move
suddenu and cause
a.cdent.
Make sun the bnke pedal is applied
before shtftins the rhift lewn
S
Low fluid level causes lransaxle
slippage. Overfilling can cause
foaming,loss
offlL
d, and
Ue hicle
a
.+.
Ac.lunoN
udde n
With $e engine still idling, pull out
the dipstick. wipe itclean. and put it
back.
5. Pull i! out again.
The proper fluid level is marked on the
fluid (page l0-2). A
nonspecified fluid could result in
transaxle malfunction and failure.
Use sp€cified
4.25
Maintenance
Use the cold scale only as a
If outsid€ temperalure is lowerthan
Funtl
o
l(tl
about 20"C (70'F), stalt fie engine
and insp€ct the fluid level after the
engine reacbes operaiing
u.,
""- lilr
"
If
V Fluid hot
scale
A
Wlen the vehicle has been driven and the
fluid is at normal operating temperature.
about 65oC (150oF), the level nusrbe
between Full and
V Fluid cold
lnw.
scale B
W}len the engine has not been running
and the outside temperature is about
20"C (70'F), the level rnuslbe between
Full and Low.
8-26
the vehicle has been driven for
period at high speeds
an extended
or in city traffic in hot lveathe!
inspect the level only afier
stopping the engine and allowing
the fluid to cool for 30 ninutes.
Fully insert the dipstick. W}Ien adding
fluid, inspect with the dipstick to male
sure it doesn't pass full.
NOTE
Inspect both sides of the dipstick for
Maint€nance
_<---.--..-.--
A
waRlnarc
F lnid:
Using tudiator antifreeze as vather
lluid is dansemus. If sprared on the
S
ubs titute Washer
windshieu, it
dirty the
'.rilt
*indshieu, allect
Jour visibw and
couA result in an accident. Use onlr
rtindshieu vashetflui.d ot pl&in
water in the reservoi.
I
Inspecting Washer
I
Body Lubrication
All moving points of the body, such
as
door and hood hinges and locks, should
be lubicated each time the engine oil is
changed. Use a nonfreezing lubricanr on
locks during €old weather.
Make sure the engine hood's secondary
latch keeps the hood from opening when
the primary latch is released.
fluid Lev€l
Inspectfluid level in ihe washer fluid
reservoiq add fluid if necessary.
The iop of lhe float should be between
FULL and LOW.
Use plain waterjffluid is unavailabie.
But use only washerfluid in cold weather
to prevent it from freezing.
4.27
Maintenance
NOTtr
If tle vehicle is operated in very dusty
or sandy areas. replace the filter more
often than recommended intervals.
AclurroN
an air filter This
could resuli in excessive engine wear.
Don'tdrive witiout
I
Maintaining the Air Filter
A viscous paper airfilterfits inside the
air cleaner housing, as shown.It'sbeen
specjally treated and should not be
cleaned and reused. Replace it when
l.
Unfasten the clamps.
2. Lift off the air filter cover and r€move
the
filler.
3. Wipe insid€ ihe air cleaner housing
with a damp clotb.
4. Replace tbe
filter
5. Install in the reverse order ofremoval.
Replace the filter according to Scheduled
Maintenance (page 8-3).
8-28
I
Mainiaining wiper Blades
Ac.lurron
Hot waxes applied by automatic car
washes have been known to affect the
cieanab jliry of windows.
Contamination of either the windshield or
$e blades with foreign matter can reduce
wiper effectiveness, Common sources are
Ac.luuoN
To prevent damage to lbe wiper
blades, don't use gasoline, kerosene.
paint thinne! or other solvents on or
I
Replacing Windshietd Wiper Blades
When the wipers no longer clean well.
the blades are probably wom or cracked.
Replace lhem.
AclurroN
To prevent damage lo the wiper arms
and other components. don'tmove the
wip€rs by hand.
insecis, tree sap, and hot wa\ aeaiments
usedby some commercial car washes,
If the
blades are nor wiping properly,
clean lhe window and blades with a good
cleaner or mild detergent; then rinse
thoroughly wiih clean waier. Repeat if
8-29
Maintenance
Raise the wiper arm and tum the blade
assembly to expose the plastic locking
clip.
suppon.
Compress the clip and sljde the
assembly downward; iben lift il off ihe
Ac.turroN
To prevent damag€ to the windshield,
don't let rhe wiper arm fall on i1.
8-30
3. Hold the end of rhe rubber and puil
until the tabs are free of the metal
4. Remove the metal stiffeners from the
blade rubb€r and installdlem in new
Msintenance
I
ACAUTION
Don'lbend the stiffeners. You need
Awl.nvnlc
to use them again,
B atte n - Re la t e d L e a d
If
the metal stiffeners are switched,
the blade's wiping efficiency could
So don'tuse the driver's side meral
stiffeners on the pa,jsenger's side,
Be sure to reinstall the metal
stiffeners in |he new blade rubber
so ihat the cuNe is ibe same as it
was in ihe old blade rubber
Battery
5. Carefully insert the new blade rubber.
Then install tlte blade assembly in ihe
reverse older of removal.
M ate rtuls :
Baltery posts, teminals an l relateil
accestories cont&in lead an,l leatr
compound!, ch2nicals knot'tt to the
State ofcalifo ia to cause cancer
and rcprcductite hum,
wash hands ofter han ins,
NOTtr
Insiall the blade so tha! the rabs are
toward the bottom of the wiper arm.
8-31
Awnnlmc
Spilled Battery Fluid:
SNled bottetr fluid dansercus.
Bafteryjl id contains SULFURIC
ACID which tuuA cause seriot"
Wwies, il it sets in row eres ot on
r o u skin. If this happe ns,
innediateb Jlush rour eres with
$'ate4or 15 ninutes or wash roul
i
skin thoroughb and get nedi&l
altentio . Be carcful not to get
battery fluA on yursev.
A
wa-nlrnsc
B a tte ry - Re la t e d E xpl9si94
Flames and sparks near open botte.r
cells arc dangercw. Hrdroge gas,
pm!*'ced during otmal battery
operulion, couu isnite a dcausethe
battery to explode. An exploding
battery can cause seious burns anal
Auries,
Keep
ollfiamer,
i
cigarettes, and spafts awar
cluding
fron
To get the best service from a battery:
.
.
.
Awnntlivc
Childnn and Battenes:
A
owing chimren to pla! near
batteies is dangenus. Batterr fluA
.oud cause seious injwies ifit gets
in the eres or on the skin. Al*ars
keep batteries out of the
8-32
nach
of
.
Keep it securely mounted.
Keep the top clean and dry.
Keep terminals and connections clean,
tight, and coated with petroteumjelly
or terminal grease.
Rinse off spilled electrolyte
immediately with
and baking soda.
a
solulion of water
Maintenance
.
If
the vehicle will not be used for an
extended time, disconnect the battery
a
A wanlrnrc
Tires
For reasons of prop€r periormance.
safety, and better fuel economy, always
maintain recommended tire infl ation
pressures and stay \rifiin the
recommended load limits and weight
Aw,qnuwe
DwredT
pu
row Mazta (pase 10-s)
is dangerous. It coua seriousl!
rpecifrcd fot
affect i.de, hmdling, grou d
clearunce, tire clearunce, and
distribution.
Using
Asins Wrcns-Sbad Tires:
Asing anJ other tire size than ,ihat is
ire Trpes:
speedometer calibrution. Thk couu
caute Nu to hare sn accident. Use
on0 tircs that are the conect size
specifred
lor low Mazda.
whick u'ith dWrc t
trpes of tifts is dangenus.It couu
cause poor htndling ond poor
braking; leading to loss of cotttlol.
Except N'hen using the ten porury
spare tire, use onlr the sane tJpe
tires (radial, bits-belted, bios-trpe)
Dneins
8-33
Maintenance
NOTE
Awnnwmc
Warm tires normally exceed
recommended pressures. Don't
release air from warm tires to
Incoftect Tin
Underinflation can cause reduced
fuel economy and poor sealing of
the lire bead, which will deforrn
result in a seious occAent. Atwars
iniate the tires to the cornct
prcssure (pase 10-5).
the wheel and cause separation
tire from dm.
of
V Tire inflation pressure
Inspect all tire pressures monthly
(includjng tbe spare) when the lires ar€
cold. Maintain recommended pressures
ior rhe best ride, lop handling, and
Refer 1o the specification charts (page
10 s).
8.34
Inlhtion:
owrtnflanon or undennflation of
tires is dangercus. A6'ene ha dA g
or ututpected tirc lailure could
Overinflation can produce a harsh
ride and a greater possibiliry of
damage from road hazards.
Keep your tire pressure al ihe
coffect levets. If one frequently
needs inflating, have it inspected.
Improper wheel alignment
o@@
t>
b?
Do nor include (TEMPORARY USE ONLY
Out of-balance wbeel
.
Nrt
llftl"
Severe braking
After rotation, bring all tire pressures to
(Jfri
specification (page 10,5) and inspeci rhe
Iug nuts for tightness.
V Tire rotation
V Replacing a tire
To equalize tread wear. rotate rhe tires
every 6000 km (3.750 nilet, or sooner
if iffegular wear develops. During
rotation, inspect them for correct balance.
lfa
will
tire wears evenly. a wear indicator
appear as a solid band across lhe
iread. Replace the tire when this happens
You may need to replac€ it before rhe
band is across the entire tread.
Also, inspect them for uneven wear and
damage. Abnormal wea. is usually
caus€d by one or a combination of the
following:
.
Inconect tire pressure
8-35
Maintenance
A
wanlsnrc
WornTires:
D6'ing vith won
tires isdangercus.
Reduc e d b rukins, stee ins, and
truction could rcsult in M accident
Ali'ars L\e tires thal are in good
V Temporary spsre tire
Insp€cl the temporary spare tire at least
monthly to make sure it's properly
inflated and stored.
The temporary spare tirc js easier to
handte because of its constuction. lt is
lighter and smaller than a conventional
tire and should be used only for an
em€rgency and onty for a short distance.
Use ihe lemporary only until the
conventional tire is repaired, which
shouldbe as soon as possible.
Maintain its pressure at,120 kPa (60 psi).
AcaurroN
.
Don'tuse your temporary spare
tire rim with a snow tire or a
conventional tire. Neither will
properly fit and could drmage both
iire and rim.
.
.
The temporary spare tire has a
tread life of up to 4,8tJo km (3,000
niles), depending on road
conditions and driving habits.
Wlen
the tread wear solid-band
indicator appears, replace the tire
wilh the sarne type of temporary
spare.
Maini€nance
V
AclurroN
Replacing a wheel
When replacing a wheel, male sure the
new one is the same as the original
Iactory wheel in diameter, rim width, and
oflsel.
Proper tire balancing provides the best
riding comfort and helps reduce tread
wear. Oul of'balance tires can cause
vibration and uneven wear, such as
cupping and flat spots.
A wamrnrc
asinr a wrcns-Sized Wheel:
Asing a turong-si&d wheel is
dangem
couu
be
s.
Brakw
and hantrline
aflected,leani g to
loss
of
contrcl and an accuent. Alwars ute
wheels of the coftect ske on rour
A wrong sized wheel may adYersely
affect
.
.
.
.
.
.
Tire
fit
wleel
and bearing
life
Do nol louch tne glass surface
Ground clearance
Snow chainclearance
Speedometer calibration
Headlight aim
I
Replacing a Headlight Bulb
Your Mazda's headlights have
replaceabl€ halogen bulbs.
Maintenance
A
Awz.nuntc
H a n d li n g H ato
eLg-!!lbt;
When a halogen bulb breaks, it is
dangerous. These bulbs contain
pftssunaed
gas.
wi
If o eisbrok.n,it
explode and seious injuries
could be caused bt the lbittg glars.
IyARNING
ChiUrc and Halogen B lbs:
Plati tg
a halogen bulb i
'a'ithSerious
dansenus.
Aunes couu be
ctused br dnpping o halogen bulb
or brcakine
i.t
sone other war.
\
Afuals kzep halogen bulbs out of the
If the glass pottion is touched vith
baft hands, bod| oil coua cause the
bulbtoow
r>.t
eat and explode when
Iit. Net,et touch the
glass
pottion
of
the bulb if ith jou. ba.e hon.ls and
alpaJs wear ete pmtection whe
handlins ot workins anund halosen
L
Make sure $e headlight switch is off.
2. Lift the hood and find the bulb in lhe
rear ofthe headtight body.
bulbs.
3. Detach the electsical connector from
the bulb by squeezing the tabs and
pulling it to the rear.
Maintenance
9. Install in the reverse order of removal.
%
,.-s:t,
/@
NOTE
.
.
When reinstalling the sealing
cover, make sure ? faces up.
Use the proteciive cover and carton
to dispose of the old bulb promptly
out of the reach of children.
4- Pull off the sealing cover.
5. Unhook the bulb retaining spring.
6. Swing the relaining spring our and
away
10
free the headlighrbulb.
7. Carefully remove the headlighlbulb
from the socket by pulling it straight
8. Replace ihe bulb.
8-39
Maintenance
I
Replacing a Bulb (Front)
Fmnt-turn signal lights/
--'9:
To replace the fog light bulbs, contact an Authorized Mazda Dealer
The number in ( ) shows the bulb number
8-40
Maintenance
I
Replacing a Bulb (Interior)
O Interior light (Type B) 8w
@ Map light (t'pe B)
sw
(-)
(-)
Maintenance
uffi+ffi
ffi+W
I
Rear Bulb Acc€ss
To replace the tun-signal light,brake
lighytaillight, side-marker light or
back-up ligbt bulb, the trunk end trim
must be removed and ihe insid€ cover
must be partially opened.
1. Pull the center section of tle plastic
reiainer and remove rhe retainers and
the trunk end trim.
a-42
*ffi)ffi
ffivW
2. Remove the inside cover's plastic
retainers and partially open the inside
I
Replacing a Bulb (Rear)
O Brske
lightvTaillights 2r6w (7u3)
@ Rear-side
marker lights 3.8W (194)
2rw (1uo)
O,W
!?*
*ffi
2-
Th€ numb€r in
(
) shows fie buib number.
@ ReaFtum signal lights 21W
(-)
Who tocohsuhabouta Noblen; what to do
has a safery defect: ||hat
if
lourehicte
\9arranties pbtecr torr vehicle: .ltieitug
autside the Uhited Statet atui Cano.la:
a.l.lihg equipnent; tirc qualitt €.ades:'lhb h
the kind af cohsuher idorwtion lou ll fnd
CDsromer Assistance
Mazda Importer/Distributors
Wmnties for Your Mazda
Outside the Uniled SBtes and Canada
Add-On Non Genuine Parts and Accesories
Uniforn TiE Quaiity GEdins System (UTQGS)
Reponine Safery Defects
Senice Publicarions
92
9-5
96
9-6
9-7
9-8
911
9-1
Customer Information
Customer Assistance (U.S.A.)
Your complete and permanent satisfaction is our business. we are here to sewe you. Al1 Authorized
Mazda Dealers have the knowledge and the tools to k€ep your M^zda vehicle in rop condition.
If you have
any questions or recommendations for improvement regarding th€ service of your Mazda
vehicle or s€rvicing by Mzz da Dealer personnel, we reconmend that you |ake ihe following steps:
STEP
l:
Contact Your Mazda Dealer
Discuss lhe malter with an Aulhorized Mazda Dealer This is tbe ouickestandbest wav to
addre\\ rhe r5,ue. ll your concem ha\ no{ been resolred b) he CLiSTOMER RELATIbNS.
SALES, SERVICE, or PARTS MANAGER, $en please contact the CENERAL MANAGER
of the dealership or the OWNER.
#a
STEP 2: Call the Mszda National Customer Assistance Center #800
ff for any reason you feel the need for furlher assistance after contacting your dealership management, call Mazda North American OperationJ Customer Assistance Center toll free atl
I (800) 222-5500
In order to serve you efficienlly and effectively, please help us by providing ihe following
l.
Your name, address, and telephone number
2. Year and nodel ofvehicle
3. Vehicle Identification Number
(
17
digits, noted on your registration or title or located on
the uDrerdiver's side comer of the dash)
Purchase date and current mileage
5. Your dealer's name and location
Yourqueslion(s)
w
Customer Inlormation
If you would like to write a letter,
please address it io the foltowing,
REGIONAL OFFICE
Atft
Customer Assistarce, which corresponds with your srate
AREAS COVERED
Mazda North American Operalions
7755 lrvine Center Drive
IN;^e. C A 9261A-2922
PO. Box 19734
Irvine, CA 92623-9734
This way, we can be sure to respond to you as efficiently
Ifyou live outside $e U.S.A.,
as
possible. Tbat is our goal.
please conract your nearest Mazda Distriburor
Customer lnformation
Customer Assistance (Puerto Rico)
Your compleie and permanent satisfactioq is our business. That is why ali Authoized Mazda Dealers bave the knowledge and the
tools to keep your Mazda vehicle in top condition.
If you have any questions or recommendations for imprcvement regarding ahe seNice of your Mazda vehicle or servicing by
Mazda Dealer personnei, we recommend that you take the following steps:
STEP
I
Discuss tbe matter with an Authorized MazdaD€aler This is the quickest and best way to address the issue. If your concem has
not been resolved by the CUSTOMER RELATIONS, SALES, SERVICE, or PARTS MANAGER, then please contact the
GENERAL MANACER of tbe dealenhip or the OWNER.
STEP 2
If, afGr following STEP I , you feel the need for further assistanc€, please contact your area's Mazda representative (Indicated on
rhe next page).
Please help us by providing the following information:
I
Your name, address, and telephone number
2. Year and model ofvehicle
.
3.
vehicle ldentification Number (17 digits, noted on your registration or tide or located on the upper driver's side comer of the
dash)
4. Purchase date and cunent mileage
5. Your dealer's name and location
6. Yourquestion(s)
9-4
Customer Information
Mazda Importer/Distributors
U.S.A. (Importer/Distributor)
GUAM
Mazda North American Operations
7755 haine Center Drive
lrr'ine, CA 92618-2922
P.O. Box 19734
lwine, C492623 9?31
Thiple J Motors
157 South Marine Drive, Tanuning,
GUAM 9691I USA
PO. Box 6066 Tamuning, Guam 96931
TEL: (671) 649-6555
TEL|
1 (800) 222 5500 (in U.S.A.)
(949) 727-1990 (ourside U.S.A.)
(Distribntor in each area)
CANADA
M^z da Canada Inc.
305 Milner Avenue, Suite 400
Scarborough, Ontario MIB 3V4 Canada
I (800) 263-4680 (in Canada)
(416) 609 9909 (outside Canada)
TEL:
PUERTO RICO
Plaza Motors Corp. (Maz& de Puerto Rico)
PO. Box 362722. San Juan. Puer.o Rico 00936-2722
TEL: (787) ?88 9300
SAIPAN
Paciffc lnternational Marianas, Inc.
(d.b.a. Midway Motors)
P.O. Box 887 Saipan, MP 96950
TEL:
(6"70)
234't524
AMERICAN SAMOA
Polynesia Motors, Inc.
PO. Box 1120, Pago Pago, Arnerican Samoa 96799
TEL: (684) 699-9347
Customer Informstion
Warranties for Your Mazda
.
.
.
.
.
New Vehicle Limited Waffanty
Safety Restrainr Syslem Limited
Anti-prforanon Limited Waranty
Federal Emission Control Warranty
Defect Warranty
-Emission
Emission Perforrnance Warranty
California Enission Control Warranty
(ifapplicable)
.
Outside the United States and
Canada
Government regulations in the United
States require that automobiles meet
specific emission regulations and safety
standards. Ther€fore, vehicles built for
use in rhe United States. its territories,
and Canada may differ from those sold in
The differences may make it difficult or
even impossible for yourvehicle to re
ceive satisfactory servicing in other coun'
tries, We strongly recommend that you
NOT take your Mazda outside these
Replacement Parts and Accessories
Limited Warranty
You may have these problems if you do:
.
NOTE
Detailed warranty information is
provided with your Mazda.
9-6
.
Recommended fuel may te
unavailable. Any kind of ieaded fu€l
or low-octane fuel will affect vehicle
performance and damage th€ ernission
controls and engine.
Prop€r repair facitilies, lools. tesling
equipment. and rcplacement parts may
The Mazda wananty applies only to
Mazda vehicles registered and normally
operated in the unitred states, iis
terdtories, and Canada.
Customer Information
Add-On Non-Genuine Parts and
Accessories
Non-genuine pans and accessories for
Mazda vehicles can b€ found in stores.
These may fit your vehicle, but they are
not approved by the Mazda for us€ with
Mazda vehicles. W}len you install
non genuine parts or accessories, they
could affect your vehicle's performance
or safety system; the Mazda warranly
doesn tcoverrhis. Before you install any
non-genuine parts or accessories, consult
an Authorized Mazda Dealer.
A
Awaruvavc
Insta ation of Non-Genuine Parts or
Accessories:
Insta ation of non-senuine parts or
accessoies is .langetuus. Impnpe
dengned parts or accessories couA
!
seiouslJ o,ffect !ou. rehicle\
Wrfornu ce ot safeg slstem. Thit
couu cause rou to haw an accinent
o. incresse
lour
chances of
Wuies
id an accident. Alv'ats consult an
Attthoized Mazda Dealer beforc fou
insta ott-ge uine pafts or
wemrnvc
Add-On Electical and Electonic
Eouipa@alir
Incoftectlr chMsing or installi g
inprcper add-on equipment or
choosinga inproper
i
sta eris
dangerous. Essential slstems coud
damaged, cauNing e gine stolling,
ab-bas (SRS) actn'afion, ABS
inoctivanon, oraJirc in the vehicte.
Be very csreful in choosins and
in
stauing add-on
equipnelt, such
e le
as
ctical
nobile
telephones, trio-N)a! radios, stereo
sfstens, and car abrn slstems.
Mazda assumes no responsibility for
death, injury, or expenses that may result
from the instatladon of add on non genune pans or accessofles.
9-7
Cuslomer Informalion
Uniform Tire Quality Grading
System (UTQGS)
This information relates to the tire
gradjng system developedby the U.S.
National Highway Traffic Safety
Administration for grading tires by tread
wear, traction, and temperature
I
ltead Wear
WARNING:
The tread wea.r grade is a comparative
nting based on $e wear rate of the tire
when tested under controlled conditions
on a specified govemment test course.
For example, a tire graded I 50 would
wear one-and-a-half times as well on the
govemment course as a tire gmded l0o.
The relative performance of tires depends
upon the actual conditions of their us€,
howeve! and may depart significandy
from the nom because of valiations in
driving habits, service practices and differences in rcad characteristics and cli-
I
Tlacaion-AA,
.\
B, C
'fte tracdon grades, from
highest to low,
est, are AA, A, B. and C. These grades
9.8
r€present fte tire's abilily to stop on wet
pavement as measured under controlled
conditions on sp€cified govemment test
surfaces of asphalt and concrete. A dre
marked C Inay have poor traction perfor-
The tructioi glade assigned to this tirc
is based
blaki g (slraight ahea.l)
tractio tests a d does not include
o
ac.elerudon
hJdropla
i
co edne tunind,
g, or peak trcction
Grade C conesponds to alevel of
performance which all passenger vehicle
tires must me€t under the Federal Motor
Vehicle Safety Standard No. 109. Grades
B and A represenl higher levels of
perfoamance on the laboraiory test wheel
than $e minimum required by law.
WARNING:
The tenperulure srude for this tbe is
established fof a tie th4t B pfope
inlated and not ove oaded Excessive
speed, undefit Jlation, or excessive
r
Ioading, either separat b or in
combination, con cause heat buiuap
I
Temperature-A, B, C
The lemperature graales are A (the highest), B, and C, represent the tiret resistance to the generation of heat and its
ability to dissipate heat when tested under conlrolled conditions on a specifi€d
indoor laboratory iest wheel. Sustained
high temperature can cause the material
of lhe tire 1o degen€rate and reduce tire
life, and excessive temperatures can lead
to sudden tire failure.
a
.l possible tirc
faiure.
These grades will be added to the sidewalls of passenger vehicle tires over the
next several years according to asched,
ule €stablished by the NHTSA and the
tire manufacturels.
The grade of tires available as standard or
optional equipment on Mazda vehicle
may vary with respect to grade.
Ctstom€r Information
Reporting Safety Def€cts
ALL PASSENGER VEHICLE TIRES
MUST CONFORM TO THESE
CRADES AND TO ALL OTHER
FEDERAL TIRE-SAFETY
REQUIREMENTS,
If you believe that your vehicle
TREADWEAR 2OO TRACTION AA
TEMPERATURE A
i'\\
has a
defect which could cause a crash or could
cause injury or death, you should
imnediately inforn the National
Highway Trafiic Safety Adminisrration
(NHTSA) in addition to nolifying Mazda
Motor Corpomrion (Your Mazda
lmporte/Distributor).
If NHTSA receives similar complaints, il
Unifonn Tire Quality Grading
Quality grades can be found where applicable on the tire sidewall between tread
shoulder and ma\imum section width.
may open an invesrigation. and if ir finds
that a safeiy defectexists in a group of
vehicles. it may order a recall and remedy campaign. However, NHTSA cannor
become involved in indivjdual problerns
between you, your dealer, or Mazda Motor Corporation (Your Mazda Importer/
Disiributor).
Tfeadwear 200 Tiaction AA
9-9
Customer Information
To conlacl NHTSA. you may either call
the Auto safety Hodine toll,free at
1 (800) 424-9393 (or 366-0123 in
Washington, D.C. area) or wriie to:
NHTSA, U-S. Departmenl of
Transponation. Washington, D.C. 20590.
You can also obrain orher information
about motor vehicle safety from the
Hotline.
(Note)
Ifyou live in the U.S.A., all correspondence to Mazda Motor Corporation
should be forwarded .o:
Mazda Nonh American Operalions
7755, Irvine CenterDrive
h v ine, C alif omia 926 1 a -2922
P.O. Box 19734
lNine.
C
A 92623-9734
Customer Assistance Center
or toll fr€e at I (800) 222-5500
lfyou live oubide of
the U.S.A., please
contact fie nearest Mazda Dislributor
shown on page 9-5 in this bookler.
9-10
Customer Informalion
Service Publications
Factory authorized Mazda service publicarions are available for owners who wish ro
do some of their own maintenance and repair
When requesting any of our publicarions $rough an Authorized Mazda Dealer. refer
If they don't have what you
need in stock, they can order ir for you.
PUBLICATION ORDER NUMBER
9999 95 0l78 01
9999
999 95 0lgc 0l
95 038C 0l (Except Pueno Rico)
PUBLICATION DESCRIPTION
2001 WORKSHOP
2001 WIRING
2OOI
MANUAL Gnslish)
DIAGRAM GnAIhh)
OWNER'S MANUAL
WORKSHOP MANUAL:
Covers recommended maintenance and repair procedures of the drive rrain, body and
WIRING DIAGRAMI
Provides eiectrical schematics as well as component locarion for the entire elecrrical
sysrem.
OWNER'S MANUAI,:
This booklel contains information regarding the proper care and op€ralion of ]our
vehicle. This is not a technician's rnanuat.
9-ll
Specifications
Lubricant Quality
Engine
Electrical System
to- 2
10,2
to- 2
l0-
3
to- 4
104
r0-
t0Light Bulbs
5
5
r0,5
l0-1
Specificaiion!
Lubricant Quality
Dimensions
ILSAC
sG @crH/ consflins tr)
SH (Enegr Consening tr)
GF-I
SJ
GF
Overall length
r,705 (67.1)
t.47O
II
Above l0'C (50'F)
API S€dice GL'4 or GL-5
(sAE 80W-90)
ATF
M{Il
ATF M-III or eqDilalenr
II)
FMVSSIt6DOT-3
*
Refer to the recommended SAE viscosily numbers on page
8
16.
t0-2
15',7
.9)
1,470157.9)
2,6r0 (ro2.8l
Weights
or-equivalent
(e.g. Dexron*
t,4i0 (55.5)
Olerall heighl
API Senice GL 4 or GL 5
(sAE 75W90)
Automatic transaxle fl uid
4450 \175.2)
Model
GVWR
1.8
and 2.O-liter
1,600 (3,527)
t,653 (3,644)
850 (1,874)
883 (1,947)
760 0,675)
780 (1.?20)
GV.!VR| Gross Vehicle Weight Rating
GAWR: Gross Axle weight Rating
Specilications
Engine
Model
Type
DOHC- l6V inline. 4cylinder
?8.0 x 83.6 nm
(3.07 x 3.29 in)
1.598
nl
(1,598 cc.97.5 cu in)
9.0
81.0 x 85.0 mm
(1.27 x 3.35 in)
83.0
(.3.27
x
92.0 mm
3.62ln)
l.991ml
i.8.lOml
(1,840cc. 112.2cu in)
><
(1,991 cc, 121.5 cD in)
9.1
Specificstions
Electrical Svstem
Model
Battery
Capacities
1.8 and
1.6-liter engine
12V
,
40Arv5HR
I2V_4OAI'5LIR
l2v 52AI'5HR
l2v-70A
t2v 1.0 kw
NGK
DENSO
ZFR5F
l2v-80A
t2v-1.0 kw
BXR5E-]I
KJl6CRll
BXR6E-] I
K16PR UII
KJ2oCRIl
KzOPR-UI I
II
ZI'R6F II
RC8YC4
CHAMPION
Unit
Eng'ne
BPl4l8
1.0
1.I
nn
110
110
L
US qt
Imp qt
3.2
3.4
2.8
3.0
3.2
2.6
3.5
3.7
3.1
3.3
3.5
2.9
6.0
6.3
5.3
5.5
5.8
4,E
7.5
7.9
6.6
6.9
7.3
6.1
2.7
2.9
2.4
7,2
'7.6
6.3
L
US gal
50
13.2
8ar
l l,0
55
14.5
t2.l
z.u
1.6 -
RCloYC4
BPl3 r8
MAZDA
Spark-plug gap
roximate Quantities
2.0-liter
1.8 and
2.0-
(0.03H.043 in)
1.6-liter engine
1.8 and
2.0liter engine
Check oil and fluid levels with dipsticks or reservoir gauges.
Specifications
Air Conditioner
Gas complies
Bulbs
with SAX J639
R-134a
Maxinum openting charye
Bulb
Lieht bulb
0.6 kg (21.2 oz)
HeadliBhls
Tires
I
Standard tire
Frcnr-rum signaUParking lighrs
kPa r kgflcm-t.
Pl85/65R14 85S
lE5/65R14 867
r95/55R15 85V
]2) zzo (2.2,32)
210 (2_1, 30)
Zl0 (2.1.30)
Spon
(2.2,32) zzo (2.2,32)
Pt95/50R16 83V
I .8
and
2.otiter engine
Rear-tum signal lights
21
Front-sidc marker lighrs
5
Rear-side marker lights
3.8
Tailligh!!
BEke lighr.fi.illights
k?a (osi)
25t70Dt4
42O <@)
Map
194
3.8
194
2|5
7443
2l
2l
1440
Licens€ plae lights
Interior light
Tl15/70 DI5
ll57
5
Trunk lighr
Temporary spar€ tire
'
27ta
55
Back up lights
22O
HB2
Fog tights*
High-mount b6ke lighr
Pl95/55R15 84V
2.O-
I
220 \2.2,
6(V55
5
Type
A
TYpe B md
l0
c
8
lidts*
Fuses . . , . . . . . . . .
5
.
Refer to page 6-9
,s".e
roaet'. 10-5
Index
ll-l
Page
A
B
Add'On Non Genuine Paris and
Accesories
..................
Battery
-.
-.. 9 7
Air Bag Restnint Syslem
C
..........................
Charging system waming light
Jumpstaning
Supplenental Resfiaint Syslem . . . . . 2-3O
................... 5-31
Aluminun Wheel Maintenance ........ 7-8
Ant€nna .........................
5-86
Antil@kBEke System (ABS) ........ 5 13
Waminglight .......-........-.. 5 30
Ashtmy.......-.................. 5-3E
ADdio System .... -. ......... - 5 56,5 57
waminglight
8-31
58
Fluid level . . . . . . . . . . . . . . . . . . . . . . 8-25
Overdnve .......................
Shift-locksystem ................
Transaxleranges
..................
5-9
5-10
Capacities.............-..........
l0-4
.... -. 5 28
..........-...... -..
6-4
Beforc Driling
(see Emission
Conrol Slstem)
CenterConsole....................
5-40
Ct'ecking
Automatic transaxlefluid
Brake/clulch fluid
..-... -..-..-.......1-6 Chains ....-.....--...-...-...... 4-10
Beforc g€ltingin ..,.,..,.,.,.,.,..
+6 ChangingaFlatTirc--.....-....... - 6 16
Body Lubrication ...... - -... -...... a-27 ChdgiDgCoolani ............-....
8'20
Chdging the Oil ..................
8-18
Antilo.kbrakesysten (ABS) .. -.... 5 13 Cheging Systen wamjng Light .. .. .. 5-28
Pluidlevel ......................
E-23
Check Engine Light . . . . . . . . . . . - . . . . 5-29
Afte! getringin
Foo! brake . . . . . . . . . . . . . . . . . . . . . . 5 I I
indicator . . . . . . . . . . - . - . . 5 12
ParKngbrake ......... -...... -.. 5-lZ
Pad wear
Drivinglips...........-..........
Page
Page
System
weinS light -.. .. -.. -. ...
5-26
......-....-........
BrighrMetal Mainiemnce, -. -....,..,
7-7
Headright......................-
8,37
BEaklnPeriod
+6
5-7
Red...........................
8-43
Buld Replacenenr, Front,
interior
.....................
8-40, 8-41
]evel......
8-25
level............
E-23
Coolant1eveI....................
8'19
.................. 8-l?
Power steering fluid level ..........8-24
Engineoillevel
washer fluid level . . . . - . . . . . . . - . . . 8'27
Child Restnint, P@autions.
2-20
Child Safety t-ockforRearD@r.. -. -.. 3-6
Child-RestFinr Syst€mr............. 2-22
Installing
-. 2-23
.........
....-................
..................
CigareueLighter
5-3E
Ciean'ng
Dashb@rd.......................
Laphhoulderbeltwebbing
rt-2
-........
7-9
7-10
lndex
Page
ffin . . . . . . . . . 7 9
Windowinterio$................. 7-lO
Cumate Control Systen . . . .. .. .. .. . .5 A
Uphohtery and inlerior
Coolan!, Engine
Adding
8
Changing....-..................
Inspecting
....-.............-...
19
8-20
8-19
Cruise Control . . - . - . . . . . . . . . . . . . . . 5 15
CupHolder...............-.......
Customer Assistance . . . . - . . . . . .
Customerlnfomation
.
5-:lO
9-2, 9-4
:..............
9-l
Energency Starting
....................
......-..,.,..,.,,.,.
6-4
66
Push-starting
Emission Control System .. . .... ... .. . +3
Engine Compaiment Oveniew. -. -... 8-14
Engine Coolant
.................. 8 19
................ 8-20
Inspectingcoolantlevel ........... 8-19
Overheann9................ -..... 6 2
Addingcoolant
Changingcoolan!
Engine Coolanr Tenperature cauge
D
FinishDanase
.............. -......'7-7
Flashea Hazard
Wamine
Flat
Tlre
...
.
-.
....
.. .6
2
.. .. . ... .. .. .. ..-. ... .. . .
6 t4
,.,..,.... ..,.
....................
8-25
8-23
Automanc
hnsaxle
Biake/clutch
Powersteering.....-......... -...
Washer............. -... ........
8,24
a-27
....................... 5,35
Foot Bmke ..................
-. -.. 5- ll
FogLights
Front Seat Belt Pretensioner and Load
Limiling Systems
2-ll
Fron! Seat Belts . . . . . . . . . . . . . . . . . . . 2-t2
..................
.........-.-. 5 25
................ l-3
Dashbosrd Precautions.... ...... -.. -. 7 9
Day/Night Minor.....-.... -....... 3-23
DashboardIllunination
Dashboard
F
Jump-sBning
.,.,.,,..-.....,....,.,,
page
Page
E
Ovedjew
Rearwindow............ ........
5 37
Engine ExhaDst
(carbon Monoxide) .
Engine
.........
.. .. .. . +4
Oil
Changingengineoilandiilter
Inspecting engine oil
Re.onnendedoil
level
....
-.
Headrcshinr
......
.. .. ... .
-.........
8-18
.
8- I 7
8-16
Engine Oil Pressure waming Light . . . . 5-28
Reline
....................
2-l
.23
Slide .-.........................
2-z
Ilt(driver'sseao ............. -. -. 2-4
FuelGauge....................... 5 24
.. .. ... .. .-.-.. .. ... .. . .
DoorLocks......-.-............... 3 2 EngineSrat1ing..................... 5,4 Fuel Requircments
. .... . -. -. -.. . .. .. +2
Door-AjeWanine Lighr............ 5-30
Exhaust (Carbon Monoxide) .. .. ... .. . +4 Fuel-FillerCap.................... 3-19
Doos ...-..............-...-.....
l-4 ExteriorCarc .............,........
7,4 Fuel'FillerLid ....................
3-19
Driling in Fl@ded Areas.......... .. 4ll
Fuses ............................
6-6
Fusepaneldescription . . ......... 6 9
Replacement .....................
66
11-3
lndex
Page
Page
Paint chipping . . . . . . . . . . . . . . . . . . . .
G
Walermarks
.........-.-.........
1-3 J
7-3
Jack md
Gauges
Fuel . . .
... .. ..-.. .. ..-.. .. ... .
. 5 24
tlipmeter,.. ...,....
....................
5-22
5-22
Odometerand
Spedometer
Tachometer,...,.,,.,.,,.,.,,.,.
5-25
Watertenpenture...
5-24
-............
.......................
cloveBox
5'39
H
Halogen Bulb . . . . . - . . . . . . . . . . . - . - . 8 3?
Hazard waming Flasher . . . . . . . . . . . . . . 6-2
Hazardous
Driving . . .. .. . .. .. .. . .. .. +8
Headlight Bulb
Headlights
Replacement.........
E-37
light....... -..
5-33
5-32
....-.-......-.........
Higb'beam indicator
HoodReleak .-...... -............
Hom ............................
How to Minimire Environnental Paint
Damage
.,.,.,......,..,.,.,..,.,.
tt4
K
InCaseof Emergercy
3-6
KeylessEntrySystem
Maintemnce
3'9
Tmnsnitter - . . . . . . . . . . . . . . . . . . . . . 3-1
............... 6'l
Cruiseset.......................
Headlight high'bean...... ........
o/D(overdrive) oFF .............
5 3?
5-32
5'32
..
8'25
...
8-23
Autonatic traDsaxle fluid lev€l . ..
BEke/clutch fluid level .. .. . .. ..
Coolanr level . . . . . . . . . - . . . - . . .
.
..
. 8-19
. . .............
7-2
Inleriorcarc.......................
lnteriorLight ......-.... -. -....... 3-26
7-9
or tree sap . . . . . . . . . . . . . . . . . . . . . . . 7-2
Etchingcaused by acid rain or industrial
7-2
fallout
14
6-4
Ignition KeyReminder ............. 5-31
Ignition SwitchPositions ............. 5-2
3'21
Damage caused by bird dropping. insects,
..........................
I
Engine oil level
8-17
Power steering fluid level . . . . . . . . . . 8-24
wdher fluid level . . . . . . . . . . . . . . . . I 27
Instrument Cluster . . . . . . . . . . . . . . . . . 5 20
l-18
Tml Storage . . . . . . . . . . . . . . 6
Junp'Sarting......................
Interior Oveniew .
.. . .. . .. .. .. . .. .. . l-z
...............
.....................
Kets
.....-.......................
3-2
L
LabelInfomation .................
LAICH Child'Restnint
Syslem
..-
.. ..
.. .
Lane'Change Signals
+12
...... .. ..2-2'1
............... 5-34
.. .. ..
Light
........................
Map......................-.-.Trunk..........................
Lighler ..............-.....-..-..
Interior
3 26
3 28
3-28
5-38
Lighting Control
Lights
Fog
.-.........................
5-35
Index
.........................................
LockingLugNuts ........... -.....
Page
HeadIi8hts
5-33
Onreminder
5-31
o
P
... .. ... ..
6 2l
Low Fuel Waming Lighr . - . . - . - . - . . . 5-29
LugNuts. Locking .................
6,21
Odomeler and Trip Meter. .
Oil(see Engine)
LuegageCompanment.-....
Ou$ide Ue Uniled States and
-........
1,6
Maintaining the Air Filler .
,.. ,. ,.. ,
. 8-28
-...... l-4
........ -.. 8'29
MainlainingtheFinish...... -.
Maintaining wiper Blades
Maintenance....................... 8'l
Introduction.................... -. 8 2
Owner.................-......-.
Scheduled .......................
Opemtion
.......................
Outlide Mirmrs ..
..........
5-22
8'8
83
5'5
Shiftpattem,..................... 5-5
MapLighrs...-................... 3-28
PainrDamage................... -..
7-2
Damage caused by bird dropping, insers,
.. ... ..1-2r
canada ...........................
9-6
Overheating - . . . . . . . . . . . . . . . . . . . . . . 6-2
Overloading -........... . ......... +12
M
page
Page
sap , . , , , ,
or tree
8-13
8-12
. '7-2
Etching caused by acid rain or industrial
fallout
Waier
..........................
marks . . . .
7-2
... .. .. .. ... .. . .
-...............
Minor...............
Park'ngBrake.....
PowerControl
Precautions .....................
Schedule .......................
,,. ,. ,. .. .. .. .. .
. 7-3
5-12
3-22
Power Door L@ks . . . . . . . . . . . . . . . . . . 3-4
Powersteering...............-....
Power Steering Fluid
l€vel
.........
5-14
. 8-24
................... 3'll
Driver'sdoor.................... 3-ll
Lockswitch..................... 3-12
Powerwirdows
-...............
-.................
PassengeFDoor..
3-13
Reardoor.....
3-13
PEgnant Women . . . . . . . . . . . . . . . . . . 2-19
Push-SBning
6-6
......................
Outsidemirors ..................
3-21
Powerfold in outside nircrs ......322
Rearviewmiror
Vanity
.................
3-21
. 5-41
.. ..... . +7
-.......................
Money-Saving Suggestions
...
ll-5
Index
page
R
Dimensions
S
.
Radio Reception . . . . . . . .
........5-52
Rear DoorChild Safety Lack.......... 3-6
SafetyCenificatior
RearSeat
Sear
..-.-....................
Rear Seatback
splirfolding
lock ..
_
-....
-.
2-5
-.... -. 2'8
.. .. .. ... ... .. .. ...
. 2-5
.,.,,,,... ,... -.... .2-14
RearWindow Defrosier ............. 5-37
Reaniew Minor (DayiNisho ....... - 3'23
Rear Seat B€Its
Repairing Damage to
Replacing
theFinhh........
Bulb(ree).............. -.......
7-7
8'43
......... 8'4O, 8'41
Headlightbulb... _............... 8-37
'Iire ...........................
8 35
..., -...,.,,,,.,
ScheduledMaintenance
5-54
..............
8'3
Belt
Extender,.,,,,-...,.,,.,...,.,,
Front .,.,-.................,.,,
2-18
2-12
F.ont sea! belt prcEnsioner and loading
limiting systens
Pregnan!women
... .. ... .. ... .. .
.2II
.................
Rear-..-.-......-..-...........
System,-........................
wminglightbeep .......... -....
. . . . . . . . . . . . . . . . . . . . . . . . . 8'37
windshield wiper bndes . . . . . . . . . . . 8 29
Rockingthe Vehicle ..... -............L8
2-11
28
5 27
Front,,.,..,............., -,.,,. 2-2
Rear.,....,.,.,,.,.,,.,.,....,.. 2-5
SenicePublications. -.... -...... -.. 9-11
Snow lires .......................
+10
Sparcf ire ......... -.... - .... 6-22,8 36
Special Driving Conditions
........... +ll
-.......... +8
Rockingthe vehicle .... -.......... +8
Drivinginfloodedareas
Hazddousdrivin8......
Winterdriving.................... 49
Specifications..................... l0-1
..................
Capacities ......................
Airconditioner
l1-6
.....................
Electricalsystem.................
.. -.
Engine ,.,...,.,............
Ligh! bulbs
................. -...
LDbricanrqualily.................
]:res ..........................
Weighrs
.,...,.,................
l0'2
l0-4
l0-3
l0-5
l0-2
105
l0-2
SFedometer........... -.......... 5-22
Staningth€Engino.................- 5-.4
2-19
Buld(front. interiot
wheel
Page
Page
Hom ..-.......................
3-21
'Illt wheei . . . . . . . . . . . . . . . . . . . . . . 3-20
StoFge Compartrnents.............. 5-39
Sunroof, Opention.......
3-24
..........
........................
Sunvnors ....-.-.................
Sunshade
l-25
5'41
Supplemental Restnint System
Constantmonitoring .,...,.,....,.
Frontairbag etivalion .,,..,....,.
2-44
2-38
How the air bags work . . . . . . . . . - . . 2 33
Linitations rc side air bag
2-42
activation........,.,.,...,......
Maintenance,,,..,.,.,.,.,.,..,,
Non-acrivarion of side air'bags . -. -..
Sjde air'bag
2-:15
2'43
activation . . . . . . . . . . . . 2-41
...............
....... -...........
l0-5
Systemdescription
l0-4
wamingligiit
2-32
5'31
Index
Page
Page
..............
.......
TumSignal.......................
Page
Tacbometer,.,..,..............,..
5 25
Tempomr! SpareTire
8-36
D@Fajar.......................
Engine oil prcsurc ...............
Ignition key reminder .......... -..
Lights'onrcminder ...............
TlhSteering
l-20
Low fuel . . . .
T
Trunk Release Handle
Tum and l-ane-Change Signals
Chains
..............
..........-...........
.-..................-....
FlartiE
.....-..,.,,.,..,,,.....
................
Replac€ment ....................
RoBtion........................
lnflation plessurc
410
6 l:l
8 34
8-35
8-35
Snow tires . . . . , . , . , , . , , . . . . . . , . . +10
8-16
Sparetire
-. - -. -. 6 22
Tool
6 14
Spe..........................
-...............
Stora8e....................-.
Towing ............... -.......... 6-12
TnilerTowing ....................
+ll
TEnsaxleRanges, Automldc ..-...... 5-7
TEnsaxle, Automatic .
Tnnsaxle, Manual . .
..
..
... .. .. , ..
... .. ... .. .. ...
. 5-6
.55
Tmnsmission (see Transaxle)
TripMeter
.......................
5-23
Ttunk Lid
Key operatedlrunk ..............- 3 14
Remote lrunk lid release . . .. .. ... .. 3-14
Trunkseuity..,....,.,,.,...-..
Trunk
Light
-.-..................
3
15
. 3-28
3-16
5-34
5-34
U
5,31
5 29
. 5-2'7
Supplemental rcstraint systen . . . . . . 5-3 I
Wamingiights inspection .......... 5-26
Wamnties for Your Mazda . . . . . . - . . . . 9-6
washing ................. -........ 7-4
WaterTempenture Gauge ........... 5-24
... .. .. .. .. .. .. .-.-
Seat belt , . , , , . , . . . . . . . . . . . . . . . ,
Underbody Maintenance . . . . . . . . . . . . . 7-7
Unifom Tire Qulily Grading Systen
(UTQAS)
Tenperature-AA. A. B,
C
... .. ... .
C..,.,.,.,..,.,,...
.,..,.,.,.,...........
Tra.tion-A,B.
Treadwear
5,30
5-28
5,31
. 9-8
98
9-8
waxing
.......... -................'7-6
Wheel Replacement - . . . . . . . . . . . . . . . 8-37
windshieldwasher
5-36
Windshield washer Fluid Level .......8-27
................
v
VanityMirors
windshield wiper Blades
....................
5-41
Vehicle Infomation Labeh . . . . . . . . . . +12
w
waming LighttBeeps
Antilockbrake system (ABS)
.......
systen....................
Charging systen .................
Ch{ken9ine....................
Bnke
-......
8-29
Maintaining.....................
8 29
8 29
Replacement...........-...
-... -...... 5-35
WinterDriving................... - - +9
windshieldwipers......
Windshield
.....................
5-30
5-26
5'28
5-29
tt-7