1
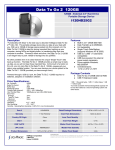
PC PVR
Desktop TV/Personal Video Recorder
USER’S GUIDE
I/OMagic PC PVR
User’s Guide
Dear Customer:
Congratulations on the purchase of your I/OMagic PC PVR Desktop
TV/Personal Video Recorder. We all want to express our sincere gratitude for
your decision to purchase our product, and to reaffirm our commitment to
you of providing a product that is easy to install and easy to use.
You can be assured that your new product is made from the latest state-ofthe-art components and that it has also gone through the most rigorous
testing and quality assurance procedures in the industry.
With an emphasis on products that revolutionize the way people interact with
the new technologies around us, we continually introduce integrated solutions
that enable users to take full advantage of their multimedia experience. Our
ever-expanding product line covers the entire multimedia spectrum. Look to
us to as the leader of providing media products ranging from sound and
graphics cards, to DVD and CD-ROM drives, and even to digital imaging and
mp3 audio products.
We hope you enjoy using your new product, and look forward to earning your
business in the coming years.
- 2-
I/OMagic PC PVR
User’s Guide
Copyright Statement
It is a criminal offense, under applicable copyright laws, to make
unauthorized copies of copyright-protected material, including computer
programs, films, broadcasts and sound recordings. This equipment should
not be used for such purposes.
Notice:
I/OMAGIC Corporation makes no warranty of any kind with regards to this material, including,
but not limited to, the implied warranties of merchantability and fitness for a particular product.
I/OMAGIC Corporation shall not be liable for errors contained herein or for incidental
consequential damages in connection with the furnishing, performance, or use of this material.
Every effort has been made to ensure that the information in this manual is accurate. I/OMAGIC
Corporation is not responsible for printing or clerical errors.
Mention of third party products is for information purposes only and constitutes neither an
endorsement nor a recommendation. I/OMAGIC Corporation assumes no responsibility with
regards to the performance of these products.
This document contains proprietary information, which is protected by copyright (see below).
Trademarks:
Copyright:
Warranty:
The information contained in this document is subject to change without notice.
Microsoft is a registered trademark of Microsoft Corporation. Windows, Windows
95/98/Me/NT/2000 and the their logos are trademarks of Microsoft Corporation. IBM is a
registered trademark of International Business Machines Corporation. All other trademarks and
product names used within this manual are the property of their respective companies and are
hereby acknowledged.
© 2001 I/OMAGIC Corp. all rights reserved. No part of this publication may be reproduced,
transmitted, transcribed, stored in a retrieval system, or translated into any language or
computer language, in any form, by any means, without prior written consent of I/OMAGIC.
I/OMAGIC Corporation warrants that the products it sells will be free from defects in materials
and workmanship. Consult the warranty card for complete warranty information.
- 3-
I/OMagic PC PVR
User’s Guide
FCC Compliance Statement
This device complies with Part 15 of the FCC Rules. Operation is subject to
the following two conditions:
•
•
This device may not cause harmful interference, and
This device must accept any interference received, including
interference that may cause undesired operation.
FCC Warning Statement
This equipment has been tested and found to comply with the limits for a
Class B digital device, pursuant to Part 15 of the FCC Rules. These limits are
designed to provide reasonable protection against harmful interference in a
residential installation. This equipment generates, uses and can emit radio
frequency energy and, if not installed or used in accordance with the
instructions, may cause interference to radio communications. However,
television reception interference can be determined by turning the equipment
off and on. The user is encouraged to correct the interference by one or more
of the following measures:
•
•
•
•
Reorient or relocate the receiving antenna
Increase the separation between the equipment and the receiver
Connect the equipment into an outlet different from that to which the
receiver is connected
Consult the dealer or an experienced radio/TV technician for help.
Caution
Changes or modifications not expressly approved by the party responsible for
compliance could void the user’s authority to operate the equipment.
For Europe
“The drive is in conformity with the EMC directive and low-voltage directive.”
- 4-
I/OMagic PC PVR
User’s Guide
Table Of Contents
Introduction.................................................................................... 6
FEATURES..................................................................................................................7
SPECIFICATIONS..........................................................................................................8
CONTENTS O F YOUR PACKAGE ........................................................................................9
SYSTEM REQUIREMENTS ................................................................................................9
Hardware Installation.....................................................................10
Driver Installation ..........................................................................14
WINDOWS 98SE.......................................................................................................14
WINDOWS ME..........................................................................................................18
WINDOWS 2000.......................................................................................................21
Power VCR II .................................................................................25
POWER VCR II INSTALLATION......................................................................................25
POWER VCR II FEATURES ...........................................................................................30
POWER VCR II LAYOUT ..............................................................................................31
MODES ...................................................................................................................33
RECORDING AND P LAYING VIDEO FILES ...........................................................................38
CHANGING SYSTEM SETTINGS.......................................................................................42
E DITING AND CONVERTING VIDEO FILES..........................................................................48
SCHEDULING RECORDING TIMES....................................................................................51
Troubleshooting .............................................................................53
I/OMAGIC PC PVR FAQ............................................................................................53
POWER VCR II FAQ .................................................................................................55
Limited Warranty ...........................................................................58
Contacting I/OMagic ......................................................................59
Register Your I/OMagic Product .....................................................59
- 5-
I/OMagic PC PVR
User’s Guide
Introduction
Congratulations on your purchase of the I/OMagic PC PVR Desktop
TV/Personal Video Recorder. We are sure that you will enjoy this product in
the years to come.
The I/OMagic PC PVR capture card is a TV tuner capture card, which can be
used with most PCI 2.1 Compliant bus. You can digitally record and playback
single frames or video clips from your computer. It combines all the functions
of your television and adds the convenience of your VCR all in one.
The I/OMagic PC PVR is equipped with a TV tuner, allowing you to receive any
TV channel using a common TV antenna or via cable TV connection. Watch TV
on your computer using PCI busmastering technology when combined with a
graphics card that enables digital TV overlay. Your TV image is superimposed
onto the image generated by your graphics card and displayed in a scalable
window.
The included CyberLink® PowerVCR II ™ is an award-winning program,
designed to perform MPEG-1 or MPEG-2 real-time software video recording
directly from TV tuners. It gives you complete control of recording live
programs and offers you all the newest advantages of digital recording such
as time shifting, CyberEPG, and pre-scheduled recording.
- 6-
I/OMagic PC PVR
User’s Guide
Features
Now you can watch broadcast television programs on your home computer.
Want to keep up with the local news or sports events while surfing the Web or
working on your computer? With I/OMagic PC PVR, getting TV on your PC is
easy. Now you can stay productive without missing your favorite TV
programs! Record and play your favorite TV moments. Turn your PC into a TV
and VCR. Record television shows on your PC to play back at anytime. Want
to share special TV moments? Save digital video clips for video email to share
with friends and family. Watch TV on PC monitor while surfing the Internet or
working on a project. Watch your favorite programs in a window or at fullscreen.
•
•
•
•
•
•
•
•
•
•
Watch broadcast or cable TV on your PC
Create MPEG movies
Create streaming video
Record and play TV shows like a VCR
Record your favorite TV moments
Keep an eye on the local news or favorite sporting event while working
Track financial news and stock quotes without tying up your phone line
Capture hilarious or memorable TV moments, and then share them
with friends and family
Grab still images from your TV
Save space in your home or office by using your PC to watch TV
With the I/OMagic PC PVR, watching entertaining movies from your home PC
has never been easier or more fun!
- 7-
I/OMagic PC PVR
User’s Guide
Specifications
I/OMagic PC PVR capture card is compatible with NTSC video only.
•
•
•
•
•
•
NTSC TV-Tuner
125 channels, cable-ready TV Tuner
Inputs: Antenna
Audio loopback cable
Full motion video captures
Video Output as MPEG 1 or 2
I/OMagic PC PVR works with all graphics chips/cards, Listed are the cards we
have tested with this product.
•
•
•
•
•
•
•
•
•
S3: Savage2000, Savage4, Virge 3D, Trio 64V+, Trio 32/64 and Vision
ATI: Rage128, Rage Pro, Rage, and Mach 64
NVidia: GeForce, TNT -Ultra, TNT -2, TNT, Riva128, Riva
3DFx: Voodoo3xxx, Voodoo 2xxx, Voodoo, Banshee
Tseng Labs (now ATI): ET6000
Matrox: G400, G200, Millennium and Mystique
Cirrus Logic: 5446
3Dlabs: Permedia
Rendition: Verite
This includes most cards from ATI, Matrox, Diamond Stealth/Viper Series,
Creative Labs, and Guillemot. Always check your graphics card
manufacturer’s website for latest drivers.
- 8-
I/OMagic PC PVR
User’s Guide
Contents Of Your Package
•
•
•
•
•
I/OMagic PC PVR Capture Card.
Driver Installation CD.
Manual.
Warranty Card.
Audio Loopback Cable
System Requirements
Computer Requirements:
• Pentium 350 MHz or faster.
• Windows 98SE/Me/2000.
• 32 MB RAM.
• Open PCI slot with Bus Mastering.
• DirectX-compatible sound & graphics card.
• 30 MB of disk space for software installation.
• 500 Mb of disk space for minimum instant replay buffer.
• CD-ROM drive (for driver installation).
Power VCR Requirements:
• Windows 98SE/Me/2000.
• Pentium II 350 or above, and at least 64MB RAM recommended for
Real-time MPEG-1 video recording.
• Pentium II 650 or above, and at least 64Mb RAM recommended for
Real-time MPEG-2 video recording.
• Pentium III 650 or Athlon 650, or above, and at least 64MB RAM
recommended for Real-time MPEG-2 video recording.
- 9-
I/OMagic PC PVR
User’s Guide
Hardware Installation
To install the I/OMagic PC PVR video capture card in your computer, follow
these steps:
1
Turn off your computer, monitor, and other peripherals
You may also need to disconnect your power cord and other devices
from the rear panel of your computer.
Electronic components are sensitive to static
electricity. To prevent damage, discharge any static
electricity from your body by touching any known
grounded metal surface, such as your computer’s
chassis, before and during installation of hardware.
2
Remove the computer cover
Locate and remove any screws that hold the cover in
place.
Gently remove the cover, leaving the base of the unit
in place. You may need to wiggle the cover back and
forth to loosen it. Do not use excessive force.
- 10 -
I/OMagic PC PVR
User’s Guide
Your computer cover may be different than the computer cover
shown above. The screws may not be located at the back of your
computer. Some covers have screws on the side of the computer.
Tower cases also have different location for the screws. Refer to
your computer’s manual if you need specific instructions on how to
remove the cover.
3
Locate an available PCI expansion slot
4
Remove the cover plate from the access slot
Each expansion slot has an access slot in the chassis covered by a
removable plate. Undo the screw that holds the plate and remove the
plate.
- 11 -
I/OMagic PC PVR
User’s Guide
7
Install the I/OMagic PC PVR video capture card into the card slot
Place the card over the expansion slot with the mounting bracket facing the
access slot (the same slot you removed the cover plate from). Carefully
align the connector with the slot and push the card into the slot until it
snaps into place. You may need to use a gentle back-and-forth rocking
motion when inserting the card into the slot. Once you install the card,
secure it by replacing the screw you removed with the expansion slot cover
plate.
Double-check all connections, make sure everything is
plugged in correctly and firmly seated before you replace the
cover.
- 12 -
I/OMagic PC PVR
User’s Guide
8
Replace your computer’s cover
Reverse the procedure followed when you removed the computer’s cover.
Route all cables inside your computer so that they are not in the way of the
cover.
Remember that your computer cover may be different from the one
above. If you need help replacing the computer cover, refer to your
computer’s manual.
9
Turn on your computer, monitor, and other peripherals
Your computer should start up as it normally does. If it
doesn’t, power down your system first and check to make
sure that all your expansion boards are firmly seated and
that all cables, both inside and on the back of the
computer, are properly connected. If you are still having
problems, refer to the troubleshooting section before
calling for help.
- 13 -
I/OMagic PC PVR
User’s Guide
Driver Installation
Windows 98SE
1
Power on your System.
2
During the load process, the "Add New Hardware Wizard" should
detect “PCI Multimedia Video Device”. Click on the "Next" button.
3
Insert the I/OMagic PC PVR driver diskette into your floppy drive. Select
“Search for a better driver” and press “Next”
- 14 -
I/OMagic PC PVR
User’s Guide
4
Select the “CD-ROM drives” option. Make sure everything else is
unchecked and then hit the “Next” button.
5
After the install program finds the correct drivers, Click on the "Next"
button to begin installation.
- 15 -
I/OMagic PC PVR
User’s Guide
Note: For some systems , MS Windows will show Version Conflict dialog
during the driver installation. Please click Yes to keep the file.
6
Once done installing drivers, Press the “Finish” button to finish your
installation, and restart your computer.
Note: Three other driver installation portions will continue after completing
this step. (I/OMagic WDM Audio Capture, WDM TvTuner, and WDM Crossbar)
- 16 -
I/OMagic PC PVR
User’s Guide
8
Check “Device Manager” to make sure everything is installed
correctly. From the top row of tabs. Click on the “+” sign next to
“Sound Video and Game Controllers” and make sure there are
“I/OMagic WDM” devices listed below.
- 17 -
I/OMagic PC PVR
User’s Guide
Windows ME
1
Power on your System.
2
During the load process, the "Add New Hardware Wizard" should
detect “PCI Multimedia Video Device”. Select the “Specify the
location” option, and click on the "Next" button.
3
Select the “Search the best driver” option, put a check on
“Removable Media” Then press the “Next” button.
- 18 -
I/OMagic PC PVR
User’s Guide
4
After the install program finds “I/OMagic, WDM Video Capture”
drivers, Click on the "Next" button to begin installation.
Note: For some systems , MS Windows will show Version Conflict dialog
during the driver installation. Please click Yes to keep the file.
- 19 -
I/OMagic PC PVR
User’s Guide
5
Once done installing drivers, Press the “Finish” button to finish your
installation, and restart your computer.
Note: Three other driver installation portions will continue after completing
this step. (I/OMagic WDM Audio Capture, WDM TvTuner, and WDM Crossbar)
8
Check “Device Manager” to make sure everything is installed
correctly. From the top row of tabs. Click on the “+” sign next to
“Sound Video and Game Controllers” and make sure there are
“I/OMagic WDM” devices listed below.
- 20 -
I/OMagic PC PVR
User’s Guide
Windows 2000
1
Power on your System.
2
During the load process, the "Found New Hardware Wizard" open up. Click on
the "Next" button.
3
Select the “Search for a suitable driver” option, and then press the “Next” button.
- 21 -
I/OMagic PC PVR
User’s Guide
4
Place a check mark on “CD-ROM drives” only, and click the “Next”
button.
6
Windows will find the appropriate drivers for this “Multimedia Video
Controller”. Press the “Next” button to begin copying the files.
- 22 -
I/OMagic PC PVR
User’s Guide
Note : For some systems , MS Windows will show Version Conflict dialog
during the driver installation. Please click Yes to keep the file.
6
After it is done copying files, Click on the “Finish” button to restart your
computer and complete the driver installation process.
Note: Three other driver installation portions will continue after completing
this step. (I/OMagic WDM Audio Capture, WDM TvTuner, and WDM Crossbar)
- 23 -
I/OMagic PC PVR
User’s Guide
8
Check “Device Manager” to make sure everything is installed
correctly. Click on the “+” sign next to “Sound Video and Game
Controllers” and make sure there are “I/OMagic WDM” devices listed
below.
- 24 -
I/OMagic PC PVR
User’s Guide
Power VCR II
Power VCR II Installation
Note: Make sure the drivers for your PC PVR card is installed first before
installing Power VCR II.
1
After installing your WDM video drivers, place your I/OMagic software
CD into your CD-ROM drive and Power VCR II will automatically install.
Note:
To manually install Power VCR II, open the CD-ROM drive and select the
“Power VCR II” directory. Then run “Setup.exe” from “disk 1” directory
2
Select “English” and press “Ok” button.
- 25 -
I/OMagic PC PVR
User’s Guide
3
Press “Next” when the “InstallShield Wizard” comes on.
4
Click “Yes” and agree to the License Agreement.
- 26 -
I/OMagic PC PVR
User’s Guide
5
Enter your Name, Company and Power VCR II serial number. The
serial number can be found on the CD-ROM itself or on the package
sleeve.
6
Select the directory you would like to install Power VCR II into by
clicking the “Browse” button. Click “Next” to continue.
- 27 -
I/OMagic PC PVR
User’s Guide
7
Select the working directory for saving and recording from your TV.
(Your working directory should preferably be set to another hard drive
that does not contain your system data) Press “Next” to continue.
8
Power VCR II will begin copying files to your computer.
- 28 -
I/OMagic PC PVR
User’s Guide
9
After installation is complete, run the “System Diagnostics”
program.
10
You should enable DMA mode for your drives if your system supports
it. Please refer to your computer manufacturer’s manual for further
information.
11
Restart your computer after Power VCR II installation is complete.
- 29 -
I/OMagic PC PVR
User’s Guide
Power VCR II Features
PowerVCR is opening doors to an entirely different technological dimension for
computer users across the globe. The analog-to-digital movement is well
under way. Let PowerVCR take you to the digital paradise with its incredible
recording features that capture raw video data from analog camcorders, DV
camcorders, VCRs, and TVs (video capture cards are required) with MPEG-2
technology.
Instant Video Replay
•
Digitally speaking, PowerVCR leads the pack as the leader in its field when it
comes to recording TV programs directly from your TV tuner card. The
incomparable Instant Video Replay feature give s you your own instant replay
of what you just witnessed on TV! Pause, fast forward or rewind your own
instant replay to your heart's content.
Time-shifting Playback
•
Don't forget PowerVCR's incredible time -shifting feature that allows you to
watch the b eginning of a recorded program while it is in progress! Skipping
through trivial commercials and watching at a faster speed to catch up to the
live broadcast has never come so easy nor effortlessly.
Still Image Snapshot
•
Catch and capture all your memora ble video frames as still image files with a
single click!
Channel Surfing
•
With the channel surfing feature, no more incessant flipping or searching for
lost TV guides are needed. PowerVCR allows you to preview multiple channels
in one quick glance. When you decide to watch one given channel, simply
double -click on its preview display and your screen will revert to its normal
display.
Recording Reminders
•
PowerVCR considerately thinks for you during the recording process by
providing messages when the amount of free space available on your working
drive is running out of space.
Other PC PVR Features
•
Not only does PowerVCR record, it also plays VCDs, converts video files from
AVI to MPEG, and edits your MPEG files by trimming, cutting, splicing and
merging your video clips.
Note: Some features are not supported
- 30 -
I/OMagic PC PVR
User’s Guide
Power VCR II Layout
Main Controls
Icon
Description
•
Turns PowerVCR off
•
Minimizes PowerVCR
•
Accesses Online Help
•
About PowerVCR
- 31 -
I/OMagic PC PVR
User’s Guide
Display Area
•
Displays replay indicator status
•
Displays current channel
•
Displays time remaining until next scheduled task
•
Displays current file size
•
Displays total time for current file
•
Displays hard disk space available
Modes
1. Live/Digital Recorder
In this mode, you may watch live video content and record video content.
•
Configures PowerVCR's System Settings
•
Captures still images during playback or from TV
•
Enables the Time -shifting playback feature
•
Shows/hides the TV tuner control
•
Controls playback volume
TV Tuner Control
•
Goes to next channel
•
Returns to previous channel
•
Auto scans for available channels
•
Returns to the last channel viewed
- 33 -
I/OMagic PC PVR
User’s Guide
2. Instant TV Replay
In this replay mode, you may pause, rewind, play in slow motion, instantly
replay live television, or skip commercials. Video recording is not allowed
here. The default video replay limit is 30 minutes of live video. Please refer
to the Control Wheel for information on navigating in the Instant TV Replay
mode.
Note: There is no Stop function in the Replay mode.
3. File Player
In this mode, you may play existing video files. There are two types of files:
MPEG video files and playlist files. Playlist video files contain the description of
the video file(s) and if greater than one, are played in its original playback
sequence.
•
Opens files for playback
•
Navigates during playback by advancing or reversing
•
Steps left during pause or stop mode
•
Steps right during pause or stop mode
- 34 -
I/OMagic PC PVR
User’s Guide
4. Recording Scheduler
In this mode, you may schedule record times and its associated channel. Set
the automatic recording frequency to record serial programs.
•
Scheduling Wizard that guides you through the
scheduling process
•
Deletes scheduled tasks
5. File Converter
In this mode, you may convert AVI files to MPEG files according to your
specified recording profile or you may extract DAT files from video CDs to
MPEG-1 files for further editing.
•
Opens files for converting
•
Converts selected files
•
Converts all files
•
Deletes conversion tasks
•
Shows PowerVCR
- 35 -
I/OMagic PC PVR
User’s Guide
6. Video Trimmer
In this mode, you may choose to cut and splice video clip segments or merge
clips into a new video file.
•
Opens files for editing/trimming
•
The start trimming position
•
The end trimming position
•
Step left trim
•
Step right trim
•
Edits (trims) selected files
•
Edits all selected items (merge)
•
Adds next segment of current tape as a new clip
•
Goes up to previous task
•
Goes down to next task
•
Deletes task
•
Shows PowerVCR
- 36 -
I/OMagic PC PVR
User’s Guide
7. DV Tape Transcoder
In this mode, you may choose to cut and convert DV video clip segments into
new video files.
•
Adds a new task
•
The start trimming position
•
The end trimming position
•
Step left trim
•
Step right trim
•
Transcodes (trims) selected clip
•
Transcodes all clips
•
Adds next segment of current tape as a new clip
•
Marks current tape position as the start trimming
position.
•
Marks current tape position as the end trimming
position.
•
Deletes task
•
Shows PowerVCR
8. i-Power
In this mode, you may access Internet resources directly from PowerVCR. It
provides the latest electronic TV program guide and links for the PowerVCR
Recording Scheduler.
- 37 -
I/OMagic PC PVR
User’s Guide
Recording and Playing Video Files
Display Options
PowerVCR has flexible displaying options located on the video display panel:
• Click on the Always on Top icon so that the video display is always
visible and overlaps all desktop application windows
• Click on the Resize to enlarge or minimize your video display
• Click on Full Screen to enlarge your video display to its maximum
Tips: Double-click on any given area of the video display once to enlarge it to
full screen and once more to restore to window.
Recording
Now you may start recording after everything has been set up properly. If
you would like to configure your system settings before you begin recording
or select another recording profile.
Channel Surfing
Before recording, you might just want to learn how to surf with PowerVCR.
The incredible surfing function gives you a break from all the channel flipping
and mouse clicking endured when watching TV by providing a preview of
sixteen channels at a time.
1. Be sure that your TV Tuner card (or capture card) is installed correctly
or your PowerVCR screen will be blank.
2. Click on Surf Channels located in the video display area.
3. Click on Auto Page to allow a continuous refresh of sixteen new
channels.
4. Click Next and Previous Page to preview other channels.
5. Click Auto Scan to scan for available channels.
6. Click Cancel Surfing to exit or select one specific channel by clicking
on it to return to the normal display.
Recording with the TV Tuner Control
1. Be sure that your TV Tuner card (or capture card) is installed correctly
or your PowerVCR screen will be blank.
2. Start PowerVCR. Click the source indicator until the indicator reads TV
if you have an antenna or CATV if you have a cable wire.
Note: PowerVCR will automatically detect and select the country region of
your cable provider and the correct video signal format. If not, please see
Changing System Settings for more details.
- 38 -
I/OMagic PC PVR
User’s Guide
3. Click the arrow located on the right edge of the PowerVCR panel to
activate the TV Tuner Control.
1. Select a desired channel by using the number pad or left and right
arrows.
2. Click on Return to return to the last channel.
3. Click Auto Scan to scan all the possible channels. To cancel the
scanning, click Cancel once the Auto Scan dialog box appears and
you will be returned to the original channel.
Note: Unlike the playback volume, the recording volume is automatically set
and is not allowed for adjustment in PowerVCR II.
Note: Keep in mind that the TV Tuner Control only works with capture
devic es utilizing WDM drivers.
4. After you have selected the desired channel, click Record.
Tips: While recording, click on the recording button to display the Recording
Timer menu. Select one of the time durations and PowerVCR will
automatically stop the recording once the set time duration has expired.
5. Click Stop when you are finished.
6. The playlist will appear for you to save it.
Info: Because of the inherent limitations of the Windows operating system in
handling files over 2 GB, PowerVCR will automatically save and chunk your
video files into 600 MB files if the file's size is over this limit. Thus, when you
select the appropriate playlist for playback, all the chunked files will play
continuously like a single file.
7. To delete all the file(s), click Delete.
Note: When you click Delete, the file(s) will be deleted from your playlist.
8. Click OK when the dialog box appears to confirm your deletion.
9. Click on Save to... to save it to another folder other than the default
folder.
10. A dialog box will appear for you to save it in another folder or to
rename it. Click Save when you are finished.
- 39 -
I/OMagic PC PVR
User’s Guide
Instant TV Replay
Your own personal up-close and instant replay is at your fingertips with
PowerVCR's sterling new Replay feature. No more annoying and prolonged
periods of waiting for an instant replay from your TV station, you can simply
invoke the Replay function while watching TV for your own private instant
replay!
Note: Replay files are temporarily stored in your hard drive, but are
automatically deleted as soon as exiting Replay mode.
1. While watching TV with PowerVCR, switch to the Instant TV Replay
function by clicking it in the Master panel and instant replay playback
will commence. Refer to Changing System Settings for more details.
2. Refer to the next section for more details on Navigating in Replay
Mode.
Note: There is no Stop function in Instant TV Replay mode.
Navigating in Replay Mode
• Skip forward (skip commercials) or backward (instant replay) by
clicking on the corresponding buttons in the control wheel.
Note: The skipping forward or backward speed is set at seven seconds.
•
•
Click Pause to momentarily cease instant replay.
The fastest method for navigating here is to drag the slider. Note that
the live broadcast will always be at the slider's end, so you may notice
that the slider bar will regularly reposition itself during playback.
Time-shifting Playback
Time-shifting playback is similar to Instant TV Replay in regards to the instant
replay capability, but may only be used while recording video content.
Another difference is the recording quality, which is fractionally better, yet at
the same time, consumes more CPU resources.
First, we will turn this feature on:
1. Be sure you are in the Live/Digital Recorder mode.
2. Click System Settings.
3. Click the Recording/Advanced tab and in the Advanced Options
section, click Enable time-shifting playback when recording.
4. Click OK to exit System Settings.
- 40 -
I/OMagic PC PVR
User’s Guide
Note: The Time-shifting Playback button will now appear below the
Snapshot button on the PowerVCR panel.
5. Click Record.
Tips: The Recording Timer may also be set here. Click once on the record
button and the menu will appear for selection.
6. Click Time-shifting.
7. The mode will switch to Time -shifting. Click Play to begin time -shifting
playback.
8. To Fast Forward, Rewind, or Pause, click the corresponding
buttons.
Note: If you rewind to the beginning of the recorded content during time shifting, the mode will automatically switch back to Live/Digital Recorder.
9. To return to the recording in progress (i.e. the Live/Digital Recorder
mode), click Stop or Time-shifting again.
Playing Files
The File Player plays all the playlists or video files you have stored in your
hard drive.
Info: Because of the inherent limitations of the Windows operating system in
handling files over 2 GB, PowerVCR will automatically save and chunk your
video files into 600 MB files if the file's size is over this limit. Thus, when you
select the appropriate playlist for playback, all the chunked files will play
continuously like a single file.
1. Switch into the File Player mode.
2. A dialog box will automatically appear for you to select a playlist to
play.
3. Otherwise, you may click the Open video files.
4. Type in or select the playlist or file you would like to play. List Playlist
files or Windows' Media files by clicking on the drop-down menu in the
Files of type field and selecting the appropriate file extension.
5. Click Open.
6. After opening the file, click Play on the Control Wheel.
- 41 -
I/OMagic PC PVR
User’s Guide
Navigating During Playback
• PowerVCR's fast-forward and rewind speeds are set at 2X. Click Play
to resume playback.
• You may also click anywhere along the slider bar in order to jump to a
precise spot or drag the slider during playback for navigating.
• When you click Stop during playback, the video will always return to
the beginning of the file.
Using the Step Functions
During playback, use the step functions while you are in the Pause or Stop
mode. You may save time capturing snapshots of specific frames by stepping
backward (left) or forward (right) without wasting precious minutes blindly
pausing on the right frames. Please refer to Snapshots for more information on
snapshots.
1. When in Pause or Stop mode, click the Step Left or Step Right
functions for moving minimal frames at a time.
Note: Step Left functions move one GOP (Group of Pictures) backward at a
time, while Step Right moves one frame forward at a time.
2. To begin playback, click Play.
Changing System Settings
Settings are configured automatically before recording. If you would like to
alter them, these are the following sections under the Live/Digital Recorder
mode:
Note:
Some features are not supported with this device
V/A Devices
This is the default tab where you may set your video capture device, audio
capture device and other video and audio options.
Video Capture Device
Your default capture device should already be selected. If not, click on the
drop-down menu to select the correct capture device.
- 42 -
I/OMagic PC PVR
User’s Guide
Video Option
PowerVCR is able to control video formats and options for the WDM (Windows
Driver Model) drivers, so its settings will be disabled. However, if the Video
for Windows driver is being utilized, you may modify various options, formats
and the source depending on the manufacturer. All options below may fall
below any type of the following categories: Video Format, Video Source,
Video Display, etc. Listed below are some of these possible categories:
•
Many options concern the capture format. Read the previous sections
and the paragraph below for more information.
Info: RGB is an additive color model (color system) consisting of the three
primary colors red, green, and blue. YUV is a color encoding-scheme for
natural pictures in which the luminance and chrominance are separate. The
human eye is less sensitive to color variations than to intensity variations, so
YUV allows the encoding of luminance (Y) information at full bandwidth and
chrominance (UV) information at half bandwidth. The YUV color model
luminosity and color values are processed separately. The YUV values are
calculated by addition or subtraction of specifically formed RGB values. RGB is
the default setting with 16 bit (the higher the bit, the better the quality but
with more memory consumed).
•
•
•
For video source, choose the appropriate input such as SVHS, S-Video,
TV tuner, composite, etc.
Some allow field order (even versus odd fields first) selections. These
do not have to be altered and do not impact the codecs.
Output size or the image size of your video display is a prevalent
option. The larger the size, the more it will consume CPU resources so
select according to available resources.
Note: If you have modified the image size (output size) here, and the setting
is different from that of your recording profile, the profile's output size will
always act as the default. Go to Video Signal Formats for more details.
•
•
Some allow adjustment of brightness, hue, color, and saturation. Click
on the slider and drag.
You may also choose the type of video signal. Refer to Video Signal
Formats in selecting the appropriate one.
- 43 -
I/OMagic PC PVR
User’s Guide
Video Source
Click on the drop-down menu to select one of the available options depending
on your video source. If you chose Video Tuner, click on Antenna or Cable
depending on how your TV tuner card receives the signals.
Audio Capture Device
The default should be automatically set as your sound card. If not, click on
the drop-down menu to select the correct sound card device.
Audio Source (Live Audio & Audio Recording)
Typically, both of these settings should be identical.
•
•
Set the correct audio source for listening during Live Audio by clicking
on the drop-down menu and selecting.
For Audio Recording, the audio source does not have to match Live
Audio depending if you have multiple audio sources. Click on the dropdown menu to select other audio sources if necessary.
Video
Adjust the visual aspect of your video content when viewing and recording.
Click on Default to return to the original settings.
• Brightness: Drag to the right to increase the intensity of light and left
to decrease.
• Contrast: Drag to the right to increase the contrast of colors and left
to decrease.
• Hue: Drag to the right to increase the color tones and left to decrease.
• Saturation: Drag to the right to increase the degree of color
permeation and right to decrease.
Overlay Setting
Overlay
This is the default setting where your VGA card regulates your video display
performance and is optimal for recording video content from your TV tuner
card or capture card where you prefer live content to be good quality.
Non-Overlay
This allows PowerVCR, as opposed to your hardware, to regulate your video
display performance.
- 44 -
I/OMagic PC PVR
User’s Guide
Depending on your VGA graphics card and capture card, you may not be able
to override the hardware default setting for video overlay. When hardware
employs the overlay mode, less CPU resources are consumed, speed is faster,
video quality is better, but less stable than non-overlay mode (when
PowerVCR regulates video display performance).
Profiles
Selecting your Recording Profile
A recording profile is great for discerning video enthusiasts or hard drives
with a limited amount of space. Choose a profile that will suit your recording
requirements. If it's a file that warrants great video quality or only an
experimental recording, PowerVCR's recording profiles are guaranteed to suit
any of your inclinations.
When you first start PowerVCR, the default position will be the Live/Digital
Recorder.
3. Click System Settings.
4. Click on the Profiles tab.
5. Now, select a profile under the Profiles List in the following categories:
Basic Profiles or Advanced Profiles.
6.
- 45 -
I/OMagic PC PVR
User’s Guide
gives you more control over the amount of hard disk used. DVD video quality
usually uses VBR or variable bitrate.
Video Bitrate
Measured in kilobytes per second, the higher the bitrate the more memory
consumed but with better quality.
Frame Rate
The frame rate is measured by frames per second (FPS) during recording. The
more frames the better for capturing video content with motion.
GOP (Group of Pictures) Pattern
A MPEG compression technology, GOP concept reduces the temporal
redundancy across frames (from frame to frame) for video content. There are
three types of frames involved in the GOP concept:
• I-Frame (Intra pictures): I-frame is typically the first frame of each
GOP, is moderately compressed, and serves as the reference points for
random access and can be likened to images.
• P-Frame (Predicted pictures): P-frames are coded with reference to
past pictures, predict in a forward direction and significantly
compressed.
• B-Frame (Bi-directional pictures): B-frames' predictions are forward,
backward and bi-directional, which is relative to the other I-frames
and P-frames. Compression is at a high level.
Audio Compression
The default, Layer 2, contains more efficient codes for representing bit
allocation and performs better than Layer 1. Possible applic ations for this
layer are the storage of audio sequences and content on CD-ROM or VCD
audio tracks.
Audio Mode
Stereo (default) includes two independent channels but bitrate remains
constant while the channels' split may vary. The encoder uses this flexibility
to improve quality by allocating more bits to the channel with the higher
dynamic signal. Stereo is best for audio quality at higher bitrates.
Audio Bitrate
Like its video counterpart, this too is measured in kilobytes per second
(kbps). The higher the bitrate, the more hard disk it will use but with better
quality.
- 46 -
I/OMagic PC PVR
User’s Guide
Speed Quality Indicator
When encoding, the trade-off parameter consists of speed versus quality. '0'
is for the fastest speed with the lowest quality while '3' is for the best quality
at the lowest speed but consumes more CPU resources.
Frame Size
This determines the frame size when recording. The available sizes are
320x240, 352x240, 352x288, 640x480, 720x480, 720x576 or As Source,
which is dependent on the driver's automatic settings.
Now, if you would like to create your own personal profile, go to the next
section.
Creating your Own Profile
If it's precision you desire-as a video editing professional-look no further than
PowerVCR when recording video files. Basic users or video aficionados alike
may create numerous recording profiles tailored to their every need and
heart's content.
1. Click System Settings while in the Live/Digital Recorder mode.
2. Click the Profiles tab and then select an existing profile that closely
matches with the new profile you want to create.
3. Click New only after selecting an existing profile.
4. Rename your profile in the Profile Name field.
5. Click the Video tab.
6. Select an encoding format.
7. Select an Output Size for your video content by clicking the dropdown menu. Remember that the larger the size, the more disk space
used.
8. Drag the Video Bitrate slider left to decrease the Kbps (kilobits per
second) or right to increase the quality of video content but at the
expense of disk space consumed.
9. Click the Audio tab.
10. Click the Audio Bitrate drop-down menu and select Kbps (kilobits per
second). The higher the Kbps, the better the quality of audio content
but at the expense of disk space consumed.
11. Click the Advanced tab.
12. Click on the arrows to increase the number of a specific frame or click
the I-Frame Only box. Refer to the GOP (Group of Pictures) Pattern for more
details.
- 47 -
I/OMagic PC PVR
User’s Guide
13. Click and drag the indicator left or right to adjust the quality and speed
of the recording. Refer to Speed Quality Indicator for more details.
14. When you're done, click OK. Click OK again to exit the System
Settings.
Instruction Set Options
PowerVCR will automatically determine the CPU Type. The Instruction Set
Options depend on the CPU type, which are from two possible
microprocessor manufacturers:
•
•
Intel (MMX and Streaming SIMD Extension)
Advanced Micro Devices (3D Now and Enhanced 3D Now)
Info: Instruction sets optimize and regulate multimedia tasks and
configuration.
Be sure that all possible selections are checked for optimal recording.
Editing and Converting Video Files
Not only does PowerVCR possess astounding recording features and
breathtaking recording quality, it also allows you to edit all the files that you
have recorded or boxes full of VHS tapes stashed away in your private
collection. PowerVCR cuts and trims out unwanted footage of any given file or
combines and merges video clips or files to resemble a feature length movie.
If you have in your possession AVI video files that are clogging up a lot of
disk space, there is no need to fret because PowerVCR's converting function
saves you all the disk space you need, for it converts large and uncompressed
AVI files into MPEG format.
Note:
This device can only record and edit from TV input sources only.
Editing
There is a host of ways to go about editing your video files. You may trim or
merge them in any fashion you like, but be sure to make use of the Step
Left/Right Trim functions for precise editing.
- 48 -
I/OMagic PC PVR
User’s Guide
Trimming Clips
1. Click Open to load a video file for editing. After you are done selecting
a file, click Open.
2. The first frame of the video file will be displayed in the upper left pane
after you have selected it in the display area.
3. Now, drag the Start Trim and End Trim sliders located at the top of
the PowerVCR panel and release at the specific points where you
would like the newly trimmed file to begin and end.
Note: Both trim functions will be highlighted when the cursor is positioned
over it.
4. If you want to add another task (another clip) to the end of the first
trim or task (the End Trim's position), click Add Next Segment and
the next task will be added to the original but both tasks will still
remain two distinct files.
Note: This function only applies to tasks with remaining time from the
original clip since the next segment will only be added after the End Trim
position of the original task.
5. Click Trim Selected Item(s) to begin trimming.
6. You will be asked to save and name your edited file first. Name it and
then click Save.
Step Left and Right Trim
The purposes of the step left and right functions in the Video Trimmer mode
are for accurate trimming and merging timed within fractions of a second.
Their function is similar to that of the normal Step Left and Step Right
playback functions, but with the difference being they only step in the
selected trim area and adjust Step Left Trim or Step Right Trim positions.
1. To use the editing Step Left/Right Trim functions located to the
immediate left and right of Start/End Trim, click on either Start or
End Trim first after you have set the trimming positions.
2. Click Step Left Trim (after clicking on Start Trim) or Step Right Trim
(after clicking on End Trim) and the selected content will step in the
chosen direction.
3. Click Trim Selected Item(s) after you are finished.
4. A dialog box will appear. Select the proper directory and name your
file. Click Save.
- 49 -
I/OMagic PC PVR
User’s Guide
Previewing and Selecting Clips
1. To preview files before trimming, select the files by keeping <CTRL>
(selects files individually) or <SHIFT> (selects files in a row) pressed
as you click on files with the mouse in the display area.
2. To select multiple files quickly, use your mouse in the cut list area to
click, drag (enlarging selection area), and release.
3. To switch the order of the files, select a file first and then click on the
Move Up and Move Down arrows.
4. Click Play to begin previewing when you have finished selecting files.
Note: During editing and previewing clips, you may experience time lags
when playing videos. If your video content utilizes constant bitrate, these lags
will be minimized.
Merging Multiple Video Clips
If you have a collection of files or an infinite number of video samples, you
may produce your own feature length movie by merging all your favorite
video clips!
1. Click Open File to select your files when you are in the Video Tn pr.0735 9 -0.0116 .25 m47
2. Click
- 50 -
I/OMagic PC PVR
User’s Guide
Caution: Some AVI files are already compressed and don't need further
compression nor conversion unless for merging. If already compressed,
further conversion of such AVI files will result in an exponentially large MPEG
file.
1.
2.
3.
4.
5.
6.
7.
8.
Click on the File Converter mode from the master panel.
Click Open File to load your video file(s).
Click Open after you are done selecting.
After opening your file, the Save As dialog box appears on top of the
File Converter Wizard dialog box.
Select a directory and then name your file or just use "Default". When
you are finished, click Save.
Click Next.
Choose a converter profileClick Finish.
This will be added to the cut list. Now, select this file and the first
frame will be displayed in the upper left pane.
Tips: You may also trim your files to be converted by following instructions in
the Trimming Clips section earlier in this chapter.
9. Click Convert Selected Item(s) after you have selected specific files
or add more files by repeating the above steps.
10. Click Convert All Items to convert all your files at once.
Scheduling Recording Times
Scheduling with the Wizard
For recording programs when you're away from your computer, the
Scheduling Wizard meets every one of your recording needs. Be sure your TV
tuner card is installed properly and you have cable access or an antenna. The
final reminder is to keep your computer on during scheduled recording times!
1. Switch to the Recording Scheduler mode and the Wizard should
automatically appear or click the Scheduling Wizard icon located in
the Recording Scheduler panel.
2. A dialog box will appear. The Enable this Schedule should be
selected as default. Unselect it if you want to disable it.
3. Confirm the default Video Settings. If they are not properly
configured, click on the drop-down menu and select the correct Video
Device and Source.
4. Choose the correct Channel by clicking on the drop-down menu.
- 51 -
I/OMagic PC PVR
User’s Guide
5. Set the recording mode, scheduled date, starting time and ending
time. After you're done, click Next.
6. Pick a profile. Click Finish.
7. The scheduled task will now appear in the video display area. To exit
the Recording Scheduler, click the upper right hand corner.
Editing Scheduling Tasks
1. To edit scheduling tasks, just double-click on the specific task located
in the Recording Scheduler panel and the Scheduling Wizard will
automatically appear.
2. To add more scheduling tasks, repeat the steps in the last section.
3. To delete tasks, click on Delete or press <DELETE> on your keyboard
after selecting a task in the display area.
- 52 -
I/OMagic PC PVR
User’s Guide
Troubleshooting
I/OMagic PC PVR FAQ
Does this card accept video input from devices such as a VCR or
camcorder?
A. No, at this time, this device can only record from a TV source, such as
regular TV or Cable.
On the back of my card, there are “Comp”, and “S-Video” input plugs.
What are those for?
A. Those features are not supported on this version of the PC PVR.
I can’t hear captured audio or the audio is distorted.
A. Reinstall the latest sound card drivers. This problem could be with the
sound card you are using on the system. Try downloading the latest
version of the software for the sound card on the system. For example: if
you are using a SoundBlaster sound card, you'll want to go to Creative
Labs website for a new driver. You can find out what card you are using
by opening the computer system, locating the port where the speakers
are plugged in. This is the sound card and it should be marked as to what
manufacturer and what model it is.
The capture window displays distorted video
A. Make sure you use the latest drivers for your graphics card. We
recommend that you do not use any generic driver that is built into
Windows 98SE. It is always better to use the drivers specifically written
for your graphics card. If your graphics card is built onto the motherboard,
go to the website for the motherboard/system vendor instead of the
chipset vendor.
B. Check cabling. Double check that the Video Out on your source is
connected to the correct port on the PC PVR card. If you are using a video
mixer or a splitter, disconnect this equipment and connect the video
source directly to the I/OMagic PC PVR input. Replace your video cables if
necessary.
C. Check DirectX certification. You may also need the latest version of
DirectX; this software helps your graphics card to create the overlay
image.
- 53 -
I/OMagic PC PVR
User’s Guide
Dropping frames during capture
A. Background tasks. Before launching a PC PVR application, close any
unnecessary applications and programs including those running in the
background.
B. Defragment hard drive. Since hard drives become fragmented over
time, it is important to defragment the hard drive on a regular basis.
C. Capture to separate hard drive. If you have a separate hard drive with
more available space than the C: drive, capture your video to the
secondary drive.
D. Enable hard drive UDMA/ATA33. To check if UDMA/ATA33 is enabled
on your hard drive, use the following steps.
E. Go to Device Manager
1. Double-click on the Heading "Disk Drives"
2. Double-click on the device GENERIC IDE TYPE xx (xx is some 2 digit
number, usually 01, 02, etc)
3. Click on the Settings tab.
4. In the section marked Options, put a check in front of DMA.
5. NOTE: If you do NOT have a selection called DMA, then most likely you
do not have the UDMA driver loaded or your hard drives do not
support UDMA (or both). Please contact either your computer
manufacturer or the hard drive vendor.
6. You'll get a message stating that you may want to contact your hard
drive vendor to ensure that the setting is supported. Click OK.
7. You'll be prompted to reboot your system. Click OK.
8. Now try to capture.
F. Upgrade RAM. If you have less than 64MB of memory in your computer,
upgrading to 64MB or more (128MB is best) may improve performance to
allow capturing with no dropped frames.
Why is there a 2 GB capturing file limit?
A. The limit is within the Windows operating system. The Windows 95/98 file
system also known as FAT16 (16 bit File Allocation Table), cannot store
more than 2 gigabytes in a single file. If you have Windows95 OSR 2 or
Windows98, you can format the hard drive with the new FAT32 file system
and avoid this limit. FAT32 allows a 4-gigabyte storage capacity per
single file.
After I install the I/OMagic PC PVR, my computer will not boot.
A. Re-seat the I/OMagic PC PVR board as follows: Shutdown your
computer completely. Unplug the power cord from the computer as a
- 54 -
I/OMagic PC PVR
User’s Guide
safety precaution. Reseat the I/OMagic PC PVR in the slot it is in. You can
tell when the card is seated properly when the gold contacts on the edge
connector are barely visible above the PCI slot. The card must be seated
all the way in the slot and must NOT be tilted in the slot. Reconnect the
power cord and reboot.
If step number 1 above does not work, your computer most likely has a
resource conflict involving IRQ's. To identify and resolve the resource conflict,
please perform the following steps.
1. Remove the I/OMagic PC PVR board from your computer as follows:
Shutdown your computer completely. Unplug the power cord from the
computer as a safety precaution. Remove the PC PVR board from the
slot that it is in.
2. Make sure you have no current driver or resource problems.
3. Make sure you have an available IRQ for the I/OMagic PC PVR.
4. If you don't have an available IRQ, free one up.
5. Go into your computer's BIOS and set the option for Plug and Play to
OFF (or disable or NO). Save the BIOS settings, and then restart the
machine.
6. Put the I/OMagic PC PVR in a different PCI slot - Shutdown your
computer completely. Unplug the power cord from the computer as a
safety precaution. Remove the I/OMagic PC PVR and insert it into
another PCI slot.
Power VCR II FAQ
Can the MPEG files recorded by PowerVCR II be edited by other video
editing software?
A. The MPEG video recorded by PowerVCR II is conformed to be industry
standards; therefore, we need not worry about the compatibility issues.
Both MPEG-1 and MPEG-2 follow industry standards, so that, we can use
general video editing software without any glitches.
Whenever I press "record" button, after 1 hour, a dialogue window
will pop out to ask me to save the file. What do I do?
B. You may have ever set the timer as 1 hour. Kindly be advised that Timer
Setting enables you to set the maximum recording time. Please follow the
steps to disable "Timer Setting".
- 55 -
I/OMagic PC PVR
User’s Guide
1. PowerVCRII --> System Setting--> Basic --> Timer --> disable the
setting.
How do I cut clips of what I need from record file?
A. Open the MPEG file that needs to be edited first, and move the "S" and "E"
slider bars to begin trimming the movie.
Why is the file created by PowerVCRII V3.0 with "plt"?
A. "plt" means "Playlist". Because of the inherent of the Windows operating
system in handling files over 2GB, PowerVCRII will automatically save and
chunk your video files into 600MB files if the file’s size crosses this limit.
Thus, when you select the appropriate playlist for playback, you won't
notice the difference during playback as all the files are played
continuously leaving you worry-free from video file sizes and constraints.
For conversion feature, is there any limitation of file size about the
resource file, such as AVI files?
A. No. There is no file size limitation for the convert resource.
There are two modes of video setups in PowerVCR II: Video Overlay
and Video Preview. What are the differences between these two
modes for recording MPEG files?
A. The Video Overlay mode means the superimposition of computer graphics
over a live or recorded signal and storing the resulting video image on
hard disk. Therefore, the result is that motion in video content is
smoother. Whether you will view video in this mode (via Video Overlay)
depends on the capability of your display card. For display cards
implemented with new specification such as the AGP bus display cards,
they usually support this function. In addition, you need to install
Microsoft DirectX and DirectDraw before we can smoothly run in this
mode. However, there are still some display cards that are not capable of
displaying video properly under the video overlay mode. Most of the time,
this situation is caused by the conflict between the driver of the hardware
capture device and the display card. If this happens, PowerVCR II will
automatically switch to preview mode. As for PowerVCR II, it does not
affect its functionality regardless of what modes you are using when
recording MPEG-1 files.
- 56 -
I/OMagic PC PVR
User’s Guide
I can't see my control panel and TV window on the screen. But there
are "PowerVCRII", "TV window" on the taskbar. How can I get them
back?
A. There should be 3 icons on the taskbar "Power VCRII", "Video
Window"and "TV Tuner". Please follow the steps to open up them one by
one: Open Power VCRII --> move cursor to "Power VCRII"--> right click -> select "move"--> move the cursor to the middle of screen --> "Shift" +
left click --> then, Power VCRII will start up automatically. Please do the
same steps as above to get Video Window and TV Tuner back.
Why can't I merge these two movie selections when using PowerVCR
II?
A. To ensure the smoothness and quality of movie playback, pay attention to
the following items when merging video files:
1. Merging video files recorded with different MPEG profiles is not
allowed. For example, merging a MPEG-1 file with MPEG-2 files.
2. Merging files with different video profiles is not recommended; for
example, merging files recorded by two different profiles that possess
different designations such as "Constant Bitrate" versus "Constant
Quality".
3. Merging movie files of different resolution is not recommended. For
example, merging files with a resolution of 320x240 and 640x480.
Why is my screen blank when I start up Power VCR II?
A. Try adjusting your video settings. Click on the “System Settings” button
(looks like a hammer) on your PowerVCR Panel and select the “Video”
tab. You should see four slide bars for “Picture, Hue, Brightness, and
Saturation”. Adjust the slide bars until your desired picture quality is
achieved.
- 57 -
I/OMagic PC PVR
User’s Guide
Limited Warranty
Hardware Limited Warranty
This product is warranted to be free from failures due to defects in material
and workmanship for one year from the date of original purchase as
evidenced by a copy of the purchase receipt. During the warranty period,
I/OMagic at its sole discretion will repair or replace at no charge, the
product that, in its opinion, is defective. The original purchaser is responsible
for packing the product for shipment and for the charges to ship the failed
product.
If the failed product has been modified in any way without the consent of
I/OMagic or if the failure is the result of misuse, abuse, or misapplication,
I/OMagic has no obligation to repair or replace the failed product.
Except as expressly provided above, the hardware and accompanying written
materials (including the Users Guide) are provided as is without warranty of
any kind including the implied warranties of merchantability and fitness for a
particular purpose. The specifically does not warrant the operation of the
hardware and will not be liable for any direct, indirect, consequential or
incidental damages arising out of the use or inability to use such product even
if has been advised of the possibility of such damages. Some states do not
allow the exclusion or incidental damage, so the above limitation may not
apply.
- 58 -
I/OMagic PC PVR
User’s Guide
Contacting I/OMagic
If you experience problems with this I/OMagic product and you cannot find an
answer in the previous troubleshooting sections, you can contact I/OMagic’s
Technical Support Staff. Please have the following information ready when
you call:
•
•
•
The name of the product you are having problems with.
The operating system and processor (CPU) you are using.
A detailed description of the problem.
You can contact I/OMagic’s Technical Support staff at the following numbers:
Phone: (714) 953-0675 (M-F 8:00AM – 5:00PM PST)
Internet: http://www.iomagic.com (Go to the technical support section
and fill out support form.)
Register Your I/OMagic Product
Please take the time to send in your registration card. The serial number of
your DVD drive is located on the top of the drive itself. The series of numbers
under the bar code is the serial number.
Go to http://www.iomagic.com and click on the “register” button.
This is actually the fastest way to receive the latest I/OMagic product
information and updates. Again, we would like to thank you for buying
I/OMagic products.
- 59 -
DR-PCTV100-02
Ver. 01