1
Anti-TipBracket
ApplianceRegistration
Careand Cleaning
ControlPanel
Features
FlooringUnder Range
-
3,5
2
16-20
16
6,7
5
5
16
Leveling
Lift-UpCooktop
2
Modeland SerialNumbers
10,11
Oven
.AirAdjustment
21
12,13
Baking,BakingGuide
19,20”
BroilerPanand Rack
Broiling,BroilingGuide
15
ContinuousCleaningCare
ControlSettings
DoorRemoval
Light
LightingInstructions
OvenBottomRemoval
17
11
19
11
10
18
13
14
11,19
Shelves
21
ThermostatAdjustment
11
VentDuct
22
ProblemSolver
RepairService
23
2-5
SafetyInstructions
8,9
SurfaceCooking
16,20
Burner Grates
19,20
Burners
9
Clockand Timer
8
ControlSettings
9
CookwareTips
Preheating
Roasting,RoastingGuide
Drip Pans
FlameSize
16,20
8
8
LightingInstructions
BackCover
Warranty
GEAnswefCenterm
8oa62&2flQo
—
i%ead
this boolicarefkBlly.
1$is intendedto helpyouoperate
and maintainyournewrange
properly.
Keepit handyfor answersto your
questions.
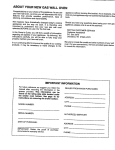
mPoRTMT
If youdon’tunderstandsomething
or needmorehelp,write(include
yourphonenumber):
ConsumerAffairs
GE Appliances
AppliancePark
Louisville,KY40225
,sMTY
~mc~
The ~alifornia Safe Drinking
~ater and ToxicEnforcement
~Act re~uifesthe Governorof
~alifo;nia fo publish a iist of
,+ub$taficesbown tb the state
to cayse c~ricerand re~uires
businessesto warricustomers ~
of pot~ntialexposuretOsuch
~,substances.
write down the model
and serial numbers.
You’llfindthemon a labellocated
in the burnerboxunderthe
cooktop.Seepage6.
These numbersare also on tile
ConsumerProductOwnership
RegistrationCard that camewith
your range.Beforesendingin this
card, pleasewritethesenumbers
here:
,.
Gas appliancescan cause
~mipbr e~posureto threeofthese
~subimncei,namely,benzene,
‘.fo~rnald~hyde
and~oot,caused
primarily“bytheincomplete
,*.
--—
——
.cdmtiustitin’of
naturalgasor LP .-‘-;
kels: Properlyadjustedranges,
~~
in~ieatedbya bluishratherthan
.;a yelltiwflatie,will minimize
in~omplete”.tiornbustion.
ExposuIe
to th+p stibstancescanbe
,
:miti~mi<~~~further
byventing
:,’wi~h
anopenwindowor tising.”
a venii~tition’fan”.dr
hood.
klodelNumber
SerialNumber
Use thesenumbersin any
correspondenceor servicecalls
concerningyour range.
If you received
a am~ed
mngee oe
Immediatelycontactthe dealer (or
builder)that sold youthe range.
save time and money.
Before yol~ request
~~~~~~~**~
Check tileProblemSolveron
page22. It listscausesof minor
operatingproblemsthatyoucan
COrreCf
yourself.
2
or
@CAUTION:
ITEMS
g~oun~in~
the
Ofthehomeelectrical
s~;stem,it is yourpersona]
~;sponsibility
andobligationto
haveanungrounded
outletreplaced
witha proper]y-groundedthreep~ong~utletinaccordancewith
theNationalElectricalCode.Do
notuseanextensioncordwith
thisappliafice.
‘Be sure all packingmaterials
are removedfrom the range
beforeoperatingit, topreventfire
or smokedamageshouldthe
packingmaterialignite.
a ~~~~~~~~g~~~~of~~~~~~~
trafficpath and out ofdrafty
locationsto preventpilotoutage
(onmodelsso equipped)and
poorair circulation.
@B8sure your range iscorrectly
adjustedbya qualifledservice
technicianor installerfor the
@~~ ~~~ use wafer 011grease
fires.
Neverpickupa flaming
INTEmsT To CHILDMN
sHomD Nm BEsmMD m~ pan.Turnoffburner,then
smotherflamingpanbycovering
cABINEmABOWARANGE
pancompletelywithwellfittirig
ORONTm BACKSPLASH
lid,cookiesheetor flattray.
OFARANGE–CHILDREN
Flaminggreaseoutsidea
pan
CLIMBING
ONTHERANGE
canbeputoutbycoveringwith
~ REACHITEMSCOULDBE
bakingsodaor,if available,a
SENOUSLYINJURED.
multi-purposedrychemical
or foamtypefireextinguisher.
ranges
cantip and
injurycould
result.To
prevent
@Do notletcookinggrease
accidenhl
or
otherflammablematerials
tipping
ofthe accumulate
inor neartherange.
range,attach
e when Cooungpork,follow
it tothewdl
thedirectionsexactlyandalways
or floorby
cookthemeattoaninternal
installingthe
temperatureofat least170°F.
ANTI-TIPbracketsupplied.To
Thisassuresthat,in
theremote
checkif thebracketis installed
possibilitythattrichinamaybe
andengagedproperly,carefully
presentin themeat,it willbe
tiptherangeforwardtocheckif
killedandmeatwillbe safetoeat.
theANTI-TIPbracketisengaged
withthelevelingleg.
If youpulltherangeoutfrom
thewallforanyreason,make
@Always
usethe LITEposition
suretherearlegisreturnedto its
whenig~itingtop burners and
positioninthebracketwhenyou
makesuretheburnershaveignited.
pushtherangeback.
* ~ev~~~e~~e
~~~f~~e
~~~~~~
~ht burner gratesand other
unattended at~GH flame
surfacescoolbeforetouching
settings.Boilovercauses
them or leavingthemwhere
smokingandgreasyspillovers
childrencan reach them.
thatmaycatchonfire.
e Neverwearloosefittingor
@Adjusttopburner flame size
hanginggarmenk whileusing
so itdoesnotextend beyond the
the appliance.Flammable
edge ofthecookingutensil.
materialcouldbe ignitedif
Excessiveflameis hazardous.
broughtincontactwithflame
e use o~ly drypotholders—
or hotovensurfacesandmay
moistor
damppotholdersonhot
causesevereburns.
surfacesmayresultin burnsfrom
QNeveruseyourappliancefor
steam.Donotletpotholderscome
warmingor heatingthe room,
nearopenflameswhenIiRing
Prolongeduseoftherange
utensils.Donotusea toweior
withoutadequateventilation
otherbulkyclothin placeofa pot
canbehazardous.
holder.
Wm
NG–A1l
..3
—
e ToWlillilllize
thepossibilityof
b~:r~~s,
ignitionofflammable
materials,andspillage,turn
cookwarehandlestowardtheside
or backoftherangewithout
extendingoveradjacentburners.
~Ai”way$
turn surface!burner $0
OFF beforeremovingIltensii.
e carefully Watchfoodsbeing
fried at HI flamesetting.
@Neverblockthe Vens(air
openings)ofthe range.They
providetheairinletandoutlet
whichis necessaryfortherange
tooperateproperlywithcorrect
combustion.
@Donot usea wokon the
cookingsurfaceif thewokhasa
rouIIdmehl ringwhichis placed
overtheburnergratetosupport
thewok.Thisringactsasa heat
trapwhichmaydamagetheburner
grateand.burnerhead.Also,it
maycausetheburnerto work
improperly.Thismaycausea
carbonmonoxidelevelabovethat
allowedbycurrentstandards,
resultingina healthhazard.
@Foodsfor fryingshouldbe as
dryas possibIe.Froston frozen
foodsor moistureon freshfoods
cancausehotfattobubbleupand
oversidesofpan.
@Useleastpossibleamountof
fatforeffectiveshallowordeepfatfrying.Filling the pantoofull
offatcancausespilloverswhen
foodis added.
@If ~~~~~~~~~~~~~
of~~~$
~~
fa~ willbe usedin frying,stir
togetherbeforeheating,or as fats
meltslo~wly.
@Alwaysi~catfat slowly,and
watchas it heats.
o use deepfn$fhermom.eter
:zthe31e~Je~
possibletoprevent
ov8Yt152tiIlg
fatbeyondthe
!;rilc~king
point.
@USe properpansixe—~void
pansthatareunstableor easily
tipped.Selectutensilshavingflat
bottomslargeenoughtoproperly
containfoodavoidingboiiovers
andspillovers,butlargeenough
tocoverburnergrate.Thiswill
bothsavecleaningandprevent
hazardousaccumulations
offood,
sinceheavyspatteringorspillovers
lefionrangecanignite.Usepans
withhandlesthatcanbeeasily
graspedandremaincool..
@Useonlyglasscookwarethat
is recommended
foruseongas
burners.
@Keepall plasticsawayfrom
topburners.
@Toavoidthepossibilityofa
burn,alwaysbecertainthatthe
controlsforal~burnersareat
OFFpositiona~dallgratesare
coolbeforeattemptingtoremove
thegrate.
@Whenflamingfoodsunder
thehood,turnthefanoff.The
fan,if operating,mayspread
theflame.
@If rangeis locatedneara
window9
donotuselongcurtains
whichcouldblowoverthetop
burnersandcreatea firehazard.
@Whena pilotgoesout9(on
modelssoequipped),youwill
detecta faintodorofgasasyour
signaltorelightpilot.When ‘
relightingpilot,makesureburner
controlsarein OFFpositionand
followinstructionsdescribedon
followingpagestorelight.
~If yousmellgas5andyouhave
alreadymadesurepilotsarelit,
turnoffthegastotherangeand
calla qualifiedservicetechnician.
Neveruseanopenflametolocate
a leak.
from
grease
buildupe
@PIaceovenshelves
indesired
position while oven isCOOI.
@Keepovenfree
@Pullingoutshelftotheshelf
stopis a conveniencein lifting
heavyfoods.It is alsoa
precautionagainstburrofrom
touchinghotsurfacesofthe
doororovenwalls.
@Don9theat unopenedfood
containersintheoven.Pressure
couldbuiidupandthecontainer
couldburstcausingan injury.-.:
@~o~9~ use
a~~~i~~~f~~~
anywhereinthe
‘-
oven except a
describedin thisbook.Misus
couldresultin a firehazardor
darnageto therange.
@Whenusingcoo~ng or
roastingbagsinoven9followthe
manufacturer’s
direction.
@Useotiy glasscookware
thatis recommendedforuse
in gasovens.
@Alwaysre~nove
broilerpan
frombroilercompartmentas
soonasyoufinishbroiling.
Greaseleftinthepancancatch
fireif ovenis usedwithout
removingthegreasefromthe
broilerpan.
Flooringunder
theRange
Yourrange, like so many other
householditems, isheavy and
can settle intosoftfloor Coverings
such as cushionedvinyl.When
movingthe rangeon thistypeof
flooring,use care.
Do not insta~lthe rangeover
unlessyou
kitchen carpeting
placean insulatingpad or sheetof
l/4-inch-thickplywoodbetween
the rangeandcarpeting.
Men thefloor covetingends at
thefront of the range, the areathat
therangewillrest on shouldbe
builtup withplywoodor similar
materialto the samelevelor higher
thanthe floorcovering.Thiswill
allowthe rangeto be movedfor
cleaningor servicing.
bvelkg theRange
SAVETmE
~NSTRUCr~IONS
/
Levelinglegsare locatedon each
cornerof thebase ofthe range.
Yourrangemustbe levelin orderto
producepropercookingand baking
results.Afteritisinitsfind location,
placea levelhorizontallyon an
ovenshelfand checkthe levelness
frontto backand sideto side. Level
the rangeby adjustingthe leveling
legsor byplacingshimsunderthe
cornersas needed.
Oneof the rear levelingIegswill
engagetheANTI-TIPbracket(allow
for somesideto sideadjustment).
Allowa minimumclearanceof 1/8”
betweenthe rangeandthe leveling
legthat is to be installedinto
theANTI-TIPbracket.
I
Featuresof YourRa~e
e
JGBCBGPKwithStinding Hlot Ignition
JGBCKGEKWthAutomaticHlotlessIgnition
JGBC17GEKwithAutomaticRlotlessIgnition
.
6
See
FeatureIndex
page
JGBC15GPK
JGBC15GEK
JGBC17GEK
1 Modeland SerialNumbers
2
9
2 SurfaceBurnerControls
8
4
16,19
4
3 SurfaceBurnersand Grates
I
4 OvenTemperatureControl
11
5 Clockand Timer
9
6 OvenVent
11
7 OvenInteriorLight
11
e
8 OvenLightSwitch
(letsyouturn interiorovenlight
on and off)
11
e
9 OvenShelves
(easilyremovedor repositioned
on shelfsupports)
11,19
2
11
e
Digital
~—.
-.
—
—
-–
10 OvenShelfSupports
11 BroilerPanand Rack
I
19,20
12 ChromePlatedDrip Pans
I
16,20
——
-
E.-
..
m!
=
—.
13 RemovableOvenDoor
(easilyremovedfor ovencleaning)
19
14 LiR-UpCooktop
(locksin up positionto simplify
cleaningunderneath)
16
e
15 RemovableOvenBottom
18
e
16 BroilerDrawer
19
e
17 Continuous-CleaningOvenInterior
17
e
3,5
e
(
~
j
1,8 Anti-TipBracket
(see InstallationInstructions)
7
Howb Seld Me
MBotMdel
JGBmGPK
Theshce burnemonthese
rangeshavestandingpilotshat
mustbelitiniti~y. T~ht them:
-*
1. W surestice burnercontrol
bobs arein the OFF position.
Theknobsthatturn thesufice
burnerson and off are locatedon
thelowercontrolpanelin frontof
the burners.
Thetwoon the leftcontrolthe left
frontandleftrear burners.The two
on tie rightcontrolthe rightfront
and rightrear burners.
Sh
The flamesizeon a gasburner
shouldmatchthecookwareyou
are using.
?
2. Removethe gratesandlifi the
cuoktopup ($eepage 16).
I
NEVERLET THEFLAME
EXTENDUP THE SIDESOF
THE COO~ARE. Anyflame
largerthanthe bottomof the
cookwareis wastedand only
servesto heatthehandles.
3. Locatethe twopilotportsand
lighteachof themwith a match.
4. Wer *e cooktop.Yoursufice
burnersare nowreadyfor use.
Stice burne~son theserangesare
lightedbyelectricignition,ending
the needfor standingpilotswith
constantlyburningflames.
h-of
a pwer ou~e, youcan
lightthepflotlessignitionsufice
burnerson~ur rangewitha match.
Holdalighted matchto the burner,
hen turn the knobto the L~E
pition. U* ~
a*n
wkn
W*
~-em b tm mmer.
S@ce burnersin u= whenan
electrid powerMure tiurs w~
continuetooperaknotiy.
Pushthe controlknobin andturn it
to LITE.Onelectri~ignitionmodels,
youwillheara litie clickingnoise—
thesoundoftheelectricspark
ignitingtheburner.
men using aluminm or
alurninm-clad stainlesssteel
pfi and pans,adjustthe flameso
the circleit makesis about1/2inch
smallerthanthebottomofthe
cookware.
men boiling,usethis same
flamesize-1/2 inchsmallerthan
the bottomof thecookware-no
matterwhatthe cookwareis made
of. Foodscookjust as quicklyat a
gentleboilas theydo at a firious,
rohg boil. A highboilcreates
steamand cooksawaymoisture,
flavorand nutrition.‘Avoidit except
for the fewcookingprocesses
whichneeda vigorousboil.
Wr theburnerignites,turnthe
knobto adjustthe flamesize.
Note:
~Do notoperatea burnerfbr
extendedperiodsoftimewithout
havingcooon thegrate.The
fish on thegratemaychipwithout
mkware to absorbtheheat.
~ Checkto be sm theburneryou
turnedon is the oneyouwantto use.
@Be surethe burnersandgratesare
coolbeforeyouplaceyourhand, a
pot holder,cleaningclothsor otier
materialson them.
8
, -.
men fryingor warmingfinds
in staidess steel,cast ironor
enamelwa~e,keepthe flamedown
lower—toabout1/2the diameter
of thepan.
men fryingin glassor ceramic
cookware,lowerthe flameeven
more.
*
Clwkandher
-
mpof-wqe
Cookwre
Aluminu: Medium-weight
cookwareis recommendedbecause
it heatsquicklyand evenly.Most
foodsbrownevedy in an aluminum
skillet.Mineralsin foodandwater
willstainbutwillnot harm
aluminum.A quickscourwitha
soap-filledsteelwoolpad after
eachusekeepsaluminumcookware
lookingshinynew.Use saucepans
withtight-fittinglids for cooking
withminimumamountsof water.
Cast fion: If heatedslowly,most
skilletswillgivesatisfactoryresults.
Enamelware:Under some
conditions,the enamelof some
cookwaremaymelt.Followcookware
manufacturer’srecommendations
for cookingmethods.
Glass: Thereare twotypesofglass
cookware—thosefor ovenuseonly
andthosefor top-of-rangecooking
— (saucepans,coffeeand teapots).
Glassconductsheatvery slowly.
A
--
HeatproofGlassCeramic:Can
be usedfor eithersurfaceor oven
”’-”
cooking.It
conductsheat very
slowlyandcoolsveryslowly.Check
cookwaremanufacturer’sdirections
tobesureitcanbeusedongasranges.
Smess $t~l: Thismetalalonehas
poorheatingproperties,andisusually
combinedwithcopper,aluminum
or othermetalsfor improvedheat
distribution.Combinationmetal
skilletsgenerallyworksatisfactorily
ifusedat mediumheat as the
manufacturerrecommends.
Wer
—.
TosettheC1oek,turntheknobto
theleftuntilthewordsSETTIME
appearinthedisplay.Thenturnthe
knobin eitherdirectionuntilthe
correcttimeis displayed.Aftera
slightpause,timeis set.
. ——
—
——
—
—
-~
-TosettheTimer,turntheknobto
therightuntiltheweds SETTIMER _—
appearin thedisplay.Thenturnthe
knobin eitherdirectionuntilthe
desiredtime(minutesandseconds)
isdisplayed.Thetimerwillstart
countingdown.
w.-
.
m-
=
Tocancelthetimer,turntheknob
ineitherdirectionuntil0:00appears
inthedisplay.
Attheendof thetimeroperation,
Wr the3 &ps, thedisplayreturns
totimeofdayautomatically.
During
thetimerfunction,thedisplay
flashesbacktothetimeofday
every10seconds.
I
~—
——
-—
—
—~
l—.
—
, ——
-—
~
.-.
,=
—.
-_
——
———.—
—
using
Youroven
LightingItiructiom
LightingImtructiom
StandingPilotModel
ElectricIgnitionModeIs
JGBCMGEK
JGSC17GEK
The ovenpiloton theserangesis
lightedbyelectricignition.
JGBC15GPK
Theserangeshavea standingoven
pilotport that mustbe lit initially.
Tolightthe ovenpilotport:
1. Be sure OVENTEMP knobis in
the OFF position.
2. Openthe broilerdrawerand pull
thedrawerdownflat. Put thebroiler
pan in the lowestpositionand slide
the drawerbackintothe range.This
willmakeit easierfor youto reach
insidethe broilercompartment.
Tolightthe burner,turn the
OVENTEMP knobto thedesired
temperature.The burnershould
lightwithin60 seconds.Youwill
hear a littleclickingnoise—the
soundofthe electricsparkigniting
the burner.
Poweroutage?
—
Althoughthe oven/broilerburner
on theserangeswillnot self-light
in the eventof an electricalpower
outage,a burnir Inuse whenan Celectricalpowerfailureoccurswill
..
.
continueto operatenormally.
Tolighttheovenpilotduringan
electricalpoweroutage,carefully followthe stepsbelow.
1. BesureOVENTEMP knobis e
in the OFF position.
2. Openboththe ovenand broiler
doorsandwait5 minutesto allow
anypilotgasto dissipate.
3. Unplugthe rangefromthe wall
outlet,turn offthe circuitbreaker,
or removethefusetoavoidaccidental
ignitionof theovenif electricpower
is restoredwhileyouare lighting
the pilot.
4. Put thebroilerpan in the lowest
position.
..
—.
5’ Locatethe ovenPilotassemblY \
by lookng intothebroileropening.
Thepilotis at thebackofthebroiler
compartment,on the leftsideof
the burner.
Note:Theovenmustbeat room
temperaturebeforeyoushould
attemptto lightthe ovenpilot
manually.
6. Turnthe OVENTEMP knobto
the desiredtemperaturesetting.
7. Lightthe pilotwitha matchand
withdrawyourarm immediately
becausethe ovenburnermaylight
in as littleas 20 seconds.
8. Closethe ovenandbroilerdoors.
Note:It is necessaryto lightthe
pilotmanuallyeachtimethe oven
is usedduringa poweroutage.
3. Findthe ovenpilotport at the
backof the broilercompartment.
The longtube, runningfrom front
to back, is the ovenburner.The
pilotport is at the back, aboutone
inchbelowthe burner.
4. Usinga longmatchor match
holder,reach in and lightthe oven
pilot.
To Iighttheovenburner:
Turnthe OVENTEMP knobto the
desiredtemperature.
Wweroutage?An electricalpower
failurewillnot affecta lighted
standingovenpilot.
I
10
@
~
OvenTempemtureControl
The OVENTEMP controlis
@ ocatedon the controlpanelon the
frontof the range(seepage6).
Simplyturn the knobto the desired
cookingtemperatures,whichare
markedin 25°F.incrementson the
dial. It will normallytake60
secondsbeforethe flamecomeson.
After[heovenreachesthe se]ected
temperature,theovenburnercycles—
off completely,then on witha full
flame-to keepthe oventemperature
.
controlled. -
oven
Light
(onmodelsso equipped)
Usethe switchon the controlpanel
to turn the lighton and off.
ovenshelves
oven Venk
Theovenis ventedthroughduct
openingsat thecenterrear of the
range,(seepage6), Do notblock
theseopeningswhencookingin the
oven—itis importantthattheflowof
hotair fromtheovenandfreshair to
theovenburnersbe uninterrupted.
Toremovethe she!vesfromthe
oven,pullthemtowardyou,tilt
frontend upwardandpullthemout.
TorepIace,placeshelfon shelf
supportwithstop-locks(curved
extensionundershelf)facingup
andtowardrear of oven.Tiltup
frontand pushshelftowardbackof
ovenuntilit goespast “stop”on
ovenwall.Thenlowerfrontof shelf
andpushit all the wayback.
o Handlesof potsand panson the
cooktopmaybecomehot if left
toocloseto the vent.
~
m~-.
-----
ShelfPositiom
The ovenhas fourshelfsupports—
A (bottom),B, C and D (top).
Shelfpositionsfor cookingare
suggestedon BakingandRoasting
pages.
w
~Ventopeningsand nearby
surfacesmaybecomehot. Do not
touchthem.
-!
—.—=...—_–
@Do not leaveplasticitemson
the cooktop—theymaymeltif
left too closeto the vent.
.
:.:,:.:.:.
The shelvesare designedwith stoplocksso when placedcorrectlyon
the shelf supports,theywill stop
beforecomingcompletelyout of
the ovenand will not tilt whenyou
are removingfoodfromthemor
placingfoodon them.
Whenplacingcookwareon a shelf,
pullthe shelfout to the “stop”
position.Place the cookwareon
the shelf, then slidethe shelfback
intothe oven.This willeliminate
reachingintothe hot oven.
—
........ . ..,:,:,:,:
=
I
OvenMoisture
Asyourovenheatsup, the
temperaturechangeofthe air
in the ovenmaycausewater
dropletsto formon the door
glass.Topreventthis, openthe
ovendoor for the first minute
of ovenheat-upto let the moist
air out.
—
——
-
Baking
HOTV
toSet YourRange
forBaking
1. Positiontheshelfor shelvesin
~ If moistureis notnoticeableonthe
frontoftheovendoorwhenfirst
turningon theoven,leavethedoor
ajar fora fewminutesor untilthe
oveniswarm.
the oven,
2. Closeovendoor.TurnOVEN
TEMP knobto desiredtemperature.
Preheatovenforat least 15minutes
if preheatingis necessary.
3. Placefoodin ovenon center
of shelf. Allowat least2 inches
betweenedgeof bakewareand oven
wallor adjacentcookware.
If cookingon twoshelvesat the
sametime, placeshelvesabout4
inchesapartandstaggerfoodon
them.
4. Checkfoodfor donenessat
minimumtimeon recipe. Cook... ,,
longerif necessary.TurnOVEN
TEMP knobto OFF and remove,
food.
~
Preheating
.
Preheatingisveryimportantwhen
usingtemperaturesbelow225”F.
andwhenbakingfoodssuchas,
biscuits,cookies,cakesandother
pastries.
Preheatingis notnecessarywhen
roastingor forlong-timecookingof<
wholemeals.
ShelfPositions
.,
Mostbakingis doneon the second
shelfposition(B)from the bottom.
Whenbakingthreeor four items,
use twoshelvespositionedon.the
secondand fourthsets of supports
(B& D) frombottomof oven.
Bakeangelfoodcakeson first shelf
position(A) frombottomof oven.
Bating mps
,//”’
@Followa tested,,~~~pe
and
measuretheingredientscarefully.
If youareusinga packagemix,
followlabeldirections.
e Do notopentheovendoorduring
a bakingoperation—heat
willbelost
andthebakingtimemightneedto
beextended.Thiscouldcausepoor
bakingresults.Ifyoumustopenthe
door,openitpartially-only 3 or 4
inches—andcloseitasquicklyas
possible.
@Do notdisturbtheheatcirculation
intheovenwiththeuseofaluminum
foil.If foilis used,placeasmall
sheetofit, about10by 12inchesat
themost,ona lowershelfseveral
inchesbelowthe”food.Do notplace
foilontheovenbottom.
,
CommonBakingProblems
andPossibleSolutions
Pms
Burningaroundedges
@Oven~oo’
full;avoidovercrowding.
o Ed~es ofcrusttoothin.
‘ e Inc%rrectbakingtemperature.
Bottomcrustsoggyandunbaked
oA11ow
crustand/orfillingto cool
sufficientlybeforefillingpieshell.
e Filling maybe too”thinorjuicy.
e Filling allowedto standinpieshell
beforebaking.(Fillpieshellsand
bakeimmediately.)
e Ingredientsandpropermeasuring
affectthequalityof.thecrust. Usea
testedrecipeandgoodtechnique.
Makesuretherearenotinyholesor
tearsina bottomcrust. “Patching”
a piecrust couldcausesoaking.
Piefillingrunsover
@Top andbottomcrustnotwell
sealedtogether.
~Edgesofpiecrustnotbuiltup
highenough.
e Toomuchfilling.
@Checksizeofpieplate.
Wstryistough;crustnotflaky
@Toomuchhandling.
e Fattoosoftor cutin toofine.
Rolldoughlightlyandhandleas
littleaspossible.
12
CAKES
Cakeriseshigherononeside
oBatterspreadunevenlyinpan.
e oven shelvesnot level,
e Usingwarpedpans.
oIncorrectpansize.
Cakescrackingontop
oOventemperaturetoohigh.
e Battertoothick,followrecipe
or exactpackagedirections.
e Checkforpropershelfposition.
● Checkpansizecalledforin recipe.
e Impropermixingofcake.
Cakefalls
oToomuchshortening,sugaror
liquid.
e Checkleaveningagent,baking
powderor bakingsodato assure
freshness.Makea habitto note
expirationdatesofpackaged
ingredients.
e Cakenotbakedlongenoughor at
incorrecttemperature.
● If addingoiltoa cakemix, make
certaintheoilisthetypeand”
amountspecified.
Crustishard
● Check
temperature.
e check shelfposition.
e
Cakehassoggylayerorstreaksat
,.
bottom ~
0Underminingingredients.
e Shorteningtoosoftforproper ~
creaming.
‘.
e TOO muchliquid.
COOKIES
&BISCUITS
Doughycenter;heavycruston
..
surface.
~
0Checktemperature.
;,
oCheckshelfposition.
e FO11OW bakinginstructions
carefu~y-asgiveninreliablerecipe
or onconveniencefoodpackage,
e Flatcookiesheetsw1llgivemore
evenbakingresulk.Don’tovercrowd,
foodsona bakingsheet.
0 Conveniencefoodsusedbeyond
theirexpirationdate.
.
Browningmorenoticeableon
oneside
~Ovendoornotclosedproperly,
checkgasketseal.
oCheckshelfposition.
——
W
BakingGuide
1. Preheatingis veryimportant
S
when usingtemperaturesbelow
225°F.and when baking foods
such as biscuits,cookies, cakes
andotherpastries.Preheatthe
ovenforat least 15minutes.
Preheatingis not necessarywhen
roastingor for long-timecooking
of wholemeals.
Food
=read
Biscuits(M-in.thick)
Coffeecake
—
Cookware
3. Dark or non-shinyfinishes,also
glassand Pyroceram”cookware,
generallyabsorbheat whichmay
resultin dry,crisp crusts. Reduce
ovenheat25”F.if lightercrustsare
desired.Rapidbrowningof some
foodscan be achievedbypreheating
cast ironcookware.
Shelf
Positions
Oven
Temperatures
Time,
Minutes
B,C
400°-4750
15-20
B,
350°-4000
20-30
B
B
. .
B“
B
400°-4500
350°
20-40
45-55
400”-425°
“375°
20-30
45-60
B
A, B
350°-3750
375°-4250
45-60
45-60
ShinyCookieSheet
Comments
Canned,refrigeratedbiscui~”take2 to4
minuteslesstime.
Muffins
Popovers
ShinyMetalPanwith
satin-finishbottom
CastIronor GlassPan
ShinyMetalPanwith
satin-finishbottom
ShinyMetalMuffinPans
DeepGlassor CastIronCups
Quickloafbread
Yeastbread(2 loaves)
Metalor GlassLoafPans
Metalor GlassLoafPans
Plainrolls
Sweetrolls
Cakes
(withoutshortening)
Angelfood
Jellyroll
Sponge
?akes
Bundtcakes
Cupcakes
Fruitcakes
ShinyOblongor MuffinPans
ShinyOblongor MuffinPans
B
B
375°-4250
350°-3750
10-25
20-30
AluminumTubePan
MetalJellyRollPan
Metalor CeramicPan
A
B
A
325”-375°
375°-4000
325°-3500
30-55
10-15
45-60
A.,B
B
A, B
325”-350° .
350°-3750
275°-3000
~~45:65
20-25
2-4hrs.
B
350°-3750
20-35
‘B
350°-3750
25-30
B
350°
40-60
Metalor GlassPans
CookieSheet
B,C
B, C
325°-3500
350°-4000
25-35
10-20
CookieSheet
CookieSheet
B,C
B,C
400°-4250
375°-4000
6-12
7-12
A, B,C
B
350°-4000
300”-350°
30-60
30-60
B
325°
50-90
A
B
400°-4250
325°-3500
A, B
B
B
400°-4250
400°-4250
450°
45-70 ~ Largepiesuse400°F.and increasetime.
15-25
Toquicklybrownmeringueuse400”F.for
9 to 11minutes,
45-60
Custardfillingsrequirelowertemperature,
40-60
longertime.
13-16
A, B,C
A, B,C
B
325°-4000
325°-3750
300°-3500
60-90
30-60
30-75
Cornbreador muffins
Gingerbread
.
2. Aluminumpansconductheat
quickly.For mostconventional
baking,light,shinyfinishesgive
bestresultsbecausetheyhelp
preventoverbrowning.For best
browningresults,werecommend
dullbottomsurfacesforcakepans
andpieplates.
Layer
Layer,chocolate
Loaf
Cookies
Brownies
Drop
Refrigerator
Rolledor sliced
Fruits,
OtherDesserts
Bakedapples
:ustard
~uddings,rice
]ndcustard
3ies
Metalor CeramicPan
ShinyMetalMuffinPans
Metalor GlassLoafor
TubePan
ShinyMetalPanwith
satin-finishbottom
ShinyMetalPanwith
satin-finishbottom
Metalor GlassLoafPans
Glassor MetalPans
GlassCustardCupsor
Casserole[setinpanof hotwater)
GlassCustardCupsor
Casserole
dcringuc
F oil PanonCookieSheet
spreadtocrustedges
)ne crust
‘WO
crust
‘astryshelI
Glassor Satin-finishMetal
Glassor Satin-finishMetal
Glassor Satin-finishMetalPan
‘rozen
miscellaneous
lakedpotatoes
~cailoped
dishes
!Oufflcs
,
set onOvenShelf
Glassor Metal
GlassPan
.,
13
Preheatcast ironpanforcrispcrust.
{“
Decreaseabout5 minutesfor muffinmix.
Or bakeat450”F.for25 minutes,thenat
350”F.for.10to 15minutes.
Darkmetalor glassgivesddepest
browning.
-“A
-.
-
TWO piecepanisconvenient.,
,
Linepanwithwaxedpaper.
Paperlinersproducemoremoistcrusts.
Use300”F.andShelfBfor smallor
individualcakes.
If bakingfourlayersuse
‘ shelvesBandD.
Barcookiesfrommixusesametime.
UseShelfC andincreasetemperature
25to 50°F.for morebrowning.
‘
.
Reducetemperatureto300”F.for large
custard.
Cookbreador ricepuddingwithcustard :
base80to 90 minutes.
Increasetimefor largeamountor size.
-u.---
.
Roasting
Roastingis cookingbydry heat.
Tendermeator poultrycan be
roasteduncoveredin youroven.
Roastingtemperatures,which
shouldbe lowand steady,keep
spatteringto a minimum.When
roasting,it is notnecessaryto sear,
baste,cover,or add waterto your
meat. Roastingis easy,just follow
thesesteps:
Step 1. Positionovenshelfat
secondfrombottomposition(B)
for smallsizeroast (3 to 5 lbs.) and
at bottomposition(A) forlarger
roasts.
Step2: Checkweightof roast.
Placemeatfat-side-upor poultry
breast-side-upon roastingrackin a
shallowpan. Themeltingfatwill
bastethe meat. Selecta pan as
closeto the sizeof meat;S possible.
(Broilerpan with rackis a good
pan for this.)
Step3: TurnOVENTEMP to
desiredtemperature.Checkthe
RoastingGuidefortemperatures
and approximatecookingtimes.
Step4: Mostmeatscontinueto
cookslightlywhilestandingafter
beingremovedfromthe oven.For
rareor mediuminternaldoneness,
Youmaywishto removemeatfrom
~heove~iustbeforeit is doneif it is
to stand ~0to 20 minuteswhileyou
makegravyor attendto otherfoods.
If no standingis planned,cook
meatto suggestedtemperature.
frozenRoask
Frozenroastsofbeef, pork,
lamb,etc., can be startedwithout
thawing,but allow15to 25 minutes
per poundadditionaltime (15
minutesper poundfor roastsunder
5 pounds,moretimefor larger
roasts).
Thawmostfrozenpoultrybefore
roastingto ensureevendoneness.
Somecommercialfrozenpoultry
can be cookedsuccessfullywithout
thawing.Followdirection~given
on packer’slabel.
RoastingGuide
Type
Oven
Temperature
Doneness
Meat
Tendercuts;rib,highquality
sirlointip,rumpor topround*
325°
Lamblegor bone-inshoulder*
325°
Vealshoulder,legor loin*
Porkloin,ribor shoulder*
Ham,pre-cooked
325°
325°
325°
Rare:
Medium:
WellDone:
Rare:
Medium:
WellDone:
WellDone:
WellDone:
ToWarm:
Ham, raw
*Forbonelessrolledroastsover6-inches
thick,add5 to 10minutesper !b.totimes
givenabove,
325°
WellDone:
%ultry
Chickenor Duck
Chickenpieces
325°
375°
WellDone:
WellDone:
Turkey
325°
WeltDone:
14
I
Approximate
RoastingTime
inMinutesperPound
3 to5-lbs.
6 to 8-lbs.
24-35
18-25
35-39
25-31
39-45
31-33
21-25
20-23
25-30
24-28
30-35
28-33
35-45
30-40
35-45
30-40
18-23minutesper lb. (anyweight)
Under10lbs.
10to 15-lbs.
27-35
24-27
3 to5-lbs.
35-40
30-35
10to 15-lbs.
16-22
Over5 lbs.
30-35
Over15lbs.
13-19
I
Internal
Temperature“F
130°-140°
150°-160°
1700-185°
130°-140°
150°-160°
170°-185°
170°-180°
170°-180°
115°-1250
170°
185°-1900
185°-1’900
Inthigh:
185°-1900
e
Broiling
Broilingis cookingfoodbydirect
Broiling~ps
heatfromabovethefood.Your
~Usetongsto turnmeatover—
— rangehasa convenientcompartment
~ Steaksandchopsshouldbe at
piercedm~atlosesjuices.
least1
inchthickfor bestbroiling
belowthe ovenforbroiling.It also
results.Panbroilthinnerones.
– hasa speciallydesignedbroilerpan
andrack thatallowdrippingfatto
drainawayfromthe foodsand be
BroilingGuide
keptawayfromthehighheatof
thegas flame.
Quantity
1st
Side 2ndSide
andlor
Broil Time, Time,
Distancefromtheheatsourcemay
Food
Thickness
~sitior Minute! Minutes Comments
bechangedbypositioningdiebroiler
panand rackon oneof three shelf
‘A-1b.
(about8
Bacon
B
3%
3
Arrangeinsinglelayer.
thinslices)
positionsinthebroilercompartment—
A (bottomof broilercompartment),
GroundBeef
1-lb.(4patties)
Spaceevenly.Upto8patties
WellDone
‘hto %-in.thick
B
8-9
6-7
takeaboutsametime.
B (middle)andC (top).
Boththe ovenandbroiler
compartmentdoorsshouldbe
closedduringbroiling.
Howto Broil
1. If meathasfator gristlenearthe
edge,cutverticalslashesthrough
bothabout2 inchesapart, butdon’t
cutintomeat.Werecommendthat
youtrim fatto preventexcessive
smoking,leavinga layerabout
l/8-inchthick.
2. Removebroilerpan and rack
frombroilercompartmentand
placefoodon rack.
3. Pull outdrawerandposition
broilerpanin compartment.Placing
fd closertoflameincreasesexterior
browningof food,butalsoincreases
spatteringandthepossibilityof fats
andmeatjuicesigniting.
4. Closebroilerdoorand, for most
foods,turn OVENTEMPknobto
BROIL.Note:Chickenand hamare
broiledat 450°in orderto cookfood
throughwithoutover-browningit.
5. Turnmostfoodsonceduring
cooking;(theexceptionis thinfillets
of fish; oil oneside,placethat side
downonbmflerrackandcookwitiout
turninguntildone).Timefoodsfor
aboutone-halfthetotalcooking
time,turn food,thencontinueto
cookto preferreddoneness.
6. Turn OVENTEMPknobto
OFF.Removebroilerpan from
compartmentandservefood
immediately.Leavepan outside
compartmentto cool.
BeefSteaks
Rare
Medium
WellDone
Rare
Medium
WellDone
Chicken(450°)
l-in.thick
(1-l% lbs.)
1%-in.thick
(2-2%Ibs.)
1whole
(2to2%-lbs.),
splitlengthwise
BakeryProducts
Bread(Toast)or
2-4slices
ToasterPastries
1pkg.(2)
EnglishMuffins 2-split
B
B
B
B,C
B
B
9
12
13
10
15
25
7
5-6
8-9
6-7
12-14
16-18
Steakslessthanl-in.cook
throughbeforebrowning.
Panfryingisrecommended.
Slashfat.
A
30-35
25-30
Reducetimesabout5to 10min.
persideforcut-upchicken.
Brusheachsidewithmelted
butter.Broilwithskinsidedown
firstandbroilwithdoorclosed.
c
2-3
‘h-1
Spaceevenly.PlaceEnglish
muffinscut-side-upandbrush
withbutterifdesired.
c
3-5
B
13-16
Donot
turn
over.
Cutthroughbackofshell,sp~d
open.Brushwithmeltedbutter
beforeandafierhalftime.
B,C
5
5
Handleandturnverycarefully.
Brushwithlemonbutterbefore
andduringcookingif desired.
Preheatbroilertoincrease
browning.
Hamslices(450°) l-in.thick
Precooked
B
8
8
Increasetimes5-10min.perside
for llA-in.thickorhomecured.
~rk chops
WellDone
2(%in.)
2(l-in.thick),
about1lb.
B
B
10
13
4-5
9-12
Slashfat.
2(1inch)
~bout10-12OZ.
2(1‘Ainch),
ibout1lb.
B
B
B
B
8
10
10
17
4-7
10
4-6
12-14
Slashfat.
B, C
6
1-2
bbster tails
(6to8-02.each)
2-4
Rsh
l-lb.fillets%to
‘A-in.thick
Lambchops
Medium
WellDone
Medium
WellDone
Wieners,
l-lb.pkg.(10)
similarprecooked
sausages,
bratwurst
15
Ifdesired,splitsausagesinhalf
lengthwise;cutinto5 to6-in.
pieces.
-----=
—
—
-– -– ——
—
-------
——-
CareandCleaniw
Propercare and cleaningare
importantso yourrangewillgive
youefficientand satisfactory
service.Followthesedirections
carefullyin caringfor it to help
assuresafeandpropermaintenance.
IF YOURRANGEHAS
ELECTRICIGNITION,BE
SUREELECTRICPOWERIS
OVFBEFORECLEANING
ANYPARTOF IT.
OutermintedFinish
Whenthe rangeis cool, washthe
top, frontand, if exposed,the sides
withmildsoapandwater.Neveruse
anyharshabrasivesor cleaning
powdersthatmayscratchor mar the
paintedsurface.Rinsethe surface
withcleanwateranddry witha soft
cloth. If youwish, occasionally
applya thin coatof mildcleaning
waxto helpprotectthe finish.
PorcelainCooktop
Thereare a numberof precautions
youcan taketo avoidmarringthe
porcelainenameledsurfaceof the
cooktopand preventit from
becomingdull. Don’tslideheavy
pansacrossit. If youspillfoods
witha lot of acid (tomatoes,
sauerkraut,fruitjuices, etc.)or
foodswithhighsugarcontent,
cleanthemup as soonas possible.
If allowedto set, thesefoodscould
causea dull spot. Also,no matter
howstubbornthe foodstain,never
use harshabrasivecleansers.They
couldpermanentlydamagethe
enamelsurface.Werecommenda
cleansersuch as “SofiScrub”
brand.
controlRnel
BurnerGmtes
It’sa goodideato wipethecontrol
panelcleanafter eachuseof the
oven.Fora morethoroughcleaning,
the knobscan be removedby
pullingthemoff the knobstems.
Cleanwithmild soapand water,
rinsewithcleanwaterandpolish
dry witha soficloth.
Do notuseabrasivecleansers,
strongliquidcleanersor oven
cleanerson the controlpanel—
theywilldamagethefinish.
Gratesshouldbe washedregularly
and, ofcourse,afterspillovers.
Washthemin hot, soapywaterand
rinsewithcleanwater.Dry the
grateswitha cloth—don’tputthem
backon the rangewet. When
replacingthegrates,be surethey’re
lockedintopositionovertheburners.
Togetrid of burned-onfood,soak
the gratesin a slightlydiluted
liquidcleaner.
Althoughthey’redurable,the
grateswillgraduallylosetheir
shine,regardlessof the bestcare
youcan givethem.Thisis dueto
theircontinualexposureto high
temperatures.
Do notoperatea burnerfor an
extendedperiodof timewithout
cookwareon thegrate.Thefinish
on the gratemaychipwithout
cookwareto absorbthe heat.
BrushedChromeFitish
(onmodelssoequipped)
Cleanthebrushedchrometop
withwarm, soapywateror an allpurposehouseholdcleanerand
immediatelydry it witha clean,
soficloth.Takecareto dry the
surfacefollowingthe “grain.”To
helppreventfingermarksafter
cleaning,spreada thinfilm of baby
oil on the surface.Wipeaway
~
excessoil with a clean, soficloth.
A goodappliancewaxwill help
protectthis finish.
Lift-UpCooktop
Cleanthe area underthe cooktop
often.Built-upsoil, especially
grease,maycatchfire.
Tomakecleaningeasier,the
cooktopmaybe liftedup.
Toraisethe cooktop:
1. Be sureburners are turnedoff.
2. Removethe gratesand, on
modelsso equipped,the drip pans.
3. Graspthe two frontburner wells
and lifi up.
Dual supportrods on somemodels
will holdthe cooktopup whileyou
cleanunderneathit. Other models
havea singlesupportrod.
Aftercleaningunderthe cooktop
with hot, soapywaterand a clean
cloth, lowerthe cooktop.Be
carefulnotto pinchyourfingers.
16
DripRns
(onmodelsso equipped)
Removethe gratesand lift outthe
chromedrip pans.Washthemin
hot, soapywater.Rinsethemwith
clean,hot waterandpolishthem
dry witha cloth.Neveruse
abrasivecleaneror steelwool—
they’llscratchthe surface.Instead,
so~kthe drip pansfor about20
minutesin slightlydilutedliquid
cleanseror mildsolutionof
ammoniaandwater(1/2cupof
ammoniato onegallonof water).
After soaking,washthemin hot
soapywater.Rinsewithcleanwater
andpolishwitha clean, soficloth.
m
specia~
careof
To CleantheContinuom-
Continuow-Cleaning
Oven Interior
CleaningOven:
1. Letrangepartscoolbefore
The Continuous-Cleaning oven
cleans itself whilecooking.The
insideof theoven—top,sidesand
back—isfinishedwitha special
coafi}?g
whichcannotbe cleaned
in the usualmannerwith soap,
detergents,steelwoolpads,
commercialovencleaners,coarse
abrasivepadsor coarsebrushes.
Useof suchcleanersand/orthe use
ofovensprayswillcausepermanent
damage.
Thespecialcoatingis a porous
ceramicmaterialwhichis dark in
colorand feelsslightlyroughto the
touch.If magnified,the surface
wouldappearas peaks,valleys,and
sub-surface“tunnels~’Thisrough
finishtendsto preventgrease
spattersfromforminglittlebeads
or dropletswhichrun downthe
sidewallsof a hard-surfaceoven
linerleavingunsightlystreaksthat
requirehandcleaning.Instead,
whenspatterhitsthe porousfinish
it is dispersedand is partially
absorbed.Thisspreadingaction
increasestheexposureof oven
soilto heatedair, and makesit
somewhatlessnoticeable.
Soil maynotdisappearcompletely
andat sometimeafierextended
usage,stainsmayappearwhich
cannotbe removed.
The specialcoatingworksbeston
smallamountsof spatter.Itdoes
notworkwellwith largerspills,
especiallysugars,eggor dairy
mixtures.
Thespecialcoatingis not used
onovenshelves.Shelvesshouldbe
cleanedoutsidethe ovento avoid
damageto the specialcoating
insidethe oven.
handling.Werecommendrubber
glovesbe wornwhencleaning.
2. Removeshelvesandcookware.
3. Soilvisibilitymaybe reducedby
operdtingthe ovenat 400”F.Close
thedoor and turn OVENTEMP
knobto 400”F.Timefor at least4
hours.Repeatedcyclesmaybe
necessarybeforeimprovementin
appearanceis apparent.
REMEMBER: DURING
THE
OPERATION
OFTHEOVEN,
THE
DOOR,WINDOW
ANDOTHER
RANGE
SURFACES
WILLGETH~
ENOUGH
~ CAUSE
BURNS.
DONOT
T’O?JCH.LETTHERANGE
COOL
BEFORE
REPLACING
OVEN
SHELVES.
4. If a spilloveror heavysoiling
occurson theporoussurface,as
soonas the ovenhas cooled,remove
as muchof the soilas possibleusing
a smallamountof wateranda stiff
bristlenylonbrush. Usewater
sparinglyand changeit frequently,
keepingit as cleanas possible,and
be sureto blotit up withpaper
towels,cloths,or sponges.Do not
rubor scrubwithpapertowels,
clothsor sponges,sincetheywill
leaveunsightlylinton theoven
finish.If waterleavesa whitering
on the finishas it dries,applywater
againandblotit witha clean
sponge,startingat the edgeof the
ring andworkingtowardthecenter.
—
—
17
Do notusesoap,detergent,
steelwoolpads,commercial
ovencleaner,siliconeoven
sprays,coarsepadsor coarse
brusheson the poroussurface.
Theseproductswillspot,clog,
andmar theporoussurfaceand
reduceitsabilityto work.
Do notscrapethe~rous
surfacewitha knifeorspatula—
theycouldpermanentlydamageit.
Theovenbottomandthe inside
of the ovendoorhavea porcelain
enamelfinish. Thedoor liftsoff
andthebottomcomesoutfor
cleaningawayfromthe continuouscleaningoven.
——
—.
—.
-.
------
RemovableOvenBottom
The ovenbottomcan be removedto
makecleaningeasier.
Finger
slot
II,
Toreplacethe ovenbottom:
1. Slideovenbottomintoovenso
rear tabsfit intoslotsin rearwallof
oven.
2. Graspovenbottomat finger
slotsand pushit backandthen
downto hooktheflangeunderthe
frontframe.
3. Fit fronttabsintoslotsin front
frame.
Toremove:
1. Graspovenbottomat finger
slotson eachside.
2. Lififrontedgeof ovenbottom
enoughto raisetabs from slotsin
frontframe.
3. Pushovenbottombackabout
1/4”to releaseflangefrom front
frame,thenpull out.
Theovenbottomhasa porcelain
enamelfinish. Tomakecleaning
easier,protecttheovenbottom
fromexcessivespillovers.Thisis
particularlyimportantwhenbaking
a fruitpieor otherfoodswithhigh
acidcontent.Hot fruitfillingsor
‘
foodsthatare acidin contentsuch
as milk, tomatoor sauerkraut,and
sauceswithvinegaror lemonjuice,
maycausepittinganddamageto
the porcelainenamelsurface.
Toprotectthe ovenbottomsurface,
placea pieceof aluminumfoil
slightlylargerthanthebakingdish
or a smallcookiesheeton a lower
shelfor underthebakingdishto
catchanyboilovers.It shouldnot
completelycoverthe shelfas this
wouldcauseunevenheatin the
oven.Aluminumfoilshouldnotbe
placedon the ovenbottom.
If a spilloverdoesoccuron the
ovenbottomallowtheovento cool
first. Youcan cleanthe bottomwith
soapandwater,a mildabrasive
cleanser,soap-filledabrasivepads
or causticovencleanerfollowing
manufacturer’sdirections.
18
Lift-offOven
Door
Theovendoorisremovableto make
theinteriormoreaccessible.
BroilerDmwer
k~e
Toremove:
The holesin the burnersof your
rangemustbe keptcleanat all
timesfor proper ignitionand an
even,unhamperedflame.
Youshouldcleanthe burners
routinelyand especiallyafterbad
spilloverswhichcouldclogthese
holes.Burnerslifi rightout for
1. Whenbroileris cool, remove
rackandpan.
TopBurners
cleaning” ~
2. Pullthe broilerdraweroutuntil
it stops,thenpushit backin about
oneinch.
Toremovethe door, openita few
inchestothespecialstopposition
thatwillholdthedooropen.Grasp
firmlyoneachsideandliftthedoor
straightupandoffthehinges.
Note:Becarefulnottoplacehands
betweenthespringhingeandthe
ovendoorframeasthehingecould
snapbackandpinchfingers.
Washwithhot, soapywater.For
stubbornspots,usea solutionof
vinegarandwater.Donotimmerse
thedoorin water.
Toreplace the door, makesurethe
hingesareinthe “out”position.
Positiontheslotsinthebottomof
thedoorsquarelyoverthehinges.
Thenlowerthedoorslowlyand
evenlyoverbothhingesat thesame
time.If hingessnapbackagainstthe
ovenframe,pullthembackout.
oven
—
shelves
Ovenshelvesmaybe cleanedwith
a mildabrasivecleanserfollowing
manufacturer’sdirections.Afier
cleaning,rinsetheshelveswithclean
wateranddry witha dry cloth.To
removeheavy,burned-onsoil,soapy
metalpadsmaybe used following
manufacturer’sdirections.After
scrubbing,washwithsoapywater,
rinseanddry.
3. Grasphandle,lifi andpull
broilerdrawerout (liftthe rollers
locatedunderthe draweroverthe
rollerguidestopsin the range).
Toreplace:
1. Put the rollersunderthebroiler
drawerbehindthe rollerguide
stopsin the range.
2. Holdthe broilerdrawerin the
raisedpositionas youslideit
partwayintothe range.Thenlower
thedrawerandpushit completely
closed.
BroilerWn &Rack
Afierbroiling,removethe broiler
rack and carefullypour offthe
grease.Washand rinsethe rack
in hot, soapywater.
If foodhas burnedon, sprinkle
the rack whilehot withdetergent
andcoverwithwetpapertowelsor
a dish cloth. Thatway,burned-on
foodswill soakloosewhilethe
mealis beingserved.
Do not storea soiledbroilerpan
and rack in the ovenor broiler
compartment.
—
19
w.
Note:A screwholdseachof
the burnersin placeto keepthem
fromwobblingaroundduring
shipment.Removeand discardthe
shippingscrew.Tiltthe burnerto
the rightto releaseitstwotabsfrom
slotsin the burner supportand
movethe burner towardthe backof
the range.This disengagesit from
the gasvalveat thefrontof the
range,and it lifisouteasily.
Toremoveburned-onfood, soak
theburner in a solutionof a product
usedforcleaningtheinsideofcoffee
makers.Soakthe burner for 20 to
30 minutes.If the fooddoesn’t
rinseoff completely,scrub it with
soapand wateror a mild abrasive
cleanserand a dampcloth.
Beforeputtingthe burnerback, dry
it thoroughlyby settingit in a warm
ovenfor 30 minutes.Thenplaceit
backin the range,makingsure it is
properlyseatedandlevel.
cleaningGuide
Note:Let range/ovenpartscoolbeforetouchingor handling.
PART
MATERIALSTO USE
GENERALDIRECTIONS
Broiler Pan and Rack
● Soapand Water
o Soap-Filled Scouring Pad
e Plastic Scouring Pad
Drainfat, coolpanandrackslightly.(Donotlet soiledpanandrackstandin
broilercompartmentto cool.)Sprinkledetergenton rackandpan. Fillpanwith
warmwaterandspreadclothor pdpertoweloverrack.Letpanandrackstand
fora fewminutes.Wash;scourif necessary.Rinseanddry.O~ION: Cleanpan
and rackindishwasher.
Control Knobs
●
Outside Giass Finish
@Soapand Water
Metal, including
Side Trims, Trim
Strips and Brushed
●
- —
e
Pulloffknobs.Washgentlybutdo notsoak.Dryandreturncontrolsto range.
Mild Soap and Water
*
Cleanoutsideofcooledblackglassdoorwi,tha glasscleanerthatdoesnot
containammonia.Washglasscontrolpanelwithclothdampenedinsoapywater.
Rinseandpolishwitha dry cloth.If knobsare removed,do notallowwaterto
rundowninsidesurfaceof glasswhilecleaning.
Soapand Water
Wash,rinseandthenpolishwitha drycloth. DON~ USEsteelwool,
abrasives,ammonia,acids,or commercialovencleanerswhichmaydamage
the finish.
ChromeCooktop
Porcelain Cooktop*
●
Paper Towel
s Dry Cloth
● Soap and Water
Avoidcleaningpowdersor harshabrasiveswhichmayscratchtheenamel.
Werecommend“SoftScrub”brandcleanser.
If acidsshouldspillonthe rangewhileit is hot, usea dry papertowelor cloth
to wipeup rightaway.Whenthe surfacehascooled,washandrinse,
Forotherspills,suchas fat smatterings,etc., washwithsoapandwaterwhen
cooledandthen rinse.Polishwitha dry cloth.
WintedSurfaces
(doorfront,broiler
drawerfront,
sidepanels)
o Soapand Water
Usea mildsolutionofsoapandwateranda soficloth.Do notuse anyharsh
abrasivesor cleaningpowderswhichmayscratchor marsurface.
Shelves
o SoapandWater
~ Soap-FilledScouringPad
● PlasticScouringPad
Shelvescanbe cleanedbyhandusingsoapandwater.Rinsethoroughlyto
removeanysoapaftercleaning.
SurfaceBurner
Grates
● SoapandWater
@Soap-FilledScouringPad
(Non-metallic)
Liftout whencool.Soak5 to 10minutesif desiredin warmsolutionof
dishwasherdetergent.Scourwithmaterialsmentionedhereto removeburnedon foodparticles.
Chrome-Plated
DripPans
@SoapandWater
e Stiff-BristledBrush
~ Soap-FilledScouringPad
(Non-metallic)
Cleanas describedbelowor indishwasher.Wipedrippansaftereachcooking
so unnoticedspatterwillnot “burnon” nexttimeyoucook.Toremove“burnedon” spatters,use anyor all cleaningmaterialsmentioned.Rublightly with
scouringpadtopreventscratchingofthe surface.
SurfaceBurners
e Solutionfor Cleaning
InsideofCoffeeMakers
e SoapandWater
~MildAbrasiveCleanser
~DampCloth
Wipeoffburnerheads.If heavyspilloveroccurs,removeburnersfromrange
(seepage19)andsoakthemfor20 to 30 minutesinsolutionof hot waterand
productforcleaninginsideofcoffeemakers,suchas Dip-Itbrand.If soildoes
not rinseoffcompletely,scrubburnerswithsoapandwateror a mildabrasive
cleanseranda dampcloth. Dry burnersina warmovenfor 30minutesbefore
returningthemtothe range.
*Spillageofmarinades,fruitjuices, andbastingmaterialscontainingacidsmaycausediscoloration,soshouldbe wipedupimmediately(blottedup
ifinContinuous-Cleaning
oven).Takecarenottotouchhotportion-ofoven.Whensurfaceiscool,cleanandrinse.CAUTION:
Lightbulbscanget
-.
warmenoughto breakif touchedwithmoistcloth.Whencleaning,avoidwarmlamp.
20
e
MinorAdjwtmenkYouCanMake
OvenThermostat
Adjustment
Thetemperaturecontrolin your
newovenhasbeencarefullyadjusted
{oprovideaccuratetemperatures.
However,if this ovenhas replaced
oneyouhaveusedforseveralyears,
youmaynoticea differencein the
degreeof browningor the lengthof
timerequiredwhenusingyour
favoriterecipesbecauseoven
temperaturecontrolshavea tendency
to “drift” overa periodofyears.
Beforeattemptingto havethe
temperatureof yournewoven
changed,be sureyouhavefollowed
the bakingtimeand temperatureof
the recipecarefully.Then, after
youhaveusedthe ovena fewtimes
andyoufeeltheovenis too hot
or too cool, thereis a simple
adjustmentyoucan makeyourself
on the OVENTEMP knob.
Pullthe knoboff the shaftandlook
at the back side.There is a discin
thecenterofthe knobskirt witha
seriesof marksoppositea pointer.
originalsettingand checkoven
performancebeforemakingany
additionaladjustments.
Afierthe adjustmentis made,
press skirtand knobtogetherand
retightenscrewsso theyare snug,
but be carefulnot to overtighten.
Re-installknobon rangeand
checkperformance.
Note:Afteran adjustmenthas
beenmadeto the OVENTEMP
knob,OFF and BROILwillnot
lineup withthe indicatormarkon
the controlpanelas theypreviously
did. Thisconditionis normaland
will notcreatea problem.
_
—
Noteto whichmarkthe pointeris
pointing.Tomakean ad~ustment,
carefullyloosen(approximately
oneturn), butdo notcompletely
re~.ovethe twoscrewsthatholdthe
skirt to the knob.Holdthe knob
bladein one handand the outer
skirt in the otherhand.
Toraisethe oventemperature,
movethe pointerin the directionof
thearrow for RAISE. Tolowerthe
temperature,movethe pointerin
thedirectionof arrowfor LOWER.
Eachmark willchangethe oven
temperatureapproximately20”F.
Wesuggestthatyoumakethe
adjustmentone mark fromthe
Theair adjustmentshutterfor the
ovenburner regulatesthe flowof
air to the flame.
Theshutterfor theovenburneris
neartheback wallof the oven
behindthe broilerdrawer.
r
(
SurfaceBurner
AirAdjustmentShutters
..-
An air adjustmentshutterfor each
surfaceburnerregulatesthe flowof
air to the flame.
Whenthe rightamountof air
flowsintothe burner,the flame
willbe steady,relativelyquietand
haveapproximately3/4”sharpblue
cones.This is usuallythecasewith
factorypresetshuttersettings.
Air adjustmentshutter
The air adjustmentshuttersset on
the hoodof the valves,and are ‘
positionedon the burnertubesby
frictionfit.
Toadjustthe flowof ir to the
bur~ers,applya blade type
screwdriveragainstthe\ friction-fit
shuttersand push to adjustthe
shutters,allowingmoreor less air
intothe burner tubesas needed.
21
--
.-
\
Kh
1
Loosen-
Air adjustment
shutter
,
Toreachthe shutter,remove
thebroilerdrawer(page19).
Toadjustthe flowof airto the
burner,loosenthe Phillipshead
screwand rotatethe shutterto
allowmoreor lessair intothe
burnertubeas needed.
Withnotenoughair,youwon’tsee
any sharpblueconesin the flame,
youmaysee yellowtips,and soot
mayaccumulateon potsand pans.
I
~–
——
-w
—.
‘“
v
Withtoomuchair,theflamewill
be unsteady,possiblywon’tburn all
the wayaround,and willbe noisy,
soundinglikea blowtorch.
L Notepositionof
pointerto marks
beforeadjustment
OvenBurner
AirAdjustmentShutter
~
-.
-—
—
-
I
Todetermineif the burnerflame
is proper,lighttheburner.The
flameshouldhave1/2”to 3/4”blue
coneswithno yellowtipping,and
shouldnotextendout overthe
baffleedges.
-—
-.
—
=r.
-–
--~
—.
--
.—.
Questiom?
Solver
UseThisProblem
PROBLEM
-POSS~LE CAtiSEAND/ORWHAT~ DO
TOPBURNERS
DONOTLIGHT
OVENDOESNOT
COOKPROPERLY
.CLOCKDOES
NOTWORK
OVENLIGHTDOES ~
NOTCOME ON
‘
(on modelsso equipped)
If youneedmorehelp..call, tollfree:
GEAnswerCenter”
800.626.2000
consumerinformationservice
22
‘
‘
‘
If YouNeedservice
—
—
—
—
Toobtainservice,seeyourwarranty
on the backpageof thisbook.
We’reproudof our serviceand
wantyouto be pleased.If for some
reasonyouare nothappywiththe
serviceyoureceive,hereare three
stepsto followfor furtherhelp.
FIRST,contactthe peoplewho
servicedyourappliance.Explain
whyyouare notpleased.In most
cases,this willsolvetheproblem.
NEXT,if youare stillnotpleased,
writeall the details-including
yourphonenumber—to:
Manager,ConsumerRelations
GE Appliances
AppliancePark
Louisville,Kentucky40225
FINALLY,if yourproblemis still
notresolved,write:
MajorAppliance
ConsumerActionPanel
20 NorthWackerDrive
Chicago,Illinois60606
—
—.
-
,.
I
YOUR
GENERAL
ELEmR1c
RANGE
WARRANTY
Saveproof of original purchasedatesuchas yoursalesslip or cancelledcheckto establishwarrantyperiod.
,.
WHATIs COVERED
FULL ONEWEAR WARRANTY
W~~~
~ Servicetrips to yourhometo
teachyouhowto usethe product.
J
.
.
:-
,’.
:
.,
IS ~0~
co~~~~~
This warrantyis extendedto
the originalpurchaserand any
Foroneyearfromdateof original
succeedingownerfor products
purchase,wewill provide,freeof
purchasedforordinaryhomeuse
charge,partsandservicelabor
in the 48 mainlandstates,Hawaii
in your hometo repairor replace
andWashington,D.C.In
Alaskathe
any pafi of the range thatfails
warrantyis
the
sameexceptthat
it is
becauseof a manufacturingdefect.
.LIMITEDbecauseyoumustpayto
shipthe productto~heserviceshop
or for the servicetechnician’stravel
coststo yourhome.
All warrantyservicewill be provided
byour FactoryServiceCentersor
byour authorizedCustomerCare”
servicersduringnormalworking
hours.
Lookin the Whiteor YellowPages
of yourtelephonedirectoryfor
GENERALELECTRICCOMPANY,
GENERALELECTRICFACTORY
SERVICE,GENERALELECTRICHOTPOINTFACTORYSERVICEor
GENERALELECTRICCUSTOMER
CARE@SERVICE.
Read your Use and Care material.
If youthen haveanyquestions
aboutoperatingthe product,
pIeasecontactyourdealeror our
ConsumerAffairsofficeat the
addressbelow,or call,toll free:
GEAnswerCenter”
800.626.2000
consumerinformationservice
● Replacementof housefusesor
resettingof circuitbreakers.
@Failureof the productif it is used
for otherthan its intendedpurpose
or usedcommercially.
(
)
e Damageto productcaused
by accident,fire,floodsor acts
of God.
WARRANTORISNOTRESPONSIBLE
FORCONSEQUENTIALDAMAGES.
e Improperinstallation.
If you havean installationproblem,
contactyourdealeror installer.
Youare responsiblefor providing
adequateelectrical,gas,exhausting
andotherconnectingfacilities.
Somestatesdo notallowtheexclusionor limitationof incidentalorconsequentialdamages,sothe abovelimitationor exclusion
maynotapplyto you.Thiswarrantygivesyouspecificlegalrights,andyoumayalsohaveotherrightswhichvaryfromstateto state,
Toknowwhatyourlegalrightsarein yourstate,consultyourlocalor stateconsumeraffairsofficeor yourstate’sAttorneyGeneral.
Warrantor: General Electric Company
.. .
1
If further help is needed concerning this warranty, write:
Manager—Consumer Affairs, GE Appliances, Louisville, KY 40225
m
JGBC15G
[ Part No. MNL106
JGBC17GEK
3-89
———