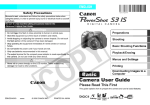
1
Wireless Broadband Router
User's Guide
Version: 1.0
Aug. 2001
Copyright Statement
No part of this publication may be reproduced, stored in a
retrieval system, or transmitted in any form or by any means,
whether electronic, mechanical, photocopying, recording or otherwise without the prior writing of the publisher.Windows 95/98
and Windows 2000 are trademarks of Microsoft Corp.
Pentium is trademark of Intel.
All copyright is reserved.
TABLE OF CONTENTS
1 Introduction
1.1 About the Gateway...................................................... 1-2
1.2 Features and Benefits.................................................. 1-3
1.3 Applications................................................................. 1-4
2 Installation
2.1 Kit Contents................................................................ 2-2
2.2 Description of Hardware............................................ 2-3
2.3 System Requirements.................................................. 2-6
2.4 Connect the System..................................................... 2-7
2.4.1 Basic Installation Procedure....................................... 2-8
2.4.2 Attach to Your Network Using Ethernet Cabling...... 2-9
2.4.3 Attach to Your Network Using Radio Signals........... 2-11
2.4.4 Attach the Gateway to the Internet............................ 2-13
2.4.5 Connect the Gateway to a Printer.............................. 2-14
2.4.6 Connecting the Power Adapter.................................. 2-14
2.4.7 Verify Port Status....................................................... 2-15
3 CONFIGURING CLIENT TCP/IP
3.1 Installing TCP/IP Protocol in Your PC..................... 3-3
3.2 Setting TCP/IP to Work with the Gateway.............. 3-5
3.2.1 Dynamic IP Allocation via a DHCP Server............... 3-6
3.2.2 Manual IP Configuration............................................ 3-7
3.2.3 Verifying Your TCP/IP Connection........................... 3-9
4 CONFIGURING THE GATEWAY
4.1 Navigating the Web Browser Interface..................... 4-2
4.1.1 Setting a Password..................................................... 4-2
4.1.2 Making Configuration Changes................................. 4-3
4.2 Main Menu.................................................................. 4-4
4.3 Networking and Client Services................................. 4-6
4.3.1 Change Password....................................................... 4-7
4.3.2 Set Time Zone............................................................ 4-8
4.3.3 LAN Gateway and DHCP Settings............................ 4-9
4.3.4 WAN Configuration................................................... 4-10
4.3.4.1 Dynamic IP Address - DHCP................................. 4-11
4.3.4.2 Static IP Address - Fixed IP.................................... 4-12
4.3.4.3 PPP over Ethernet - PPPoE..................................... 4-13
4.3.4.4Dial-up on Demand - Modem.................................. 4-14
4.3.5 DNS Configuration.................................................... 4-16
4.3.6 Wireless Configuration.............................................. 4-17
4.3.6.1 Channel and SSID................................................... 4-18
4.3.6.1 Encryption............................................................... 4-19
4.3.7 Configuring Client Services..................................... 4-20
4.3.7.1 Firewall Protection.................................................. 4-22
4.3.7.2 Network Address Translation - NAT...................... 4-23
4.3.7.3 Virtual Server.......................................................... 4-24
4.3.7.4 Enabling Special Applications................................ 4-26
4.3.7.5 Virtual DMZ Host................................................... 4-28
4.3.7.6 Remote Management.............................................. 4-29
4.3.7.7 Client Filtering........................................................ 4-30
4.4 Viewing Network and Device Status......................... 4-31
4.5 Using System Tools...................................................... 4-32
5 CONFIGURING PRINTER SERVICES
5.1 Install the Printer Port Monitor................................ 5-2
5.2 Configure the Print Server......................................... 5-7
5.2.1 Configure the Network Printer in Windows 95/98.... 5-7
5.2.2 Configure the Network Printer in Windows NT........ 5-10
5.2.3 Configure the Network Printer in Windows 2000..... 5-13
5.2.4 Configure the Network Printer in Windows ME....... 5-23
5.2.5 Configure the Network Printer in Unix Systems....... 5-28
APPENDICES:
A. Troubleshooting............................................................ A-1
B. Cables............................................................................. B-1
Ethernet Cable................................................................. B-1
Straight-through Cable.................................................... B-1
RJ-45 Port Pin Assignments........................................... B-2
Serial Port Pin Assignments............................................ B-3
Printer Port Pin Assignments.......................................... B-6
C. Specifications................................................................. C-1
Compliance......................................................................... C-5
Safety Compliance............................................................. C-7
INTRONDUCTION
Thank you for purchasing our product, and we are proud to provide you with this powerful yet simple communication device for
connecting your local area network (wired or wireless LAN) to
the Internet. For those who want to surf the Internet at the lowest
possible cost, this Broadband Router provides a convenient and
powerful solution.
This User's Guide introduces to you the common configurations
of the Gateway and leads you through the installation step by
step.
Please read this manual to become familiar with this Gateway
and its applications. This manual contains detailed instructions in
the operation of this product. Please keep this manual for future
reference.
1-1
CHAPTER 1
CHAPTER1
CHAPTER 1
1.1About the Gateway
The Gateway provides Internet access to multiple users by
sharing a single-user account. The Gateway's most outstanding features include wireless LAN connectivity, as well as
the dual-port WAN interface which allows you to connect to
an xDSL or Cable modem, ISDN TA or PSTN analog
modem. The Gateway provides extensive firewall protection
and Virtual Private Network (VPN) services. It also provides print services for any client attached to a LAN port.
The Gateway supports dial-on-demand for ISDN/PSTN
service, automatically connecting to the Internet when there
are requests, and terminating the connection if no further
requests occur. This dual-port design also supports fail-over
Internet access through the secondary WAN port (i.e., the
serial port can be used for primary or backup Internet
access).
This new Gateway technology provides many cost-effective
functions and management benefits. It is simple to configure
and can be up and running in minutes.
1-2
CHAPTER 1
1.2Features and Benefits
zInternet
access via 10 Mbps WAN port connection to xDSL/Cable modem, or
RS232 console port connection to ISDN/PSTN modem
zLocal Network Connection via zThree 10/100 Mbps Ethernet switch ports, or
z11 Mbps wireless interface
zBuilt-in Print Server for any client attached to the LAN
zDHCP for dynamic IP configuration, and DNS for domain
name mapping
zFirewall - client privileges, hacker prevention, NAT
zNAT also enables multi-user access with a single-user
account, and virtual server functionality (providing protected access to Internet services such as Web, FTP, mail
and Telnet)
zMulti-user access (up to 253), single-user account
zVirtual server with network address translation
zVirtual Private Network support using PPTP, L2TP or
IPSec pass-through.
zUser-definable application sensing tunnel supports applications requiring multiple connections
zSupports CHAP authentication protocol for dial-up identification
zSupports PPP dial-in connection using standard dial-up
program
zEasy setup through a Web browser on any operating system that supports TCP/IP
zCompatible with all popular Internet applications an Builtin Print Server support
1-3
CHAPTER 1
1.3Applications
Many advanced applications are provided by the
Gateway, such as:
zFlexible
LAN Access
The Gateway provides connectivity to 10/100 Mbps wired
devices as well as 11 Mbps wireless mobile users. The
wireless interface makes it easy to create a network in difficult-to-wire environments, or to provide quick access to
databases for mobile workers.
zInternet
Access
This device supports Internet access through an xDSL,
Cable, ISDN or PSTN connection. Since many xDSL
providers use PPPoE to establish communications with end
users, the Gateway includes a built-in client for this protocol, eliminating the need to install this service on your
computer.
zShared
IP Address
The Gateway provides Internet access for up to 253 users
with a shared IP address. Using only one ISP account, multiple users on your network can browse the Web at the
same time.
zVirtual
Server
If you have a fixed IP address, you can set up the Gateway
to act as a virtual host for network address translation.
Remote users access various services at your site using a
constant IP address. Then, depending on the requested
1-4
zUser-Definable
Application Sensing Tunnel
You can define special applications that require multiple
connections such as videoconferencing, Internet gaming,
and Internet telephony. The Gateway can then sense the
application type and open a multi-port tunnel for it.
zDMZ
Host Support
Allows a networked computer to be fully exposed to the
Internet. This function is used when the special application
sensing tunnel feature is insufficient to allow an application
to function correctly.
zSecurity
The Gateway supports security features that can deny
Internet access to specified users, or filter all requests for
specific services the administrator does not want to serve.
The Gateway's firewall can also block common hacker
attacks, including IP Spoofing, Land Attack, Ping of Death,
IP with zero length, Smurf Attack, UDP port loopback,
Snork Attack, TCP null scan, and TCP SYN flooding.
zVirtual
Private Network
The Gateway supports three of the most commonly used
1-5
CHAPTER 1
service (or port number), the Gateway can route the request
to the appropriate server (at another internal IP address).
This secures your network from direct attack by hackers,
and provides more flexible management by allowing you to
change internal IP addresses without affecting outside
access to your network..
CHAPTER 1
VPN protocols - PPTP, L2TP and IPSec. These protocols
allow remote users to establish a secure connection to their
corporate network. If your service provider supports VPNs,
then any of these protocols can be used to create an
authenticated and encrypted tunnel for passing secure data
over the Internet (i.e., a traditionally shared data network).
The VPN protocols supported by the Gateway are briefly
described below:
*Point-to-Point Tunneling Protocol: Provides a secure
tunnel for remote client access to a PPTP security gateway. PPTP includes provisions for call origination and
flow control required by ISPs.
*Layer Two Tunneling Protocol - Includes most of the
features provided by PPTP, but has fewer overheads and
is more suited for managed networks.
*IP Security - Provides IP network-layer encryption.
IPSec can support large encryption networks (such as
the Internet) by using digital certificates for device
authentication
1-6
CHAPTER2
INSTALLATION
CHAPTER 2
Before installing the Gateway Wireless Broadband Router, verify
that you have all the items listed under the "Kit Contents." If any
of the items are missing or damaged, please contact your local
distributor. Also be sure that you have all the necessary cabling
before installing the Gateway. After installing the Gateway, refer
to the Web-based configuration program in Chapter 4
"Configuring the Gateway" for information on configuring the
router.
2-1
2.1 Kit Contents
CHAPTER 2
After unpacking the Gateway Broadband Router, check the
contents of the box and make sure you have received the
following components:
zGateway
4-port Wireless Broadband Router
adapter (5V, 2.4A)
zOne CAT-5 Ethernet cable
zFour rubber feet
zUser's Guide
zPower
Immediately inform your dealer in the event of any incorrect, missing or damaged parts. If possible, please retain the
carton and original packing materials in case there is a need
to return the product.
2-2
2.2 Description of Hardware
CHAPTER 2
The main functions of the Gateway can be divided into
three categories:
1.Connects to the Internet or to a remote site by using its
RJ-45 WAN port or RS232 serial port.
2.Directly connects to your PC or to a local area network
by using any of the three Fast Ethernet LAN ports or
through the IEEE802.11b wireless interface.
3.Functions as a print server as well.
Access speed to the Internet depends on your service type.
Full-rate ADSL can provide up to 8 Mbps downstream and
640 Kbps upstream. G.lite (or splitterless) ADSL provides
up to 1.5 Mbps downstream and 512 Kbps upstream. Cable
modems can provide up to 36 Mbps downstream and 2
Mbps upstream. ISDN can provide up to 128 Kbps when
using two bearer channels. And PSTN analog connections
can now run up to 56 Kbps. However, you should note that
the actual rate provided by specific service providers may
vary dramatically from those above-mentioned limits.
Although access speed to the Internet is determined by the
modem type connected to your Gateway, data passing
between devices connected to your local area network can
run up to 100 Mbps over the Fast Ethernet ports.
The Gateway includes an LED display on the front panel
for system power and port indications that simplifies installation and network troubleshooting. It also provides three
RJ-45 LAN ports, one RJ-45 WAN port, one RS232 serial
2-3
port, one parallel printer port, as well as two antennas on
the rear panel.
CHAPTER 2
zThree
RJ-45 ports for connection to a 10BASET/100BASE-TX Ethernet Local Area Network (LAN).
These ports can auto-negotiate the operating speed to
10/100 Mbps, the mode to half/full duplex, and the pin
signals to MDI/MDI-X (i.e., allowing these ports to be
connected to any network device with straight-through
cable). These ports can be connected directly to a PC or to
a server equipped with an Ethernet network interface card,
or to a networking device such as an Ethernet hub or
switch.
zOne RJ-45 port for connection to an xDSL or Cable
modem. This port is fixed at 10 Mbps, full duplex.
zOne RS232 serial port to connect to an ISDN Terminal
Adapter (TA) or to a PSTN analog modem.
zOne parallel printer port that can be connected to a printer,
which can be shared by any LAN/WLAN users.
zTwo antennas.
The following figure shows the components of the
Gateway:
2-4
CHAPTER 2
2-5
2.3 System Requirements
CHAPTER 2
You must have access to an ISP that meets the following
minimum requirements:
zInternet
access from your local telephone company or
Internet Service Provider (ISP) using an xDSL modem,
Cable modem, ISDN TA, or PSTN analog modem. You
may also have access over the telephone system to an analog modem at another site.
zA
PC using a fixed IP address or a dynamic IP address
assigned by DHCP, a Gateway server address, and a DNS
server address from your service provider.
zFor
wired LAN connection, you need a computer equipped
with a 10 Mbps, 100 Mbps, or 10/100 Mbps Fast Ethernet
card, or a USB-to-Ethernet converter. For wireless LAN
connections, each computer must have an 11 Mbps wireless adapter.
zTCP/IP
network protocol installed on each PC that needs
to access the Internet.
zA
Java-enabled Web browser, such as Microsoft Internet
Explorer 5.0 or above or Netscape Communicator 4.0 or
above installed on one PC at your site for configuring the
Gateway.
2-6
2.4 Connect the System
zKeep
zDo
the Gateway away from any heating devices.
not place the Gateway in a dusty or wet environment.
When you install the Gateway, you should remember to turn
off the power, remove the power cord from the outlet, and
keep your hands dry.
2-7
CHAPTER 2
The Gateway can be positioned at any convenient location
in your office or home. No special wiring or cooling
requirements are needed. You should, however, comply with
the following guidelines:
2.4.1 Basic Installation Procedure
CHAPTER 2
zConnect
the LAN: You can connect the Gateway to your
PC, a hub, or a switch. Run the Ethernet cable from one of
the LAN ports on the rear of the Gateway to your computer's network adapter or to another network device. You can
also connect the Gateway to your PC or to a client adapter
via radio signals. Position both antennas on the back of the
Gateway into the desired positions.
zConnect
the WAN: Prepare an Ethernet cable for connecting the Gateway to a Cable/xDSL modem or Ethernet
router. Prepare a serial cable for connecting the Gateway
to an ISDN TA or PSTN modem.
zConnect
your printer: Use standard parallel printer cable to
connect your printer to the printer port on the Gateway.
zPower
on: Connect the power adapter to the Gateway.
Figure 2-2. Connecting the Gateway
2-8
2.4.2 Attach to Your Network Using Ethernet
Cabling
CHAPTER 2
The three LAN ports on the Gateway can auto-negotiate the
connection speed to 10 Mbps Ethernet or 100 Mbps Fast
Ethernet, as well as the transmission mode to half duplex or
full duplex. These LAN ports also support auto-configuration for pin signals (auto-MDI/MDI-X) that allows you to
use straight-through cable for connecting the Gateway to
any network device. (See Appendices "B. Cables" for
details on wiring.)
Use twisted-pair cable to connect any of the three LAN
ports on the Gateway to an Ethernet adapter on your PC.
Otherwise, you can cascade any of LAN ports on the
Gateway to an Ethernet hub or switch, and then connect
your PC or other network equipment to the hub or switch.
When inserting an RJ-45 plug, be sure the tab on the plug
clicks into position to ensure that it is properly seated.
Warning:
Do not plug a phone jack connector into any RJ-45 port.
This may damage the Gateway. Instead, use only twistedpair cables with RJ-45 connectors that conform to FCC
standards.
2-9
CHAPTER 2
Notes:
1.Use 100-ohm shielded or unshielded twisted-pair cable
with RJ-45 connectors for all connections. Use Category
3, 4 or 5 for connections that operate at 10 Mbps, and
Category 5 for connections that operate at 100 Mbps.
2.Make sure each twisted-pair cable does not exceed 100
meters (328 feet).
Figure 2-3 Making LAN Connections
2-10
2.4.3 Attach to Your Network Using Radio Signals
Install a wireless network adapter in each computer that will
be connected to the Internet or your local network via radio
signals.
CHAPTER 2
Rotate both antennas on the back of the Gateway to the
desired position. Try to place the Gateway in a position that
is located in the center of your wireless network. Normally,
the higher you place the antenna, the better the performance
will be. Ensure that the Gateway's location provides optimal
reception throughout your home or office.
Computers equipped with a wireless adapter can communicate with each other as an independent wireless LAN by
configuring each computer to the same radio channel.
However, the Gateway can provide access to your
wired/wireless LAN or to the Internet for all wireless workstations. Each wireless PC in this network infrastructure can
talk to any computer in the wireless group via a radio link,
or access other computers or network resources in the wired
LAN infrastructure or over the Internet via the Gateway.
The wireless infrastructure configuration not only extends
the accessibility of wireless PCs to the wired LAN, but also
doubles the effective wireless transmission range for wireless PCs by re-transmitting incoming radio signals through
the Gateway.
A wireless infrastructure can be used for access to a central
database, or for connection between mobile workers, as
2-11
CHAPTER 2
shown in the following figure:
Figure 2-4 Making WLAN Connections
2-12
2.4.4 Attach the Gateway to the Internet
Figure 2-5. Making WAN Connections
Note:When connecting to the WAN port, use 100-ohm
Category 3, 4 or 5 shielded or unshielded twisted-pair
cable with RJ-45 connectors at both ends for all connections.
2-13
CHAPTER 2
If Internet services are provided through an xDSL or Cable
modem, use unshielded or shielded twisted-pair Ethernet
cable (Category 3 or greater) with RJ-45 plugs to connect
the broadband modem directly to the WAN port on the
Gateway. Use either straight-through or crossover cable
depending on the port type provided by the modem (see
Appendices "B. Cables"). For ISDN or PSTN service, attach
the access device to the RS232 serial port on the Gateway.
CHAPTER 2
2.4.5 Connect the Gateway to a Printer
If you connect a printer to the Gateway, all the computer
users connected to your LAN can have access to the printer.
Connect a standard parallel printer cable to the Printer port
on the Gateway, and configure the printer server as
described in Section 5.1 "Install the Printer Port Monitor".
2.4.6 Connecting the Power Adapter
Plug the power adapter into the power socket on the
Gateway, and the other end into a power outlet. Check the
indicator marked Power on the front panel to be sure it is
on. If the Power indicator does not light up, refer to
Troubleshooting in Appendices "A. Troubleshooting".
2-14
2.4.7 Verify Port Status
Check the power and port indicators as shown in the following table.
CHAPTER 2
2-15
CHAPTER3
CONFIGURING CLIENT TCP/IP
CHAPTER 3
To access the Internet through the Gateway Broadband Router,
you must configure the network settings of the computers on
your LAN to use the same IP subnet as that defined for the
Gateway. The default network settings for the Gateway are:
IP Address: 192.168.2.1
Subnet Mask: 255.255.255.0
Note:These settings can be changed to fit your network
requirements, but you must first configure at least one
computer as described in Chapter 3 "Configuring
Client TCP/IP" to access the Gateway's Web configuration interface. (See Chapter 4 "Configuring the
Gateway" for information on configuring the
Gateway.)
All PCs connected to the Gateway must be set to the same IP
subnet as the Gateway. The default subnet address of the
Gateway is 192.168.2.X (where X means 2-254) and the subnet
mask is 255.255.255.0. You can set the IP address for client PCs
either by automatically obtaining an IP address from the
Gateway's DHCP service or by manual configuration. See
Section 3.2 "Setting TCP/IP to Work with the Gateway".
3-1
If you have not previously installed the TCP/IP protocol on your
client PCs, refer to the following section. For information on how
to configure a TCP/IP address on a PC, refer to Section 3.2
"Setting TCP/IP to Work with the Gateway".
CHAPTER 3
3-2
3.1 Installing TCP/IP Protocol in Your PC
CHAPTER 3
1.Click the Start button and choose Settings, then click
Control Panel.
2.Double click the Network icon and select the
Configuration tab in the Network window.
3.Click the Add button to add the network component to
your PC.
4.Double click Protocol to add the TCP/IP protocol.
5.Select the Microsoft item in the manufacturers list. And
choose TCP/IP in the Network Protocols. Click the OK
button to return to the Network window.
3-3
6.The TCP/IP protocol will be listed in the Network window. Click OK to complete the install procedure and
restart your PC to enable the TCP/IP protocol.
CHAPTER 3
3-4
3.2 Setting TCP/IP to Work with the Gateway
CHAPTER 3
1.Click the Start button and choose Settings, then click
Control Panel.
2.Double click the Network icon. Select the TCP/IP line that
has been assigned to your network card in the
Configuration tab of the Network window.
3.Click the Properties button to set the TCP/IP protocol for
the Gateway.
4.You can dynamically assign TCP/IP address settings to a
client, or you can manually configure a client with address
settings to meet your specific network requirements. (Note
that the default IP address of the Gateway is 192.168.2.1.)
3-5
3.2.1 Dynamic IP Allocation via a DHCP Server
Select Obtain an IP address automatically in the IP Address
tab. Do not input any values under the Gateway tab, and
choose Disable DNS in the DNS Configuration tab. The
DHCP server will automatically configure these settings.
Click OK and reboot your system to implement the changes.
CHAPTER 3
3-6
CHAPTER 3
3.2.2 Manual IP Configuration
3-7
1.Select Specify an IP address in the IP Address tab. Select
an IP address based on the default network 192.168.2.X
(where X is between 1 and 254), and use 255.255.255.0
for the subnet mask.
2.In the Gateway tab, add the IP address of the Gateway
(default: 192.168.2.1) in the New gateway field and click
Add.
3.In the DNS Configuration tab, add the IP address for the
Gateway and click Add. This automatically relays DNS
requests to the DNS server(s) provided by your ISP.
Otherwise, add specific DNS servers into the DNS Server
Search Order field and click Add.
CHAPTER 3
4.After finishing TCP/IP setup, click OK, and then reboot
the computer. After that, set up other PCs on the LAN
according to the procedures described above.
3-8
3.2.3 Verifying Your TCP/IP Connection
CHAPTER 3
After installing the TCP/IP communication protocol and
configuring an IP address in the same network with the
Gateway, you can use the Ping command to check if your
computer is successfully connected to the Gateway. The following example shows how the Ping procedure can be executed in an MS-DOS window. First, execute the Ping command: ping 192.168.2.1
If there appear the following messages:
"Pinging 192.168.2.1 with 32 bytes of data:
Reply from 192.168.2.1: bytes=32 time=2ms TTL=64",
a communication link between your computer and the
Gateway has been successfully established.
Otherwise, if you get the following messages:
"Pinging 192.168.2.1 with 32 bytes of data:
Request timed out",
there may be something wrong in your installation procedure. You need to check the following items in sequence:
1.Is the Ethernet cable correctly connected between the
Gateway and your computer? The LAN LED on the
Gateway and the Link LED of the network card on your
computer must be on.
3-9
2.Is TCP/IP properly configured on your computer? If the IP
address of the Gateway is 192.168.2.1, the IP address of
your PC must be from 192.168.2.2 - 192.168.2.254 and the
default gateway must be 192.168.2.1.
If you can successfully Ping the Gateway, then you are now
ready to connect to the Internet!
CHAPTER 3
3-10
CHAPTER4
CONFIGURING THE GATEWAY
CHAPTER 4
After you have configured TCP/IP on a client computer, you can
use a Web browser to configure the Gateway. The Gateway can
be configured by any Java-supported browser including Internet
Explorer 4.0 or above, or Netscape Navigator 4.0 or above. Using
the Web management interface, you can configure the Gateway
and view statistics to monitor network activity.
4-1
To access the Gateway's management interface, enter the IP
address of the Gateway in your browser http://192.168.2.1. Then
enter the User Name "admin" with no password. The home page
displays the Main Menu on the left-hand side of the screen and
descriptive information on the right-hand side. The Main Menu
links are used to navigate to other menus that display configuration parameters and statistics.
4.1 Navigating the Web Browser Interface
The Gateway's management interface includes four key
menus: Status, Help, Tools, and Setup.
The Status and Help menus provide general information on
the current settings and how to configure the Gateway.
The Setup menu is used to configure the LAN, WAN and
wireless interface, as well as other advanced functions.
While the Tools menu is used to reset the Gateway, restore
the factory settings, or upgrade firmware.
CHAPTER 4
4.1.1 Setting a Password
If this is your first time to access the Gateway, you should
define a new Administrator password, record it and put it in
a safe place. From the Main Menu, select "Setup" and enter
the default password for the Administrator (i.e., "admin").
Then select "Change Password" and follow the instructions
on the screen (see Section 4.3.1 "Change Password"). Note
that passwords can consist of 3 to 12 alphanumeric characters and are not case sensitive.
4-2
4.1.2 Making Configuration Changes
Configurable parameters have a dialog box or a drop-down
list. Once a configuration change has been made on a page,
be sure to click the "Enter" button at the bottom of the page
to confirm the new setting.
CHAPTER 4
Note:To ensure proper screen refreshment after a command
entry, be sure that Internet Explorer 5.0 is configured
as follows: Under the menu "Tools / Internet Options /
General / Temporary Internet Files / Settings," the setting for "Check for newer versions of stored pages"
should be "Every visit to the page".
4-3
4.2 Main Menu
Using the web management interface, you can define system parameters, manage and control the Gateway and its
ports, or monitor network conditions. The following table
briefly describes the selections available from this program.
CHAPTER 4
4-4
4-5
CHAPTER 4
4.3 Networking and Client Services
Use the Setup menu to configure the LAN interface (including TCP/IP parameters for the Gateway's gateway address,
DHCP address pool for dynamic client address allocation),
the WAN connection options, DNS domain name mapping,
the wireless interface, and other advanced services.4.3.1
CHAPTER 4
You can use the Setup Wizard by clicking the "Enter" button at the bottom of the page and changing the required settings, or you can select the specific items you need to
change from the Setup menu on the left side of the screen.
4-6
CHAPTER 4
4.3.1 Change Password
Use this menu to restrict management access based on a
specific password. Anyone can access the Status and Help
menus, but you must enter the user name "Admin" and a
password to access the configuration options provided by
the Setup and Tools menus.
By default, there is no password, so please assign a password to the Administrator as soon as possible, and store it
in a safe place.
Passwords can contain from 3-12 alphanumeric characters,
and are not case sensitive.
Note:If your password is lost, or you cannot gain access to
the management interface, press the Reset button on
the front panel (holding it down for at least five seconds) to restore the factory defaults.
4-7
4.3.2 Set Time Zone
Set the time zone for the Gateway. This information is used
for log entries and client filtering.
CHAPTER 4
4-8
CHAPTER 4
Configure the gateway address of the Gateway. To dynamically assign the IP address for client PCs, enable the DHCP
Server, set the lease time, and then specify the address
range. Also remember to configure all of your client PCs for
dynamic address allocation.
Valid IP addresses consist of four numbers, and are separated by periods. The first three fields are the network portion,
and can be from 0-255, while the last field is the host portion and can be from 1-254. However, remember not to
include the gateway address of the Gateway in the client
address pool.
4-9
4.3.4 WAN Configuration
CHAPTER 4
Specify the WAN connection type required by your Internet
Service Provider, then click "More Configuration" to provide detail configuration parameters for the selected connection type. Specify one of the first three options to configure
a WAN connection through the RJ-45 port (i.e., a connection to an xDSL modem or Cable modem). Specify the
"Dial-up on Demand" option to configure a WAN connection through the serial port (i.e., a connection to an ISDN
TA or PSTN modem).
Note:If WAN connections are configured for both the RJ45 and serial port, the serial port will be used as a
backup Internet connection if the primary RJ-45 WAN
connection fails.
4-10
CHAPTER 4
4.3.4.1 Dynamic IP Address - DHCP
4-11
The Host Name is optional, but may be required by some
ISPs. The default MAC address is set to the WAN's physical
interface on the Gateway. Use this address when registering
for Internet service, and do not change it unless required by
your ISP. You can use the "Clone MAC Address" button to
copy the MAC address of the Ethernet Card installed by
your ISP (in your PC) and replace the WAN MAC address
with this MAC address.
4.3.4.2 Static IP Address - Fixed IP
If your Internet Service Provider has assigned a fixed
address, enter the assigned address and subnet mask for the
Gateway, then enter the gateway address of your ISP.
CHAPTER 4
Note:You may need a fixed address if you want to provide
Internet services, such as a Web server or FTP server.
4-12
CHAPTER 4
4.3.4.3 PPP over Ethernet - PPPoE
4-13
Enter the PPPoE user name and password assigned by your
ISP. The Service Name is normally optional, but may be
required by some providers.
4.3.4.4 Dial-up on Demand - Modem
CHAPTER 4
If you are accessing the Internet via an ISDN TA or PSTN
modem attached to the serial port on the Gateway, then you
must specify your account information on this screen as
described below:
Check if you only use a dial-up modem to connect to the
Internet - If the serial port is used for primary Internet
access, then mark this item. If not marked, then this connection will only be used for backup access if the primary
WAN link fails.
4-14
Dial-Up Service Phone Number - Enter the phone number
your service provider has given to you for Internet access.
Dial-Up Account Information - Enter your ISP account
user name and password.
CHAPTER 4
Has your Internet Service Provider given you an IP
address? - If you are assigned a dynamic IP address every
time you dial up, mark "No" for this item. However, if your
ISP has assigned a fixed IP address for you to use, mark
"Yes" for this item and enter the IP address and subnet
mask.
4-15
Note:If your ISP has given you a secondary phone number,
or if you have a secondary Internet service account,
then fill in the relevant fields under "Secondary Dialup."
4.3.5 DNS Configuration
Domain Name Servers are used to map an IP address to the
equivalent domain name (e.g., www.abc.com). Your ISP
should provide the IP address for one or more domain name
servers. Enter those addresses on this screen.
CHAPTER 4
4-16
CHAPTER 4
4.3.6 Wireless Configuration
4-17
To configure the Gateway as a wireless access point for
wireless clients (either stationary or roaming), all you need
to do is define the radio channel, the domain identifier, and
encryption options. You can use the Setup Wizard by clicking the "Enter" button at the bottom of the page and changing the required settings, or you can select "Channel and
SSID" or "Encryption" from the Setup menu on the left side
of the screen.
4.3.6.1 Channel and SSID
You must specify a common radio channel and service
domain (i.e., Extended Service Set ID) to be used by the
Gateway and all of your wireless clients. Be sure you configure all of your clients to the same values.
CHAPTER 4
4-18
4.3.6.2 Encryption
CHAPTER 4
If you are transmitting sensitive data across wireless channels, you should enable encryption. Encryption requires you
to use the same set of encryption/decryption keys for the
Gateway and all of your wireless clients. However, please
aware that the extra processing time required for encryption
may affect the throughput for wireless communications.
4-19
You can automatically generate encryption keys by entering
a pass phrase that will be used to create four keys as shown
below, or you can manually enter the keys. To manually
configure the keys, enter five hexadecimal pairs for each
key. (A hexadecimal digit is a number or letter in the range
0-9 or A-F.)
CHAPTER 4
If you use encryption, then configure the same keys used for
the Gateway on each of your wireless clients. Note that the
Wired Equivalent Privacy (WEP) protects data transmitted
between wireless nodes, but does not protect any transmissions over your wired network or over the Internet.
4-20
CHAPTER 4
4.3.7 Configuring Client Services
4-21
The Gateway includes a broad range of client services,
including firewall protection, network address translation,
virtual server, connection support for special applications,
and restricted Internet access for specified clients. You can
configure these functions using the Setup Wizard by clicking "Enter" at the bottom of the Advanced Settings screen,
or by selecting specific items from the menu on the left of
the screen.
4.3.7.1 Firewall Protection
CHAPTER 4
The Gateway's firewall can block common hacker attacks,
including IP Spoofing, Land Attack, Ping of Death, IP with
zero length, Smurf Attack, UDP port loopback, Snork
Attack, TCP null scan, and TCP SYN flooding. The firewall
does not significantly affect system performance, so we
advise leaving it enabled to protect your network users.
4-22
CHAPTER 4
4.3.7.2 Network Address Translation - NAT
4-23
Network Address Translation can be used to give multiple
users access to the Internet with a single user account, or to
map the local address for an IP server (such as Web or FTP)
to a public address. This secures your network from direct
attack by hackers, and provides more flexible management
by allowing you to change internal IP addresses without
affecting outside access to your network. Note that NAT
must be enabled to provide multi-user access to the Internet
or to use the Virtual Server function.
The WAN interface must have a fixed IP address to utilize
this function. For example, if you set Type/Public Port to
TCP/80 (HTTP or Web) and the Private IP/Port to
192.168.2.2/80, then all.NETWORKING AND CLIENT
SERVICES 4-18 HTTP request from outside users will be
transferred to 192.168.2.2. Therefore, by just entering the IP
Address provided by the ISP, Internet users can access the
service they need at the local address to which you redirect
them.
Some of the more common TCP service ports include:
HTTP: 80, FTP: 21, Telnet: 23 and POP3: 110.
CHAPTER 4
4-24
4.3.7.3 Virtual Server
CHAPTER 4
If you configure the Gateway as a virtual server, remote
users accessing services such as Web or FTP at your local
site via public IP addresses can be automatically redirected
to local servers configured with private IP addresses. In
other words, depending on the requested service (TCP/UDP
port number), the Gateway redirects the external service
request to the appropriate server (located at another internal
IP address).4.3.17 Enabling Special Applications
4-25
4.3.7.4 Enabling Special Applications
Some applications require multiple connections, such as
Internet gaming, videoconferencing, Internet telephony and
others. These applications may not work when Network
Address Translation (NAT) is enabled. If you need to run
applications that require multiple connections, use the following screen to specify the additional public ports to be
opened for each application.
CHAPTER 4
4-26
Specify the port normally associated with an application in
the "Trigger Port" field, select the protocol type as TCP or
UDP, and then enter the public ports associated with the
trigger port to open them for inbound traffic.
CHAPTER 4
Note:If an application still cannot function correctly after
enabling multiple ports via the Special Application
screen, you may have to open the client PC for full
Internet access using the DMZ Host option.
4-27
4.3.7.5 Virtual DMZ Host
If you have a client PC that cannot run an Internet application properly from behind the NAT firewall or after configuring the Special Applications function, then you can open
the client up to unrestricted two-way Internet access.
CHAPTER 4
Enter the IP address of a DMZ host to this screen. Adding a
client to the DMZ (Demilitarized Zone) may expose your
local network to a variety of security risks, so only use this
option as a last resort.
4-28
4.3.7.6 Remote Management
CHAPTER 4
By default, management access is only available to users on
your local network. However, you can also manage the
Gateway from a remote host by adding the IP address of an
administrator to this screen.
4-29
Note:If you specify an IP address of 0.0.0.0, any host can
manage the Gateway.
4.3.7.7 Client Filtering
You can filter Internet access for local clients based on IP
address, application type (i.e., HTTP port), and time of day.
CHAPTER 4
For example, this screen shows that clients in the address
range 192.168.2.50-99 are permanently restricted from
using FTP (Port 21), while clients in the address range
192.168.2.110-119 are blocked from browsing the Internet
from Monday through Friday.
4-30
4.4 Viewing Network and Device Status
CHAPTER 4
You can use the following screen to display the connection
status for the WAN/WLAN/LAN interfaces, firmware and
hardware version numbers, any illegal attempts to access
your network, as well as information on all DHCP clients
connected to your network.
4-31
The following items are included in this screen:
4.5 Using System Tools
You can use the "Tools" menu to reboot the Gateway,
restore factory settings, or update firmware.
Note:If you use the Reset button on the front panel, the
Gateway performs a power reset and restores the factory settings.
CHAPTER 4
4-32
CHAPTER5
CONFIGURING PRINTER SERVICES
If you need to provide print services for devices attached to the
Gateway, then install the Port Monitor program from the
Gateway CD (for Windows 95/98/NT), and configure the
Gateway's print server on each network station. The Gateway
printer server supports Windows 95/98/ME/NT/2000, Unix and
MAC OS v8.5.1 and above.
CHAPTER 5
To configure the Gateway Print Server for Windows
95/98/ME/NT/2000 or Unix, see the following Section 5.2
"Configure the Print Server".
5-1
5.1 Install the Printer Port Monitor
Skip this section if you are using Windows ME/2000 or
Unix.
For Windows 95/98/NT clients, you need to install the port
monitor program as described in this section.
1.Insert the installation CD-ROM into your CD-ROM drive.
Under the PrintSvr directory, run the "setup.exe" program.
CHAPTER 5
5-2
CHAPTER 5
2.Select the destination folder and click on the Next button.
The setup program will then begin to install the programs
into the destination folder.
5-3
3.Select the Program Folder that will contain the program
icon for uninstalling the port monitor, and then click Next.
CHAPTER 5
5-4
4.Enter the printer port name that will be used to identify the
port monitor in your system, and press Next.
CHAPTER 5
5.When the setup program finishes installing the port monitor, select the item to restart your computer and then click
OK.
5-5
6.After rebooting your computer, add the Gateway print
server to your system as described in the following section.
CHAPTER 5
5-6
5.2 Configure the Print Server
The Gateway's print server supports Microsoft Windows
95/98/ME/NT/2000, Unix based platforms, and MAC OS
v8.5.1 and above. If you are using Windows 95/98/NT, first
install the port monitor as described in the previous section
before adding the Gateway's print server to your operating
system.
5.2.1 Configure the Network Printer in Windows
95/98
CHAPTER 5
1.On a Windows 95/98 platform, open the Printers window
in the My Computer menu, and double-click the Add
Printer icon.
5-7
2.Follow the prompts to add a Local printer to your system.
3.Specify the printer type attached to the Gateway.
4.Select the monitored port-the default port name is
"Gateway" and then click the Configure Port button.
CHAPTER 5
5-8
5.Enter the IP address of the Gateway and click OK, and
then click Next in the Add Printer Wizard dialog box.
CHAPTER 5
6.Continue following the prompts to finish installing the
Gateway print server. The printer type you specified will
now be added to your Printers menu.
5-9
5.2.2 Configure the Network Printer in
Windows NT
1.On a Windows NT platform, open the Printers window in
the My Computer menu, and double-click the Add Printer
icon.
2.Follow the prompts to add a local printer to your system.
CHAPTER 5
5-10
2.Select the monitored port. The default port name is
"Gateway." Then click the Configure Port button.
CHAPTER 5
3.Enter the IP address of the Gateway and click OK, and
then click Next in the Add Printer Wizard dialog box.
5-11
4.Specify the printer type attached to the Gateway.
5.Continue following the prompts to finish installing the
Gateway print server. The printer type you specified will
now be added to your Printers menu.
CHAPTER 5
5-12
5.2.3 Configure the Network Printer in
Windows 2000
1.On a Windows 2000 platform, open the Printers window
in the My Computer menu, and double-click the Add
Printer icon.
CHAPTER 5
2.Select Network printer and click Next.
5-13
3.Select the option Connect to a printer on the Internet or on
your intranet, enter the IP address of the Gateway in the
URL field, and then click Next.
CHAPTER 5
5-14
4.Pick the option Create a new port and select the type
Standard TCP/IP Port.
CHAPTER 5
5.Click Next
5-15
6.Enter the Printer Name or IP Address-please note that it
must be 192.168.2.1. The Port name will be generated
automatically and synchronously according to the input
Printer Name or IP Address. Click Next as it is finished.
CHAPTER 5
5-16
7.Pick the Standard Device Type, select the Generic
Network Casrd, and then click Next.
CHAPTER 5
8.Specify the printer type attached to the Gateway.
5-17
9.Click Finish to complete the "Add Standard TCP/IP
Printer Port Wizard".
CHAPTER 5
5-18
CHAPTER 5
10.Type a name for this printer, or use the name supplied
below-your Windows-based programs will use it as the
default printer. When you have finished naming this
printer, click Next.
5-19
11.Follow the wizard to set if you would share the printer
and print a test page.
12.To enter the Properties windows of the printer connected
to the Gateway, double click on the My Computer icon
first, then double click on the Printers icon, and then right
click on the target printer and select Properties from the
menu.
CHAPTER 5
5-20
CHAPTER 5
13.Pick the Ports tab first. Select the Standard TCP/IP Port
and then click the Configure Port button.
5-21
14. Enter the Queue Name as lpt1, and then click OK.
CHAPTER 5
15.Continue following the prompts to finish installing the
printer. The specified printer type will be added to your
Printers menu.
5-22
5.2.4 Configure the Network Printer in
Windows ME
1.On a Windows ME platform, open the Printers window in
the My Computer menu, and double-click the Add Printer
icon.
CHAPTER 5
2.Select Network printer and click Next.
5-23
3.Specify the printer type attached to the Gateway.
4.Select "Gateway: Gateway PTR Port", and then click on
Configure Port.
CHAPTER 5
5-24
CHAPTER 5
5.Enter the IP address of the Gateway and click OK, and
then click Next in the Add Printer Wizard dialog box.
5-25
6.Click Next after configuring the Port.
CHAPTER 5
5-26
CHAPTER 5
7.Type a name for this printer, or use the name supplied
below-your Windows-based programs will use it as the
default printer. When you have finished naming this printer, click Next.
5-27
8.Continue following the prompts to finish installing the
printer. The specified printer type will be added to your
Printers menu.
5.2.5 Configure the Network Printer in
Unix Systems
Follow the traditional configuration procedure on Unix platforms to set up the Gateway print server. The printer name
is "lp."
CHAPTER 5
5-28
APPENDIX A
TROUBLESHOOTING
APPENDIX
This appendix describes common problems you may
encounter and possible solutions. The Gateway can be easily monitored through panel indicators to identify problems.
If you cannot resolve any connection problems after checking the indicators, then refer to the other sections in the following table.
A-1
APPENDIX
A-2
A-3
APPENDIX
APPENDIX B
CABLES
Ethernet Cable
Straight-through Cable
Caution:DO NOT plug a phone jack connector into any RJ45 port. Use only twisted-pair cables with RJ-45
connectors that conform to FCC standards.
For 10BASE-T/100BASE-TX connections, a twisted-pair
cable must have two pairs of wires. Each wire pair is identified by two different colors. For example, one wire might be
red and the other, red with white stripes. Also, an RJ-45
connector must be attached to both ends of the cable. All
RJ-45 ports on the Gateway support automatic MDI/MDI-X
configuration. This means that you can use straight- through
cable to attach to any network device.
APPENDIX
The Ethernet cable you use on the Gateway can be wired
straight through for Pins 1, 2, 3 and 6, matching the same
pins at the both ends of the cable. Pins 4, 5, 7 and 8 are not
used.
B-1
Figure B-1 illustrates how the pins on the RJ-45 connector
are numbered. Be sure to hold the connectors in the same
orientation when attaching the wires to the pins.
Figure B-1. RJ-45 Connector Pin Numbers
RJ-45 Port Pin Assignments
APPENDIX
All RJ-45 ports on the Gateway support automatic
MDI/MDI-X configuration. This means that the pin signals
in use will depend on whether the port is operating in MDI
or MDI-X mode.
B-2
Serial Port Pin Assignments
The DB-9 serial port on the rear panel is used to connect the
Gateway to an ISDN TA or PSTN modem. The pin assignments used to connect to this port are provided in the following tables.
Figure B-2. DB-9 Serial Port Pin Numbers
APPENDIX
B-3
B-4
APPENDIX
APPENDIX
B-5
Printer Port Pin Assignments
The DB-25 parallel port on the Gateway's rear panel is used
to connect the Gateway to a printer. When a printer is
attached to this port, any PCs attached to the Gateway's
LAN ports can pass files to the printer. The pin assignments
used to connect to the printer port are provided in the following table.
APPENDIX
Figure B-3. DB-25 Printer Port Pin Numbers
B-6
APPENDIX
B-7
APPENDIX C
SPECIFICATIONS
WAN Interface
10BASE-T, 1 RJ-45 port
Serial, 1 RS232 DB-9 connector
LAN Interface
10BASE-T/100BASE-TX
3 RJ-45 ports
APPENDIX
WLAN Interface
Standard: IEEE 802.11b, Direct Sequence Spread Spectrum
(DSSS)
Transmission Rate: 11 Mbps, with automatic fallback to 5.5, 2
or 1 Mbps
Maximum Channels: US/Canada: 11, Europe (ETSI): 13, Japan:
14
Range: up to 1500 feet
Frequency: (US/Canada) 2.400-2.4835 GHz, (ETSI/Japan)
2.400-2.497 GHz
Sensitivity: 1, 2, 5.5 Mbps: -80 dBm; 11 Mbps: -76 dBm typical
Modulation: CCK, BPSK, QPSK
Encryption: 64-bit WEP
C-1
Printer Interface
Parallel
1 DB-25 printer port
Management
Web management
Advanced Features
Dynamic IP Address Configuration - DHCP, DNS
Firewall - Client privileges, hacker prevention and logging, NAT
Virtual Private Network - PPTP, L2TP, IPSec Passthrough
Backup Internet Connection - Dial-on-demand via secondary
WAN port Print server
Internet Standards
ARP (RFC 826), IP (RFC 791), ICMP (RFC 792), UDP (RFC
768), TCP (RFC 793), Telnet (RFC 854-859), MD5 (RFC 1321),
BOOTP Extension (RFC 1497), PPP LCP Extension (RFC 1570),
PPPoE (RFC 2516), NAT (RFC 1631), PPP (RFC 1661), HTML
(RFC 1866), HTTP (RFC 1945), CHAP (RFC 1944), DHCP
(RFC 2131), PPTP (RFC 2637)
Indicator Panel
WAN, WLAN, LAN (Link, Activity), Power
APPENDIX
Dimensions
22.0 x 18.1 x 4.3 cm (8.7 x 7.15 x 1.6 in)
C-2
Weight
2.26 lbs (1.023 kg)
Input Power
5V DC (2.0A)
Maximum Current
0.40A RMS max.@110V, 0.87A RMS max.@240V
Power Consumption
10 Watts max. @ 100-240 VAC
Heat Dissipation
34.1 BTU/hr max. @ 100-240 VAC
Temperature
Operating 32 to 104 oF (0 to 40 oC)
Storage -40 to 158oF (-40 to 70 oC)
APPENDIX
Humidity
5% to 95% (non-condensing)
C-3
Compliances
CE Mark
Emissions
FCC Class B
VCCI Class B
Industry Canada Class B
EN55022 (CISPR 22) Class B
C-Tick - AS/NZS 3548 (1995) Class B
ETS 300 328
MPT RCR STD-33
Immunity
IEC 1000-4-2/3/4/6
Safety
UL 1950
EN60950 (TUV)
CSA 22.2 No. 950
Warranty
Limited Lifetime
APPENDIX
C-4
Compliance
FCC - Class B
This equipment has been tested and found to comply with
the limits for a Class B digital device, pursuant to Part 15 of
the FCC Rules. These limits are designed to provide reasonable protection against harmful interference in a residential
installation. This equipment generates, uses and can radiate
radio frequency energy and, if not installed and used in
accordance with instructions, may cause harmful interference to radio communications. However, there is no guarantee that the interference will not occur in a particular installation. If this equipment does cause harmful interference to
radio or television reception, which can be determined by
turning the equipment off and on, the user is encouraged to
try to correct the interference by one or more of the following measures:
zReorient
the receiving antenna
the separation between the equipment and receiver
zConnect the equipment into an outlet on a circuit different
from that to which the receiver is connected
zConsult the dealer or an experienced radio/TV technician
for help
APPENDIX
zIncrease
C-5
EC Conformance Declaration - Class B
This information technology equipment complies with the
requirements of the Low Voltage Directive 73/23/EEC and
the EMC Directive 89/336/EEC, and carries the CE Mark
accordingly. It conforms to the following specifications:
EMC: EN55022 (1988)/CISPR-22 (1995) Class B
IEC 1000-4-2 4 kV CD, 8 kV AD
IEC 1000-4-3 (1995) 3 V/m
IEC 1000-4-4 (1995) 1.0 kV - (power line)
0.5 kV - (signal line)
IEC 1000-4-6 (1995) 3 Vrms.viii
Industry Canada - Class B
This digital apparatus does not exceed the Class B limits for
radio noise emissions from digital apparatus as set out in the
interference-causing equipment standard entitled "Digital
Apparatus," ICES-003 of the Department of
Communications.
Cet appareil numerique respecte les limites de bruits radioelectriques applicables aux appareils numeriques de Classe
B prescrites dans la norme sur le materiel brouilleur:
"Appareils Numeriques," NMB-003 edictee par le ministere
des Communications.
APPENDIX
C-6
Safety Compliance
Underwriters Laboratories Compliance Statement
APPENDIX
Important! Before making connections, make sure you have
the correct cord set. Check it (read the label on the cable)
against the following:
C-7