1
Names and Functions
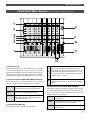
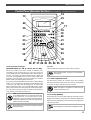
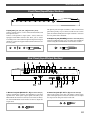
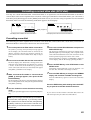
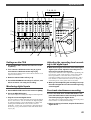
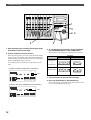
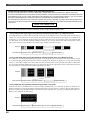
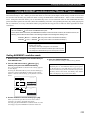
26. Play button [PLAY]
* Refer to page 70 for more information on these operations.
* Refer to page 45 for more information on the Punch In/Out
operation using a foot switch.
Pressing this button causes the recorder section to play back.
Pressing this button while holding down the RECORD button
when a track is in READY mode will cause the FD-8 to start
recording on the READY track.
Pressing only this button during the recording operation
28. Record button [RECORD/ AUTO PUNCH ]
will punch-out (cancel) recording. Pressing this button while
Pressing the PLAY button while holding down this button
holding down the STOP button will cause the “CLIPBOARD
PLAY” operation to start.
will cause the FD-8 to start recording on any READY tracks.
* Refer to the “STOP button” section and page 57 for more
information on the “CLIPBOARD PLAY” operation.
* Refer to page 47 for more information on the Punch Out
operation using the PLAY button.
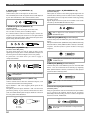
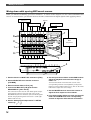
27. Stop button [STOP]
Pressing this button during the playback, recording, fast
forward, or rewind operation will stop the recorder transport
At this time, the flashing LED of the RECORD TRACK select
key for the corresponding READY track lights up steadily,
and the PLAY LED and the RECORD LED light up.
If you press only the RECORD button, a READY Real track
enters input monitoring mode (The RECORD LED flashes.).
At this time, pressing the RECORD button again will cancel
the input monitoring mode, and the track will return to
playback monitoring mode.
Pressing the RECORD button while holding down the SHIFT
key will toggle between AUTO PUNCH on and off.
operation. Pressing this button while the FD-8 is in SETUP
* Refer to page 41 for more information on AUTO PUNCH
mode.
mode will cause the unit to exit SETUP mode.
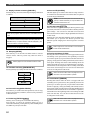
Pressing the PLAY, REWIND, or F FWD button while holding
* Refer to page 25 for more information on input monitoring
and playback monitoring.
down the STOP button will cause the following operations
to start.
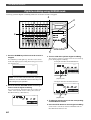
If you wish to rehearse the Manual Punch In/Out operation
using the foot switch, press the foot switch while holding
down this button to enter Rehearsal mode.
PLAY
STOP
“CLIPBOARD PLAY” operation starts. (See
below.) . During the operation, the STOP
LED flashes and the PLAY LED lights up.
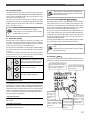
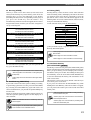
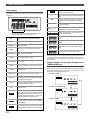
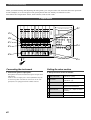
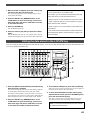
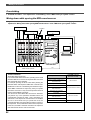
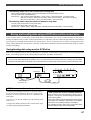
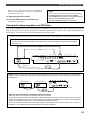
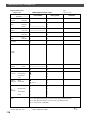
29. Shift key [ SHIFT ]
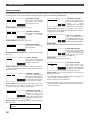
Press a key, button, or turn the dial while holding down the
SHIFT key to activate the following “shift-invoked” functions.
You can audition the data at edit points
(locate points) stored in the memory
keys. (For more information, refer to
REWIND/
ABS 0 is located. (See below.)
The removable SCSI disk is
ejected. (Refer to “Formatting a
“Preview function” on page 74.)
disk” on page 29.)
RECORD TRACK
F FWD/
1/L
2/R
3/L
START
IN
OUT
REC END is located. (See below.)
4/R
5/L
6/R
END
IN
OUT
7/L
8/R
SCRUB
PREVIEW
SETUP
TIME BASE
SEL
EXECUTE
/YES
EXIT
/NO
DISP SEL
CLIPBOARD
AUTO PUNCH
AUTO RTN
HOLD/
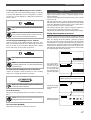
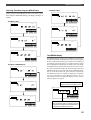
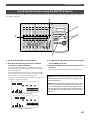
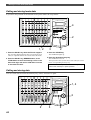
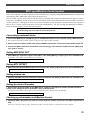
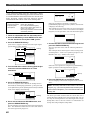
* CLIPBOARD PLAY operation
The CLIPBOARD PLAY operation plays back data on the clipboard. (If the
clipboard does not contain any data, the display shows [Void Data !] and
nothing happens.). During this operation, the display indicates the type of
the data (“Copy Clip” for copy data, and “Move Clip” for move data), and the
duration. The indicator of the copy source or move source track flashes.
In this way, you will know which track the currently playing data comes from
and why the data is on the clipboard.
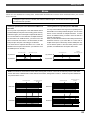
Auto Punch mode
is turned on and
* ABS 0 locate operation
off. (Refer to
“Punch In/Out” on
* REC END locate operation
This operation locates the end of the audio recording (REC END) on the
Real track in the current Program.
UNDO/
REDO
AUTO RTN
AUTO PLAY
LOCATE
EJECT
PGM SEL
VARI
PITCH
This operation locates the beginning of the current Program (ABS time:
00m 00s 00f).
EDIT
STORE
ACCESS
JOG
SHIFT
AUTO
PUNCH
RECORD
P.EDIT
STOP
PLAY
page 41.)
You can edit Vari Pitch data.
(Refer to “Playback in Vari Pitch
mode” on page 37 for more
information.)
SHUTTLE
LOC MEM
CLIPBOARD PLAY
LOCATE ABS 0
LOCATE REC END
REWIND/
F FWD/
The SHUTTLE dial
You can edit locate
data stored in the
LOCATE key. (Refer
to “Storing an edit
function is activated.
(Refer to “JOG dial/
SHUTTLE
dial
cueing” on page 65 for
more information.)
point (locate point)” on
page 66 for more
information.
11