1
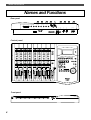
Names and Functions
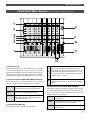
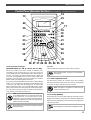
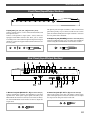
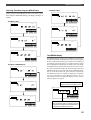
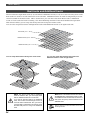
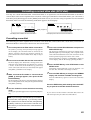
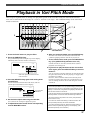
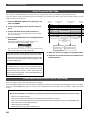
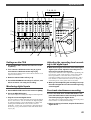
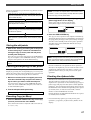
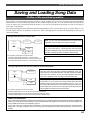
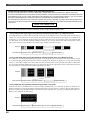
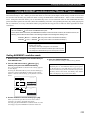
Control Panel (Recorder Section) Letters in brackets ([
]) are labels on the panel.
14
15
13
40
16
OL
0
6
12
24
1
2
3
4
5
6
7
8
L
17
R
39
18
19
20
RECORD TRACK
1/L
2/R
3/L
START
IN
OUT
4/R
5/L
6/R
END
IN
OUT
7/L
SCRUB
8/R
PREVIEW
SETUP
TIME BASE
SEL
CLIPBOARD
AUTO PUNCH
37
DISP SEL
AUTO RTN
HOLD/
STORE
UNDO/
REDO
EDIT
EXECUTE
/YES
VARI
PITCH
33
AUTO RTN
AUTO PLAY
LOCATE
ACCESS
JOG
SHIFT
AUTO
PUNCH
RECORD
EXIT
/NO
EJECT
PGM SEL
P.EDIT
21
SHUTTLE
LOC MEM
CLIPBOARD PLAY
LOCATE ABS 0
LOCATE REC END
STOP
PLAY
REWIND/
F FWD/
34
22
29
42
30
23
DIGITAL MULTITRACKER
41
28
36 27 31 26 32 25 24 35 38
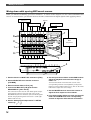
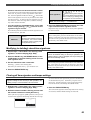
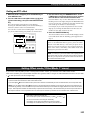
13. Record track select keys
[RECORD TRACK (1/L, 2/R, 3/L, 4/R, 5/L, 6/R, 7/L, 8/R)]
These keys enable you to select “SAFE” or “READY” for a
recording track. Pressing the key once will cause the
corresponding track to enter READY mode, and the LED of
the key you pressed to flash. Pressing the key again will
cause the corresponding track to enter “SAFE” mode, and
the LED to turn off. When you start recording on a track in
READY mode, the flashing LED remains lit.
If you press only the RECORD button with a track in READY
mode, you can monitor the signal input to the READY track
so that you can adjust the recording level. To cancel this
input monitoring status, press the RECORD button again.
(This causes the FD-8 to enter playback monitoring mode.)
You can also use these select keys to select tracks to edit for
Copy & Paste, Move & Paste, Erase, etc.
Note: You can record on Real tracks 1–8 in real-time, but
not on Additional tracks 9–24. If you are using an MO drive
as the current drive, you can record only two tracks
simultaneously. If you try to record more than two tracks by
setting them to READY mode, [track Over !] appears and
READY mode will be cancelled.
Refer to page 25 for more information on playback monitoring
and input monitoring.
14. LCD
The LCD indicates signal levels and various settings.
Refer to “Display Section” on page 17 for more information
on the display.
15. Contrast adjustment knob
Use this knob to adjust the contrast of the LCD. Turning
this knob clockwise will increase the contrast, and turning
it counter-clockwise will decrease the contrast.
Note: The display is not illegible if you leave the knob
counter-clockwise all the way.
16. Scrub key [SCRUB]
Pressing this key causes its LED to light up as the FD-8 enters
Digital Scrub mode. At this point, press the desired RECORD
RACK select key to digitally scrub the selected track playback
using the JOG dial.
Refer to page 64 for more information on Digital Scrub mode.
9