Download Dell PowerConnect W-Clearpass 100 Software Integration Cheat Sheet
Transcript
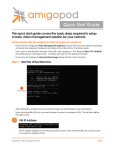
ArubaOS + Amigopod Integration Cheat Sheet FOR ARUBA NETWORKS EMPLOYEES, CUSTOMERS AND PARTNERS ArubaOS + Amigopod Integration Cheet Sheet Table of Contents 1. Create RADIUS Server instance ........................................................................................................... 3 2. Add RADIUS Server to a Server Group ................................................................................................. 3 3. Create Captive Portal Profile ............................................................................................................... 4 4. Configure Authentication for Captive Portal Profile ............................................................................ 5 5. Create AAA Profile ............................................................................................................................... 6 6. Enable Captive Portal on Initial Role of Captive Portal Profile ............................................................ 7 7. Ensure the Amigopod IP Address allowed in captiveportal policy ...................................................... 8 8. Configure Guest VAP with new AAA Profile ........................................................................................ 9 9. Configure RADIUS NAS for Aruba Controller ..................................................................................... 10 10. Configure Web Login for Captive Portal Authentication ................................................................. 11 11. Configure RADIUS User Role ............................................................................................................ 15 13. Check RADIUS Accounting is working as expected .......................................................................... 17 14. Troubleshooting Tips ....................................................................................................................... 18 Aruba Networks | 2 ArubaOS + Amigopod Integration Cheet Sheet 1. Create RADIUS Server instance The core of Amigopod is a RADIUS server so the basis of the integration in ArubaOS is the full AAA config. Amigopod uses the default ports of 1812 for Authentication and 1813 for Accounting. 2. Add RADIUS Server to a Server Group Add the newly created RADIUS Server to a Server Group so it is ready to be referenced in future AAA Profiles. Aruba Networks | 3 ArubaOS + Amigopod Integration Cheet Sheet 3. Create Captive Portal Profile One of the key features of Amigopod is the ability to host the branded Web Login or Captive Portal pages on the Amigopod appliance. The Captive Portal profile allows us to configure both the Login and optionally Welcome Pages to be hosted by Amigopod. For example, we could set these pages to the following: § Login Page: https://<Amigopod IP Address or FQDN>/Aruba_login.php § Welcome Page: https://<Amigopod IP Address or FQDN>/Aruba_welcome.php These URLs will be defined on the Amigopod in a later step as part of the Web Login configuration. Note: Based on your customer’s security policy make sure to change the Default Role of the Captive Portal profile to a Role that includes appropriate firewall policies. Aruba Networks | 4 ArubaOS + Amigopod Integration Cheet Sheet 4. Configure Authentication for Captive Portal Profile Now the new Captive Portal Profile has been created, make sure the Server Group for the Amigopod RADIUS definition is selected as the authentication source. Aruba Networks | 5 ArubaOS + Amigopod Integration Cheet Sheet 5. Create AAA Profile The AAA Profile should be configured to have the Initial Role reference the newly created Captive Portal Profile. Also ensure the RADIUS Accounting Server Group of the AAA profile is pointing to the Server Group created in Step 2 above. Aruba Networks | 6 ArubaOS + Amigopod Integration Cheet Sheet 6. Enable Captive Portal on Initial Role of Captive Portal Profile This step is easy to miss and the Captive Portal will not be triggered. Select the configured Captive Portal profile from the dropdown box and click the Change button to activate the redirect to Amigopod. Aruba Networks | 7 ArubaOS + Amigopod Integration Cheet Sheet 7. Ensure the Amigopod IP Address allowed in captiveportal policy An entry needs to be placed in the firewall policy used to control pre-‐authentication traffic for the guest users. Typically this is defined in the captiveportal policy can be modified easily through the CLI or GUI. It is handy to define the Amigopod appliance in an alias definition as shown below: netdestination Amigopod host 10.0.20.15 Add an entry that allows the client based HTTPS traffic to reach the hosted Captive Portal pages on the Amigopod appliance: ip access-list session captiveportal user alias Amigopod svc-http permit user alias mswitch svc-https dst-nat user any svc-http dst-nat 8080 user any svc-https dst-nat 8081 The equivalent the GUI configuration will look something like the screenshot below: Aruba Networks | 8 ArubaOS + Amigopod Integration Cheet Sheet 8. Configure Guest VAP with new AAA Profile This cheat sheet assumes you have already got a Guest SSID up and running and the associated VAP deployed to an appropriate AP Group. To activate the new Amigopod specific Guest configuration, edit your VAP and ensure the AAA Profile for the VAP is set to the new AAA Profile configured in the previous step. Assuming all this setup correctly the Aruba Controller should now be attempting to redirect to the Amigopod hosted Web Login page. The next steps are to setup the corresponding components on the Amigopod configuration. Aruba Networks | 9 ArubaOS + Amigopod Integration Cheet Sheet 9. Configure RADIUS NAS for Aruba Controller An entry for the Aruba Controller needs to be created under the Amigopod RADIUS ServicesàNAS List. The NAS Type should always be set for Aruba (RFC 3576) to allow the Amigopod to enable the support for RADIUS Dynamic Authorization. As usual the shared secret must match on the Amigopod and the ArubaOS RADIUS Server definition. You can optionally check the Web Login option at the bottom of the form to automatically create the Web Login form based on the Aruba Networks presets. Note: Once you have clicked the Create NAS Device you will be prompted to Restart the RADIUS Server. This is essential, as the RADIUS Server within Amigopod will reject any request from the Aruba Controller as unknown until the restart has been performed. Aruba Networks | 10 ArubaOS + Amigopod Integration Cheet Sheet 10. Configure Web Login for Captive Portal Authentication Assuming you selected the Web Login checkbox on the previous step, there will already be a newly created Web Login page under the RADIUS Services à Web Logins. The screenshot below shows you the automatically created Web Login but you can equally create a new one manually at a later stage. The Page Name field is what defines the URL that will be hosted on the Amigopod appliance. For example in step 3 of this document we configured the Login Page of the Captive Portal Profile to be the following URL: https://<Amigopod IP Address or FQDN>/Aruba_login.php As you can see the screenshot has got the Aruba_login name defined – there is no need to include the .php extension as this will be automatically appended. Aruba Networks | 11 ArubaOS + Amigopod Integration Cheet Sheet The IP Address should be set to Aruba Controller IP Address. That is, this address needs to be available from the wireless/wired client via the captiveportal policy on the controller. As you can see there are several Login Form options that allow you to override the default Login Form and Labels used to reference User and Password fields. These typically do not need to be changed. The Pre-‐Auth Check is only required for Advanced configurations where you might need to ensure the username and password pair is valid before initiating the RADIUS transaction from the Aruba Controller. Given the Web Login and RADIUS database is hosted on the same appliance we can perform a query locally prior to firing a RADIUS transaction. You can enable the display of an Accept Terms & Conditions option of the login page if required. This refers to the default T&Cs URL defined under Guest Manager à Customization à Customize Guest Manager. Unfortunately, as of ArubaOS 6.x there is an issue default the Default Destination capability shown in the Web Login configuration. This option is designed to allow you to define an override URL that the wireless/wired user is sent to post authentication. The obvious work around this issue is to set the post authentication URL in the Welcome Page of the ArubaOS Captive Portal Profile. You can leverage the Amigopod skin technology to quickly brand the Captive Portal displayed to the wireless/wired users. These skins are available as a professional service as a purchasable SKU or there are also Custom and Blank Skins available for those customer’s that wish to perform their own HTML/CSS style customization. The Title field allows you to customize the Page Title displayed in the Browser. Aruba Networks | 12 ArubaOS + Amigopod Integration Cheet Sheet The Header, Footer, Login HTML allow you add and modify the displayed text and/or content displayed on the Web Login page. As you can see there are options to Insert Content and Self-‐ Registration page (respectively found in Administrator à Content Manager & Guest Manager à Customization à Guest Self Registration). You will notice the code at the top of the Header HTML that parses the redirect URL from the Aruba Controller – if there has been an authentication error the controller returns an error message in the errmsg variable. Aruba Networks | 13 ArubaOS + Amigopod Integration Cheet Sheet There is an option to set a Login Delay option which will pause the login process at the point where the contents of the above Login Message HTML will be displayed. This is a useful point to grab the contents of a View Source in the client’s browser if you need to troubleshoot any Captive Portal issues. Finally, each Web Login page can be configured with Access Lists to allow or deny specific IP Source Address ranges. There is an option to select the web server behavior when responding to an invalid request. Aruba Networks | 14 ArubaOS + Amigopod Integration Cheet Sheet 11. Configure RADIUS User Role The RADIUS User Role is a collection of 1 or many RADIUS Standard or Vendor Specific Attributes. These attributes can be used to signal role based access control context back to the Aruba Controller as shown in the example screenshot. This RADIUS Role is presented in the Create User screens of Amigopod’s Guest Manager or can be hard coded as a hidden field in Self Registration pages to ensure each user’s session gets managed appropriately on the Aruba Controller. Aruba Networks | 15 ArubaOS + Amigopod Integration Cheet Sheet 12. Test Login and verify successful RADIUS transaction Now that everything is setup on both the Amigopod and the Aruba Controller, attempt to connect a test wireless/wired client to the network and their session should be successfully redirected to the Amigopod Web Login page. Use the Amigopod Guest Manager to create a test account and then attempt to login via the redirected Web Login page. If you have been able to successfully authenticate you will see a Login OK message in the RADIUS Services à Server Control page where a tail of the RADIUS log is always displayed. If you are experiencing any issues with the authentication process, the RADIUS debugger can also be enabled from this page for more detailed analysis. Aruba Networks | 16 ArubaOS + Amigopod Integration Cheet Sheet 13. Check RADIUS Accounting is working as expected If the RADIUS Accounting traffic is not being received by Amigopod, you will not find a corresponding entry in the Guest Manager à Active Sessions screen shown below. Given the Interim Accounting support in ArubaOS 6.1 this screen will display live traffic statistics based on these updates. Assuming you have configured RFC 3576 on your Aruba Controller as well, you can click on any given Active Session and select the Disconnect button to terminate their session on the Aruba Controller. This will return the user to the login or initial role that corresponds to the configured AAA Profile. Aruba Networks | 17 ArubaOS + Amigopod Integration Cheet Sheet 14. Troubleshooting Tips Test device is not being redirected to the Amigopod Captive Portal: • Check DNS resolution as client will not be redirected if it can’t resolve initially requested webpage. • Check the captiveportal policy and ensure traffic is permitted to the Amigopod IP Address for the redirect via HTTP or HTTPS. • Does the amigopod have a route back to the test client’s address space – look at use of NAT, default gateway of Amigopod etc. Login process stalls and never receive RADIUS request from Aruba Controller in logs: • Check the Web Login page and ensure correct IP address for controller is configured • Check the captiveportal policy and ensure traffic is permitted to configured IP address of the controller in the step above Receiving error message in RADIUS Logs about unknown client: • Check the RADIUS NAS List and make sure there is an entry present that matches the IP address listed in the error message. Aruba Controller maybe using loopback instead of interface address as source for RADIUS traffic. • Make sure you restarted the RADIUS Server after you added the new RADIUS NAS entry for the Aruba controller. • Run test RADIUS authentication from the Aruba Controller to ensure basic connectivity using UDP 1812 / 1813. Receiving error message in RADIUS Logs about login incorrect • Check the username and password has been entered correctly – reset password if required. • Check that the shared secrets are the same on both Amigopod and ArubaOS – reset on both ends to be sure. • Run RADIUS debugger on Amigopod for deeper analysis of the transaction. Aruba Networks | 18 ArubaOS + Amigopod Integration Cheet Sheet Aruba Networks 1344 Crossman Ave. Sunnyvale, CA 94089-‐1113 Phone: +1-‐408-‐227-‐4500 Fax: +1-‐408-‐227-‐4550 Get Directions » General Inquiries: [email protected] © 2010 Aruba Networks, Inc. AirWave®, Aruba Networks®, Aruba Mobility Management System®, Bluescanner, For Wireless That Works®, Mobile Edge Architecture®, People Move. Networks Must Follow®, RFprotect®, The All Wireless Workplace Is Now Open For Business, Green Island, and The Mobile Edge Company® are trademarks of Aruba Networks, Inc. All rights reserved. Aruba Networks reserves the right to change, modify, transfer, or otherwise revise this publication and the product specifications without notice. While Aruba uses commercially reasonable efforts to ensure the accuracy of the specifications contained in this document, Aruba will assume no responsibility for any errors or omissions. Note: All scaling metrics outlined in this document are maximum supported values. The scale may vary depending upon the deployment scenario and features enabled. Aruba Networks | 19


