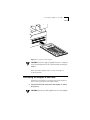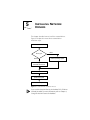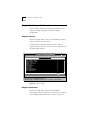
1
®
TOKENLINKâ III 16/4
PC CARDä ADAPTER
USER GUIDE
A member of the TokenLink III product family
Part No. 09-0536-001
Published October 1995
3Com Corporation
■
5400 Bayfront Plaza
■
Santa Clara, California
■
95052-8145
© 3Com Corporation, 1995. All rights reserved. No part of this documentation may be reproduced
in any form or by any means or used to make any derivative work (such as translation,
transformation, or adaptation) without permission from 3Com Corporation.
3Com Corporation reserves the right to revise this documentation and to make changes in
content from time to time without obligation on the part of 3Com Corporation to provide
notification of such revision or change.
3Com Corporation provides this documentation without warranty of any kind, either implied or
expressed, including, but not limited to, the implied warranties of merchantability and fitness for a
particular purpose. 3Com may make improvements or changes in the product(s) and/or the
program(s) described in this documentation at any time.
UNITED STATES GOVERNMENT LEGENDS:
If you are a United States government agency, then this documentation and the software
described herein are provided to you subject to the following restricted rights:
For units of the Department of Defense:
Restricted Rights Legend: Use, duplication or disclosure by the Government is subject to restrictions
as set forth in subparagraph (c) (1) (ii) for restricted Rights in Technical Data and Computer
Software clause at 48 C.F.R. 52.227-7013. 3Com Corporation, 5400 Bayfront Plaza, Santa Clara,
California 95052-8145.
For civilian agencies:
Restricted Rights Legend: Use, reproduction or disclosure is subject to restrictions set forth in
subparagraph (a) through (d) of the Commercial Computer Software - Restricted Rights Clause at
48 C.F.R. 52.227-19 and the limitations set forth in 3Com Corporation’s standard commercial
agreement for the software. Unpublished rights reserved under the copyright laws of the United
States.
The software described in this documentation is furnished under a license agreement included
with the product either as a separate document or on the software distribution diskette in a root
directory file named LICENSE.TXT. If you are unable to locate a copy, please contact 3Com and a
copy will be provided to you.
Unless otherwise indicated, 3Com registered trademarks are registered in the United States and
may or may not be registered in other countries.
3Com, 3+Open, CardFacts, NetFacts, TokenDisk, TokenLink, and Transcend are registered
trademarks of 3Com Corporation. AutoLink and SmartAgent are trademarks of 3Com Corporation.
3ComFacts and Ask3Com are service marks of 3Com Corporation.
Novell and NetWare are trademarks of Novell, Inc. Banyan and VINES are trademarks of Banyan
Systems Incorporated. DEC and PATHWORKS are trademarks of Digital Equipment Corporation.
Artisoft and LANtastic are trademarks of Artisoft, Inc. Microsoft, MS-DOS, and Windows are
trademarks of Microsoft Corporation. IBM and OS/2 are trademarks of International Business
Machines Corporation. CompuServe is a trademark of CompuServe, Inc. TROPIC is a trademark of
National Semiconductor Corporation. Compaq and Concerto are trademarks of Compaq
Computer Corporation. PC Card is a trademark of Personal Computer Memory Card International.
Other brand and product names may be registered trademarks or trademarks of their respective
holders.
Guide written by Jean Anderson. Edited by Nancy Kurahashi. Technical illustration by Tim Buckreus.
Production by Yvonne Sartain.
LIFETIME WARRANTY
®
3Com’s EtherLinkâ, TokenLinkâ III 16/4, Fast EtherLink,
and FDDILinkä adapters have a Lifetime Warranty.
To ensure the very best 3Com service and support,
take the time to complete the product registration
card.
Any defective 3Com adapter will be repaired or
replaced, at 3Com’s option, for as long as the adapter
resides in its original IBMâ Personal Computer,
Personal System/2â, or compatible computer (driver
software is covered by the standard 90-day limited
software warranty).
Customers in the countries shown below should send the completed
registration card to the appropriate address. Customers in other non-U.S.
locations should send the registration card to the U.S. address on the front
of the card.
■
Asia
■
3Com Mediterraneo Srl,
Marketing Department
Via Michelangelo Buonarroti, 1
20093 Cologno Monzese MI
Italy
3Com Asia Ltd., Marketing Department
Room 2506-07, 25/F., Citibank Tower
Citibank Plaza, Central
Hong Kong
■
■
Australia, New Zealand
3Com Australia, Marketing Department
99 Walker Street
Level 7
North Sydney
New South Wales 2060
Australia
■
Belgium, Netherlands, Luxembourg
■
France, Israel
3Com France, Marketing Department
Immeuble McKinley
BP 965
1, Avenue de l’Atlantique
91976 Les Ulis Courtaboeuf Cedex
France
■
Germany, Austria, Switzerland
3Com GmbH, Marketing Department
Gustav-Heinemann-Ring 123
D-81739 Muenchen
Munich
West Germany
Japan
3Com Japan, Marketing Department
Shinjuku Sumitomo Building 23F
2-6-1 NishiShinjuku, Shinjuku-ku
Tokyo 163-02
Japan
Sweden, Finland, Norway, Denmark
3Com Nordic, Marketing Department
Torshamsgatan 39
Box 1110
164 22 KISTA
Sweden
3Com Benelux B.V., Marketing Department
Nevelgaarde 8-9
3436 ZZ
Nieuwegein
Netherlands
■
Italy, Greece, Spain, Portugal, Malta
■
United Kingdom, Eire
3Com UK Ltd., Marketing Department
Pacific House
Third Avenue
Globe Park Marlow-on-Thames
Buckinghamshire, SL7 1YL
England
CONTENTS
ABOUT THIS GUIDE
Introduction i
How to Use This Guide
Conventions ii
i
1 INTRODUCTION
3C689 Adapter Features 1-2
3C689 Adapter Requirements 1-2
Installation and Configuration Options 1-3
AutoLink Installation 1-3
Standard Installation and Configuration 1-3
Card Services 1-4
Transcend PC Link SmartAgent Software 1-4
Troubleshooting 1-4
100% Compatibility 1-6
Money-Back Guarantee 1-6
2 INSTALLING THE 3C689 ADAPTER
Unpacking the Adapter 2-2
Inserting the Adapter 2-2
Connecting the Adapter to the Cable 2-3
Connecting the 3C689 Cable to the Network
UTP Cable Network Connection 2-4
STP Network Connection 2-5
Removing the Adapter 2-6
2-4
3 USING THE AUTOLINK FEATURE FOR NETWARE
AutoLink Requirements 3-2
AutoLink Options 3-2
Avoiding Memory Manager Conflicts
Using the AutoLink Feature 3-4
3-3
4 STANDARD INSTALLATION AND CONFIGURATION
Configuration Requirements 4-2
Avoiding Memory Manager Conflicts 4-2
Using Auto Configuration 4-3
Changing Configuration Settings 4-5
Saving Settings to Use for Installing Other Adapters
4-6
5 INSTALLING NETWORK DRIVERS
Installing the Novell NetWare DOS ODI Driver 5-2
Updating the Computer Startup Files 5-4
Installing the OS/2 Network Driver for NetWare 5-6
Installing the NDIS 2.01 Driver 5-6
Updating the Computer Startup Files 5-7
Using the 3C689 Adapter with Windows for Workgroups
Using IBM LAN Support Program Drivers 5-11
Installing the OS/2 Network Driver for NDIS 5-12
Updating the Current NDIS Driver 5-12
6 TROUBLESHOOTING
Using the TokenDisk Diskette Diagnostic Program
Diagnostic Test Types 6-2
Group 1 Diagnostics 6-3
Group 2 Diagnostic 6-3
Running Diagnostic Tests 6-3
Changing the Test Setup 6-6
When Tests Fail 6-7
6-1
5-9
Adapter Statistics and Information
Adapter Statistics 6-8
Adapter Information 6-8
Troubleshooting Tips 6-9
6-8
A ABOUT CARD SERVICES
Verifying Card Services Is Installed A-1
Boot Screen Display A-1
CONFIG.SYS File A-1
If Your Computer Does Not Have Card Services
Avoiding Memory Manager Conflicts A-2
A-2
B SPECIFICATIONS
Cabling B-1
Physical Dimensions B-1
Environmental Operating Range B-1
Power Requirements B-1
FCC Certification B-1
Configuration Options B-2
Ring Speed B-2
I/O Base Address B-2
MMIO Address Location B-2
Shared RAM Page Size and Address Range
Interrupt Request Level B-4
C TECHNICAL SUPPORT
On-line Technical Services C-1
3Com Bulletin Board Service C-1
World Wide Web Site C-2
Ask3Com on CompuServe C-2
3ComFacts Automated Fax Service C-2
Support from Your Network Supplier C-3
Returning Products for Repair C-4
B-3
GLOSSARY
INDEX
LIMITED WARRANTY
FCC CLASS A VERIFICATION STATEMENT
CE NOTICE
FIGURES
1-1 3C689 Adapter 1-1
1-2 Adapter Installation and Configuration
2-1
2-2
2-3
2-4
2-5
1-5
3C689 Adapter Installation 2-1
Inserting the 3C689 Adapter 2-3
Connecting the Cable to the 3C689 Adapter 2-4
Connecting the UTP Cable to the Network Port 2-5
Connecting the STP Connector to the Network Port 2-5
3-1 AutoLink Installation Process
3-1
4-1 Standard Installation and Configuration 4-1
4-2 Main Menu with Auto Configure Option Selected
4-3 Adapter Configuration Screen 4-5
4-4
5-1 Network Drivers Installation Process 5-1
5-2 Main Menu with Network Drivers Option Selected
5-3 Network Drivers Menu 5-3
5-3
6-1 Using the TokenDisk Diskette Diagnostic Program 6-2
6-2 Main Menu with Configuration/Diagnostic/Troubleshooting
Selected 6-4
6-3 Tests Menu 6-5
6-4 Run Tests Dialog Box 6-5
6-5 Test Setup Dialog Box 6-6
6-6 Adapter Statistics 6-8
6-7 Adapter Information 6-9
TABLES
1 Text Conventions
2 Notice Icons ii
ii
ABOUT THIS GUIDE
Introduction
This guide describes how to install, configure, and
troubleshoot the 3Comâ TokenLinkâ III 16/4 PC Cardä
(3C689) adapter.
If the information in the release notes or README.TXT files
shipped with your product differs from the information in
this guide, follow the release notes and README.TXT files.
How to Use This Guide
The following table shows where to find specific information
in this guide.
If you are looking for:
Turn to:
3C689 adapter overview
Chapter 1
3C689 adapter hardware installation procedures
Chapter 2
Instructions for using the AutoLink Feature for NetWare
Chapter 3
Instructions for standard installation and configuration
Chapter 4
Instructions for Network Drivers installation
Chapter 5
Troubleshooting tips and procedures
Chapter 6
Card Services information and tips
Appendix A
3C689 adapter specifications and configuration descriptions Appendix B
Definition of terms used in this guide
Glossary
ii
ABOUT THIS GUIDE
Conventions
Table 1 and Table 2 list text and icon conventions that are
used throughout this guide:
Table 1 Text Conventions
Convention
Description
Text represented as
screen
display
This typeface is used to represent displays that appear
on your terminal screen, for example:
Text represented as
commands
This typeface is used to represent commands that you
enter, for example:
Login:
A: Install
Italics
Italics are used to denote new terms or emphasis.
Table 2 Notice Icons
Icon
Type
Description
Information Note
Information notes call attention to important features
or instructions.
Caution
Cautions contain directions that you must follow to
avoid immediate system damage or loss of data.
Warning
Warnings contain directions that you must follow for
your personal safety. Follow all instructions carefully.
1
INTRODUCTION
The 3Comâ TokenLinkâ III PC Cardä network adapter (referred
to as the 3C689 adapter in this guide) lets you connect a DOS or
OS/2â computer to an IEEE 802.5 standard token ring network.
The 3C689 adapter, shown in Figure 1-1, operates in computers
containing Personal Computer Memory Card International
Association (PCMCIA) Release 2.01, Type II or Type III slots.
Figure 1-1 3C689 Adapter
This introduction provides general information about the
adapter features, requirements, installation and configuration
options, Card Services, troubleshooting, and Transcend
PC Link SmartAgentä software. Figure 1-2, an installation and
configuration flowchart, can help you choose the installation
option you need to install the 3C689 adapter quickly and
successfully.
1-2
CHAPTER 1: INTRODUCTION
3C689 Adapter Features
The 3C689 adapter ships with an unshielded twisted-pair
(UTP) cable and a shielded twisted-pair (STP) connector.
The 3C689 adapter features include:
■
Automatic adapter configuration.
■
Compliance with IEEE 802.5 standards.
■
100% IBMâ compatibility (uses IBM-designed chip set).
■
Compliance with PCMCIA Release 2.01 standard, Type II form
factor.
■
Integrated Card Services support (also works without
Card Services).
■
“Hot Swap” support (you can remove and reinsert the
adapter without rebooting the computer).
The TokenDiskâ diskette is supplied with the adapter. It
includes the AutoLinkä automatic installation program, the
Configuration and Diagnostic Program, DOS and OS/2 drivers,
and driver agents for Transcend PC Link SmartAgent software.
3C689 Adapter Requirements
Before you can install the adapter successfully, you must
meet the following requirements:
■
Your computer must have the PCMCIA Release 2.01, 16-bit
Type II or Type III card slot and a 3 1/2-inch diskette drive.
■
Your computer must be running DOS 3.1 or higher.
■
Your computer must have an 80286 or higher processor.
■
You must be physically connected to a UTP or
STP network port.
Installation and Configuration Options
■
1-3
If your computer is using a memory manager (all computers using
Microsoftâ Windowsä use a memory manager such as EMM386
or its equivalent), you must set aside upper memory for the
Card Services memory, the MMIO area, and the shared RAM area.
Refer to the section “Avoiding Memory Manager Conflicts” in
Chapter 3 or 4, or Appendix A, for a sample procedure.
Installation and Configuration Options
The software on the TokenDisk diskette provides two methods
to install the adapter:
■
AutoLinkä installation
■
Standard installation and configuration
These methods are described in the following sections.
AutoLink Installation
The AutoLink feature can be used to make your computer a
NetWareâ DOS ODI client. The AutoLink program configures
and tests the 3C689 adapter, installs the client driver and
NetWare client files, and modifies computer startup files to
allow you to log in to a NetWare server after you reboot your
computer. For more information about the AutoLink feature,
see Chapter 3, “Using the AutoLink Feature for NetWare.”
Standard Installation and Configuration
The standard installation and configuration procedures can be
used to configure the 3C689 adapter, test the adapter, and
install drivers in DOS- and OS/2-based network operating
systems. For more information about these procedures, refer to
Chapter 4, “Standard Installation and Configuration,”
Chapter 5, “Installing Network Drivers,” and Chapter 6,
“Troubleshooting.”
1-4
CHAPTER 1: INTRODUCTION
Card Services
Card Services, when loaded on your computer, coordinates
PC Card access to device drivers, utilities, and application
programs. Card Services assigns the I/O Base Address, the
Interrupt Request Level, and memory segments for the
3C689 adapter. For more information about Card Services,
see Appendix A, “About Card Services.”
Transcend PC Link SmartAgent Software
You can manage the 3C689 adapter using 3Com’s Transcend
PC Link SmartAgent software. Driver agents for use with this
product are supplied on the TokenDisk diskette. Refer to the
SMARTAGT.TXT file in the \SMARTAGT directory on the
TokenDisk diskette and the Transcend PC Link SmartAgent User
Guide for more information.
Figure 1-2 depicts the installation process, including the
cable and operating system options. The chapters listed
contain detailed information for that step.
Troubleshooting
The TokenDisk diskette contains a diagnostic program
described in Chapter 6, “Troubleshooting.” This program runs
tests that provide the status of the adapter.
Troubleshooting
1-5
Unpack adapter
Install adapter
Connect adapter cable
Chapter 2
STP
Network
cabling type
?
Connect UTP adapter cable
to STP connector and
connect to STP network
UTP
Connect adapter cable
to UTP network
Chapters 3
and 4
If memory manager is installed,
exclude memory range
CC000 – D3FFF
Install single
adapter as a NetWare
DOS ODI client
?
No
Configure the adapter
Yes
Chapter 4
Install network drivers
Chapter 3
Use AutoLink installation
Chapter 5
Update network startup files
Reboot computer
Figure 1-2 Adapter Installation and Configuration
1-6
CHAPTER 1: INTRODUCTION
100% Compatibility
The 3C689 adapter is 100% compatible with any
commercially available application that functions with the
generation of TROPICä chip-based IBM adapter boards
available at initial shipment of the 3C689 adapter.
Money-Back Guarantee
If a 3C689 adapter is not 100% compatible (as defined above)
with any application written to function on an IBM adapter,
3Com will refund the purchase price of the adapter. Customers
who believe the 3C689 adapter they have purchased is not
compatible should contact the support group of the
organization from which they purchased the 3C689 adapter.
Be prepared to describe the observed incompatibility in detail.
A refund of the purchase price is the customer’s sole remedy
and constitutes 3Com’s entire liability for incompatibility.
2
INSTALLING THE 3C689
ADAPTER
This chapter describes the 3Com 3C689 adapter installation
and removal steps. The flowchart in Figure 2-1 depicts the
3C689 adapter installation process.
Unpack adapter
Install adapter
Connect PC Card
cable to adapter
Network
cabling type
?
UTP
STP
Connect UTP adapter cable to
network (CAU, MAU, or DAU)
Connect UTP adapter cable
to STP connector and
connect to network
Install single
adapter as a NetWare
DOS ODI client
?
No
Go to Chapter 4
Yes
Go to Chapter 3
Figure 2-1 3C689 Adapter Installation
2-2
CHAPTER 2: INSTALLING THE 3C689 ADAPTER
Unpacking the Adapter
The contents of your 3C689 adapter package are listed
below. If any of these items are missing, contact your
authorized network supplier immediately.
■
TokenLink III PC Card adapter
■
UTP network cable with an RJ-45 connector
■
TokenLink III 16/4 PC Card Adapter User Guide
■
TokenDisk diskette
■
STP connector
If you need to return the adapter to 3Com, you must pack it in
the original (or equivalent) packing material, or the warranty
will be voided.
Inserting the Adapter
Before you insert the adapter, make sure that you meet the
requirements described in the Introduction. The 3C689
adapter can be inserted into a computer whether the power
is ON or OFF. Follow these steps:
1 Hold the adapter so that the PC Card connector is next to
the PC Card slot of your computer, as shown in Figure 2-2.
2 Insert the adapter into the adapter slot in the computer
and slide it in until it is firmly seated.
CAUTION: Do not force the 3C689 adapter into the slot.
Connecting the Adapter to the Cable
2-3
Figure 2-2 Inserting the 3C689 Adapter
CAUTION: If you are using a Compaqâ Concertoä computer,
check the orientation of the PC Card slot before inserting the
adapter.
When the 3C689 adapter slides in easily and stops, it is
inserted correctly.
Connecting the Adapter to the Cable
Follow these instructions to connect your 3C689 adapter to
the PC Card connector on the supplied cable.
1 Connect the PC Card connector to the adapter, as shown
in Figure 2-3.
CAUTION: Use only the cable supplied with the 3C689 adapter.
2-4
CHAPTER 2: INSTALLING THE 3C689 ADAPTER
III
Latch
Figure 2-3 Connecting the Cable to the 3C689 Adapter
2 Slide the latch on the PC Card connector forward to secure
the connector to the adapter.
When the latch slides forward easily, the cable is connected
correctly.
Connecting the 3C689 Cable to the Network
You can connect the 3C689 adapter to either UTP or STP
network ports using the supplied cable and connectors.
These connections are described in the following sections.
UTP Cable Network Connection
To connect the RJ-45 connector on the UTP cable to the
network port, see Figure 2-4.
Connecting the 3C689 Cable to the Network
To network port
(CAU, MAU, or DAU)
2-5
RJ-45
connector
PC Card
connector
6' cable
Figure 2-4 Connecting the UTP Cable to the Network Port
STP Network Connection
Use the supplied STP connector to connect the
3C689 adapter cable to an STP port. To attach the STP
connector to the RJ-45 connector, see Figure 2-5.
STP
connector
To
network
port
RJ-45
connector
PC Card
connector
6' cable
Figure 2-5 Connecting the STP Connector to the Network Port
2-6
CHAPTER 2: INSTALLING THE 3C689 ADAPTER
Once you have inserted and connected the 3C689 adapter to
the network, you are ready to configure the adapter. To
configure the 3C689 adapter, go to Chapter 3 if you are on a
DOS-based Novellâ NetWareâ network. If you are running
any other network operating system, go to Chapter 4.
Removing the Adapter
The adapter can be removed whether the power to the
computer is ON or OFF.
Be sure to log off the network before you remove the
3C689 adapter.
Follow these steps to remove the adapter:
1 Disconnect the connecting cable from the network.
2 Slide the latch on the PC Card connector back to
disconnect the connecting cable from the 3C689 adapter.
Do not use the cable to pull the adapter out of the slot.
3 Remove the adapter from your computer.
You can remove and reinsert the adapter without rebooting
the computer.
4 Store the adapter card in its original or similar packaging.
3
USING THE AUTOLINK
FEATURE FOR NETWARE
The AutoLink feature for NetWare configures the adapter as a
NetWare DOS ODI client. The AutoLink installation steps are
depicted in Figure 3-1.
If memory manager is installed,
exclude memory range
CC000 – D3FFF
Insert TokenDisk diskette.
Make diskette drive active.
Type: AUTOLINK
Select ring speed
Reboot computer
Figure 3-1 AutoLink Installation Process
This chapter describes the AutoLink program requirements,
ways to avoid memory conflicts, and installation steps. See
Chapter 4 for additional network drivers information.
The AutoLink program performs the following functions:
■
Configures the 3C689 adapter.
■
Tests the adapter.
■
Installs the DOS ODI client driver.
■
Logs on to the server and updates the NetWare client
software if a 3Install account exists on the server; otherwise,
the client software is installed from the TokenDisk diskette.
3-2
CHAPTER 3: USING THE AUTOLINK FEATURE FOR NETWARE
■
Modifies the CONFIG.SYS, AUTOEXEC.BAT, and NET.CFG files.
(The previous versions of these files are renamed
CONFIG.3CM, AUTOEXEC.3CM, and NET.3CM.)
If you want to configure the adapter manually, see Chapter 4,
“Standard Installation and Configuration.”
AutoLink Requirements
Verify that you meet the following requirements in addition
to those stated in the Introduction.
■
The 3C689 adapter must be installed in your computer and
connected to the network.
■
NetWare on the server must be version 2.2 or higher.
■
You must have an account on the target NetWare server, with
an assigned user ID and password, or you will not be able to
log in to the server after running the AutoLink program.
■
You must have a minimum of 2 megabytes of free memory
on your hard disk drive.
AutoLink Options
■
A 3Install account on the server allows the AutoLink program
to download the NetWare client software from the server
instead of from the TokenDisk diskette. This feature can be
used to install newer versions of the software or to customize
your installation.
Installation instructions for creating the 3Install account and
preparing the server can be found in the
A:\QINSTALL\SERVER\README.TXT file on the TokenDisk
diskette.
■
An AUTOLINK.CFG file can be used to control the AutoLink
process. The AUTOLINK.CFG file in the TokenDisk diskette’s
root directory contains default settings and descriptions of
the control parameters.
Avoiding Memory Manager Conflicts
3-3
Avoiding Memory Manager Conflicts
If you are using a memory manager on your computer (all
computers running Windows have a memory manager such
as EMM386 or its equivalent), you need to inform the
memory manager of the memory used by the 3C689
adapter. The 3C689 adapter requires the following memory:
■
CIS memory 4 K
■
MMIO memory 8 K
■
Shared RAM page size 16 K
If you have Card Services installed in your computer, use the
procedure described in Appendix A instead.
To make this process easier, the following example combines
these memory requirements into one memory range. Follow
these steps to exclude the memory range used by the
3C689 adapter:
1 Make a backup copy of the CONFIG.SYS file. Type:
copy CONFIG.SYS CONFIG.OLD
2 Use a text editor to edit the CONFIG.SYS file on your
computer.
3 Exclude the memory range that the 3C689 adapter is
using. For example, type this line into the device section
of the new CONFIG.SYS file:
device=c:\windows\emm386.exe x=CC000-D3FFF noems
where x stands for exclude, followed by the memory range
that the adapter is using.
Refer to the manual that accompanied the memory manager
software for additional instructions and information.
4 Save the CONFIG.SYS file and exit the text editor.
5 Reboot the computer.
3-4
CHAPTER 3: USING THE AUTOLINK FEATURE FOR NETWARE
This completes the procedure for avoiding conflicts with a
memory manager. You are now ready to run the AutoLink
program.
Using the AutoLink Feature
Follow these steps to use the AutoLink feature:
1 Place the TokenDisk diskette in a floppy drive on your
computer and make that drive the active drive. For
example, type:
A: [Enter]
2 Type at the prompt:
INSTALL [Enter]
The first time you use the TokenDisk diskette, the 3Com
license appears.
3 To accept the terms and conditions of the 3Com end-user
software license agreement, type Y.
A status message appears, followed by a prompt asking for
the ring speed.
4 Type the correct ring speed (16 or 4) and press [Enter].
A message appears, stating that the AutoLink program has
completed the configuration.
5 Remove the TokenDisk diskette and reboot your computer.
The login prompt for a NetWare server appears.
6 Log in to the NetWare server using your user ID and
password provided by your network administrator.
The 3C689 adapter is now a NetWare DOS ODI client.
Installation and configuration are complete. If you have
problems, see Chapter 6, “Troubleshooting,” for help.
4
STANDARD INSTALLATION
AND CONFIGURATION
This chapter describes how to configure your 3C689 adapter
using the steps depicted in Figure 4-1.
If memory manager is installed,
exclude memory range
CC000 – D3FFF
Insert TokenDisk diskette.
Make diskette drive active.
Type: INSTALL
Auto
configure
desired
?
Yes
Select Auto Configure 3Com
PC Card Adapter
on main menu
No (manual configuration)
Select Configuration/
Diagnostic/Troubleshooting
Set configuration values
Select ring speed
Go to Chapter 5
Figure 4-1 Standard Installation and Configuration
The standard installation and configuration process requires
that you modify the extended memory range, configure the
adapter, install the network driver, and modify the network
startup files.
4-2
CHAPTER 4: STANDARD INSTALLATION AND CONFIGURATION
The adapter can be configured automatically or manually.
Automatic configuration selects configuration values for the
adapter. Manual configuration allows you to select the
resources yourself.
If you are preparing your computer for use as a Novell
NetWare DOS client, follow the instructions in Chapter 3.
Configuration Requirements
Verify that you meet the following requirements in addition
to those stated in the Introduction.
■
The 3C689 adapter must be installed in your computer and
connected to the network.
■
No drivers should be loaded during configuration.
Avoiding Memory Manager Conflicts
If you are using a memory manager on your computer (all
computers running Windows have a memory manager such as
EMM386 or its equivalent), you need to inform the memory
manager of the memory used by the 3C689 adapter. The
3C689 adapter requires the following memory:
■
CIS memory 4 K
■
MMIO memory 8 K
■
Shared RAM page size 16 K
If you have Card Services installed in your computer, use the
procedure described in Appendix A instead.
To make this process easier, the following example combines
these memory requirements into one memory range. Follow
these steps to exclude the memory range used by the
3C689 adapter:
1 Make a backup copy of the CONFIG.SYS file. Type:
copy CONFIG.SYS CONFIG.OLD
Using Auto Configuration
4-3
2 Use a text editor to edit the CONFIG.SYS file on your
computer.
3 Exclude the memory range that the 3C689 adapter is
using. For example, type this line into the device section
of the new CONFIG.SYS file:
device=c:\windows\emm386.exe x=CC000-D3FFF
noems
where x stands for exclude, followed by the memory range
that the adapter is using.
Refer to the manual that accompanied the memory manager
software for additional instructions and information.
4 Save the CONFIG.SYS file and exit the text editor.
5 Reboot the computer.
This completes the procedure for avoiding conflicts with a
memory manager. You are now ready to configure the adapter.
Using Auto Configuration
The Auto Configure the 3Com PC Card Adapter option on the
main menu configures the adapter. To perform the auto
configuration procedure, follow these steps:
1 Place the TokenDisk diskette in a floppy drive on your
computer and make that drive the active drive. For
example, type:
A: [Enter]
2 Type at the prompt:
INSTALL [Enter]
3 The first time you use the TokenDisk diskette, the 3Com
software license box appears. To continue with the
program you must enter Y for Yes.
The AutoLink information screen appears. Press [Enter] to
continue. The main menu appears.
4-4
CHAPTER 4: STANDARD INSTALLATION AND CONFIGURATION
4 Select the Auto Configure 3Com PC Card Adapter option,
as shown in Figure 4-2, and press [Enter].
This step configures the I/O Base Address and the Interrupt
Request Level to settings that do not conflict with any other
device on your computer.
The Select Ring Speed screen appears with 16 Mbps
highlighted as the default speed.
TokenDisk for the TokenLink III PC Card Adapter
ESC=Cancel
F1=Help
MAIN
MENU
Auto Installation with Configuration (AutoLink)
NetWare DOS ODI Client
Standard Installation and Configuration
Auto Configure 3Com PC Card Adapter
Network Drivers ...
Configuration/Diagnostic/Troubleshooting ...
General Information/Release Notes
Automatically configures the adapter to non-conflicting settings
[ENTER]=Execute Function
[-¯]=Scroll
[F1]=Help [ESC]=<Cancel>
Figure 4-2 Main Menu with Auto Configure Option Selected
5 Select the correct ring speed and press [Enter].
A message appears, telling you the 3C689 adapter has been
configured successfully. The configuration settings are saved
to the NET.PCM and PROTOCOL.PCM files.
The next step is to install the network drivers. If you need to
change the configuration settings before you install the
drivers, follow the steps in the next section. Otherwise,
proceed to Chapter 5, “Installing Network Drivers,” for
instructions on installing the network drivers.
Changing Configuration Settings
4-5
Changing Configuration Settings
To manually change the configuration settings, follow
these steps:
If you have loaded Card and Socket Services, you will not be able
to change Interrupt Request Level, MMIO Base Address, and
CIS Memory as Card Services manages these values for you.
1 Select the Configuration/Diagnostic/Troubleshooting
option on the main menu, shown in Figure 4-2.
Press [Enter].
2 On the Configuration and Diagnostic menu, select
Configuration and Diagnostic Program.
A screen identifying the adapter appears.
3 The menu item Configure Adapter appears already
highlighted. Press [Enter].
The configuration information for the selected adapter
appears on a screen similar to that shown in Figure 4-3.
The I/O Base Address parameter is automatically highlighted.
Quit
Install Test
Configuration and Diagnostic Program
View Select
F1=Help
Adapter Configuration
TokenLink III Adapter Configuration
I/O Base Address
(Primary)
Interrupt Request Level
3
Ring Speed
16 Mbps
MMIO Base Address
CC000h
Shared RAM Address Range
D0000h - DBFFFh
Modify
File Options
OK
[ENTER]=Change the Setting
[-¯]=Scroll
[Alt]=<Highlighted Key>=Execute Function
Figure 4-3 Adapter Configuration Screen
Cancel
4-6
CHAPTER 4: STANDARD INSTALLATION AND CONFIGURATION
4 Use the arrow keys to scroll through the list of valid
settings for each parameter. To select a setting,
press [Enter].
Press [F1] for information about the settings.
5 Continue this procedure with any other parameters that
you want to change.
6 To save the new settings to the NET.PCM and the
PROTOCOL.PCM files, press [Tab] to highlight <OK>.
Press [Enter].
This completes the parameter changes for the selected
setting(s). The next step is to install the network drivers.
See Chapter 5.
Saving Settings to Use for Installing Other Adapters
If you want to use the same settings on other adapters, you
can save the configuration settings to a .SET file stored on
the copy of the TokenDisk diskette. To save the settings,
follow these steps:
1 Complete steps 1–5 in the previous procedure.
2 Select Save under the <File Options> command button in
the Adapter Configuration dialog box.
3 Use the arrow keys to select the directory where you
want to save the file.
4 Press [Enter].
This saves the settings to the selected directory.
5
INSTALLING NETWORK
DRIVERS
This chapter describes how to install the network drivers.
Figure 5-1 depicts the menu-driven network driver
installation steps.
Select network drivers
Driver type?
NetWare
NDIS
Select instructions for your
network operating system
Select Copy NetWare
DOS ODI Client Driver
Exit to DOS
Update startup files
Reboot computer
Figure 5-1 Network Drivers Installation Process
If you used the AutoLink feature, the NetWare DOS ODI driver
is already installed. For more information, refer to Chapter 3,
“Using the AutoLink Feature for NetWare.”
5-2
CHAPTER 5: INSTALLING NETWORK DRIVERS
The following network drivers are on the TokenDisk diskette:
■
Novell NetWare DOS ODI driver (3C689.COM)
■
Novell NetWare OS/2 ODI driver (3C689.SYS)
■
NDIS 2.01 DOS driver (TLPC3.DOS)
■
NDIS 2.01 OS/2 driver (TLPC3.OS2)
The NDIS driver supports the following network operating
systems:
■
IBM LAN Server
■
Banyanâ VINESâ
■
DECâ PATHWORKSâ
■
3Com 3+Openâ
■
Artisoftä LANtasticâ/AI
■
Microsoftâ LAN Manager
■
Microsoft Windows for Workgroups
You can also use the IBM LAN Support Program drivers
(version 1.33 or higher) with this adapter. The NDIS driver
also works with the OS/2â Operating system.
Installing the Novell NetWare DOS ODI Driver
If you did not use the AutoLink installation feature, you can
use the Network Drivers menu option to copy the NetWare
DOS ODI driver to the path you specify.
The following steps assume you have already configured the
adapter, started the program on the TokenDisk diskette, and
are at the main menu.
To copy the NetWare DOS ODI driver and NET.CFG file, follow
these steps:
1 From the main menu, select Network Drivers and press
[Enter]. See Figure 5-2.
Installing the Novell NetWare DOS ODI Driver
5-3
TokenDisk for the TokenLink III PC Card Adapter
ESC=Cancel
F1=Help
MAIN
MENU
Auto Installation with Configuration (AutoLink)
NetWare DOS ODI Client
Standard Installation and Configuration
Auto Configure 3Com PC Card Adapter
Network Drivers ...
Configuration/Diagnostic/Troubleshooting ...
General Information/Release Notes
Program & information for configuring/testing/troubleshooting adapters
[ENTER]=Execute Function
[-¯]=Scroll
[F1]=Help [ESC]=<Cancel>
Figure 5-2 Main Menu with Network Drivers Option Selected
TokenDisk for the TokenLink III PC Card Adapter
ESC=Cancel
F1=Help
NETWORK
DRIVERS
Install Novell NetWare Drivers ...
NDIS Driver Installation and Information ...
Display Software Compatibility Information
Copy drivers for DOS ODI client.
[ENTER]=Execute Function
[-¯]=Scroll
[F1]=Help [ESC]=<Cancel>
Figure 5-3 Network Drivers Menu
5-4
CHAPTER 5: INSTALLING NETWORK DRIVERS
2 When the next screen appears, select Install Novell
NetWare Drivers, as shown in Figure 5-3, and press [Enter].
3 When the next screen appears, select Copy DOS ODI Client
Driver.
4 At the prompt, enter a path for the destination of the
driver or press [Enter] to accept the default.
5 Exit to DOS and follow the instructions in the next section
to make the necessary changes to your AUTOEXEC.BAT,
CONFIG.SYS, and NET.CFG files.
Updating the Computer Startup Files
This sample procedure installs the 3Com ODI driver on a DOS
computer by making changes to the AUTOEXEC.BAT,
NET.CFG, and CONFIG.SYS files (the computer startup files).
Refer to Novell’s NetWare ODI Shell for DOS or Novell’s
Workstation for DOS and Windows guide for more detailed
information concerning other protocols and frame types.
Make sure to use the latest Novell files. Obtain these from the
Novell forum on CompuServeâ or your authorized reseller.
To install the DOS ODI driver for NetWare, use the following
procedure:
1 From the Novell WSGEN diskette’s root directory, copy the
NETx.COM file to your computer.
If you are running a version of DOS higher than 5.0, you may
need to upgrade to a newer version of NETx. This file is
available from the Novell forum on CompuServe.
2 From the Novell WSGEN diskette’s DOS ODI subdirectory,
copy the LSL.COM and IPXODI.COM files to your computer.
These are the link support layer and protocol stacks,
respectively.
Installing the Novell NetWare DOS ODI Driver
5-5
You may also need the files NETBIOS.EXE and INT2F.COM if
you are running full NetBIOS applications. Check with the
vendor of your application.
3 If you have not already done so, copy the 3Com NetWare
adapter driver (3C689.COM) to your computer’s hard drive.
The NetWare client drivers are located in the \NETWARE\ODI
subdirectory on the TokenDisk diskette.
4 Modify the AUTOEXEC.BAT file to include the following
commands:
LSL
3C689
IPXODI
VLM
H:
LOGIN
If you are using the Compaq Concerto computer, you need to
specify a drive other than F here and in the CONFIG.SYS file.
This computer uses the F drive as the RAM disk.
5 Edit the NET.CFG file and include the text from the
NET.PCM file after the LINK DRIVER 3C689 statement.
■
If you are not using Card Services, your NET.CFG file
should look similar to the following:
LINK DRIVER 3C689
PRIMARY
INT 3
MEM #1 CC000
MEM #2 D0000 400
DATA RATE 16
■
If you are using Card Services, your NET.CFG file should
look similar to the following:
LINK DRIVER 3C689
DATA RATE 16
5-6
CHAPTER 5: INSTALLING NETWORK DRIVERS
6 Edit your C:CONFIG.SYS file and include the following
statements:
Files= <value>
Buffers= <value>
Novell recommends that <value> be at least 20 for each
statement.
If you are using a Compaq Concerto computer, add the
following line and replace the X with the letter preceding the
letter you designated in the AUTOEXEC.BAT file:
LastDrive = X
For example, if you specified the H drive in the AUTOEXEC.BAT
file, then you specify the G drive here to replace the X in the
CONFIG.SYS file.
7 Remove the TokenDisk diskette and reboot your computer.
This completes the manual NetWare DOS ODI client driver
installation.
Installing the OS/2 Network Driver for NetWare
The TokenDisk diskette includes the Novell NetWare OS/2
ODI driver (\NETWARE\ODI\3C689.SYS). Instructions for
installing this driver are provided in the
\NETWARE\ODI\OS2REQ.TXT file.
Installing the NDIS 2.01 Driver
The Network Driver Interface Specification (NDIS) was
developed by Microsoft and 3Com. This software
specification is used in network operating systems such as
IBM LAN Server or Microsoft LAN Manager to create drivers
for network adapters.
The NDIS Driver Installation and Information option on the
Network Drivers menu shown in Figure 5-3 provides
instructions for installing the NDIS driver.
Installing the NDIS 2.01 Driver
5-7
The following steps assume you have already configured the
adapter, started the program on the TokenDisk diskette, and
are at the main menu.
To install the NDIS driver, follow these steps:
1 Select Network Drivers on the main menu and press
[Enter].
2 Select NDIS Driver Installation and Information on the
Network Drivers menu, and press [Enter].
3 Select your network operating system.
4 Follow the instructions provided.
Instructions for using the TokenDisk diskette as an automatic
OEM import disk for IBM LAN Server 3.0, Microsoft LAN
Manager, and Microsoft Windows for Workgroups are
included.
Updating the Computer Startup Files
This sample procedure describes how to modify the
PROTOCOL.INI and CONFIG.SYS computer startup files to load
the DOS NDIS driver for a system running LAN Manager.
1 Create a LANMAN subdirectory from the root of your
boot disk using the following command:
MD \LANMAN
2 Build a PROTOCOL.INI file in the LANMAN subdirectory.
The protocol manager, PROTMAN.DOS, places the
PROTOCOL.INI file in the LANMAN subdirectory. The
PROTOCOL.INI file contains information about the protocol
manager, NDIS transport protocol, and your network adapter.
5-8
CHAPTER 5: INSTALLING NETWORK DRIVERS
The following sample PROTOCOL.INI file uses NetBEUI (2.0)
as the NDIS transport protocol with 3Com drivers.
[PROTOCOL MANAGER]
DRIVERNAME = PROTMAN$
[NETBEUI_XIF]
DRIVERNAME = NETBEUI$
BINDINGS = TLPC3_NIF
[TLPC3_NIF]
DRIVERNAME = TLPC3$
3 Edit the PROTOCOL.INI file and include the text from the
PROTOCOL.PCM file after the DRIVERNAME=TLPC3$
statement.
■
If you are not using Card Services, the statements should
look similar to the following:
DRIVERNAME = TLPC3$
PRIMARY
INTERRUPT = 3
MMIO = 0XCC00
RAM = 0XD000
RAMSIZE = 16
RINGSPEED = 16
■
If you are using Card Services, the statements should look
similar to the following:
DRIVERNAME = TLPC3$
RINGSPEED = 16
4 If you have not already done so, copy the 3Com DOS NDIS
driver (TLPC3.DOS) into the LANMAN subdirectory.
The NDIS driver is located in the \NDIS\DOS subdirectory on
the TokenDisk diskette.
5 Add the following lines to your CONFIG.SYS file (located
in the root directory of your boot disk):
DEVICE = C:\LANMAN\PROTMAN.DOS/I:C:\LANMAN
DEVICE = C:\LANMAN\TLPC3.DOS
DEVICE = C:\LANMAN\<PROTOCOLDRIVER>.DOS
If you are using DOS 6.0, you must use the Microsoft Protocol
Manager version 2.0 and not the 3Com Protocol Manager.
Installing the NDIS 2.01 Driver
5-9
Substitute the actual DOS PROTOCOL driver name, if
appropriate, for PROTOCOLDRIVER.DOS.
This completes the NDIS driver installation sample procedure.
Using the 3C689 Adapter with Windows for Workgroups
The TokenDisk diskette contains a subdirectory structure and
files that make it an OEM import disk for Microsoft Windows
for Workgroups (WFW). Run the configuration portion of the
Configuration and Diagnostic Program before you start this
procedure.
To import the driver during installation of Windows for
Workgroups, follow these steps:
1 Insert Microsoft’s Setup disk 1 in the diskette drive and
make that drive the active drive. For example, type:
A: [Enter]
2 Execute the WFW setup program. Type:
setup [Enter]
3 Follow the instructions on the screen.
4 When prompted, enter the target drive and directory
where WFW is to be installed. For example, type:
C:\WINDOWS
5 From the Network setup dialog box, select the Networks...
box.
6 Select Install Microsoft Windows Network and the <OK>
button.
7 From the Network window select the Drivers... box.
8 In the Network Adapters dialog box, select the
<Add Adapter> button.
5-10
CHAPTER 5: INSTALLING NETWORK DRIVERS
9 From the list of network adapters, select Unlisted Or
Updated Network Adapter, and then select the <OK>
button.
10 Insert the TokenDisk diskette in drive A, and then select
the <OK> button.
A dialog box appears, listing the supported network adapters
on the disk.
11 Select the 3Com 3C689 TokenLink III PC Card Adapter, and
then select the <OK> button.
A dialog box appears, prompting you to specify the disk or
directory where the TLPC3.DOS driver can be found.
12 To specify the directory, type:
A:\NDIS\DOS
13 Select the <OK> button.
14 In the Network Adapters dialog box, select the <Close>
button.
15 In the Network Settings dialog box, select the <OK>
button.
A message appears, prompting you to restart your
computer. Select the <Continue> button instead.
16 In the WINDOWS subdirectory, edit the PROTOCOL.INI file
to include a section for the TokenLink III PC Card adapter
and its configuration.
The configuration parameters were stored in the
PROTOCOL.PCM file on the root directory of your hard drive
when you configured the adapter.
Installing the NDIS 2.01 Driver
5-11
17 Immediately following the line DRIVERNAME=TLPC3$,
include the text from the PROTOCOL.PCM file.
For example, if you are using Card Services, the statements
should look similar to the following:
[TLPC3]
DRIVERNAME=TLPC3$
RINGSPEED=16
Or, if you are not using Card Services, the statements should
look similar to the following:
[TLPC3]
DRIVERNAME=TLPC3$
PRIMARY
INTERRUPT=3
MMIO=0XCC00
RAM=0XD000
RAMSIZE=16
RINGSPEED=16
18 Save the file and exit.
This completes the procedure that imports the driver during
installation of Windows for Workgroups.
Using IBM LAN Support Program Drivers
You can install IBM LAN Support Program (LSP) drivers with
the 3C689 adapter. IBM's LSP drivers do not have any
embedded support to initialize PC Card adapters.
3Com provides an enabler program that works with the
protocol manager to initialize the PC Card adapter. You must
load the enabler program and protocol manager before
loading the IBM LSP drivers. The LANSUP subdirectory of the
TokenDisk diskette contains the enabler program
(LSPEN.3CM), the protocol manager (PROTMAN.DOS), and
installation instructions (LANSUP.TXT).
5-12
CHAPTER 5: INSTALLING NETWORK DRIVERS
Installing the OS/2 Network Driver for NDIS
The TokenDisk diskette includes the NDIS 2.01 OS/2 driver
(\NDIS\OS2\TLPC3.SYS). Instructions for installing this driver
are provided in the \NDIS\LANSRV.TXT file.
Updating the Current NDIS Driver
If you are updating an existing NDIS driver (rather than
installing one for the first time), follow these steps:
1 From the main menu, select Network Drivers and press
[Enter].
2 Select NDIS Driver Installation and Information.
3 Select Update NDIS Driver and press [Enter].
This option will update your current driver to the latest
version.
4 Exit the program and remove the TokenDisk diskette.
5 Reboot your computer.
This completes the procedure for updating the NDIS driver.
6
TROUBLESHOOTING
This chapter describes information for isolating and solving
problems.
Using the TokenDisk Diskette Diagnostic Program
Run the TokenDisk diskette diagnostic portion of the
Configuration and Diagnostic Program for your installed
3C689 adapter when you need to do the following:
■
Test for setup/configuration
■
Test for physical board problems
■
View adapter statistics
The diagnostic program tests the adapter, not the network.
Make sure to boot from DOS before running the diagnostic
program, because the TokenDisk diskette is not a bootable
disk. Make sure that your computer has an 80286 or higher
processor.
The adapter must be connected to the network for all tests.
6-2
CHAPTER 6: TROUBLESHOOTING
Figure 6-1 depicts how to use the TokenDisk diskette
diagnostic program.
Insert TokenDisk diskette
Make diskette drive active
Type: INSTALL
Select
Configuration/Diagnostic/Troubleshooting
Select Test
Standard test ?
Yes
No (Custom)
Select Test Setup
Select test
Select Run Tests
Figure 6-1 Using the TokenDisk Diskette Diagnostic Program
Diagnostic Test Types
The tests performed by the TokenDisk diskette Configuration
and Diagnostic Program are divided into Group 1 and Group 2
tests.
Using the TokenDisk Diskette Diagnostic Program
6-3
Group 1 Diagnostics
Group 1 diagnostics test the physical components,
connectors, circuitry, and normal ring operation of the
adapter. They include the following tests:
■
MMIO Register Write/Read Test
■
AIP Checksum Test
■
Shared RAM Boundary/Domain Test
■
Shared RAM Write/Read Test
■
Open Adapter for Ring Operation Test
■
Ring Operations Test
■
Close Adapter Test
For more information about each diagnostic test type, select
the test type and press [F1] to activate an on-line description
of the selected test.
Group 2 Diagnostic
The Group 2 diagnostic (Adapter Wrap Test) is a wrap test
that causes all user-transmitted data to be sent and received
without going to the network.
A lobe cable must be connected from the selected adapter to
a retiming concentrator or MAU for all tests.
Running Diagnostic Tests
The Configuration and Diagnostic Program can be started
from the menus or the DOS command line. For command
line instructions, see the INSTRUCT.TXT file in the \DIAG
subdirectory on the TokenDisk diskette.
You need to unload the drivers to run the diagnostic program.
To unload drivers, exit this program and boot using a DOS
diskette.
6-4
CHAPTER 6: TROUBLESHOOTING
The following instructions assume that you have started the
program and are at the main menu. To start the diagnostic
tests, follow these steps:
1 Select the option Configuration/Diagnostic/Troubleshooting,
as shown in Figure 6-2.
TokenDisk for the TokenLink III PC Card Adapter
ESC=Cancel
F1=Help
MAIN
MENU
Auto Installation with Configuration (AutoLink)
NetWare DOS ODI Client
Standard Installation and Configuration
Auto Configure 3Com PC Card Adapter
Network Drivers ...
Configuration/Diagnostic/Troubleshooting ...
General Information/Release Notes
Program & information for configuring/testing/troubleshooting adapters
[ENTER]=Execute Function
[-¯]=Scroll
[F1]=Help [ESC]=<Cancel>
Figure 6-2 Main Menu with Configuration/Diagnostic/Troubleshooting
Selected
2 When the Configuration and Diagnostic screen appears,
select Configuration and Diagnostic Program.
Figure 6-3 shows the subsequent screen, indicating the
installed adapter and its token ring address.
3 From the Test pull-down menu, select Run Tests, as shown
in Figure 6-3.
The Run Tests dialog box appears, as shown in Figure 6-4.
Using the TokenDisk Diskette Diagnostic Program
Quit
Install Test
Configuration and Diagnostic Program
View Select
6-5
F1=Help
Run Tests... (F5)
Test Setup... (F6)
Selected Adapter
3Com 3C689: Token Ring Address = 00608C112233
TokenLink III 16-bit PC Card Adapter
[ENTER]=Run the Diagnostic Tests
[Alt]+<Highlighted Key>=Execute Function [-¯]=Scroll
[F1]=Help [F3]=Exit [F4]=Configure Adapter [F6]=Test Setup
Figure 6-3 Tests Menu
Quit
Install Test
Configuration and Diagnostic Program
View Select
F1=Help
Run
3Com 3C689 PC Card in Slot 2: Token Ring Address = FFF7000FFFF1
Test Results
Group 1 Tests
Repetitions Completed
Results
MMIO Register Write/Read Test
0
Not Tested
AIP Checksum Test
0
Not Tested
Shared RAM Boundary/Domain Test
0
Not Tested
Shared RAM Write/Read Test
0
Not Tested
Open Adapter for Ring Operation Test
0
Not Tested
Ring Operations Test
0
Not Tested
Close Adapter Test
0
Not Tested
-
¯
Waiting for <Start>
Start Continue
Pass
Test Setup... Zoom... Stats...
0 of 1
File Options...
[ENTER]=<Start> Begin Diagnostic Tests
[Alt]+<Highlighted Key>=Execute Function
[TAB]=Next Field [SHIFT+TAB]=Previous Field [F1]=Help [ESC]=Cancel
Figure 6-4 Run Tests Dialog Box
Cancel
6-6
CHAPTER 6: TROUBLESHOOTING
4 Press [Enter] to start the tests.
Each test is set up to run once unless you specify otherwise.
The test results are displayed on the screen with “Passed” or
“Failed” in the Results column.
If you want to run the tests continuously, select the
Continuous option in the Test Setup dialog box, as described
in the next section, “Changing the Test Setup.”
Changing the Test Setup
If you want to change the test parameters, follow these
steps:
1 Choose the <Test Setup> command button in the Run
Tests dialog box shown in Figure 6-4.
The Test Setup dialog box appears, as shown in Figure 6-5.
Quit
Install Test
Group Select
Group 1
Group 2
Repetitions
(.) [1
]Times
Continuous
Configuration and Diagnostic Program
View Select
F1=Help
Test Setup
Group 1 Tests
MMIO Register Write/Read Test
AIP Checksum Test
Shared RAM Boundary/Domain Test
Shared RAM Write/Read Test
Open Adapter for Ring Operation Test
Ring Operations Test
Close Adapter Test
Defaults
*Enabled
*Enabled
*Enabled
*Enabled
*Enabled
*Enabled
*Enabled
Disable Group
Enable Group
Errors
[X] Halt on Error
File Options...
OK
Cancel
[-¯]=Select a Test Group to View
[Alt]+<Highlighted Key>=Execute Function
[TAB]=Next Field [SHIFT+TAB]=Previous Field [F1]=Help [ESC]=<Cancel>
Figure 6-5 Test Setup Dialog Box
Using the TokenDisk Diskette Diagnostic Program
6-7
2 Press [Tab] to move from field to field and highlight any
field within the Test Setup dialog box.
Within the Group Select area, use the arrow keys to
highlight Group 1 or Group 2. Use the <Enable Group> or
<Disable Group> command buttons to enable or disable a
group of tests.
Press [F1] for a description of these tests.
3 When you are satisfied with the new test setup, highlight
the <OK> command button and press [Enter].
4 To run the tests, choose Run Tests from the Test menu and
select the <Start> button.
When Tests Fail
If the diagnostic tests fail, the adapter may not be defective.
The problem may be incorrect configuration settings,
configuration settings that conflict with the settings of other
boards, or improper installation.
If any test fails, you can get additional information by
highlighting the test that failed in the Run Tests dialog box
shown in Figure 6-4, and pressing [Enter]. You can also
highlight the <Zoom> command button and press [Enter].
The program notifies you of the error and suggests actions
you can take to solve the problem.
6-8
CHAPTER 6: TROUBLESHOOTING
Adapter Statistics and Information
Use the adapter statistics and information feature to view
statistics of adapter operation and current adapter
configuration.
Adapter Statistics
Use the View pull-down menu and select Adapter Statistics,
or press [F9] from the main screen.
An example of the Adapter Statistics screen is shown in
Figure 6-6. Press [F1] on this screen for a short explanation of
the highlighted statistics.
Quit
Install Test
Configuration and Diagnostic Program
View Select
F1=Help
3Com 3C689 PC Card in Slot 2: Token Ring Address = FFF7000FFFF1
Adapter Statistics
Total frames transmitted:
0
Total frames received:
0
Receive with no buffer:
0
Transmit errors:
0
Adapter check errors:
0
Line errors:
0
Internal errors:
0
Burst errors:
0
A/C errors:
0
Abort delimiters:
0
Invalid ARB commands:
0
Lost frame errors:
0
-
¯
Cancel
[-¯]=Select a Test Group to View
[Alt]+<Highlighted Key>=Execute Function
[TAB]=Next Field [SHIFT+TAB]=Previous Field [F1]=Help [ESC]=<Cancel>
Figure 6-6 Adapter Statistics
Adapter Information
Use the View pull-down menu and select Adapter
Information, or press [F8] from the main screen. An example
of the Adapter Information screen is shown in Figure 6-7.
Troubleshooting Tips
Quit
Install Test
Configuration and Diagnostic Program
View Select
6-9
F1=Help
3Com 3C689: Token Ring Address = 00608C112233
Adapter Information
Slot number:
1
Token Ring address:
00600C112233
I/O base address:
A20H
Interrupt request level:
3
Ring speed:
16 Mbps
MMIO base address:
CC000H
Shared RAM base address:
D0000H
Shared RAM size:
64 kB
Shared RAM page size:
16 kB
-
¯
Cancel
[-¯]=Select a Test Group to View
[Alt]+<Highlighted Key>=Execute Function
[TAB]=Next Field [SHIFT+TAB]=Previous Field [F1]=Help [ESC]=<Cancel>
Figure 6-7 Adapter Information
Troubleshooting Tips
1 Make sure that the 3C689 adapter is operating in a
computer containing a Personal Computer Memory Card
International Association (PCMCIA) Release 2.01, 16-bit
Type II or Type III slot.
The slot must be capable of supporting I/O cards.
2 Make sure that the adapter is seated correctly in the slot.
Review the adapter installation instructions in Chapter 2.
3 Inspect all cables and connections.
Use only the supplied cable.
4 Make sure that your computer is running DOS 3.1 or higher.
5 Use only the 3C689 drivers that are on the TokenDisk
diskette that shipped with the 3C689 adapter, or use the
IBM LAN Support Program drivers (version 1.33 or higher).
6-10
CHAPTER 6: TROUBLESHOOTING
6 Install the adapter in another functioning computer and
run the tests again.
If the adapter passes, your computer may be defective.
Contact the reseller or the manufacturer of the computer.
7 If you experience problems that occur only when running
under Microsoft Windows, consult the readme files that
are provided in Windows.
8 If you experience problems that occur only when using the
AutoLink program, display or print the AutoLink.Log file.
This file contains a log of the events that occurred during the
AutoLink installation, including errors if any occurred. To
display the log, type:
Type AutoLink.Log | More
To print the file, press [Alt]+[F]+[P] or type:
print autolink.log
9 If you need to unload the drivers to run the Configuration
and Diagnostic Program, exit the Configuration and
Diagnostic Program if necessary, and reboot the
computer using a DOS diskette.
For additional technical support information, see Appendix C.
A
ABOUT CARD SERVICES
Card Services coordinates the 3C689 adapter access to
sockets and system resources, including device drivers,
utilities, and application programs. Card Services sets the
I/O Base Address, Interrupt Request Level, and the memory
segments for the 3C689 adapter. Card Services also blocks
access to Socket Services by non-PC Card-compliant clients.
This appendix describes the Card Services information for the
3C689 adapter.
Verifying Card Services Is Installed
You can verify whether Card Services is installed in your
computer by checking the boot screen and looking in the
CONFIG.SYS file on your computer.
Boot Screen Display
The computer boot screen may display the following line for
some versions of Card Services:
Card Services Installed
CONFIG.SYS File
If Card Services is not displayed on the boot screen, check
the device section of the CONFIG.SYS file. If Card Services is
installed, one DEVICE statement will list Card Services, Card
Serv, or CS. When installed, Card Services and Socket Services
can use large amounts of base memory.
A-2
APPENDIX A: ABOUT CARD SERVICES
3Com recommends that you load Card and Socket Services
into upper memory by using the DEVICEHIGH statement to
load these programs. Consult your Card Services
documentation for more information. For example, type:
DEVICEHIGH=C:\<directory name>\SS365SL.EXE
DEVICEHIGH=C:\<directory name>\CS.EXE
If Your Computer Does Not Have Card Services
The 3C689 adapter has intelligent drivers and configuration
software that detect the presence of Card Services. If
Card Services is not present, then the adapter automatically
uses its built-in point enabler to manage system resources.
Avoiding Memory Manager Conflicts
If you are running Card Services, you may need to inform the
memory manager already loaded on your computer of the
address range used by the 3C689 adapter. To inform the
memory manager, follow these steps:
1 Make a backup copy of the CONFIG.SYS file. Type:
Copy CONFIG.SYS CONFIG.OLD
2 Use a text editor to edit out the startup command for the
memory manager located in the CONFIG.SYS file. The
startup command will look similar to this:
device=c:\windows\emm386.exe noems
To edit out this command, type REM in front of it:
REM device=c:\windows\emm386.exe noems
3 Save the CONFIG.SYS file and reboot the computer.
4 Insert the TokenDisk diskette into the floppy drive and
make that drive the active drive. For example, type:
A: [Enter]
5 At the prompt, type:
Install [Enter]
Avoiding Memory Manager Conflicts
A-3
6 Select Configuration/Diagnostic/Troubleshooting on the
main menu.
7 Select Adapter Information under the View menu item to
view the adapter’s base memory addresses.
The MMIO address and the Shared RAM base address are the
memory addresses that the adapter is using.
8 Write down the memory ranges that the 3C689 adapter is
using.
For example, the MMIO base address = CC000H, the Shared
RAM address = D0000H, and the Shared RAM Page Size = 16 KB.
9 Exit the Configuration and Diagnostic Program and remove
the diskette.
10 Edit the CONFIG.SYS file again.
a Remove the REM command you added in step 2.
b Modify the startup command line to exclude the memory
range that the 3C689 adapter is using. For example, type:
device=c:\windows\emm386.exe x=CC000-C7FFF noems
where x stands for exclude, followed by the memory range.
Refer to the manual that accompanied the memory manager
software for additional instructions and information.
11 Save the CONFIG.SYS file and exit the text editor.
12 Reboot the computer.
This completes the procedure for avoiding conflicts with a
memory manager.
B
SPECIFICATIONS
This appendix describes the specifications and configuration
options for the 3C689 adapter.
Cabling
The 3C689 adapter supports industry-standard token ring
cabling that follows IEEE 802.5 specifications. Use Type 3
(UTP) or Types 1 or 6 (STP) cabling.
Physical Dimensions
Length:
3.370 in. (85.6 mm)
Thickness:
Type II, 0.197 in. (5.0 mm)
Width:
2.126 in. (54 mm)
Weight:
1.49 oz. (42.5 g)
Environmental Operating Range
Operating temperature:
(32 to 131 ˚F) 0 to 55 ˚C
Relative humidity:
10 to 90% noncondensing
Power Requirements
Operating voltage:
FCC Certification
Part 15, Class A
+5 V ± 5% @ 0.3 A
B-2
APPENDIX B: SPECIFICATIONS
Configuration Options
This section describes the configuration options for the
3C689 adapter. The following options are available:
■
Ring Speed
■
I/O Base Address
■
MMIO Address Location
■
Shared RAM Page Size and Address Range
■
Interrupt Request Level
These options are described on the following pages.
Ring Speed
The 3C689 adapter operates at either 4 or 16 Mbps ring
speed and must match the speed of the token ring network.
The default is 16 Mbps.
I/O Base Address
The I/O base addresses allowed are Primary or Secondary.
The Primary default address is A20h. If a system resource
conflict continues, you may have to change the settings of
other adapters or options that are in your computer.
MMIO Address Location
There are 16 possible 8 KB blocks of PC memory that can be
assigned for accessing the MMIO address area of the 3C689
adapter. The factory default MMIO address is CC000. The 16
MMIO address locations are listed below, with the defaults in
bold.
C0000–C1FFF
C2000–C3FFF
C4000–C5FFF
C6000–C7FFF
C8000–C9FFF
CA000–CBFFF
CC000–CDFFF
CE000–CFFFF
D0000–D1FFF
D2000–D3FFF
D4000–D5FFF
D6000–D7FFF
D8000–D9FFF
DA000–DBFFF
DC000–DDFFF
DE000–DFFFF
Configuration Options
B-3
The MMIO address selected must not be assigned for use by
any other adapter or option and cannot be the same as the
RAM address for this adapter. If a system resource conflict
continues, you may have to change the settings of other
adapters or options that are in your computer.
Shared RAM Page Size and Address Range
There are 30 possible blocks of memory that can be assigned
for accessing the RAM located on the 3C689 adapter. The
factory default RAM size is 16 KB and the address location is
D0000–D3FFF.
RAM paging allows the software to access all 64 KB of RAM
on the adapter one page (16 KB) at a time, while using only
16 KB of computer memory space. RAM paging is available
for all 16 KB address ranges.
If a conflict continues, you may have to change the settings
of other adapters or options that are in your computer. The
30 RAM address ranges are as follows, with the default in
bold:
8 KB / C0000–C1FFF
8 KB / C2000–C3FFF
8 KB / C4000–C5FFF
8 KB / C6000–C7FFF
8 KB / C8000–C9FFF
8 KB / CA000–CBFFF
8 KB / CC000–CDFFF
8 KB / CE000–CFFFF
8 KB / D0000–D1FFF
8 KB / D2000–D3FFF
8 KB / D4000–D5FFF
8 KB / D6000–D7FFF
8 KB / D8000–D9FFF
8 KB / DA000–DBFFF
8 KB / DC000–DDFFF
8 KB / DE000–DFFFF
16 KB / C0000–C3FFF
16 KB / C4000–C7FFF
16 KB / C8000–CBFFF
16 KB / CC000–CFFFF
16 KB / D0000–D3FFF
16 KB / D4000–D7FFF
16 KB / D8000–DBFFF
16 KB / DC000–DFFFF
32 KB / C0000–C7FFF
32 KB / C8000–CFFFF
32 KB / D0000–D7FFF
32 KB / D8000–DFFFF
64 KB / C0000–CFFFF
64 KB / D0000–DFFFF
B-4
APPENDIX B: SPECIFICATIONS
Interrupt Request Level
The 3C689 adapter can operate on one of seven interrupt
levels: 3, 5, 7, 9, 11, 12, and 15. The preferred interrupt level is 3,
but the adapter can operate on the other levels if necessary.
If a conflict continues, you may have to change the setting
ofother adapters or options that are in your computer.
C
TECHNICAL SUPPORT
3Com provides easy access to technical support information
through the variety of services described in this appendix.
On-line Technical Services
3Com offers worldwide product support seven days a week,
24 hours a day, through the following on-line systems:
■
■
■
■
3Com Bulletin Board Service (3ComBBS)
World Wide Web Site
Ask3ComSM on CompuServeâ
3ComFactsSM Automated Fax Service
3Com Bulletin Board Service
3ComBBS contains patches, software, and drivers for all 3Com
products, as well as technical articles. This service is available
via modem seven days a week, 24 hours a day. To reach the
service, set your modem to 8 data bits, no parity, and 1 stop
bit. Call the telephone number nearest you:
Country
Baud Rate
Telephone Number
Australia
up to 14400 baud
(61) (2) 955 2073
France
up to 14400 baud
(33) (1) 69 86 69 54
Germany
up to 9600 baud
up to 9600 baud
(49) (89) 627 32 188
(49) (89) 627 32 189
Hong Kong
up to 14400 baud
(852) 537 5601
Italy (fee required)
up to 9600 baud
(39) (2) 273 00680
Japan
up to 14400 baud
(81) (3) 3345 7266
Singapore
up to 14400 baud
(65) 534 5693
Taiwan
up to 14400 baud
(886) (2) 377 5838
(886) (2) 377 5840
U.K.
up to 14400 baud
(44) (144) 227 8278
U.S.
up to 14400 baud
(1) (408) 980 8204
C-2
APPENDIX C: TECHNICAL SUPPORT
World Wide Web Site
Access the latest networking information on 3Com’s World
Wide Web site by entering our URL into your Internet
browser:
http://www.3Com.com/
This service features news and information about 3Com
products, customer service and support, 3Com’s latest news
releases, selected articles from 3TECHä, 3Com’s
award-winning technical journal, and more.
Ask3Com on CompuServe
Ask3Com is a CompuServe-based service containing patches,
software, drivers, and technical articles about all 3Com
products, as well as an interactive forum for technical
questions. To use Ask3Com, you need a CompuServe account.
To use Ask3Com:
1 Log on to CompuServe.
2 Enter go threecom
3 Press [Return] to see the Ask3Com main menu.
3ComFacts Automated Fax Service
3Com Corporation’s interactive fax service, 3ComFacts,
provides data sheets, technical articles, diagrams, and
troubleshooting instructions on 3Com products 24 hours a
day, seven days a week. Within this service, you may choose
to access CardFactsâ for adapter information, or NetFactsâ
for network system product information.
■
CardFacts provides adapter installation diagrams,
configuration drawings, troubleshooting instruction, and
technical articles.
Document 9999 provides you with an index of adapter
documents.
Support from Your Network Supplier
■
C-3
NetFacts provides data sheets and technical articles on
3Com Corporation’s hub, bridge, router, terminal server, and
software products.
Document 8888 provides you with an index of system
product documents.
Call 3ComFacts using your touch-tone telephone.
International access numbers are:
Country
Fax Number
Hong Kong
(852) 537 5610
U.K.
(44) (144) 227 8279
U.S.
(1) (408) 727 7021
Local access numbers are available within the following
countries:
Country
Fax Number
Country
Fax Number
Australia
800 123853
Italy
1678 99085
Denmark
800 17319
Netherlands
06 0228049
Finland
98 001 4444
Norway
800 11062
France
05 90 81 58
Sweden
020 792954
Germany
0130 8180 63
U.K.
0800 626403
Support from Your Network Supplier
If additional assistance is required, contact your network
supplier. Many suppliers are authorized 3Com service
partners who are qualified to provide a variety of services,
including network planning, installation, hardware
maintenance, application training, and support services.
When you contact your network supplier for assistance, have
the following information ready:
■
Diagnostic error messages
■
A list of system hardware and software, including revision levels
■
Details about recent configuration changes, if applicable
C-4
APPENDIX C: TECHNICAL SUPPORT
If you are outside the U.S. and Canada, contact your local
3Com sales office to find your authorized service provider:
Country
Telephone Number
Australia (Sydney) (61) (2) 959 3020
(Melbourne)
Country
Telephone Number
Mexico
(525) 531 0591
(61) (3) 653 9515
Netherlands
(31) (3) 402 55033
Belgium
(32) (2) 7164880
Singapore
(65) 538 9368
Brazil
(55) (11) 241 1571
South Africa
(27) (11) 803 7404
Canada
(905) 882 9964
Spain
(34) (1) 3831700
France
(33) (1) 69 86 68 00
Sweden
(46) (8) 632 91 00
Germany
(49) (89) 6 27 32 0
Taiwan
(886) (2) 577 4352
Hong Kong
(852) 868 9111
United Arab Emirates (971) (4) 349049
Italy
(39) (2) 273 02041
U.K.
Japan
(81) (3) 33457251
(44) (1628) 897000
Returning Products for Repair
A product sent directly to 3Com for repair must first be
assigned a Return Materials Authorization (RMA) number. A
product sent to 3Com without an RMA number will be
returned to the sender unopened, at the sender’s expense.
To obtain an RMA number, call or fax:
Country
Telephone Number
Fax Number
U.S and Canada
(800) 876 3266, option 2
(408) 764 7120
Europe
(44) (1442) 278000
(44) (1442) 236824
Outside Europe, U.S.
and Canada
(1) (408) 492 1790
(1) (408) 764 7290
GLOSSARY
AutoLink
A menu selection that configures the 3C689 adapter, installs
the DOS ODI client driver, and modifies PC startup files to
allow you to log in to a NetWare server after you reboot your
computer. For more information about the AutoLink feature,
see Chapter 3, “Using the AutoLink Feature for NetWare.”
Card Information Structure (CIS)
A data structure written on every card that complies with the
PC Card standard, containing information about the
formatting and organization of the data on the card.
Card Services
A software layer that coordinates PC Card adapter access to
sockets and system resources, including device drivers,
utilities, and application programs. Card Services assigns the
I/O Base Address, Interrupt Request Level, the CIS Memory
Base Address, the MMIO Address, and the Shared RAM Page
Size and Address Range for the 3C689 adapter. For more
information about Card Services, see Appendix A, “About
Card Services.”
CAU
Controlled access unit. An intelligent token ring network
wiring concentrator. One CAU is needed per ring. It handles
the ring/in and ring/out function.
Client
In the PC Card environment, an application program or
device driver that uses Card Services and Socket Services.
DAU
Dual access unit.
DB-9
Type of connector that connects the adapter to STP wiring.
Diagnostics
Tests that help troubleshoot PC Card adapter problems.
2
GLOSSARY
Driver
A program, usually resident in server or workstation
memory, that controls the adapter or implements the
protocol stacks that allow higher-level applications to
communicate with the network hardware.
IEEE 802.5
The standard for the token ring access method and Physical
layer specifications developed by a subcommittee of the
Institute for Electrical and Electronics Engineers (IEEE) 802
standards committee.
Lobe cable
The section of cable that attaches a ring station or network
device to a MAU or wiring hub.
MAU
Multistation access unit. A hub in an IBM token ring network.
Each unit supports up to eight workstations and servers, and
can be connected to another hub to create large networks.
NDIS
Network Driver Interface Specification, developed by
Microsoft and 3Com. A software specification used in
network operating systems, such as IBM LAN Server or
Microsoft LAN Manager, to create drivers for network
adapters. NDIS drivers support multiple protocols and
multiple adapters and can be unloaded from memory to
conserve conventional DOS RAM space.
NET.CFG
An ASCII file containing control information for network
protocol elements of stations and servers for a Novell
NetWare environment.
ODI
Open Data-Link Interface. A Media Access Control
(MAC)-level specification developed by Novell and Appleâ.
Drivers complying with this specification can work with
NetWare 2.x, 3.x, and 4.x. Like NDIS, the ODI driver supports
multiple protocols and adapters, and can be unloaded from
memory to conserve conventional DOS RAM space.
GLOSSARY
3
Packet
The unit of information transmitted over the network,
consisting of a preamble, a destination address, a source
address, the data being transmitted, and a code that allows
testing for correct transmission.
PC Card
The new name (effective 1994) for the standard developed
by the Personal Computer Memory Card International
Association.
PCMCIA
Personal Computer Memory Card International Association.
PROTOCOL.INI
An ASCII file containing control information for network
protocol elements of NDIS network stations and servers.
Release 1.0
In the PC Card environment, the Memory Card Standard
Release 1.0, September 1990.
Release 2.0
In the PC Card environment, the release in which I/O capability
and software support were added in September 1991.
Release 2.1
In the PC Card environment, the release containing
typographical corrections to Release 2.0. There were no
technical enhancements.
RJ-45
Type of connector that connects the adapter to UTP wiring.
Socket
In the PC Card environment, the hardware in the host
computer where the PC card is placed. The socket maps the
host’s internal bus signals to the PC Card interface signals.
Socket Services
The software layer that provides a standardized interface to
manipulate PC cards, sockets, etc. It is directly above the
hardware.
4
GLOSSARY
STP
Shielded twisted-pair.
Token ring
A network that employs a ring topology and uses a
token-passing method for ring access.
TSR
Terminate and stay resident. A program that upon execution,
loads itself (or an executable portion of itself ) into computer
working memory (RAM). It can be activated at any time with
a specified key sequence.
Type I card
In the PC Card environment, a 3.3 mm thick card that is
typically used for memory cards.
Type I slot
In the PC Card environment, a slot that accepts a Type I card.
Type II card
In the PC Card environment, a 5.0 mm thick card that is
typically used for modem/fax cards and network adapters.
Type II slot
In the PC Card environment, a slot that accepts a Type I or
Type II card.
Type III card
In the PC Card environment, a 10.5 mm thick card that is
typically used for hard disk drives.
Type III slot
In the PC Card environment, a slot that accepts a Type I, II, or
III card.
Twisted-pair
Wiring similar to that found in the telephone system,
consisting of two insulated wires loosely twisted around each
other to help cancel out induced noise in balanced circuits.
UTP
Unshielded twisted-pair.
INDEX
Numerics
B
3C689 adapter 1-1
configuring 3-1, 4-1
connecting to the cable 2-4
connecting to the network 2-4, 2-5
features 1-2
installing 2-1
memory requirements 3-3, 4-2
removing 2-6
requirements 1-2
statistics and information 6-8
troubleshooting 6-1
3C689.COM 5-2, 5-5
3Com Bulletin Board Service
(3ComBBS) C-1
3Com sales offices C-4
3ComFacts C-2
3Install account 3-1, 3-2
bulletin board service C-1
A
adapter configuration screen 4-5
adapter options
Interrupt Request Level 4-4, B-4
I/O Base Address 4-5, B-2
MMIO Address Location B-2
Ring Speed 3-4, 4-4, B-2
Shared RAM Page Size and Address
Range 3-3, 4-2, B-3
adapter specifications B-1
adapter statistics and information 6-8
Ask3Com C-2
Auto Configure 3Com PC Card Adapter
option 4-4
AUTOEXEC.BAT 5-4, 5-5, 5-6
AutoLink feature for NetWare 1-3, 3-1,
3-2, 3-4
AUTOLINK.CFG 3-2
AutoLink.Log 6-10
automatic configuration
for NDIS 5-6
for NetWare 3-1
C
cable
connecting 2-4, 2-5
disconnecting 2-6
cabling B-1
Card Services 1-4, 5-5, 5-8, A-1
lack of 5-5, 5-8, A-2
verifying installation A-1
boot screen display A-1
CONFIG.SYS file device
section A-1
CardFacts C-2
changing diagnostic test setup 6-6
compatibility 1-6
CompuServe 5-4, C-2
CONFIG.SYS 3-3, 4-2, 5-4, 5-5, 5-6,
5-7, 5-8
configuration
automatic
for NDIS 5-6
for NetWare DOS ODI
client 3-1
changing 4-5
saving settings 4-6
standard 4-1
Configuration and Diagnostic
Program 4-5, 6-1, 6-2, 6-3, 6-4, 6-10
Configuration/Diagnostic/
Troubleshooting option 4-5, 6-4
configuration options B-2
Configure Adapter menu item 4-5
connecting cables 2-4, 2-5
connecting to the network 2-5
conventions
notice icons ii
text ii
INDEX
2
D
M
default configuration settings B-2
diagnostic program 6-1
diagnostic tests
failed 6-7
Group 1 6-3
Group 2 6-3
running 6-3
setup, changing 6-6
disconnecting cables 2-6
drivers. See NDIS driver and NetWare.
main menu 4-4, 5-3, 6-4
memory manager 3-3, 4-2, A-2
memory requirements 3-3, 4-2
Microsoft Windows for Workgroups 5-9
MMIO Address Location B-2
E
environmental operating range B-1
F
fax service. See 3ComFacts
FCC certification B-1
G
N
NDIS driver 5-2
new installation 5-2, 5-6
TLPC3.DOS 5-2, 5-8
updating 5-12
NET.CFG 5-2, 5-4, 5-5
NET.PCM 4-6, 5-5
NetFacts C-3
NetWare 3-2
3C689.COM 5-2, 5-5
DOS ODI driver 3-1, 3-4, 5-2
server files 3-2
network, connecting to 2-4, 2-5
network supplier support C-3
Group 1 diagnostic test 6-3
Group 2 diagnostic test 6-3
O
H
ODI driver. See NetWare
on-line technical services C-1
operating voltage, adapter B-1
Hot Swap 1-2
I
IBM compatibility 1-6
information, adapter 6-8
Install command 4-3
installation
adapter 1-3, 1-5
AutoLink 1-3, 3-4
standard 1-3, 4-1
drivers 5-1
installing OS/2 network driver for
NDIS 5-12
installing OS/2 network driver for
NetWare 5-6
Interrupt Request Level B-4
I/O Base Address B-2
P
Personal Computer Memory Card
International Association Release
2.01 1-1, 6-9
physical dimensions B-1
power requirements B-1
printing AutoLink.Log file 6-10
PROTOCOL.INI 5-7, 5-8
PROTOCOL.PCM 4-6, 5-8
INDEX
R
W
removing the adapter 2-6
requirements
for 3C689 adapter 1-2
for AutoLink feature 3-2
for standard configuration 4-2
returning products for repair C-4
Ring Speed 3-4, 4-4, B-2
RJ-45 connector 2-2, 2-4, 2-5
Run Tests dialog box 6-4
running diagnostic tests 6-3
Windows 6-10
Windows for Workgroups 5-9
WSGEN diskette 5-4
S
saving option settings 4-6
setup. See configuration.
Shared RAM Page Size and Address
Range B-2
software license 4-3
specifications, adapter B-1
Standard Installation and Configuration
option 1-3, 4-1, 4-3
requirements 4-2
statistics, adapter 6-8
STP network connection 2-5
T
technical support C-1
tests, diagnostic. See diagnostic tests.
TLPC3.DOS 5-2, 5-8
TokenDisk diskette 3-4, 4-3, 6-1
main menu 4-4, 6-4
Transcend PC Link SmartAgent
software 1-4
troubleshooting 6-1, 6-9, 6-10
Type II slot 1-1
Type III slot 1-1
U
unpacking adapter 2-2
unshielded twisted-pair (UTP) cable 2-5
Using IBM LAN Support Program
Drivers 5-11
UTP cable network connection 2-4
Z
Zoom command button 6-7
3
LIMITED WARRANTY
HARDWARE: 3Com warrants its hardware products to be free from defects in workmanship and
materials, under normal use and service, for the following lengths of time from the date of
purchase from 3Com or its Authorized Reseller:
Internetworking products
Network adapters
Ethernet stackable hubs and unmanaged Ethernet fixed port repeaters
*Power supply and fans in these stackable hubs and unmanaged repeaters
Other hardware products
Spare parts and spares kits
One year
Lifetime
Lifetime*
(One year if
not registered)
One year
One year
90 days
If a product does not operate as warranted during the applicable warranty period, 3Com shall, at
its option and expense, repair the defective product or part, deliver to Customer an equivalent
product or part to replace the defective item, or refund to Customer the purchase price paid for
the defective product. All products that are replaced will become the property of 3Com.
Replacement products may be new or reconditioned. Any replaced or repaired product or part
has a ninety (90) day warranty or the remainder of the initial warranty period, whichever is longer.
3Com shall not be responsible for any software, firmware, information, or memory data of
Customer contained in, stored on, or integrated with any products returned to 3Com pursuant to
any warranty.
SOFTWARE: 3Com warrants that the software programs licensed from it will perform in
substantial conformance to the program specifications therefor for a period of ninety (90) days
from the date of purchase from 3Com or its Authorized Reseller. 3Com warrants the magnetic
media containing software against failure during the warranty period. No updates are provided.
3Com's sole obligation hereunder shall be (at 3Com's discretion) to refund the purchase price
paid by Customer for any defective software products, or to replace any defective media with
software which substantially conforms to 3Com's applicable published specifications. Customer
assumes responsibility for the selection of the appropriate applications program and associated
reference materials. 3Com makes no warranty that its software products will work in combination
with any hardware or applications software products provided by third parties, that the operation
of the software products will be uninterrupted or error free, or that all defects in the software
products will be corrected. For any third party products listed in the 3Com software product
documentation or specifications as being compatible, 3Com will make reasonable efforts to
provide compatibility, except where the non-compatibility is caused by a “bug” or defect in the
third party's product.
STANDARD WARRANTY SERVICE: Standard warranty service for hardware products may be
obtained by delivering the defective product, accompanied by a copy of the dated proof of
purchase, to 3Com's Corporate Service Center or to an Authorized 3Com Service Center during
the applicable warranty period. Standard warranty service for software products may be obtained
by telephoning 3Com's Corporate Service Center or an Authorized 3Com Service Center, within
the warranty period. Products returned to 3Com's Corporate Service Center must be
pre-authorized by 3Com with a Return Material Authorization (RMA) number marked on the
outside of the package, and sent prepaid, insured, and packaged appropriately for safe shipment.
The repaired or replaced item will be shipped to Customer, at 3Com's expense, not later than
thirty (30) days after receipt by 3Com.
WARRANTIES EXCLUSIVE: IF A 3COM PRODUCT DOES NOT OPERATE AS WARRANTED ABOVE,
CUSTOMER’S SOLE REMEDY SHALL BE REPAIR, REPLACEMENT, OR REFUND OF THE PURCHASE
PRICE PAID, AT 3COM’S OPTION. THE FOREGOING WARRANTIES AND REMEDIES ARE EXCLUSIVE
AND ARE IN LIEU OF ALL OTHER WARRANTIES, EXPRESS OR IMPLIED, EITHER IN FACT OR BY
OPERATION OF LAW, STATUTORY OR OTHERWISE, INCLUDING WARRANTIES OF
MERCHANTABILITY AND FITNESS FOR A PARTICULAR PURPOSE. 3COM NEITHER ASSUMES NOR
AUTHORIZES ANY OTHER PERSON TO ASSUME FOR IT ANY OTHER LIABILITY IN CONNECTION
WITH THE SALE, INSTALLATION, MAINTENANCE OR USE OF ITS PRODUCTS.
3COM SHALL NOT BE LIABLE UNDER THIS WARRANTY IF ITS TESTING AND EXAMINATION
DISCLOSE THAT THE ALLEGED DEFECT IN THE PRODUCT DOES NOT EXIST OR WAS CAUSED BY
CUSTOMER'S OR ANY THIRD PERSON'S MISUSE, NEGLECT, IMPROPER INSTALLATION OR TESTING,
UNAUTHORIZED ATTEMPTS TO REPAIR, OR ANY OTHER CAUSE BEYOND THE RANGE OF THE
INTENDED USE, OR BY ACCIDENT, FIRE, LIGHTNING, OR OTHER HAZARD.
LIMITATION OF LIABILITY: IN NO EVENT, WHETHER BASED IN CONTRACT OR TORT (INCLUDING
NEGLIGENCE) SHALL 3COM BE LIABLE FOR INCIDENTAL, CONSEQUENTIAL, INDIRECT, SPECIAL, OR
PUNITIVE DAMAGES OF ANY KIND, OR FOR LOSS OF REVENUE, LOSS OF BUSINESS, OR OTHER
FINANCIAL LOSS ARISING OUT OF OR IN CONNECTION WITH THE SALE, INSTALLATION,
MAINTENANCE, USE, PERFORMANCE, FAILURE, OR INTERRUPTION OF ITS PRODUCTS,EVEN IF
3COM OR ITS AUTHORIZED RESELLER HAS BEEN ADVISED OF THE POSSIBILITY OF SUCH
DAMAGES.
Some states do not allow the exclusion of implied warranties or the limitation of incidental or
consequential damages for consumer products, so the above limitations and exclusions may not
apply to you. This warranty gives you specific legal rights which may vary from state to state.
GOVERNING LAW: This Limited Warranty shall be governed by the laws of the state of California.
3Com Corporation
5400 Bayfront Plaza
Santa Clara, CA 95052-8145
(408) 764-5000
FCC CLASS A VERIFICATION STATEMENT
WARNING: This equipment has been tested and found to comply with the limits for a Class A
digital device, pursuant to Part 15 of the FCC Rules, and the Canadian Department of
Communications Equipment Standards entitled, “Digital Apparatus,” ICES-003. These limits are
designed to provide reasonable protection against harmful interference in a commercial
installation. This equipment generates, uses and can radiate radio frequency energy and, if not
installed and used in accordance with the instructions, may cause harmful interference to radio
communications. Operation of this equipment in a residential area is likely to cause harmful
interference, in which case, the user will be required to correct the interference at the user’s own
expense.
Changes or modifications not expressly approved by 3Com could void the user’s authority to
operate this equipment.
CE NOTICE
Marking by the symbol
indicates compliance of this equipment to the EMC directive of
the European Community. Such marking is indicative that this equipment meets or exceeds the
following technical standards:
■
EN 55022—“Limits and Methods of Measurement of Radio Interference Characteristics of
Information Technology Equiment.”
■
IEC 801-2—“Electromagnetic compatibility for industrial-process measurement and control
equipment Part 2: Electrostatic discharge requirements.”—Severity level 3.
■
IEC 801-3—“Electromagnetic compatibility for industrial-process measurement and control
equipment Part 3: Radiated electromagnetic field requirements.”—Severity level 2.
■
IEC 801-4—“Electromagnetic compatibility for industrial-process measurement and control
equipment Part 4: Electrical fast transient/burst requirements.”—Severity level 2.
■
A “Declaration of Conformity” in accordance with the above standards has been made and is
on file at 3Com Corporation.