Download BENDIX BW2187 User's Manual
Transcript
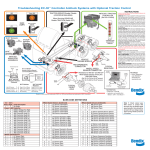
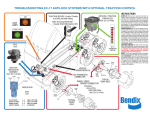
TROUBLESHOOTING THE BENDIX MC-30 TRAILER ANTILOCK SYSTEM
30-PIN
CONNECTOR
ABS
If light remains on,
ABS unit should be serviced.
1-800-AIR-BRAKE
P.N. 560560-2
MC-30
ABS Warning
Lamp
POWER-UP SEQUENCE
WARNING LAMP SEQUENCE: When power is applied, the trailer
ABS Warning Lamp will turn on for a 2.5 second bulb check, and
then turn off. If a PLC tractor and PLC trailer are powered at the
same time, the MC-30 will also trigger a 2.5 second bulb check
on the tractor dash using PLC.
CHUFF TEST: The MC-30 will perform a modulator “chuff test”
at power-up. With brake pressure applied, a properly installed
modulator will cause five rapid, audible chuffs of air pressure. If
two modulators are installed, the MC-30 activates five chuffs at
MOD1 and then MOD2. The chuff sequence is then repeated.
LED SEQUENCE: At power up, the diagnostic LEDs all turn on,
then display the current configuration.
MC-30 — LED Power-Up Sequence
Tie Wrap
At power-up
All LEDs
1st blink displays number of wheel speed sensors
2 Sensors
SEN-FRT
Wheel Speed
Sensor
Mounting
Block
4 Sensors
SEN-RER-FRT
2nd blink displays modulator configuration
1 Modulator (Dolly-Axle control)
MOD
DIAGNOSTIC DISPLAY
TYPICAL
TRAILER AXLE
1 Modulator (Axle control)
2 Modulators (Axle control)
2 Modulators (Side control)
Normal Operation
No Faults
Pigtail 30-Pin
Connector
E2
Bendix
Diagnostic
Tools
1
2
3
C3
Right Front
Right Rear
G1, G2
Ground
KJHGF
E DC B A
K3
E1
E3
D2
D1
+12V Ignition Power
+12V Brake Light Power
Ground
N/A
Aux Switch
Input #1
D3
ABS Warning Lamp (Source)
C2
A1
Right Front Wheel Speed +
Right Front Wheel Speed -
Aux Switch
Input #2
A2
A3
Left Front Wheel Speed +
Left Front Wheel Speed -
B1
B2
Right Rear Wheel Speed +
Right Rear Wheel Speed -
B3
C1
Left Rear Wheel Speed +
Left Rear Wheel Speed -
J2
H3
J3
Modulator 1 Hold
Modulator 1 Common
Modulator 1 Exhaust
H2
J1
K1
Modulator 2 Hold
Modulator 2 Common
Modulator 2 Exhaust
G1
G2
E2
C3
Diagnostic, J1587, Serial A
Diagnostic, J1587, Serial B
Diagnostic, +12v Ignition
Diagnostic, GND
K3
F2
G3
H1
F3
Auxiliary Switch Input #1
Auxiliary Switch Input #2
Auxiliary Switch Input #3
Auxiliary Switch Input #4
Auxiliary Switch Input #5
F1
K2
Auxiliary Low Side Output
Auxiliary High Side Output
WS-20
WS-20
C2 A1
F2
B1 B2
MC-30
3-PIN MOD1
CONNECTOR
J3 H3 J2
RESET
G3
Aux Switch
Input #3
MOD 1
H1
Aux Switch
Input #4
CAUTION: An incorrect ABS configuration may
cause a fault indication or degraded
ABS performance. All MC-30 service
replacement parts are initially defaulted to
4S/2M side control and may need to be
reconfigured upon installation. Before and
after activating a self-configuration, always
determine the current ABS configuration by
monitoring the diagnostic LEDs at power-up
or by activating blink code diagnostics.
F3
Aux Switch
Input #5
Aux High Side
Output Load
K2
Aux Low Side
Output Load
F1
Ignition
Power
M-30T
K1
D2
D
C
D3
MOD 2
E3
A
E
J1 H2
E1
B
7-Pin Trailer
Electrical Connector
A2
A3
B3 C1
5-Pin ABS
Connector
Ground
A
B
C
D
E
Ignition
Power
D
Brake Light Power
Ignition Power
N/A
Trailer ABS Warning Lamp
Ground
WS-20
WS-20
C
A
E
B
ABS Warning Light
Left Front
Brake Light
Power
Twisted
Conductor
Brake Lines
Ground
Left Rear
ABS
Control Group A
Configuration
Control Group B
2S/1M
Axle
Toggle
Dolly-Axle
2S/2M
Axle
Toggle
Side
4S/2M
Axle
Toggle
Side
MOD-FRT
MOD-RER-FRT
MOD-LFT-RHT
VLT (green) LED illuminated only
FAULT DETECTION: When a fault is detected, the trailer ABS warning lamp will remain on. If the tractor and trailer are equipped
with PLC, the dash mounted trailer ABS lamp will also remain
on. The warning lamps notify the driver that all or part of the ABS
function has been disengaged and standard air braking is in effect. The faulted component will be identified on the diagnostic
display.
FAULT RESET: The MC-30 will automatically reset (self-heal) the
active fault code when the fault is corrected. Repeated occurrences of a given fault will cause the fault code to latch. Once the
fault code is latched, the fault code will need to be cleared by a
magnetic reset or through blink code diagnostics.
MAGNETIC RESET: The ECU can be reset by momentarily holding a magnet against the RESET area on the controller. All the
LEDs will be on while the magnet is held in place. If faults occur
on multiple components, the LEDs will display one fault at a time.
When the first fault is cleared and the MC-30 is reset, the next
fault will be displayed on the LEDs.
SELF-CONFIGURATION: This is generally performed after replacement of an MC-30. When activated with a magnet or diagnostic
tool, the wheel speed sensor, modulator and ABS control settings can be altered. After holding a magnet on the ECU reset
location for 20 seconds, the LEDs will begin to roll and the MC30 will self-configure. IF IT IS NOT DESIRED TO TOGGLE THE
ABS CONTROL, REMOVE THE MAGNET AFTER 20 SECONDS.
ABS CONTROL TOGGLE: The MC-30 ABS control setting can be
toggled between axle control, dolly-axle control or side control.
To activate an ABS control toggle, continue to hold the magnet in
place while the LEDs are rolling, for an additional 20 seconds (a
total of 40 seconds). The LEDs will begin to flash rapidly. Remove the magnet. Verify the new ABS configuration by monitoring the LED sequence at power-up or by activation of blink code
diagnostics.
BLINK CODE DIAGNOSTICS
The MC-30 provides diagnostic and configuration information through blink code
diagnostics. Blink code diagnostics are activated by providing constant power to the ignition
circuit and toggling the brake light power input to the MC-30.
When blink code mode is activated, the MC-30 will blink the trailer mounted ABS warning lamp
to display active fault codes, fault code histor y, ABS configurations, and odometer
mileage. Blink code diagnostics can also be used to reset active fault codes.
With Ignition Power Applied,
Cycle Brake Light Power
3 times
4 times
5 times
6 times
7 times (If Equipped)
•
•
•
•
POWER AND GROUND
Trailer electrical power is supplied to the MC-30 from the ignition and
brake light circuits.
Sensor Fault
The example shown is a Right Front Sensor fault.
30-Pin Connector
1
2
3
Blink Code Action
KJHGF
Display Active Fault Codes
Display Fault Code History
Reset Active Fault Codes
Display EC-30T Configuration
Display of Odometer Mileage (x1000)
If wheel speeds are detected during blink code diagnostics mode, the MC-30 will exit
blink code diagnostics and return to normal operating mode.
Blink code diagnostics can only be activated following a power-up, where wheel speeds
have not been detected.
Blink code diagnostics must be activated within 15 seconds of ignition power being applied.
If brake light power is continuously applied for greater than 5 seconds, blink code diagnostics will be disabled until ignition power is cycled.
Lamp Behavior During Blink Code Display
Following activation, there will be a 5 second delay followed by the blink code display.
Following a single display of all available messages, the ABS warning lamp will remain on for 5
seconds and then return to normal operating mode.
CALIBRATION OF NON-STANDARD WHEEL SIZES
The MC-30 allows for tire rolling radius and tone ring tooth count parameters to be set for each
axle using a diagnostic tool. These adjustments may be necessary for the MC-30 to accurately
calculate the vehicle velocity and odometer mileage. Wheels of the same axle must be set to the
same rolling radius and tone ring tooth count. In most cases, these parameters are set by the
trailer OEM and do not need to be adjusted. In the case of a service replacement unit, these
parameters will need to be adjusted if the default settings do not match the vehicle.
Parameter
DIAGNOSTIC LED REFERENCE
If the LEDs shown below are illuminated...
Default Settings Available Settings
Rolling
Radius
500 revs/mile
300 to 700 revs/mile
Tone Ring
Tooth Count
100 teeth
80, 86, 100, 120 teeth
WHEEL SPEED SENSOR ADJUSTMENT
Speed sensors are properly adjusted by gently pushing (not striking) the sensor into the clip
until it makes contact with the face of the tone ring. The wheel speed sensor will automatically
adjust as the wheel rotates. If rotating the wheel causes a gap of 0.020 in. or greater, check for
excessive wheel bearing play or tone ring run-out. Proper wheel speed sensor installation is
critical to proper ABS operation.
PLC4Trucks
An MC-30 with PLC will continuously broadcast
PLC messages that indicate trailer ABS status.
At power-up or during a trailer fault condition, the
MC-30 will signal the tractor ABS unit to illuminate the dash mounted trailer ABS lamp. An oscilloscope can be used to verify the presence and
strength of a PLC signal on the power line. Suggested oscilloscope settings are AC coupling, 1
volt/div, 100 sec/div. Diagnostic tools are available that detect the presence of a PLC signal.
Static Wheel Speed Sensor Fault
Verify 1500-2500 OHMs across sensor
connector pins
Dynamic Wheel Speed Sensor Fault
Rotate wheel and verify a minimum of 0.8VAC
sensor output @1RPS across wheel speed sensor pins. A properly positioned sensor can
output more than 2.0VAC @1RPS.
Modulator Fault
The example shown is a MOD1 fault.
B3 Left Rear WS+
C1 Left Rear WS-
Right Front WS+
Right Front WSLeft Front WS+
Left Front WSRight Rear WS+
Right Rear WS-
E1 Ignition Power
E3 Brake Light Power
D2 Ground
30-Pin Connector
1
2
3
KJHGF
Static ABS Modulator Fault
* Verify 7.0 to 10.0 OHMs across Hold and
Common Pins
* Verify 7.0 to 10.0 OHMs across Exhaust and
Common Pins
* Verify 14.0 to 20.0 OHMs across Exhaust and
Hold pins
E D CBA
J2 Mod1 Hold
H3 Mod1 Common
J3 Mod1 Exhaust
H2 Mod2 Hold
J1 Mod2 Common
K1 Mod2 Exhaust
E1 Ignition Power
E3 Brake Light Power
D2 Ground
ECU Fault
The example shown is an ECU fault. The red ECU
LED indicates a fault internal to the EC-30T. Reset
the MC-30 with a magnet. If the fault returns,
replace the EC-30T. If the red ECU LED is on and
the green VLT LED is off, the MC-30 may have very
low voltage.
Duty
Heavy rotocol
Multi Pdge
Cartri
*NEXIQ part nos. Order from your NEXIQ supplier.
BW2187 © 2003 Bendix Commercial Vehicle Systems LLC 6/2003 Printed in U.S.A. All rights reserved.
5-Pin ABS
Power
Connector
30-Pin ECU
Connector
Ignition Power (PLC)
(Blue Wire)
Pin 7
B
Pin E1
Brake Light Power
(Red Wire)
Pin 4
A
Pin E3
Ground
(White Wire)
Pin 1
E
Pin D2
Warning Lamp
(White/Green Wire)
N/A
D
Pin D3
Function Mode
Value
Operating Range
8.0 to 16.0 VDC
ECU Active
383 mA
ABS Active
(1 modulator)
2.4 A @ 12 VDC
ABS Active
(2 modulators)
4.5 A @ 12 VDC
MC-30 WIRING HARNESS (PIGTAIL)
The EC-30T utilizes a pigtail wiring harness to interface with ABS and
other trailer system components. The following connectors are optional
and may not be present on all pigtail harnesses: Modulator 2, auxiliary,
diagnostic, and rear axle wheel speed sensors.
ECU Connector Jackscrew
(Tighten to 15-20 in. lbs.)
30-Pin ECU
Connector
3-Pin
Modulator 2
(MOD2)
3-Pin
Modulator 1
(MOD 1)
DIAGNOSTIC TOOLS
The MC-30 uses the Bendix ABS Diagnostic Software (PN 5009089) for advanced troubleshooting on PC’s. The Bendix ABS Diagnostic Software requires an RP1210A* adapter. These adapters are available from MPSI (Serial data module - PN 129037* and Parallel data module - PN 126032*).
Additional diagnostic tools are available through SPX. A Bendix PCMCIA card is available for the ProLink tool. It can be used with EC-15, EC-16, EC-17, EC-30 tractor ABS units and MC-30 trailer ABS
units.
k
7-Pin Trailer
Electrical
Connector
8-Pin
Auxiliary
(AUX)
Voltage Out of Range Fault
A flashing green VLT LED indicates ECU voltage below 8.0 VDC or above 16.0 VDC. The VLT
LED will blink until power is brought into normal range.
Pro-Lin
Power Line with PLC
C2
A1
A2
A3
B1
B2
E D C BA
Circuit
PC Car
Part N d MPSI
801013umber
*
For Additional Information:
Refer to SD-13-4834
Call 1-800-AIR-BRAKE (1-800-247-2725)
Visit: www.Bendix.com
5-Pin Power and
Warning Lamp
(PWR/WL)
4-Pin
Diagnostic
(DIAG)
Left
Rear
Right
Left Rear (LFT
Right Front
RER)
Front (LFT (RHT
(RHT FRT) RER)
FRT)
2-Pin Wheel
Speed Sensors
MOST COMMONLY ENCOUNTERED PROBLEMS THAT RESULT IN LEDS
BEING ILLUMINATED
1. Abraded or cut wires in the convoluted tubing near frame clamps.
2. Damaged wires near frame members and frame mounted modulators.
3. Wire jacket worn through from overlapping sensor and modulator wires near frame
members and frame mounted modulators.
4. Corroded connectors or seal damage.
5. Damaged connector latches or connectors not completely seated.
6. Terminals not completely latched or seated into connectors.
7. Excessive sensor air gap, sensor clip tension, or excessive bearing end play (gently
push sensor against wheel hub, or readjust bearings).
8. Damage to exposed wires exiting or entering the convoluted tubing.
9. Worn, chipped or damaged sensor or modulator.
10. Non-functioning antilock controller.
ADDITIONAL SERVICING TIPS
1. Do not pierce wires with probes when troubleshooting harnesses.
2. Gently probe terminals when checking for resistances, do not deform contacts.
3. Apply nonconductive dielectric grease to any and all connectors if inspecting or disconnecting connectors.
4. Bundle and tie wrap excess cable neatly to adjacent air lines or framing
members.
MC-30 BLINK CODE DEFINITIONS
1st 2nd
Digit Digit Fault Description
1
1 No Faults
Power / ABS Controller
1
2
Battery Voltage Too High
1
3
Battery Voltage Too Low
1
4 ABS Controller Fault (2)
1
5 ABS Controller Fault (6)
1
6 ABS Controller Fault (7)
1
7 ABS Controller Fault (9)
1
8 ABS Controller Fault (10)
1
9 ABS Controller Fault (11)
1
10 ABS Controller Fault (12)
1
11 ABS Controller Fault (13)
1
12 ABS Controller Fault (14)
1
13 ABS Controller Fault (1)
1
14 ABS Controller Fault (3)
1
15 ABS Controller Fault (8)
Wheel Speed Sensors
2
1 LF Sensor Start
3
1 RF Sensor Start
4
1 LR Sensor Start
5
1 RR Sensor Start
2
2 LF Sensor Intermittent
3
2 RF Sensor Intermittent
4
2 LR Sensor Intermittent
5
2 RR Sensor Intermittent
Repair Information
System Fully Operational - No Faults Detected
Check for corrosion or damaged power wiring and connectors.
Verify that ABS unit is powered by a 12 volt supply.
Check for corrosion or damaged power wiring and connectors.
Measure voltage under load to insure proper levels.
Check for corrosion or damaged power wiring and connectors.
Clear/Reset faults. If fault returns, replace ECU.
Sensor output low during low-speed vehicle operation. Adjust speed sensor to contact
tone ring. Verify condition of tone ring mounting and teeth. Rotate wheel and verify minimum 0.8 volts AC sensor output @ 1 RPS. Verify condition and retention force of sensor
clip. Verify proper sensor lead routing and clamping.
Intermittent sensor output. Adjust speed sensor to contact tone ring. Verify condition of
tone ring mounting and teeth. Rotate wheel and verify minimum 0.8 volts AC sensor output @ 1 RPS. Verify condition and retention force of sensor clip. Verify proper sensor
lead routing and clamping.
1st 2nd
Digit Digit Fault Description
Wheel Speed Sensors (Continued)
2
3 LF Sensor Shorted to VBAT
3
3 RF Sensor Shorted to VBAT
4
3 LR Sensor Shorted to VBAT
5
3 RR Sensor Shorted to VBAT
2
4 LF Sensor Shorted to Ground
3
4 RF Sensor Shorted to Ground
4
4 LR Sensor Shorted to Ground
5
4 RR Sensor Shorted to Ground
2
5 LF Sensor Open
3
5 RF Sensor Open
4
5 LR Sensor Open
5
5 RR Sensor Open
2
6 LF Sensor Shorted Across Sensor
3
6 RF Sensor Shorted Across Sensor
4
6 LR Sensor Shorted Across Sensor
5
6 RR Sensor Shorted Across Sensor
2
7 LF Sensor Lock Time Out
3
7 RF Sensor Lock Time Out
4
7 LR Sensor Lock Time Out
5
7 RR Sensor Lock Time Out
2
8 LF Sensor Frequency Doubling
3
8 RF Sensor Frequency Doubling
4
8 LR Sensor Frequency Doubling
5
8 RR Sensor Frequency Doubling
Repair Information
Check for corroded or damaged sensor and ECU wiring and connectors.
Verify +12V is not measured at either sensor lead.
Check for corroded or damaged sensor and ECU wiring and connectors.
Verify no continuity from sensor leads to ground.
Check for corroded or damaged sensor and ECU wiring and connectors.
Verify 1500-2500 OHMS across sensor leads.
Check for corroded or damaged sensor and ECU wiring and connectors.
Verify 1500-2500 OHMS across sensor leads.
Sensor output low or missing during vehicle operation above 10 MPH. Verify condition of
tone ring mounting. Adjust speed sensors to contact tone ring. Rotate wheel and verify
minimum 0.8 volts AC sensor output @ 1 RPS. Verify condition and retention force of
sensor clips. Verify proper sensor lead routing and clamping.
Verify condition and retention force of sensor clips. Check for corroded or damaged
sensor and ECU wiring and connectors. Verify no continuity from sensor leads to
ground. Verify sensor leads are twisted pair.
MC-30 BLINK CODE DEFINITIONS
1st 2nd
Digit Digit Fault Description
Wheel Speed Sensors (Continued)
2
9 LF Sensor High Frequency Noise
3
9 RF Sensor High Frequency Noise
4
9 LR Sensor High Frequency Noise
5
9 RR Sensor High Frequency Noise
2
10 LF Sensor Wobble Run
3
10 RF Sensor Wobble Run
4
10 LR Sensor Wobble Run
5
10 RR Sensor Wobble Run
4
5
Verify condition and retention force of sensor clips. Check for corroded or damaged
sensor and ECU wiring and connectors. Verify no continuity from sensor leads to
ground. Verify sensor leads are twisted pair.
Sensor output intermittent or excessive wobble in exciter ring. Verify condition of tone
ring mounting and teeth. Verify proper adjustment of wheel bearings. Adjust speed
sensor to contact tone ring. Rotate wheel and verify minimum 0.8 volts AC sensor output
@ 1 RPS. Verify condition and retention force of sensor clip. Verify proper sensor lead
routing and clamping.
LR Sensor Gross Mismatch
RR Sensor Gross Mismatch
Tire Size Mismatch. Verify correct tire size as desired. Verify proper tire inflation. Verify
proper number of tone ring teeth per sensed wheel. Verify proper wheel rolling radius
setting in ECU.
2
12 LF Sensor Abnormal Speed
3
12 RF Sensor Abnormal Speed
4
12 LR Sensor Abnormal Speed
5
12 RR Sensor Abnormal Speed
ABS Modulators
6
1 Mod 1 Lock Time Out
6
7 Mod 2 Lock Time Out
Adjust speed sensor to contact tone ring. Verify proper number of tone ring teeth per
sensed wheel. Rotate wheel and verify minimum 0.8 volts AC sensor output @ 1 RPS.
Verify condition and retention force of sensor clip. Verify proper sensor lead routing and
clamping.
6
6
11
11
Repair Information
2
8
Mod 1 Open / Shorted to GND
Mod 2 Open / Shorted to GND
No wheel response to ABS command. Verify proper modulator activation with brake
pressure applied, at power-up (Chuff Test) and/or using diagnostic tool. Wiring to modulator may be reversed. Possible slow brake release. Check for dragging brakes, dry
bearings, faulty return springs, parking brake system faults, restricted brake air lines,
over adjusted slacks, out of round drums or damaged/ loose tone rings.
Check for corroded or damaged modulator wiring and connections. Verify 7.0 to 10.0
OHMS across HOLD/COMMON. Verify 7.0 to 10.0 OHMS across EXHAUST/
COMMON. Verify 14.0 to 20.0 OHMS across EXHAUST/HOLD. Verify no continuity from
modulator leads to ground.
1st 2nd
Digit Digit Fault Description
ABS Modulators (Continued)
6
3 Mod 1 Shorted to Ground
6
9 Mod 2 Shorted to Ground
Repair Information
Check for corroded or damaged modulator wiring and connections. Verify no continuity
from modulator leads to ground. Verify 7.0 to 10.0 OHMS across HOLD/COMMON. Verify
7.0 to 10.0 OHMS across EXHAUST/COMMON. Verify 14.0 to 20.0 OHMS across
EXHAUST/HOLD.
6
6
4
10
Mod 1 Shorted Solenoid
Mod 2 Shorted Solenoid
Check for corroded or damaged modulator wiring and connections. Verify 7.0 to 10.0
OHMS across HOLD/COMMON. Verify 7.0 to 10.0 OHMS across EXHAUST/COMMON.
Verify 14.0 to 20.0 OHMS across EXHAUST/HOLD.
6
6
5
11
Mod 1 Shorted to VBAT
Mod 2 Shorted to VBAT
Check for corroded or damaged modulator wiring and connections. Verify +12V is not
measured at any modulator lead. Verify 7.0 to 10.0 OHMS across HOLD/COMMON. Verify
7.0 to 10.0 OHMS across EXHAUST/COMMON. Verify 14.0 to 20.0 OHMS across
EXHAUST/HOLD.
6
6
6
12
Mod 1 Shorted Between
Mod 2 Shorted Between
Check for corroded or damaged modulator wiring and connections. Verify 7.0 to 10.0
OHMS across HOLD/COMMON. Verify 7.0 to 10.0 OHMS across EXHAUST/COMMON.
Verify 14.0 to 20.0 OHMS across EXHAUST/HOLD.
ABS Warning Lamp
ABS - Warning Lamp
7
1 Trailer
Shorted to VBAT
7
2 Trailer ABS Warning Lamp Open
ABS Warning Lamp
7
3 Trailer
Shorted to Ground
Check ABS warning lamp wiring and connections. Verify proper illumination of
warning lamp at power-up.
MC-30 Configuration Blink Code Display
1st Digit
2
3
2nd Digit
1
2
3
4
Sensor
2 Sensors
4 Sensors
Modulators
1 Modulator (Dolly-Axle control)
1 Modulator (Axle control)
2 Modulators (Axle control)
2 Modulators (Side control)


