1
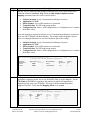
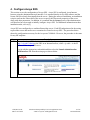
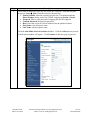
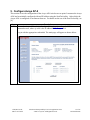
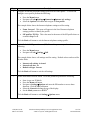
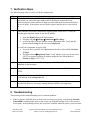
. Step 1. Description Configure a WLAN access point profile on the Nokia phone. To create and configure a new profile perform the following: Press the Menu button. Navigate to ToolsÆSettingsÆConnectionÆAccess Points. Select the Options soft button and navigate to New access pointÆUse default settings. The example below shows the WLAN access point profile settings used for testing. Default values can be used for all other fields. Connection Name: TestRm15 This name will appear in the list of access points to identify the profile. Data bearer: Wireless LAN WLAN netw. name: tim This name must match the SSID configured in the Avaya AP-8 in Section 5, Step 3. Network status: Public WLAN netw. mode: Infrastructure WLAN security mode: Open network For simplicity, the wireless network was configured as an open network without encryption and authorization. More secure network options could also be used. Click the Options soft button. Navigate to Advanced SettingsÆIPv4 settings. DHCP or static IP addressing may be used. The settings below show the use of a static IP address. These settings were used for the testing. Default values can be used for all other parameters. o Phone IP address: 10.75.5.47 o Subnet mask: 255.255.255.0 o Default gateway: 10.75.5.1 Click the Back soft button twice to exit the sub-menus. Click the Back soft button to exit the access point profile. 2. Download the Avaya one-X Mobile software from http://support.avaya.com to a local PC containing the Nokia PC Suite software. The Nokia PC Suite software is available from http://www.nokia.co.uk. Install the Avaya one-X Mobile software on the Nokia phone using the Nokia PC Suite software. For more information on installing Avaya one-X Mobile refer to [7]. CTM; Reviewed: SPOC 10/15/2007 Solution & Interoperability Test Lab Application Notes ©2007 Avaya Inc. All Rights Reserved. 15 of 22 oneXmobileAP8