Download ADTRAN HTU-C / 3192 User's Manual
Transcript
JOBAID
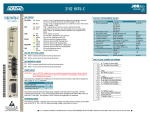
HTU-C / 3192
HTU-C / 3192
CLEI: T1L4SNSC_ _
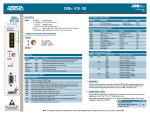
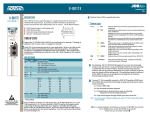
STATUS LEDs
LP1 / LP2
● OFF
DSX
●
●
●
✷
●
✷
●
●
●
RED
YELLOW
GREEN
FLASHING
OFF
FLASHING
GREEN
OFF
RED
●
●
✷
●
YELLOW
OFF
FLASHING
YELLOW
HTU-C
1245004L6
H
D
S
L
LP1
LP2
DSX
ALM
ALM
LBK
C
L
O
S
AIS
LBK
CDI
LBK
CIRCUIT BOARD ROTARY SWITCH - SW2
No synchronization between the HTU-C and the next
HDSL unit (HRE or HTU-R) on loop1 / loop2
Poor signal quality on loop1 / loop2
Marginal signal quality loop on loop1 / loop2
Good signal quality on loop1 / loop2
Error detected at HTU-C or HTU-R
DSX-1 signal not detected
BPV, Frame Error (SF), CRC Error (ESF) is detected
DSX-1 signal is present and synchronized
No alarm condition detected
Local alarm condition detected (HTU-C), or local and
remote alarm condition detected (HTU-C and HTU-R)
Remote alarm condition detected (HTU-R)
No active loopback
Armed but not in loopback
Local loopback is active
FACEPLATE SWITCH - SW1
Selects response of HTU-R upon Customer Loss of Signal
EXT ALM
AIS
■ HTU-R generates unframed all 1s toward network upon loss of customer signal
LBK
■ HTU-R generates loopback towards network upon loss of customer signal
CDI
■ HTU-R generates framed all 1s toward network upon loss of customer signal
EN
AMI
FT1
EN
TX
RX
R
S
2
3
2
C A U T I O N !
SUBJECT TO ELECTROSTATIC DAMAGE
OR DECREASE IN RELIABILITY.
HANDLING PRECAUTIONS REQUIRED.
Selects the DSX-1 Line Build Out
■ 0..........0 - sets LBO to 0-133 feet
■ 1..........133 - sets LBO to 133-266 feet
■ 2..........266 - sets LBO to 266-399 feet
■ 3..........399 - sets LBO to 399-533 feet
■ 4..........533 - sets LBO to 533-655 feet
Note: Positions 5,6 & 7 are not used.
CIRCUIT BOARD JUMPER - P1
Selects the span powering voltage
LV (–140 Vdc)
■ Used to span power circuit with 0 or 1 HRE
HV (–190 Vdc)
■ Used to span power circuit with multiple HREs
CIRCUIT BOARD JUMPER - P3
Selects the framing of the HDSL circuit
LBK
TM OUT
DIS
BZS
T1
DIS
61245004L6-22B
0104
FACEPLATE SWITCH - SW3
COMPLIANCE CODES
Loopback Timeout
Enabled
■ Loopback timeout is enabled
Disabled
■ Loopback timeout is disabled
Manual Line Code Select
AMI
■ AMI line code is selected
B8ZS
■ B8ZS line code is selected
Latching Loopback
T1
■ Allows only standard T1 testing
FT1
■ Allows for fractional T1 testing
External Alarm
Enabled
■ External alarm is enabled
Disabled
■ External alarm is disabled
This product complies with UL 1459, third
edition. It is intended to be installed in an
enclosure with an Installation Code (IC) of
“B” or “E” and in Restricted Access Locations
only. Input current at maximum load is 1 A,
and maximum output at overcurrent condition is 160 mA at -188 Vdc.
Code
Installation Code (IC)
Telecommunication Code (TC)
Power Code (PC)
Input Output
A
–
–
X
F
C
UNF
■ HTU-C operates in unframed mode
AUTO
■ HTU-C auto detects framing
DSX EQ BANTAM JACKS
Provides an intrusive test access point to the data stream
TX
■ Accesses the data stream being received from the local loop
RX
■ Accesses the data stream being transmitted to the local loop
RS-232 DB-9 CONNECTOR
■
■
■
Used to access performance monitoring data, perform loopbacks and provision units
via VT100 emulation software such as Hyper Terminal – Private Edition and
ProComm Plus.
Provision terminal port as follows:
Data Rate — 19.2 kbps
Asynchronous Data Format — eight data bits, no parity (none), one stop bit
When using a PC with terminal software, be sure to disable any power saving
programs.
WARRANTY
Warranty for Carrier Networks products manufactured by ADTRAN and supplied
under Buyer’s order for use in the U.S. is ten (10) years. For a complete copy of
ADTRAN’s U.S. Carrier Networks Equipment Warranty:
(877) 457-5007, Document #414.
For complete Installation and Maintenance: (877) 457-5007, Document #300. Please have your fax number available.
Pricing and Availability 800.827.0807
Tech Support 800.726.8663
Return for Repair 256.963.8722
www.adtran.com
61245004L6-22B
TURN-UP & TROUBLESHOOTING GUIDE
INSERTION LOSS MEASUREMENTS
Frequency
(kHz)
Maximum
Loss Data (dB)
10000
50000
100000
150000
196000
200000
15.00
25.50
30.00
32.75
35.00
35.25
NOTE: If your TIMs is unable to transmit 200 kHz tone,
set the TIMs to one of the frequencies shown above and
compare the received signal to the maximum loss at that
frequency.
HTU-C
Open at Frame HV
Open at Frame LV
HTU-C LV / HTU-R
HTU-C LV / HRE1 / HTU-R
HTU-C HV / HRE 2 / HTU-R
VMDF
A
t-t Voltage
185 - 190
145 - 150
145 - 150
130 - 135
185 - 190
HRE 1
B
t-t Voltage
N/A
N/A
145 - 150
110 - 135
160 - 185
HRE2
C
t-t Voltage
N/A
N/A
130 - 145
110 - 135
160 - 185
D
t-t Voltage
N/A
N/A
N/A
N/A
140 - 185
HTU-R
E
t-t Voltage
N/A
N/A
N/A
N/A
140 - 185
F
t-t Voltage
N/A
N/A
125 - 130
100 - 135
130 - 185
NOTE: All measurements taken with HTU-C installed. With the HTU-C unseated or with protector removed at VMDF, t-r resistance will be cable resistance plus 3 ohms
(for either HRE or HTU-R).
Turn-up Guide
1. Set option switches according to circuit design and local practice.
2. Install HTU-C and HTU-R.
3. See reverse side of this job aid to ensure all LEDs are correct and synchronization has occurred.
a) HTU-C will have red ALM LED if not connected to network. LP1 and LP2 should be solid
green.
b) HTU-R will have red ALM LED if no customer connected. LP1, LP2, line coding and framing
(if not UNFR) LEDs should be illuminated.
4. If all LEDs are correct:
a) Verify that the signal quality is the same on each loop. Ensure signal quality indicators do
not fluctuate.
b) Verify that the loop loss is within design limits. If there is a difference of more than 1 dB
between the two loops, a problem exists with the cable pairs.
c) If errors occur, use the Current System Status and Performance History screens to determine
where they are occurring. See Troubleshooting Guide section.
5. If everything checks out, proceed with BERT testing.
Troubleshooting Guide
The HTU-C DSX LED is Flashing, but no Errors are Indicated by the HTU-R
■ A BPV, Frame Error (SF) or CRC Error (ESF) has been detected at the DSX-1 interface. Possible network
or wiring problem between the HTU-C and the DSX. This is not an indication of problems on the
HDSL loops.
The HTU-R DS1 LED is Flashing, but no Errors are Indicated by the HTU-C
■ A BPV, Frame Error (SF) or CRC Error (ESF) has been detected at the DS1 interface. This indicates a
wiring problem or a B8ZS/AMI mismatch between the HTU-R and the customer equipment. This
is not an indication of problems on the HDSL loops.
The HTU-R has Power, but LP1 and LP2 LEDs are Dark. The Unit cannot Sync with the HTU-C
■ Simplex power for powering the HTU-R can be passed over cable pairs that contain load coils or
that are too long for HDSL synchronization. Using a TIMs, verify the circuit is within design limits.
■ The HTU-R will power up as long as there is at least one good conductor on each loop. To test,
remove the protector plug at the MDF and measure t-r resistance to the HTU-R on both loops.
The HTU-R will place a 3 ohm short between t-r on both loops. An extremely high impedance
indicates an open conductor. An extremely low reading on one loop may indicate a t-r short in
the field. In the field, measure t-t and t-r voltage with the HTU-C installed and compare to the
chart above. If these voltages are not present, open pairs or mis-wiring is indicated. As with other
circuits, standard resistance measurements between each conductor and ground should also be
used to test for a grounded conductor.
■ If the HTU-C is optioned for LV and there are two HREs in the circuit, the HTU-R could fail to
power up normally. The LEDs on the HREs or HTU-R will flash at a rate of 3 times/second. Make
sure the voltage option on the HTU-C is set to HV.
■ A high resistance open which degrades to the point that it causes the circuit to lose sync can
be “resealed” by reseating the HTU-C. Test the cable pairs before reseating the HTU-C.
Running Excessive Errors on the Loop
■ Measure t-r resistance as described above. If the pairs are unbalanced by more than 4 ohms, or
a measurement varies a great deal, this could indicate a high resistance open or an intermittent
fault on the loop with the higher measurement. A TDR is typically required to locate this splice
for repair.
■ Excessively long bridged taps can also cause errors. Check the records and/or use a TDR to verify the
location and length of bridged taps.
■ Using ADTRAN’s “Performance History” screen, it is often possible to see that many more errors
are being received on a particular loop or at a particular unit. The fault will typically be very close
to the unit receiving the most errors.
No Power at the HTU-R
■ This could be caused by a loop with two open conductors. Measure t-r resistance from the MDF
to the HTU-R or use the voltage chart to see which pair is open.
■ Check the HV/LV option on the HTU-C and re-option if necessary.


