1
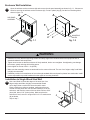
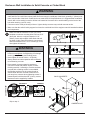
Enclosure Wall Installation to Solid Concrete or Cinder Block
WARNING
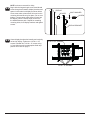
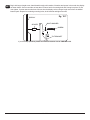
• Verify that you have a minimum of 1-3/8" (35mm) of actual concrete thickness in the hole to be used for the concrete anchors. Do not drill into mortar joints! Be sure to mount in a solid part of the block, generally 1" (25mm) minimum from the side of the block. Cinder block must meet ASTM C-90 specifications. It is suggested that a standard
electric drill on slow setting is used to drill the hole instead of a hammer drill to avoid breaking out the back of the
hole when entering a void or cavity.
• Concrete must be 2000 psi density minimum. Lighter density concrete may not hold concrete anchor.
• Make sure that the wall will safely support four times the combined load of the equipment and all attached hardware
and components.
2
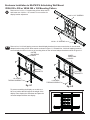
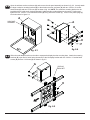
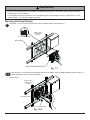
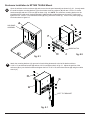
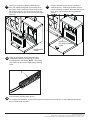
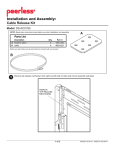
Make sure that the enclosure is level, use it as a
template to mark two mounting holes. Drill two 5/16"
(8mm) dia. holes to a minimum depth of 2-1/2"
(64mm). Insert anchors (B) in holes flush with wall
as shown (right). Place the enclosure over anchors
and secure with two #14 x 2-1/2" screws (C). Level,
then tighten all fasteners.
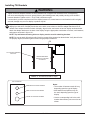
• Tighten screws so that wall plate is firmly attached,
but do not overtighten. Overtightening can damage
screws, greatly reducing their holding power.
CUTAWAY VIEW
B
3
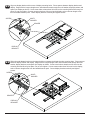
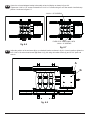
• Never attach concrete expansion anchors to
concrete covered with plaster, drywall, or other
finishing material. If mounting to concrete surfaces
covered with a finishing surface is unavoidable,
the finishing surface must be counter bored as
shown below. Be sure concrete anchors do not
pull away from concrete when tightening screws. If
plaster/drywall is thicker than 5/8" (16mm), custom
fasteners must be supplied by installer.
plaster/
dry wall
A
C
• Always attach concrete expansion anchors directly
to load-bearing concrete.
concrete
Drill holes and insert anchors (B).
Place enclosure (A) over anchors (B) and secure with screws (C).
• Never tighten in excess of 80 in. • lb (9 N.M.).
wall
plate
B
2
WARNING
INCORRECT
concrete
surface
1
Tighten all fasteners.
SOLID CONCRETE
CORRECT
concrete
wall
plate
A
B
plaster/
dry wall
C
Skip to step 11.
CINDER BLOCK
6 of 22
ISSUED: 08-24-12 SHEET #: 180-9030-1