1
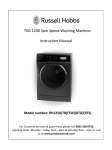
Washing Machine
Instruction Manual
Model number:
RH1042 (B)
For Customer Services & Spare Parts please call 0345 208 8750
Opening times: Monday - Friday 8am – 6pm & Saturday 9am – 1pm
or visit us at www.productcareuk.com
IMPORTANT:
Before using your appliance, please read this
manual carefully and keep it for future reference.
Contents
Safety Instructions
……………………………………………………
3-4
Product Fiche
……………………………………………………
5
Savings & Efficiency Information
……………………………………………………
6
Before using the Appliance
……………………………………………………
7–8
Installation
……………………………………………………
9 – 13
Control panel
……………………………………………………
14
How to Use
……………………………………………………
15 - 21
Program Table
…………………………………………………..
21
First Wash
……………………………………………………
22
Trouble Shooting
……………………………………………………
23 - 25
Error Codes
……………………………………………………
25 - 26
Maintenance
……………………………………………………
27 - 31
Stain Removal Information
……………………………………………………
32 - 34
Specification
……………………………………………………
35
Connection to the Mains Supply
……………………………………………………
36
Warranty
…………………………………………………..
37
Notes
…………………………………………………..
38 - 39
For Customer Services & Spare Parts please call 0345 208 8750
Opening times: Monday - Friday 8am – 6pm & Saturday 9am – 1pm
or visit us at www.productcareuk.com
Safety Instructions
Important note:
Please read this booklet before installing and switching on this appliance. The
manufacturer assumes no responsibility for incorrect installation and usage as
described in this booklet.
• This appliance can be used by children aged from 8 years and above
and persons with reduced physical, sensory or mental capabilities or
lack of experience and knowledge if they have been given supervision
or instruction concerning use of the appliance in a safe way and
understand the hazards involved. Children shall not play with the
appliance.
• Do not use an extension lead for this appliance. Only plug directly into a wall
socket.
• Do not plug in damaged plug sockets.
• In case the power cable becomes damaged, contact Customer Services on
0345 208 8750 for advice.
• Never pull the cable when unplugging – always grip the plug itself.
• Do not plug-in or pull-out the plug from the receptacle with wet hands
to prevent electric shock.
• Never touch the machine with wet hands or feet.
• Never open the detergent drawer when the appliance is running.
• Never force the door to open when the washing machine is running.
• Do not touch discharging hose and water during discharging as the appliance
may reach high temperatures when running.
• In case of any breakdown, unplug the appliance first and then turn the tap
off. Do not attempt to repair by yourself, always contact Customer Services
on 0345 208 8750 for advice.
• Remember that packaging materials of your machine may be dangerous for
children.
• Keep the packaging materials in a place where children cannot reach or dispose
of them appropriately.
• Do not allow your children to play with the washing machine as it is an
electrically driven appliance.
• Keep your pets away from your machine.
For Customer Services & Spare Parts please call 0345 208 8750
Opening times: Monday - Friday 8am – 6pm & Saturday 9am – 1pm
or visit us at www.productcareuk.com
3
Safety Instructions
• Your appliance should only be used by adults in line with the information
provided in this user’s manual.
• Your machine is designed to be used domestically. Commercial use will
cause your warranty to be cancelled.
• Anyone’s intervention to your machine except for a qualified engineer, in
anyway will cause your warranty to be invalid.
• Ideal operating temperature of your machine is 15-25˚C.
• Do not place your machine on carpet as this will block ventilation of the base.
• Do not keep inflammable liquids near your machine.
• You should remove the transport bolts of your machine before the first
usage. Faults occurring in machines operated with transport bolts fitted are
not covered by the warranty.
• Do not put the discharging hose of your machine in a bucket or sink.
• Your machine is not covered under warranty for faults caused by any kind of
external factors (pesticides, fire, etc.).
To avoid fire, electrical shock and other accidents, please remember the
following:
To ensure your safety, an earthed power supply should be used.
• Only the voltage indicated in power label can be used. If you are not clear
of the voltage at home, please contact your electricity supplier.
For Customer Services & Spare Parts please call 0345 208 8750
Opening times: Monday - Friday 8am – 6pm & Saturday 9am – 1pm
or visit us at www.productcareuk.com
4
Product Fiche
Brand: Russell Hobbs
Model: RH1042 (B)
Rated capacity: 5.0kg
Energy efficiency class: A+
Washing performance class: A (A: Higher
G: Lower)
Rated capacity (Cotton 60° full load) (kg) 5,0
Energy efficiency class A+
Energy consumption (kWh/annum)* 167
Water consumption (L/annum)** 9240
Spin-drying efficiency class C
Noise (Washing) (dB(A)) 58
Noise (Spinning) (dB(A)) 77
Max spin speed (rpm)*** 1000
Remaining moisture content (%)*** 62
Energy consumption (cotton 60° full load)(kWh/cycle) 0,85
Energy consumption (cotton 60° partial load)(kWh/cycle) 0,66
Energy consumption (cotton 40° partial load)(kWh/cycle) 0,52
Water consumption (Cotton 60° full load)(L/cycle) 43
Water consumption (Cotton 60° partial load)(L/cycle) 41
Water consumption (Cotton 40° partial load)(L/cycle) 41
Power consumption (off-mode)(W) 1,00
Power consumption (left-on mode)(W) 2,00
Program duration (min) (cotton 60° full load) 190
Program duration (min) (cotton 60° partial load) 145
Program duration (min) (cotton 40° partial load) 140
Note:
• Programme number 3 (Standard 60 ° C cotton programme) and programme number 4 (standard
40 ° C cotton programme) are the standard washing programmes to which the information on the
label and the fiche relates, that these programmes are suitable to clean normally soiled cotton
laundry and that they are the most efficient programmes in terms of combined energy and water
consumptions.
• The actual water temperature may differ from the declared cycle temperature.
• Based on 220 standard washing cycles for cotton programmes at 60°C and 40°C at full load and
partial load, and the consumption of the low-power modes. Actual energy consumption will
depend on how the appliance is used.
• Based on 220 standard washing cycles for cotton programmes at 60°C and 40°C at full load and
partial load. Actual water consumption will depend on how the appliance is used.
• Based on test results of standard 60 ° C cotton programme at full load and partial load, and
standard 40 ° C cotton programme at partial load.
• Program duration, energy consumption and water consumption values may vary according to
wash load weight and type, selected extra functions, tap water and ambient temperature.
For Customer Services & Spare Parts please call 0345 208 8750
Opening times: Monday - Friday 8am – 6pm & Saturday 9am – 1pm
or visit us at www.productcareuk.com
5
Savings & Efficiency Information
Some important information to get more efficiency out of your appliance:
• The amount of laundry you put in your washing machine should not exceed
the maximum amount indicated in the programme table. By avoiding
overloading, your machine should run more efficiently.
• Not using the pre-wash feature for normal and lightly soiled laundry should
save electricity and water.
Describing Energy label and Saving energy
• Energy and water consumption may vary based on water pressure, water
hardness, water temperature, ambient temperature, laundry amount,
additional function selection, voltage fluctuations.
• It will reduce energy and water consumption when used with the laundry
capacity proposed for the selected programme.
• Wash your less dirty or daily laundries in short programmes.
• Carry out cleaning and maintenance periodically, use your machine in
convenient time intervals specified by electricity vendor.
Care label
For Customer Services & Spare Parts please call 0345 208 8750
Opening times: Monday - Friday 8am – 6pm & Saturday 9am – 1pm
or visit us at www.productcareuk.com
6
Before using your Appliance
• Transportation screws which are located at the back of the machine,
must be removed before using or running the machine. You will void the
manufacturer’s guarantee if these are not removed before using or
running the machine
• Before installation, check that all parts listed below are present. If
any parts are missing, please contact the product care service
team on 0345 208 8750.
Liquid detergent apparatus
Note
The drawings in the book may vary from your washer model. They are
designed to show the different features of all models covered by this
book. Your model may not include all features.
The Front of the machine
Control buttons
Detergent draw
Control Knob
Door
Pump filter
For Customer Services & Spare Parts please call 0345 208 8750
Opening times: Monday - Friday 8am – 6pm & Saturday 9am – 1pm
or visit us at www.productcareuk.com
7
Before using your Appliance
The Back of the machine
Water inlet valve
Transport bolts
Remove all transit bolts
before installation
Outlet hose
Power cable
For Customer Services & Spare Parts please call 0345 208 8750
Opening times: Monday - Friday 8am – 6pm & Saturday 9am – 1pm
or visit us at www.productcareuk.com
8
Installation
Before operating the washing machine, remove the 4 transportation screws
and rubber spacers from the back of the machine. If the screws are not
removed, it may cause heavy vibration, noise and product malfunction
(voiding the guarantee).
Unscrew the 4 screws with a wrench, spanner or cross-tip screwdriver.
Keep the four screws as they will need to be re-used if the machine has to
be transported.
Close the holes with the cap holders supplied.
For Customer Services & Spare Parts please call 0345 208 8750
Opening times: Monday - Friday 8am – 6pm & Saturday 9am – 1pm
or visit us at www.productcareuk.com
9
Installation
Feet adjustment
• Adjust the level of washing machine by the adjustable feet. Please check if there is a
gap between the four adjustable feet and the floor. If there is then adjust the level of
the washing machine by turning the adjustable feet. Make sure that the machine does
not sway and that it is completely level. After the adjustment is finished, turn the fixing
nuts up tightly, so that the adjustment that has been made is fixed.
NOTE
The machine should not sway and all the adjustable feet should touch the floor.
Location of the Washing Machine
•
•
•
•
•
•
•
•
•
Check location where the appliance will be installed. Make sure you have everything
necessary for correct installation.
Do not place or store your appliance below 0°C (32°F) to avoid any damage from freezing.
Do not place or store laundry products on top of the appliance at any times.
Install the appliance on a horizontal solid, flat, non-slippery and tough floor. Do not
install onto a carpet.
If the appliance is installed on an unsuitable floor, it could make considerable noise,
vibrate severely and cause a malfunction. If the appliance is not level, adjust the feet up
or down for horizontal installation.
Never put cardboard, wood or other materials under your machine to try and stabilise
the unit.
Ventilation openings must not be obstructed.
Leave a space (right & left : 2cm, rear : 10cm).
In case of built-in installation, the distance
between top of the washer and bottom of
upper plate should be at least 3mm.
For Customer Services & Spare Parts please call 0345 208 8750
Opening times: Monday - Friday 8am – 6pm & Saturday 9am – 1pm
or visit us at www.productcareuk.com
10
Installation
Water drainage
• The water outlet hose should be mounted at a height of minimum 60 cm,
maximum 80 cm from the ground.
• The end of the water outlet hose can be fitted directly to the drainage
hole on the back side of the washer.
• When installing the outlet hose, secure it with a string or tie extensions
(not included).
• Never attempt to extend the water outlet hose by adding extra parts.
• If the outlet hose is too long, do not force it back into the washer.
This will cause abnormal noise and damage to the product.
• Diagram below illustrates installation depending on water supply and waste
outlet.
Do not insert drain hose more
than10cm (100mm) down the
waste outlet pipe.
10cm
For Customer Services & Spare Parts please call 0345 208 8750
Opening times: Monday - Friday 8am – 6pm & Saturday 9am – 1pm
or visit us at www.productcareuk.com
11
Installation
Water
• The appliance should be connected to the cold water mains using new
hose sets. Old hose sets should not be reused. In using only one water
tap or in case of only one water inlet valve, connect the inlet hose to the
cold water inlet valve.
Water inlet hose connection
• Be careful not to confuse hot water inlet and cold water inlet.
• Your machine has a single water (cold) inlet.
• To prevent leakages on the connection joints, 1 seal is included in the hose
packing.
• After all connections are completed, check for leakages around the
connection joints by turning on your tap completely and seeing if any
water escapes.
• Be sure that the water inlet hoses are not folded, twisted, crushed or
elongated by stretching.
Electrical connection
• Your washing machine is set to 220-240V and 50Hz.
• The mains cord of your washing machine is equipped with a specific
earthed plug. This plug should always be inserted to a earthed socket of 13
amps. The current value of the fuse should be 13 amps.
• We do not take responsibility for any damage that occurs due to non
earthed usage.
• Operating your appliance under low voltage will cause the life cycle of
your appliance to be reduced and its performance to be restricted.
For Customer Services & Spare Parts please call 0345 208 8750
Opening times: Monday - Friday 8am – 6pm & Saturday 9am – 1pm
or visit us at www.productcareuk.com
12
Installation
Ordinary tap (not included)
Screw-shaped tap (not included)
For Customer Services & Spare Parts please call 0345 208 8750
Opening times: Monday - Friday 8am – 6pm & Saturday 9am – 1pm
or visit us at www.productcareuk.com
13
Control Panel
1
2
1
2
3
4
5
6
7
3
4
5
6
7
Drawer
Programme Knob
Programme ready light
Programme end light
Cold wash
No spin
Start/Pause cycle
Programme
60 ̊ C
End
40 ̊ C
Ready
1.
2.
3.
4.
5.
6.
7.
8.
9.
10.
11.
12.
0
Cotton 90 ̊C
Cotton 60 ̊C With prewash
Cotton 60 ̊ C
Cotton 40 ̊ C
Eco wash
Quick wash
Cotton cold
Synthetic 60 ̊ C
Synthetic 40 ̊ C
Synthetic Cold
Delicate 30 ̊ C
Wool 30 ̊ C
Rinse
Spin
Drain
Off
For Customer Services & Spare Parts please call 0345 208 8750
Opening times: Monday - Friday 8am – 6pm & Saturday 9am – 1pm
or visit us at www.productcareuk.com
14
How to Use
To obtain the best washing results, you must operate your appliance
properly. This section gives you this important information.
Preparing clothes for washing
• Close zippers, snaps, and hooks to avoid snagging on other items.
Remove pin, buckles, and other hard objects to avoid scratching the
washer interior.
• Empty pockets and pull them inside out.
• Turn down cuffs and turn synthetic knits inside out to avoid pilling.
• Reverse textiles such as pants, knitwear, t-shirt and sweat suits.
• Tie strings and sashes to avoid tangling.
• Treat spots and stains. (See ‘Removing stains’ section pg32- pg34).
• Follow the washing instructions supplied on the clothing.
Important note:
Faults that emerge due to the penetration of foreign objects will void the
manufacturer’s guarantee.
• Separate heavily soiled items from lightly soiled ones, even if they would
normally be washed together.
• Separate dark colours from light colours, colourfast items from noncolourfast items.
• Wash lint producers and lint collectors separately.
For Customer Services & Spare Parts please call 0345 208 8750
Opening times: Monday - Friday 8am – 6pm & Saturday 9am – 1pm
or visit us at www.productcareuk.com
15
How to Use
Child Lock
Child lock is used in order to protect the washing cycle from the effects of unwanted button
activations during the cycle. The Child lock is activated by pressing the first and third button
on the control panel at the same for more than 3 seconds. When child lock is activated
LEDs on the cold wash and no spin buttons will blink to indicate that Child Lock is active. In
order to De-activate Child Lock, the same buttons (1st and 3rd) should be pressed again for
more than 3 seconds. Deactivation of Child Lock is shown by blinking of the LED on the cold
wash and no spin buttonsbutton. Whilst the child lock is active all operations become inactive
except for the dial number ‘’0’’ which stops the cycle however, if the dial is returned to the
current setting number and started the programme will continue as normal.
Running the machine
Program selection and features
Select an appropriate programme for your clothing by turning the main knob.
Start/Pause
By pressing this button, you can start the programme you have selected or pause a running
programme.
Starting the programme
•
•
•
•
Adjust the programme knob to the programme you desire.
The programme ready light will be on.
If you want, you can select one or more additional functions.
Run the programme which you have selected by pressing the Start/Pause button.
Changing the programme
If you have selected a programme and you want to continue with another:
• Press the Start/Pause button.
• Bring the program knob to the O (off) position.
• Adjust the programme knob to the programme you desire.
• The programme ready light will be on.
• By pressing the Start/Pause button, run the programme which you have selected.
Cancellation of the Programme
To end a programme early:
• Press the Start/Pause button.
• Turn the programme knob to O (off) position.
• Turn the programme knob to “Draining” or “Spinning” programme.
• The programme ready light will be on.
• Run the programme you have selected by pressing the start/pause button.
End of programme
Your machine will automatically stop when the programme you have selected ends.
• The programme end light will be on.
For Customer Services & Spare Parts please call 0345 208 8750
Opening times: Monday - Friday 8am – 6pm & Saturday 9am – 1pm
or visit us at www.productcareuk.com
16
How to Use
Detergent drawer general view
Your appliance is designed to use both powder and
liquid detergent.
When using liquid detergent, use the liquid detergent
apparatus supplied with the appliance.
You can use liquid detergent for all programs without
pre-wash.
For this, inserted the liquid detergent apparatus into the
slots located in the main detergent compartment.
Add the correct amount of liquid detergent as directed
by the detergent manufacturers.
Do not exceed the 200 level mark as indicated on the
apparatus.
Remove the liquid detergent apparatus if reverting back
to powder detergent.
Slots for liquid
detergent apparatus.
Main wash detergent compartment: In this
compartment, use only substances like detergent
(liquid or powder) or anti-lime. You can find
the liquid detergent apparatus for your
liquid detergent inside your machine.
Softener, starching compartment:
In this compartment, substances like softener for
your laundry can be used, it is advised that you
use amounts as directed on the softener label. If
the softener is of a thick constituency, dilute with
a small amount of water. (If the softener is to thick
it will struggle to siphon on the rinsing cycle)
Pre-Wash detergent compartment: This
compartment should only be used when the
pre-wash feature is selected. It is recommended
that the pre-wash feature is used only for very
dirty laundry.
Liquid detergent
apparatus
For Customer Services & Spare Parts please call 0345 208 8750
Opening times: Monday - Friday 8am – 6pm & Saturday 9am – 1pm
or visit us at www.productcareuk.com
17
How to Use
Choice of detergent and placing into the machine
The amount of detergent you will put in your machine will depend on the
following criteria:
• The amount of detergent needed is based on how dirty the laundry is.
• Do not prewash your less stained laundries and put the correct amount of
detergent compartment of the detergent drawer.
• The Pre-wash feature might be used for your very dirty laundry. If you are
going to do a pre-wash, place 1/4 of the detergent you would normally put in
the detergent compartment into the pre-wash compartment numbered 1,
and put the remaining 3/4 to the detergent compartment numbered 2.
• Use detergents produced for automatic washing machines in your
machine. Adhere to the advice of detergent manufacturers while
determining the amount of detergent you should use with your laundry.
• The higher the degree of hardness of the water the more detergent you will
need to use.
• Put the softener in the softener compartment in the detergent drawer. Do
not exceed the 200 mark level. Otherwise, softener will flow into washing
water through flushing.
• Softeners with high density are required to be thinned out to a degree before
being put in the drawer. High density softener will clog the flush and block
the flow of the softener.
• When using liquid detergent, use the liquid detergent apparatus supplied with the
appliance.
• You can use liquid detergent for all programs without pre-wash.
• For this, inserted the liquid detergent apparatus into the groves located in the
main detergent compartment.
• Add the correct amount of liquid detergent as directed by the detergent
manufacturers.
• Do not exceed the 200mm level mark as indicated on the apparatus.
• Remove the liquid detergent apparatus if reverting back to powder detergent, see
page 17.
For Customer Services & Spare Parts please call 0345 208 8750
Opening times: Monday - Friday 8am – 6pm & Saturday 9am – 1pm
or visit us at www.productcareuk.com
18
How to Use
Loading clothes for washing
• Drop items into the appliance loosely. Items should move easily through
wash water for the best cleaning and wrinkle-free results.
• Load appliance properly.
• You should not load your appliance with an amount of laundry that will
exceed the maximum laundry amount specified for this appliance.
Overloading and selecting a inappropriate program for the wash load can:
• Cause poor cleaning, Increase wrinkling, Create excessive lint
• Wear out items faster (because of pilling).
Mix large and small items in each load. Load evenly to maintain washer
balance. An unbalanced load can make the appliance vibrate and
prolong program times during spin.
• Ensure that no laundry is caught between the cover and below the seal
when closing the door of your appliance.
• When closing the door, push the door of your appliance until you hear the
locking sound – this indicates the door is fully closed.
• In case of any malfunction, unplug the machine and close the tap first. Do
not attempt to repair by yourself and contact Customer services on
0345 208 8750.
• Never open the detergent compartment when the appliance is running.
• Never force the door open when the machine is running.
• Please adhere to the manufacturers’ advice regarding the use of fabric
conditioner or similar products you will use in your machine.
For Customer Services & Spare Parts please call 0345 208 8750
Opening times: Monday - Friday 8am – 6pm & Saturday 9am – 1pm
or visit us at www.productcareuk.com
19
How to Use
Placing laundry into the machine
Open the loading door
of your appliance.
Check inside the drum of your machine. There
might be laundry left inside from previous
washes. If there is, empty your machine before
selecting your program.
Place your laundry into the machine by
spreading them well. Fold objects like quilts
and blankets that you will load into the machine
as shown below.
NB: Do not exceed the maximum laundry
weight of 5kg.
•
Appliance specifications may vary depending on the product purchased.
For Customer Services & Spare Parts please call 0345 208 8750
Opening times: Monday - Friday 8am – 6pm & Saturday 9am – 1pm
or visit us at www.productcareuk.com
20
How to Use
Programme
Max dry load capacity (kg)
Type of laundry
Programme times
(min)
COTTON90°C
5
Dirty, cotton and linen textile.
155
COTTON 60°C (Prewash)
5
Very dirty, cotton, coloured and
linen textile.
140
COTTON 60°C
5
Dirty, cotton, coloured and linen
textile.
190
COTTON 40°C
5
Dirty, cotton, coloured and linen
textile.
180
ECO WASH
5
Dirty, cotton, coloured and linen
textile.
80
QUICK WASH
2.5
Slightly dirty, cotton, coloured and
linen textile.
30
COTTON COLD
5
Slightly dirty cotton, coloured and
linen textile. Washed without
heating the tap water.
110
SYNTHETICS 60°C
3
Dirty, synthetic or synthetic mixture
textile.
84
SYNTHETICS 40°C
3
Slightly dirty, synthetic or synthetic
mixture textile.
65
SYNTHETICS COLD
3
Slightly dirty, synthetic or synthetic
mixture sensitive laundry. Washed
without
heating the tap water.
72
DELİCATE 30'C
2
Slightly dirty, cotton, coloured,
synthetic or synthetic mixture
sensitive laundry.
70
WOOL 30°C
2
Dirty, hand and machine to wash
wool laundry.
73
RINSE
When you need an additional rinsing to be done to your
clothes after the process, you can use this programme for all kinds
of clothes.
28
SPIN
When you need an additional spinning to be done to your clothes
after the washing process, you can use this programme for all kinds
of clothes.
10
DRAIN
This programme is used to drain the dirty water inside after the
washing process of your machine. If you want the water inside
your machine to be drained before the programme ends, you can
use this programme.
2
For Customer Services & Spare Parts please call 0345 208 8750
Opening times: Monday - Friday 8am – 6pm & Saturday 9am – 1pm
or visit us at www.productcareuk.com
21
First Wash
Before using the appliance for laundry, ensure you run the machine on
a program of 90°C (Cotton program), with detergent and without
laundry.
Before Use
• Ensure the inlet hose is connected correctly and turn the inlet valve
from its closed position to the open position.
• Check that the outlet hose is connected correctly.
• Plug in the machine to the power socket.
• Run the machine on a cycle of 90°C (Cotton program), with detergent and
without laundry.
• After cycle has completed, the appliance is ready for use.
Important note:
If the supply power is turned off at any stage of the washing program and
then turned on, your machine will continue the program from the point
where it was interrupted. This is not harmful for your machine.
Recommendations
• Put detergent into the drawer at the beginning of each wash.
• It is recommended that you wash only extremely dirty laundry
in prewashing programme.
• The amount of laundry you put in your washing machine should not
exceed 5kg.
• If your machine is not going to be used for a long period of time you
should unplug the appliance, turn off the water inlet and leave the door
slightly open. This is so that the inside of your machine will remain dry
and will not cause an unpleasant odour.
For Customer Services & Spare Parts please call 0345 208 8750
Opening times: Monday - Friday 8am – 6pm & Saturday 9am – 1pm
or visit us at www.productcareuk.com
22
Trouble Shooting
•
•
All repairs to your machine should be carried out by a qualified engineer or contact
Product Care on 0345 208 8750.
Before contacting a qualified engineer or Product Care, please see if the problem your machine
has developed can be solved with the help of the below:
Fault
Possible cause
Your appliance does
not discharge water.
Your appliance
vibrates.
Your appliance does
not start.
Removing methods
•
Outlet hose is clogged or twisted.
•
Check the outlet hose, then
either clean or untwist.
•
Pump filter clogged.
•
Clean the pump filter.
•
Laundry settled in the machine
unevenly.
•
Spread your laundry in the
machine evenly.
•
The feet of your machine have not
been adjusted correctly.
•
Adjust the feet on your
machine.
•
Transportation screws have not been
removed.
•
Remove transportation screws.
•
Your machine is under-loaded with
laundry or laundry settled unevenly.
•
This will not stop the operation
of your machine.
•
Your machine is overloaded with
laundry or laundry settled unevenly.
•
Do not overload the appliance
more than the amount
recommended and settle the
laundry in the machine evenly.
•
Your machine rests on a hard surface.
•
Prevent your machine from
resting on hard surfaces. (sides
and rear)
•
It is not plugged in.
•
Plug the machine in.
•
The fuse has blown.
•
Replace the fuse.
•
Electricity cut - off.
•
Check mains power.
•
Start/pause button not pressed.
•
Press the Start/pause button.
•
Programme dial ‘stop’ position.
•
Switch the programme dial to
the desired position.
•
The machine door is not completely
closed.
•
Close the machine door.
For Customer Services & Spare Parts please call 0345 208 8750
Opening times: Monday - Friday 8am – 6pm & Saturday 9am – 1pm
or visit us at www.productcareuk.com
23
Trouble Shooting
Fault
Possible cause
Your appliance does
not fill with water.
Excess foam has
formed in the
detergent draw.
Unsatisfactory
washing results.
Removing methods
•
Water tap has been turned off.
•
Turn the faucet on.
•
Water inlet hose may be twisted.
•
•
Water inlet hose clogged.
•
Check water inlet hose and
untwist.
Clean water inlet hose filters.
•
Valve inlet filter clogged.
•
Clean the valve inlet filters.
•
The machine door is not completely
closed.
•
Close the machine door.
•
Excessive amount of detergent used.
•
Press the Start/pause button.
To eliminate foam formation,
mix a tablespoon of softener
with 500ml of water and pour
the mixture in the detergent
drawer. After 5 – 10 minutes,
press the Start/pause button
again. For the next washing
operation, use the correct
amount of detergent.
•
Wrong detergent used.
•
Use detergents produced only
for automatic washing
machines.
•
The dirtiness of the laundry does not
match the programme select.
•
Select the appropriate
programme for the dirtiness of
the laundry. See page 21
•
Insufficient amount of detergent used.
•
Adjust the amount of detergent
based on the dirt level of the
laundry.
•
The washing machine is overloaded
with laundry.
•
Load the washing machine with
the correct amount and weight
and do not exceed maximum
laundry capacity.
For Customer Services & Spare Parts please call 0345 208 8750
Opening times: Monday - Friday 8am – 6pm & Saturday 9am – 1pm
or visit us at www.productcareuk.com
24
Trouble Shooting
Fault
Possible cause
Removing methods
As soon as the
appliance fills with
water, water
discharges.
•
The end of the water drain hose is too
low for the machine.
No water appears to
be in the drum.
•
No fault. Water is in the unseen part of
the drum.
There are detergent
residues on laundry.
•
Laundry has oily like
stains on them.
•
•
Set the water drain hose to an
appropriate height. See page
11
Non dissolving particles of some
detergents may remain undissolved
and adhere to your laundry as white
spots.
•
Perform an additional rinsing
cycle by setting your appliance
to ‘Rinsing’ programme or
clean the spots using a small
brush.
The reason for these oily like stains are
due to oil, cream or ointment that may
have been on the laundry prior to the
wash.
•
Apply laundry stain remover to
affected area and repeat the
wash programme with a
maximum amount of
detergent.
Error Codes
Display
Description
Solution
Checks to be carried out
Err 01
The start/pause
light blinks.
The door is not shut
properly.
Err 02
The program
ready light blinks.
The water level in your
machine is below the
heating element.
The pressure of your
water supply may be low
or switched off.
Err 03
The start/pause
light and program
ready light blinks
.
The pump has failed or
the pump filter is
obstructed.
Check the door, is the door of the appliance
closed properly?
Has the water faucet been turned on / is
the mains water to the property on?
Hard water areas - build up of lime scale
can cause blockages in inlet hose filter,
valve, internal pipes and water
distribution plate.
Clean the pump filter
For Customer Services & Spare Parts please call 0345 208 8750
Opening times: Monday - Friday 8am – 6pm & Saturday 9am – 1pm
or visit us at www.productcareuk.com
25
Error Codes
Display
Description
Solution
Checks to be carried out
Err 04
The program end
light blinks.
Communication error
Switch the appliance off and unplug from the
wall socket. Leave the appliance for 2
minutes so that it can discharge. Insert the
plug back in the wall socket, turn on the
appliance, select the desired programme and
press start. Has the appliance started its
programme?
Err 05
The start/pause
light and
program end
light blink.
The heating element of
your machine or the
heat sensor has failed.
Hard water areas - build up of lime scale can
cause blockages in inlet hose filter, valve,
internal pipes and water distribution plate.
Err 06
The program
ready light and
program end
light blink.
The motor has failed.
Turn off the appliance.
Err 07
The program
start/pause light,
ready light and
program end
light stays on
permanently.
Configuration error.
Switch the appliance off and unplug from the
wall socket. Leave the appliance for 2
minutes so that it can discharge. Insert the
plug back in the wall socket, turn on the
appliance, select the desired programme and
press start. Has the appliance started its
programme?
Err 08
The start/pause
light, program
ready light and
program end
light blink.
Fault error.
Switch the appliance off and unplug from the
wall socket. Leave the appliance for 2
minutes so that it can discharge. Insert the
plug back in the wall socket, turn on the
appliance, select the desired programme and
press start. Has the appliance started its
programme?
Err 09
The program
ready light and
program end
light stays on
permanently.
The network voltage is
too high or too low.
If the network voltage is lower than 150V or
higher than 260V, your machine will
automatically stop. When the network
voltage is recovered, your machine will
continue its operation.
All repairs to your machine should be carried out by a qualified engineer or contact Product
Care on 0345 208 8750.
For Customer Services & Spare Parts please call 0345 208 8750
Opening times: Monday - Friday 8am – 6pm & Saturday 9am – 1pm
or visit us at www.productcareuk.com
26
Maintenance
The correct care of your appliance can extend its life. This section explains
how to care for your washer properly and safely.
When cleaning your machine, ensure that the machine is unplugged and
the water supply is closed off.
Cleaning your Machine
Exterior
Wipe up detergent, bleach and other spills with a soft, damp cloth or
sponge as and when they occur.
Occasionally wipe the outside of the washer to keep it looking like new.
Interior
Clean interior with 250ml of chlorine bleach mixed with 500ml of detergent.
Run washer through a complete cycle. Repeat this process if necessary.
Important note
Do not put sharp or metal object in your washer, or they can damage the
finish. Check all pockets for pins, clips, money, bolts, nuts, etc.
Do not lay these objects in your washer after emptying pockets.
Winter storage or moving care
Install and store your washer where it will not freeze. Because some water
may stay in the hoses, freezing can damage your washer. If you store or
move your washer during freezing weather, winterize it.
To winterize washer
• Turn off water faucet.
• Disconnect and drain water inlet hoses.
• Run washer on a drain and spin setting for 1 minute.
• Unplug the power supply cord.
To use washer again
• Flush water pipes and hoses.
• Reconnect water inlet hoses.
• Turn on water faucet.
• Reconnect the power supply cord.
For Customer Services & Spare Parts please call 0345 208 8750
Opening times: Monday - Friday 8am – 6pm & Saturday 9am – 1pm
or visit us at www.productcareuk.com
27
Maintenance
Non-use or vacation care
Operate your washer only when you are at home.
If you are on vacation or don’t use your washer for an extended period of time,
you should:
• Unplug the power supply cord or turn off electrical power to the washer.
• Turn off the water supplier to the washer.
This helps avoid accidental flooding (due to a water pressure surge) while you are
away.
Cleaning the water inlet filter
Filters are used to avoid dirt and foreign substances in the water from entering
the machine. These are on the tap and on the ends of water valves along the
water inlet hose of your machine.
• If your machine cannot take sufficient amounts of water despite the tap
being open, these filters should be cleaned.
• Detach the water inlet hoses.
• Remove the filters on water inlet valves using pliers and then clean it with
a brush in water.
• Disassemble the filters on the tap end of the water inlet hoses manually and
clean it.
• Having the filters cleaned, you can fit them in the same way reversely.
• Filters of water inlet valves may be clogged due to a contaminated water
tap, lack of necessary maintenance or valves may be broken. Which will
cause water to leak into your machine continuously. Breakdowns or faults
that may arise because of these reasons are not covered under
manufacturer’s guarantee.
For Customer Services & Spare Parts please call 0345 208 8750
Opening times: Monday - Friday 8am – 6pm & Saturday 9am – 1pm
or visit us at www.productcareuk.com
28
Maintenance
• Please Note: Unplug the appliance before cleaning the filter for your
own safety .
Cleaning the drain filter
• This drain filter is used to screen foreign objects such as threads, coins,
pins, buttons etc.
• If the drain filter is not cleaned regularly (after every 10 times of use), a
drain problem could be caused.
• Depress the lug downwardly to uncover the pump section of the toe
board and pull it towards yourself and extract it.
CAUTION
Be careful when draining if the water is hot.
• Before opening the filter cover, place a towel on the ground immediately
in front of the filter hole to soak up remaining water.
•
•
•
•
•
•
•
Loosen the filter cover in and allow water to flow out.
Clean the foreign objects present in the filter.
Check whether the pump rotates with your hands.
After cleaning the filter, fit the filter cover by rotating it clockwise.
Fit the pump section of the toe board.
Remember that water will leak if you do not fit the filter cover properly.
Appliance specifications may vary depending on the product purchased.
For Customer Services & Spare Parts please call 0345 208 8750
Opening times: Monday - Friday 8am – 6pm & Saturday 9am – 1pm
or visit us at www.productcareuk.com
29
Maintenance
Cleaning the detergent case
• After a while detergent and fabric softeners leave a deposit in the case;
• It should be cleaned from time to time with a jet of running water. If
necessary it can be removed completely from the machine by pressing
the catch downwards and by pulling it out.
• To facilitate cleaning, the upper part (flush stopper) of the fabric softener
compartment can be removed.
• Detergent can also accumulate inside the recess which should be cleaned
occasionally with a brush.
• Once you have finished cleaning, replace the case and run a rinse cycle
without laundry.
Do not wash your detergent drawer in a dishwasher.
•
Appliance specifications may vary depending on the product purchased.
For Customer Services & Spare Parts please call 0345 208 8750
Opening times: Monday - Friday 8am – 6pm & Saturday 9am – 1pm
or visit us at www.productcareuk.com
30
Maintenance
Flush stopper
•
•
•
•
Remove the detergent drawer.
Disassemble the flush stopper and clean the softener residues completely.
Refit the flush stopper after cleaning.
Check that the flush stopper is correctly positioned after replacing.
Flush stopper
For Customer Services & Spare Parts please call 0345 208 8750
Opening times: Monday - Friday 8am – 6pm & Saturday 9am – 1pm
or visit us at www.productcareuk.com
31
Stain Removal Information
Fruit: Stretch the stained area and pour on cold
water. Apply glycerine and wipe over the stain.
Wait 1 – 2 hours and rinse after wiping the stained
area with a few drops of white vinegar.
Grass stain: Rub over the stained area with
detergent before washing.
Oil – based paint: Immediately apply paint thinner
solvent over the stained area before it dries, then
rub the area with detergent and wash.
Burn stain: If your laundry is suitable for applying
bleacher, you can add bleacher into washing water.
For wool fabric, a cloth previously submerged in
oxygen water should be used to dampened the area
of the stain. Using a dry cloth, cover the area and
iron over.
It should be washed after being rinsed properly.
For Customer Services & Spare Parts please call 0345 208 8750
Opening times: Monday - Friday 8am – 6pm & Saturday 9am – 1pm
or visit us at www.productcareuk.com
32
Stain Removal Information
Alcoholic drinks: Wash the stained area under cold
water, wipe with glycerine, then rinse with a solution
of water and white vinegar.
Shoe polish: Scratch out the stain taking care not to
damage the material, rub over the stained area with
a solution of detergent and water and rinse.
Tea and coffee: Stretch the area containing the stain
and pour on hot water.
Care should be taken when performing this
procedure.
Chocolate and cocoa: Leave your in cold water
and rub the stained area with detergent, then
wash at a high temperature.
Tomato paste: Scrape away the dried pieces,
leave to soak in cold water for about 30 minutes
and hand wash by rubbing with detergent.
For Customer Services & Spare Parts please call 0345 208 8750
Opening times: Monday - Friday 8am – 6pm & Saturday 9am – 1pm
or visit us at www.productcareuk.com
33
Stain Removal Information
Blood stain: Leave to soak in cold water for
about 30 minutes and hand wash with detergent.
Cream, ice cream and milk: Leave to soak in cold
water for about 30 minutes and hand wash with
detergent.
Mould: Clean the stained area as soon as possible and
hand wash with detergent.
Ink: Hold the stained area under cold running water
and wait until the inky water has completely run off.
Rub the stained area with a solution of lemon juice and
water, leave for 5 minutes before washing.
For Customer Services & Spare Parts please call 0345 208 8750
Opening times: Monday - Friday 8am – 6pm & Saturday 9am – 1pm
or visit us at www.productcareuk.com
34
Specification
Maximum washing capacity (dry laundry) (kg)
5.0
Spin speed (rev / min)
1000
Number of programs
12
Operating voltage / frequency (V/Hz)
220-240 / 50
Water pressure (Mpa)
Maximum:1
Minimum:0.1
845x597x527
Dimensions (HxWxL) (mm)
For Customer Services & Spare Parts please call 0345 208 8750
Opening times: Monday - Friday 8am – 6pm & Saturday 9am – 1pm
or visit us at www.productcareuk.com
35
Connection to the Mains Supply
For UK use only – Plug fitting details (where applicable):
As the colours of the wires in the mains lead of this appliance may not
correspond with the coloured markings identifying the terminals in your plug,
proceed as follows:
The GREEN/YELLOW wire is the EARTH and must be connected to the
terminal which is marked with the letter E or by the earth symbol or coloured
GREEN or
GREEN/YELLOW.
The BLUE wire is the NEUTRAL and must be connected to the
terminal marked with the letter N or coloured BLACK. The
BROWN wire is the LIVE wire and must be connected to the
terminal marked with the letter L or coloured RED.
Always ensure that the plug cord grip is fastened correctly.
If a 13A (BS1363) fused plug is used it must be fitted with a
13amp fuse conforming to BS1362 and be BSI or ASTA approved.
For Customer Services & Spare Parts please call 0345 208 8750
Opening times: Monday - Friday 8am – 6pm & Saturday 9am – 1pm
or visit us at www.productcareuk.com
36
Warranty
This product is guaranteed for 12 months from the date of the original
purchase. If any defect arises due to faulty materials or workmanship the
faulty product must be returned to the place of purchase.
Refund or replacement is at the discretion of the retailer.
The following conditions apply:
• The product must be returned to the retailer with the original proof of
purchase.
• The product must be installed and used in accordance with the
instructions contained in this instruction guide and any other instructions
for use which are supplied.
• It must be used for domestic purposes only and for its intended use.
• This warranty does not cover wear and tear, damage, misuse or
consumable parts.
This does not affect your statutory rights.
Produced for:
G2S Limited
Hindley Green
Wigan
England
WN2 4EZ
For Customer Services & Spare Parts please call 0345 208 8750
Opening times: Monday - Friday 8am – 6pm & Saturday 9am – 1pm
or visit us at www.productcareuk.com
37
Notes:
For Customer Services & Spare Parts please call 0345 208 8750
Opening times: Monday - Friday 8am – 6pm & Saturday 9am – 1pm
or visit us at www.productcareuk.com
38
Notes:
For Customer Services & Spare Parts please call 0345 208 8750
Opening times: Monday - Friday 8am – 6pm & Saturday 9am – 1pm
or visit us at www.productcareuk.com
39
For Customer Services &
Spare Parts please call
0345 208 8750
Opening times:
Monday – Friday
8am – 6pm
&
Saturday
9am – 1pm
or visit us at
www.productcareuk.com
Revision 4
This symbol is known as the 'Crossed-out wheelie bin Symbol'. When this
symbol is marked on a product/batteries, it means that the product/batteries
should not be disposed of with your general household waste. Only discard
electrical/electronic/battery items in separate collection schemes, which cater
for the recovery and recycling of materials contained within. Your co-operation
is vital to make sure the success of these schemes and for the protection of the
environment. For your nearest disposal facility, visit www.recycle-more.co.uk
or ask in store for details.
We reserve the right due to possible changes to design to alter the
instruction manual without prior notice.