1
Warranty and Service
owner’s expense to the PS Audio factory.
Contact your PS Audio distributor or the
PS Audio customer service department for
more information.
Inside the U.S. and Canada
PS Audio’s warranty is 3 years parts and
labor, from the date of original purchase.
This means that we warranty the product
itself regardless of ownership, new or used.
Service issues
Should your unit ever require service or if
you have any technical questions about the
Power Plant, you must either contact your
dealer (PS Audio if purchased direct) or your
PS Audio distributor. No equipment will be
received at our service facilities without an
attached RA number.
Outside the U.S. and Canada
PS Audio has authorized distribution in
many countries of the world. In each
country, the authorized importing retailer or
distributor has accepted the responsibility
for warranty of products
sold by that retailer or
distributor. Warranty service should normally be
obtained from the importing retailer or distributor
from whom you purchased
the product. In the unlikely
event of service required
beyond the capability of
the importer, PS Audio will
fulfill the conditions of the
warranty. Such product
must be returned at the
If purchased through an
authorized PS Audio dealer
or distributor, the RA number must be obtained by
the dealer or distributor. If
the product was purchased
from PS Audio direct, this
can easily be obtained by
contacting PS Audio at:
E-mail [email protected]
Phone - 720.406.8946
Fax - 720.406.8967
PS Audio International, Inc.
4824 Sterling Dr.
Boulder, CO 80301 USA
Phone: 720-406-8946
Fax: 720-406-8967
www.psaudio.com
8
What’s In the Box
Table of Contents
2.
2.
2.
3.
3.
4.
4.
4.
5.
6.
6.
7.
8.
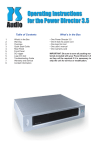
• One PS Audio Power Plant P300
• One 2m power cable
• One operating manual
• One 5amp slow blow spare fuse
Warning
Safety Instructions
Overview
Quick Start Guide
Rear Panel Layout
Front Panel Controls
Isolated Ground Post
Power Plant Operation
Multiwave II™ Waveforms
Servo System
Troubleshooting Guide
Specifications
Warranty and Service
IMPORTANT:
Be sure to save all packing materials
included with the Power Plant P500 as this
will be required if you ever need to ship the
unit for service or modification.
1
Warning
Overview
To prevent fire or shock hazard, do not
expose the unit to rain or moisture. To avoid
electrical shock, do not open the enclosure.
Refer servicing to qualified personnel only.
The Power Plant P300 is a power
regenerator capable of delivering the highest
level of AC performance to all audio and
video components.
To prevent electric shock, use a 3 prong,
grounded type power cable.
The PS Audio Power Plant P300 is
designed to operate as a stand-alone power
management device, or as part of a larger
power management system. The P300 is
capable of producing, clean and safe power
for a small 2 channel audio system or small
home theater system.
Any change or modifications not expressly
approved in the manual could void your
warranty.
Safety Instructions
The P300 is capable of delivering up to
300 watts of peak power, depending on
the load.
Any turntable or equipment with AC
synchronous motors, such as some cooling
fans should not be used with MultiWave II.
This equipment must be used with 60Hz
SineWave mode.
• Up to 300 watts power delivery depending on load requirements.
• Next generation MultiWave II technology
featuring TubeWave.
We recommend the use of the SineWave
[sin] or TubeWave [tub] with any type of
tube based audio products.
Read the operating instructions provided
with the P300.
• Independent power zones keep power for
analog, digital and high current equipment
electrically isolated.
Retain the operating instructions for later
use and reference
• Regenerated AC delivered through 4
Power Port outlets.
Unplug the P300 from the wall outlet before
changing the fuse or performing any cleaning or service.
• Front panel display for systems monitoring
and user interface.
• Front panel displays waveform setting,
output voltage and wattage.
Do not operate the P300 near water. Avoid
placement near a water reservoir or excessive moisture.
• Reduction of AC line noise by more than
70dB.
When replacement parts are required, be
sure they are specified by the manufacturer
to have the same characteristics as the
original part. Unauthorized substitutions
may result in fire, electric shock, or other
hazards.
• High voltage surge suppression devices
for surge and spike protection.
• Lower AC impedance for better transients
Do not operate with faulty or frayed power
cables.
Do not operate the P300 with the LED load
indicator when illuminated RED or YELLOW
for extended amounts of time.
2
My turntable or fan based equipment is
not operating normally
Any turntable or equipment with AC
synchronous fans should not be used with
MultiWave II. These products must be used
with 60Hz SINE mode.
Specifications
Output:
Power
Voltage
Frequency
The P300 shut down, the display is blank
and the fuses are not blown
If airflow is inadequate or room temperature
is very warm and the P300 is run near 100%
capacity for very long periods of time this
type of shut-down may occur. If this occurs
the load should be lessened on the P300 or
else improve the airflow around the P300.
-
300 Watts
95-240 Vts
50-120 Hz
Current
Peak
Distortion (THD)
-
2 Amps
3 Amps
0.1%
Input:
AC input range
-
90-250Volts
-
50/60 Hz
750 VA
15 Watts
-
9 in
5.5 in
19 in
30 lbs
forced
convection
(depending on model)
(depending on model)
Frequency input
Input capacity
Power consumption
How do I reset the settings to factory
default?
To revert to the default factory settings.
Simply switch the P300 off at the back
panel. The default settings are: Sin mode,
60hz, 117v (export - 220v, Japan - 100v).
(with no load)
General:
Width
Height
Depth
Weight
Cooling system
7
Troubleshooting Guide
[P-4] MultiWave4
MultiWave4 is full combination of P-1 and P2. It generates a pseudorandom collection of
frequencies, however instead of generating
sine waves it generates the same waveform
as P-1.
The Power Plant P300 sets a new mark for
performance and protection. It has been
designed to bring forth the absolute best
from the connected equipment. In addition
to the audio and video improvements, the
P300 will also provide long-term product
reliability and the piece of mind that
connected equipment is safe from electrical
disturbances.
Again, try these settings on your system to
see which one has the highest perceived
benefit in terms of performance.
Servo System
In the event of abnormal operation with
the P300, please refer to the following
suggestions:
The Power Plant provides a virtual Servo
System to continually correct for any DC offset. This will reduce hum from problematic
or sensitive transformers as the Power Plant
produces pure AC waveforms indefinitely
without the need for calibration.
Unit will not turn on
1. Check the obvious. Is it plugged in and
is the AC wall outlet live? This can easily
be tested by using a functional lamp. Plug
the lamp into the wall outlet and see if the
light works. If not, the P300 may be plugged
into a switched outlet, or perhaps the circuit
breaker feeding the outlet has tripped and
needs resetting.
2. After plugging the unit into the wall,
the P300 will only become activated after
flipping the rear switch and pressing the
front panel power button. Be sure that the
unit is both plugged into the wall and turned
on by the both power buttons.
3. Check the Main Fuse. The chances of
the Power Plant’s main fuse being blown
are very remote. However, if the Main
Fuse is blown, the P300 will be completely
inoperable. To check the fuse locate the
section of the back panel labeled "Main
Fuse." It is located between the IEC and the
mail power switch.
Unplug the unit from the wall, remove the
fuse and check its conductivity. If necessary,
replace the fuse and try powering up
the P300. If the main fuse is blown and
a replacement fuse does not solve the
problem, please contact your dealer for
additional service.
The P300 seems to be working, but the
display is blank
The P300 may be in the display blanking
mode. Press the Mode button on the front
panel and the display should turn back on.
6
Quick Start Guide
Rear Panel Layout
1. Place the P300 in a rack or on a shelf in
the audio/video system. If placed on carpet
it is necessary to use isolation or accessory
feet to elevate it above the carpet 1 inch, as
it is essential for proper ventilation. Failure
to do so could compromise the power
regeneration capabilities of the P300.
1. Coaxial pass-through
The P300 comes equipped with a coaxial
pass-through for providing protection to a
cable TV coaxial lead. It can also reduce
ground loop problems associated with the
cable TV coaxial lead.
2. Connect the power cable(s) of the audio/
video equipment to the P300. There are two
electrically isolated duplex receptacles on
the P300, which are oriented horizontally.
2. Main Power Switch
The main power switch is a hard power
switch and will not keep the P300 in standby
mode. No current is drawn from the wall and
the unit will not pass power. There is also a
soft power switch on the front of the unit.
3. Plug the P300 into a power source.
Use the supplied AC power cable, or an
aftermarket power cable. We would strongly
urge the use of an xStream Power Cable.
3. AC Power Inlet
15 Amp IEC standard male socket.
4. Main Fuse
The main fuse is a 5 Amp slow blow. The
fuse can be removed by inserting a flat
device into the fuse holder, removing the
outter cover then removing the fuse.
4. Turn on the P300 by switching the rear
panel rocker switch and then, pressing the
power button located on the far left side of
the front panel.
5. If desired, select a MultiWave II setting
using the front panel controls. See the
MultiWave II section of the manual for more
information on MultiWave II
5. Isolated Ground Post
The P300 allows for an isolated ground line
to be used instead of the ground from the
wall outlet. See the Isolated Ground Post
section for more information.
Default settings
The P300 comes from the factory with
standard default settings that should work
well for most situations. The type of power
delivery can be configured to achieve the
optimal performance for any system.
6. Power Ports™
Two PS Audio Power Ports™ provide
the best possible connection to power
equipment.
Underside ventilation slots (not show)
The ventilation slots provide exhaust
for the thermally controlled cooling
fan. Leave at least 1 inch of clearance
underneath the unit at all times.
3
Isolated Ground Post
Power Plant Operation
Using an isolated ground wire can eliminate
ground potential difference problems and
provide a more reliableground connection.
Before attaching the isolated ground wire to
the grounding post on the P300 the internal
ground wire must be disconnected.
There are five available display modes on
the front panel of the Power Plant. The
Mode button will cycle through the following
five modes:
1.
2.
3.
4.
5.
Place the P300 on its back so the underside
is exposed. Remove the bottom cover of the
P300 and set it to the side. Be cautious of
the wires which are connected to the bottom
cover. Locate the green cable which runs
from the rear outlets to the main cirucit
board. Disconnect the white jumper on the
green cable.
Waveform setting
This mode will display the name of the
waveform presently being generated.
For more information about each of the
MultiWave settings, see the Multiwave II
Waveforms section of the manual.
Replace the bottom cover and screws. Now
attach the isolated ground wire to the post.
All products powered by the power plant
will use this ground instead of the ground
supplied in the wall outlet.
Frequency generated
The frequency setting will only be displayed
if the Waveform menu is set to Sin.
This mode will display the frequency the
Power Plant is generating. The frequency
can be adjusted in 1 hertz increments from
50Hz to 120Hz by using the Up and Down
buttons. The default setting is 60Hz.
Front Panel Controls
There are four buttons on the front panel of
the Power Plant P300.
1.
2.
3.
4.
Waveform setting
Frequency generated (sin mode only)
Voltage produced
Wattage produced
Display blanking mode
Power
Mode
Frequency Down
Frequency Up
Voltage produced
This mode will display the output voltage of
the Power Plant. Note: the voltage figure
will be flashing. The output voltage can
be adjusted in 1 volt increments by using
the Frequency Up and Down buttons. The
range varies depending on the Power Plant
model:
Power On/Off
The power button will activate the front panel
display and provide power to the outlets.
Mode
The Mode button cycles through the
available display modes.
• 100 volt model ranges from 95 - 105 v.
Default setting is 100 volts.
• 120 volt model ranges from 100 - 120 v.
Default setting is 117 volts.
• 240 volt model ranges from 220 - 240 v.
Default setting is 220 volts.
Frequency
The Frequency Up and Frequency Down
buttons cycle through the available options
within each display mode.
(adjustments in 2 volt increments)
As long as the voltage to the Power Plant
does not deviate more than 10% below
normal it will continue to output the voltage
displayed on the front panel.
Wattage produced
This mode will display, in real-time, the
approximate wattage the Power Plant is
generating. Complex loads may not register
4
MultiWave II Waveforms
accurately on the Power Plant's meter. For
true power consumption figures consult the
owners manual of the connected product.
[sin] SineWave
In the sine wave mode the Power Plant will
generate a perfect sine wave (50-120Hz).
Under normal operation a green LED will
illuminate. A yellow LED will indicate a
heavy load and is not recommeded for
continous operation. A red LED indicates an
overload or fault mode.
[tub] TubeWave
TubeWave is specifically designed to optimize the performance of tube based audio
products.
Display Blanking
This mode allows discrete front panel
operation by blanking the display. The PS
logo will continue to illuminate in blue to
indicate that the unit is operational.
TubeWave uses the same pseudorandom
generation of frequencies as MultiWave2
waveform, however it utilizes more “tubefriendly” frequencies.
Notice of MultiWave II operation:
Any turntable or equipment with AC
synchronous motors, such as some cooling
fans should not be used with MultiWave
patterns. This type of equipment must be
used with 60Hz sin mode.
[P-1] MultiWave1
MultiWave1 is a single 60Hz sine wave
with a minute amount of 3rd Harmonic
sine waves mixed together to form a
single partial square MultiWave. This is an
improved version of PS2 from the original
MultiWave™ series.
We recommend the use of the SineWave
[sin], or TubeWave™ [tub] with any type of
tube based audio products.
The partial square wave setting improves
the power supply’s ability to charge the
capacitors in equipment by extending the
length of time available to "top off" the
capacitors' voltage. Use this setting to
enhance the performance of both source
and power equipment.
[P-2] MultiWave2
MultiWave2 is a 60Hz sine wave that
incorporates a pseudorandom collection
of frequencies which are dithered from 5565Hz.
Using this slightly random frequency
deviation is similar to adding dither on a
digital audio source. Power supply dithering
can lower the perceived noise floor and help
remove apparent glare on the audio signal.
[P-3] MultiWave3
MultiWave3 is a combination of P-1 with
a slight degree of 3rd harmonic addition
(P-1).
Try this setting and see how the audio
sounds and the video looks. All systems
can respond differently to each MultiWave
pattern.
5