1
4.Pattern mode
○○○○○○○○○○○○○○○○○○○○○○○○○○○○○○○○○○○○○○○○○○
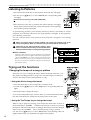
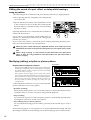
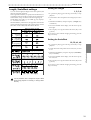
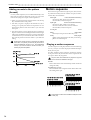
Swing settings
Creating a Pattern
50...75
By adjusting the Swing settings you can offset the note timing
of the steps. For example, you can change a straight 16-beat
by adding a slight "bounce" or shuffle. The Swing value can
be adjusted from 50 to 75 (%), and will affect the note timing
of even-numbered steps. A setting of 50 will produce a perfect
16-beat, and a setting of 66 will produce a shuffle.
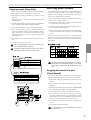
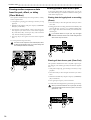
1. If a pattern is playing back, press the Stop/Cancel key to
stop playback.
2. Rotate the dial to select the pattern for which you wish to
make Swing settings.
3. Hold down the Shift key, and press step key 3 (Swing). Key
3 will light.
4. A value will blink in the display. Rotate the dial to set the
Swing value.
5. Once again press step key 3 to execute the Swing setting
(key 3 will go dark).
If you decide to cancel without making the setting, press the
Stop/Cancel key.
The Swing setting has no effect if Length or Scale/Beat
is set to “tri” (3 x 12) or “tr2” (3 x 12).
It is not possible to view or adjust the Swing parameter
during playback or recording, or during Pattern Set Play.
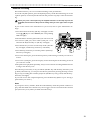
The patterns of the EM-1 consist of a rhythm pattern created
by the drum parts, and a phrase pattern created by the synth
parts.
The rhythm pattern consists of a sequence pattern (note timing data) for each step of each part.
The phrase pattern consists of trigger (note timing data), note
number (pitch), and gate time (note length) data for each step
of each part.
As listed below, there are two ways to create a rhythm pattern
and three ways to create a phrase pattern.
• Realtime recording
Use the rhythm part keys and step keys (keyboard function: on) to record the rhythm or phrase by playing it just as
you want it to sound.
• Step recording
With pattern playback stopped, use the step keys to create a
sequence pattern, or input pitch and note length for individual notes at each step to create the pattern.
• Note edit (only for a phrase pattern)
Create a phrase by editing the data (trigger, note number,
gate time) of the selected step.
If you wish to erase the rhythm and phrase data of each part
before you create a pattern, refer to p.38 “Erasing pattern data
from a part.”
Realtime recording
Please refer to "Realtime recording " (p.19) in chapter 3. Basic
operation (Quick Start).
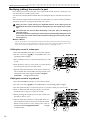
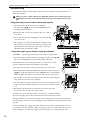
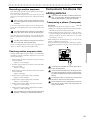
Setting the Roll Type
2, 3, 4
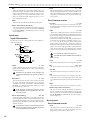
If you specify the Roll Type, the part steps for which Roll is
“on” will be subdivided. You can select a subdivision of either 2, 3, or 4.
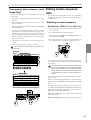
1. If a pattern is playing, press the Stop/Cancel key to stop
playback.
Step recording
Please refer to "Step recording " (p.20) in chapter 3. Basic operation (Quick Start).
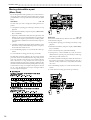
Note editing
2. Use the dial to select the pattern whose roll type you wish
to set.
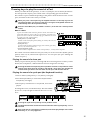
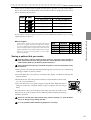
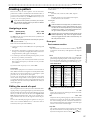
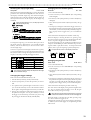
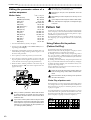
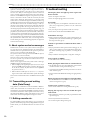
A phrase pattern consists of the following three data items for
each step. For each step, you can set these three items.
3. Hold down the Shift key and press step key 4 (Roll Type).
(Key 4 will blink.)
• Trigger: Whether or not a note will sound
4. The value will blink in the display. Use the dial to specify
the number of subdivisions for the roll type.
• Gate time: The duration of the sound
• Note number: The pitch that will be sounded
5. Press step key 4 once again to finalize the value. (Key 4 will
go dark.)
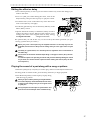
If you wish to cancel without changing the setting, press the
Stop/Cancel key.
Step
It is not possible to change the Roll Type during playback, recording, or sampling, nor during Pattern Set Play.
Trigger
Note number
Gate time
It is not possible to apply a roll to note-on messages
from an external MIDI device.
32
1
On
2
On
C2 G2
1.25
2.00
3
4
On
F2
0.5
5
6
7
8
10
11
On On
On
On
D2 D2
A1
E2
1.50
2.00
0.5
(duration of
the sound)
Scale/Beat : 32
4.00
9
12
13
On
A2
1.00
14