1
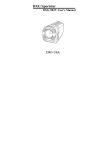
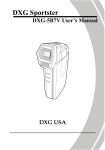
DXG-528
User’s Manual
About this manual
Every effort has been made to ensure that the contents of this
manual are correct and up to date. However, no guarantee is made
regarding the accuracy of the contents, and DXG reserves the
right to make changes without notice.
Copyright
© Copyright 2005
i
Preface
Preface
Congratulations on your purchase of the DXG-528 digital
camera. Please read this manual carefully and keep it in a safe
place for future reference.
Preface
Safety
‧ Inserting the batteries upside down can cause damage to the
camera.
‧ Never attempt to recharge non-rechargeable batteries.
‧Do not use or store the product in dusty, dirty, or sandy
areas, as the components may be damaged.
‧Do not store the product in hot areas. High temperatures
can shorten the life of electronic devices, damage batteries
and warp certain plastics.
‧Do not store the product in cold areas. When the product
warms up to its normal temperature, moisture can form
inside the camera and damage electronic circuits.
‧Do not attempt to open the casing.
‧Do not drop or hit the product. Rough handing may
damage the internal components.
‧Do not use harsh chemicals, cleaning solvents or strong
detergents to clean the product. Use a
soft, slightly dampened cloth.
‧If the camera or any of its accessories are not working
properly, visit the DXG USA website at www.dxgusa.com.
There you can arrange for the product to be repaired or replaced.
ii
Table of contents
Preface
About this manual ....................................................….....i
Copyright ...................................................................…...i
Safety ..........................................…......................…..…..ii
Overview
Camera Features ......................................….............….....1
Unpacking .....................................................………........2
About the camera ...................................................…........3
Front view ...........................................................…......3
Back view .............................................................….....4
Top view ...............................................................…....4
Getting Started
Installing the batteries .....................................................….5
Inserting an SD card ....................................................…….6
Powering on the camera ....................................……....…..7
Before you start ...........................................................…....8
Setting the date and time .......................................….....8
Setting the date display ..................................................9
Setting the beep function ................................……......10
Setting the language .............................................….....11
Changing modes ...........................................................12
Taking still pictures ..........................…………..…......13
Shooting video .....................................………….…....13
Connecting to a TV or PC.............................................14
iii
Connecting the earphones ..............................................15
Using the Camera
Using the camera buttons ...............................................16
Using the camera LCD display .............................….....18
Changing the LCD display..........................................18
About the LEDs ..............................................................19
Photo mode .....................................................................20
Photo mode icons ........................................................20
Setting the flash ...........................................................22
Using the macro function ............................................23
Using the zoom function .............................................24
Capture mode and self timer function .........................24
Video and voice recorder mode .......................................25
Video mode icons .........................................................26
Using the zoom function ..............................................27
Using the macro function .............................................27
Playback mode .................................................................28
Playback mode icons ....................................................28
Viewing pictures and videos ........................................29
Playing voice files ........................................................30
Displaying file information ..........................................30
Using thumbnail mode ..................................................31
Viewing a slide show ..........................................…......31
MP3 mode .............................................................……...32
Getting MP3 files onto your DXG-528.................……32
MP3 mode icons ...........................................................32
Playing MP3s ...............................................................34
USB mode .........................................................................35
Connecting to a PC ................................................…....35
iv
Connecting to a printer ............................................35
Connecting to a TV ......................................................35
Using the Setup Menus
Picture menu ................................................................36
Automatic or Manual mode ......................................36
Image size ................................................................37
Scene ........................................................................37
Color ........................................................................38
Quality .....................................................................38
White balance ..........................................................39
Focus selection ........................................................39
Exposure adjustment (EV) ......................…….........40
ISO adjustment ........................................................40
Metering ...................................................................41
Date stamp ...............................................................42
Video menu .........................................................….....42
Video and voice recorder mode ...............................42
Video quality ...........................................................43
Playback menu ............................................................43
Delete ......................................................................43
Protect .....................................................................44
Slide show delay ....................................…….........44
Copy to card ............................................................45
DPOF ..................................................................…45
Setup menu ............................................................….46
Date and time ......................................................…46
Date type ....................................................……....46
Number reset ...................................................…...46
v
Beep ......................................................................47
Language ...............................................................47
Power saving .........................................................47
Default ..................................................................47
Format ............................................................…...48
USB mode ......................................................…...48
TV .................................................................…....49
Installing the Software and Drivers
Drivers ......................................................................50
Presto! Video Works 6 ..............................................51
Presto! Mr. Photo 3 ...................................................51
Appendices
Appendix A: Specifications .......................................52
Appendix B: System requirements.............................54
Appendix C: PictBridge errors....................................55
Appendix D: SD card capacities.................................56
vi
1.1 Camera features
The DXG-528 has many features including:
‧ Digital still camera (5.1 megapixel)
‧ Digital camcorder
‧ Mass storage device
‧ MP3 player
‧ Voice recorder
‧ 3X optical zoom
‧ Direct Print functionality
1
System requirements
1. Overview
Unpacking
1.2 Unpacking
All the following items should be included in the camera
package. If any item is missing or appears damaged,
contact DXG USA immediately.
Camera
Earphones
Wrist strap
Camera pouch
Alkaline
AA batteries x2
USB/TV-Out
cable
2
User’s manual
1.3 About the camera
Refer to the following diagrams to familiarize yourself with
The buttons and controls of the camera.
1.3.1 Front view
3
About the camera
CD-ROM (driver and
application software)
About the camera
1.3.2 Back view
Note:
Refer to page 19 for more information on the LEDs.
1.3.3 Top view
4
This section covers only basic functions. See later chapters
for details about advanced functions.
2.1 Installing the batteries
The camera can use either standard two AA alkaline
Batteries or one CRV3 lithium battery (shown).
Note: Installing the batteries incorrectly could damage
the camera.
1. Open the battery door.
2. Insert the battery as shown.
5
Inserting the battery
2. Getting Started
Inserting an SD card
3. Close the battery door.
Note: The pictures here show a CRV3 lithium
battery. The camera can also use 2 AA alkaline type
batteries. Be sure the batteries are installed properly.
Batteries inserted upside down can damage the
product.
2.2 Inserting an SD card
An optional SD/MMC card can be installed in the camera to
provide additional storage space for still images, videos, MP3,
or other files. These cards are available for purchase at
www.dxgusa.com
To install an SD card:
1. Open the battery door.
6
3. Close the battery door.
2.3 Powering on the camera
Press and hold the power button for 2 seconds.
7
Turning on for the first time
2. Insert an SD card as shown.
Make sure the gold contacts are facing up as shown.
Before you start
2.4 Before you start
Before you use your camera, there are some basic settings
you should adjust.
2.4.1 Setting the date and time
To set the date and time:
1. Turn the camera on as described on page 7.
2. Press the menu button to
display the menu screen.
3. Move the joystick to the right
to select the tools menu.
4. Use the joystick to highlight
the date and time option.
Press the joystick when the
option is highlighted.
8
2.4.2 Setting the date display
To set the way the date is displayed:
1. Turn the camera on as described in “Turning on for the
first time” on page 7.
2. Press the menu button to
display the menu screen.
3. Move the joystick to the right
to select the tools menu.
9
Before you start
5. Move the joystick left and right to move between fields
and move joystick up and down to alter values in the
selected field.
6. Press the joystick button to save the new setting.
7. Press the menu button to leave the menu.
Before you start
4. Use the joystick to highlight
the date type option.
5. Use the joystick to select the date type, YMD, MDY, DMY.
6. Press the menu button to leave the menu and save the setting.
2.4.3 Setting the beep function
To set the beep function:
1. Turn the camera on as described in “Turning on for the
first time” on page 7.
2. Press the menu button to
display the menu screen.
3. Move the joystick to the right
to select the tools menu.
10
2.4.4 Setting the language
To set the language:
1. Turn the camera on as described in “Turning on for the
first time” on page 7.
2. Press the menu button to
display the menu screen.
3. Move the joystick to the right
to select the tools menu.
11
Before you start
4. Use the joystick to highlight
the beep option . Press the
joystick when the option is
highlighted.
5. Press the menu button to
leave the menu and save
the setting.
Changing modes
4. Use the joystick (up/down)
to select the Language
option.
5. Use the joystick (left/right) to select the language option,
English, French, Dutch, Spanish, Italian, Simplified Chinese,
Traditional Chinese, or Japanese.
2.5 Changing modes
The DXG-528 can operate in three modes, Photo Mode, Video
Mode, and Playback Mode. Use the Mode Switch to change
the mode.
12
Before taking your first still picture, ensure you have read
“Before you start” on page 8.
To take a still picture:
1. Turn the camera on and make sure it is in photo mode.
2. Use the viewfinder or LCD screen to frame the picture.
3. Press the shutter button to capture the picture.
The picture will automatically be saved with a unique
file name.
2.7 Shooting video
Before shooting your first video, ensure you have read
“Before you start” on page 8.
To shoot a video:
1. Turn on the camera and make sure it is in video mode.
2. Use the viewfinder or LCD screen to frame your video.
3. Press the shutter button to begin recording.
4. Press the shutter button again to stop recording.
The video will automatically be saved with a unique
file name.
13
Taking your first still picture
2.6 Taking still pictures
Connecting
2.8 Connecting to a TV or PC
Read this section to learn how to learn how to connect the
camera to a host computer and to a TV. Also learn how to
connect the earphones for listening to MP3 audio files.
2.8.1 Connecting to a TV
Connect the camera to a TV as shown.
See “TV” on page 47 for
more details about displaying images on a TV screen.
14
Connect the camera to a host computer using the USB
port as shown.
See “USB mode” on
page 47 for more
information about
connecting to a host
computer.
2.8.3 Connecting the earphones
Connect the earphones to the camera as shown.
15
Connecting
2.8.2 Connecting to a Computer (PC)
Using the camera buttons
3. Using the Camera
Read this section to learn how to use the camera.
3.1 Using the camera buttons
All buttons are located on the top and the back of the camera.
16
Button
Name
Mode
Zoom
Joystick
Function
To select Playback, Video, or
Photo Mode.
To zoom in or out in Photo or
Video modes. Use to increase or
decrease image size in Playback
mode.
To navigate the display menus. In
Photo mode, move left to change
flash mode, right to change capture
mode, and down to use the macro
function.
Display
To switch between LCD display
modes (off, only graphics off)
Menu
To display the main display
menu.
MP3
To enter MP3 mode.
Power
To turn power On or Off.
Shutter
To capture a picture in Photo
Mode or start/stop video recording in Video Mode.
17
Using the camera buttons
See the table below for a description of each button’s function.
Using the camera LCD display
3.2 Using the camera LCD display
Use the LCD display to compose your pictures and videos,
review pictures and videos stored in memory, and navigate
the menu system.
Icons are also displayed on the LCD display that show the
current configuration.
3.2.1 Changing the LCD display
You may decide that you don’t want to display icons on the
LCD screen, or that you want the LCD screen off to save power.
Use the Display button to cycle through the display modes.
When you turn the camera on, the LCD display shows icons
and picture by default. Press the Display button once to turn
off the icons and display only the picture. Press the Display
button a second time to turn off the LCD display completely. Press
the Display button a third time to display everything again.
Note: Turning off the LCD display will increase battery
life.
18
Photo
mode Power on Self-capture Shutter Flash
Mode
button charging
Front LED
Back LED R
Back LED G
Video
Mode
Front LED
Back LED R
Back LED G
Playback
Mode
Front LED
Back LED R
Back LED G
MP3 mode
Power on
Recording
Power on
Playing
video
MP3
reading
MP3
playback
Playing
voice file
Front LED
Back LED R
Back LED G
USB/TV
Connecting
Mode
USB
Front LED
Back LED R
Back LED G
Legend:
-LED turns on then off
-blinking LED
-steady LED
Connecting ERROR!
to TV
19
About the LEDs
3.3 About the LEDs
The following tables explain what the LEDs mean.
Photo mode
3.4 Photo mode
Use the Photo Mode to capture
still pictures in the internal
memory or on an
SD card. The camera is in
Photo Mode when the mode
switch is in the far right position.
3.4.1 Photo mode icons
Use the following picture to familiarize yourself with the
Photo Mode icons and symbols.
20
2
3
Size of picture. The number indicates the
megapixel value 8, 5, 4, 3, 2, or VGA
Color mode. Indicates the color of the
pictures the camera is set to take: color,
black and white, or sepia.
4
5
6
7
8
ISO mode. When no number is shown,
the ISO value is automatic. A number
indicates the manually set ISO value.
Counter to display the number of the
current shot and the number of available
shots.
Zoom indicator to show the amount of
zoom.
Time and date display
Camera shake warning. Displayed when
low light requires slow shutter speeds.
21
Photo Mode
See the table below for a description of each icon and symbol.
Icon
Description
1
Photo mode icon, Manual and Auto.
Photo mode
Icon
9
Description
Focus zone. The camera focuses on the
area inside this symbol.
Indicates battery status. More bars equal
more power.
Memory indicator. Where the pictures are
written: SD card or internal memory.
Macro indicator. The flower icon indicates
when the camera is in macro mode (close up).
Flash mode indicator. The “A” indicates
automatic mode, the “F” indicates forced
flash. The flash icon with the line through
it indicates that flash is turned off.
Capture mode indicator. Capture mode
can be single shot, multi shot, or self
timer.
10
11
12
13
14
3.4.2 Setting the flash
There are five different flash modes. To cycle through the
flash modes, press the joystick to the left. The current flash
setting is shown by an icon. Due to the charging of the flash
capacitor, the LCD screen will go dark and the red busy LED
may blink for a few seconds -- this is normal.
Icon
Description
Flash is turned off
Automatic flash, fires only when needed.
22
Description
Slow sync flash. A flash mode designed for low
light conditions with long shutter speed.
Forced flash, flash always fires
Photo mode
Icon
Automatic flash with red eye reduction. Flash
fires automatically when needed; flashes
once before the picture is taken to reduce the
redeye effect.
Flash always fires; fires once before the
picture is taken to reduce the red eye effect.
3.4.3 Using the macro function
The macro function enables you to capture images of subjects
very close to the lens. In macro mode you can focus on subjects
as close as 2 inches. When not in macro mode the minimum
distance is 7 inches. Use macro mode for subjects 2-6 inches
from the camera.
To switch the macro function on, press the joystick down. An
icon
will appear to indicate macro mode. Press the joystick
down again to leave macro mode. The macro function can be
used in Video and Photo mode.
23
Photo mode
3.4.4 Using the zoom function
The camera is equipped with a 3x optical zoom and a 4x
Digital zoom. The zoom function will work in Photo mode
and Video mode. When in Video mode, the zoom must
be set before you start recording as the zoom cannot be
adjusted during the recording.
Press the right side of the zoom button to zoom in on a
subject (get closer to it). Press the left side of the zoom
button to zoom out from the subject (move away from it).
The zoom status is indicated by the zoom bar on the right
of the screen. The line in the zoom bar indicates the point
where the optical zoom stops and the digital zoom begins.
When the optical zoom reaches the end
of its range, the digital zoom takes over.
You must take your finger off the zoom
button and press it again to start using
the digital zoom.
3.4.5 Capture mode and self timer function
The DXG-528 has three capture modes, single shot, multi-shot
and self timer. Single shot mode captures a single picture every
time the shutter button is pressed. Multi shot mode captures three
pictures every time the shutter button is pressed.
The self timer function enables you to take pictures of yourself
by adding a delay between the moment the shutter button is
pressed and the moment the picture is actually captured.
24
Icon
Capture mode
Single shot capture mode, captures a single
shot each time the button is pressed.
Multi shot capture mode, captures three shots
each time the shutter is pressed.
Self timer capture mode, adds a 10 second delay
between the pressing of the shutter button and
the capture of the picture.
When using the self timer, press the shutter button as normal.
There will be a 10-second delay before the picture is captured.
A countdown is displayed on the LCD screen. A red LED
flashes on the front of the camera to indicate that a picture is
about to be taken. The LED flashes faster as the time expires
and stops flashing when the picture is taken.
3.5 Video and voice recorder mode
Use Video mode to capture
video or audio and store it in
internal memory or on an SD
card. The camera is in Video
mode when the mode switch
is in the center position.
See “Video and voice recorder mode” on page 41 for details
of how to switch between voice and video recording modes.
25
Video and voice recorder mode
To cycle through the capture mode options, press the joystick
right. An icon will appear to indicate capture mode.
Video and voice recorder mode
3.5.1 Video mode icons
Use the following image to familiarize yourself with the
Video mode icons and symbols.
See the table below for a description of each icon and symbol.
Icon
1
2
Description
Video mode and Voice memo mode
icons.
Counter shows total number of pictures
and videos stored in memory.
26
3
4
5
6
7
8
7
8
Description
Zoom indicator to show the current
zoom status.
Timer shows elapsed time of current
video and total possible recording time.
Focus zone. The camera focuses on the
area inside this symbol.
Record and stop icons. STOP is
displayed during a recording, REC is
displayed while not recording.
Indicates battery status.
Memory indicator, SD card or internal
memory.
3.5.2 Using the zoom function
See “Using the zoom function” on page 24.
3.5.3 Using the macro function
See “Using the macro function” on page 23
27
Video and voice recorder mode
Icon
Playback mode
3.6 Playback mode
Use playback mode to review all the pictures, videos, and
Audio recordings stored in your camera.
3.6.1 Playback mode icons
Refer to the following images to familiarize yourself with
the Playback mode icons and symbols.
Photo Playback
Video Playback
See the table below for a description of each icon and symbol.
Icon
1
2
3
Description
Photo mode icon.
Counter to display the number of the
current shot and the total number of
shots/videos.
Playback mode indicator.
28
Description
4
Video mode icon.
5
Volume level indicator
(video only)
6
Counter showing elapsed time and
total time of current video.
Indicates battery status.
7
8
Zoom function. Use the zoom buttons to zoom in on an image.
9
Memory indicator, SD card or
internal memory.
3.6.2 Viewing pictures and videos
To view pictures and videos:
1. Turn the camera on and ensure that it is in playback mode.
The most recent picture is displayed on the screen.
2. Use the joystick to move through the images, videos and
audio files stored in memory.
3. Press the joystick button in to play video and audio
files.
29
Playback mode
Icon
Playback mode
4. Press the joystick up and down to adjust the volume of
files with sound.
5. Use the zoom buttons to increase or decrease the size of
the picture.
6. Use the joystick to scroll a picture too big to fit on the
screen.
3.6.3 Playing voice files
Play voice files the same way as video files. File information
will be displayed on screen.
3.6.4 Displaying file information
Basic information is displayed by default on each image, video,
or audio file when viewed in Playback mode. To display
detailed information about the still image file currently displayed,
press the display button. All the details are displayed
on the screen.
Press the display button a second time to remove all file
information from the screen. Press the button a third time to
display basic information again.
Note: Audio and video files only show basic information.
Pressing the display button will hide the information on
the screen. Pressing the button again will restore it.
30
To use thumbnail mode:
1. Turn the camera on and ensure that it is in playback mode.
The most recent picture will be displayed on the screen.
2. Press the left side of the zoom button once to display four
thumbnail images on screen. Press the left zoom button a
second time to display nine images.
3. Use the joystick to highlight an image.
4. Press the joystick button in to display the highlighted
image on screen full size.
5. Press the left zoom button to go back to thumbnail view.
Playback mode
3.6.5 Using thumbnail mode
By default, each image is displayed full size in playback mode,
but you can display four or nine thumbnail images on screen.
3.6.6 Viewing a slide show
This camera includes a slide show function. A slide show displays
each image in sequence for a predefined amount of time.
To view a slide show:
1. Turn the camera on and ensure that it is in playback mode.
The most recent picture is displayed on the screen.
2. Press the menu button to display the playback menu.
3. Use the joystick button to highlight the slide show option
in the menu.
4. Use the joystick to select a delay of 1, 3, 5, or 10 seconds.
5. Press the joystick in to start the slide show.
The images stored in the memory will be displayed, one after
another. You can stop the slide show at any time by pressing in the
joystick.
31
MP3 mode
3.7 MP3 mode
The DXG-528 has the ability to play MP3 files. Only song files
in the MP3 file format can be played in the MP3 function. Files on
CDs are usually in the Windows Media format (.wma) or wav
format and cannot be played in their native format; they must first
be converted into MP3 files. This can be accomplished with many
types of software which are available at little or no cost.
3.7.1 Getting MP3 Files Onto Your DXG-528:
Once the songs are in the MP3 format, they can be transferred
to the MP3 folder in the camera’s onboard memory or onto the
SD card. This can be accomplished by one of two ways: 1.)
Attach the USB cable to the camera, select “Mass Storage” and
then use your PC to find the removable hard drive ( the camera /
SD card). Once located, drag and drop the MP3 files into the MP3
folder. NOTE: Two removable hard drives will be visible if the
camera has an SD card inserted. 2.) The other way is to place the
SD card into a card reader, locate the MP3 folder, and drag and
drop the MP3 files into the MP3 folder. The card can then be
re-inserted into the camera.
After the files are in the MP3 folder, they can be played on the
camera through earphones or the internal speaker.
Note: To be played, files MUST be in the mp3 format (the file
ends with a “.mp3”). Further, the files must be place in a the
MP3 file in the camera (similar to the DCIM file).
3.7.2 MP3 mode icons
Refer to the following picture to familiarize yourself with the
MP3 mode icons and symbols.
32
MP3 mode
See the table below for a description of each icon and symbol.
Icon
1
Description
2
MP3 mode icon.
Counter to display the current track
number and the total number of tracks.
3
Volume level indicator.
4
5
Timer; shows elapsed time of current
track and total recorded time.
Indicates battery status.
6
Memory card status indicator.
33
MP3 mode
3.7.3 Playing MP3s
To go into MP3 mode:
1. Turn the camera on and press the MP3 button.
2. Use the left and right joystick control to scroll through the
MP3s stored in memory.
3. Press the center joystick button to play/stop the selected
MP3 file.
4. Use the up and down joystick to adjust the volume.
All the MP3s stored in memory will play one after another until
the last one is finished.
34
3.8 USB mode
You can use USB mode to connect to a printer or a host PC.
Before connecting to a printer or PC, see “Installing the software and drivers” on page 49.
3.8.1 Connecting to a PC
When connected to a PC using the USB cable, the camera will
appear as two removable drives in Windows Explorer. One
drive is the camera’s internal memory, the other is the SD
card. You can drag and drop files to and from the new removable
drives just like any other drive.
See also “Connecting to a computer” on page 15.
3.8.2 Connecting to a printer
You can connect the camera to a printer and print images
directly from the camera. Connect to a printer using the USB
cable exactly the same way as you would connect a PC. To print
images to a printer, see “DPOF” on page 44.
3.9 Connecting to a TV
You can connect the camera to a TV and view images from the
camera on the TV screen. Connect the TV to the camera as
described in “Connecting to a TV” on page 14.
Make sure the camera is set to NTSC for playback in the United
States uses NTSC. See “TV” on page 47.
35
USB mode
Note: When adding MP3 files to the camera memory or
memory card, they must be in a folder called MP3.
See “Connecting to a computer” on page 15 for
more information.
Picture menu
4. Using the Setup Menus
This section shows you how to configure your camera
and use the advanced features.
4.1 Picture menu
The picture menu appears when the camera is in Photo mode
and the menu button is pressed.
The picture menu is available in Photo mode only.
4.1.1 Automatic or Manual mode
The camera mode can be set either to Automatic or Manual.
When set to Automatic, the camera sets the ISO value, white
balance, light metering and focus. When set to Manual, these
settings are determined by you.
Note: When in Automatic mode, menu entries for scene,
white balance, focus, ISO and metering will not
appear.
To set the mode:
1. Turn the camera on and ensure that it is in Photo mode.
2. Press the menu button.
3. Use the joystick to highlight the MODE option.
36
4.1.2 Image size
Use the image size option to set the size of the captured
image. Bigger images contain more detail and therefore
use more memory space.
To set the image size:
1. Turn the camera on and ensure that it is in Photo mode.
2. Press the menu button.
3. Use the joystick to highlight the SIZE option.
4. Use the joystick to Select
.
5. Press the menu button again to leave the menu.
Picture menu
4. Use the joystick to Select Automatic or Manual
mode.
5. Press the menu button again to leave the menu.
Note: The number represents the number of pixels. 8M
means 8 megapixels, 5M means 5 megapixels. VGA
is VGA resolution (640 x 480 pixels).
Multishot mode is not available when the camera is
set to 8M (8 megapixels).
4.1.3 Scene
The scene option can be set to manual
, in which case focus,
EV, ISO, metering, and date stamp must be set manually. There
are also a number of preset scene options which set all these
values automatically. When a preset scene option is chosen,
focus, EV, ISO, metering, and date stamp are grayed-out in the
menu and cannot be changed.
37
Picture menu
Note: The scene option can only be changed when the
camera mode is set to manual. See “Automatic
or Manual mode” on page 35.
To set the scene:
1. Turn the camera on and ensure that it is in Photo mode.
2. Press the menu button.
3. Use the joystick to highlight the SCENE option.
4. Use the joystick to select the scene option.
Press the menu button again to leave the menu.
4.1.4 Color
The camera can capture standard color images, black and white
images, or images tinted with a sepia tone to give them an oldfashioned look.
To change the color setting:
1. Turn the camera on and ensure that it is in Photo mode.
2. Press the menu button.
3. Use the joystick to highlight the COLOR option.
4. Use the joystick to select the color, black and white, or
sepia.
5. Press the menu button again to leave the menu.
4.1.5 Quality
The picture quality can be set to high, medium, or low. High
quality pictures require more memory space.
To set picture quality:
1. Turn the camera on and ensure that it is in Photo mode.
2. Press the menu button.
38
4.1.6 White balance
Use the white balance option to correct color for different
lighting conditions. When white balance is set to auto, the
camera will automatically compensate for different lighting
conditions. You can also set white balance to sunlight, cloudy,
tungsten, or fluorescent light.
Note: The white balance option can only be changed when
the camera mode is set to Manual. See “Auto or Manual
Mode” on page 35.
To set the white balance:
1. Turn the camera on and ensure that it is in Photo mode.
2. Press the menu button.
3. Use the joystick to highlight the WB option.
4. Use the joystick to select Auto, sunlight, cloudy, tungsten,
or fluorescent light (tungsten is incandescent light).
5. Press the menu button again to leave the menu.
4.1.7 Focus selection
Use the focus selection option to determine where the camera
focuses. The focus selection can be set to center, left, right, top
or bottom.
Note: The focus selection option can only be changed
when the camera mode is set to Manual. See “Auto or
Manual Mode” on page 35.
39
Picture menu
3. Use the joystick to highlight the QUALITY option.
4. Use the joystick to select high, medium, or low quality.
5. Press the menu button again to leave the menu.
Picture menu
To set the focus selection:
1. Turn the camera on and ensure that it is in Photo mode.
2. Press the menu button.
3. Use the joystick to highlight the FOCUS SEL. option.
4. Use the joystick to select center
, left
,right
top
,or bottom
.
5. Press the menu button again to leave the menu.
4.1.8 Exposure Value (EV)
Use the exposure, EV setting to change the exposure for your
pictures. Usually this value would be set to zero, but you might
want to increase the exposure to light up a subject with strong
back lighting, or decrease the exposure if taking a picture of
something very bright.
To set EV:
1. Turn the camera on and ensure that it is in Photo mode.
2. Press the menu button.
3. Use the joystick to highlight the EV option.
4. Use the joystick to move the slider up and down the scale.
5. Press the menu button again to leave the menu.
4.1.9 ISO adjustment
The ISO value is equivalent to the film speed setting on film
cameras. In bright conditions you would need a low ISO film.
Correspondingly, in low light conditions a high ISO is preferable.
When set to automatic, the camera sets the ISO value automatically.
40
To set the ISO value:
Picture menu
Note: The ISO option can only be changed when the camera mode is set to Manual. See “Auto or Manual
Mode” on page 35.
1. Turn the camera on and ensure that it is in Photo mode.
2. Press the menu button.
3. Use the joystick to highlight the ISO option.
4. Use the joystick to select automatic ,
ISO 100
,
ISO200
, or ISO 400
.
5. Press the menu button again to leave the menu.
4.1.10 Metering
Use the metering option to determine how the camera light
metering is used to calculate the exposure of the picture. The
metering can be set to an average value across the whole scene,
a center weighted value or a spot value in the center of the
scene.
Note: The metering option can only be changed when the
camera mode is set to Manual. See “Auto or Manual
Mode” on page 35.
1. Turn the camera on and ensure that it is in Photo mode.
2. Press the menu button.
3. Use the joystick to highlight the METERING option.
4. Use the joystick to select average, center weighted or spot
metering.
5. Press the menu button again to leave the menu.
41
Video menu
4.1.11 Date stamp
The date stamp function allows you to print a date on the captured
images.
To set the date stamp function:
1. Turn the camera on and ensure that it is in Photo mode.
2. Press the menu button.
3. Use the joystick to highlight the DATE STAMP option.
4. Use the joystick to select on or off.
5. Press the menu button again to leave the menu.
4.2 Video menu
4.2.1 Video and voice recorder mode
When the camera is in video mode it can be set to record video
with sound, or just voice with no video.
To set video and voice recorder mode:
1. Turn the camera on and ensure that it is in Video mode.
2. Press the menu button.
3. Use the joystick to highlight the MODE option.
4. Use the joystick to select video
or voice
5. Press the menu button again to leave the menu.
42
To set video quality:
1. Turn the camera on and ensure that it is in Video mode.
2. Press the menu button.
3. Use the joystick to highlight the QUALITY option.
4. Use the joystick to select high, medium, or low.
5. Press the menu button again to leave the menu.
Playback menu
4.2.3 Video quality
The video quality can be set to high, medium, or low.
The high quality options require more memory storage space.
4.3 Playback menu
The playback menu manages the files stored in the camera’s internal
memory or on the SD card.
4.3.1 Delete
The delete function deletes one or all of the files on the current
memory media.
To delete files:
1. Turn the camera on and ensure that it is in Playback mode.
2. Press the menu button.
3. Use the joystick to highlight the DELETE option.
4. Use the joystick to select Single, or All.
5. Press the center joystick to confirm.
If you are deleting all files, a message will be displayed asking
you to confirm the action. Use the joystick to high light YES and
press the center joystick to confirm.
All files will be deleted from the current media, or just the
last file viewed if you chose to delete a single file.
6. Press the menu button again to leave the menu.
43
Playback menu
Note: Once deleted, files cannot be recovered so make sure
you have a backup before you delete. Files that have
been protected will not be deleted. See “Protect” on
page 43 for more details about file protection.
4.3.2 Protect
Use the protect option to protect files from being accidentally
deleted.
To protect a file or files:
1. Turn the camera on and ensure that it is in Playback
mode.
2. Press the menu button.
3. Use the joystick to highlight the PROTECT option.
4. Use the joystick to select protect the current file, unprotect
the current file, protect all or unprotect all.
5. Press the menu button again to leave the menu.
Note: Files that have been protected cannot be deleted. To
delete a protected file, you must unprotect it first.
4.3.3 Slide show delay
Use the slide show view option to set the time each image is
displayed in the slide show. The time can be set from 1 to 10
seconds. See “Viewing a slide show” on page 31 for slide show
details.
To set the slide show view option:
1. Turn the camera on and set it to Playback mode.
2. Press the menu button.
44
4.3.4 Copy to card
Use the copy to card option to copy the contents of the internal
memory to the SD card.
To copy internal memory to an SD card:
1. Insert the SD card, turn the camera on and set it to
Playback mode.
2. Press the menu button.
3. Use the joystick to highlight the COPY TO CARD option.
4. Press the center joystick button to confirm the action.
5. Press the menu button again to leave the menu.
4.3.5 DPOF
Use the DPOF (Digital Print Order Format) function to tag
pictures stored in your memory card with print information.
You can tag all pictures to be printed or just the current picture.
You can also select how many copies you want printed and
whether the prints should include the date and time stamp.
DPOF requires a memory card. When all images to be
printed are tagged, remove the memory card for processing or
printing with a DPOF compatible printer.
45
Playback menu
3. Use the joystick to highlight the SLIDE SHOW option.
4. Use the joystick to select 10 SECONDS.
5. Press the menu button again to leave the menu.
Setup menu
To print images:
1. Turn the camera on and ensure that it is in Playback
mode.
2. Press the menu button.
3. Use the joystick to highlight the DPOF option.
4. Use the joystick to select DPOF one, or DPOF all.
5. Press the center joystick to confirm the action.
6. Use the joystick to select whether to include the date and time
stamp on the printed image.
7. Press the center joystick to confirm the action.
8. Use the joystick to confirm the action.
9. Press the center joystick to confirm the action. The DPOF
information is now stored
10. Press the menu button again to leave the menu.
4.4 Setup menu
The setup menu can be accessed from any camera mode and
is used to configure the miscellaneous camera functions.
4.4.1 Date and time
See “Setting the date and time” on page 8.
4.4.2 Date display
See “Setting the date display” on page 9.
4.4.3 Number reset
Use the number reset function to reset the file name numbers
to zero.
To reset the file numbering:
1. Turn the camera on.
2. Press the menu button.
46
Setup menu
3. Use the joystick to highlight the setup menu icon
4. Use the joystick to highlight the NUMBER RESET
option.
5. Use the joystick to select 000, or continue.
6. Press the menu button again to leave the menu.
4.4.4 Beep
See “Setting the beep function” on page 10
4.4.5 Language
See “Setting the language” on page 11.
4.4.6 Power saving
Use the power saving function to allow the camera automatically
switch itself off after a period of inactivity. You can turn the power
saving function off or select a period of 3 minutes, 5 minutes or 10
minutes.
To set the power saving function:
1. Turn the camera on.
2. Press the menu button.
3. Use the joystick to highlight the setup menu icon .
4. Use the joystick to highlight the POWER SAVING option.
5. Use the joystick to select OFF, 3 minutes, 5 minutes or 10
minutes.
6. Press the menu button again to leave the menu.
4.4.7 Default
Use the default option to restore all settings to the factory default.
47
Setup menu
To restore the factory default settings:
1.Turn the camera on.
2. Press the menu button.
3. Use the joystick to highlight the setup menu icon
4. Use the joystick to highlight the DEFAULT option.
5. Press the center joystick button to confirm the action.
6. Press the menu button again to leave the menu.
.
4.4.8 Format
Use the format option to format the current media. Formatting
will delete everything on the media.
To format the current media:
1. Turn the camera on.
2. Press the menu button.
3. Use the joystick to highlight the setup menu icon
4. Use the joystick to highlight the FORMAT option.
.
4.4.9 USB mode
Use the USB mode to determine whether the camera is connected
to a printer or a host PC. When connected to a PC, the
camera acts like a removable drive and files can be transferred
between the camera and host computer. When connected to a
compatible printer, images can be printed directly from the camera.
To set USB mode:
1. Turn the camera on.
2. Press the menu button.
3. Use the joystick to highlight the setup menu icon.
4. Use the joystick to highlight the USB MODE option.
5. Use the joystick to select PC, or printer.
6. Press the menu button again to leave the menu.
48
4.4.10 TV
To set the TV system:
1. Turn the camera on.
2. Press the menu button.
3. Use the joystick to highlight the setup menu icon
4. Use the joystick to highlight the TV option.
5. Use the joystick to select NTSC for the United States
(Europe uses PAL)
6. Press the menu button again to leave the menu.
49
.
Setup menu
Use the TV option to set the TV system for your geographic
location.
Drivers
5. Installing the Software and Drivers
5.1 Drivers
You will only need to install a driver for the camera if your
operating system is Windows 98SE or Windows ME.
Windows 2000 and Windows XP are plug and play operating
systems and do not require a driver to be manually loaded.
To load a driver:
1. Insert the supplied CD-ROM in the CD-ROM drive.
2. If the CD-ROM doesn’t automatically boot, use Windows
Explorer to execute the instngr.exe file in the root directory.
3. Click the install button to install the driver.
4. Follow the on-screen instructions.
5. Connect the camera to the computer using the USB cable
provided as described in “Connecting to a computer” on
page 15.
Note: When connecting the camera to a host PC running
Windows 2000 or Windows XP operating system,
connect the camera as described in step 5 above,
and the PC will install a driver automatically.
When the driver has been installed and the camera connected,
the camera memory and any installed SD card will appear as
removable disks in Windows Explorer. Files can be dragged and
dropped in the same way as with an ordinary disk.
50
To install Presto! Video Works 6:
1. Insert the supplied CD-ROM in the CD-ROM drive.
2. If the CD-ROM doesn’t automatically boot, use Windows
Explorer to execute the instngr.exe file in the root directory.
3. Click the install button to begin the installation process and
follow the on-screen instructions.
More information about Presto! Video Works 6 can be found in
the help files when the application is started.
5.3 Presto! Mr. Photo 3
Presto! Mr. Photo 3 is an advanced photo editing software
application.
To install Presto! Mr. Photo 3:
1. Insert the supplied CD-ROM in the CD-ROM drive.
2. If the CD-ROM doesn’t automatically boot, use Windows
Explorer to execute the instngr.exe file in the root directory.
3. Click the install button to begin the installation process and
follow the on-screen instructions.
More information about Presto! Mr. Photo 3 can be found
in the help files when the application is started.
51
Presto! Video Works 6
5.2 Presto! Video Works 6
Presto! Video Works 6 is an advanced software application for
editing video.
Specifications
Appendix A
Specifications
General
Imaging sensor
Active pixels
Storage media
5.1 Megapixel CCD sensor
4.9 Megapixel
Built-in 32 MB Flash memory
SD/MMC card (32/64/128/256/512/1G MB)
Sensor sensitivity Auto, ISO 100, 200, 400 equivalent, user
definable
Lens
3X optical zoom lens
Wide: f=5.8 mm, F/2.6 ~ 4.8
Tele: f=17.4 mm, F/4.3 ~ 7.6
Focal range 15.748 ~ infinity
ZP1~4:0.06~0.3m ZP5~7:0.18~0.3m (macro)
Still image
Formats: JPEG (EXIF), DCF, DPOF, Direct
Print (DPS)
Resolution: VGA, 2M, 3M, 4M, 5M, 8M
(firmware interpolation)
Quality: Fine, Normal, Basic
Movie clips
MPEG4
320 x 240 pixels, 30 fps
Audio
Support for MP3 audio format
Zoom
3x optical zoom, 4x digital zoom
LCD TFT screen 2.4-inch High resolution TFT (480 x 234
pixels)
Viewfinder
Real image optical viewfinder
52
Flash
2 – 8 Feet
Off/Auto/Force/Slow Sync/Force Red
Eye Reduction/Auto Red Eye Reduction
Specifications
General
White balance
Auto/sunny/cloudy/tungsten/fluorescent
EV compensation -2.0 EV ~ +2.0 EV (in 0.2 EV steps)
Self timer
2-10 seconds
PC interface
USB 2.0, full speed
TV out format
Shutter
NTSC/PAL
Mechanical and electronic shutter.
8 ~ 1/2000 second
Auto power off
off,3, 5, or 10 minutes (user definable)
Power supply
2 x AA alkaline batteries, CRV3 compatible
Dimension
4”(L) x 1.14”(D) x 2.28”(H)
Weight
<4.76 oz without batteries
53
System requirements
Appendix B
System requirements:
The camera requires a host PC with the following
specifications:
‧
‧
‧
‧
‧
‧
Windows® XP, 2000, ME, 98SE operating system
Intel® Pentium 166 MHz CPU or better
At least 32 MB of RAM
Standard USB 1.1 port or better
4 x speed CD-ROM drive or better
At least 10 MB of available disk space
Note: A USB 1.1 port will enable you to transfer files to and
from your host PC, but transfer speeds will be much
faster with a USB 2.0 port.
54
Type
Value
Description
Paper
256
257
258
259
260
Paper related error (default)
Paper is empty
Load Error – paper not loaded correctly
Eject Error – paper not ejected correctly
Media Error – paper not detected, paper skewed, roll paper cannot
261
262
263
cut or turn off
Paper jam
Paper nearly empty
Paper type / paper size combination not supported or paper found
in printer does not match the request
Ink
Hardware
File
512
513
514
515
768
769
770
771
772
773
774
775
776
777
1024
1025
1026
Ink related reason (default)
Ink empty
Ink low
Waste ink error (waste-ink reservoir full)
Hardware related error (default)
Fatal error
Service call
Printer unavailable (performing maintenance or
otherwise occupied)
Printer busy (processing a job from another source,
e.g., a PC)
Lever error (lever position not correct)
Cover open
No marking agent (e.g., missing print head)
Ink Cover open
No Ink Cartridge
File related error (default)
print Info error (internal protocol error)
File decode error (picture format of the specified
image cannot be decoded)
55
PictBridge errors
Appendix C:
PictBridge errors
SD card capacities
Appendix D:
SD card capacities
Photos:
Card Size
32MB
128MB
256MB
512MB
1GB
VGA
172
688
1367
2752
5504
2MP
28
142
284
568
1137
3MP
16
106
213
426
853
4MP
14
64
128
256
512
5MP
10
51
102
204
409
8MP
6
36
73
146
292
Photos(pcs)
Video 320x240 (30 fps):
Card Size
32MB
128MB
256MB
512MB
1GB
Times(Min)
1021
2529
5058
11012
20112
32MB
128MB
256MB
512MB
1GB
34
134
267
534
1067
MP3(@128 kbps):
Card Size
Times(Min)
56
SD card capacities
The number of pictures you can take varies depending on the
complexity of the scene being photographed.
The minutes of music that your card can hold depends on the
rate at which your songs were recorded. The standard bit rate for
MP3 recordings is 128 Kbps. The bit rate (Kbps) is determined by
the encoder software used to create your audio file. The higher the
bit rate, the better the audio quality.
To assure 100% SD card compatibility, we suggest using
SD cards sold through the DXG USA site. These cards
have been tested and are guaranteed to be compatible with
this device.
www.dxgusa.com/shop
57