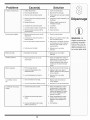
1
Safety ,, Set-Up ,, Operation ,, Adjustments ,, Maintenance ,, Troubleshooting ,, Parts Lists ,, Warranty
A
OF
A
O
ingle-Sta!e
now
Thrower
AL
Model
Model
Model
Model
Model
230,
240,
250,
260,
261,
$230
S240
S250
S260
S261
iMPORTANT
READ SAFETY
RULES AND iNSTRUCTiONS
CAREFULLY
BEFORE
OPERATION
Warning: This unit is equippedwith an internalcombustionengineand shouldnot be usedon or nearany unimprovedforest-covered,brushcoveredor grass-coveredland unlesstheengine'sexhaustsystemis equippedwith a sparkarrestermeetingapplicablelocalor statelaws(if any).
If a sparkarresteris used,it shouldbe maintainedin effectiveworkingorder by the operator.In theState of Californiathe aboveis requiredbylaw
(Section4442 of the CaliforniaPublicResourcesCode). Otherstatesmay havesimilarlaws.Federallaws applyon federallands.A sparkarrester
for the muffleris availablethroughyour nearestengineauthorizedservicedealeror contactthe servicedepartment,RO. Box361131Cleveland,
Ohio 44136-0019.
PRINTEDIN U.S.A.
For USCustomers: MTDLLC,P.O.BOX361131CLEVELAND,OHIO44136-0019
FORMNO 769-00805D
For CanadianCustomers: MTDProducts Ltd., P.O.BOX 1386,KITCHENER,ONTARION2G4J1
07/12/07
This Operator's Manual is an important part of your new snow thrower, it will help you assemble,
prepare and maintain the unit for best performance.
Please read and understand what it says.
Table of Contents
Safety Labels ......................................................
Safe Operation Practices ...................................
Set Up & Adjustment ..........................................
Know Your Snow Thrower ..................................
3
4
6
7
Adjustments
& Maintenance
...........................
Off-Season Storage ..........................................
Trouble Shooting ..............................................
illustrated Parts Lists .......................................
10
12
13
14
Operation
8
Warranty ............................................................
18
.............................................................
Finding and Recording Model Number
BEFOREYOU START ASSEMBLING
YOUR NEW EQUIPMENT,
please locate the model plate on the equipment and copy the
the model number and the serial number to the sample model
plate provided to the right. You can locate the model plate by
standing at the operating position and looking down at the
frame.
Model
Number
Num#ro
de mod#le
XXXXXXXXXXX
Serial
Num#ro
Number
de s#rier
XXXXXXXXXXX
MTD LLC
CLEVELAND, OH 44136
MTD PRODUCTS LIMITED
KITCHENER, ON N2G 4J1
USA-www.mtdproducts.com
CAN=www.mtdcanada.com
1-800=800-7310
1=800=668=1238
Customer Support
Please do NOTreturn
the unit to the retailer from which it was purchased,
without first contacting Customer Support.
If you have difficulty assembling this product or have any questions regarding the controls, operation or maintenanceof this unit,
you can seek help from the experts. Choose from the options below:
1.Visit www.mtdcanada.cafor many useful suggestions, click on Customer Support button.
2. Call a CustomerSupport Representative:For US Customers: 1-330-220-4MTD (4683)or 1-800-800-7310
For Canadian Customers" 1-800-668-1238
3. The engine manufacturer is responsiblefor all enigne-related issues with regards to performance, power-rating,specifications, warranty and service. Please refer to the engine manufacturer's Owner's/Operator's Manual, packedseparately with
your unit, for more information.
Please have your unit's model number and serial number ready when you call. See previous section to locate this information.
You will be asked to enter the serial number in order to processyour call.
2
FORTURNING,
NOTLiFTiNG
WARNING
This symbol points
out importantsafety
instructionswhich, if
not followed,could
endangerthe personal
safety and/or property
of yourselfand others.
Read and followall
instructionsin this
manual beforeattemptingto operate
this machine. Failure
to complywith these
instructionsmay result
in personalinjury.When
you see this symbol.
HEED ITS WARNING!
Your Responsibility
Restrict the use
of this power machine
to persons who read,
understand
and follow the warnings
and instructions
in this manual
and onthe machine.
3
WARNING: Engine Exhaust, some of its constituents, and certain vehicle components contain or emit chemicals known to State of Californiato cause cancer and
birth defects or other reproductiveharm.
DANGER: This machine was built to be operated according to the safe operation practices in this
manual. As with any type of power equipment, carelessness or error on the part of the operator can
result in serious injury. This machine is capable of amputating hands and feet and throwing objects.
Failureto observe the following safety instructions could result in serious injury or death.
Training
WARNING
This symbolpoints
out importantsafety
instructionswhich,
if not followed, could
endangerthe personal safetyand/or
property of yourself
and others. Read and
follow all instructions
inthismanualbefore
attemptingto operate
thismachine.Failure
i to complywith these
instructions
may
; resultin personal
injury.When you see
this symbol, HEED
iTS WARNING!
Your Responsibility
Restrict the use
of this power machine
to persons who read,
understand
I and follow the warnings
and instructions
in this manual
and on the machine.
Safe Handling
1. Read,understand,andfollowall instructionson the
machineandin the manual(s)beforeattemptingto
assembleand operate.Keepthis manualina safe placefor
futureandregularreferenceandfor orderingreplacement
parts.
2. Be familiarwithall controlsandtheir properoperation.
Knowhowto stopthe machineanddisengagethem quickly.
3. Neverallowchildrenunder14 yearsoldto operatethis
machine.Children14 yearsold andovershouldread and
understandthe instructionsandsafe operationpractices
inthis manualand on the machineand be trainedand
supervisedbyan adult.
4. Neverallowadultsto operatethis machinewithoutproper
instruction.
5. Thrownobjectscan causeserious personalinjury.Plan
yoursnow-throwingpatternto avoiddischargeof material
towardroads,bystandersandthe like.
6. Keepbystanders,helpers,pets andchildrenat least 75 feet
fromthe machinewhileit is in operation.Stopmachineif
anyoneentersthe area.
7. Exercisecautionto avoidslippingor falling,especially
when operatingin reverse.
of Gasoline
Toavoid personalinjury or propertydamage use extremecare
in handlinggasoline.Gasolineis extremelyflammableandthe
vaporsare explosive.Serious personalinjury can occur when
gasolineis spilled on yourselfor your clothes,whichcan ignite.
Washyourskin andchangeclothesimmediately.
a. Useonly an approvedgasolinecontainer.
b. Extinguishall cigarettes,cigars, pipes andothersources
of ignition.
c. Neverfuel machineindoors.
d. Neverremovegas cap or add fuel whilethe engineis hot
or running.
e. Allow engineto coolat leasttwo minutesbeforerefueling.
f. Neveroverfill fuel tank. Filltank to no morethan Y2inch
below bottomoffiller neckto providespacefor fuel
expansion.
g. Replacegasolinecap andtighten securely.
h. If gasolineis spilled,wipe it off the engine and equipment. Movemachineto another area.Wait 5 minutes
beforestartingthe engine.
i. Neverstorethe machineor fuel containerinside where
there is an openflame, sparkor pilot light (e.g.furnace,
waterheater,spaceheater,clothesdryeretc.).
j. Allow machineto cool at least5 minutesbeforestoring.
Preparation
1. Thoroughlyinspectthe area wherethe equipmentis to be
used. Removeall doormats,newspapers,sleds, boards,
wiresand otherforeignobjects,whichcould be tripped
overor thrown bythe auger/impeller.
2. Alwayswearsafetyglasses or eye shieldsduring
operationand whileperformingan adjustmentor repair
to protectyour eyes.Thrownobjectswhich ricochetcan
causeseriousinjury to the eyes.
3. Do not operatewithoutwearingadequatewinteroutergarments. Donot wearjewelry, long scarvesor otherloose
clothing,whichcould becomeentangledin movingparts.
Wearfootwearwhichwill improvefooting on slippery
surfaces.
4. Usea groundedthree-wireextensioncordand receptacle
forall units withelectric startengines.
5. Adjustcollectorhousingheight to cleargravel or crushed
rock surfaces.
6. Disengageall control leversbeforestartingthe engine.
7. Neverattemptto makeany adjustmentswhileengineis
running,exceptwherespecificallyrecommendedinthe
operator'smanual.
8. Let engine andmachineadjustto outdoortemperature
beforestartingto clearsnow.
4
Operation
Maintenance
1. Donot put hands or feet near rotatingparts, inthe
auger/impellerhousingor chuteassembly.Contactwiththe
rotatingparts can amputatehands andfeet.
2. The auger/impellercontrolleveris a safetydevice.Never
bypassits operation.Doingso makesthe machineunsafe
and may causepersonalinjury.
3. The controlleversmustoperate easilyin bothdirections
and automaticallyreturnto the disengagedpositionwhen
released.
& Storage
1. Nevertamper withsafetydevices.Checktheir proper
operationregularly.Referto the maintenanceandadjustmentsectionsof this manual.
2. Beforecleaning,repairing,or inspectingmachinedisengage
all control leversandstop the engine.Wait untilthe
auger/impellercometo a completestop.Disconnectthe
sparkplug wireand groundagainstthe engineto prevent
unintendedstarting.
3. Checkbolts and screwsfor propertightness at frequent
intervalsto keepthe machinein safe workingcondition.
Also,visuallyinspectmachinefor any damage.
4. Do not changethe engine governorsettingor over-speed
the engine.The governorcontrols the maximumsafe
operatingspeed of the engine.
5. Snowthrowershaveplatesand skidshoesare subjectto
wearanddamage. For yoursafetyprotection,frequently
check all componentsand replacewith originalequipment
manufacturer's(OEM) parts only."Use of partswhich do
not meetthe original equipmentspecificationsmaylead to
improperperformanceandcompromisesafety!"
6. Checkcontrols periodicallyto verify they engageand
disengageproperlyandadjust, if necessary.Referto the
adjustmentsection inthis operator'smanualfor instructions.
7. Maintainor replacesafetyandinstructionlabels, as necessary.
8. Observeproper disposallaws andregulationsfor gas, oil,
etc. to protectthe environment.
9. Priorto storing,run machinea few minutesto clearsnow
from machineand preventfreezeup of auger/impeller.
10. Neverstorethe machineor fuel containerinside where
thereis an openflame, sparkor pilot lightsuch as a water
heater,furnace, clothesdryeretc.
11. Alwaysreferto the operator'smanualfor proper instructions
on off-seasonstorage.
4. Neveroperate witha missingor damagedchuteassembly.
Keepall safetydevicesin place andworking.
5. Neverrunan engineindoorsor in a poorlyventilatedarea.
Engineexhaustcontainscarbonmonoxide,an odorlessand
deadly gas.
6. Donot operate machinewhile underthe influenceof alcohol
or drugs.
7. Mufflerandengine becomehot andcan causea burn.Do
not touch.
8. Exerciseextremecaution when operatingon or crossing
gravel surfaces.Stay alert for hidden hazardsor traffic.
9. Exercisecaution when changingdirectionandwhileoperating on slopes.
10. Plan yoursnow-throwingpatternto avoid dischargetowards
windows,walls, cars etc. Thus, avoidingpossibleproperty
damage or personalinjury causedby a ricochet.
11. Neverdirect dischargeat children,bystandersand pets or
allow anyonein front of the machine.
12. Donot overloadmachinecapacity byattemptingto clear
snow at too fast of a rate.
13. Neveroperatethis machinewithoutgoodvisibility or light.
Alwaysbe sure of yourfooting and keepa firm hold on the
handles.Walk, neverrun.
14. Disengagepowerto the auger/impellerwhentransportingor
not in use.
15. Neveroperate machineat hightransport speedson slippery
surfaces. Lookdownand behindand use care when
Do not modify
engine
Toavoid seriousinjury or death,do not modifyengine inany
way.Tamperingwiththe governorsettingcan leadto a runaway
engineandcauseit to operateat unsafespeeds.Nevertamper
withfactorysettingof enginegovernor.
backingup.
16. Ifthe machineshouldstartto vibrate abnormally,stop the
engine,disconnectthe sparkplug wire and groundit against
the engine.Inspectthoroughlyfor damage.Repairany
damage beforestartingandoperating.
17. Disengageall control leversandstop engine beforeyou
leavethe operatingposition (behindthe handles).Wait
untilthe auger/impellercomesto a completestop before
uncloggingthe chuteassembly,makingany adjustments,or
inspections.
18. Neverput yourhand in the dischargeor collectoropenings.
Alwaysuse the clean-outtool providedto unclogthe discharge opening.Donot unclogchuteassemblywhileengine
is running.Shut off engine and remainbehindhandlesuntil
all movingparts havestoppedbefore unclogging.
19. Useonly attachmentsandaccessoriesapprovedbythe
manufacturer(e.g. wheelweights,tire chains,cabs etc.).
20. If situationsoccurwhich are not coveredin this manual,use
care and goodjudgment. Call customerassistancefor the
nameof yournearestservicingdealer.
Notice
regarding
Emissions
Engineswhichare certifiedto complywithCaliforniaandfederal
EPAemissionregulationsfor SORE(SmallOff RoadEquipment)
arecertified to operateon regularunleadedgasoline,and may
includethe followingemissioncontrolsystems:EngineModification (EM)andThreeWayCatalyst(TWO)if so equipped.
Average
Useful
Life
Accordingto the ConsumerProductsSafetyCommission
(CPSC)andthe U.S.EnvironmentalProtectionAgency(EPA),
thisproducthas an Average UsefulLife of seven(7) years,or
60 hoursof operation.At the end of the Average UsefulLife,
buya newmachineor havethe machineinspectedannuallyby
an authorizedservicedealerto ensurethat all mechanicaland
safetysystemsare workingproperlyandnot wornexcessively.
Failureto do so can resultin accidents,injuriesor death.
5
WARNING
This symbol points
out important safety
instructions,which
if not followed, could
endanger the personal safety and/or
property of yourself
and others. Read and
follow all instructions
in this rnanuai before
attempting to operate
this machine. Failure
to complywith these
instructions may
result in personal
injury.When you see
this symbol, HEED
IT'S WARNING!
Your Responsibility
Restrict the use
of this power machine
to persons who read,
understand
and follow the warnings
and instructions
in this manual
and on the machine.
Contents
of Carton
Cartoncontentsare listedbelowwith part numbersin
parentheses,
1. TwoignitionKeys(725-0201)
2, 2,6oz Bottleof 2 CycleOil (737-04037)
3, ExtensionCord(if soequipped)(629-0236)
Adjustment
__IL
wire and groundit against the engineto
ARNING: Disconnectthe spark plug
preventunintended starting.
Positioning
the Upper Handle
1. Removepackingmaterial,if present.
2. Makingsurenot to pinchthe cablein the process,
pivotthe upper handleintothe operatingpositionas
illustrated
in Figure1 untilit clicksintoplace.
Figure 1
3. Tightenthewing knobsto securethe handle in place
as in Figure1.
NOTE: This Operator's
Manual covers several
models. Snow thrower
Assembling the Discharge
For shippingreasons,the snow throwerhasbeen
packagedwith the upperchute pivotedall the waydown.
Topivot itupward,proceedas follows:
features vary by
model. Not all features
discussed in this
,
manual are applicable
to all snow thrower
models.
,
NOTE: All references
Turnthe chute untilthe chuteopeningis facing
straightahead. Removethewing knoband carriage
boltfrom the lowerchute. See Figure2.
Pivotthe upperchute upwardoverthe lip on the lower
chuteso that there is NOgap betweenthe upper
chuteand the lowerchute.
3. Resecurewith the hardwarejust removed. If installed
correctly,your snowthrowershouldlook like Figure3.
i to left or right side of
the snow thrower is
IMPORTANT:Do not usethe chute handleto lift the
snowthrower.
i from the operating
position only.
Figure 2
IMPORTANT:
Do not usethe chute
handleto lift the snow
thrower.
Chute
f
Chute
Figure 3
6
f
",
AugerControl
ElectricStarter Button
<
Key
ChuteAssembl FuelCap_
Y__
Srl_
_
..
_
YJ/__
"" "_
_/_
_ t_,_/'
,//"
SparkPlugAccass
_
,.,
ChuteHandle
_,,_k,_._/_"J
/
_,_I
/
Shave
PI
//
Primer
, )
IMPORTANT:
_\
This
unitofruns
on a
mixture
gasoline
ChokeLever'_
/
and oil. Do NOT
_/_
)
operate
snowfirst
thrower the
without
-_
--
reading !,heengines
operator s manual for
instructions regarding proper fuel and
engine oil.
Figure 4
Spark
IMPORTANT:This unit runson a mixtureof gasoline
and oil. Do NOToperatethe snowthrowerwithoutfirst
readingthe enginesoperator'smanualfor instructions
regardingproperfueland engine oil.
Plug Cover
Removesparkplug coverto access sparkplug.
Auger
Whenengaged,the augersrotationdrawssnowinto the
augerhousingand throwsitout the dischargechute.
Activatingchoke controlclosesthechoke plateon
Rubberpaddleson the augersalso aid in propellingthe
carburetorand aids in startingengine.Referto the engine unitas they come in contactwith the pavement.
manualpackedwith unitfor moredetailedinstructions.
Choke
Lever
Auger Control
Primer
Handle
Depressingprimerforcesfueldirectlyinto engine's
carburetorto aid in cold-weatherstarting.Referto engine
manualpackedwith unitfor moredetailedinstructions.
Locatedon theupperhandle,theaugercontrolhandle
is usedto engageand disengagedriveto theauger.
Squeezethecontrolhandleagainstthe upperhandleto
engageauger;releaseit todisengage.
Ignition
Discharge
Key
Ignitionkeymustbe present,insertedinkey switch,and
in the "ON" positionfor engineto start.
Recoil
of thedischargechutebeforepivotingdischargechute
upwardor downward.Retightenthe knoboncedesired
positionhasbeenachieved.
Electric
Starter Button (If so equipped)
Pressingthe electric starterbutton engagesthe
engine'selectric starterwhen pluggedinto a 120V
power source
Starter
Plug (If so
Handle
handle.Pitchof the dischargechutecontrolsangleat
whichthesnowisthrown.Loosenwingknobon side
Starter
The starterhandleisusedto manuallystartthe engine,
Electric
Chute / Chute
Rotatethe dischargechuteto theleft or rightusingchute
Shave
Plate
Theshaveplatemaintainscontactwithpavementas
thesnowthrowerispropelled,allowingsnowcloseto
equipped)
Requiresuseof a two-prongoutdoorextensioncord
(packedwith the snowthrower)and a 120Vpower
source/walloutlet.
pavement'ssurfaceto bedischarged.
7
Electric
Before Starting
_
engine,read, understand, and follow
ARNING:Before startingthe
all instructionsand warnings on the
machine and in this manual.
_
1. Thespark plug wirewas disconnectedfor safety.
Attachsparkplug wireto sparkplug beforestarting.
2. Determinethat your housewiringis a three-wire
groundedsystem.Ask a licensedelectricianif you are
not certain.
Fuel And Oil Mixture
Read, understand,
and follow all instructions and warnings
onthe machineand
in this manual before
operating.
Use extreme care
when handling
gasoline. Gasoline is
extremely flammable
i and the vapors are
explosive. Never fuel
the machine indoors
or while the engine
is hot or running.
Extinguishcigarettes,
; cigars, pipes and
other sources of
ignition.
' The electric starter
must be used with a
properly grounded
three=prongreceptacleat alltimes to
3. If your homewiringsystem is not a three-wire
grounded system, do not usethis electricstarter
underany conditions.
handlinggasoline. Gasoline is
ARNING:Useextremecare
when
extremely
flammable and the vapors
are explosive. Never fuel machine
indoorsor while the engine is hot or
running.Extinguish cigarettes, cigars,
pipesand other sources of ignition.
IMPORTANT:This unitrunson a mixtureof gasoline
and oil. Do NOToperatethe snow throwerwithout
first readingthe enginesoperator'smanualfordetailed
instructions
regardingproperfueland engineoil.
Do NOToperatethe snow throwerwithoutthe fuelcap
securelyin placeon the fuel tank.
_
Positioning
Chute
4. If your homeelectricalsystemis grounded, but
a three-holereceptacleis not available,one should
be installedby a licensedelectricianbeforeusingthe
electricstarter.
5. If you havea grounded three-prong receptacle,
proceedas follows.
6. MoveChokeControlto the "Full"position.
7. PushPrimerthree (3) times, makingsureto cover
vent holewhen pushing.
the Discharge
1. Loosenthe wing f
knobfoundon
the left side of the
dischargechute
and pivotthe upper
chuteupwardor
downwardto the
desiredpitch.
Retightenthe
star knobbefore
operatingthe snow
thrower.
be used with a properly grounded
ARNING:The
electricstartermust
three-prong
receptacle
at all times to
avoid the possibilityof electric shock.
Follow all instructionscarefullypriorto
operating the electric starter.
1. Theelectricstarteris equippedwith a groundedthreewirepowercordand plug,and is designedto operate
on 120volt AC householdcurrent.
IMPORTANT:Forcompleteand detailedengine
starting,stoppingand storinginstructions,it is recommendedthat you readthe enginemanualalsoincluded
with this unit.
WARNING
Starter(if equipped)
8. Connectpowercord to switch boxon dash panel.
Plugthe otherend of powercord intoa three-prong
120-volt,grounded,AC receptacle.
9. Pushstarterbuttonto crank engine.
10.Whenenginestarts,releasestarterbutton,and move
chokegraduallyto 1/2Chokeuntil theengine runs
smoothly. NextmoveChoketo OFR If enginefalters,
movechokeimmediatelyto FULLand then gradually
to 1/2 thento OFF.
11.Disconnectthe powercord.Always unplug from the
outlet first, and then from the snow thrower.
Figure 5
Recoil Starter
1. Movechokeleverto FULLchokeposition(cold engine
start).
2. Rotatethe dischargechute to the left or rightusing
the chutehandle.See Figure5.
2. If engineis warm,placechokein OFF positioninstead
of FULL.
To Start Engine
1. Insertignitionkey intoslot.
3. PushPrimerthree (3) times, makingsureto cover
vent holewhen pushing.
2. Now followthe instructionsbelowas it pertainsto
yourunit. See Figure5 for locationof controls.
4. If engineis warm,pushprimerbuttononlyonce.
NOTE:Alwayscover venthole in primerbuttonwhen
pushing.Additionalprimingmaybe necessaryfor first
start if temperatureis below15 degreesFahrenheit.
avoidthe possibility
of electric shock. Fol-
i lowall instructions
5. Graspstarterhandleand pull rope out slowly,until it
pullsslightlyharder.Let rope rewindslowly.
i carefully prior to
operating the electric
starter.
6. Pull starterhandlerapidly.Do notallowhandleto snap
back.Allowit to rewindslowlywhilekeepinga firm
hold on the starterhandle.
8
7. As enginewarmsup and beginsto operateevenly,
rotatechoke leverslowlyto the 1/2 Chokeposition.
Whenthe enginebeginsto run smoothly,movethe
choketo the OFFposition.If enginefalters, return
to FULLchoke,then slowlymove to 1/2 thenOFF
position.
Operating
The pitchof the chute assemblycontrolsthe angleat
whichthe snow isthrown.
1. Loosenthe star knobfoundon the left sideof the
chuteassemblyand
pivotthe upper chute
upwardor downward
to the desiredpitch.
Retightenthe star
knobbeforeoperating
the snowthrower.
To Stop Engine
1. To stopengine,turnignitionkey counter-clockwise.
Disconnectthe sparkplug wirefrom the spark plug
to preventaccidentalstartingwhile equipmentis
unattended.
.
To help preventpossiblefreeze-up of starter,
proceedas follows:
1. Runenginefor a few minutesbeforestoppingto help
dry off anymoistureon the engine.
Positionthe chute
assemblyopening
Figure 6
by usingthe Chute
Handleto throw the snowin the desireddirection.
See inset Figure6.
2. ElectricStarter:Connectpowercord to switchbox
on engine,thento 120volt AC receptacle.With the
engine running,pushstarterbuttonand spin the
starterfor severalseconds.The unusualsoundmade
by spinningthe starterwill not harmengine or starter.
Disconnectthe powercord from receptaclefirst, and
then from switchbox.
.
the Snow Thrower
Clearing Snow
_
thrower with bystandersin front of or
ARNING:Neveroperatethe snow
near the dischargechute opening.
1. Engagethe auger by squeezingthe augercontrol
handleagainstthe upperhandle.See Figure5.
RecoilStarter:With engine running,pull starterrope
with a rapid,continuousfull arm strokethree or four
times. Pullingthe starterropewill producea loud
clatteringsound,which isnot harmfulto theengine or
starter.
2. Lift up slightlyon the handleto allowthe rubber
paddleson the auger to contactthe pavementand
propelthe snowthrowerforward.Pushingdownward
on the handlewill raisethe augersoff the ground
and stop forwardmotion.
4. Wipeall snowand moisturefrom the carburetorcover
in the areaof thecontrol levers.Also, movecontrol
leversbackand forth severaltimes. Leavechoke
control inthe FULLchoke position.
3. Dischargesnowdownwindwheneverpossible.
Slightlyoverlapeachpreviouslyclearedpath.
WARNING
Muffler'
engine
and
surroundingareas
become hot
can cause a burn,
Do not touch;
Never operate the
snow thrower with
bystanders in front of
or near the discharge
chute opening,
NOTE:Excessiveupwardpressureon the handlewill
result in prematurewearon the rubberauger blades
whichwouldnot be coveredbywarranty.
5. Removeignitionkey and disconnectsparkplug wireto
preventaccidentalstarting.
Operating
Tips
1. Runthe enginefor a few minutesbeforestoppingto
help dry anymoistureon the engine.
2. Cleanthe snowthrowerthoroughlyafter each use.
__i=
surroundingareas become hot and
ARNING:Muffler,engineand
can
causea burn.Be carefuland do
not touch when hot.
NOTE: Excessive
upward pressure on
the handle will result
in premature wear
on the rubber auger
blades which would
not be covered by
warranty.
9
Shave
PJate
1. Tocheckthe adjustmentof the shaveplate,placethe
uniton a levelsurface.The wheels,shaveplateand
augersshouldall contact levelsurface.Notethat if the
shaveplateisadjustedtoo high,snowmay blowunder
the housing,if the shavepJatewearsout excessively,
or the unit doesnot self-propeJ,the shaveplatemay
be too lowand needsto be adjusted.
NOTE:On newunits or units with a newshaveplate
installed,the augersmay be slightlyoff theground.
2. Toadjust,tip the snowthrowerback sothat it rests
on the handle.Loosenthe lock nuts and boltswhich
securethe shaveplateto the housing.See Figure7.
Movethe shaveplateto desiredpositionand retighten
the nuts and bolts securely.
Replacing
Figure 7
WARNING
i Disconnect the
spark plug wire
and ground it against
the engine to prevent
2. install newshaveplate,making suretheheadsof the
carriagebolts are on the insideof the housing.
3. Adjustthe shaveplateaccordingto instructions
above.Tightenthe nuts securelybeforeoperatingthe
snowthrower.
NEVER attem pt to
make any adjustments while
NOTE: Forinformation
regardingthe priceand availability
of ShavePlateKit referto customersupporton page 2.
the engine is runi ning, except where
specified in
the operator's
manual.
stop engine. Wait
until all moving
parts have come to a
complete stop.
Theshaveplate isattachedto the bottomof theauger
housingand is subjectto wear.It shouldbe checked
periodically.Thereare two wearingedgesand the shave
platecan be reversed.Referto Figure7.
1. Removethecarriageboltsand hexlock nuts which
attachit to the snowthrowerhousing.
i unintended starting.
Before servicing,
_repairing, or inspecting, disengage the
control bail and
Shave Plate
Control
CabJe
As a resultof both thecontrolcable and thedrive belt
stretchingdue to wear,periodicadjustmentsmaybe
necessary.
Figure 8
If the augerseemsto hesitatewhenrotatingwhilethe
enginemaintainsa constantspeed,an adjustmentis
necessary.Proceedas follows:
__
wire and groundit against the engine
ARNING:Disconnectthe spark plug
to preventunintended starting.
Theupper hole inthe control handleprovidesfor an
adjustmentin cabletension.Toadjust,disconnectthe
end of controlcablefrom the bottomhole in the control
_
any adjustments while the engineis
ARNING:NEVERattempt
to make
running,
except where specified
in the
operator's manual.
handleand reinsertit in the upper hole.Insertthe cable
from theoutsideas shownin Figure8. Testthe snow
throwerto seeif thereis a noticeabledifference.
Carburetor
,__
be made to the enginewhile the engine
WARNING:If
any
adjustments
needto
is running(e.g.
carburetor),
keep
clear of all moving parts.Be careful of
muffler, engine and other surrounding
heated surfaces.
1. Referto the separateengine manual,packedwith
yourunit, for carburetoradjustmentinformation.
10
Replacing
_
Belt
or inspecting,disengage the control
ARNING:Beforeservicing,repairing,
bail
and stop engine. Wait until all
moving parts have come to a complete
stop. Disconnect spark plug wire and
ground it against the engine to prevent
unintended starting.
iustments
Removethebeltcoverbyremovingfivehexscrews.See
Figure9. Thensimplypullthebeltoff bygraspingitfromthe
bottomoftheaugerpulleyandpullingoff. Onceyou remove
thebeltfromthepulleys,youcanpushdownonthe idler
pulleyto releasethebeltfromunderthebeltkeeper.
Belt Keeper
To replacethe beltfollow theseinstructionsand referto
Figure10:
1. Pushdownon the Idlerpulley.
J
To remove,pullbelt off here
Figure 9
2. Putbelton top of the augerpulley,underbelt keeper.
WARNING
3. Threadbeltaroundengine pulley.
4. Pushbeltoverbottomof augerpulley.
Before servicing;
repairing, or inspecting,
disengage the control
stopengine:
Reinstallthe belt cover removedearlier.
Engine
1. Referto the separateenginemanualfor all engine
maintenanceprocedures.
lall moving
2. Checkengineand snow throwerfrequentlyfor loose
hardware,and tightenas needed.
parts have come to a
complete stop. Distort'
Lubrication
nect spark plugwi e
and ground itagainst
the engine to prevent
unintended starting:
Lubricatepivotpoints on the controlhandleand the
extensionspringat the end of the controlcable with a
light oil once everyseasonand beforestorageof the
snow throwerat the end of the season.
Replacing
Auger Paddles
The snowthrowerauger'srubber paddlesare subjectto
wearand shouldbe replacedif any signsof excessive
wear is present.
Figure 10
f
IMPORTANT:Do NOTallowthe auger'srubberpaddles
to wearto the pointwhereportionsof the metal auger
itself cancome in contact with the pavement.Doingso
can result in seriousdamageto your snowthrower.
\ \,
iMPORTANT:
Do.oTallow
NOTE:For informationregardingthe priceand availability
of Auger Kit referto customersupporton page2.
augeCs rubber
paddles to wear
to the point where
portions of the metal
auger itself can come
in contact with the
Tochangethe rubberpaddles,proceedas follows:
1. Removethe existingrubberpaddlesby unscrewingthe
self-tappingscrewswhich securethemtothe auger.
See Figure11.
2. Securethe replacementrubberpaddlesto the auger
usingthe hardwareremovedearlier.
pavementl
oo ng
so
_..L
J
Figure 11
11
result in serious
damage to your snow
thrower.
Observethe following,whenpreparingyour snow
throwerfor off-seasonstorage:
• Drainfuel intoan approvedcontaineroutdoors,away
from anyopen flame.Allowengine to cool. Extinguishcigarettes,cigars,pipesand other sources
of ignitionpriorto drainingfuel. Fuelleft in engine
duringwarmweatherdeterioratesand willcause
seriousstartingproblems.
If unitis to be storedover30 days,preparefor
storageas instructedin the separateenginemanual
packedwithyour unit.
Runengine untilfueltank is emptyand enginestops
due to lack of fuel.
Removegasolinefromcarburetorand fuel tank to
preventgum depositsfrom formingon these parts
and causingpossiblemalfunctionof engine.
WARNING
Never store snow
i thrower with fuel
in tank indoors or
in poorly ventilated
areas, where fuel
fumes may reach an
open flame, spark
or pilot light as on a
furnace, water heater,
clothes dryer or gas
appliance.
Draincarburetorby pressingupwardon bowldrain,
locatedbelowthecarburetorcover.
• Fuelstabilizers,such as STA-BIL®,are an acceptable alternativein minimizingthe formationof fuel
gumdepositsduring storage.Do notdrain carburetor
if usinga fuel stabilizer.
• Wipeequipmentwith an oiled ragto preventrust.
• Removesparkplug and pour one ounceof engine
oil throughsparkplug hole into cylinder.Coverspark
plug hole with rag.Crankengine severaltimesto
distributeoil. Replacespark plug.
• Followthe lubricationrecommendationsfoundin the
MaintenanceSection.
Alwaysstorethe snowthrowerin a clean,dry area.
i Drain fuel into an
' approved container
outdoors, away from
any open flame. Be
certain engine is
i cool. Do not smoke.
i Fuel left in engine
i during warm weather
deteriorates and
will cause serious
starting problems.
Do not drain
carburetor if using
fuel stabilizer.
i Never use engine or
carburetor cleaning
products in the fuel
tank or permanent
damage may occur.
12
Problem
Cause
Fnrl n_.f_ .£f_
I
! '_-
Remedy
1: Choken0t'in ON positionl
1:
2. Sparkp!ugwiredisconnected.
2. c0nnect wire to Sparkplug.
&Fue! tank emptyor stale fue!.
4
M0veChoketoON postion:
&Fi!!
Enginen0t Primed.
41
tank with clean,fresh gaSOlinel
meengineas instructedin
OpeiatingYou[sniw ThrOwe
r
6 B!0#kedfue!
7_ SafetykeYnot in igniti0non engine:
8: FuelShut-offValveClosed.(If
I
Engine runs erratic
I
8. Open fuelshut-offvalve:
1. Unit runningon CHOKE.
1. Movechoke leverto OFFposition.
2. Blockedfuel line or stalefuel.
2. Cleanfuelline; fill tank with clean,
freshgasoline.
3. Wateror dirt in fuelsystem.
3. Drainfueltank. Refillwith
freshfuel.
4. Carburetorout of adjustment.
4. ContactServiceCenter.
NOTEi ThiSsection
addresses minor
service issues: For
further details, contact
customer assistancel
Eng ne overheats
1. Carburetornot adjustedproperly.
1. ContactServiceCenter.
1. Looseparts or damagedauger.
1. Stopengine immediatelyand
disconnectsparkplugwire.Tighten
all boltsand nuts.If vibration
.
Excessive
Vibration
continues,haveunit servicedby a
ServiceCenter.
Loss of power
1, Sparkplugwire loose.
1. Connectand tightenspark plug
wire
2. Gas capvent hole plugged.
•
Unit fails
to propel itself
Unit fai s
to d scharge snow
3. Exhaustport plugged.
2, Removeiceand snow from gas
.
cap. Be certainvent hole is clear
3, ContactServiceCenter.
1. Drivecontrolcablein needof adjust-
1. Adjustdrivecontrolcable. Referto
merit.
2. Drivebelt looseor damaged.
"Adjustments".
2. Replacedrive belt.
1, Chute assemby clogged.
1. Stopengine immediatelyand
disconnectspark plugwire. Clean
chuteassemblyand insideof
augerhousingwith clean-outtool
2. Foreignobjectlodged in auger.
3. Auger beltlooseor damaged.
13
or a stick.
2, Stopengine immediatelyand
disconnectspark plugwire.
Removeobject from auger.
3, Referto Maintenancesection.
ii i _iI_ ii
iVlodels/iVlodeles
230-260
14
i
Models/Modeles
REF
NO.
PART
NO.
N ° DE
REF
N ° DE
PIECE
1
2
3
*4
5
6
7
8
9
10
11
12
13
14
15
"16
17
"18
19
2O
21
22
23
24
230-260
DESCRIPTION
DESCRIPTION
629-0236
710-0627
710-1003
710-0805
Cord-Extension
110V3M 2 Prong
Hex L-Bolt 5/16-24 x .75 Gr. 5
Corde
Boulon
Hex Wash
Screw-Hex
710-3025
712-04063
725-0157
Screw-Hex
Cap 5/16-18
Flange Locknut 5/16-18
Cable Tie
Push Mount Tie
Vis taraudee
nO. 10 x 0,62 po de Ig.
Vis &t6te hex. 5/16-18 x 1,5 Qual. 5
Vis & t6te hex. 5/16-18 x 0,625 Qual. 5
726-0154
726-0205
736-0119
736-0242
747-04150
7511825510
751-0535
751-10023
751-10487
754-0367
754-0101A
756-0416B
756-04243
756-04232
790-00225
734-04070
684-04253
710-0106
710-0642
B-Tapp Scr #10 x .62" Lg.
Cap 5/16-18 x 1.5 Gr. 5
x .625 Gr. 5
Gr. F, Nylon
hex 5/16-24
Contre-ecrou
Attache-c&ble
x 0,75 Qual. 5
& embase
5/16-18
Qual. F, nylon
Oel:aClleS
Tige de poussoir
Collier
Rondelle frein 5/16
Hose Clamp
Lockwasher
5/16
!
Cupped Washer .340 ID x .872 OD x .06
Gas Tank Support Wire
Choke Lever Knob
Fuel Line
Fuel Tank 2 Quart
Rondelle creuse 0,340 Dt x 0,872 DE x 0,06
Fil de support - reservoir & carburant
Cap-Fuel
V-Belt
Capuchon
d'essence
Courroie trapezoidale
Courroie trapezoidale
V-Belt
1/2 x 35.0" Lg.
Pulley Half .625 ID x 2.25 OD
Pulley
V-Pulley 1/2 x 6,0" OD
2-cycle Mounting
Bracket
Wheel, 7 x 1.50 dia. Lug
Thd Forming
Manette du volet de depart
Ligne d'essence
Reservoir de carburant
de 2 quarts
Moitie poulie
Poulie
1/2 x 35,0 po de Ig
0,625 DI x 2,25 DE
Poulie, 1/2 x 6,0" DE
Support de montage
Roue, 7 x 1,50 diam. Lug
Ensemble de la tariere
Auger Assembly
Hex Screw 1/4-20 x 1.25 Gr. 5
Scr. 1/4-20 x .75 Lg.
For parts and/or
accessories refer to
Vis & t6te hexagonale
1/4-20 x 1,25 Qual 5
Vis taraudee
1/4-20 x 0,75 Ig.
710-0653
710-0896
710-1005
Hex Wash HD Tapp Scr 1/4-20 x .375
Hex B-Tap Scr 1/4-28 x .25" Lg
Hex Tap Scr. 1/4-14 x .5" Lg.
Vis auto-taraudeuse
hexagonale
1/4-20 x 0,375
Vis taraudee
a t6te hexagonale
1/4-28 x 0,25
Vis taraudee
1/4-14 x 0,50 po de Ig.
28
29
30
710-3008
712-04064
726-0299
732-0357A
31
32
33
34
736-0176
790-00249
736-0329
741-04188A
Hex Bolt 5/16-18 x .75" Lg. Gr. 5
Flange Locknut 1/4-20 Gr. F, Nylon
Push Cap x 1/2" Rod
Extension
Spring .33 OD x 1.12 Lg.
Flat Washer .25 ID x .93 OD x .125
Boulon hex. 5/16-18 x 0,75 po de Ig. Qual. 5
Contre-ecrou
a embase 1/4-20 Qual. F, nylon
Ecrou pour tige de 1/2 po
Ressort d'extension
0,33 DE x 1,12 po de Ig
Rondelle plate 0,25 DI x 0,93 DE x 0,125
Roulement a cuvette
Rondelle frein 1/4 Dt
35
36
37
684-04168
748-0234
712-0896
Idler Pulley (1/4" hole)
Shoulder Spacer
.25 Thk.
Hex Ins Jam L-Nut 1/4-28
38
39
40
41
42
750-04571
790-00238A
Shoulder Spacer
Idler Bracket
790-00045A
756-0625
Belt Cover
Cable Guide Roller
Rubber Paddle
25
26
27
43
44
735-04033
735-04032
684-04252
45
46
47
48
* 49
* 50
"51
* 52
Bearing
L-Wash
Cup
1/4 ID
Ball Bearing
.625 x 37 x 12.63
Roulement
a billes 0,625 x 37,0 x 12,63
Poulie du tendeur
(trou 1/4 po)
Entretoise
epaul6e
Contre-ecrou
de blocage 1/4-28
Entretoise
Support du tendeur
Couvercle
de courroie
Guide du c&ble
Pale en caoutchouc
7510009636
7512B1476
738-0924A
Rubber Spiral-Crescent
Auger Ass'y 21" w/Solid Shaft
(w/o rubber paddels)
Recoil Handle, Mitten
Primer
Hex Shld.Scr.1/4-28
x .375
Spirale en caoutchouc
- croissant
Ensemble de la tari@e de 21 po avec arbre solide
(sans pale en caoutchouc)
Poignee du demarreur
684-04227
750-04757
750-04758
750-0589
750-0716A
Auger Assembly
Housing
Auger Spacer LH
Auger Spacer RH
Spacer .325 ID x .625 OD x .88
Spacer .630 x .88 x .747
Logement
Entretoise
Entretoise
de la tariere
de la tariere
de la tariere
Entretoise
Entretoise
0,325 DI x 0,625 DE x 0,88
0,630 Dt x 0,88 DE x 0,747
Amorgeur
Vis a epaulement
*
98 cc Tec. only/98 cc Tec. seulement
** 139 cc Tec. only/139 cc Tec. seulement
1/4-28 x 0,375
- gauche
- droite
31A-2501
6,26,07
NOTE:Snowthrowerfeatures/componentsvary by model.NOTall parts listedaboveand picturedon the previous
pageare standardequipment.
15
Illustrated
Parts/
Pi ces
customer support on
page 2.
Adressez-vous au
,,Service apr_s-vente_>
la page 2 pour ce qui
;oncerne les pi_ces
et/ou accessoires.
iVlodels/iVlodeles
230-260
/
16
Models/Modeles
REF
NO.
N°DE
REF
PART
NO.
N°DE
PIECE
230-260
DESCRiPTiON
DESCRiPTiON
1
684-04127
Lower Chute Ass'y (Incl. #5-7 and 10)
2
3
710-04071
710-0451
4
5
6
712-04063
720-0284
731-04388A
Carriage Screw 5/16-18 x 1.0
Carriage Bolt 5/16-18 x .75
Flange Locknut 5/16-18 Gr. F, Nylon
7
731-04354B
Handle Knob Assembly
Chute Handle
Ens. de la goulotte inf. comp. les nos. 5-7 et 10
Vis ordinaire 5/16-18 x 1,0
Boulon ordinaire 5/16-18 x 0,75
Contre-ecrou a embase 5/16-18 Qual. F, nylon
Bouton
Poignee - goulotte d'ejection
Upper Chute
Flat Washer .349 ID x .879 OD x .063
Goulotte superieur
8
9
11
736-0159
710-04532
725-0157
13
14
747-04165
749-1092A
Gull Wing Bail
Upper Handle
Etier de suspension
15
684-04144
684-04042
16
17
710-04187
710-04669
Shroud Ass'y (98 cc)
Shroud Ass'y (139 cc)
Hi-Lo Screw 1/4-15 x .50
Capot (98 cc)
Capot (139 cc)
Vis 1/4-15 x 0,50
710-1882
712-0252
725-2018
Hex Wash B-Tapp Scr #10 x .62" Lg.
Hex Scr. 5/16-18 x 1.50 Gr. 5
Vis taraudee
18
19
20
21
22
736-0225
736-0400
24
25
736-0362
710-0134
Flat Washer .22 ID x 1.25
Carriage Bolt 1/4-20 x .62
Rondelle plate 0,218" DI x 0,62" DE
Rondelle plate 0,22 DI x 1,25
Boulon ordinaire 1/4-20 x 0,62
27
28
712-04064
731-1033
Hex L-Flanged Nut 1/4-20 Gr. F Nylon
Shave Plate
Contre-ecrou
Grattoir
29
30
736-0176
746-04237
Flat Washer .25 ID x .93 OD x .125
Control Cable
Rondelle plate 0,25 DI x 0,93 DE x 0,125
C&ble de la commande
31
32
749-04114
725-0201
Lower Handle
Ignition Key
Guidon inferieur
Clavette
33
34
731-1133C
731-04127
Spark Plug Cover
Lower Chute 5" Dia
Couvercle de la bougie
Goulotte d'ejection inferieur dia. 5 po
35
36
37
731-04353
731-04886
732-04111
Ring-Lower Chute
Chute Adapter 5" Dia
Chute Adjustment Spring
Bague - goulotte d'ejection inferieur
Adaptateur de la goulotte 5 po de dia.
Ressort d'ajustement - goulotte d'ejection
Carriage Bolt 5/16-18 x 2.0 Gr. 5
Cable Tie
Rondelle plate 0,349 DI x 0,879 DE x 0,063
Boulon ordinaire 5/16-18 x 2,0 Qual. 5
Attache-c&ble
Guidon superieur
Hex Nut 5/8-32 x .12 Special
Key Switch-Electric Start
L-Washer Internal
Flat Washer .218" ID x .62" OD
no. 10 x 0,62 po de Ig.
Vis hexagonal 5/16-18 x 1,50 Qual. 5
Ecrou a.six pans 5/8-32 x 0,12 speciale
Contacteur d'allumage - demarreur electrique
Rondelle frein interne
For parts and/or
accessories refer to
a embase 1/4-20 Qual. F nylon
customer support on
page 2.
Adressez-vous au
_Service apr_s-vente_,
la page 2 pour ce qui
concerne les pi_ces
et/ou accessoires.
31A-2502
6.27.07
17
TWO YEAR LiMiTED WARRANTY
The limited warranty set forth below is given by MTD LLC with respect to new merchandise purchased and used in the United
States and/or its territories and possessions, and by MTD Products Limited with respect to new merchandise purchased and
used in Canada and/or its territories and possessions (either entity respectively,"MTD").
MTD warrants this product (excluding its normal wear parts as described below) against defects in material and workmanship for a periodof two (2) years commencing on the date of original purchase and will, at its option, repair or replace, free
of charge, any part found to be defective in materials or workmanship. This limited warranty shall only apply if this product
has been operated and maintained in accordance with the Operator's Manual furnished with the product, and has not been
subject to misuse, abuse, commercial use, neglect, accident, improper maintenance, alteration, vandalism, theft, fire, water,
or damage because of other peril or natural disaster. Damageresulting from the installation or use of any part, accessory
or attachment not approved by MTD for use with the product(s) covered by this manualwill void your warranty as to any
resulting damage.
Failureto comply
with suggested
maintenance
and lubrication
specifications will
void warranty.
Normal wear parts are warranted to be free from defects in material and workmanship for a period of thirty (30) days from the
date of purchase. Normal wear parts include, but are not limited to items such as: batteries, belts, blades, blade adapters,
grass bags, rider deck wheels, seats, snow thrower skid shoes, friction wheels, shave plates, auger spiral rubber and tires.
HOW TO OBTAIN SERVICE: Warranty service is available, WITH PROOF OF PURCHASE, through your local authorized
service dealer. To locate the dealer inyour area;
In the U,S,A,: Check your Yellow Pages, or contact MTD LLCat RO. Box 361131,Cleveland, Ohio 44136-0019,or call
1-800-800-7310 or
1-330-220-4683 or log on to our Web site at www.mtdproducts.com.
In Canada: Contact MTD Products Limited, Kitchener, ON N2G 4J1, or call 1-800-668-1238 or log on to our Web site at
www.mtdcanada.com.
This limited warranty does not provide coverage in the following cases:
a. The engine or component parts thereof. These items may carry a separate manufacturer'swarranty. Refer to applicable
manufacturer's warranty for terms and conditions.
b. Log splitter pumps, valves, and cylinders have a separate one-year warranty.
c. Routine maintenance items such as lubricants, filters, blade sharpening, tune-ups, brake adjustments, clutch adjustments, deck adjustments, and normal deterioration of the exterior finish due to use or exposure.
d. Service completed by someone other than an authorizedservice dealer.
e. MTD does not extend any warranty for products sold or exported outside of the United States and/or Canada, and their
respective possessions and territories, except those sold through MTD's authorized channels of export distribution.
f. Replacement parts that are not genuine MTD parts.
g. Transportation charges and service calls.
h. If Products are used commercially. (MTD may separately offer Limited Commercial Warranties on certain select
products. Ask your dealer or retailer for details or contact MTD Service for more information.)
No implied warranty, including any implied warranty of merchantability of fitness for a particular purpose, applies after the applicable period of express written warranty above as to the parts as identified. No other express
warranty, whether written or oral, except as mentioned above, given by any person or entity, including a dealer or
retailer, with respect to any product, shall bind IVITD.During the period of the warranty, the exclusive remedy is
repair or replacement of the product as set forth above,
The provisions as set forth in this warranty provide the sole and exclusive remedy arising from the sale. MTD shall
not be liable for incidental or consequential loss or damage including, without limitation, expenses incurred for
substitute or replacement lawn care services or for rental expenses to temporarily replace a warranted product,
Some jurisdictions do not allow the exclusionor limitation of incidental or consequential damages, or limitations on how long
an implied warranty lasts, so the above exclusions or limitations may not apply to you.
In no event shall recovery of any kind be greater than the amount of the purchase price of the product sold. Alteration of
safety features of the product shall void this warranty. Youassume the risk and liability for loss, damage, or injury to you
and your property and/or to others and their property arising out of the misuse or inability to use the product.
This limited warranty shall not extend to anyone other than the original purchaser or to the person for whom it was purchased
as a gift.
HOW LOCAL LAWS RELATE TO THIS WARRANTY: This limited warranty gives you specific legal rights, and you may also
have other rights that vary in different jurisdictions.
IMPORTANT: Owner must present Original Proof of Purchase to obtain warranty coverage.
MTD LLC, P.O. BOX361131 CLEVELAND, OHiO 44136-0019; Phone: 1-800-800-7310, 1-330-220-4683
MTD Products Ltd., P.O. BOX 1386, KITCHENER, ON N2G 4J1; Phone: 1-800-668-1238
18
S6curit6
= Montage = Fonctionnernent
= Reglages,
Entretien
, Listes des pi_ces d6tach6es • Garantie
NO'T'|C
|
D" U||
, D_pannage
L|SA"r'|o
N
IViodeles
lVlodeles
Modeles
lVlodeles
Modeles
\
230,
240,
250,
260,
261,
S230
S240
S250
S260
S261
iMPORTANT
LISEZ ATTENTIVEMENT
iNSTRUCTiONS
LES REGLES
AVANT DE METTRE
DE SECURITE
EN MARCHE
ET LES
LA MACHINE.
Avertissement:Cet appareilest equipe d'unmoteur&combustioninterne.Pourcetteraison,il ne doltpas_tre utilisesur un terrainforestiernon
debroussailleou sur tout autreterrainrecouvertde broussaillesou d'herbess'il n'estpas equiped'un pare-etincellesconforme&toutesles loisapplicables& I'echellelocaleou de I'etat(le cas echeant).Toutpare-etincellesdolt _tremaintenuen parfaitetat de fonctionnementpar rutilisateur.L'!_tat
de Californierexigeen vertu du Codesur lesressourcespubliques4442 et 4443. D'autresloissimilairespeuvent_treen vigueurdanscertains
autresetats. Lesloisfederalessont applicablessurles terresfederales.Vouspouvezvousprocurerun pare-Oincelles& installer
sur le silencieux
aupresde la stationtechniqueagreeela plus procheou adressez-vousau serviceapres-vente,P.O. 361131,Cleveland,Ohio 44136-0019.
PRINTEDIN U.S.A.
For USCustomers: MTDLLC,P.O.BOX361131CLEVELAND,OHiO 44136-0019
For CanadianCustomers: MTD Products Ltd., P.O.BOX1386,KITCHENER,ON N2G4J1
FORMNO. 769-00805D
07/12/07
Cette notice d'utilisation est une piece importante de votre nouvel _quipement. Elle vous foumit les renseignements
n6cessaires _ I'assemblage,_ la preparation et _ rentretien de votre machine. Veuillezdonc la lire attentivement et
vous assurer de bien comprendre toutes les instructions.
Table des mati res
Etiquettes
............................................................
important consignes de s_curit6 ......................
instructions de montage ....................................
Connaitre votre souffleuse ................................
Utilisation
de la souffleuse
................................
R_glages
............................................................
Pour trouver
3
4
6
7
8
Entretien
de la souffleuse
................................
10
Remisage hors saison .....................................
D_pannage ........................................................
Garantie .............................................................
12
13
14
Pieces d_tach_es (voir la page 14
de la version anglaise de cette notice
d'utilisation
10
le nurn ro de module
Model
Number
Num_ro
de module
AVANTDE PROC¢:DER,AEASSEMBLAGEDE VOTRE
NOUVELLESOUFFLEUSE,
Iocaliser la plaque signaletique sur I'equipement,et recopier
le numero de modele et le numero de serie sur le modele
Serial
Num_ro
XXXXXXXXXXX
de plaque signaletiquefourni sur la droite. Pour Iocaliser la
plaque signal_tique,placez-vousderriere la souffieuse & la
poste de conduite et regardez & I'arrieredu ch&ssis de la
souffleuse.
USA=www.mtdproducts.com
CAN-www.mtdcanada.com
Number
de s_rier
XXXXXXXXXXX
MTD LLC
CLEVELAND, OH 44136
MTD PRODUCTS LIMITED
KITCHENER, ON N2G 4JI
1=800=800=7310
I=800-668-1238
Service apr s-vente
Veuillez retoumer
la machine au d6taillant
qui vous I'a vendue,
sans vous adresser
d'abord au service aprbs-vente.
Si I'assemblagede cette machine vous pose des problemes ou pour toute question concernant les commandes, le fonctionnement ou I'entretiende la machine, les specialistes sont & votre disposition. Choisissez I'une des options ci-dessous:
1. Visitez le site www.mtdcanada.caoQvous trouverez de nombreusessuggestions utiles. Cliquezsur le bouton Service apresvente.
2. Appelez un agent du service apres-vente au: Pour clients des Etats-Unis: 1-330-220-4MTD (4683)or 1-800-800-7310
Pour clients du Canada" 1-800-668-1238
3. Le fabricant du moteur est responsable de toutes les questions concernant les performances, la puissance indiquee, les
caracteristiquestechniques, la garantie et le service apres-vente du moteur. Pour plus de renseignements& ce sujet, veuillez
consulter la notice d'utilisationdu moteurfournie avec votre machine.
Pr@arez vos numeros de modele et de serie avant de tel@honer. Veuillezlire le chapitre precedent pour determiner
I'emplacementde ces numeros. On vous demanderad'enregistrer le numero de serie avant de pouvoir poursuivre votre consultation.
2
;
de¸¸¸¸
AVERTISSEIViENT
Ce symboleattire
votre attentionsur des
S
consignesdes_curit6
importantesqui, si elles
ne sont pas respect_es,
peuventmettreen
dangernon seulement
votre personneet vos
b ens, mais aussiceux
d autrUi.Pri_rede fire
toutesles instructions
figurant dans cette
notice d'utilisationavant
d'essayerde vous
servir de cette machine.
Le non-respectde
ces instructionspeut
entrafnerdes blessures
corporelles.
J!
RESPECTEZ
EAVERTiSSElViENT
QUI ACCOIViPAGNE
CE SYMBOLE!
Votre responsabilit_
Cette machine ne dolt
_tre utilis_eque par des
personnesqui peuvent
fire,comprendreet
respecterles avertissementset instructions
qui figurentdans cette
notice et sur la machine.
3
AVERTISSEMENT: Les gaz d'@happement de ce produit contiennent des
produits chimiques reconnusdans I'€:tatde Californie comme causant le cancer,
des anomaliescongenitales ou d'autres problemes lies a la reproduction.
DANGER: Cette machine dolt _tre utilis@ conformement aux consignes de s@urite qui figurent
dans la notice d'utilisation. Comme avectout appareil motorise, une negligence ou une erreur de la
part de I'utilisateurpeut entrafner des blessures graves. Cette machine peut amputer mains et pieds
et projeter des debris. Par cons@uent, le non-respect de ces consignes peut causer des blessures
corporelles graveset m_me mortelles.
Formation
7. N'essayezjamais de reglerle moteurpendantqu'il tourne(&
moinsd'indicationscontrairesde la part du fabricant).
8. Laissez lemoteuret lamachines'habituera.la temp@ature
ext@ieureavantde commencer&deblayer.
1. Assurez-vousde lire et de bien comprendretoutes les
instructionsqui figurentsur lamachineet dans lanotice
d'utilisationavantde la mettreen marche. Conservez
AVERTiSSElVlENT
Ce symbole attire
votre attentionsur des
consignesde s@urit_
importantesqui. si elles
ne sont pas respect_es.
peuventmettre en
dangernon seulement
votre personneet vos
biens, maisaussi ceux
d'autrui.Pri_rede fire
toutes les instructions
figurant dans cette
notice d'utilisationavant
d'essayerde vous
servir de cette machine.
Le non-respectde
ces instructionspeut
entrafnerdes blessures
corporelles.
RESPECTEZ
UAVERTISSEMENT
QUI ACCOMPAGNE
CE SYMBOLE!
Votre responsabilite
Cette machine ne dolt
@e utilis@que par des
personnesqui peuvent
lire,comprendreet
respecterles avertissementset instructions
qui figurentdans cette
noticeet sur la machine.
cette noticed'utilisation&un endroitsQrpour route
consultationult@ieureet pourcommanderdes pi@esde
rechange.
2. Familiarisez-vousavecles commandeset la bonne
utilisationde cettemachineavantde vous en servir.
Manipulation
de I'essence
Poureliminer toutrisque de blessuregrave,faites tres attention
en manipulantde I'essence.IIs'agitd'un produitextr_mement
inflammableet lesvapeursrisquentd'exploser.Vouspouvez
_tre grievementblessesi des @laboussuressur votre peau
ou sur vos v_tementss'enflammaient.Rincezvotrepeau et
changezimmediatementde v_tements.
a. Remisezle carburantdansdes bidonshomologues
seulement.
Appreneza.arr_terla machineet & debrayerrapidement
lescommandes.
3. Nepermettezjamais&des enfantsde moinsde 14ans
de se servirde la machine.Desadolescentsplus &ges
doiventlire la noticed'utilisation,bien cemprendrele
fonctionnementde la machineet respecterlesconsignes
de s@urite. IIsdoiventapprendre_.utiliser la machineet
s'enservir sous la surveillanceetroited'un adulte.
b. Eteignezroutecigarette ou pipe,toutcigare ou toute
autresourceincandescente.
c. Nefaites jamais le plein &I'int@ieur.
d. N'enlevezjamais le capuchond'essenceet n'ajoutezpas
d'essencependant quele moteurtourne.
e. Laissezle moteurrefroidir pendantau moinsdeux
minutesavantde faire le plein.
f. Nefaites jamais deborderle reservoir.Laissez un
espaced'un demi-pouceenvironpour permettre
I'expansiondu carburant.
g. Resserrezbien lecapuchond'essence.
h. En casde debordement,essuyezroute@laboussure
sur le moteuret la machine.D@lacezla machineet
attendez5 minutesavantde la remettreen marche.
4. Nepermettezjamais&des adultesne connaissantpas
bien lefonctionnementde la machinede s'en servir.
5. Les objetsprojetesparla machinepeuventcauser des
blessuresgraves.Pr@oyezde travailleren @itantde
projeterla neigevers la route,des spectateurs,etc.
6. Gardezlesspectateurs,les animauxde compagnieet les
enfantsa.unedistanced'au moins75 pieds de la machine
quandelle est en marche.Arr6tezla machinesi quelqu'un
s'approche.
7. Soyeztoujoursprudent pour ne pas glisser ou tomber,
surtouten reculant.
i. Ne remisezjamais la machineou les bidonsd'essence
a.I'int@ieurs'il y a uneflamme,une etincelleou une
veilleuse(dun chauffe-eau,un radiateur,un fourneau,
un @che-lingeou autreappareila.gaz).
j. Laissezla machinerefroidirpendantau moins5 minutes
avantde la remiser.
Preparation
1. Examinezsoigneusementla zone& deblayeret enlevez
tousles paillassons,traineaux,morceauxde bois,ills de
feret autresobjetssur lesquelsvous pourrieztrebucher
ou qui risquentd'etre projetespar la tariere/turbine.
2. Porteztoujoursdes lunettes de s@uriteen utilisantla
machineou en effectuantun reglageou une r@aration.
Unobjet peuten effet_tre projete,ricocheret vous
blesseraux yeux.
3. Netravaillezpas sans porterdes v_tementsd'hiver
adequats.Neportezpas de bijoux,d'@harpesIongues
ou de v_tementsamplesqui risquentde seprendreclans
lespieces en mouvement.Portezdes chaussuresqui
ameliorentvotre stabilitesur dessurfacesglissantes.
4. Utilisezune rallonge& 3ills et uneprisede courantmises
a.laterre avec toutesles machinesequipeesd'un moteur
a.demarreurelectrique.
5. Reglezla hauteurde I'habitaclepour evitertout contact
avecles surfacesen gravierou en pierreconcassee.
6. Debrayezroutesles commandesavantde mettre le
moteuren marche.
Utilisation
1. Neplacez jamais vosmainsou vospieds pres d'une
piece en mouvement,dans I'habitaclede latari@eou de
la turbineou clansla goulotted'ejection.Les pisces en
mouvementpeuventamputermainset pieds.
2. La manettede commandede I'ensemblede la tari@eet
de la turbineest un dispositifde s@urite. Necontournez
jamais son r61ece qui rendrait dangereuxI'emploide la
machineet pourraitcauserdes blessurescorporelles.
3. Toutesles manettesde commandedoiventfonctionner
facilementclansles deuxdirectionset revenirautomatiquement &la positionde debrayageIorsqu'ellessent rel&ch@s.
4. Netravaillezjamais sans lagoulotted'ejectionou si elle est
endommagee.Laisseztousles dispositifs de s@uriteen
place et assurez-vousqu'ils sont en bonetat.
4
5. Nefaites jamais fonctionnerla machinedans un local
clos ou mal a6recar les gaz d'@happementdu moteur
contiennentdu monoxydede carbone, un gaz inodoretres
dangereux.
6. Nevous servezpas de la machineapresavoir bu des
boissonsalcoolis@s ou apres avoirpris des medicaments.
7. Le silencieuxet lemoteurdeviennenttreschauds et
3.
peuventcauser des brt_lures.Ne lestouchez pas.
8. Soyezextr6mementprudenta proximitedes routes,allees
ou cheminsen gravier.Faitesattentionaux dangersnon
@identseta la circulation.
4.
5.
9. Faitestres attentionen changeantde directionet en travaillant sur une pente.
10. Pr@oyezde travailleren @itantde projeterla neigevers
des fen6tres,murs,voitures,etc. car lesdebris peuvent
ricocheret causerdes blessuresgraves ou des d6g&ts
mat@Ms.
6.
Debranchezlefil de la bougieet mettez-lea la terrepour
emp6chertout demarrageaccidentelpendantle nettoyage,
la r@arationou I'examende la machine.
Wrifiez regulierementque les boulonset vis sont bien
serreset maintenezlamachineen bon etatde marche.
Examinezsoigneusementla machinepour vous assurer
qu'ellen'est pas endommagee.
Ne modifiezpasle reglagedu regulateuret ne laissezpas
le moteurs'emballer,ce qui peut6tre dangereux.
Les plaquesde raclageet lespatinsde lasouffieuse
s'usentavec I'usage.Parmesurede s@urit6, v@ifiez
souventtousles composantset remplacez-lespar des
pieces authentiquesseulement,lJutilisationde pi@es qui
ne sont pas conformesaux sp@ificationsde I'equipement
d'originepeuventdonnerlieu a.de mauvaisesperformances
et compromettrela s@urit6de I'utilisateur.
Wrifiez frequemmentqueles commandesfonctionnentbien
et faites les [email protected] chapitre
<_R6glages>>
dansla noticed'utilisationde la machine.
Prenezsoin des etiquettesde s@urit6et d'instructionset
remplacez-lesau besoin.
Respectezles reglementsconcernantI'eliminationdes
d@hetset liquides qui risquentde nuire a la natureeta.
I'environnement.
11. Nedirigezjamais la neigevers des enfants,des spectateurs
et des animauxde compagnieet ne permettezjamais a.
7.
quiconquede se tenirdevant la machine.
12. Nefatiquez pas lamachineen essayantde deblayerla
neigetrop rapidement.
8.
13. N'utilisezpas la machinesi lavisibilite est mauvaiseou si la
lumiereest insuffisante.Gardeztoujoursun bon equilibreet
9. Laissezla machinefonctionnerpendantquelquesminutes
tenez fermementleguidon. Marchez,ne courrezpas.
pour eliminerla neigede latariere et @iterque I'ensemble
14. Debrayezlacommandede I'ensemblede la tari@eet de la
de lata@re etde la turbinene gele avantde remiserla
turbine pourtransporterla machineet Iorsqu'ellen'est pas
souffleuse.
utilisee.
10. Ne remisezjamais la machineou les bidonsd'essencea.
15. Ned@lacezjamais rapidementla souffleusesur des
I'interieurs'il y a unefiamme,une etincelleou uneveilleuse
surfacesglissantes.Soyezprudent en reculant.
(d'un chauffe-eau,un radiateur,un fourneau,un @che16.Arr6tez le moteur,debranchezlefil de labougie et mettez-le
linge ou autreappareila.gaz).
a.laterre contrele moteursi lamachinecommence
11. Consulteztoujoursla noticed'utilisationquant aux instrucvibrer de fa_onanormale.V@ifiezque la machinen'est pas
tions de remisagehors-saison.
endommagee.R@areztoutd6g&t@entuelavantde la
remettreen marche.
Ne rnodifiez
pas le rnoteur.
17. Debrayezrouteslescommandeset arr6tezle moteuravant
Poureviterrouteblessuregraveou fatale,ne modifiezpas du
de quitterle postede conduite(derrierelesguidons).
tout le moteur.Toutemodificationdu reglagedu regulateurpeut
Attendezque lataft@e/turbinese soitcompletement
provoquerI'emballementdu moteuret entrainerson foncimmobilis@avant de deboucherlagoulotted'ejection,de
tionnementa
des vitessesdangereuses.Nemodifiezjamais le
faire un ajustementquelconqueou d'examinerla machine.
reglagede I'usinedu regulateur.
18. Neplacez jamais votremaindarts la goulotted'ejectionou
presde I'admission.UtiliseztoujoursI'outilde degagement
pour deboucherI'ouverturede la goulotte. Nedebouchez
pas lagoulotte d'ejectionpendantque le moteurtourne.
Arr6tez le guidonjusqu'a,ce querouteslespieces en
mouvementsesoient immobilis@savantde deboucherla
goulotte.
19. N'utilisezque des accessoireshomologuespar le fabricant
de la machine.(ex.poids de roues,chaines,cabine etc.)
20. Faitestoujours preuvede bonsens dansdes situations
qui n'ontpas 6re abord@spar cette noticed'utilisation.
Adressez-vousau serviceapres-ventepourobtenir le nom
du concessionnairele plus prochede chezvous.
Avis concernant
les 6missions
de gaz
Les moteurscertifiesconformesaux normesregulatricesde
la Californieet de I'agenceEPAf6deralespourSORE(petit
equipementhorsroute)sont certifiespour fonctionneravec
de I'essencesansplomb ordinaireet peuvent6tre dotesdes
systemesde contr61edes emissionsde gazsuivants:Engine
Modification(EM)et ThreeWayCatalyst(TWC)lecas @h6ant.
Dur6e
Ce symboleattire
votre attentionsur des
consignesdes@urit6
importantesqui. si elles
ne sont pas respect6es,
peuventmettreen
dangernon seulement
votre personneet vos
biens, mais aussiceux
d'autrui.P@re de lire
toutes les instructions
figurant dans cette
notice d'utilisationavant
d'essayerde vous
servir de cette machine.
Le non-respectde
ces instructionspeut
entratnerdes blessures
corporelles.
RESPECTEZ
LAVERTISSEMENT
GUI ACCOMPAGNE
CE SYMBOLE!
de vie utile rnoyenne
D'apresla ConsumerProductsSafetyCommission(CPSC
- Commissionsur la s@urit6des pro@itsde consommation)
et la "U.S.EnvironmentalProtectionAgency"(EPA- Agence
am@icainede protectionde I'environnement),ce produita une
dureede vie utilemoyennede sept (7)ans, ou 60 heuresde
Entretien et Rernisage
fonctionnement.Au terme de cettedureede vie utilemoyenne,
1. Nemodifiezjamais lesdispositifs de s6curite.Wrifiez
achetezunemachineneuveou faites inspecterlamachine
souvent qu'ils fonctionnentcorrectement.Consultezles
chaqueann@ parune stationtechniqueagre6epourvousaschapitresconcemant I'entretienet les reglagesclanscette
surerque tousles dispositifsm@aniqueset de s@urit6sont en
noticed'utilisation.
bonetatde marcheet ne sont pas usesde fa{;onexcessive.Le
2. Avant de nettoyer,de r@arer ou d'examinerlamachine,de- non-respectde ces recommandationspeutcauser des accidents
brayezroutesles commandeset arr6tezle moteur.Attendez et des blessuresgravesou mortelles.
que la tariere/turbinese soit completementimmobilisee.
5
AVERTISSEMENT
Votre responsabi_ite
Cette machiqe ne dolt
_tre utilis6eque par des
personnesqui peuvent
life, comprendreet
respecterles avertissementset instructions
qui figurentdans cette
notice et sur la machine.
'i
"
_
CONTENUDELA CARTON
Les piecessont enumereesci-dessousavec le numero
de pieceapparaffentreparenthesus.
1. Deuxcles (725-0201)
2. Bouteilled'huile,2 temps,2,60oz. (737-04037)
3. Rallonge(le cas echeant)(629-0236)
__i
ia bougie et mettez le _ la masse contre
VERTISSEMENT:D_branchezle fil de
le moteur, pour emp6cher tout d_marrage accidentel.
Positionnez
le guidon superieur
1. Enleveztoute garnitured'expeditioneventuelle.
2. Relevezle guidon superieurdartsla directionindiquee
A la Figure1jusqu'ace qu'il s'emboffea la positionde
travail.Faitesattentionde ne paspincerle cable.
,_,
REIVlARQUE:Cette
notice d utilisation cou-
,J
3. Serrezlesbouton.
Figure 1
vre plusieurs modules.
Les traits du souffleuse
varient par le modele.
Pas toutes les traits
discut6es dans ce
installation
Pourexpedier,la souffleusea eteempaqueteavecla
goulottesuperieurepivoterentierementen has, comme
A la Figure2. Pourle faire pivotervers le haut, procedez
cornmesuit:
1. Tournezlagoulottejusqu'&ce que I'ouverturede la
goulotted'ejectionface I'avantde la machine.Retirez
le boutonet le boulonordinairede la partieinferieure
de la goulotte.Voir la Figure2.
notice sont applicables
&tous les modules de
souffleuse,
REMARQUE: Les
/
//
c6t_s droit et gauche
de la souffleuse sont
de la goulotte
/
/,'
/
2. Faitespivoterla goulottesuperieureau- dessusde le
rebordsur la goulotteinferieure
pour qu'il n'yait plus
d'espaceentreles deuxparties.
d_termin_s du poste
de conduite, derriere la
souffleuse.
3. Attachezavec la boulonnerieque vousvenez de
retirer.
iMPORTANT:Ne soulevezpas la machinepar la poignee
de la goulotte.
IMPORTANT:
Ne soulevez pas la
machine par la poignee
de la goulotte.
Figure 3
6
Manettede commande
Demarreurelectrique
(le cas echeant)
Poigneedu demarreur
Bouchonde carburant
Amor{;eur
votre
souffleUse
Bouchonde bougie
Goulotted'ejection
de d@art
IMPORTANT: Cette
machine fonctionne
Plaque de raclage
Tariere
Figure 4
IMPORTANT:Cettemachinefonctionnesur un melange
d'essenceet I'huile.NEFAITESPASfonctionnerla
souffleusesansavoirconsulterla noticed'utilisationdu
moteurpourles instructionsquantau carburantapproprie
et I'huilede moteur.
Manette
Acc_s a la bougie
La bougiesetrouve sous le couvercle.
Tariere
Lorsqu'ellessont enclenchees,les tarieresamenent
la neigedarts I'habitacleen tournantet la neigeest
ensuiteevacueepar la goulotted'ejection.Les aubes
en caoutchoucdestarieres permettede faireavancer
la souffleusequandellestouchentla surface&deblayer.
du volet de d_part
La manettedu volet de departpermetde fermerle volet
du carburateurce qui facilite le demarrage.Consultezla
noticed'utilisationdu moteurqui accompagnela machine
Manette de commande
des tarieres
pourplus de renseignements.
Elle se trouvesur le guidon superieuret sert &embrayer
Amorgeur
ou a.debrayerlestarieres.Serrezla manettecontre le
Lenfoncementdu boutond'amorcageforce le carburant
guidonsuperieurpourembrayerlestarieres,I_.chez-la
directementdansle carburateurdu moteurpouraider
pour lesdebrayer.
& fairedemarrerle moteuren tempsfroid. Consultezla
noticed'utilisationdu moteur.
Goulotte d'_jection/Poign_e
de la
goulotte
Cl6 de contact
La cle de contactest un dispositifde securit& Elledolt
_tre complNementenfonceepour mettrele moteuren
marche.Retirezla cle quand la souffleusen'estpas
utilisee.N'essayezpasde tournerla cl&
Demarreur
d'6jection
Utilisezla manettede la goulotted'ejectionpour la faire
tournervers la droiteou vers la gauche.L'anglede la
goulotted'ejectiondeterminela distance&laquelle la
neigeest projetee.Redressezla goulottepour projeter
la neigeplusloin ou abaissez-lapour la projeterplus
pres. Desserrezle boutonsur le c6te de la goulotte
d'ejectionpour I'ajuster.Inclinezla goulotte& la position
voulueet resserrezle bouton.
a lanceur
Pourfairedemarrerle moteurmanuellement.
Dernarreur
_lectrique(le
cas _ch_ant)
Pourfairedemarrerun moteuravecune sourcede
courantde 120V
Plaque de raclage
Elle maintientle contact avecle sol etfacilite le
degagemente la neigeprochede la surface&deblayer
_lectrique
ExigeI'utilisationd'une rallonge& 3 fiches pour I'exterieur au fur et _.mesureque la souffleuseavance.
et unesourcede courantde 120V.
Prise pour d_marrage
7
sur un melange
d'essence et I'huile.
NE FAITES PASfonctionner la souffleuse
sans avoir consulter
la notice d'utilisation
du moteur pour les
instructionsq uant au
carburant appropri_
et I'huile de moteur.
2. Suivezmaintenantlesinstructions
ci-dessouscomme
Avant le demarrage
_
Utilisation
de la
AVERTISSEMENT
Lisez, comprenez,
et suiveztoutesles
instructions et les
consignes sur la
machine et darts
ce notice avant le
fonctionnement.
Faites tr_s attention
en manipulant de
I'essence. L'essence
est extr_mement
inflammable et les vapeurs sont explosif.
Ne faites jamais le
piein d"essence
I'int_rieur, pendant
que le moteur tourne
ou quand le moteur
est chaud. I_teignez
toute cigarettes ou
pipe, tout cigare ou
toute autre source
incandescente.
Le d_marreur _lectrique (en option)
dolt _tre utilis_ avec
une prise de courant
trois fils reli_ _ la
terre _ tout instant,
pour eviter la possibilit6 d'une d_charge
_lectrique. Suivez soigneusement toutes
les instructionsavant
d'utiliser le demarreur
_lectrique.
il s'appliquea.votre machine.Voir la Figure5 pour la
positiondescommandes.
mencer le moteur, lisez, comprenez
etVERTISSEMENT:
suiveztoutes lesAinstructions
vantde comet les
consignessur la machine et dartsce
noticeavant le fonctionnement.
D_marrage
1. Le fil de bougied'allumagea ete debranchepour
la sOrete.Attachezle fil de bougied'allumagea.la
bougied'allumageavantde commencer.
IMPORTANT:Nousvous conseillonsde lire la notice
d'utilisationdu moteur,fournieavec la machine,
pour obtenirdes instructionscompleteset detaillees
concernantla raiseen marcheet I'arr_tdu moteurainsi
que son remisage.
Pleins d'essence
_ii_lLiillb
_lectrique (en option)doit _tre utilis_
VERTISSEMENT:Led_marreur
avec une prisede courant_ trois fils
reli__ la terre _ tout instant,pour _viter
la possibilit_ d'une d_charge_lectrique.
Suivezsoigneusementtoutes les
instructionsavant d'utiliser le d_mar-
reur_lectrique,
1. Cedemarreurest equiped'un fil et d'uneprise
electriquea.trois ills et il est conqupour fonctionner
sur un courantde 120volts,C.A.
et d'huile
2. Wrifiez que le c_blagede votremaisoncomporte
trois fil reliesa la terre.Si vous n'estpas certain,
renseignez-vousaupresd'un electricien.
en manipulant de Fessence.[.'essence
_htb
VERTISSEMENT:
Faitestr_s et
attention
est
extr_mement inflammable
les
vapeurssont Fexplosif. Nefaites
jamaisle plein d'essence _ Fint_rieur,
pendantque le moteur tourne ou
quand le moteur est chaud.Ne fumez
pasen faisant le pleind'essence.
IMPORTANT:Cettemachinefonctionne
sur un melanged'essenceet I'huile.NE FAITESPAS
fonctionnerla souffleusesansavoirconsulterla notice
d'utilisationdu moteurpour les instructions
quantau
carburantapproprieet I'huilede moteur.
Nefaites PASfonctionnerla souffleusesans avoir
bien serrezle bouchonde carburantsurle reservoir&
carburant.
3 Si le c_blagede votre maison n'est pas un
syst_me _ trois fils reli_s_ laterre, n'utilisezen
aucuncas ce demarreurelectrique.
4. Si votre syst_me est reli_ _ laterre, maisil n'y a pas
de prise a troistrous a.rendroitou le demarreurdolt
normalement_tre utilise,faites-eninstallerune par un
electricienqualifie.
5 Si vousavez une prisede courant_ trois trous
reli_ _ la terre, procedezcommesuit:
6. Tournezle boutondu volet de depart& la position
VOLETPLEIN.
7. Appuyezlentementtrois (3) fois sur leboutonde
I'amorceur.CouvreztoujoursI'eventdu boutonde
I'amorceuren appuyant.
Montage de la goulotte
d'ejection
8. Branchezle fil electriquedansle commutateur,sur
le moteur.BranchezI'autreextremitedu fil dansune
prisede courantde 120volts C.A.& trois trous,mise&
la terre.
1. Desserrezle boutonen forme d'Ooilequi se trouve
sur le c6te gauchede la goulotte d'ejectionet faites
pivoterla goulotte
superieurvers le
hautou de hauten
hasau direction
desirable.Reserrez
le boutonen forme
d'etoileavantle
fonctionnementde
la souffleuse.
2. Tournezlagoulotte ,.
d'ejectionvers la
droiteou vers la
gauche& raide de
la poigneede la
goulotte.Voir la Figure5.
_lectrique
(le cas 6ch_ant)
9. Enfoncezle boutondu demarreurpour fairetournerle
moteur.Quandle moteurdemarre,I_.chezle bouton
du demarreuret tournezprogressivementle boutondu
volet de depart& la positionSANSVOLET.
10.Si le moteurhesite,deplacezimmediatement
le
boutondu voletde depart& lapositionVOLETPLEIN,
puis revenezprogressivement& la positionSANS
VOLET.
j
11.D_brancheztoujours d'abord le fil _lectrique
de la prisede courantreli__ la terre, puis de la
souffleuse,
Figure 5
Dernarreur a lanceur
1. Tournezle boutondu volet de departa la position
VOLETPLEIN(demarrageAfroid).
Mise en rnarche du moteur
2. Si le moteurest chaud,tournezle boutondu voletde
departa la positionSANSVOLET.
1. Enfoncezlacle de contact.
8
3. Appuyezlentementdeuxou trois (3) fois sur le bouton
de ramorceurpour demarrage& froid.
Utilisation
de la souffleuse
La distancede projectionde la neigepout_tre modifiee
en relevantou abaissantla goulottesuperieur.
1. Desserrezle bouton& en forme d'etoilequi se trouve
surle c6te gauchede la goulotted'ejectionet faites
pivoterla goulottesuperieurvers ,e hautou de haut
en has au directiondesirable.Reserrezle bouton
en formed'etoileavantle fonctionnementde la
souffieuse.
4. Sile moteurestchaud, appuyezune seulefois sur le
boutonde ramorceur.
REMARQUE:Couvreztoujoursreventdu boutonde
ramorceuren appuyant.Un amor£agesupplementaire
pout_trenecessaireIorsdu premierdemarragesi la
temperatureest inferieure& 15°F(-9°C).
5. Tirez lentementsur la poigneedu demarreurjusqu&
ce que vous sentiezune legereresistance.Laissezla
cordes'enroulerlentement.
Utilisation
de la
souffleuse
Positionnezrouverturede la goulotted'ejection&
raide de la poigneede la goulotted'ejectionpour
projeterla neigea rendroitvoulu.Voir la Figure4A &
la page7.
6. Tirez a.nouveau,mais rapidement.Ne laissezpas
la poigneeclaquercontre la souffieuse.Laissezla
cordes'enroulerlentementen retenantla poigneedu
demarreur.
Deblayage
de la neige
7. Au fur eta mesureque le moteurchauffeet quand il
Projetezla neigedans le sons du vent dartsla mesure
commence& tournerregulierement,tournezlentement du possible.
le boutondu voletde departvers la positionSANS
VOLET.Sile moteurhesite,tournez& nouveaule
fonctionner la souffleuse avec des
VERTISSEMENT:
efaites
jamais
boutondu volet de depart& la positionVOLETPLEIN, __k
spectateurs
devantNou
pros de
puisrevenezlentement&la positionSANSVOLET.
rouverture de la goulotted'_jection.
1. Pressezla manette
Pour arr_ter le moteur
de commandocontre
1. Pourarr_terlemoteur,tournez la clevers la position
le guidonsuperieur
"OFF"(ARREST).
Debranchezle fil de labougiepour
pour enclencher
emp_chertout demarrageaccidentel.
lostarieres.Voir la
Pour emp_cherle d_marreur de geler, proc_dez
comme suit:
Figure6.
2. Soulevez-vous
1. Laisseztournerle moteurpourpendantquelques
minutespour sechertoute rhumiditequi auraitpu s'y
accumuler.
legerementsur le
guidonsuperieurpour
Figure 6
permettrela tariere
d'entreren contactavec le trottoiret propulsezla
souffleuseen avant.Appuyezsur le guidonpour
releverla tariereet pour arr_terle mouvementde la
souffieuse.
2. D_marreur _lectrique (on option): Branchezlefil
electriquesur le commutateurdu moteur,puis& une
prisede courantde 120voltsC.A. Quandle moteur
tourne,appuyezsur le boutondu demarreuret faites
tournerle demarreurpendantquelquessecondes.Le 3. Dartsla mesuredu possible,projetezla neige
bruitparticulieremis par le demarreurne risquepas
dansle sonsdu vent.Chevauchezlegerementlos
d'endommagerle moteurnile demarreur.Debranchez
passagessuccessifs.
le fil electriquede la prisede courantd'abord,puis du
REMARQUE:Unepressionascendanteexcessive
commutateur.
causeune usureprematureedespalesen caoutchouc
3. D_marreur _ lanceur: Quandle moteurtourne,tirez
de la tariere.L:usureresultantene seraitpas couverte
rapidementet fermementsurla cordedu demarreur&
solonla garantie.
trois ou quatrereprises.Vousentendrezun claquemeritqui ne risquepasd'endommagerle moteurni le Conseils
d'utilisation
demarreur.
1. Apresavoirdeblayela neige,laissezle moteur
4. Enleveztoutela neigeet rhumiditedu couvercledu
tournerpendantquelquesminutesavant de rarr_ter.
carburateuret presdes manettesde commande.
Ceci permetle moteurde secher.
Deplacezcelles-ciplusieursfois. Laissezla manette
2.
Essuyezla neigeet la condensationde la machine.
de robturateurA la positionARRI_Tet le boutondu
volet de depart A la positionVOLETFERMI_.
rnoteur et des zones voisines devien5. Enlevezla cle de contactet debranchezle fil de la
__5
VERTISSE_ENT:Lesilencieux,le
nent
chauds et peuvent causer des
bougiepouremp_chertout demarrageaccidentel.
br_lures. Evitezde los toucher.
9
AVERTISSEMENT
Le silencieux; ie
moteur et des zones
deviennent
chauds et peuvent
Evitez de los toucher.
Ne fakes jamais
la
souffleuse avec des
spectateurs devant
ou pros de I'ouverture
la goulotte
ectioni
aE AaQUE:
une
pression ascendante
excessive cause une
usure pr_matur_e des
pales en caoutchouc
de la tari_re: L:usure
r_sultante ne serait
pas couverte solon ia
garantie;
/,
Reglage
raclage
de la plaque
de
1. Pourverifierle reglage,phcez la souffieusesur une
surfaceplate. La plaquedoit _tre regleede maniere
que les roues,la plaqueet la tarieretouchentle sol
simultanementlots de rutilisationde la souffleuse.
Voir laFigure6. Si la neige souffleen dessousdu
Iogementde la souffieusela plaquepeut_tre regle
tros haut. Si la plaquepresentedes signesd'usure
excessive,ou la souffleusen'auto-propulserapas, la
plaquepeut_tre ajustetrop has
3. Ajustezla plaquede raclagecommeinstruitdans la
sectionReglagesde cette noticed'utilisation.Serrez
les ecrousau fondavant lefonctionnement.
REMARQUE:Adressez-vousau ,,Serviceapres-vente,,a
la page2, pour rinformationen ce qui concernele prix et
la disponibilitedu kit de h plaquede raclage.
f
REMARQUE:Lestarierespeuvent_trelegerement
releveessur les modelesneufs ou sur les modeles
equipesd'un plaquede raclageneuve.
AVERTISSEIVlENT
D_branchez le fil
2. Pourajuster,basculezla souffleuseen arriere pour
qu'il reposesur le guidon.Desserrezles ecrous&
six pansetles boulonsordinairequi maintiennent
la plaquede raclageau Iogement.Voirla Figure7.
Ajustezla plaquede raclagea la positionvoulueet
serreza fondles ecrousa six panset lesboulons
ordinaires.
de la bougie et
rnettez-le _ la terre
\
contre le rnoteur
Reglage de le c_ble
d'embrayage
Un reglageperiodiquede la courroieet le cfible
d'embrayagepeut s'averernecessairedu fait de
retirementet de rusurenormalede la courroieet du
cable.
N'essayez jarnais
d'effectuer un
II faut regler la courroieou le cablesi la tarierepara_t
d'hesiteralors que le moteurtourneau m_me regime.
Procedezcommesuit:
r_glage quelconque
_endant que le
rnoteur tourne, saul
en cas d'instructions
sp_ciales dans la
notice d'utilisation.
Figure 7
une r_paration,
un ajusternent
quelconq ue ou
d'examiner la
machine. Attendez
que la tari_re/turbine
se soit cornpl_tement
immobilis_e.
j
Figure 8
pour emp_cher
tout d6marrage
accidentei.
D_brayez la manette
de cornmande et
arr_tez le moteur
avant de faire
,
Remplacement
de la plaque de
raclage
La plaque de raclages'useraet devrait_treverifie
periodiquement.La plaquede raclagea deuxc6tes
d'usageet peut_tre renverseapresque un c6te s'use.
Voir la Figure7.Pour remplacerou renverserla plaque
de raclage,procedezcommesuit:
1. Enlevezles quatreboulonsordinaire,et lesecrous a
six pansqui la maintiennentsur la souffieuse.
2. Installezla plaque neuve assurantque la t_te
desboulonsordinairesse trouve surrinterieurdu
Iogement.
Le trou superieurdans la manettede commandeprevoit
un ajustementdansla tensiondu cable. Pourajuster,
debrancherla finde cable d'embrayagedu trou de fond
dansla manettede commandeet le reinserentdans le
trousuperieur,l_valuezla souffleusepour voirs'il y a une
differenceconsiderable.
Carburateur
_
des reglagesquelconquesau moteurpenVERTISSEMENT:
i vous
devezfaire
dant
qu'iltourne(parSex.
au carburateur),
eloignez-vousde touteslespieces mobiles.
Netouchezpas les surfaceschaudesnile
silencieux.
1. Consultezla notice d'utilisationdu moteurfoumie
avec la souffieusequantaux reglagesa effectuerau
carburateur.
10
Replacement
__lb
de la courroie
de commandeet arr_tez le moteur avant
VERTISSEMENT:
D_brayezla
manette
de
faire une r_paration,un
ajustement
quelconqueou d'e×aminerla machine.
Attendezque la tari_re/turbine se soit
compl_tementimmobilis_e.D_branchez
le fil de la bougieet mettez-le _ la terre
contrele moteur pour emp_cher tout
Remplacementde la courroie
Enlevezlescinq vis hex.pour demonterle couvre-courroie.Voir la Figure9. Enlevezla courrieen la degageant
simplementde la basede la pouliede la tariere. IIsera
alors possibled'abaisserla pouliede tension pour
degagerla pouliedu guide-courroie.
Pourreplacerla courroie,suivezces instructionset
consultezla Figure10.
1. Abaissezla pouliede tension.
Poulietendeur
Guide de courroie
'_
Tirezicisur la
courroiepour la retirer.
Figure 9
f
AVERTISSEMENT
2. Placezla courriesurle dessusde la pouliede la
tariere,sous le guide-courroie.
D_brayez la manette de
3. Glissezla courroiesurla pouliemotrice.
commandoet arr_teZle
4. Inserezla courroiesurla basede la poulie de la
tariere.
moteur avant de faire
une r_parationl un ajus:
tement quelconque ou
d'examiner la machine.
Replacezle couvre-courroieretireplust6t.
Moteur
Attendez
1. Consultezla noticed'utilisationdu moteurqui
accompagnela souffleusepour tout ce qui concerne
I'entretiendu moteur.
/
turbine se soit
pl_tement immobilis_e,
D_branchez le fil de la
2. Verifiezfrequemmentquetoute la boulonneriedu
moteurest bien serreeet resserrez-laselonle besoin.
bougie et mettezqe _. la
torte c0ntre le moteur
Lubrification
Lubrifiezles pointsde pivotsur la manettede commande
et le ressortd'extensiona la fin du cabled'embrayage
avec une huile legereune fois chaquesaison etavant le
rernisagede la souffleusea la fin de la saison.
Remplacement
caoutchouc
que la tari_rei
pouremp_cher tout
Reraplacement de la
Figure 10
r
'\
/'
des pales en
Lespalesen caoutchoucsur la tariereont une tendance
s'useret devraient_treremplacedes I'apparitionde
signes d'usure.
i_
iiii/
_iiii_i_
ii!
iiiii
iiiiiii _ _
I[VlPORTANT:Ne
IMPORTANT:Ne laissezpasles aubesen caoutchouc
de la tarieres'userau pointoQcertainespartiesde la
tarieremetalliquepeuventtoucherle sol, car la souffleuse
pourrait_tregravementendommagee.
laiSsez pas ies aubes
en caoutchouc de la
Pourchangerles palesen caoutchouc,procedezcomme
suit:
dela tari_re m_tallique
peuvent toucher le
sol, carla souffleuse
1. Pourdemonterles pales,enlevezlesvis taraudeequi
lesmaintiennentsur la souffleuse.VoirIf Figure11.
tari_re s'user au point
O_ Certaines parties
Figure 11
pourrait _tre gravement
2. Maintenezles nouvellespales de caoutchoucen place REMARQUE:Adressez-vousau ,,Serviceapres-vente>,
sur la tariereavec les vis taraudee.
& la page 2, pour I'informationence qui concernele prix
et la disponibilitedu kit de tarriere.
ii
11
i
i
Procedezcommesuit pour preparerla souffleuseavant
de la remiser.
* Videzle carburanta I'exterieurdans un recipient
homologue,a distancede toutefiammenue.
Assurez-vousque le moteura refroidi.Nefumezpas
et eteigneztoute sourcede chaleurincandescente
avantde vider le carburant.Toutcarburantrestant
dansle reservoirpar tempschaudse deterioreraet
causerade gravesproblemesau demarrage.
* Si la machinedolt_tre entreposeependantplusde
30 jours, preparez-laselonles instructionsfournies
dansla noticed'utilisationdu moteurqui accompagnevotresouffieuse.
* Laisseztournerle moteurjusqu'ace qu'il s'arr_te
pourcause de panned'essence.
AVERTISSEIViENT
N'entreposez jamais le
moteur avec du carburant
clans le r_servoir
I'int_rieurou dans
des endroitsferm_s
si la ventilation n'est
pas adequateet si les
vapeurs de carburant
peuventvenir en contact
avec une fJammeou une
_tincefle ou veilleuse d'un
chauffe-eau,un radiateur,
un fourneau, un s_chelinge ou autre appareiJ
gaz.
Videz le carburant
I'e×t_rieur dans un
r_cipient homologu_,
distance de toute flamme
nue. Assurez-vousque le
moteur a refroidi. Ne fumez pas.Tout carburant
restant dans Jer_servoir
par temps chaudse
d_t_riorera et causera
de gravesprobl_mesau
d_marrage.
Ne videzpas le carburateur si vous utiJisezun
stabilisateur de carburant. N'utiJisezjamais des
produitsde nettoyage du
moteur ou du carburateur
pour nettoyer le r_servoir
de carburant car vous
pouvezcauserdes
d_g_ts permanents.
* Videztoute ressencedu carburateuret du reservoir
pour eviterla formationde dep6tsde gommequi
pourraientcauser le mauvaisfonctionnementdu
moteur.
* Videzle carburateuren appuyantsur I'evacuationqui
se trouvesous le couvercledu carburateur.
Lesagentsde stabilisationdu carburant(STA-BIL®
par exemple)offrentune solutionacceptable
pour minimiserla formationde dep6tsde gomme
pendantle remisage.Nevidez pasle carburateursi
vous decidezd'utiliserun agentde stabilisationdu
carburant.
• Essuyezla machineavec un chiffonimbibed'huile
pour emp_cherla formationde rouille.
• Retirezla bougieet versezune onced'huile
moteurdansle trou de la bougiede la chemise.
Reouvrezle trou avecun chiffonet faitestourner
le moteurplusieurslois pour bien repartirI'huile.
Remettezla bougieen place.
• Suivezlesinstructionsconcernantla lubrification
dansle chapitresur rentretien.
• Entreposeztoujourslasouffleusedans un endroit
sec et propre.
Pro bib me
Ca use(s)
Le moteurne d6marrepas
Fonctionnementirregulier
Sol ution
1. Voletde d6part ferm6.
1. Ouvrez ievolet de d6part.
2. Filde la bougied6branch6.
2. Branchezle fil de la bougie.
3. R6servor v de ou essence6ventee.
3. Fate e p e n avecune essencepropre
1. Machinefonctionnantavec levolet de
depart ferme.
2. Canalisationde carburantboucheeou
essence 6ventee.
1. Ouvrezlevolet de depart.
3. Eauou saletedansle systemed'essence.
2. Nettoyezlacanalisation;faites le plein
avec uneessencepropre.
3. Debranchezlacanalisationd'essence
au carburateurpourvider le reservoir
d'essence.Faitesle plein avecune
essencefraiche.
4. Carburateurest real regl6.
4. Adressez-vousa.unestation
technique.
Moteursurchauffe
1. Carbureteurest mal r6g16.
1. Addressez-vous_ une station
Vibrationexcessives
1. Piecesdesserreesou vis sansfin
1. Arr6tezimmediatementle moteuret
technique.
endommagee,
Pertede puissance
,
La souffieusen'avance
pas
La seuffieusen'6vacuepas
laneige
debranchezle fil de la bougie.Serrez
tousles boulonset ecrous.Si les
vibrationspersistent,faites verifierla
machinepar unestation technique
agre6e.
1. Filde la bougiedesserr6.
1, Branchezet serrezlefil de la bougie.
2. Chapeaud'6chappementdu trou
d a6rationbouch6,
2. D6gagezla glace et la neigedu
chapeau.Assurez-vousde la propret6
3. Le port d6chappementest bouch6.
du trou d'a6ration.
3. Adressez-vous_.unestation
technque.
1. C_.bled'entrainementmal regl6.
1. Reglezle c_.bled'entrafnement.
Voirle Reglages.
2. Courroied'entrainementabfm6eou ayant
2. Remplacezla courroie d'entrainement.
1. Goulotted'6vacuationbouch6e.
1. Arr6tezimm6diatementle moteur
et d6branchezle fil de la bougie.
,N.ettoyez
lagoulotted6jection et
Iint6rieurdu Iogementde la tari_re
avec I'outilde d6gagementde la
goulotteou un b&ton.
2. Pr6sencede corps 6trangerdansla
tari_re,
2. Arr6terimmediatementle moteur
et d_branchezie fil de la bougie.
I
'
abi'm6eou ayantdu jeu.
13
_UE: Ce
probi_mes d,entretien
mineurs. Poui plus de
d6tails;adressez:vous
au sewice apres!vente:
GARANTIE
Le non-respect des
conseils d'entretien
et de iubrification
annule la garantie.
LIMITEE DE DEUX ANS
Lagarantielimit_equi est _nonc6eci-dessousest offertepar MTDLLCpour touteslesmarchandisesneuvesachet_eset
utilis_esaux I_tats-Unis,
dansses possessionset territoires,et parMTD ProductsLimited,pourtouteslesmarchandises
acheteeset utilis_esau Canadaet/ouses territoires(l'uneou I'autreentite respectivement
appelee,, MTD,_).
,, MTD,_garantitquece produit(a I'exceptiondes piecesa usurenormale6num@_esci-dessous)estexemptde toutvice
de mati_reet de fabricationpourune dur_ede deux(2) ans& compterde la datede I'achatinitialet s'engage& r@arerou
remplacer,gratuitementeta sonchoix,toutepiecequi s'averedefectueuseen raisond'un vicede matiereou defabrication. Cettegarantielimit_en'estapplicableque si ce produita _t_utilis_et entretenuconform_ment
aux instructionsde la
noticed'utilisationqui I'accompagne.Deplus, le produitne doltpasavoirfait I'objetd'unemploiincorrectou abusif,d'une
utilisation& desfins commerciales,d'unenegligence,d'unaccident,d'unentretienincorrect,d'unemodification,d'un
acte devandalisme,d'unvol, d'unincendie,
d'uneinondation
oude toutautred_g&tcaus_partout incidentou d_sastre
naturel.Lesdeg&tscausespar I'installationou I'utilisationd'unepiece,d'unaccessoireou d'un_quipementannexe,dont
I'emploiavecle produitfaisantI'objetde la noticed'utilisationn'estpashomologu_par MTD,rendrontla garantienulleet
nonavenue.
Lespiecesou composantsa usurenormalesontgarantisexemptsde tout vicede matiereetde fabricationpour une
periodede 30jours& compterde la dated'achat.Lespi_cesetcomposantsa usurenormalecomprennent,sanss'y
limiter,les batteries,courroies,lames,adaptateursde lame,sacsa herbe,rouesdu plateaude coupe,sieges,patinsde
souffleuses,rouesde frottement,lamesde raclage,le caoutchoucde la tari@eet pneus.
POURFAIREHONORERLAGARANTIE: PresentezUNEPREUVED'ACHATa.la stationtechniqueagr_6ede votre
Iocalite.PourIocaliserunestationtechniqueagr_6eou un concessionnaire
dansvotrer6gion:
Aux Etats-Unis : ConsultezlesPagesJaunesou adressez-vous
_.MTDLLC, P.O.Box361131,Cleveland,Ohio
44136-0019ou appelezle 1-800-800-7310
ou le 1-330-220-4683.
Vouspouvezaussivisiternotresitewebau www.
mtdproducts.com
Au Canada: Adressez-vous
a.MTDProductsLimited,Kitchener,Ontario,N2G4J1ou appelezle 1-800-668-1238
ou
visiteznotresite webau www.mtdcanada.com
Cettegarantielimiteene couvrepas:
a. Le moteurou sescomposants.Cesarticlespeuvent_trecouvertspar unegaranties@ar_edu fabricant.Consultezla
garantiedufabricantquantauxconditions.
b. Lespompes,soupapeset pistonsdesfendeusesa boissont couvertspar une garanties@ar_ed'unan.
c. Lesarticlesd'entretiencouranttels queles lubrifiants,filtres,aiguisagesde lameet r@isions,lesr_glagesde frein,de
I'embrayageou du plateaude coupeet la d_t@iorationnormalede la finitiondu faitde I'utilisationde la machineou de
son expositionauxintemp_ries.
d. L'entretien
ou lesr@arationseffectu_sparquiconqueautrequ'unestationtechniqueagr_e.
e. MTDne garantitpasles produitsvendusou exporteshorsdesI_tats-Uniset/ou du Canada,de leurspossessionset
territoiresrespectifs,saul sices produitsont _t6venduspar I'interm_diaire
des servicesd'exportationde MTD.
f. Lespiecesde rechangesi ellesne sontpasdespiecesMTDauthentiques.
g. Lesfrais de transportdesmachineset de d@lacementdestechniciens.
h. Lesproduitsutilisesdansun butcommercial.(Certainsproduitspeuvent_treaccompagn_sd'unegarantielimit_e
MTDs@ar_epour usagecommercial.Renseignez-vous
aupresduconcessionnaireou detaillantpourplusde d_tails
ou adressez-vous
directementau serviceapres-ventede MTD.)
Aucunegarantietacite, y compris toute garantie tacJtede qualit_ marchande oud'adaptabilit_ dartsun but
partJculJer,
ne s'applJque
au×pi_cesidentifi_esci-dessus apr_s la p@iodede vigueurde la garantie_crJte
expresse. Aucuneautre garantie expresse,qu'elle soit verbale ou _crite, _ I'e×ceptiondes stipulations ci-dessus,
offerte par toute personneou entit_ (y compds un concessJonnaire/revendeur),pourtout produit, n'engage
MTD.Pendantla p@iodede garantJe,la r_paration ou le remplacementdu produitci-dessus constitue le recours
e×clusif _ la disposition du client.
Lesstipulations _nonc_es dartscette garantJeoffrentle seul recours a la suitede lavente.MTDne peut_tre
tenue responsable pourtoute perte ou tout dommage accessoireou immat@ielcomprenant, sans s'y limiter,
lesfrais de remplacementou de substitution des services d'entretJendes pelousesou lesfrais de locationpour
remplacertemporairement un article sous garantie.
Certainesjuridictions
ne permettentpasI'inclusionou la restrictiondesdommagesaccessoiresou immat@ielsou une
limite& la dureede la garantietacite.Parconsequent,lesexclusionsci-dessuspeuventne pass'appliquerdartsvotre
situation.
Le remboursement
ou remplacementquel qu'ilsoit ne seraenaucuncas sup@ieurau montantdu prixd'achatdu produit
vendu.Toutemodification des caract@istJquesde s_curit_ rendrala garantie nulle et non avenue.Eutilisateur
assumetout risqueet toute responsabilit_
en cas de perte,de dommagemat@ielou de blessureresultantde I'utilisation
incorrecte
du produitou de I'incapacit_de I'employer.
Cettegarantielimiteen'estoffertequ'&I'acheteurinitialou & la personne&laquellele produita _t_offerten cadeau.
LESLOiS LOCALESETCETTEGARANTIE: Cettegarantielimit_evous accordedesdroitsjuridiquessp@ifiqueset
vouspouvezb_neficierd'autresdroitsqui varientselonlesjuridictions.
iMPORTANT: Le proprietairedoltpresenterle re_uoriginalpourfairehonorerla garantie.
MTDLLC,P.O.Box361131,Cleveland,Ohio 44136-0019;t_l_phone: 1-800-800-7310,1-330-220-4683
MTDProducts Ltd., C.P.1386,Kitchener, Ontario N2G4J1; t_l_phone: 1-800-688-1238
14