1
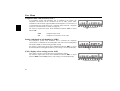
7DEOHRI&RQWHQW
7DEOHRI&RQWHQW
$UUDQJHPHQWRI&RQWUROV
$QWLWKHIW'HYLFH
Code number entry
Remove portable panel
Inserting portable panel
*HQHUDO2SHUDWLRQ
Switch on / off
Adjust volume
Mute function
Activate tone menu
Adjust bass
Adjust treble
Adjust balance
Fader
Loudness on /off
Linear adjustment
Subwoofer output volume
Selecting reception optimisation
5DGLR2SHUDWLRQ
Selecting the operating mode
Selecting the waveband
Switching on radio menu mode
Setting procedures for transmitter selection
Dynamic autostore (FM DAS)
FM transmitter search
AM, LW, SW station search
52
53
53
54
54
54
54
55
55
55
55
56
56
56
57
58
58
58
59
59
60
60
Scan search
Direct frequency entry for FM
Direct frequency entry for AM, LW, SW
Programme type selection (PTY)
Switching PTY display on / off
Requesting/storing stations on FM STT
Requesting/storing AM, LW, SW stations
AM, LW, SW autostore
FM manual tuning
AM, LW, SW manual tuning
Regionalisation
Switching regionalisation on / off
Switching frequency display on / off
Switching radio text display on / off
Programme filtering
Deactivating the programme filter
Traffic Program (TP)
Activating/quitting the TP menu
Setting automatic tracking
Setting/deleting direct programming
Switching off TP
Mute function - switch on/off
Interrupting TP announcements
TP announcement volume
Telephone mute function
Time request
7DSH2SHUDWLRQ
Cassettes - insert / eject
Track switching
60
61
61
61
61
62
62
63
63
63
64
64
65
65
66
66
67
68
68
68
69
69
69
69
70
70
71
71
49
7DEOHRI&RQWHQW
Radio operation during forward / rewind
Fast forward / rewind
Music search - forwards / backwards
Dolby NR
Skip blank
Scan search
Cleaning the cassette mechanism
&'0'2SHUDWLRQ
Compact disc (CD) instructions
Insert / ejecting CDs/MDs
Skipping tracks - forwards / backwards
Scan search
Fast forward / rewind
Number of tracks and total playing time
Random play
Replaying a track (repeat)
Direct track selection
Temperature protection circuit
&'0'&KDQJHU2SHUDWLRQ
Operational readiness of CD/MD changer
CD magazine - load / unload
Playing CDs/MDs
Naming a CD
CD title filtering
8VHU0HQX
Requesting/quitting user menu
User memory (US)
71
72
72
72
73
73
73
74
74
75
75
75
76
76
76
77
77
78
78
79
80
81
82
82
Setting the search mode (SEK)
GAL setting
Telephone mute characteristics (TEL)
Setting right-hand or left-hand drive (DRV)
(COL) display colour setting (not for 4625)
Favourite station settings (FAV)
AUX input (AUX)
Display setting (LCD) (not for 4625)
6HUYLFH0HQX
5HPRWH&RQWURORSWLRQ
&RQQHFWLRQ,QVWUXFWLRQV
5HPRYDO,QVWDOODWLRQ*XLGH
*HQHUDO,QVWUXFWLRQV
Frequency search
Name search
Transmitter chain search
RDS SYSTEM
PTY (Program Type)
92
92
92
92
93
7HFKQLFDO'DWD
127,&(
DOLBY and the double D-ymbol
are trademarks of Dolby Laboratories Li-
censing Corporation.
Dolby noise reduction system manufactured under license from Dolby Laboratories Licensing Corporation.
50
83
83
84
84
84
85
85
86
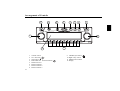
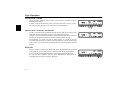
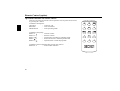
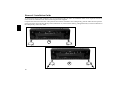
$UUDQJHPHQWRI&RQWUROV
2
3
4
5
6
7
8
9
1
10
11
12
1
2
3
4
5
6
7
8
51
Volume control
On / off switch (
)
Tone button (
)
Road traffic announcement button (
Infrared receiver
Function button 1.
Function button 2.
Function button 3.
)
9
10
11
12
CD/MD eject button (
Right rotary control
Multifunction buttons
Display
)
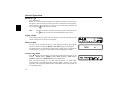
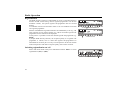
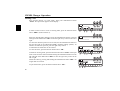
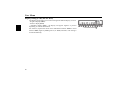
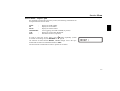
$QWLWKHIW'HYLFH
&RGHQXPEHUHQWU\
If the car radio is disconnected from the power supply, it is theft-protected upon
reconnection. After switching on at the
button, the prompt CODE, followed
by 4 squares is displayed.
The four-digit code must then be entered using the multifunction buttons “-”.
([DPSOH Code number 1530 (the code number can be found on the enclosed
CODE CARD).
Enter code number using the multifunction buttons.
The first square is extinguished after entry of the first digit. The second square
is extinguished after entry of the second digit, etc. The unit switches on
automatically after entry of the 4th digit, if this and all other digits have been
correctly entered.
1RWH
It is essential that the CODE CARD be kept in a safe place outside
the vehicle. Thus, illegal use is not possible. The accompanying
sticker should be attached to the inside of the vehicle windscreen/
window.
If an incorrect code number is entered, the prompt &2'( with the four stars is
displayed again. After entering incorrect code three times :$,7 is displayed
and the unit is disabled for approx. 60 minutes. Three further incorrect entries
block the unit again for 60 minutes.
,PSRUWDQW The waiting time functions only with the unit switched on.
52
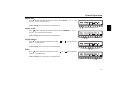
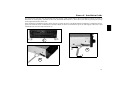
$QWLWKHIW'HYLFH
5HPRYHSRUWDEOHSDQHO
As effective anti-theft device, the portable panel ($) can be removed from the
unit.
Press and hold button
(storage medium remains in the unit). The display
folds forwards.
The portable component can then be pulled out.
The volume is limited to a maximum value after the display has been folded
down. After 20 seconds an audible signal indicates that the control component
is folded down. The unit is switched to mute. The unit switches off after an
additional 10 seconds.
1RWH
$
For safety reasons, it is not permitted to leave the portable panel
open when driving
,PSRUWDQW Please insert the portable panel in the accompanying protective
cover after removal.
Do not touch the metal contacts on the portable panel or on the
radio.
,QVHUWLQJSRUWDEOHSDQHO
Insert the portable panel so that it engages first in the lower left catch and then
in the lower right. Then press the portable panel into the upper catches.
Or position portable panel directly over all four catches and press in firmly to
engage.
For proper functioning, ensure that the portable panel is firmly engaged in all
four catches.
If a new portable panel or one from another unit is utilised, the code number
must be entered, as previously described, in order to activate the unit.
53
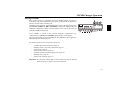
*HQHUDO2SHUDWLRQ
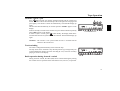
6ZLWFKRQRII
Press
button.
Further on / off switching possibilities: Via ignition. In order to switch on via
the ignition, the unit must previously have been switched off via the ignition.
After switching off the ignition, the unit can be prevented from switching off
by pressing the
button within 3 seconds.
1RWH
The unit can also be switched on with the ignition switched off via
the
button, but will switch off automatically after 1 hour.
$GMXVWYROXPH
Turn volume control to right / left. The volume is increased or decreased. The
current volume level is shown on the display.
0XWHIXQFWLRQ
The unit can be switched to mute in each operating mode by pressing the
volume control. In the display 087( or 73,1)2(page 69) will appear.
The mute function is cancelled by pressing the volume control, changing the
operating mode , changing the waveband or inserting MD/CD or TAPE.
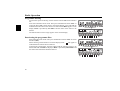
$FWLYDWHWRQHPHQX
Press
button. The tone menu is activated. The following functions can be
called up: %$66 (Bass), 75(% (Treble), %$/ (Balance), )$' (Fader),
/28' (Loudness) and 67(5(2 (Reception optimisation).
Bass and treble settings for the AM, FM wavebands, for road traffic
announcements and MD/CD/TAPE and CDC/MDC operation are stored
separately. The settings for fader, balance and loudness are stored together for
all operating modes.
54
*HQHUDO2SHUDWLRQ
$GMXVWEDVV
Press
button and then multifunction button (under %$66) “” or “”. Set
the desired bass via both buttons.
&HQWUHVHWWLQJ Press both buttons simultaneously.
$GMXVWWUHEOH
Press
button and then multifunction button (under 75(%/() “” or “”.
Set the desired treble via both buttons.
&HQWUHVHWWLQJ Press both buttons simultaneously.
$GMXVWEDODQFH
Press
button and then multifunction button “ ” or “ ”. Set the desired
balance via both buttons.
&HQWUHVHWWLQJPress both buttons simultaneously.
)DGHU
Press
button and then multifunction button “ ” or “ ”. Set the desired
fade level via both buttons.
&HQWUHVHWWLQJ Press both buttons simultaneously.
55
*HQHUDO2SHUDWLRQ
/RXGQHVVRQRII
Press
button and then multifunction button “/'”. The loudness will
switch 21 / 2)).
Loudness is switched off for AM, LW and SW wavebands.
/LQHDUDGMXVWPHQW
Press and hold
button until a signal tone sounds. The tone values for the
set signal source (e.g. radio/FM) are set to an average value.
Press and hold
button until two signal tones sound. All tone values for the
signal sources radio, CD/MD/TAPE and CDC/MDC are set to an average
value.
6XEZRRIHURXWSXWYROXPH
Press multifunction button „ “ in tone menu.
Then press multifunction button “” or “³. Set the desired subwoofer volume
via both buttons.
The change in subwoofer volume to the currently set volume is shown in the
display.
56
*HQHUDO2SHUDWLRQ
6HOHFWLQJUHFHSWLRQRSWLPLVDWLRQ
Three different reception optimisation settings can be selected in order to
suppress reception dependent interference and reflections.
Press multifunction button „ “ in tone menu. Repeatedly press multifunction
button “67”, „$87“ or “021” in the tone menu until the desired
optimisation is set.
$87: (Auto)Setting for normal operation - i.e. the unit switches from stereo
to mono and back depending upon reception location (provides the optimum
setting for almost all reception areas).
67: (Stereo) Setting for unusal reception situations - i.e. the unit is set
permanently to stereo (e.g. for private radio stations in city areas)
021: (Mono)Setting for reception conditions in which reflections constantly
occur - i.e., the unit is set constantly to mono.
The setting is effective immediately after pressing the multifunction button
“67”, „$87“ or “021” and is also retained on switching off.
57
5DGLR2SHUDWLRQ
6HOHFWLQJWKHRSHUDWLQJPRGH
Press function button 1. The operating modes 7XQHU, 0' or &'7$3( or
&'0'FKDQJHU (for connected CD/MD changer) can be selected.
The last selected operating mode is set after the button is pressed for the first
time. If the other operating modes are to be selected, press function button 1
quickly and repeatedly until the desired operating mode is selected.
1RWH
If you switch often between )0 and &'&, first select )0 and then
through quick pressing &'&. Subsequently pressing the function
button after a pause of more than 2 seconds allows switching to take
place only between FM and CDC.
6HOHFWLQJWKHZDYHEDQG
Press the function button repeatedly until the desired waveband )0 '$6
(dynamic autostore),)0677 (FM station buttons), $0/: or 6: has been
set.
When changing the waveband the last selected transmitter is set.
6ZLWFKLQJRQUDGLRPHQXPRGH
Press function button 2 in radio mode. The radio menu mode is switched on and
displayed. The unit switches back to the normal display if no button is pressed
within the next 8 seconds.
58
5DGLR2SHUDWLRQ
6HWWLQJSURFHGXUHVIRUWUDQVPLWWHUVHOHFWLRQ
The desired station can be selected via dynamic autostore, transmitter search,
scan search, manual tuning, direct frequency entry and station buttons.
'\QDPLFDXWRVWRUH)0'$6
In FM DAS mode, all receivable stations are displayed above the multifunction
buttons arranged according to alphabetical order.
The user menu (Page 85) explains how to set your favourite stations for
selection according toalphabetical order.
Set the desired station by pressing the button directly below the abbreviated
station designation. If the selected station broadcasts several programmes/
regional programmes, a submenu is automatically displayed to select the
desired programme. If a programme has previously been selected that belongs
to the particular transmitter chain, the last stored programme entry will be
automatically selected.
The symbol ! means that the button can be pressed for displaying and selecting
additional stations.
To indicate those stations not easily identified due to display of advertisement
or news, the abbreviation /... /= (L = Local) is used, thus preventing
constant switching in the lower display line. Selected stations of this type are
indicated by a star (e.g. /).
When using the unit for the first time, or following interruption of the power
supply, allow for a brief waiting period so that the receiver can evaluate the
station signals. The display will appear incrementally as the evaluation
progresses.
59
5DGLR2SHUDWLRQ
)0WUDQVPLWWHUVHDUFK
Turn the right rotary control to the left/right. The radio searches in descending/
ascending order, according to selected search mode.
To request the desired search mode in the user menu (also see page 83), refer
to the setting information below:
- )54 for IUHTXHQF\VHDUFK. More information on Page 92.
-1$0forQDPHVHDUFK. More information on Page 92.
&+1forWUDQVPLWWHUFKDLQVHDUFK. More information on Page 92.
$0/:6:VWDWLRQVHDUFK
Turn the right rotary control to the left/right within the desired waveband (AM,
LW). The radio searches for reception frequencies in descending/ascending
order of frequency.
6FDQVHDUFK
In the desired waveband (FM, AM or LW), press the right rotary control will be displayed. An automatic transmitter search is started. The first search is
performed on an insensitive plane, all further searches on a sensitive plane.
Receivable transmitters can be heard for 8 seconds. Press the right rotary
control if the received program should be retained.
1RWH
60
In FM, the scan search will proceed according to the search mode
that has been set.
5DGLR2SHUDWLRQ
'LUHFWIUHTXHQF\HQWU\IRU)0
Select radio menu mode. Then press multifunction button “0$1”.
Use the multifunction buttons to enter the desired frequency.
Only those numbers used for entry will be displayed.
'LUHFWIUHTXHQF\HQWU\IRU$0/:6:
Select radio menu mode within the desired waveband. Use the multifunction
buttons to enter the desired frequency.
Only those numbers used for entry will be displayed.
3URJUDPPHW\SHVHOHFWLRQ37<
Select radio menu mode. Then use multifunction buttons “>” and ““ to select
the desired PTY (also see page 93).
1RWHOnly those PTYs can be selected that are currently available.
Once a PTY has been selected, only those stations can be selected in FM DAS
mode that are provided with this PTY.
By selecting 1237<, all stations will be re-displayed in FM DAS mode.
6ZLWFKLQJ37<GLVSOD\RQRII
Select radio menu mode. Then press multifunction button “37<” to switch the
PTY display (21) or (2))).
The PTY of the station being listened to will then appear on the right-hand side
of the normal display.
61
5DGLR2SHUDWLRQ
5HTXHVWLQJVWRULQJVWDWLRQVRQ)0677
6WRULQJ: 27 frequencies or programmes can be stored on FM STT.
To store the desired station or programme, press and hold multifunction button
“ - ” for 2 - 4 seconds.
Press multifunction button to access 10 - 27 of the available frequencies that
can be stored.
The frequency is stored on the station button if the multifunction button is
pressed for longer than 4 seconds (display),;).
5HTXHVW: Press multifunction button “ - ”. The stored transmitter is
requested.
The stored frequency is set if the transmitter cannot be identified.
No diversity or programme identification is performed after request if only one
frequency is stored on the multifunction button. ),; appears on the display.
5HTXHVWLQJVWRULQJ$0/:6:VWDWLRQV
5HTXHVW Press multifunction button “ - ”. The stored transmitter is
requested.
6WRUH 10 transmitters can be stored under station buttons. Search for the
desired station and press the multifunction button until a signal tone sounds.
62
5DGLR2SHUDWLRQ
$0/:6:DXWRVWRUH
Select desired waveband. Select radio menu mode. Then press multifunction
button “$6” repeatedly until $66((. is displayed. The 10 transmitters with
the best reception are stored under the station buttons in order of quality. The
autostore storage plane is identified on the display by $6.
Select radio menu mode in order to quit the autostore storage plane. Then press
multifunction button “$6”. The radio switches back to the station button plane.
)0PDQXDOWXQLQJ
Select radio menu mode. Then press multifunction button “0$1”. Next turn
right rotary control.
100 kHz tuning steps are performed. The function is quit if there is no further
actuation within 8 seconds.
$0/:6:PDQXDOWXQLQJ
Select radio menu mode within the desired waveband and then turn the right
rotary control.
9kHz (AM), 3kHz (LW) or 5kHz (SW) tuning steps are performed. The
function is quit if there is no further actuation within 8 seconds.
Pressing the right rotary control switches to fine tuning (1kHz steps).
63
5DGLR2SHUDWLRQ
5HJLRQDOLVDWLRQ
The RDS diversity function is independent of region. If the RDS diversity
function should switch among various regional programmes with diverse
broadcast contents, the special regional sub-programme must be selected
directly.
A transmitter must first be selected in order to see if it broadcasts more than
one regional programme.
Stations with additional regional transmitters are identified by a star (e.g. ).
Upon selection of one of these stations (e.g. ) all receivable regional subprogrammes for this station will be displayed.
At this point it is possible to select the desired regional sub-programme (e.g.
%:.).
If, despite RDS diversity function, the reception quality of a regional subprogramme is inferior, bear in mind that regional sub-programmes are
transmitted for the most part over only a few frequencies. If the unit remains
tuned to frequencies with better reception quality, there will be less drift.
6ZLWFKLQJUHJLRQDOLVDWLRQRQRII
Select radio menu mode. Then press multifunction button “5(*” to switch
regionalisation (21) or (2))).
64
5DGLR2SHUDWLRQ
6ZLWFKLQJIUHTXHQF\GLVSOD\RQRII
Select radio menu mode. Then press multifunction button “)54” to switch
frequency display (21) or (2))).
When the frequency display is on, the switched frequency of the selected RDS
diversity transmitter is displayed.
If the frequency display is ON, the time display automatically switches OFF
(also see page 70).
6ZLWFKLQJUDGLRWH[WGLVSOD\RQRII
Select FM radio menu mode. The press multifunction button “57” to switch
on the radio text.
The car radio filters information transmitted by the station and displays it in the
form of radio text.
Radio text cannot be displayed unless the selected station also transmits radio
text.
Unfavourable reception conditions, including interference, can garble or even
block a radio text display.
To quit the radio text function, press multifunction button “(1'”.
,PSRUWDQW 6LQFH LQIRUPDWLRQ WUDQVPLWWHG YLD UDGLR WH[W GLVSOD\ YDULHV
FRQVWDQWO\ZHUHFRPPHQGWXQLQJLQWKHUDGLRWH[WRQO\ZKHQ
WKHYHKLFOHLVVWDWLRQDU\WRDYRLGXQQHFHVVDU\GLVWUDFWLRQIRU
WKH GULYHU 7KLV LV D QHFHVVDU\ SUHFDXWLRQ IRU DFFLGHQW
SUHYHQWLRQ
65
5DGLR2SHUDWLRQ
3URJUDPPHILOWHULQJ
You have the option of filtering various stations from the FM DAS transmitter
list.
First select FM radio menu mode. Then press multifunction button “),/” to
switch the filter (21). Switch back to the normal display; press and hold the
multifunction button below the station to be filtered until 'RQH appears on the
display. 'RQH is preceded by 6HW )LOWHU and the name of the station to be
filtered.
The filtered station will no longer appear on the normal display.
'HDFWLYDWLQJWKHSURJUDPPHILOWHU
Select FM radio menu mode. Then press multifunction button “),/” to switch
the filter (2))).
When selecting a filtered station in normal display mode,
will appear to
indicated that the station has been filtered.
To deactivate a station filter, press the button under the station no longer to be
filtered and hold until 'RQH is displayed. 'RQH is preceded by 5HVHW)LOWHU and
the name of the station that had been filtered.
66
5DGLR2SHUDWLRQ
7UDIILF3URJUDP73
If an RDS diversity station transmits TP announcements, you can have CD/
MD/TAPE, CDC/MDC, AM, LW and SW operation interrupted and the
transmitted TP announcements switched through. Moreover, you can listen to
one FM station while having TP announcements switched through that are
transmitted by another FM station.
There are two ways to select a TP station:
DXWRPDWLFWUDFNLQJ
GLUHFWSURJUDPPLQJ
$XWRPDWLF WUDFNLQJ transmits TP announcements over the FM station
currently being listened to. If the selected FM station reception is of poor
quality or cannot function as a TP transmitter, the unit applies specified criteria
to search for a new TP transmitter.
'LUHFWSURJUDPPLQJ enables a TP transmitter to be programmed that is not
the FM station being listened to. You can, for example, listen to one FM station
while having TP announcements switched through that are transmitted by
another FM station.
If the programmed TP transmitter reception becomes weak, the unit switches
to automatic tracking until the programmed TP transmitter is receivable.
If an RDS transmitter is provided with a traffic programme, an inverse T will
appear on the display.
If TP is activated, the currently selected TP transmitter will appear on the righthand side of the display. In addition, an inverse TP will appear on the display
to indicate the activated traffic programme.
67
5DGLR2SHUDWLRQ
$FWLYDWLQJTXLWWLQJWKH73PHQX
$FWLYDWLQJPress and hold the
button for longer than 2 seconds.
4XLWWLQJ Press and hold the
button; otherwise, the TP menu will
automatically disappear after 8 seconds if no further operations are performed.
6HWWLQJDXWRPDWLFWUDFNLQJ
Press multifunction button “73” repeatedly in the TP menu until 21 appears.
,PSRUWDQW If a TP transmitter has previously been directly programmed, it
will once again be selected as TP transmitter.
Quitting the TP menu.
6HWWLQJGHOHWLQJGLUHFWSURJUDPPLQJ
Activating the TP menu.
6HWWLQJ The station providing TP announcements can be directly selected by
pressing one of the multifunction buttons.
For direct programming, set automatic tracking beforehand.
6'5 73, for example, indicates the currently activated TP transmitter.
Press 35*6'5, for example, to display the programmed TP transmitter.
'HOHWLQJ Press multifunction button “'(/” to delete the programmed TP
transmitter and to set the unit to automatic tracking.
Quitting the TP menu.
68
5DGLR2SHUDWLRQ
6ZLWFKLQJRII73
Press and hold the
button for longer than 2 seconds. Press multifunction
button “73” repeatedly in the TP menu until 2)) and 6(/(&773 appears.
TP is switched off after returning to normal display.
0XWHIXQFWLRQVZLWFKRQRII
After selection of a TP or EON transmitter, the mute function can be activated
by pressing the
button briefly. The prompt 73,1)2 appears. Thereafter,
only traffic announcements are switched through. The mute function is
cancelled by pressing the
button again or by turning the volume control.
If no TP transmitter is selected, 087( is displayed on actuating the
button
. In MUTE no traffic announcements are switched through.
,QWHUUXSWLQJ73DQQRXQFHPHQWV
Press the
button during a TP announcement. The announcement being
currently broadcast will be interrupted and the unit will automatically return to
the previously selected mode.
73DQQRXQFHPHQWYROXPH
The volume is adjusted during a TP announcement via the volume control. The
adjusted volume will be stored and subsequent announcements will be
automatically reset to the stored volume. It is not possible, however, for the TP
announcement volume to be lower than the pre-set volume.
69
5DGLR2SHUDWLRQ
7HOHSKRQHPXWHIXQFWLRQ
The telephone characteristics can be set in the user menu (also see page 84) if
a telephone system is installed in the vehicle and the mute function lead for the
car telephone is connected to the car radio.
When set to 2)), the radio is switched to mute if a call is received.
When set to 21, telephone calls are connected through the radio unit if a call
is received.
However, this is only possible if, in addition to the telephone, a handsfree unit
with loudspeaker output is installed and connected to the radio. In both cases,
3+21( is displayed.
7LPHUHTXHVW
Select radio menu mode in FM waveband. Then press and hold multifunction
button “&7” until 21 is displayed. The current time in hours and minutes will
appear on the normal display. The accuracy of the displayed time depends on
the correct time broadcast by the transmitter and received via RDS. If no time
signal has been received, is displayed.
If the time is switched ON, the frequency display automatically switches OFF
(also see page 65).
70
7DSH2SHUDWLRQ
&DVVHWWHVLQVHUWHMHFW
Press
button briefly; the display folds downwards and the cassette slot
becomes visible. Push in cassette with tape-side to the right until it engages and
press lightly. The cassette is drawn in automatically. Then fold the display up
again.
The unit switches automatically to cassette operation. 7$3( appears on the
display.
If there is already a cassette in the cassette slot, press function button repeatedly
until 7$3( appears on the display.
In order to eject a cassette, press
button briefly; the display folds downwards and the cassette is ejected and can be removed. Then fold the display up
again.
$WWHQWLRQ The cassette is not ejected when the unit is switched off but
remains in the cassette slot.
7UDFNVZLWFKLQJ
The track is changed automatically at the end of the tape.
The tape track can be switched at any desired position by pressing briefly one
of the multifunction buttons for track switching ( or ). The track currently
playing is shown on the display.
5DGLRRSHUDWLRQGXULQJIRUZDUGUHZLQG
During forward / rewind, the radio (FM) can be connected through by turning
the volume control. Operation of the radio functions is, however, not possible.
71
7DSH2SHUDWLRQ
)DVWIRUZDUGUHZLQG
During cassette operation, fast forward / rewind can be activated using the
multifunction buttons.
In order to cancel the function, press or turn the right rotary control, or press
the track switching buttons or the fast forward / rewind buttons.
0XVLFVHDUFKIRUZDUGVEDFNZDUGV
In order to activate the forward music search, turn the right rotary control to the
right until the desired number of tracks to be skipped has been set.
In order to activate the backward music search, turn the right rotary control to
the left until the desired number of tracks to be skipped has been set.
The beginning of a track can only be found if there is a pause of at least
4 seconds between tracks. In order to cancel the function, press or turn the right
rotary control, or press the track switching buttons or the fast forward / rewind
buttons.
'ROE\15
To play cassettes recorded with Dolby NR, press the multifunction buttons %
or & repeatedly for the desired noise reduction mode (Dolby B or Dolby C).
A star is displayed alongside the Dolby noise reduction that has been set.
To quit the noise reduction function, press multifunction button % or &
repeatedly until the star is no longer displayed.
72
7DSH2SHUDWLRQ
6NLSEODQN
If skip blank is active, automatic forward is activated at blank tape sections
which are longer than 10 to 15 seconds.
In order to activate the function, press the multifunction button “6%”
repeatedly until 21or 2)) is shown on the display.
6FDQVHDUFK
Press the right rotary control to start the scan search.
6&$1 appears on the display. Each track is played for approx. 10 seconds.
In order to cancel the function, press the track switching buttons or the fast
forward / rewind buttons.
&OHDQLQJWKHFDVVHWWHPHFKDQLVP
After a time, the reproduction quality of cassettes is reduced due to
unavoidable dirt and dust deposits on the sound head. The drive components in
the cassette mechanism also become dirty. For this reason the cassette
mechanism should be cleaned from time to time. The prompt &/($1 appears
on the display after each 30 hours running time.
Use a cleaning cassette suitable for reverse operation for this purpose. The
cleaning cassette should be removed again after 30 seconds.
73
&'0'2SHUDWLRQ
&RPSDFWGLVF&'LQVWUXFWLRQV
Sound interruptions may occur if the CD is dirty. In order to ensure optimum
tone quality, please note the following:
-
Always touch the CD at the edges only. Keep the disc clean and never touch
the surface.
Never stick anything to the CD.
Protect the CDs against direct sunlight and from heat sources such as
heaters etc.
Before playing, clean the CD with a commercially available cleaning cloth,
wiping from the centre outwards. Solvents such as petrol, thinners or other
commercially available cleaners and anti-static sprays must not be used.
&RUUHFW
,QFRUUHFW
,QFRUUHFW
&RUUHFW
,QVHUWHMHFWLQJ&'V0'V
Press
button briefly; the display folds downwards and the CD/MD slot
becomes visible. Insert the disc into the CD/MD slot with the printed side
upwards. The unit pulls in the CD/MD automatically and begins to play the
disc from the first track. Then fold the display up again.
After playing the last track, the unit automatically begins to play the first track
of the CD/MD again.
If there is already a CD/MD in the slot, press function button 1 repeatedly until
&' or 0' appears on the display.
In order to eject a CD/MD, press the
button briefly; the display folds
downwards and the CD/MD is ejected. Then remove the CD/MD. Then fold
the display up again.
,PSRUWDQW The CD/MD is not ejected when the unit is switched off but
remains in the slot.
74
&'0'2SHUDWLRQ
6NLSSLQJWUDFNVIRUZDUGVEDFNZDUGV
Turn right rotary control to right / left.
Through further turning of the right rotary control, several tracks can be
skipped over in forward or backward directions. The device switches to the
first track when the last track has been reached. Analogously, it switches from
the last track to the first track.
If the track has been playing for longer than 10 seconds when the return
function is triggered, the device returns to the beginning of the track.
6FDQVHDUFK
Press the right rotary control;
appears on the display. All following CD/
MD tracks are played for 10 seconds each. Press the rotary control again to
terminate the scan search.
)DVWIRUZDUGUHZLQG
Fast forward (audible) is activated by pressing the multifunction button “>>”
and fast rewind (audible) is activated by pressing the multifunction button
“<<”.
Fast forward / rewind is terminated by releasing the multifunction button.
75
&'0'2SHUDWLRQ
1XPEHURIWUDFNVDQGWRWDOSOD\LQJWLPH
By again pressing the multifunction button “7Σ”, the number of tracks and
total playing time of the CD currently being played are displayed for approx.
10 seconds.
If an MD is being played, only the number of tracks is displayed.
5DQGRPSOD\
The random play is activated by pressing the multifunction button “53”. The
tracks of the current CD/MD are then played in random order.
appears on
the display.
The random play function is terminated by repeated pressing of the
multifunction button “53”.
5HSOD\LQJDWUDFNUHSHDW
"Repeat track " is activated by pressing the multifunction button “537”.
appears on the display.
The "repeat track" function is terminated by repeatedly pressing the
multifunction button “537”.
76
&'0'2SHUDWLRQ
'LUHFWWUDFNVHOHFWLRQ
The unit is switched to select mode by pressing the multifunction button
“75&”.
75$&.BB is displayed.
A track can be selected directly by using the multifunction buttons “-”. The
unit switches back to CD menu mode if no buttons are actuated for approx. 8
seconds.
7HPSHUDWXUHSURWHFWLRQFLUFXLW
A temperature protection circuit is utilised in this unit in order to protect the
laser diode against over heating.
When this protection circuit is activated, 7(03 appears for 8 seconds and the
unit reverts to radio mode.
After a cooling time has elapsed, Single CD operation can be resumed. If it is
still too hot, the unit will revert to the signal source that had been previously
set.
77
&'0'&KDQJHU2SHUDWLRQ
2SHUDWLRQDOUHDGLQHVVRI&'0'FKDQJHU
A CD/MD changer connected to the auto audio unit is ready for operation when
there are CDs/MDs loaded. Close the sliding tray after loading. Further
operation is performed via the car radio control panel.
&'PDJD]LQHORDGXQORDG
In order to remove the CD magazine, open the sliding cover on the changer and
press the eject button. The magazine is ejected and can be removed.
When inserting CDs in the magazine, please note imprint on magazine.
,PSRUWDQWIncorrectly inserted CDs will not be played.
1RWH
78
In order to ensure the fastest possible CD change, the magazine
should be fully loaded from compartment 1.
&'0'&KDQJHU2SHUDWLRQ
3OD\LQJ&'V0'V
Press function button 1 repeatedly until the CD/MD changer operation is
switched on. The last CD/MD that was played is played from the position at
which it was left before switching off.
CDs/MDs can be selected via the multifunction buttons. During the selection
time &';/2$',1* or 0';/2$',1* is displayed. Subsequently, the
magazine compartment number and the number of the current track for the
selected CD/MD are displayed.
If no CD/MD is present in the selected magazine compartment (e.g.
compartment 2), 12&' or 120' appears briefly on the display.
After playing the last track of a CD/MD, the next CD/MD in the magazine is
automatically selected and played.
For further operations see CD Operation (page 23):
-
"Compact disc (CD) instructions" page 74
"Skipping tracks - forwards / backwards" page 75
"Scan search" page 75
"Fast forward / rewind" page 75*
"Number of tracks and total playing time" page 76*
"Random play" page 76*
"Direct track selection" page 77*
,PSRUWDQWFor the points marked with , function button 2 must be pressed
before selection, in order to access the submenu.
79
&'0'&KDQJHU2SHUDWLRQ
1DPLQJD&'
Press function button 2 in CDC mode. Then press multifunction button
“1$0”. The input menu appears on the display.
In order to name a CD or revise an existing name, press the function button
above ”(',7“ (function button 1).
Select the desired alpha characters using the multifunction buttons to the left
and right of the abbreviation $%&. Or turn the right rotary control to the left or
right.
To select the character position to be revised, use the multifunction buttons to
the left and right of the abbreviation 326 (flashing editing symbol). To
advance one character position, press the right rotary control.
A maximum of 8 characters can be entered.
To store the name, press the function button above ”2.“.
To delete an existing name, press the function button above “'(/” in the input
menu. Next select the name to be deleted using the multifunction buttons to the
left and right of the abbreviation '(/. Or turn the right rotary control to the
left or right.
Delete the name by pressing and holding the multifunction button “'(/” for
longer than two seconds.
To quit the function, press the function button above ”2.“.
80
&'0'&KDQJHU2SHUDWLRQ
&'WLWOHILOWHULQJ
Press function button 2 in CDC mode.
To filter the current CD title, briefly press the multifunction button “),/”.
appears above the multifunction button, which means the filter is activated.
Next press and hold the multifunction button “
” for longer than 2 seconds.
6HW)LOWHU will appear briefly and
will appear in the uppermost display line
to indicate the filter that has been set for this title.
To deactivate the filter, briefly press the multifunction button “),/” in order
to switch off the filter function first. (The display changes from
to ),/).
Then select the previously filtered title. The set filter for the selected title will
be indicated by
in the uppermost display line.
Next press and hold the multifunction button “),/” for longer than 2 seconds.
5HVHW)LOWHU appears briefly. The filter for this title has now been deactivated.
,PSRUWDQWThe filter function can be activated only if a name has been stored
for the selected CD.
81
8VHU0HQX
5HTXHVWLQJTXLWWLQJXVHUPHQX
After requesting the user menu, the following basic settings can be selected
according to your personal preference.
86
user memory
6(.
search mode
*$/
speed-dependent volume control
7(/
telephone characteristics
'59
LHD / RHD setting
)$9
favourite station settings
$8;
aux input setting
/&'
display setting (not for 4625)
&2/
display colour setting (not for 4625)
(1'
quit user menu
The user menu is requested by pressing and holding function button 2 for
longer than 4 seconds. The accompanying menu appears on the display.
In order to quit the user menu, press multifunction button (1'.
8VHUPHPRU\86
Request the user menu. Press multifunction button “86” to select the relevant
user (,or ).
Both tone settings for the individual tone sources and the GAL setting when the
unit was switched off, are stored in each user memory.
82
8VHU0HQX
6HWWLQJWKHVHDUFKPRGH6(.
Request the user menu. Press multifunction button “6(.” to select )54,
1$0 or &+1.
)54 Frequency search
1$0 Name search
&+1 Transmitter chain search
*$/VHWWLQJ
The GAL is a car radio control circuit, which automatically adjusts the car
radio volume according to vehicle speed. This results in compensation of the
driving noise produced at higher speeds.
Request the user menu. Press multifunction button “*$/” to select from to
. With the GAL setting, the start of volume adjustment can be specified
according to vehicle speed.
The setting is stored automatically.
Explanation of terms:
no volume control
Volume adjustment is initiated at low speed
Volume adjustment is initiated at high speed
83
8VHU0HQX
7HOHSKRQHPXWHFKDUDFWHULVWLFV7(/
If a telephone system with handsfree unit is installed in the vehicle, the
telephone conversation can be conducted via the car radio system. Thus,
installation of the normally required additional loudspeaker is not necessary. It
is essential that the signal cables (AF - telephone input and earth - telephone
input) are connected to the car radio (see page 94).
For selection, request user menu. Press multifunction button “7(/” to select
21 or 2)).
2)) 21 -
Telephone mute mode
Telephone conversation via car radio
6HWWLQJULJKWKDQGRUOHIWKDQGGULYH'59
If a telephone system with handsfree unit is installed the telephone
conversation is conducted via one loudspeaker side. The relevant loudspeaker
side (LHD / RHD) is selected using the DRV setting.
For selection, request user menu. Press multifunction button“'59” to select
/ (left-hand drive) or5 (right-hand drive). The setting is stored automatically.
&2/GLVSOD\FRORXUVHWWLQJQRWIRU
This setting is used to choose between two illumination colours.
For selection, request user menu. Press multifunction button“'59” to select
between5(' (red) and<(/(yellow). The setting is stored automatically.
84
8VHU0HQX
)DYRXULWHVWDWLRQVHWWLQJV)$9
The favourite station setting allows you to program the stations in FM DAS
according to listening preference rather than alphabetical order. For example,
if the user selects a 2nd-level FM DAS menu station with a less powerful
receiving signal, the station will be stored in 1st position in the FM DAS menu
regardless of the receiving signal strength.
For selection, request user menu. Press multifunction button “)$9” to select
21or2)). The setting is stored automatically.
$8;LQSXW$8;
This can be switched to 21 if no CD/MD changer is connected. An external
unit (Discman, Walkman, etc.) can then be operated via the CD changer AF
connections.
For selection, request user menu. Press multifunction button “$8;” to select
between 21 or 2)). The setting is stored automatically.
85
8VHU0HQX
'LVSOD\VHWWLQJ/&'QRWIRU
The display setting allows you to select among three different display versions.
- Negative display (1(*)
- Positive display (326)
- Automatic display ($87) - the display will appear negative or positive
depending on vehicle illumination.
For selection, request user menu. Press multifunction button“/&'” to select
between 1(* (negative),326 (positive) or $87 (automatic). The setting is
stored automatically.
86
6HUYLFH0HQX
6HUYLFHPHQXUHTXHVWTXLW
By repeatedly pressing the right rotary control, the following information can
be requested in the service menu.
7<3(
61
'$7(
&':5(6(7 *$/
6&'
-
display of model number
display of serial number
display of software status
reset triggering for CDW or MDW (if present)
display of current GAL adjustment
data from CD drive (if present)
In order to select the service menu, press
button repeatedly (within
8 seconds of switching on) until %(&.(5 is displayed.
On selection of menu function 5(6(7, CD/MD changer reset is first performed after actuation of multifunction button “5(6”.
The unit must be switched off in order to quit the service menu.
87
5DGLR2SHUDWLRQ
5HPRWH&RQWURORSWLRQ
2SHUDWLRQZLWKLQIUDUHGUHPRWHFRQWURO
There are two planes for remote control operation. The two planes are accessed
by pressing the * button.
Available at both planes:
ON button
- switch on / off
BD button
- select waveband
MODE button
- select operating mode
Available at first plane:
Button 2 /
Button 8 /
Button 5/SC
Button / 4
Button 6 /
-
increase volume
decrease volume
scan function according to operating mode
downward search or track skip downwards
upward search or track skip upwards
Available at the second plane after pressing the * button:
Buttons 0 - 9
- station button selection
88
&RQQHFWLRQ,QVWUXFWLRQV
C1
C2
C3
B
A
:DUQLQJ Terminal 30 and terminal 15 must always be connected
separately, otherwise an excessive current consumption occurs
when the unit is switched off. Connection socket A is not the same
for all vehicle types. Therefore, always measure voltages before
installation.
6RFNHW$
1
2
3
4
5
6
7
8
Speed dependent volume control
not assigned
Telephone mute / clearing function
Permanent positive (terminal 30)
Control output for automatic aerial / amplifier
Illumination (terminal 58)
Switched positive (terminal 15)
Earth (terminal 31)
6RFNHW%
1
2
3
4
5
89
Loudspeaker rear right +
Loudspeaker rear right Loudspeaker front right +
Loudspeaker front right Loudspeaker front left +
6
7
8
Loudspeaker front left Loudspeaker rear left +
Loudspeaker rear left -
6RFNHW&
1
2
3
4
5
6
LineOut rear left
LineOut rear right
AF earth
LineOut front links
LineOut front right
LineOut Subwoofer
6RFNHW&
7-12
Special connection for Becker CD changer /
Sony MD changer
6RFNHW&
13
AF telephone input
14
Earth - telephone input
15-17 Special connection for Becker CD changer /
Sony MD changer
18
CD AF earth (AUX)
19
CD AF left (AUX)
20
CD AF right (AUX)
5HPRYDO,QVWDOODWLRQ*XLGH
A universal bracket for DIN installation slots is integrated into this car radio. An installation frame is not required. The unit is
inserted into the installation slot and secured using the slides supplied.
Complete the electrical connections. Then push the unit into the installation slot. Subsequently, push the slides into the apertures
in the front of the unit to the first detent position (illustration A). Now lock the radio by pulling both slides, as shown in illustration
B. Subsequently, remove the slides.
$
%
90
5HPRYDO,QVWDOODWLRQ*XLGH
For removal, the unit must first be unlocked. For this purpose, push in both slides to the second detent position, as shown in
illustration A. Subsequently, withdraw the unit with both slides (illustration C). Then remove the slides by pressing the springs
on the right and left sides of the unit.
If the unit has been installed in another vehicle, the unit’s springs may have to be adjusted before installation. To adjust the springs,
push in the slides as shown in illustration D and then adjust as shown in illustration E (press the slide lightly in direction 1 and
simultaneously move the slide in direction 2).
&
(
'
91
*HQHUDO,QVWUXFWLRQV
)UHTXHQF\VHDUFK
In frequency search mode, the receivable frequencies are searched for in
descending/ascending order of frequency. Each receivable frequency is set.
Tuning steps of 100 kHz are used for the search.
1DPHVHDUFK
In name search mode, all receivable and identifiable RDS programmes in FM
can be selected in descending or ascending alphabetical order.
7UDQVPLWWHUFKDLQVHDUFK
In the transmitter chain search mode, all receivable and identifiable RDS
programmes in FM can be selected according the transmitter chains to which
they belong.
5'66<67(0
This car radio is capable of receiving RDS signals (RDS = Radio - Data System) in the VHF range. RDS is a technique which enables the transmission
of inaudible additional information in the VHF broadcasting range. This means
that the transmitter broadcasts information which can be evaluated by the car
radio.
92
*HQHUDO,QVWUXFWLRQV
37<3URJUDP7\SH
Specific types of program, such as e.g. sport, pop music, classical music etc.,
can be selected using the PTY function.
The PTY is broadcast by the RDS transmitter, provided that the transmitter is
equipped with this function. The selected transmitter program type can be
displayed or a search of a specific PTY transmitter can be performed.
Examples of program types:
1(:6
News services
$))$,56 Politics and current affairs
I1)2
Special word programme
('8&$7( Learning and further education
'5$0$
Radio plays and literature
&8/785( Culture, church, society
9$5,('
Light entertainment
27+(50 Special music programmes
),1$1&( Financial information
62&,$/
Social reports
3+21(,1 Interviews
/(,685( Leisure time reports
&28175< Country music
2/',(6
Oldies
'2&80(17Documentary
3230
Pop music
52&.0 Rock music
6&,(1&( Science
/,*+70 Easy listening
&/$66,&6 Classical music
($6<0
Musical entertainment
63257
Sport
:($7+(5 Weather reports
&+,/'35* Childrens’ programmes
5(/,*,21 Religious reports
75$9(/
Travel reports
-$==
Jazz music
1$7,210 Traditional music
)2/.
Folk music
1237<
No programme type
93
7HFKQLFDO'DWD
:DYHEDQGV
:
FM 87.5 MHz - 108 MHz
AM 531 kHz - 1620 kHz
LW 153 kHz - 282 kHz
SW 5800 kHz - 6250 kHz
)UHTXHQF\UDQJH
:
50 Hz - 14 kHz for TAPE operation
20 Hz - 20 kHz for CD/MD operation
30 Hz - 15 kHz for FM
50 Hz - 2.5 kHz for AM, LW, SW
2XWSXWSRZHU
:
4 x 18 Watt
/LQHFURVVVHFWLRQ
:
min. 0.75 mm²
/RXGVSHDNHULPSHGDQFH :
min. 4 Ω
/LQHRXW
:
4 x analogue line out (Va max 3Veff at 10 kΩ)
*$/
:
In order to utilise the GAL, a square wave voltage
with an amplitude of +4 V - +12 V relative to earth, must be available from the electronic
speedometer of the vehicle. The adjustment is performed in 7 steps of 2.5 dB.
$HULDO
:
Impedance 50 Ω
$)WHOHSKRQHLQSXW
:
Max. input voltage 8 V (if interference occurs, a commercially available 1 : 1 transformer
should be connected into the signal cable).
$8;LQSXW
:
16 kΩ input impedance, max. input voltage 1.7 Veff
7HOHSKRQHPXWH
:
Low active level < 2 Volt
6XSSO\YROWDJH
:
12 Volt
&'0'FRQQHFWLRQ
:
The Becker CD changer Silverstone (2660 or 2630), or the Sony MD changers MDX 60 and
MDX 61 can be connected.
3OD\DEOH&'V
:
Only CDs which conform to DIN EN 60908 may be used.
The use of 8 cm CDs with adapter is not recommended.
94
127,&(
Dear listener !
According to current EU guidelines, any person may operate this radio receiver.
This unit conforms to the current valid European or harmonised national regulations. The designation
is your guarantee of conformance to the applicable specifications concerning electromagnetic
compatibility for the unit. This means that interference affecting other electrical/electronic devices
caused by your unit, as well as interfering influences on your unit from other electrical/electronic
devices, can be largely prevented.
Current designations are:
&(V\PERO for issue according to
European guideline 89/336/EEC.
HV\PEROaccording to European
motor vehicle EMC guideline 95/54/EU, also permits
operation in motor vehicles (classes M, N and O)
which received their type approval after 1st January 1996
95


![[de] Gebrauchsanleitung 2 [fr] Mode d`emploi 10 [en] Instruction](http://vs1.manualzilla.com/store/data/006429905_1-a9442a5acfa7a0b1f04bd604e34d2e55-150x150.png)