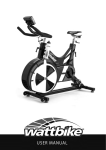
Download Wattbike On-site Workshop
Transcript
Wattbike
On-site Workshop
Contents
Introduction..........................................................................................................................................................................................3
Aims of the workshop........................................................................................................................................................................3
Workshop Outline...............................................................................................................................................................................4
What does a Wattbike do?................................................................................................................................................................5
Bike set up.............................................................................................................................................................................................6
Using the Wattbike Performance Computer...............................................................................................................................7
Pedalling Technique...........................................................................................................................................................................8
Gearing and Resistance.....................................................................................................................................................................9
Wattbike Pro – table.........................................................................................................................................................................11
Wattbike Trainer – table..................................................................................................................................................................11
Warming up........................................................................................................................................................................................12
Submaximal Ramp Test and 10’ Progress Check.....................................................................................................................14
10’ Progress HR Observation.........................................................................................................................................................18
Heart rate and power training zones..........................................................................................................................................18
Care of the Wattbike.........................................................................................................................................................................21
What’s next?....................................................................................................................................................................................... 22
Workshop notes................................................................................................................................................................................ 22
2
Introduction
Welcome to the Wattbike Introductory Workshop. This represents the culmination of a number
of years work, monitoring cyclists, triathletes and fitness enthusiasts on the Wattbike, and has
been re-written many times to try and enable the science behind performance to be explained
in a way that is accessible to all, without compromising the quality of the content.
We have also developed expanded training and testing guides which are available from our
website, created by Wattbike’s resident Sport Scientist, Eddie Fletcher, who has been testing,
monitoring and training athletes around the world over the past few years. Each of the
performance tests within the guides have been based on providing the answer to a specific
question, how to assess an individual to establish their heart rate and power training zones to
be able to monitor performance.
In some cases new testing protocols have been developed as there had never been a testing
tool like the Wattbike available before.
We hope that today you can see how effective the Wattbike is when training, testing and
improving physical ability.
Aims of the workshop
•
•
•
•
•
•
•
Understand how the Wattbike works and how to set up a rider correctly
Use the Wattbike Performance Computer (WPC) and scroll through the different screen options including linking heart rate monitors to the WPC
Understand the importance of pedalling technique
Understand how resistance and cadence works on a Wattbike
Conduct a warm up and submaximal test on the Wattbike
Know how to take care of your Wattbike (physically and technically)
Know how to have fun on a Wattbike
3
Workshop outline
10.00 - 10.15
10.15 - 10.35
10.35 - 10.55
10.55 - 11.15
11.15- 11.25
11.25-11.45
11.45-12.30
12.30 - 12.45
12.45-13.00
13.00 - 13.15
13.15-13.45
13.45 - 14.00
Introduction, registration, welcome
How the Wattbike works and Bike set up
Using the WPC
Pedalling Technique
How to use the resistance settings
Warm up
Introduction to Fitness Testing
Break
10’ Progress check
Care of your Wattbike
Having fun on the Wattbike
What’s next? & Q and A workshop, close
Contact details
Wattbike Head office: 0115 945 5450
Email: [email protected]
Wattbike Ltd
Vermont House
Nottm Sth & Wilford Ind Est
Nottingham
NG11 7HQ
Extended Training Guide http://wattbike.com/uk/guide
For information, help, complaints, feedback, bookings, sales please use these contact details.
4
What does a Wattbike do?
The Wattbike measures absolute mechanical power in Watts (a measure of how quickly work
is done). The amount of power produced is measured from the force applied to the chain
through the cranks.
The Wattbike is factory calibrated and does not need recalibrating. It is very accurate and has
a mean accuracy typically within 2%. It samples the force data 100 times a second recording
data for each pedal revolution.
It also measures 42 different cycling parameters. Not all the parameters are visible on the
Wattbike Performance Computer but the main parameters that are needed to monitor and
analysis performance are contained within the Wattbike Performance Computer.
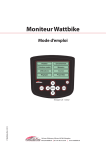
The most up to date Wattbike Performance Computer (known as Monitor B) shows every pedal
revolution live and has many of the parameters and analysis functions built into the screens.
What’s the difference between the Wattbike Pro and the
Wattbike Trainer?
There are two Wattbikes, the Pro and the Trainer. Both Wattbikes have the same measurement
system, accuracy, Performance Computer and Wattbike Expert software functions and deliver
a professional range of cadence/power outputs. The only difference is the resistance range.
The Trainer is low to medium resistance whilst the Pro is medium to high resistance.
There is an overlap from the Trainer to the Pro at the medium level. At each equivalent resistance
level and cadence the Trainer power output (W) is approximately 57% of the equivalent output
on the Pro.
Simply put, if cycling at 90 cadence on the Wattbike Trainer at resistance level 1 power output
is 85 W and at resistance level 10 225 W.
On the Wattbike Pro resistance level 1 at 90 cadence delivers 150 W and at resistance level 10
390 W.
How to choose the right Wattbike
The choice is easier to make if the Wattbike is for individual use. If it will be used by others
(family members, young adults/children) then the choice invariably will be the Wattbike Trainer
as this gives the lower resistance ranges that will be needed for effective exercise by noncyclists and children.
The Wattbike Trainer is the preferred model for most people, as they can use the combination
of the air brake and the magnetic brake to replicate any desired power to meet practical
exercise and training needs.
For riders who need higher resistance settings and for sprinters the Wattbike Pro is probably
more appropriate.
5
Bike Set Up
It is important that to set up a safe and comfortable cycling position. The correct set- up is crucial
to maximise performance, prevent injury and ensure the most comfortable riding position on
the Wattbike. Set up takes account of various body shapes, bone length discrepancy, flexibility/
core strength and injury history.
The correct sequence for set up is, saddle height, saddle fore/aft position, handlebar height
and handlebar fore/aft position.
Before starting, ensure that the saddle is parallel to the floor; use a spirit level if necessary.
Saddle Height
The easiest way to get a rough height for the saddle height is
to stand the rider next to the bike with the heel pushed into the
back stabiliser, and then lift the saddle up so that the top of the
saddle is level with the boney protrusion of the hip.
Sit the rider on the Wattbike and align the crank arms with the
seat post, place the heel of the foot on the crank arm nearest the
floor – the leg should be straight (but not locked out).
When clipped in (or with feet in the toe clips) and with the pedal at its longest stroke (in line
with the seat post) there should approximately 25-30 degrees bend on the knee. The rider
should be able to ‘drop the ankle’.
Raise/lower the saddle height to get the correct leg position. ALWAYS DISMOUNT THE
WATTBIKE BEFORE MAKING ADJUSTMENTS TO THE SADDLE.
Now get the rider to pedal backwards, they should be able to complete rotations with only a
slight rocking of hips and without the legs locking out.
Saddle fore/aft Position
With the feet clipped in (or in the toe clips) bring the crank arms parallel to the floor, drop a
plumb line from the inside of the knee, in the indentation next to the patella - it should bisect
the pedal spindle. Adjust the saddle fore/aft to ensure that the knee is over the pedal spindle.
NOTE – if you need to move the saddle fore/aft severely, you may need to raise/lower the
saddle to compensate
The difference between the forward and back positions of the saddle fore/aft adjustment is 6
cm.
Handlebar Height (Saddle to Handlebar Difference)
Adjust the handlebar height so that it is no more than 4 to 10 cm lower than the saddle height
(depending on fitness and flexibility, a higher handlebar height may be more comfortable) –
for general exercise classes the saddle and handlebars should be at the same height - Use a
long spirit level from the saddle across to the handlebar to set this height.
Once the handlebar height has been set, check it by asking the rider to lift their hands off the
handlebars – they should be able to hold position.
NOTE – with the saddle and handlebar both set at maximum height there is a saddle to
6
handlebar difference of 7 cm – for safety reasons do not go above minimum markings – extralong stems are available which increase the settings by 10 cm.
Handlebar fore/aft Position
Ask your participant to place their hands on top of the handlebars and bring the crank arms
parallel to the floor – drop a plumb line from the elbow, it should fall through the inside of
the knee, in the indentation next to the patella and should bisect the pedal spindle – adjust
handlebars fore/aft to get the correct position. ALWAYS DISMOUNT THE WATTBIKE BEFORE
MAKING ADJUSTMENTS TO THE SADDLE OR HANDLEBARS.
An alternative method is to look at the angle of the back which should be at 45° parallel to the
floor with an upper arm to torso angle of 90°.
The difference between the forward and back positions of the handlebar fore/aft adjustment
is 6 cm.
By following these simple steps the rider will be placed in the optimum position for both
comfort and effective cycling technique. Any slight variation in correct set up will alter the
alignment of the joints, muscles and subsequently technique. Ensure that you follow these
simple steps with every new rider and recap where required with your existing, regular riders.
Using the Wattbike Performance Computer
(WPC)
Home Screen Options
Just Ride - The quickest way to start a workout. Just ride is a simple way of getting started.
Time duration counts upwards showing the total time spent on the Wattbike. Has screens
showing pedaling technique (polar view), power (W), Energy (kcals), speed (kmh/mph), and
pace (1/km).
Workouts/Tests - Includes pre made tests and workouts and gives the ability to set up
customized workouts as a single (distance/ time) or intervals (distance/time – no rest, with
rest or varied) or ride a previous workout.
Linking HR Belt - Allows link to heart rate monitor strap so that it is coded to the Wattbike.
Links with Polar, Garmin/Myzone or Suunto belts providing it has ANT/ANT+ technology.
Recall - Allows the recall of old workouts, old races data and statistics.
Users - Allows the set up a personal profile where all of the users’ data is stored.
Settings – Allows customization of the screens on the Performance Computer. Change the
default screen, switch to the imperial measurements (mph, lbs.), set the language and set
keyboard sounds are just a few of the options.
7
Race - This becomes available if the Wattbike is connected to other bikes and Power Cycling
software
Properties - Is where information about the Performance Computer is stored. The firmware
and battery life are just a few of the things that can be found here
Other commands.
ESC - Ends the workout and activates the Recall screen. Continue to press ESC to go back to
Main menu
Enter – To input a command
Arrows - Used to navigate through options or find letters and numbers on scroll options
Menu - When the Wattbike is being used the Menu button can be used to give you further
options such as Pause and Setting a Pace.
Pedalling Technique
Fundamental using the Wattbike and improving performance is the development of good
pedaling technique.
One of the unique features of the Wattbike is the ability to monitor pedaling technique, live
every pedal revolution. This is shown as a graph on the Wattbike Performance Computer –
we call it the Wattbike Force Curve or Polar view.
The Wattbike Force Curve shows three things:
• Force applied to the pedals
• Position of the pedals when applying this force on the left and right leg
• Down stroke (angle of peak force)
The left hand side is the left leg down stroke starting at the top of the graph (12 o’clock position)
and finishing at the bottom of the graph (6 o’clock position).
The right hand side is the right leg down stroke starting at the bottom of the graph (6 o’clock
position) and finishing at the top of the graph (12 o’clock position).
The key measures used to assess pedaling technique are:
• Left and right leg symmetry (50%/50% balance) • Left and right leg angle to peak force (the same angle for each leg)
• The overall shape of the Polar view
8
Gearing and Resistance
What is a Gear?
In addition to the measuring technology the basic construction of the Wattbike includes a
chain, a 48 chainring and 13 sprocket combination. Fundamental to understanding how the
Wattbike relates to cycling is the understanding of what chainrings and sprockets are and do,
bike gearing and how the air brake gear lever, in particular can be used to simulate gearing on
a bike.
We have all heard about and probably used a gear on a bike – but what is a gear and what does
it do? Simply a gear determines the distance a bike will travel in one complete pedal revolution.
It is dependent on the circumference of the wheels and the size of the front ‘chainring’ and the
back ‘sprocket’
The number of teeth on a chainring or sprocket determines its size. For instance a 52 chainring
has 52 teeth; a 14 sprocket has 14 teeth. So you may hear a gear referred to as a 52/14.
Chainrings commonly range from 39 teeth to 56 teeth in size (smaller and larger are available)
and sprockets 11 teeth to 26 teeth – the combinations depend on the needs of the cyclist.
Measuring the distance a bike travels over one complete pedal revolution is known as ‘rolling
out’ and is measured in metres (known as ‘gear metres’). Put the bike into gear i.e. 52/14 roll the
bike backwards for one complete pedal revolution. The distance between the start and finish
position is measured.
There is a full standard gear metre table (rolled out meters) for standard sprint rim wheels
with normal road tubular tyres in the Wattbike training guide (available for free download on
wattbike.com if a user requires more information on these measurements.
Resistance on a Wattbike
This is determined by the use of the air resistance (on the left) and magnetic resistance located
on the inside of the main body (the right)
The air resistance allows for settings 1-10 (1 being less air resistance and 10 allowing more) and
the magnetic control 1-7 (1 being no resistance and 7 being more).
Lower gearing can be used for:
• High leg speed (cadence drill/training)
• A starting point for a beginner
• Technique sessions
• Endurance training
Higher gearing can be used for:
• Short interval training • Power development training
• Testing for stronger riders
9
Air resistance vs. magnetic resistance
The air resistance (on the left) can be used to replicate the gearing of a regular bike. The
magnetic resistance (on the right) can be used to replicate hills/inclines/bigger gears (although
for some riders there is enough range using air resistance only).
Using the resistance setting
It is important to first, determine the fitness and ability of the rider. Start off with a lower resistance
and establish good cycling technique. Adjust the settings in small amounts depending on the
distance/time cycled. This may take a few weeks/sessions to determine how much resistance
the rider can maintain with good form, at different power and speeds and without their heart
rate climbing too high. Monitor and record data as they exercise to create a personal profile of
development.
Establishing heart rate and power training zones will assist in setting appropriate resistance
levels. Once training zones have been established it is easy to work out the air resistance and
cadence settings that apply to each of the heart rate and power training zones.
This means that it is possible to train with the correct heart rate, power, cadence and air
resistance for a training session of known duration/distance and intensity (training zone).
It is then possible to train by any combination of heart rate, power, cadence and air resistance
setting. Training zones are determined by percentage of maximum heart rate, and percentage
of maximum minute power (MMP*) and duration.
*The highest average power achieved in any minute (usually the final minute) of a maximum
1 minute cycling ramp test.
How to test is the subject of a second workshop on Fitness Testing although this workshop
includes conducting a submaximal test to approximate maximum heart rate and maximum
minute power.
Use the tables below to establish the correct power output (in Watts) by air resistance setting
and cadence (in 5 rpm bands) for any test or training workout. For ease of reference the Watts
have been rounded to the nearest 5 W.
10
Wattbike Pro
Cadence
Level 1
Level 2
Level 3
Level 4
Level 5
Level 6
Level 7
Level 8
Level 9
Level 10
40
25
30
30
40
45
45
50
50
55
55
45
35
40
40
45
50
55
55
60
60
65
50
40
40
50
55
60
65
70
70
75
80
55
50
50
60
70
75
80
90
95
100
105
60
60
60
70
80
90
100
110
115
120
125
65
70
80
90
100
115
125
135
150
155
160
70
85
90
105
120
135
150
165
175
185
190
75
100
105
130
150
175
185
200
210
225
240
80
115
125
150
170
195
215
235
250
270
280
85
130
145
170
195
225
260
275
295
320
340
90
150
165
200
235
265
300
325
350
375
390
95
175
185
225
265
310
350
375
400
425
450
100
195
215
260
310
355
395
430
465
500
520
105
210
230
295
350
400
445
490
525
565
600
110
245
270
330
395
455
510
555
600
645
675
115
270
310
380
445
515
575
625
675
725
760
120
300
335
410
490
570
640
695
750
810
850
125
330
370
450
545
635
710
775
835
900
945
130
360
405
495
600
705
785
855
925
995
1045
Wattbike Trainer
Cadence
Level 1
Level 2
Level 3
Level 4
Level 5
Level 6
Level 7
Level 8
Level 9
Level 10
40
15
15
15
20
25
25
25
30
30
30
45
20
20
20
25
30
30
30
35
35
35
50
25
25
25
30
35
35
40
40
45
45
55
30
30
35
40
40
45
50
50
55
55
60
35
35
40
45
50
55
60
65
70
70
65
40
45
50
55
65
70
75
80
85
90
70
50
50
60
70
75
85
95
100
105
110
75
55
60
70
80
95
105
115
120
130
135
80
65
70
85
95
110
125
135
145
155
160
85
75
80
100
115
130
145
160
170
180
190
90
85
95
115
135
150
170
185
200
215
225
95
100
110
130
155
175
200
215
230
245
260
100
110
125
150
175
200
225
245
265
285
300
105
125
140
170
200
230
260
280
300
325
340
110
140
155
190
225
260
290
320
340
365
385
115
155
175
210
250
290
325
355
385
415
435
120
170
190
235
280
325
365
395
430
460
485
125
190
210
260
310
360
405
440
480
513
540
130
210
230
280
340
400
450
490
530
570
595
11
Warming up
The purpose of a warm up is to increase muscle and core temperature, blood flow and improve
the uptake, transport and utilisation of oxygen, as well as providing a comfortable way to lead
into more vigorous exercise.
A warm up should progress gradually and provide sufficient intensity to increase muscle and
core temperature without causing fatigue or reduced energy stores (it should make you sweat
and you should be slightly breathless).
A warm up also prepares the body physically and mentally for the test or training workout. At
the start of exercise, the body begins to release adrenalin, which increases the heart rate and
causes dilation of the capillaries in the muscles.
This has the dual function of increasing the temperature and elasticity of the muscles to help
prevent injury and improve the speed at which oxygen can be transported around the body.
The increased temperature allows the enzymes required for the muscular contraction to
function more efficiently.
Warm up also make the body more alert as the increased body temperature allows nerve
impulses to travel more quickly, improving reaction time. There are also psychological benefits
of a warm up, especially for riders who are superstitious and perform the same routine every
time they exercise.
The warm up may need to vary depending on the environmental conditions (hot or cold/dry
or humid) and should be completed 5-10 minutes before undertaking a Wattbike workout.
We have included a 20 minute set warm up. The idea is to make sure the rider is adequately
warmed up for a high intensity test or training workout, without causing fatigue.
The warm up routines are examples only – getting the warm up right so that it really works
for an individual rider may take time. It is important to use and practice the warm up so the
body adapts to the routine – it could be used as a stand-alone practice workout (particularly
for pedaling technique).
The exact position of the ‘rev outs’ can be variable but make sure they are towards the end of
the warm up and that the rider has 1’ steady pedalling between each ‘rev out’. Always complete
the warm up with 2’-3’ minutes at the lowest recommended cadence level. The last interval of
2’42” is to make the warm up last exactly 20 minutes.
It is important when carrying out fitness tests to have a set warm up that is used consistently
each time the rider is retested.
When using Wattbike programming you will notice (‘) and (“) next to numbers. This indicates
minutes and seconds (5’) is five minutes and (5”) is five seconds.
Warm up on the Wattbike Pro
Warm Up A - Cadence 90-110rpm
Levels:
• for people with MMP of < 320 W - use Air Damper Lever Setting 1
• for people with MMP of 320-360 W - use Air Damper Lever Setting 2
• for people with MMP of 360-440 W - use Air Damper Lever Setting 3
• for people with MMP of >440 W - use Air Damper Lever Setting 4
12
Time
Cadence
5’
90
2’
95
2’
100
2’
105
1’30”
110
30”
Rev out
120-130
2’
90
6”
Max rev
out 150+
1’
90
6”
Max rev
out 150+
1’
90
6”
Max rev
out 150+
2’42”
90
If your MMP is less than 280-320 you may wish to consider the Wattbike Trainer as the Wattbike of choice.
Warm up B and C are shown only as possible alternatives for cyclists with lower leg speed OR MMP.
Warm Up B - Cadence 85-105rpm
Levels:
• for people with MMP of < 290 W - use Air Damper Lever Setting 1
• for people with MMP of 290-320 W - use Air Damper Lever Setting 2
• for people with MMP of 320-390 W - use Air Damper Lever Setting 3
• for people with MMP of > 390 W – also use Air Damper Lever Setting 3
Time
Cadence
5’
85
2’
90
2’
95
2’
100
1’30”
105
30”
Rev out
115-125
2’
85
6”
Max rev
out 150+
1’
85
6”
Max rev
out 150+
1’
85
6”
Max rev
out 150+
2’42”
85
Cadence 80-100rpm
Levels:
•
•
•
•
Time
Cadence
for people with MMP of <260 W - use Air Damper Lever Setting 1
for people with MMP of 260-290 W - use Air Damper Lever Setting 2
for people with MMP of 290-350 W - use Air Damper Lever Setting 3
for people with MMP of > 350 W – also use Air Damper Lever Setting 3
5’
80
2’
85
2’
90
2’
95
1’30”
100
30”
Rev out
110-120
2’
80
6”
Max rev
out
1’
80
6”
Max rev
out
1’
80
6”
Max rev
out
2’42”
80
Warm up on the Wattbike Trainer
Warm Up - Cadence 90-110rpm
Levels:
• for people with MMP of < 185 W - use Air Damper Lever Setting 1
• for people with MMP of 185-200 W - use Air Damper Lever Setting 2
• for people with MMP of 200-250 W - use Air Damper Lever Setting 3
• for people with MMP of 250-300 W - use Air Damper Lever Setting 4
• for people with MMP of 300-350 W - use Air Damper Lever Setting 5
• for people with MMP of 350-390 W - use Air Damper Lever Setting 6
• for people with MMP of 390-425 W - use Air Damper Lever Setting 7
• for people with MMP of 425-450 W - use Air Damper Lever Setting 8
• for people with MMP of 450-485 W - use Air Damper Lever Setting 9
• for people with MMP of >485 W – Use air damper Lever setting 10
13
Time
Cadence
5’
90
2’
95
2’
100
2’
105
1’30”
110
30”
Rev out
120-130
2’
90
6”
Max rev
out 150+
1’
90
6”
Max rev
out 150+
1’
90
6”
Max rev
out 150+
2’42”
90
If your MMP is greater than 300-320 you may wish to consider the Wattbike Pro as the Wattbike of choice.
Always err on the side of caution and choose a level that produces the warm up effect.
Submaximal Ramp Test and 10’ Progress Check
Submaximal Ramp Test
This test is designed for individuals who take part in moderate activity on a regular basis (3x30’
per week). This includes regular gym users, people who run and cycle and people who play
sports recreationally.
This test is designed to give a benchmark fitness level from which improvement in fitness can
be monitored. As with the sub-maximal 10’ test, the test is terminated when the rider indicates
they have reached level 7/8 on the Borg scale of perceived exertion (‘no-talk’ level).
The heart rate achieved at termination is deemed to be 85% of maximum heart rate and 60 W
is added to the Watts achieved at the termination level to determine maximum minute power*
so that heart rate and power training zones can be calculated.
As it is a sub-maximal test it can be done regularly to track fitness improvement (monthly) and
to rebase heart rate and power training zones as fitness improves.
The test uses just one setting – air resistance level 8 on a Wattbike Trainer OR air resistance
level 3 on a Wattbike Pro
The data collected during this test can be used to estimate maximum minute power and
maximum heart rate which can then be used to establish training zones using the British
Cycling methodology.
What is maximum minute power [MMP]?
*The highest average power achieved in any minute (usually the final minute) of a maximum
1 minute cycling ramp test.
How does the test work?
• Warm up for 5’ at 50-60 rpm on air resistance setting 8 on the Wattbike Trainer or setting 3 on the Wattbike Pro
• Pedal in a seated position for 1’ at the starting power
• Increase the air resistance setting and cadence as necessary every minute to ensure a 15 W increase in power (W) output very minute
• Keep increasing the power (W) output by 15W minute until ride reaches the no-talk stage – level 7/8 on the Borg scale of perceived exertion – note peak heart rate achieved (assumed to be 85% of maximum heart rate)
• OR if the rider experiences any adverse symptoms, requests to stop or experiences an emergency situation
• Cool down for 5’ at 50-60 rpm 5’ on air resistance setting 8 on the Wattbike Trainer or setting 3 on the Wattbike Pro – or lower setting as appropriate
14
Wattbike Trainer cadence - air resistance 8
Stage (minutes)
1
2
3
4
5
6
7
8
9
10
11
12
13
Power (W)
85
100
115
130
145
160
175
190
205
220
235
250
265
Approx. Cadence (rpm)
67
70
74
77
80
83
86
88
91
93
96
98
100
Wattbike Pro cadence - air resistance 3
Stage (minutes)
1
2
3
4
5
6
7
8
9
10
11
12
13
Power (W)
85
100
115
130
145
160
175
190
205
220
235
250
265
Approx. Cadence (rpm)
64
68
72
75
79
82
85
88
91
93
96
99
101
15
Monitor B output from a Submaximal Ramp Test
The Wattbike Monitor B has pre-set test workouts and a number of automatic outputs following
completion of a test.
From the Main menu select Workout/Tests and then Tests – the Tests screen appears. Select
Submax Ramp.
Input rider weight.
The monitor is set at 1’ intervals with zero rest and counts downwards.
On completion of the Test the data can be accessed in Recall. The are two test result screens,
the first is the Test tab and the second is the Zones tab.
16
The are two test result screens, the first is the Test tab and the second is the Zones tab.
Test tab
This tab will show:
Estimated Maximum minute power (MMP)
Estimated Maximum heart rate (MHR)
Estimated Power/mass
VO2max estimate
METs
Zones tab
This tab will use estimated MMP and estimated MHR to calculate training zones based on the
British Cycling heart rate and power training zones.
The data can be viewed in graph form in Intervals with the power data (scroll across the graph
for each minute) and with all the parameter data available in Summ. (again scroll up/down for
each minute).
Zones tab
This tab will use estimated MMP and estimated MHR to calculate training zones based on the
British Cycling heart rate and power training zones.
The data can be viewed in graph form in Intervals with the power data (scroll across the graph
for each minute) and with all the parameter data available in Summ. (again scroll up/down for
each minute).
17
10 Minute Progress Heart Rate Observation
The 10 minute progress heart rate observation is a simple aerobic test that can be used at the
start and finish of a fitness plan.
The test is conducted after a set warm up that should be consistent when re-testing. A heart
rate monitor should be worn throughout the test and linked to the Wattbike performance
computer.
The rider cycles at a set power (70% of estimated maximum minute power) throughout the
test and the heart rate is recorded on a graph every 60 seconds for the 10 minute duration (or
from the 1’ split data use average HR for each minute or peak HR for each minute).
When re-testing it is useful to plot on the same graph and used a different coloured marker so
that a visual comparison can be seen easily.
The benefits to this test are:
• The trainer/coach can provide simple data to the rider that directly relates to their cardiovascular fitness over the period of training
• The test can be terminated safely if the rider is reaching a maximum heart rate (but if set based on maximum minute power this should not be an issue)
•
•
•
The resistance level can be adjusted to suit the current fitness level of the rider
A rider can see evidence of their progress and set further exercise goals
The test is simple to conduct
To conduct the test, follow these steps:
• Main menu - Link HR
• The heart rate will display on the live screens
• From the Main menu go to Workouts/Tests, then go to Tests and select 10’ Progress
• When the test is completed go to Recall to look at the 1’ splits and to record average HR and peak heart rate for each completed minute
Heart rate and Power Training Zones
Heart rates are measured by connecting a heart rate monitor to the Wattbike (coded Suunto
and Garmin and Polar.
We have adopted the British Cycling methodology for calculating heart rate and power training
Zones. This methodology has been expanded to include a table of recommended Wattbike
cadence and air resistance settings to achieve the heart rate and power zones required.
In general a workout where heart rate is 50 beats below maximum heart rate is recovery
or base endurance. 30 to 50 beats below maximum is endurance training, 15 to 30 beats
below maximum is intensive training and 0-15 beats below is very short high intensity interval
training.
Once a Wattbike test has been conducted it is possible to work out the air resistance and
cadence settings that apply to each of the heart rate and power training zones using the table
provided in this guide.
18
The key measures that a test provides and that can be used to establish (or estimate) heart rate
and power training Zones are:
• Heart rate (BPM)
• Watts (W)
• Cadence (r/m)
The only way to determine cycling maximum heart rate and maximum minute power is by
using a properly constructed cycling test.
However such a test requires considerable motivation, physical stress and discomfort and it is
inadvisable without medical clearance and supervision, particularly for individuals predisposed
to coronary heart disease.
Tests should only be conducted by qualified personnel and they should have attended the
Wattbike Fitness Testing Workshop.
We use a submaximal test in this workshop to illustrate how training zones are constructed.
Training zones are determined by percentage of maximum heart rate, percentage of
maximum minute power and duration. Each Training Zone has a different purpose as defined
in the following table:
Training Zone Purpose
Recovery
Regeneration
and recovery
1. Basic
Establish base
endurance
2. Basic
Improve
efficiency
%MMP
>60
%MMP
<35
60-65
35-45
65-75
45-55
3. Intensive
75-82
55-65
4. Intensive
Improve
sustainable
power
RPE (1-10) & feeling
1. Very relaxed. Able to carry
on a conversation
2. Relaxed. Able to carry on a
conversation
3. Working. Feel warmer.
Heart rate and respiration up.
May sweat
5. Hard work. Heart rate and
respiration up. Carbon dioxide
builds up. Sweating. Breathing
hard
6. Stressed. Panting. Sweating
freely
7 Very stressed. Gasping.
Sweating heavily
<60
90’-360’
60’-240’
45’-120’
Push
82-89
65-75
30’-60’
threshold up
5. Maximal
Sustain a high 89-94
75-85
14’-40’
percentage
of maximal
aerobic
power
6. Maximal
Increase
>94
85-100 10 Heavily stressed. Gasping. 4’-10’
maximum
Sweating heavily
intervals
power output
SupraIncrease
N/A
>100
10 Extremely stressful.
Short
maximal
sprint power
Gasping. Sweating heavily
intervals
output
Note that the maximum duration times are those applicable to highly trained elite cyclists with
the range designed to reflect beginners to elite cyclists.
19
The following table summarises the purpose and physiological adaptation of each of the
training zones.
Training Zone Purpose
Recovery
Regeneration and
recovery
Zone 1
Establish base
endurance
Zone 2
Improve efficiency
Zone 3
Improve sustainable
power
Zone 4
Push threshold up
Zone 5
Sustain a high
percentage of maximal
aerobic power
Zone 6
Increase maximum
power output
Increase sprint power
output
Supramaximal
20
Physical Adaptations
Increase blood flow to
muscles to flush out
waste products and
provide nutrients
Improves fat
metabolism, gets
muscles/tendons/
ligaments/nerves used
to cycling. Increases
economy
Improves the ability to
use oxygen, produce
power and increases
efficiency
Improves carbohydrate
metabolism, changes
some fast twitch muscle
to slow twitch
Improves carbohydrate
metabolism, develops
lactate threshold,
changes some fast
twitch muscle to slow
twitch
Race fitness
Promotes recovery and
therefore training response
Increases maximum
muscle power, develops
neural control of
pedalling at specific
cadence
Develop race-specific
skills at race pace,
starting power, sprint
speed and the ability
to jump away from the
bunch
More efficient use of
energy. Prepares body
for harder training,
works on technique/skill
Able to produce more
power with the same
level of effort, works on
technique/skill
Improved sustainable
power, good for all
cycling events
Improved sustainable
race pace, useful
during tapering or precompetition periods:
too much time in
this zone can cause
staleness
Develops cardiovascular Improved time trialling
system and VO2max,
ability and resistance to
improves anaerobic
short-term fatigue
energy production and
speeds turnover of
waste products
Care of the Wattbike
Monitor Firmware and Screen Settings
Set to zero state:
This procedure will need doing every month. The purpose of this is to ensure that there is a
clear signal between the Wattbike and the computer. This process will diminish any build-up
of electromagnetic charge that may have built up within the bike.
Setting zero state will also ensure your testing is accurate.
Instructions from the main screen: Settings - Device Settings - Set Zero State - Set Zero State?
Peddle backwards (6 revolutions should be enough to unload the bike) and then ENTER.
Updating the monitor firmware software:
The updates are not at a set time or period. Any firmware updates will be sent via email to
inform users of the new data available and announced on our website www.wattbike.com.
To update the firmware use the supplied connection lead, plug this into a PC and update the
WPC.
Cleaning and maintenance:
WPC - Clean the screen and tighten the screws that hold the WPC in place.
The battery charger does not need to be plugged in all of the time. The Wattbike is selfcharging is used regularly.
Use the charger when updating the firmware to prevent losing the charge. Charge the batteries
if needed. This could take a several hours.
Frame of the Bike - Wipe down the frame, Check the foot straps are in working order, check
the frame of the Wattbike is secure.
Check the seat for any damage, make sure pedals are secure and that all adjustment levers are
correctly tightened before use.
After using the Wattbike loosen the handle bars and seat post.
If you need to report any issues or have a question about the Wattbike you can use the contact
details provided at the start of this manual.
21
What’s next?
Wattbike is always evolving. We have specialist workshops on the following topics that are
available to Wattbike for REPs level 3/4 Instructors, Coaches, Sports Scientists and Clinicians:
• Half day Fitness Testing Workshop
• 1 day Advanced Technical Workshop
Refer back to the downloadable training guide on the Wattbike website. This will help with
further knowledge and in depth information.
Watch the Video clips on the Wattbike YouTube channel to refresh understanding and see
professionals using the Wattbike.
Workshop Notes
Use this space to record all of your personal information
Seat Height
Handle Bar
Height
Seat Position
Handle Bar
Position
Age
Weight (kg)
Submax Test HR
Submax Test
MMP
Estimated MMP
Estimated MHR
Bibliography
Wattbike Training Guide
wattbike.com
22
HR minute
1
2
3
4
5
6
7
8
9
10
From 10@ Progress Check
23
wattbike.com


