1
Man PN 151680 Iss 0503
INSTALLATION INSTRUCTIONS
WARNING: - Read and follow all installation instructions before
plugging or wiring in machine to electrical circuit.
ELECTRICAL
• Warranty will be void if machine is connected to any voltage
other than that specified on the name plate.
• An electrician must provide required electrical service in
accordance with all applicable national and local electrical codes.
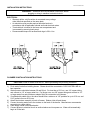
• Terminal block is located in the lower rear compartment and
is accessed by removing back panel.
• Recommended torque for terminal block lugs is 20 In. Lbs.
PLUMBER'S INSTALLATION INSTRUCTIONS
CAUTION: Power to brewer must be OFF before proceeding with plumbing installation.
1)
2)
3)
4)
5)
6)
7)
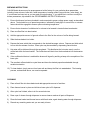
Flush water line before installing brewer. Brewer should be connected to COLD WATER LINE for
best operation.
Water pressure should be between 20 and 90 psi. For less than a 25 ft run, use 1/4" copper tubing
and connect to 1/2" or larger water line. For longer runs, use 3/8" copper tubing and connect to 1/2"
or larger water line and provide an adapter fitting for connection to the brewer.
If installed with saddle valve, the valve should have a minimum of 1/8" porthole for up to 25 ft run, and
5/16" porthole for over 25 ft runs.
Attach flow/strainer assembly to back of brewer. Strainer inlet will point down.
Connect incoming water line to the strainer on the back of the brewer. Manufacturer recommends
connecting to copper tubing.
Place empty server under brew basket.
Connect brewer to electrical circuit as outlined above and turn power on. Water will automatically
begin to fill the tank.