1
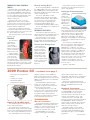
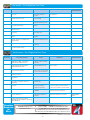
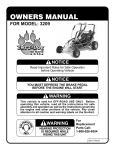
February 2009
Volume 11, No.2
A Monthly Publication for GM Dealership Service Professionals
2009 Cadillac CTS-V
2009 Pontiac G3
For 2009, the Cadillac CTS-V offers a number of new and
improved features, led by a supercharged V8 that offers 556
horsepower (415 kW) at 6,100 rpm. The vehicle's potential is
emphasized by the domed aluminum hood and new front fascia
with larger grill intakes for improved cooling.
Here are some highlights.
– 6.2L V8 ENGINE (LSA)
– 558 hp @ 6100 rpm
– 551 lb-ft @ 3800 rpm
– Supercharged (1.9 liter per revolution, 9 psi boost)
– Cast aluminum block
– Forged steel crankshaft
– 9.1:1 compression ratio
– Forged powder metal connecting rods
– Piston oil spray cooling
The 2009 Pontiac G3 is making its appearance in the spring
of 2009. It's a five-door hatchback powered by a 1.6L Ecotec
4-cylinder engine with either a 5-speed manual or 4-speed
automatic transmission.
Here are some highlights.
– 1.6L L-4 MFI DOHC ENGINE (LXV)
– 106 hp @6400 rpm
– 105 lb-ft @3800 rpm
– Cast iron block
– Cast nodular iron crankshaft
– 10.0:1 compression ratio
– Forged steel connecting rods
continued on page 3
– Variable valve timing
continued on page 2
Techline News
Contents
Identifying Aftermarket
Non-GM Calibrations
For more details, refer to bulletins 08-06-04-033 (Gasoline Engines) and
08-06-04-006A (Diesel Engines).
General Motors is identifying an increasing number of engine, transmission and
catalytic converter part failures that are the result of non GM – aftermarket engine
and transmission control calibrations being used.
When alteration to the GM released engine or transmission control calibrations
occurs, it subjects powertrain and driveline components (engine, transmission,
transfer case, driveshaft and rear axle) to stresses that were not tested by
General Motors. It is because of these unknown stresses, and the potential to
alter reliability, durability and emissions performance, that GM has adopted a
policy to cancel any remaining warranty coverage to the powertrain and driveline
components, whenever the presence of a non-GM/aftermarket calibration is confirmed – even if the non-GM control module calibration is subsequently removed.
continued on page 6
1
2009 Cadillac CTS-V . . . . . . . . . . . . . . . . . . . .1
2009 Pontiac G3 . . . . . . . . . . . . . . . . . . . . . .1
Identifying Aftermarket Non-GM Calibrations . . . .1
Center Cap Installation . . . . . . . . . . . . . . . . . . .4
Replacing Shock Absorbers in Pairs . . . . . . . . . .4
Oil Life System Reset . . . . . . . . . . . . . . . . . . . .4
Heated Washer Fluid -- An Explanation . . . . . . . .5
Applying RTV to Fuel Pump Control Module . . . . .5
Steering Calibration . . . . . . . . . . . . . . . . . . . . .5
Pontiac Vibe Programming Software . . . . . . . . .6
Auto HVAC Full Hot or Cold . . . . . . . . . . . . . . .6
Moan Noise . . . . . . . . . . . . . . . . . . . . . . . . . .7
Transfer Case Seal . . . . . . . . . . . . . . . . . . . . .7
Slipping Clutch Conditions . . . . . . . . . . . . . . . . .7
TMAP Modification . . . . . . . . . . . . . . . . . . . . .7
Fix It Right the First Time . . . . . . . . . . . . . . . . .8
Know How Broadcasts for March . . . . . . . . . . .8
Service and Parts Operations
2009 Cadillac CTS-V
–
–
–
–
–
Rotocast aluminum cylinder heads
Cast aluminum intake manifold
2 valves per cylinder
Hydraulic roller valve lifters
Sequential fuel injection
– continued from page 1
circuit, with a reservoir mounted in front
of the radiator.
LSA Oil
System
The oil
pump has a
capacity of
33.8 gallons
per minute,
for efficiency
Engine oil cooler
during extended high-rpm
operation. The six-quart oil pan is fitted
with a liquid-to-air oil cooler.
TRANSMISSIONS
Two 6-speed transmissions are offered,
both manual and automatic.
6.2L V8 ENGINE (LSA)
Manual Transmission
Supercharger
The new TR6060 manual transmission
(MG9) is based on the proven Tremec T56
six-speed used in the previous CTS-V, but
is upgraded to handle the LSA engine’s
increased torque output.
The LSA V-8 is equipped with a sixth
generation Eaton supercharger that
features Twin Vortices Series (TVS)
supercharging technology.The supercharger displaces 1.9 liters per revolution
and generates a maximum boost
pressure of 9.0 psi (0.52 bar).
The four
lobe rotor
design
enhances
quietness
while also
optimizing the
performance
and overall
efficiency of
Supercharger with
the engine.
intercooler removed
Compared
with earlier
three lobe
rotor designs,
the amount of
power needed
to operate the
supercharger
is reduced by
about 35%.
Intercooler
Four-lobe rotor design
The LSA's
intercooling
system uses
a single aluminum tube
and fin heat
exchanger
mounted
above the
rotors in the
Intercooler, viewed from
supercharger
bottom side
case. Air
pumped by
the supercharger flows down to the
intake ports on the cylinder heads. The
intercooler cooled by its own coolant
torque converter. Like the dual-disc clutch
of the six-speed manual transmission, the
twin-plate converter clutch provides additional clamping power.
Hydra-Matic 6L90 transmission
Tap-Up/Tap-Down Shift Controls
Standard steering-wheel-mounted
paddles are provided for tap-up/tap-down
shift control. There is also a consolemounted gear shifter control.
DRIVELINE
The driveline is mounted on a large
steel subframe that provides isolation
from the rest of the chassis. The rear axle
and differential assembly of the CTS-V
are upgraded to handle the additional
torque. The GT4 axle ratio is 3.73:1 with
the manual and 3.23:1 with the automatic. The driveshaft has a larger outside
diameter and thicker wall, the limited-slip
differential housing is made of cast iron
and has offset mounts.
TR6060 manual transmission (MG9)
It features both double-cone and triplecone synchronizers. A short-travel shifter
mechanism is used. Bearings are used on
the shift rail in place of bushings. This
reduces friction, making the shifter feel
lighter and more direct.
Twin Disc Clutch
Rear suspension subframe
A Luk 240 mm twin disc clutch uses
a pair of smaller diameter clutch discs
that have less inertia than a single, larger
diameter disc. This delivers improved
clamping power and excellent shift effort.
A dual mass flywheel is used for smooth,
rattle free performance.
TIP: Two different size half shafts are
used to counteract axle hop. The left side
is 55 mm, and the right side is 35 mm.
A Rear Differential Cooler kit is
available through Service Parts
(TechLink October 2008).
Automatic Transmission
TIRES AND
WHEELS
The Hydra-Matic 6L90 six-speed is
the first automatic transmission offered
in the CTS-V.
The transmission is a heavy-duty
version of the 6L80 six-speed automatic.
A strengthened input gearset has two
additional pinion gears (total of six). And
a strengthened output gearset uses
wider gears than the 6L80.
A twin-plate torque converter clutch
accommodates the torque output of the
LSA engine. This is the first twin-plate
configuration used with GM’s 300-mm
Michelin
PilotSport 2
tires (255/40R19 front and
285/35R-19
rear) on 19-inch
alloy wheels
were developed
specifically for
the CTS-V.
continued on page 3
2
MAGNETIC RIDE CONTROL
(MRC)
Magnetic Ride Control (MRC), also
known in SI as magneto-rheological real
time damping (MRRTD), independently
controls the fluid viscosity in each of the
four shock absorbers during hard cornering, acceleration, braking and other
dynamic maneuvers.
The driver can select one of two
Magnetic Ride modes: Tour for grand
touring or Sport for performance driving.
Both modes use the same algorithms
but have different calibrations.
A new type of magnetic fluid and a
new piston shape inside the shock allow
the Touring setting to be even softer, and
the Sport setting even firmer.
The CTS-V also has a lower ride height
than the CTS.
BRAKES
The J56 heavyduty antilock
brake system
uses Brembo
14.6-in. six-piston
brakes in front and
14.4-in. four-piston
brakes in the rear.
A J63 competition brake package
uses race-style
front rotors that
are bolted together, unlike the regular CTS-V front rotors
which are cast 2-piece rotors. The competition package also includes red-painted
Brembo brake calipers.
2009 Pontiac G3
–
–
–
–
–
Cast aluminum cylinder head
DOHC
4 valves per cylinder
Mechanical tappets
Sequential fuel injectors
Electric Parking Brake
An electric parking brake is standard on
the 2009 Cadillac CTS-V. An electric park
brake (EPB) release switch replaces the
park brake pedal and release handle used
on the manual system.
The electric park brake module
assembly has an internal motor, apply
actuator, release actuator, and temperature sensor. The control module also
contains the logic for applying and
releasing the parking brake when
commanded by the parking brake switch.
See the July 2008 issue of TechLink for
greater detail.
INTERIOR FEATURES
The instrument panel has a boost
gauge, lateral G meter and added tracers
on the tachometer and speedometer.
The seat inserts are covered in a
suede-like microfiber cover. Metallic
throttle, brake and clutch pedals are also
available with the microfiber package.
Performance Driving Seats
Optional performance driving seats
provide excellent
support for spirited
driving. These new,
14-way adjustable
performance seats
include suede seat
inserts and pneumatic
bolster controls in the
seat cushion and
backrest.
A microfiber covered steering wheel
and shifter are optional with the performance seat package.
Passenger Presence System
Starting
with the 2009
model year
the CTS-V (and
CTS as well) is
equipped with
a Body Sense
PPS system.
This system
uses input
Body Sense Sensor
from a flexible
sensor that emits a low level electric field
to discriminate between an infant in a
child restraint and an occupant sitting
directly on the seat. The Body Sense
PPS system will enable (turn ON) the
passenger frontal airbag for a wider range
of front seat occupants than the system
it replaces.
TIP: Customers should be aware
that some electronic devices placed on
the front passenger seat (computers,
MP3 players, cell phones, etc.) may
interfere with the electric field generated
by the system, causing it to enable (turn
ON) the passenger airbag and turn on
the safety belt reminder light and chime,
even though the seat is not occupied.
Theelectronic device does not necessarily
need to be turned on to cause this
condition. If this happens, have the
customer remove the electronic device
from the seat.
– Thanks to Toby Davis
– continued from page 1
magneto-resistive sensor (AMR) in a
plastic carrier pressed into the cylinder
block. The magnetized sensor disk for the
AMR is located between the crankshaft
and flywheel.
Camshaft phasing optimizes valve
timing over a wide range of engine
operating conditions to improve power
and low end torque output.
The operating efficiency of the 1.6L
Ecotec uses a two step intake manifold.
A rotary sleeve controls the flow of air
through the intake manifold and is
designed to minimize airflow resistance
in the manifold at high speeds.
TRANSMISSIONS
Ecotec 1.6L I-4 (LXV) engine
Manual Transmission
The standard engine for the G3 is the
Ecotec 1.6L I-4 VVT (LXV).
The cylinder block incorporates the
hollow-frame design, reducing the weight
by 17% while maintaining optimized stiffness in the engine-and-transmission unit.
The crankshaft has a new anisotropic
The D16 manual 5-speed transmission
(MLM/MM5) is a two-shaft, transverse
design in a one-piece aluminum die cast
housing. It uses a rod-type shifting
system. The final drive ratio is 3.94.
The MLM/MM5 uses a ceramic
hydraulic clutch plate. Shift quality is
enhanced by a shift precision device
(detent pin), and shift effort is reduced by
changing the angle of the 1st/2nd gear
synchronizer.
The G3 has a manual transmission
shift indicator displayed in the instrument
panel as a standard feature (except
Canada).
Automatic Transmission
The Aisin automatic 4-speed transmission (MLQ/MX0) is an electronically
controlled transaxle, with a torque
converter clutch in an aluminum die cast
housing. The final drive ratio is 3.84.
Reinforcements to the shaft, gear
housing, freewheel, and other areas allow
the MLQ/MX0 to handle a maximum
engine torque of 150 Nm. The 3rd to 4th
shift is clutch-to-clutch, while all other
shifts are one-way clutches.
The TCM includes a cruise up-hill
shift pattern and improvements to the
economic and up-hill shift pattern. The
CAN diagnostic protocols meet OBD II
regulations.
continued on page 4
3
2009 Pontiac G3
TIRES AND WHEELS
– continued from page 3
Cruise control is also available as a stand
alone option.
An electrical accessory receptacle is
suited to common consumer electronics.
Variable delay windshield wipers
wipers and a rear defogger with a timer
are standard.
Manual windows are standard, but
power windows with rear passenger
lockout are included with the Preferred
Package.
Power door locks are included with the
Preferred Package.
Remote keyless entry with a panic
button is part of the theft-deterrent
system included and available with the
Preferred Package. The engine immobilizer is part of the theft-deterrent system
and is available with 4-wheel ABS.
OnStar is a standard feature.
INTERIOR FEATURES
The standard tire is the 14-inch all-season blackwall P185/60R14 mounted to a
steel wheel with full bolt-on wheel cover.
A 15-inch all-season blackwall
P185/55R15 mounted to a 5-spoke
painted aluminum wheel is included
with the Sport Package (PDX).
A tire pressure monitoring system
is a standard
feature of the
G3 (except
Canada). If the
system detects
low pressure in
the tire, it will
turn ON the tire pressure warning light in
the DIC to alert the driver.
BRAKES
The front disc/ rear drum brake system
incorporates a 254 mm brake booster
and ventilated front disc brakes.
A 4-wheel antilock brake system is
available for models with the 4-speed
automatic transmission.
The ABS uses sensors in each wheel
to balance brake force distribution based
on the weight of the passengers and
cargo, as well as the road conditions. It
also includes an engine immobilizer as
part of the theft-deterrent system.
Seats
A tilt steering column is standard
equipment. A 4-spoke leatherette
wrapped steering wheel is included with
Sport Package.
The oil life monitoring system is standard and the display is in the instrument
panel cluster.
The electronic automatic cruise control
has Set and Resume speed features and
is included with the Cruisin' Package.
Center Cap Installation
The charcoal interior includes manually
adjusted (fore/aft and recline) cloth front
bucket seats and height-adjustable headrests with accessory hooks as standard
equipment.
Perforated leatherette seats are available with the Sport Package and the
Preferred Package with the 4-speed automatic transmission.
– Thanks to Jerry Parsell
Replacing Shock
Absorbers in Pairs
This information applies to all truck suspensions.
Refer to bulletin 05-03-08-002B for additional
details.
When replacing a shock absorber, it is not
necessary to replace in pairs.
Unless otherwise instructed, replace only the
damaged component. Do not replace the other
shock absorber in the pair if it is still serviceable.
Broken retaining tabs
– Thanks to Steve Love
Typical center caps
The owner of a 2008-09 fullsize
pickup or utility equipped with
aluminum factory wheels may
experience loose, missing, or noisy
center caps.
This may be due to an improperly installed center cap. Check for
proper installation of the center
cap. It is possible to install the
center cap in several ways, but
there is only one correct way to
achieve a tight fit. Incorrect
installation may result in broken
retaining tabs.
When installing the center cap,
the valve stem icon on the
Oil Life System
Reset
backside of the cap should point
toward the valve stem of the
wheel. With the icon aligned properly, use the heel of the hand to
seat the cap into place.
On a 2008-09 HHR SS with engine RPO LNF,
the engine oil life (EOL) may not reset.
Engineering has determined that the ECM for
the 2008-09 HHR SS does not support the use
of the accelerator pedal for the Engine Oil Life
System reset procedure. This is listed incorrectly
in SI and the Owner Manuals of this vehicle, and
is in the process of being changed.
Use the DIC procedure or Tech 2 to perform
the EOL reset.
– Thanks to Steve Love
– Thanks to Jeff Gorenflo
Valve stem icon
4
Heated Washer Fluid -- An Explanation
time before the wash/wipe cycle is
completed, the system is turned off.
TIP: The first wash/wipe cycle may
take up to 40 seconds to occur, depending
on outside temperature. Subsequent
wash/wipe cycles may take up to 20
seconds to occur.
If the wash/wipe cycle does not start
immediately, some owners may depress the button a second
time in an attempt to prod the system to work. This will actually
do the opposite. It will turn the system off, which may be misinterpreted as a malfunction.
Before attempting any repairs or replacing any components,
be sure the customer understands proper operation and waits
for the necessary warmup to occur.
A heated washer fluid feature is available on a number of
2008 and earlier vehicles. To avoid unnecessary repair and
replacement of components, it's important to understand how
the system is designed to operate.
The heated fluid feature is controlled by a unique button with
a washer icon, not the conventional windshield washer button.
The location varies, depending
on model. It may be located
on the instrument panel or on
the multifunction lever.
To use the heated fluid
feature, depress the control
button, then release. The system will then perform four
heated wash/wipe cycles, then
shut off. If the heated fluid
Typical heated washer fluid control
button is depressed a second
– Thanks to Steve Love
Applying RTV to Fuel Pump
Control Module
Steering
Calibration
This information applies to 2009
vehicles equipped with a gasoline
engine and Fuel Pump Control
Module (FPCM).
On rare occasions, a customer may
experience one or all of the following
concerns:
1. Intermittent crank no start
condition
2. Extended crank
3. Vehicle stall condition
4. One or all of the following codes:
– P069E, P0230 or U0109 set
in the PCM
– P0606 set in the Fuel Pump
Control Module (FPCM)
These symptoms may be the result
of water intrusion into the Fuel Pump
Flow Control Module due to a disruption in the case seal.
Check the Fuel Pump Control
Module (FPCM) for fuel controlspecific DTCs (if communication is
possible) before inspecting connections. Then refer to SI for those fuel
control DTCs. If module replacement
is required, replace the FPCM by
following the Fuel Pump Flow Control
Module replacement procedure in
SI and using the special procedure
below. Also clean or repair the related
connector if necessary.
Before installing the new module,
please follow instructions below to
prevent the vehicle from returning.
1. Clean the backside surface by
wiping or brushing to remove all
dirt, grease, water, etc. Surface
must be clean and dry.
2. Use GM approved RTV sealant
p/n 12378521. (Canada p/n:
88901148).
This information applies to the 2008
Tahoe and Yukon Hybrid with RPO HP2.
Currently, the Tech 2 has a software
anomaly with the power steering calibration
procedure. When you start the procedure,
the Tech 2 will have you rotate the steering
wheel 90 degrees to the right and then
another 90 degrees to the left before
centering the steering wheel. After you
perform this step and press the continue
button at the bottom of the screen, you will
experience a no-communication screen.
Currently engineering is working on new
software for the Tech 2 to resolve this
concern. Follow the temporary work-around
to perform the power steering calibration.
As soon as you reach the screen that
advises you to rotate the steering wheel left
and then right 90 degrees, immediately
move the steering wheel. There is only a
2 second window to start the test or the
Tech 2 will time out and display a "no
communications" screen when you press
the continue button. Once you make it past
this screen, the rest of the test can be
completed successfully.
TIP: If you wait longer than 2 seconds
(for example, the 10 seconds it takes to
read the instruction screen) the test will
time out.
Addition Information:
The last screen will display the
Manufacture Enable Counter reset screen.
This should be needed only if the current
counter displayed on the screen reads
something other than zero.
When performing the Power Steering
Calibration, it is normal for the Driver
Information Center (DIC ) to read "Service
Power Steering System."
3. Apply sealant to the joint
between the aluminum back
plate and the plastic housing.
4. Insure that the sealant fills the
gap in the joint. Work the
sealant into the joint using an
index finger. Leave at least a
4mm wide bead on the surface.
TIP: Review the RTV manufacturer’s MSDS before use. Wear
chemical resistant gloves. Avoid
contact of RTV with eyes, skin and
clothing. Avoid breathing vapor and
mist. Wash thoroughly after handling.
Do not wear contact lenses.
5. Allow the sealant to cure at
room temperature until it is
firm and rubber like. This will
usually take a full 24 hours
to cure.
6. Install FSCM on vehicle.
– Thanks to Saundra Massingille
5
– Thanks to Paul Radzwilowicz
Techline News –
continued from page 1
Warranty coverage is based on the
equipment and calibrations that were
released on the vehicle at time of sale, or
subsequently updated by GM. That’s
because GM testing and validation matches the calibration to a host of criteria that
are essential to assure reliability, durability
and emissions performance over the life
of the warranty coverage and beyond.
Stresses resulting from calibrations different than those tested and released by
GM can damage or weaken components,
leading to poor performance and or shortened life.
Additionally; non-GM-issued aftermarket engine control
modifications often do not meet the same emissions performance standards as GM-issued calibrations. Depending on
state statutes, individuals who install engine control module
calibrations that put the vehicle outside the parameters of
emissions certification standards may be subject to fines
and/or penalties.
GM service bulletins 08-06-04-033 and 08-06-04-006
outline procedures to identify the presence of non-GM/aftermarket calibrations. GM recommends performing this check
whenever a hard part failure is seen on internal engine or
transmission components, or before an engine assembly or
transmission assembly is being replaced under warranty. It is
also recommended that the engine calibration verification
procedure be performed whenever diagnostics indicate that
catalytic converter replacement is indicated.
In February 2009, PQC will begin piloting a process to confirm the ECM calibration is GM-issued. Beginning in February,
PQC will require a picture of the engine
calibration verification screen, as outlined
in the bulletin, before authorizing any V8
engine replacement (both Gas and
Diesel).
If a non-GM calibration is detected by
the dealership, follow the procedures
outlined in the bulletin. Once documentation of the non-GM calibration has been
received, and verification has taken place through GM, the
remaining powertrain and driveline warranty will be cancelled
and noted in VISS, and the dealership will receive the
following notification:
Based on information that has been received, please inform
the customer that the Powertrain portion of the New
Vehicle Warranty is no longer in effect for the engine,
transmission, driveline and rear axle on VIN
XXXXXXXXXXXXXXXXX, due to the presence of non-GM
calibrations and/or equipment. The stresses resulting from
the non-GM calibrations and/or equipment were not
validated by GM and therefore cannot be warranted on any
components that are subject to those stresses. Repairs to
powertrain or driveline components that may currently
require repair should not be covered under the terms of the
new vehicle warranty. The warranty group has been advised
of this information and VISS will be updated accordingly.
– Thanks to Jay Dankovich
Pontiac Vibe Programming Software
One of the unique
things about the
Pontiac Vibe is that in
the past, its control
modules have not be
service programmable. This has resulted
in extended service
downtimes for customer vehicles as dealers wait for replacement modules. To
improve this customer experience, GMSO is releasing Vibe
programming software and calibrations that will allow Pontiac
dealers to perform calibration updates for limited control
modules, rather than performing repairs with pre-programmed replacement modules.
While not supported in Service Programming Systems
(SPS), Pontiac Vibe programming software and related
calibrations will be available for download from the TIS 2
Web application.
This separate application will require detailed download and
setup procedures that may require the assistance of your
dealer's system administrator. A service bulletin will be
released shortly, covering the necessary steps to successfully
complete the setup.
Highlights:
– Pontiac Vibe software to be released mid January
– Software and calibrations will be links under TIS 2 Web
‘Help’
– Vibe programming software will be separate from SPS
– Can be used with MDI or Tech 2
– Initially limited to PCM programming
– Easy to use once software is installed
Techline Customer Support Center (TCSC) and Regional
Techline Consultants (TC) can assist with setup.
– Thanks to Mike Waszczenko
Auto HVAC Full Hot or Cold
This information applies to 2008
Enclave and H2, 2007-08 Escalade,
Avalanche, Silverado, Suburban, Tahoe,
Acadia, Sierra, Yukon, and OUTLOOK with
RPO CJ2.
The auto HVAC system may default to
full hot or full cold. There may be any of
the following HVAC DTCs: B0423, B0228,
B3779, B0413, B3782, or B0433. This
condition may correct itself if the ignition
key is cycled. This condition may be
caused by an HVAC system calibration
issue.
Reprogram the HVAC Control Module
with the latest calibrations available from
TIS2WEB. Be sure your Tech 2 is updated
6
with the latest software version. After
programming, turn the ignition key off,
open and close the driver door to turn off
RAP and wait one minute. Cycle the ignition key on and clear DTCs. If any DTCs
return, perform normal diagnostics using
SI procedures.
– Thanks to Jim Will
Moan Noise
GM TechLink is a monthly magazine
for all GM retail technicians and
service consultants providing timely
information to help increase knowledge about GM products and
improve the performance of the
service department.
In rare occurrences, the owner of a 2007-09 Aveo, G3 or Wave (Canada) equipped
with a 5 speed manual transmission may comment of a resonation or moan noise
that is heard and or felt while driving at 55-60 mph (89-97 kph). The condition is most
noticeable on smooth, level roads with a light load. Engineering is currently working
to identify the root cause and develop a correction for this condition.
Repairs in the field have been unsuccessful in correcting this condition. Until a
root cause and viable correction have been identified, repairs should not be attempted. Advise the customer that this condition should be considered a normal vehicle
characteristic and can be compared to a like vehicle.
– Thanks to Jeff Gorenflo
Publisher:
R. M. (Bob) Savo
GM Service and Parts Operations
/ [email protected]
Transfer Case Seal
Production Manager:
On a 2009 Escalade, 2008-09 Avalanche, Silverado,
Suburban, Tahoe, Sierra, or Yukon equipped with Magna
transfer case RPO NQF, NQH or NQG, a customer may
comment on transmission slipping or surging, transmission
fluid low or a leak out of the transmission vent. The transfer
Typical transfer case input
case may be overfull.
shaft seal condition
These concerns may be caused by the transfer case input
seal allowing fluid to migrate out of the transmission into the
transfer case. If the vehicle has transmission concerns such as slipping or surging and
this is a repeat transmission concern, or there is a fluid leak from the shared vent,
inspect and if necessary replace the transfer case input shaft seal.
Marie Meredith
– Thanks to Chuck Krepp
Editor:
Lisa G. Scott
GM Service and Parts Operations
/ [email protected]
Technical Editor:
Jim Horner
/ [email protected]
Desktop Publishing:
5by5 Design
/ [email protected]
FAX number:
3
1-248-729-4704
Write to:
*
TechLink
PO Box 500
Troy, MI 48007-0500
GM TechLink on the Web:
GM DealerWorld
:
General Motors service tips are
intended for use by professional
technicians, not a “do-it-yourselfer.”
They are written to inform those
technicians of conditions that may
occur on some vehicles, or to provide
information that could assist in the
proper service of a vehicle. Properly
trained technicians have the
equipment, tools, safety instructions
and know-how to do a job properly and
safely. If a condition is described, do
not assume that the bulletin applies to
your vehicle or that your vehicle
will have that condition. See a General
Motors dealer servicing your brand of
General Motors vehicle for information
on whether your vehicle may benefit
from the information.
Inclusion in this publication is not
necessarily an endorsement of the
individual or the company.
Copyright© 2009 General Motors Corporation
All rights reserved.
Slipping Clutch Conditions
In rare instances, some owners of a 2004–09 GM passenger car or light duty truck
equipped with gasoline engine and manual transmission may comment that the
Service Engine Soon (SES) light has illuminated. Upon closer inspection using a Tech 2,
DTC P0502 (vehicle speed sensor circuit low voltage) may be found stored in the PCM.
Follow the appropriate diagnostic information in SI. If no cause for the DTC can be
found, the condition may be customer induced. Supporting data may be found in the
freeze frame info stored with the DTC.
For help in diagnosing the vehicle, review Tech 2 data parameters: Calculated Engine
Load, Engine Speed, Output Shaft Speed Sensor and Clutch Pedal Position.
Inform the customer that excessive slipping of the clutch with the vehicle stationary
or moving at low speeds may cause this DTC to set. This is considered normal vehicle
operation. Engineering is currently investigating the concern and updated information
will be released when it is available.
– Thanks to Jeff Gorenflo
TMAP Modification
When installing the Performance Parts accessory upgrade
Stage I Turbo kit on a 2008-09 HHR SS, the intake air pressure temperature (TMAP) sensor interferes with the charge
air cooler (CAC) pipe .
The sensor requires modification before assembly, or leaks
may occur. Engineering is currently
TMAP before modification
reviewing this concern and a service procedure has been developed
until the parts can be updated. Following these steps will
prevent any concerns when mounting the TMAP to the
CAC pipe.
The boss must be removed to prevent interference with
the alignment tab on the CAC pipe. Carefully clearance the
boss until the TMAP will mount flush.
TMAP with boss removed
7
– Thanks to Jeff Gorenflo
Car Issues – Fix It Right the First Time
Model Year(s)
Don’t Do This
Reference
Information / Bulletin
Vehicle Line(s) / Condition
Do This
2007-08
SRX – Upper storage compartment will
not open
Push plastic retaining finger
and move pendulum
forward
Don’t replace upper I/P storage
compartment
08-08-49-007
2006-08
Impala – Key cannot be removed in Park,
shifter cannot be moved
Repair wiring damage and
reroute wiring
Don’t replace shifter
08-07-30-007A
2008
Lucerne – Front edge of headliner frayed
Install protector with longer
adhesive side facing down
Don’t install complete headliner
07-08-110-006B
2006-08
All vehicles with TPM – Transfer sensors
to replacement wheels
Move TPM sensor to new
wheel
Don’t install new TPM sensor
08-03-16-003
2006-08
Vehicles with aluminum wheels –
Tire leaking air
Repair wheel and paint
Don’t replace wheel
08-03-10-006
2007-09
DTS – Doors may not open although
unlocked
Adjust front and rear inner
door latch rods
Don’t replace door handle or latch
08-08-64-015
2007-08
2.8L, 3.6L (VIN T, 7, V) – SES light with
DTCs
Install camshaft thrust
washer
Don’t replace cylinder head
08-06-01-011A
2006-09
G6 – Convertible top inoperative, hinges
broken, flipper door cables broken,
brackets bent
Perform repair and adjust
tonneau and flippers per SI
Don’t fail to perform critical steps 1-11
AIC3517
2007-08
Impala – SES, fuel gauge erratic
Inspect connectors and
terminals
Don’t replace pump or level sensor
PIC4878C
2006-09
MW7 auto transmission – Transmission
cooler lines leak at crimp
Install new line
Don't use old design lines
—
Truck Issues – Fix It Right the First Time
Model Year(s)
Vehicle Line(s) / Condition
Do This
Don’t Do This
Reference
Information / Bulletin
2007-08
Fullsize utilities with 5.3L E85 Engine
(RPO LC9 or LMG) – Intermittent
extended crank after hot soak
Replace single dripping
injector, or all if more than
one drips
Don't clean injectors
PIP4450C
2009
Enclave, Traverse, Acadia, OUTLOOK
with Navigation Radio and RPA –
Intermittent battery draw
Reprogram radio with
latest calibrations in TIS
Don't replace battery, radio, BCM or
other modules
PIP4450C
2001-04
LB7 Duramax Diesel – Injector high
pressure lines corroded
Clean connection area of
line and nut of injector high
pressure lines as required
Don’t replace lines
03-06-04-036A
2007-08
Fullsize utilities --1500 Series – Power
steering fluid leak
Determine source of leak
Don’t replace power steering rack
07-02-32-002B
2007-08
Fullsize utilities – Remote mirror
inoperative
Perform wiring checks
Don’t replace mirror assembly
08-08-45-002
2007-08
Fullsize utilities and trucks, H2 – Clock,
clock tab on navigation screen not
appearing
Reprogram with 08i
software disc
Don’t replace radio assembly
08-08-44-002
2004-07
Colorado, Canyon, H3 – Reduced power,
P codes
Check battery state of
charge and charge or
replace as necessary
Don’t replace throttle body, throttle body
module, accelerator pedal, accelerator
position sensor, PCM, or ignition switch
08-06-04-014
2008
Sierra, Silverado – SES P1174
Reprogram ECM using
TIS2Web
Don’t replace catalytic converter, PCM,
injectors, fuel rails, fuel pumps
08-06-04-028
2006-09
All vehicles – Identifying aftermarket
engine calibrations
Block the warranty claim if
aftermarket calibration is
installed
Don’t submit warranty claim if
aftermarket calibration is installed
08-06-04-033 - Gas
08-06-04-006B Diesel
2008-09
GMC Sierra, Yukon, Chevrolet Silverado,
Tahoe, Hummer H2, H3, Cadillac
Escalade Gen IV V8 Engines – Accessory
Drive Belt Noise
Replace belt
Don’t replace pulley or component
08-06-01-008
Know-How
Broadcasts
for
March
10209.03D Emerging Issues
New Model Features
March 12, 2009
9:30 AM and 12:30 PM Eastern Time
For Web NMF courses, log on to the GM Training Website
(www.gmtraining.com). Select Service Know-How/TechAssists from
the menu, then choose New Model Features for a selection of courses.
– Thanks to John Miller
8