1
OVVNE "S
MANUAL
MODEL
NO.
580.741380
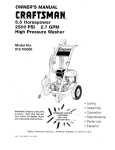
3.8 HORESPOWER
1500 PSi
2GPM
HIGH PRESSURE WASHER
CAUTION:
Read and Follow
all Safety Rules
and Inslructions
Before Operating
This Equipment
SEARS,
ROEBUCK
=
Assembly
o
Operation
°
Customer
.
Service
°
Repair Parts
and
CO.,
Responsibilities
and Adjustment
Hoffman
Estates,
IL
60179
U.S,A.
]tIlilillllltttllllH
o
Part No 97340GS, Rev,6 (9t18]96)
24847 31294
SAFETY
RULES
CAUTION: ALWAYS DISCONNECT SPARK PLUG WIRE AND PLACE WIRE WHERE IT CANNOT CONTACT SPARK PLUG, TO PREVENT ACCIDENTAL START1NG WHEN SETTING UP, TRANSPORTING,
ADJUSTING OR MAKING REPAIRS TO YOUR HIGH PRESSURE WASHER
TRAINING:
® Engine exhaust gases contain DEADLY carbonmonoxide gas. This dangerous gas, if breathed in sufficient
concentrations, ce,'_ cause unconsciousness or even
death. Operate thisequipmentonlyinthe openair where
adequate ventilationis available.
•
=
e
Never aim the gun at people, animals or plants.
High pressure spray can cause paint chipsor other particles to become airborne and flyat high speeds.
Ahvayswear eye protectionwhen you usa this equipment
or when you are inthe vicinity where the equiprnent is in
USe,
•
e
•
o
o
e
Gas_ine is highlyFLAMMABLE and itsv_apors
areE_'.PLOSIVE. DO not permit smoking,open names,sparks
or heat in the vicink'y while handling gasoline. Avoid
spilling gasoline on a hot engir_. Allowunit to coolfor 2
minutes before refueling. CompLywith all tawsregulating
storage and handling of gasolineo
Locate this pressurewasher in areas away from combustible materials, combustiblefumes or duel
The high pressure equipmentis designedto be used with
Sears authorized parts only. If you use this equipment
with parts that do not comply with minimumspecif_-.ations,
the user assumes all risks and liabilities.
Some chemicals or detergents may be harmfulifinhaled
oringested,causing severenausea,fainting orpoisoning.
Theharmfu! elements may cause propertydamage or
severe injury°
Do not allowCHILDREN to operatethe PressureWasher
at any time,
PREPARATION:
o Operate engine only at governed speed,. Runningthe
engine at excesswe speeds increases the hazard of
personal injury,. Do not tamper _
parts which may
increase or decrease the govemea speea_
e Do not wear loose clothing,jewelryor anythingthat may
be caught in the starter or other' rotating parts_
= Before starting the Pressure Washer in cold weather,
checkall parts of the equipment and be sure ice has not
formed there°
•
Units with broken or missing parts, or without protective
housing or'
covers shouidNEVER be operated,
•
The muffler and air clearer must be installedand in good
conditionbefore operating the PressureWasher. These
componentsact as spark anestors ifthe enginebackfires,,
•
Check the fuel system for Ieaks or signsofdeterioration
such as chafed or spongy hose, Ic_seor missing damps
or'damagedtank or cap. Correct all defectsbefore operating the Pressure Washer.,
OPERATION:
•
Do not spray flammable liquids,,
e Never allowany part of the bodyto come in contac_
the fluid stream. DO NOT come in contactwith a fluid
streamcreated by a leak in the highpressurehose.
•
High pressure stream of fluid that this equipmentcan
producecan pierce skin and its underlyincjtissues,leading to serious injury and possible amputation,,
Operate the pressure at no more than the PSt fluid
pressure rated for your pressure washer.
•
Never .movethe machine by pullingon the high pres_re
hose_ usa thehandle _
on tim top of the unit.
e Alwaysbe certainthespraygun, noT.._es
and accessories
are cor--r_! attached.
= Never usea spraygunwhichdoes not have a tnggerkx::k
or trigger guard in place andin workingorder°
•
Use a respiratorormask wheneverttmreis a chance that
vaporsmay be inhaled. Read ati instructionswith the
mask so you are certain the mask will providethe necessary protection against inhalingharmfulvapors,
•
High pressurespray may damage fragile items including
glass,, Do not point spray gun at glass when in the jet
spray mode.
® Keep the hose connectedto machine or the spray gun
while the system ispressurized. Disconnecting the hose
whilethe unit is pressurized is dangerous_
•
Hold the spray g.n firmtyin your hand before you start
the uniL Failuretodo so couldresult in an injury1toma
whippingspray gun. Do not leave the spray gun unattendedwhilethe machineis running.
® The cleaning area shoLltdhave adequate slopes and
drainageto reduce the possibility of a fall due to slippery
surfaces.
e Keepwatersprayaway fromelectricwiringorfatal elec_c
shockmay resuiL
•
Do not adjustu_loadervalveto a pressure in excess of
machinerating_
•
Do notsecuretriggerguninthe pulkback(open) position.
e
Do notby_passanysafety device on this machine,
•
Do not leave trigger closedfor more than 5 minutes wi_
enginerunning,This coulddamage the pump°
•
The muffler' and engine heat up during operation and
remain hot immediatelyafter shutting it down. Avoid
contact with a hot muffler or engine or you could be
severely burned.
MAINTENANCE AND STORAGE'.
•
Operate and storethisunit on a stable surface,
•
Highpressurehose candevelopleaksfrom wear, kinking,
abuse, etc, Water spraying from a leak is capable Of
injeclJngmaterial intoskin,Inspecthose each timebefore
using it,, Check all hoses for cuts, leaks, abrasions or
bulgingof cover,ordamage or movement of couplings,tf
any of theseconditionsexist, replace hose immediately.
Never repairhighpressurehose,,Replaceit with another
hose that meets minimum pressure rating of your pressurewasher,,
LOOK FOR THIS SYMBOL
TO POINT OUT IMPORTANT
SAFETY PRECAUTIONS.
IT MEANS
"ATTENTIONIH
BECOME ALERTIt!
YOUR SAFETY IS INVOLVED."
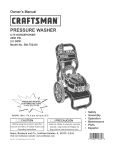
CONGRATULATIONS on your purchase of a Sears Craftsman high pressure washer° It has been designed, engineered and manufactt_red to give you the best possible
dependability and performance.
PRODUCT SPECIFICATIONS
Pressure Washer Specifications
PUMP PRESSURE
Adiustable to 15_ PS!
Should you experience any problem you cannot easily
remedy, please contact your nearest Sears Service Center/Department or call the 1+800 number listed on the front
of _is manual We have competent, well-trained technicians and the proper tools to service or repair this unit.
Please read and retain this manual. The instructions will
enable you to assemble and maintain your high pressure
washer properly. Always observe the "SAFETY RULES."
MODEL
FLOW RATE
2 gpm
DETERGENT MIX
Use undiluted detergent
DETERGENT RATIO
Adjustable to 26:1
WATER SUPPLY
TEMPERATURE
Not to exceed 140°F
Engine Specifications
NUMBER
5804741380
SERIAL
NUMBER
ENGINE MODEL
Bdggs & Stratton
RATED HORSEPOWER
3.8
DISPLACEMENT
9.67 cu. inches. (158cc)
SPARK PLUG:
DATE OF
TyI_:
Set Gap. To.
PURCHASE_
Champion RJ-8C
0,030 krt_ (0,76ram)
GASOLINE CAPACITY
THE MODEL AND SERIAL NUMBERS WILL BE
FOUND ON A DECAL ATTACHED TO THE PRESSURE WASHER.
YOU SHOULD RECORD BOTH SERIAL NUMBER
AND DATE OF PURCHASE AND KEEP IN A SAFE
PLACE FOR FUTURE REFERENCE°
A Sears Maintenance Agreement is available on this product. Contact your nearest Sears store for details..
•
Follow regular schedule in maintaining, caring for and
using your high pressure washer,,
•
Follow the instructions under "Customer Responsibilities" and "Storage" sections of this Owner's Manual.
OI L (20 oz. capacity )
SAE,30 w_k:jht
SOLID STATE IGNITION
AIR GAP
0.0125 inch
NOTE: ifyou equip the engine of your pressure washer with
a spark arrestor muffler, the spark arrestor must be maim
tained in effective working order by the owner/operator.
CUSTOMER RESPONSIBILITIES
Read and observe the safety rules.
u.s, mJarts
In the State of California a spark arrestor is required by law
(Section 4442 of the California Public Resources Code).
Other states may have similar laws. Federal laws apply on
federal lands.
MAINTENANCE AGREEMENT
+
I-Ir2
You can order a spark arrestor through your Sears Service
Center, See Repair Parts section of engine for part numbers.
FULL ONE YEAR WARRANTY ON CRAFTSMAN HIGH PRESSURE
WASHER
For one year from the date of purchase, whenthis CraftsmanHigh Pressure Washer is maintained and operated according to
the instructions in the owner'smanual, Sears will repair,free ofcharge, any defect in material and workmanship.
if this washer is used for commerci_ purposes,this warranty applies for only 90 days from the date of purchase_ If this high
pressurewasher is used for rental purposes, this warranty appliesfor only 30 days alter date of purchase.
This warranty does not cover:+
,
Expendable items such as spark plugs and air filters, which become worn during normal use.
,,
Repairs necessary because of operator abuse or negligence, including damage resulting from no water being supplied to
pump or failure to maintain the equipment according to the instructions contained in the owner's manual..
WARRANTY SERVICE IS AVAILABLE BY RETURNING THE HIGH PRESSURE WASHER TO THE NEAREST
SERVICE CENTER_EPARTMEN'F
THROUGHOUT THE UNITED STATES,
This warranty gives you specific legal rights and you may also have other rights, which vary from state to state.
SEARS, ROEBUCK AND CO., D/817 WA, Hoffman Estates, 1L 60179
3
SEARS
TABLE OF CONTENTS
SAFETY RULES ............................................................
PRODUCT SPECIFICATIONS ......................................
2
3
OPERATION ............................................................
t2-14
CUSTOME R R ES PON SI B ILITIE S .......................... 15-17
WARRANTY ....................................................................
ACCESSOR IES AND ATTACHMENTS .........................
3
5
SERVICE AND ADJUSTMENTS ..................................
STORAGE ....................................................................
TROUBLESHOOTING
...................................................
CONTENTS OF HARDWARE PACK ............................. 6
KNOW YOUR HIGH PRESSUR E WA_SHER.................. 7
ASSEMBLY ................................................................
8-11
17
18
19
R EPLACE MENT PARTS ......................................... 20-27
ORDERING PARTS .....................................
BACK PAGE
INDEX
-AAccessories
-R--
..............
Adjustable Nozzle ....
Air Cleaner ............
5
13,14,17
7, 16
Hardware Pack ............
High Pressure Hose .......
6
Replacement Parts ......
20-27
7, 9
-Swi,-
-BMaintBnance
Before Each Use .........
Before Stardng the Engine..
15
10
--C--
Carburetor ...............
Cleaning
Tips ............
Customer ResponsibililJes
Changing Oil .............
17
16
15
15
14
17
16
\
Engine Speed ............
3
Engine ......................
Pressure Washer ............
Schedule ...................
3, 15
10, 16
Checking Oil Level ...........
16
General RecomrnendalJons .... 15
Pressure Washer Maintenance . 15
Replaca Spark Plug ...........
Service Air Cleaner ...........
Agreement ..................
17
-OOil, Engine ...............
Operation
Del_rgent Applica_on ........
Ge_ng Stared ................
How_o Use .....................
10
14
12
13
S_pping .....................12
To Start Engine ...............
12
To Turn on Washer ............
12
Order Parts
.......
Safety Latch .............
12
Safety Rules ..............
2
Service and Adjuslments...
17
Siphoning ............... 14
Spec_calJons .............
3
Spray Gun ..........
13,14,t7
Starting InslructJons
Before St_ng the Engine ....
10
Checklist Before S_ng
..... 11
KnowYour Pressure Washer...
7
Preparing,forFirstUse ........8
Removingfrom CartDn .........
8
To Assemble.Components .....
9
S_rage
Engine .....................
18
PressureWasher Pump ......
18
back page
-G-
-T
Troubleshooting
=-
.......... I9
-pGuide Handle .............
8
PressureRegulator ........
1.4
-WWarranty .................
3
ACCESSORIES
AND ATTACHMENTS
These accessories and attachments were available when _he high pressure v_sher v_s purchased° They are also
available at most Sears retail outlets and service cen_rs. Most Sears stores can order _hese imms for you when you
provide me model number of your high pressure washer. FOR THE LIST OF ACCESSORIES
AND THEIR PART
NUMBERS, REFER TO THE REPLACEMENT PARTS SECTION IN THE BACK OF THE MANUAL
FLOOR/SIDING
BRUSH KIT
R OTATING
BRUSH KiT
1/4" I..Do25_ EXTENSION
HOSE
HIGH PRESSURE
HOSE QUICK
CONNECT KIT
TURBO NOZZLE
16OO and 1900 PSi
UT]LITY
BRUSH KIT
EXTENSION
3t8" I.D., 50ft. EXTENSION
HOSE
ACCESSORY
QUICK CONNECT
ACCESSORY
QUICK CONNECT
STARTER KIT
tV?JLTt-PURTURBO NOZZLE
2200 and 2500 PSi
ELECTRIC TURBO
18" STAINLESS
STEEL
POSE/HOUSE
WAS H
NOZZLE
ANGLE
EXTENSION
CHEMICAL INJEC_ON
FOAMER
HIGH PRESSURE
HOSE TO HOSE
COUPLING
DECK WASH
KIT
\ ACCESSORY SERVtCE
BRACKET KIT
GARDEN HOSE
QUICK CONNECT
_*vtTH 2 ADAPTOR S
VEHICLE 1130AT
WASH
TURBO NOZZLE
EXTENSION
DEGREASER
PRESSURE
GAUGE
WAX
CONTENTS OF HARDWARE PACK
Parts packed separately in carton
=La_
lrIPtl=
Spray Gun Assembly
Owner's Manual
Main Unit
Adjustable Nozzle Extension
\
Wire Basket
Turbo Nozzle Exter_ion
D
Nozzle Cleaner Kit
HighPressure
Hose
Product Introduction
Videotape
Engine Motor(_1
OPERATION
KNOW
YOUR
HIGH
PRESSURE
WASHER
READ THIS OWNER'S MANUAL AND SAFETY RULES BEFORE OPERATING YOUR HIGH PRESSURE WASHER,
Compare the illustralJons win your high pressure washer to familiarize yourself _th the locations of various con_'ols and
adjustments, Save this manual for future reference.
GUN HANDLE
SPRAY GUN ASSEMBLY
HIGH-PRESSURE
HOSE
TURBO NOZZLE
ENGINE
ON, OFF
CONTROL
RECOIL STARTER
FUEL
TANK
AIR CLEANER
DETERGENT
PICK-UP TUBE
AND FILTER
DETAIL OF
GROMMET FOR
SECUPJNG SPARE
NOZZLE EXTENSION
FILL
A[
PUMP
QUICK CONNECT
WATER INLET
HIGH PRESSURE
OUTLET
. PRESSURE REGULATOR
PUMP -- Develops high pressure,,
PRESSURE REGULATOR -- Altc',vs you to adjust the
pressure of the outlet stream°
ENGINE ON-OFF CONTROLSets engine in starting
mode for recoil starter; turns OFF running engine,
RECOIL STARTER -- Used for starting engine manualIy,_
AIR CLEANER - Dry type filter element limits the amount
of dirt and dust that gets in the engine,
SPRAY GUN ASSEMBLY -- Controls the application of
water onto cleaning surface with trigger device. Includes
safety tatch,.
HIGH PRESSURE HOSE -- Connect one end to water
pump and other to spray wand_
DETERGENT PICKUP TUBE AND FILTER -- Mixes water
and detergent in outlet water flow.
HIGH PRESSURE
sure hose,,
OUTLET -- Connection for high pres-
TURBO NOZZLE -- Expands the surface area of the high
pressure spray,
QUICK-CONNECT
supply.
--
Easy connection
for intake water
ASSEMBLY
Read entre Ovmer's manual before you attemptto asserrv
hie or operate your new pressure washer. Your new pressure v_sher has been assembled atthe factory _th except{on of those parts left unassembled for shipping purposes.
REMOVE
PRESSURE
WASHER
FROM CARTON
STE P
2-Take
wire basketand insert
prongs of basket into holes on cradle
base located behind _he engine.
Open the carton and remove loose parts and parts box
included with carton.
o
Cut two comers of carton and lay the end panel flat
o
Remove all packing material.
e
Roll pressure v_sher out of carton and check carton
thoroughly for additional loose parts,
Refer to Page 6, "Conten_s of Hardware Pack" for an
iUuslrated listing of all items included with your pressure
washer. Become familiar with each piece before assembling pressure washer. Check all contents against illustrations on Page 6. If any parts are missing or damaged, call
the Pressure Washer Helpline at 1-800-_-3136.
PREPARING
FIRST USE
THE PRESSURE
WASHER
FOR
/
l!
IF YOU HAVE ANY PROBLEMS WITH THE ASSEMBLY
OF YOUR PRESSURE WASHER, PLEASE CALL THE
PRESSURE WASHER HELPLINE AT 1-800-222-3136.
For the most part; your Sears Craftsman High Pressure
Washer has been assembled at the factor/. To prepare
your pressure washer for operation, however, you will need
to perform these tasks:
o
Raise the Guide Handle and attach the wire basketthat
holds chemicals
Connect high pressure hose to the spray gun and the
pump and connect water supply to the pump.
Add oil to engine crankcase and add fue! to fuel tank
STEP 1 -
FIG.2
STE P 3
- Fit basket on axle
After you have inserted prongs into holes, swing the
basket dove. Hold basket as shown in F_g. &
Raise
guide
handle.
i
Loosen knobsto
raise handle
Tightan v_en
handle is straight
Place your thumbs on the axle and apply upward pressure so you can place bracket over the axle.
FIG. 1
FIG. 3
ASSEMBLY
TO ASSEMBLE
REMAINING
COMPONENTS
IMPORTANT:
YOU MUST ASSEMBLE WAND AND ATTACH ALL HOSES BEFORE YOU START ENGINE°
STARTING
ENGINE WITHOUT
ALL HOSES CONNECTED AND WATER
SUPPLIED WILL DAMAGE
PUMP.
o
STE P 6-
Remove yellow cap from
quick-connect,
quick-connect
-...
connect garden hose to
and turn ON the water.
Unravel high pressure hose and attach one end of hose
m the base of 1he spray gun (Fig. 4)° Tighten by hand°
STE P 4-
Connect
high
pressure
hose to spray gun
female connec_r_
IF SCREEN IS DAMAGED,, DO
NOT CONNECT WATER
HG. 6
STEP 7
-- Squeeze l]'igger to purge
pump system of air and impurities.
HG. 4
O
Attach other end of high pressure hose _o the high
pressure fitting on 1he pump (Fig. 5L Tighl_n by hand.
S TE P 5- Removered
cap from high
pressure outlet and connect high pressure hose to
HG. 7
STEP 8
- Connect. adjustable
nozzle
extension to spray gun.
EIG.5
Included _th _is unit is a Quick-Connect fitting that
comes attached to Water Inlet on the pump. 'The quickconnect includes two parts -- a Mate Connector and a
Female Connecl_r (Fig, 6). Inspect inlet Screen on
female connecl_r. Clean it if it contains debris or have
it replaced if iris damaged. DO NOTRUN THE PRESSURE WASHER IF THE SCREEN IS DA_,GEDo
Attach adjustable nozzle ex-mnsion by inserting it into the and of _he
spray gun and _ghtening _e black connector_
HG. 8
ASSEMBLY
Althoughmutti-viscosit¢ oils (5W30, lOW30, etc,) improve
STE P 9-
Place assembled spray gun
on holder and place turbo nozzle in storage holder. Hang hose on its holder.
Ho=e
Holder
slarting in cold weather, these multi-viscosity oils v_ll result
in increased bil consumplJon when used above 32°F.
Check your engine oil level more frequendy m avoid possible damage from running low on oil. Oil sump capacity is
20 ounces.
•
PosilJon pressure v_sher so engine is level.
=
Clean area around oil fill and remove oil dipstick (Fig.
10).
STEP 10
- Add oil to engine crankcase. Do not attemptto start engine without a_
oil.
'
t_LG.9
BEFORE
STARTING
THE ENGINE
Before you operate your pressure washer, you should
prepare the engine for the ini_al star_ngo To operate the
engine you v_ill need the relieving:
ENGINE
Should fill I_ FULL mark on dipstick. Use the same
grade oil when oil is changed.
OIL
IMPORTANT:
ANY ATTEMPT TO CRANK OR START
THE ENGINE BEFORE ITHAS BEEN PROPERLY SERVICED WITH THE RErJOMMENDED OIL RESULTS IN AN
ENGINE FAILURE.
FIG. 10
Wipe dipslJck clean, insert it into oil fill hole and _ghten
securely. Remove oil dipstick. If oil is not up to FULL
MARK on dipstick, add recommended
oil. POUR
SLOWLY.
A 20 oz. bottle of SAE 30 weight oil is included in the parts
car_n. YOU MAY NOT USE ALL OIL IN THE BOTTLE.
NOTE: Wllen adding oil to the engine crankcase in the
future, use only high quality detergent oil rated with API
ser_ce classification SF, SG or SH, rated SAE 30 weight.
Select the oil's viscosity grade according I_ your expected
operating t_mpera_re_
I
colder
32°F
5W30
I
warmer
SAE30
e
Wipe dipstick clean each time oil level is checked.
Q
Pour oil from the enclosed bo_e into the oil fill opening.
e
Install oil dipstick, hand ggh_en securely_
ASSEMBLY
ADD
GASOLINE
WARNING:
FILL WHEN
FUEL TANK
INDOORS.
NEVER
FILL NEVER
FUEL TANK
ENGINE
IS RUNNING OR HOT° DO NOT SMOKE WHEN FILLING
FUEL TANK.
STEP 1 1 --
Add .clasoline to fuel tank.
WARNING:
NEVER FILL FUEL TANK COMPLETELY FULL. FILL TANK TO ABOUT 1/2" BELOWTHE BOTTOMOF FILLER NECK TO PROVIDE
SPACE FOR FUEL EXPANSION. WIPE AWAY ANY
FUEL SPILLAGE FROM ENGINE AND EQUIPMENT
BEFORE STARTING.
The manufaclurer recommends fresh, clean, unleaded
regular automolJve gasoline with a minimum of 77 octane
(Leaded regular grade is an acceptable substitute). Tank
capacity is %1[2 U.S. quarts.
o
Use clean fue! and store in approved, clean covered
containers. Use clean fill funr_els.. Never use "stale"
gasoline left over from last season or gasoline stored
for long periods°
IMPORTANT:
IT IS IMPORTANT TO PREVENT GUM
DEPOSITS FROM FORMING IN ESSENTIAL FUEL SYSTEM PARTS SUCH AS THE CARBURETOR, FUEL FILTER, FUEL HOSE OR TANK DURING STORAGE. ALSO,
EXPERIENCE INDICATES THAT ALCOHOL-BLENDED
FUELS (CALLED GASOHOL OR USING ETHANOL OR
METHANO L) CAN ATTRACT MOISTUR E WH ICH LEADS
TO SEPARATION AND FORMATION OF ACIDS DURING
STORAGE. ACIDIC GAS CAN DAMAGE THE FUEL SYSTEM OF AN ENGINE WHILE IN STORAGE. TO AVOID
ENGINE PROBLEMS, THE FUEL SYSTEM SHOULD BE
EMPTIED
BEFORE
STORAGE
OF 30 DAYS OR
LONGER,. SEE "STORAGE'ON
PAGE 17. NEVER USE
ENGINE OR CARBURETOR CLEANER PRODUCTS IN
FUEL TANK OR PERMANENT DAMAGE MAY OCCUR.
o
Clean area around fuel fitl cap, remove cap (Fig. 11),
o
Add "UNLEADED"
tank.
_his level
FIG. 11
o
Install fuel cap and wipe up any spilled gasoline°
CHECKLIST
BEFORE
STARTING
ENGINE
lfyou have reached this point, look back over the assembly
to see if you have performed all of the following_
Checkfor proper hose connections (high pressure and
water supply) and for light connections and that there
are no kinks, cuts, or damage to the high pressure
hose.
o
Check that oil has been added to proper level in engine
crankcase before trying to start the pressure wesher,
o
Add proper gasoline to fuel tank,
o
Provide proper water supply (notto exceed 140°F)_
=
Be sure to read "Safety Rules" and "0peratJon" sections before using the pressure weshero
reg_lar gasoline, slowly, to fuel
IMPORTANT:
DURING THE OPERATION
OF THIS
PUMP A SMALL AMOUNT OF WATER WILL WEEP
FROMTHE BOTTOM OFTHE PUMP.THIS IS ANORMAL
CONDITION AS "WATER IS USED TO LUBRICATE THE
SEALS IN THE PUMP, SEE FIGURE tlA.
FIG. 1IA
OPERATION
GETTING
STARTED
STEP 13-
Squeeze trigger to relieve
water pressure and engage safety la_ch
in ON position.
IF YOU HAVE ANY PROBLEMS OPERATING YOUR
PRESSURE WASHER, PLEASE CALL THE PRESSURE
'WASHER HELPLINE AT 1-800-222+3136.
You have just assembled your high pressure v_sher and
have prepared the engine for starring. You noware ready
to clean your car or boat or whatever _iou plan to clean.
HOW TO START YOUR ENGINE
THE BEST WAY TO START YOUR ENGINE-POWERED
PRESSURE WASHER FOR THE FIRST TIME IS TO
FOLLC)WTHESE INSTRUCTIONS STEP-BY-STEP.THIS
STARTING INFOR MATION ALSO APPLIES WHENEVER
YOU START THE ENGINE AFTER YOU HAVE LET THE
PRESSURE WASHER SIT IDLE FOR AT LEAST A DAY.
=
Place the pressure vuasher in an area close enough to
an outside wa=r source that can ffowat a rate of three
(3) gallons per minute. Connect a garden hose to l_e
',_lter spout
=
Check thatthe high pressure hose is lJghtty connected
to the spray gun and m the pump. See ASSEMBLY
section for illusvatJons.
O
Check that garden hose is lJghdy connected to weter
inlet opening on the pressure washer pump and that
water is turned ON,
o
Adjust engine throttle controlto RUN position (Fig. 12),
STEP 12-
Set throttle
conl_ol
FIG. 13
STE P 14-
Press primer bulb 5 limes.
switch
to RUN posil_on.
R_ Pt:_ion,
/
Position
FIG. L_
-
Squeeze the trigger on the spray gun to relieve the air
pressure caused by tuming ON the water. Water will
spew out the gun in a thin stream. This will make it
easier to pull start the engine.
.
Apply the safety lamh to the spray gun trigger (Fig. 13).
*
e
FIG. 14
•
lfengine fails to startafmr three puUs, prime the engine
3 _mes again, press 1rigger to relieve pressure, release
the rigger and pull slitter rope again.
=
Once engine has started, place Safety La_ch in OFF
position,
STOPPING
YOUR PRESSURE WASHER
IMPORTANT:
DO NOT RUN PUMP WITHOUT THE
WATER SUPPLY CONNECTED
AND TURNED ON,
YOU MUST FOLLOW THIS CAUTION OR THE PUMP
WILL BE DAMAGED°
=
First, move engine thro_e
(Fig+ 12).
lever _o "STOP" position
Press pd.me..rbuIb firmJy 5 _.mes (Fig. !4L
+
Grasp rope handle and pull slowly un_l you feel some
resistance.
Keep fingers of other hand away from
ro_lJng flywheel Then pull cord rapidly to overcome
compression, prevent kickback and start the engine.
Simply shutting OFF engine will not release pressure in the system. Pull the rigger on the spray wand
assembly _o relieve the pressure in the hose_
NOTE: A small amount of water will squirt out when you
release the pressure_
OPERATION
HOWTO
You
and
you
any
USE YOUR WASHER
nowshould knowhowl_ START your pressure washer
howto STOP it, The informalJon in _his section v_ll ell
how_ adjust the spray pali_m and apply detergent or
other cleaning chemicals.
HOW TO USE ADJUSTABLE
WARNING:
NOZZLE
NEVER ADJUST SPRAY PATTERN
WHEN
SPRAYING.
NEVER
PUTHANDS
tN FRONT
OF SPRAY
NOZZLE
TO ADJUST
SPRAY
PATTERN. YOU COULD BE INJURED.
On the end ofyour spray gun is a nozzle thatyou can slide
forward and backward and thatyou can also _ist#om side
to side, This adjustable nozzle takes the place of buttons
or dials, v_rrthd_eadjustable nozzle you can adjust_he spray
pattern _obe either high pressure or lowpressureo You can
also adjust the spray so it is concentramd in a stream
pattern or expanded into a fan pat_rn, Use this nozzle
apply del_rgent
o
Slide _he nozzle forward when you v_sh to adjustthe
spray to lowpressure mode (Fig, 15). Slide the nozzle
backward to achieve high pressure_
e
Point the nozzle 1Dvvard the ground and press 1he
l_gger 1Dtestlhe pattern (Fig, 16),
o
Tv_slJng the nozzle adjusts me spray pattern from a
narrow stream m an expanded stream,
FIG. 16
If you get the spray nozzle too close, especially using
high pressure mode, you may damage _he cleaning
surface.
For most effective cleaning, keep spray nozzle be_veen 8 to 24 inches of cleaning surface,
Do notget closer than 6 inches when cleaning automo_
bile tires.
SPRAY ADJUSTME
NOZZLE IN HIGH
PRESSURE MODE
PUSH NOZZLE FORWARD FOR
LOW PRESSURE MODE AND DETERGENT APPLICATION
NT
TWIST NOZZLE TO EXPAND SPRAY STREAM
FIG. 15
TWIST NOZZLE TO NARROW
SPRAY STREAM
OPERATION
,
You can also adjustthe pressure bytuming the RegutalDr
Knob (Fig. 17) 1_the desired pressure se_ng. Turning
this knob all me way clockv_se produces the highest
pressure,
Pressure
=
IMPORTANT:
DETERGENT CANNOT BE APPLIED
WITHOUT THE WATER SOURCE TURNED ON,
o
Connect garden hose to water inlet, check that high
pressure hose is connected to spray gun and pump,
and start engine. Apply detergent to a dry surface,
starting from the bottom and working up,
=
Allow the detergent tD soak in between _5 minutes
before washing and rinsing.
o
For cleaning, startat]ower por_on ofarea to be washed
and work upward, using long, even overlapping
strokes.
*
For rinsing, push nozzle sleeve to high pressure and
wait for detergent to clear_ Start at top of area to be
rinsed, working down v_thsame ac_on as for cleaning,
=
You can also stop detergent from fio_ng by simply
remo'_ng siphon from bottle,
Regulator
HG. 17
AP P LY1NG DETE R G E NT WITH ADJUSTAB
NOZZLE
LE
Slide the adjustable nozzle forward (Fig, 15) to low
pressure mode. Detergent cannot be applied v_th nozzle in high pressure pos_on.
PRESSURE
WARNING:
BE EXTREMELY
IF YOU
MUST USE PRESSURE
WASHERCAREFUL
FROM LADDER,
SCAFFOLDING OR ANY OTHER RELATIVELY UN.
STABLE LOCATION. PRESSURE IN A RUNNING
WASHER BUILDS IN THE WAND AS YOU CLIMB.
WHEN YOU PRESS THE TRIGGER, THE RECOIL
FROM THE INITIAL SPRAY COULD FORCE YOU
TO FALL, OR IF YOU ARE TOO CLOSE TO THE
CLEANING SURFACE, HIGH PRESSURE COULD
FORCE YOU OFF CLIMBING APPARATUS.
IMPORTANT: USE SOAPS DESIGNED SPECIFICALLY
FOR PRESSURE WASHERS. HOUSEHOLD DETERGENTS COULD DAMAGE THE PUMP.
IMPORTANT:
YOU MUST ATTACH ALL HOSES BE _
FORE YOU START 'THE ENGINE° STARTING THE ENGINE WITHOUT ALL THE HOSES CONNECTED AND
THE WATER TURNED ON WILL DAMAGE THE PUMP_
TO APPLY DETERGENT FOLLOW THESE STEPS:
-
=
Reviewthe
-
o
Prepare detergent solul_on as required by your job.
o
Place small filter ofciear, detergent syphoning _Jbe into
detergent container (Fig. 18) placed in the ,,_irebasket,
use of adjustable nozzles on Page 13_
WASHING/RINSING
Work #ore the E_pof the surface to the bottom.
lnilJalty clean an area and then check the surface for
damage_ if no damage is found, you can assume it is
okay to conSnue cleaning_
TIPS
°
Never use garden hose inletto siphon detergentorwax
or any water source other than household supplies.
*
lfyou have the spray nozzle too far away, the cleaning
v_ll not be as effe_ve.
SIPHONING
We recommend that you DO NOT siphon your water supply
from sources other' than from connec_ng to a household
water supply.
Detergent Filter
HOWTO
USE TURBO
NOZZLE
EXTENSION
FotlowStep 8 (Fig. 8 on Page 9) _ propedy install turbo
nozzle extension°
FIG. 18
o
The totaling turbo nozzle, in essence, expands the
area of the high pressure stream.
=
You cannot adjust the spray pattern _th this nozzle.
=
You cannot apply detergent with this nozzle,
CUSTOMER
RESPONSIBULITIES
MAINTENANCE SCHEDULE
FILL IN DATES AS YOU COMPLETE
REGULAR SERVICE
HOURLY OPERATING INTERVAL
Every25 Every 50 Every 100
Before
Hours or Hours or
Hours or
Each Use.:.. Yeady ! Ye,ady....... Yeady ......................
MAINTENANCE TASK
PRESSURE WASHER
Check/deaninletscreen
............
•...............
i
...........
X
Checkhigh pressurehose. .........
Check gun,,
and,,,vvand
for,leaks.
ENGINE
Check oil level,
X
X
.
SERVICE DATES
!
L
..............
X.....................
X
Change engineoil. •
...........
X**
Clean paperelementof air
cleaner
.....................
X
...........
Replacelctean spark plug: .......................
Preparefor storage,,
J
.............
Prepare unit for storage if it is 1o remain
longer _an 30 days
i
Clean if clogged,,
Replace
ff perforated
Change oil after first 5 hours,
or torn.
l_en altar every 50 hours,,
° Change sooner when operating under heavy toad or high ambient
tBmperatura_
_* Clean more often under dusty conditions or when airborne debris is presanr_
GENERAL
RECOMMENDATIONS
The warranty of the high pressure washer does not cover
items that have been subjected to operator abuse or negligence, To receive full value from the warranty, operator
must maintain high pressure washer as ins_Jcl_d in this
manual,
Some adjus_nents will need to be made periodically to
properly maintain your high pressure v_sher,
All adjusVnents in the Service and Adjusvnents seclJon of
this manual should be made at least once each season,
Once a year you should replace the spark plug and
clean or replace the air filter and check the gun and
wand assembly for wear° A newspark plug and clean
air filter assure proper fuel-air mixture and help your
engine run better and last longer,
BEFORE
PRESSURE
WASHER
MAINTENANCE
Check and Clean Inlet Screen: Remove inlet screen from
wal_r inlet, Clean the screen if clogged or replace it if it is
damaged,
Check High Pressure Hose: High pressure hose can
develop leaks from ,_ar, kinking, abuse. Check all hoses
for cuts, leaks, abrasions or bulging of cover, or damage or
movement of couplings. If any of these conditions exist,
replace hose immediately.
DANGER : WATER
SPRAYINGMATERIAL
FROM A LEAK
IS
CAPABLE
OF INJECTING
INTO
SKIN,INSPECT HOSE EACHTIME BEFOREUSING
IT. NEVER REPAIR HIGH PRESSURE HOSE. REPLACE IT WITH ANOTHER HOSE THAT MEETS
MINIMUM PRESSURE RATING OF YOUR PRESSURE WASHER.
Check Detergent Hose: E_mine the filter on the detergent hose and clean if ctogged. Hose should _ tightly on
barbed fi1_ng, Examine hose for leaks or tears° Replace
the filter or hose if ekher is damaged,
EACH USE
=
Check engine oil level
=
Check quick-connect
e
Checkhigh
=
Check detergent inlet hose and filter for damage,.
=
Check gun and wand assembly for leaks,,
screen for damage°
pressure hose for leaks,
Check Gun and Wand: Examine hose connection and
make sure it is secure. Test trigger by pressing it and
making sure it springs back into place when released. Put
safety latch in ON position and test1_gger., You should not
be able to press Vigger_
CUSTOMER
RESPONSIBILITIES
Purge Pump of Air and Contaminents:
To remove the air from the pump, fotlowthese
steps:
=
Set up the pressure washer as described in the ASSEMBLY section and connectthe water supply.
=
Remove the nozzle attachment from the gun.
=
Pull the 1rigger on the gun and hold.
To remove the containments from the pump, follow1_ese
steps:
=
Set up the pressure washer as described in the ASSEMBLY section, connect the wamr supply.
=
Remove the nozzle attachmentfrom _he gun and start
the engine according Io instruclJons in the OPERATION secdon.
=
Pull the _igger on the gun and hold.
*
When the water supply is steady and constant, set
safetytatch on gunand refasten the no=te attachment
FIG. 19
ENGINE MAINTENANCE
CHECKING OIL LEVEL
To clean or replace air cleaner (Fig. 20), followthese
o
Remove screw,
See _EFORE
STARTING ENGINE" for informal_on on
checking oil level. Oil level should be checked prior to each
use or at least every 5 hours of operation_ Keep oil level
maintained,
=
Remove coveraircleanercarefuUy,
_th the cover.
CHANGING
t' _
steps:
The screwv_il stay
SCREW
OIL
CAUTION:
Disconnect
spark
plug wire from spark (
plug
and keep
it away from
s'parkP!Ug.
Change oil afar first 5 hours of operation, Change oil every
50 hours thereafter, If you are using your pressure washer
under extremely dirty or dusty conditions, or in extremely
hot weather, change oil more ofl_n,
Change oil while engine is s_ll v_rm from running, as
follows:
•
Before you tip the pressure washer to drain the oil, drain
the fuel tank by running pressure washer until fuel tank
is empty,
=
Clean area around oil fill, remove oil fill cap/dipstick.
Wipe dipslJck clean,
=
Tip your pressure washer as shovm in Fig. 19 to drain
oil completely into a suitable container_ When lipping
_he pressure washer, keep the engine muffler side up.
=
=
COVER
Fill engine crankcase _th recommended oit until oil
level is at "FULL* point on oil dipstick. Do not overfill
above that mark. About 20 ounces is required, POUR
SLOWLY.
When engine crankcase is filled to proper level, install
and tighten oil dipstick,
SERVICE
FIG. 20
=
Remove 1he air filter from and examine it for damage.
=
To service the paper air fll'0ar, clean it by tapping it
gently on a flat surface. If very dirty or damaged,
replace the air filter. Do NOT oil the air filter,
o
Reassemble all parts and fasten securely _o engine
v_th screw.
AIR CLEANER
Your engine will not run properly and Pnaybe damaged if
you run it using a dirty air cleaner°
Clean or replace the air cleaner paper filter once every 100
hours of operation or once a year, v_dchever comes first
Clean or replace more of_n if operating under dusty or dirty
conditions. Replacements are available atyour local Sears
Authorized Service Cen_er.
CUSTOMER
REPLACE
SPARK
RESPONSiBiLiTiES
PLUG
0030" FEELER GAUGE
Change the spark plug every 100 hours of operation or
once each year, whichever comes first. This _tt help
engine ID start easier and run better. See pressure washer
specificagons for the type of spark plug you need° Spark
plug gap (Fig. 21) is 0_30 inch (0,76mmL
(0.76ram)
FIG. 21
SERVICE AND ADJUSTMENTS
CARBURETOR
if you think your carburetor needs adjusting, see your
nearest Sears Service dealer. Engine performance may
be affected in altitudes above 4,000 feet. To improve
engine performance, see your nearest Sears Service
dealer.
ENGINE
A
SPEED
WARNING: NEVER TAMPER "WITHENGINE GOVERNOR WHICH tS FACTORY SET FOR PROPER
ENGINE SPEED.
OVERSPEEDING ENGINE
ABOVE FACTORY HIGH SPEED SETTING CAN BE
DANGEROUS.
IMPORTANT:
CHANGING OF ENGINE
SPEED WILL VOID ENGINE WARRMqTY.
NOZZLE
GOVERNED
MAINTENANCE
Iflhe adjustable nozzle becomes restricted or clogged _th
foreign materials, such as dirt, excessive pump pressure
may develop. If this nozzle becomes partially clogged, it
can cause a pulsing sensalJon during use. This generally
is not a pump related problem, but rather a clogged or
partially restricted adjustable nozzle.
FIG. 22
NOTE: You cannot service me turbo nozzie_
If me adjustable nozzle becomes clogged or parlJatly re..
stricted, immediately cJeanthe nozzle with the kit included
with your pressure washer by follo,,,_ng these instruclJons:
o
Shut off the engine and turn off _e water supply_
o
Separate the adjusteble nozzle holder from the gun°
=
Remove nozzle from the end ofthe holder using a 2mm
or 5/64 allen wrench (like the one included in the kitL
o
Use the _re included in the kit(Fig. 22) or a smalt paper
clip to free the foreign ma!_rials clogging or resvicfing
the nozzle,
=
Remove additional debris by back flushing ,_ter supply through holder (Fig. 23L Back f_ush between 30 to
60 seconds. Turn v_nd to stream spray and move
nozzle from lowto high while flushing.
o
Reinstall nozzle into the v_nd_ DO NOT overtighten_
•
Reconnectthe
FIG. 23
Reconnect the v_ter supply, turn on the water, and
start the engine.
Test the pressure washer by operating
the high and in the low position°
wand tothe gun.
17
_th nozzle in
STORAGE
PRESSURE
WASHER
filter, fuet hose or tank during storage. Also, experience
indicates that alcohol-blended fuels (called "gasohol" or'
using ethanol or methanol) can attract moisture which leads
to separation and formation of acids during storage; Acidic
gas can damage the fuel system of an engine while in
storage
PUMP
Water should not remain in the unit for long periods of time.
Sediments of minerals can deposit on pump parts and
"freeze" pump action. If you do not plan to use the Pressure
Washer for more than 30 days, follow this procedure:
=
Shut off the engine and let it co0!, THEN REMOVE
HOSES. Place throttle lever in STOP" position.
_
°
To avoid engine problems, the fuel system should be
emp_Jed before storage of 30 days or longer. Follow these
instructions:
Flush detergent hose by placing the injector filter into
a pail of clear water while running Pressure Washer
with nozzle in low pressure mode Flush until you can
see water in line is clear_
Drain Fuel System: Remove all gasoline from carburetor
and fuel tank to prevent gum deposits from forming on
these parts and causing possible malfunction of engine_
ALL
CAUTION:
BE SUREBEFORE
THE THROTTLE
LEVER IS IN
"STOP" POSITION
YOU CONTINUE,
IF
YOU STARTTHE ENGINE WlTHOUTTHE PROPER
WATER SUPPLY CONNECTED, YOU CAN DAMAGE THE PUMP.
WARNING:
DRAIN FUEL
INTO
APPROVED
CONTAINER
OUTDOORS,
AWAY
FROM
OPEN FLAME.
BE SURE ENGINE IS COOL. DO NOT SMOKE.
Empty the pump of all pumped liquids by pulling recoil
handle about 6 times. This should remove most of the
liquid in the pump.
We recommend that the pressure washer pump storage
proecedures be followed after every use
-
o
if you did use "gasohoi", run engine until engine stops
from lac k of fuel. Make sure you have water supply to
pump inlet connected and tumed ON..
°
Fuel stabilizer (such as STA-BtL ®) is an acceptable
alternative in minimizing fuel gum deposits during stoF.
age.
Change Oil: While engine is still warm, drain oil from
crankcase Refill with recommended grade.
Coil the high pressure hose and inspect it for damage.
Cuts in the hose or fraying of it could result in leaks and
loss of pressure. Should any damage be found, replace
the hose. DO NOT attempt to repair a damaged hose
and use it. Replace the hose with the genuine Craftsman part_
Oil Cylinder Bore: Remove spark plug and pour about 1/2
ounce (15ml) of engine oil into the cylinder. Cover spark
plug hole with rag. Crank slowly to distribute oil.
Drain water from hose and properly hang it on the wire
support provided on the guide handle
[
NOTE: To protect the unit from freezing temperatures, you
can draw windshield washer fluid into the pump by pouring
the washer fluid into a 3-foot section of garden hose connected to the inlet adaptor and pulling the recoil handle
twice.
•
=
=
CAUTION!
HOLE
WHENAVOIDSPRAYFROMSPARKPLUG
CRANKING ENGINE SLOWLY.
Install spark plug, Do not connect spark plug wire.
OTHER
°
Do not store gasoline from one season to another.
,,
Replace your gasoline can if your can starts to rusL
Rust and/or dirt in your gasoline will cause problems.
°
If possible, store your unit indoors and cover it to give
protection from dust and dirt.
Store in a clean, dry area.
ENGINE
_i_
_
WARNING: NEVER STORE ENGINE WITH FUEL 1NI
TANK INDOORS OR IN ENCLOSED, POORLYVEN- I
TILATED AREAS WHERE FUMES MAY REACH AN t
OPEN FLAME, SPARK OR PILOT LIGHT AS ON A l
FURNACE, WATER HEATER, CLOTHES DRYER|
OR OTHER GAS APPLIANCE.
J
It is irn_rtant to prevent gum deposits from forming in
essential fuel system parts such as the carburetor, fuet
]8
o
Cover your unit with a suitable protective cover that
does not retain moisture. Do not use plastic. Plastic
does not breathe, which allows condensation to form
and will cause your unit to rusL
IMPORTANT:
NEVER COVER YOUR PRESSURE
WASHER WHILE ENGINE AND EXHAUST AREAS ARE
WARM
TROUBLESHOOTING
CAUSE
PROBLEM
Pump has following problems:
failure to produce pressure, erratic
pressure, chat_ring, loss of pressure,
low water volume.
1_ Nozzle in Iowpressure
CORRECTION
mode,
2_ Low regulator pressure
3. Water inletis blocked.,
4o
5,
6o
7o
8_
9.
t0.
inadequate water supply
Inlet hose is kinked or leaking
Clogged inlethose svainer.
Detergent line is not submerged°
Wal_r supply is over !40CFo
O_et hose is blocked or leaks.
Gun 1oaks,,
1., Pull nozzle backward for high
pressure mode,,
2, Adjust regulator to desired sel_ng_
3o Clear inlet
4. Provide adequate water flow.,
5. S_aighten inlet hose, pal_h leak.
6o Check and clean inlet hose strainer.,
74 Submerge detergent line.
8. Provide cooler vval_r supply,,
9_ Clear blocks in outfethose.,
11o Nozzle is obstnJc_d.
10,_ Replace gun.
11. Clear nozzle,,
12_ Pump is faulty.,
12_ ContactSears
Service Department,
1. Detergent line is not submerged,
t, lnsertchemical
2. Chemical filter is clogged.
3. Nozzle is in high pressure mode.
2. Clean or replace filter/detergent
34 Push nozzle forv_ard for
low pressure mode,
Engine runs good at no-load bt.¢'bogs
dow.n" vahen load is added.
Engine speed is too slowo
Contact Sears Service Depar_nent.
Engine v_l! not start; or starts
and runs rough
1.
2.
3.
4,
5_
Detergentfaits
to mix with spray.
Low oil Ievel
Dirty air cleaner
Out of gasoline,,
Stale gasoline,,
Spark plug wire not connected
to spark piug
6. Bad spark plug.,
7,, Water in gasoline,,
8. Overchoking.,
Excessively rich fuel mixture.
10,, Intake valve stuck open or closed°
11., Engine has lost compression,
9-
Engine shuls dov.n during operation
Engine Iacks power,,
1.
2..
Out of gasoline.
Lowoil level.
Dirty air filt_r,
line into detergent.
lineo
1,, Fill crankcase to proper level
2. Clean or reptace air cEeaner,,
3. Fill fuel tank.
4o Drain gas tank; fill with fresh fuel.
5, Connect wire to spark plug,,
6., Replace spark plug,,
7,, Drain gas tank; fill with fresh fuel,,
8,, Open choke fully and crank engine,,
9,, Contact Sears Service Department.
10, Contact Sears Service Deparlment.
1 1,, Contact Sears Service Deparvnent`
1_
Fitlfueitank.
2.
Fillcrankcase
Replace air filter_
to proper level
_5
Gt_,
WAND, AND HOSE STORAGE LOCATION
12
II
CRAFTSMAN
1500 PS! HIGH PRESSURE
WASHER
580.741380
PARTS
DESCRIPTION
ITEM
PART
Square neck eyebolt (I req)
34
97745
Lavor Wash 1500 Pump (1 req)
23139B
3/16" x 1-I/2" Square Key (1 req)
35
97769
Gun Holder Cup (1 req,)
3
38750
M6-1 0 × 30ram Ca pscrew (4 req)
36
99446
Engine Decal (1 req)
4
97876
Wheel (2 req)
37
97891
Stud (2 req,)
5
97082
Bracket Clip (2 req_)
38
97912
1/4-20 x 2,,25 in.,Carriage Bolt (I req,,)
6
39414
M8.1.,00 x 35ram Capscrew
39
97996
1/4-20 in., Screw (16 req,)
7
92235
Turbo Grommet (1 req,)
40
98021
Starting Instructions
8
52858
MB-125mm
41
98022
&8 HP Sears Decal (1 req)
9
30809
1/8"-11/16" Grommet (1 reqo)
42
98316
MV870 Gun (1 req)
10
7O453
Yellow Tag Warning Oil (1 req,)
43
98317
Regular Nozzle Wand [1 req)
11
96168
Chemical Injection Hose (1 req,)
44
98318
Turbo Nozzle Wand (1 req)
12
75402
I/2" Pushm,_ (2 req)
45
97810
14 x 14 Hose (1 req.)
13
77395
M6 Flange Lock Nut (4 req)
46
98754
Pump Seep Warning Decal (1 req)
14
81895
3/4" Square Cap Plug (4 req,.)
47
99475
Spedal Long Mounting Stud (1 req.,)
15
97758
Left Hand VeNcal Shaft Tube (1 reqo)
48
48031G
Hose Clamp (1 req )
16
87841
Wheel K3tVibration Mount (2 req.,)
49
99368
SS, Wear Plate (2 req)
17
49820
M8_125mm Nylock Nut (4 req_)
52
21106
Carb Side Guard (1 req)
18
91373
Sears Data Plate (1 req,)
53
21105
Muffler Side Guard (1 req,)
19
99827
.,312 x 1" Vinyl Cap (2 req,)
20
43107
M8-1,25 x 25ram Capscrew
21
96016
Pump Quick Disconnect (1 req )
PAGE 5 FOR PICTURES
22
96017
Male End Quick Disconnect
7175190
Floor/Siding
23
96307
1-800 No, Decal (1 req,)
7175199
Rotating Brush Kit
24
97762
Chemica} Jug Hanger (! req)
7175'189
Utility Brush Kit
25
96405
Danger Decal (1 req)
7175187
Garden Hose Quick Connect with
2 Adaptors
26
97100
H,,P,,Adaptor Cap (t req)
7175100
Multipurpose/House
27
97178
Hand{e Knob (2 req,)
7175101
Deck Wash
7175102
Vehicle/Boat
7175103
Degreaser
7175104
Spray Wax
PART NO.
DESCRIPTION
1
97998
2
ITEM
.......
(2 req,)
Nut Locking (8 reqo)
ACCESSORIES
28
12E802-1115-01
(4 req,)
Briggs & Stratton Engine (1 req,)
97738
Base (1 req,)
30
97739
Mount Plate (1 req.)
31
97740
Handle Assem. (1 req)
32
97741
Axle Assem,, (1 req._)
33
97742
Right Hand Base Tube (1 req,)
21
Decal (1 req,)
YOU CAN USE WITH THIS PRESSURE
WASHER, SEE "ACCESSORIES
(1 req,)
29
NO.
REPAIR
AND ATTACHMENTS"
ON
OF ACCESSORIES,
Brush Kit
Wash
Wash
Drw_ing No,, 97335
"TI
Z
"u
J_e
I
4
6
"1"
"13
27
41
m
o_
4o
C::
nl
G')
_3
m
3
43
7
2O
m
:zl
-4
¢n
CRAFTSMAN
ITEM
1
2
3
4
5
6
7
8
9
10
11
12
13
14
15
16
1'7
18
19
20
2t
22
23
24
26
27
28
29
30
31
33
34
35
36
37
38
39
40
41
42
43
44
45
46
1500 PSI HIGH PRESSURE
PART NO.
100-9774-5
101-97745
102-97745
103-9774-5
104-97745
105-97745
t06-97745
107-97745
108-97745
109-97745
110-97745
111-97745
112-97745
113--97745
114-97745
115-97745
116-97745
117-97745
118-97745
119-97745
120-97745
121-97745
122-97745
123-97745
124-97745
t25-97745
126-97745
127-97745
128-97745
129-97745
130-97745
131-97745
132- 97745
133-97745
134-97745
135-,97745
136-97745
137-97745
138- 97745
139-97745
140-97745
141-97745
500-97745
50t-97745
WASHER
580.741380
REPAIR
DESCRIPTION
INPUT SHAFT (1 REQo)
PUMP FLANGE TOP (1 REQ.)
OIL SEAL (1 REQo)
THRUST BEARING (1 REQ.)
AXIAL CAM {1 REQ.)
CAM RETAINER (1 REQ,)
PISTON SPRING RETAINER (I REQo)
INLET FILTER (1 REQJ
PISTON BODY (1 REQ.)
OIL SEAL (1 REQo)
O_RING (1 REQ,)
SEAL RING SEAT (1 REQo)
O-RING (1 REQ.)
BACK UP RING (1 REQ.)
HIGH PRESSURE WATER SEAL {1 REQ.)
TAPERED 18" CAP (1 REQ,)
O-RING (1 REQ.)
COMPLETE INLET VALVE (;I REQo)
M6 x 70ram SCREW (1 REQJ
PUMP HEAD (1REQ.)
O-RING (1 REQ,)
OUTLET VALVE (1 REQo)
O-RING (1 REQ.)
VALVE CAP (1 REQJ
O-RING (1 REQ,)
HIGH PRESSURE OUTLET ADAPTER (1 REQ.)
O-RING (1 REQ.)
BYPASS VALVE (I REQo)
CHEMICAL INJECTOR SPRING (1 REQJ
BALL (t REQ,)
CHEMICAL INJECTOR HOSE FITTING (1 REQ.)
REGULATOR SEAT (1 REQ.)
PRESSURE REGULATOR TOP (1 REQJ
O-RING (I REQ.)
PISTON BODY TOP WITH PRESSURE ADJUSTOR (t REQ.)
PISTON RETURN SPRING D.14 (1 REQ.)
O-RING (1 REQo)
PISTON {1 REQJ
THRUST SHOE (1 REQ.)
THRUST ROLLER BEARING (1 REQJ
THRUST BEARING DISK (I REQ.)
OIL BREATHER CAP (1 REQ,)
CYLINDER HEAD REPAIR KIT (INCL, 3 EACH OF/is 111q15)
VALVE REPAIR KIT (INCL. 3 EACH OF #s 117,118, 121-123)
23
PARTS
CRAFTSMAN
1500 PSi HiGH PRESSURE
BRIGGS & STRATTON 4-CYCLE ENGINE
WASHER 580.741380
12ES02-H 15-01
REPAIR
307
I.i
306
284
S
10
635
13
lit REQUIRES
SPECIAL
TOOLS
TO INSTALL SEE REPAIR
INSTRUC'I3ON
MANUAL
24
_40
33
270
15
/"Jr
(OJ
r_'f
883
621
-'_._
F
/
i
34
i,J
._
i
i
12
PARTS
CRAFTSMAN 1500 PSi HIGH PRESSURE WASHER 580.741380
BRIGGS & STRATTON 4-.CYCLE ENGINE 12E802-1115.01
REPAIR
@
670A
240
969
968
991
971
967
843
PARTS
REPAIR PARTS
CRAFTSMAN 1500 PSi HiGH PRESSURE WASHER 580.7413BO_
BRIGGS & STRATTON 4-_YCLE ENGINE 12ESO2;-111,_P4M
L_
634
137
124
__95_130
0
61'7'
11oO
I
134
110
127
121 CARBURETOR
KIT
515 O
l
1095 VALVE OVERHAUL
GASKET SET
1
tp
,
977 CARBURETOR
GASKET SET
842
524
358 GASKET SET
'!
REPAIR
CRAFTSMAN 1500 PSI HIGH PRESSURE WASHER 580.741380
BRIGGS & STRATTON 4-CYCLE ENGINE 12E802-1115.01
No.
1
2
3
5
7
8
9
9A
10
!1
12
13
15
16
NO.
493260
293708
"299819
214349
*_272916
495786
"_272481
"272481
9465O
23193-3
"272198
94547
9472O
49,3362
18
20
22
23
24
25
29
32
33
34
35
40
45
46
47
52
54
55
56
58
493279
*399781
94220
492893
222698
493262
493385
493.386
493387
493261
493388
493389
493390
26026
298909
298908
490566
94699
262651
262652
262224
93312
262204
492826
493737
"272199
94526
497440
498144
280399
60
81
95
I04
281434
223664
94908
"1"23137I
26
27
28
11o
117
121
124
126
127
130
131
133
134
137
161
163
t 87
188
188A
201
209
227
11
497466
496495
498260
94525
498254
1"
224908
493267
398187
1'398188
1":t:
496118
1":I:272653
296004
94644
398540
262579".t
26.3044
492349
Part Na
Cytlnder As_b./
Bushing
Oil
Cylinder Head
Cytinder Head G_ ;ket
Breather A_m_t: ry
Breather Gasket
Breather Gasket
Hex Screw
Breather Tube
Crankcase Gaskq
Hex Screw
Og Drain Plug
Crankshaft NOT Timing Gear
Key order Part f,_
Engine Sump
t3tl SeaJ
Hex Screw
F rheel
Flywheel Key
PistonAssembly (Standard)
PistonAssembly (_010"O.S)
PistonAssembly (_020"O.So)
Piston Assembly (.030" OS.)
Ring Set (Stand_
Ring Set (.01(7" C S,)
Ring Set (o020" C S.)
Ring Set (.030' O.S.,)
Piston Pin Lock
PistonPin (Stare
PistonPin (.005"
S.)
Connecting Rod
Hex Screw
Exhaust Valve
Intake Valve
Valve Spdng
Valve Retainer
Valve Tappet
Cam Gear
Oil Slinger
Intake Gasket
Hex, Screw
Rewind Starter Housing
Starter Pulley
Starter Rope (Cut to Required
Length
Starter Rope Grip
Muffler Screw Lc
Slotted Screw
Roat Hinge Pin
Seal O-ring (sol(
kit only)
Main Jet (bowl mounting screw}
Main Jet (high altitude)
Carburetor Kit
Hex. Screw
Carburetor
Welch Plug (sold in kit only)
Throttle Valve
Thrott_ Shaft
Carburetor Floal
Needle Valve
Float Bowl Gask (sold in kit only)
Air Cleaner Bas_
Air Cleaner Gas
Fuel Line
Screw
Shoulder Screw
Link
Governor Sprinc
Governor Lever
e Included in Valve Overhaul Gasket Set Part -- Part No..498528
Raf.
No.
22
240
258
284
300
3O4
3O5
3O6
307
N
387
455
456
45g
461
515
523
524
525
529
562
572
592
606
613
615
616
617
620
621
625
634
635
643
670
670A
741
832
842
843
847
851
869
870
871
883
922
923
949
957
967
968
969
97!
971A
972
975
1019
1095
Part
No.
67072
298090
94512
94511
496106
493294
94786
224324
94515
92284
802.574
94731
802592
93602
3988O8
497316
19069
89838
496115
225121
2815,33
281505
94943
263073
495264
"280393
495265
281299
94852
224,328
231082
93053
224815
497680
94231
94474
262578
1-127o334
497203
396847
261085
t$
66538
280972
"493823
280512
262598
494224
"280966
272616
495263
493880
211172
213513
262001
63709
"e272253
262640
493442
497233
397974
491588
281340
94120
94121
94749
495225
493640
494256
498528
PARTS
7
wa =
..........
|
Fuel Filter
Screw
Shoulder Screw
Exhaust Muffler
Blower Housing
Hex Screw
l
Hex. Screw
I
Magneto Armature
Hex Screw
]
|
C_inderSh_d
Rywhe Nut
SparkPlug
/
/
I
l
I
I
!
Hex Screw
|
Stop Wire
l
Gasket Set
I
Fit'wheal Puller
/
Spark Plug Wrench
J
Carburetor Primer
J
Flywheel Cup
]
Starter Rope Grip
J
Rachet Pawi
Shoulder Screw
Retainer Spring
i
Oil Fiff Cap
Fill Tube Seal
Oil Fill Tube
Grommet
Carriage Bolt
Cylinder Baffle
Hex, Nut
Hose Clamp
Bracket Strap
Rewind Starter
(includes 94904, Screw;, 94908, nut)
Hex Screw
Push Nut
Governor Crank
Intake Manifo_ Sea!
Control Bracket
Stop Switch
Intake Manifold
Washer (sold in kit only)
Spark Plug Boot
Air Filter Retainer
Spacer (includes 2)
Spacer
Timing Gear
Muffler Gaurd
O-Ring Seal
Lever Sleeve
Oil Fill Tube
Cable Terminal
Intake Valve Seat
Exhaust Valve Seat
Exhaust Valve Guide (Bushing)
Intake Valve Guide (Bushing)
Exhaust Gasket
Brake Spring
Brake
.
Finger Guard
Fuel Tank Cap
Air Filter
Air Cleaner Cover
Slotted Hex. Screw
Hex. Screw
Hex. Screw
Fuel Tank
Float Bowl
Label Kit
Valve Overhaul Gasket Set
Included in gasket set _ Part No. 497316
1" Included in carburetor kit _ Part No,. 493762
:_ Included in Carburetor Gasket Kit -- Part No,, 490937
CRRFTSMRN°
OWNER'S
MANUAL
3.8 HORSEPOWER
1500 PSI 2 GPM
HIGH PRESSURE
MODEL NO.
580.741380
WASHER
Each High Pressure Washer has its own model number. Each engine has
its own part number.,
The model number for your high pressure washer will be found on a decal
attached to the unit.
"lff_epart number for your engine witl be found on the Blower Housing of
the engine adjacent to the spark plug,
IF YOU NEED
All parts listed herein may be ordered through Sears, Roebuck and Co.
Service Centers and most Retail Stores.
REPAIR SERVICE
OR PARTS
WHEN ORDERING
REPAIR
LOWING INFORMATION:
®
FOR REPAIR SERVICE CALL
THIS TOLL. FREE NUMBER
1-800-4oREPAIR
(1-800-473-72.47)
FOR REPLACEMENT PARTS
INFORMATION AND ORDERING,
CALL THIS TOLL FREE NUMBER:
PRODUCT--
PARTS,
ALWAYS
GIVE THE FOL-
HIGH PRESSUREWASHER
•
MODEL
NUMBER
-- 580.741:380
e
ENGINE MODEL NUMBER -- 12E802-1115-01
•
PART NUMBER
•
PART DESCRIPTION
1-800-FON-PART
(1-800-366-7278)
Your Sears merchandise has added value when you consider that Sears
has service units nationwide staffed with Sears trained technicians....professional technicians specifically trained on Sears products, having the
parts, tools and the equipment to ensure that we meet our pledge to you,
we service what we sell.
SEARS,
Nm..4,. _
ROEBUCK
9_73_ Rovizi6o 6 _)/1 g/96_i
and
CO.,
HoffmanEstates,
IL
60179
U.S.A.
Printed in U,S,_,-
f UAL
DEL
PROP1ETARIO
MODELO
NO.
580.741380
>/
ALTA PRF.SlON
MAQUINA
"
LAVADORA
DE FUERZA
DE ALTA PRESION
A 1500PSI
ET 2 GPM
DE 3.8 CABALLOS
\
i
HORAS:
Lun. - Vie. 8 a,m. a 5 p.m
(TCE)
PRECAUCION:
Lea y Siga las Reglas de
Seguridad e Instrucciones
Antes de Operar Este
Equipo
SEARS,
Part No 97340GS, REv 6 (9118t96)
ROEBUCK
=
Ensamble
o
Operaci6n
°
Responsabilidades
=
Servicio
°
Partes de Recambio
and
CO.,
del Cliente
y Ajuste
Hoffman
Estates,
IL
60179
U.S_.
REGLAS DE SEGURIDAD
PRECAIJCK)N: StJEMPREDESCONECTE EL CABLE DiE LA BU_IA Y COt.OQUELO DONDIE NO PUEDA HACER ,_
CONTACTO CON LA BUJIA PARA EVlTAR UN ENCF...NDIDOACCIDENTAL CUANDO ESTE INSTALANDO,
PORTANDO, AJ_ANDO
O HAClENDO REPARACIONES EN SU MAQUINA LAVADORA DE ALTA PRF...q4ON.
ENTRENAMtENTO:
•
Losgat_esde escape det moeorcont_enen
gas de mondxJdode
carb6n MORTAL Sieme gas petgroso se msp_a en una
¢oncentraci6nsuficientepuedecausarpd_da dela conciemda
o indusiveta n'=uerte,
Opera eats equipot_nicamenteen dmas
abiertasdonde hays dtscx_libie
ventJlacJ6n
adecuada,
e
La coniente de atta p_
de f_do clue _
equipopuede
produdr puede penetrar la piei y sus t_Idos subyacentu,
Ilevando a les_ seday posit_ arr_.
e
Etrociadode aftapresidnpuede csusar qtmpartk_la_ de ptntum
U o_as par'dculassean a_rotrans_da.s
y quavuelen a
vek>cidades.
•
S_empre use pro_
ocular cuando uti_coeste equipo o
cuando estdcerca de donde el equipoestd siendoutJilzado_
Opera la presk_ entm valor qua no sea may_ que la pres_n
de fluidoe_nPStctasificadapare su mdquinalavadofa
a pms_dn.
NUFK;a
rr_eva lamdquinatirandode Lamanguerade altapm=st6n+
Utllic__aman_acotocadaen la parts supedo¢de ta unided,,
S;'empmeste sel_ro qua lapis_lade rociado,embocadurasy
accase_osest_n coneaados correct_m_ma.
•
e
nacimiento,u otros
•
uictosenla
•
La gasoiina e4 aRamente INFLAMABLE y sus vapoms son
EXPLOSIVOS_ No permita quese fume, itamas abiertas, chispas
o calor en la cercan'_ cuando se manipula gasoiina: Evite regar
gasofina sobre un motor caJiente_Perrrjita qua la unidad se enffm
por 2 minutos antes de voi,mda a cargar con combustible.
Cumpia con todas las layes de mgulacidn de a_'nacenamiento
y manejo de gasofina_
•
Ubique esta mdquina Lavadoraa presidn en _reas alajadas de
materiales combustibles, vapoms combustibles o poNo,.
•
FJ equipo de atta pmsi_n estd disei_acto peru set usaOo Linicamente con las piezas autorizadas de Seam. Et usuano asume
todos los riesgos y responsabilidedes si ustedutUizaeste equipo
con plazas qua no cumplan las especif'=cac_nes mtnimas.
•
AIgunos qu_nicos o datergentes pueden set peIigmsos si son
inhalados o ingendos, causando nausea sever'a, desmayo o
envenenamiento. Los elernentos peligmsos pueden causar
da6o a la propiedad o lesidnsevers.
•
No permits que NII_OS opemn la Mdquina Lavadora a Presi6n
en ningr_n momento.
PREPARACION:
•
Opera el motort_nicamenteen la velocidadde mando.El hacker
funcic_are6motor en veloddadesaxcesivasaumenta et desgo
de lesidn personal No manipdelas partesque puedanaumentar o d'mminuir
la vetocidadde mando+
e
•
•
•
•
Nuncautilico
unapistolsde rociadoqtm no t_ngaus segum de
gatlllo o un pmtec_r de gatflto en posk_n y funck_ando
adectmdamente_
•
Use un respirador Ouna m_scam siempre qua exists e4desgo
de quepued_n ser inhaladosvapores,Lea todaslas instruccio.
nesde lan_tscara
de manem qua est_segumque la _m
le proporckmardla proteccidnnecesaria contra la inhaiaci6n de
vapomspeligrosos.
El mciado de atta presidn puede da_ar elementos fr_giles,
inctuyendo vidnooNo apuntela pistolsde rodado haciael viddo
cuando estd en el modo de ro_:_aob
a c=horrm
•
•
e
El _rea de limpieza debe tenet inctinac_onesy drenajes
adecuadospara reducirla posibilidadde unacaidadebidoa tas
superf_es resbalosas.
•
Mantenga el tociadod_ agua alejado delalambradoe,k_rico o
puede ocumr L-mS
descarga eldctrk:afatRL
No ajuste la vdlvuta reguladoraen una presidn excesi',racon
respecloa la ctasificacidnde la mdquina.
No asegureel gatiilo de la pistols en laposick_nposterior
(abieno).
e
•
Antesde encenderla M_quinaLavadoraa Presidn an ctimafrio
revise todas laspiezas det equipoy asegdresequa no se ha
fom'_do h_o en eIIas.
•
•
Las unidades con plazas dar_adaso perdidas,o sin la caja o
cubiertasde pmteccidnNUNCA debenset operadas,
E! silenciadoryet depuradorde aim debenestar instalados yen
buenas condr_onesantes de operarala M_kluinaLavadoraa
Presidn.Estoscomporlentes act,3ancomorecolec_omsde chispas si el motorproducefuego de retroceso_
Revise s_els_stemade combustible t_enefugas o s_gnosde
deterioro como una manguerafrdgil o esponiosa,abrazaderas
suettaso inexL_tentes
o _nque o tapa da_cla. Cornjatodoslos
defectosantes de operar_a_,_quina Lavadoraa Presi_n+
No rochef_uides inflamabies.
Nuncadidjalap_stotade rociadoa personas,a,nimateso t_antas.
Nunca permitsque alguna parts dadcueq>oentre en contacto
conIa cordente del fluido. NO entreen contactoconun cordente
de fluidocmadapor unafuga an Ia manguera de alta presidn.
,BUSOUE
rSIGNIFICA
ESTE SIMBOLO
PARA UBICAR
|ATENClONItl
|ESTE ALERTAI!!
Mantengala mangueraconectadaa la mdquinao a ta pistolsde
rociadocuando el sLsterna_
presurizadmFJdesconecl;_
mangueramientn_s
Ia unidadest_ presudzadaes pettgroso_
Sostengafk'mementeta pistolsde rociadeen su mano antesde
encendertaunidad,,Sino Io hacepodrtaocurrirunalesi6ndebido
al movimientoincontrotado de ta pistotade mciado.No dejela
INStolade rociadosin atenciSnmientras Ia mdquina est_ funcionandc.
•
No use mpassueltas,joye(mo nadaquapuedaquedaratrapado
en el armnque o en otraspiezasan rotaddn_
OPERACION:
e
•
•
e
•
No evitening_ndis_vo
de seguddad de la mdquinao
Nodeje la pistolsen la posic_nde cerradoporrodsde5 minutos
con el motoren fun_namiento,.
Esto podr_ dar3arla bcmba.
El motor yet silenciadorse caJientan
durante la opemcid_ y
permanecen catientesirm'tediatamente de=spudsdel apagado+
E_.e el contactocon el sileflc_tor o elmotorcaJienteo podrfa
msultarquemado se_eramente,,
MANTENIMIENTO
Y ALMACENAMIENTO:
•
Opera y almaceneestaunidadsobreuna supedk:_eestable,
•
La manguerade alta presk_npuede desarro_r fugasdebtdoal
desga.s;te,doblamiento,abuso, etc_ B rociadode agua de una
fuga es capaz de hacer pene_rarrnatedak_sdentro de la pieL
Siempreinspecc_nela manguem antes deusada.Revisetodas
la.smangueras parsvet si ex_en cortes,fugas, abrask_es o
abuttamientode lacubierta, odai'3oo movi,'niento
de los aooptes_
Si existe cuatquiera de estas condiciones reemplace la
man_uem inmediatame_ta Nunca repam la manguem de alta
presibn, Reempld,ce_ con ottomar_juera
quemdna la dasifk:a+
ciSnde aRapresidn de su m,'tquina lavadora a preach+
IMPORTANTES
SU SEGURIDAD
PRECAUCIONES
DE SEGURIDAD.
ESTA EN PEUGRO."
ESTO
FELtCITACIONES por la compra de su m_quina lavadom
de aita presi6n Sears Cmft__man. Esta ha sido disefiada,
proyectada y fabdcada para dede la mejor confiabilidad y
rendimiento posible.
....
Si usted expedmenta cualquier problema qua no pueda
resolver con facilidad, por favor p6ngase en contacto con
su Centro/Departamento
de Servicio Sears o llame al
nSmero 1- 800 indicado en la ¢ubierta de este manual.
Tenemos t_cnicos competentes y bien entrenados y las
herramientas apropiadas para darle servicio y reparar esta
unidad.
Por favor lea y conserve este manual, Las instpJCCiones
har_n que usted ensamble
y mantenga su m&quina
lavadora de alta presi6n apropiademente, Siempre siga las
"REGLAS DE SEGURIDAD",
RESPONSABILIDADES
e
DEL CLIENTE
Lea y siga tas reglas de seguddad_
o
Siga la programaci6n regiJtar en et mantenimiento,
cuidado y uso de su m_quina lavadora de alta presi6n.
Sigas las instrucciones enlistadas bajo las secciones de
"Responsabilidades
del Cliente" y "Almacenamiento" de
este Manual del Propietario.
ESPEClFICACIONES
Espectflcactones
DEL PRODUCTO
de la Mdqulna Lavadora a Presldn
PRESION DE SALIDA
1500 psi
VELOCIDAD DEL FLUJO
2 9pro
MEZCLA ,DE DETERGEN_ente
TEMPERATURA DEL
SUMtNISTRO DE AGUA
MODELO
sin diluir
No exceder de 140°F
580.741380
NUMERO
1
Especificactones
NUMERO
DE SERIE
del Motor
CLASIFICADO
Briggs & Stratton
CABALLOS DE FUERZA
3.8
DESPLAZAMIENTO
9.67 pulgadas cubicas
FECHA
DE COMPRA
(t56cc)
LOS NUMEROS DEL MODELO
TRADOS EN LA CALCOMANIA
LAVADORA DE PRESION.
BUJtA: Tipo
Y SER|E SERAN ENCONPEGADA A LA MAQUINA
USTED DEBE REGISTRAR EL NUMERO DE SERIE Y LA
FECHA DE COMPRA Y MAF,rt"ERLOS EN UN LUGAR
SEGURO PARA FUTURAS REFERENCIASo
ACUERDO DE MANTENIMIENTO
CAPAClDAD
ACEtTE
ESPACIO
:-
Un Acuerdo de Mantenimiento de Sears est_ disponibfe en
este productoo P6ngase en contacto con su tienda de Sears
m_s cercana para detalles_
Champion RJ-8C
o su equivalente
DE GASOLINA
1-1t2 Cuarto US.
(capacidad de 20 oz.) Peso SAE 30
DE AIRE DE"
En el Estado de California es exigido un apagachispas por
la lay (Secci6n 4442 del C6digo de Recursos P_blicos de
California). Otros estados pueden tener leyes similares.
Las teyes federales se aplican err tierras federateso
NOTA: El motor de su m_quina lavadora a presi6n con es
equipo con un silenciador apagachispas_ Et apagachispas
debe ser mantenido en funcionamiento efectivo ordenado
por el propietario/operador.
GARANTIA
COMPLETA
DE UN AI_IO DE LA MAQUINA LAVADORA PRESION CRAFTSMAN
Por un aSo a partir de la fecha de compra, cuando esta M_quina
Lavadora de Alta Prasi6n Craftsman sea mantanide y operada de acuerdo
con las instrucciones del manual del propiatario, Sears reparar_,
Si esta m&quina lavadora
compra, Siesta n_quina
es utilizada para pmp6sitos
libra de cargos, cuatquier defecto en el material y ]a mano de obta
comerciales
esta garant_a se apticar_ por _nicamente 90 criasa partir de la fecha de
lavadora a presi6n es utilizada para pmp6sitos de ak:luifer, esta garant_a se aplicar_ pot (inicamente 30 criasdespu_s
de Ia fecha de compra Esta garantia no cubre:
=,
Elementos como buj'_as y filtros de aim los cuales se desgastan durante
negligencia del operador, incluyendo
alas instrucc_nes
contenidas
EL SERV1CIO DE GARANTIA
TAMENTO DE SERVlClO
el uso normal
Reparacionas
necosadas debido a abuso o
daSo debido a qua no rue suministrada agua a la bomba oet no mantener el equipo de acuerdo
en el manual del propietado
SE LLEVA A CABO DEVOLVIENDO
LA MAQUINA
LAVADORA
SF..ARS MAS CERCANO A TFLAVES DE LOS ESTADOS UNIDOS
y usted tarnbi_n podda tenet otros derechos,
SEARS,
DE ALTA PRESION A CENTROIDEPAR-
Esta garantia le da derechos legales especificos
los cuales varian de estado a estado
ROEBUCK AND CO, Dt817 WA, Hoffman Estates, IL 60179
:L
TABLA DEL CONTENIDO
REGLASDE SEGURIDAD ....................................................... 2
OPERACION .............................................................
ESPECtRCACIONES DEL PRODUCTO .................................. 3
RESPONSABII IDADES DEL CLIENTE ...................... 15..17
ACCESOR
t (_1_
Y
ADtTAM
E_I_TC_S
.............................................
5
SERV]CIO Y/_JUSTES ....................................................
17
ALMACENAJE ..................................................................
18
CONTENtDO DEL PAQUETE DE ARTICULOSAUX|UARES . 6
DIAGNOSTICO Y CORRECCION DE AVER_
EMPEZANDO ............................................................
PIEZAS DE REPUESTO .............................................
7-11
12-14
.............. 19
20-28
INDICE
A
--G--
R
Accesorios........................................... 5
Acsite del Motor ............................... 10
Garant{a .............................................
3
Regtas de Seguddad ......................... 2
A]macenaje
Responsabiiidades del Cliente
CambiodeAceite................................. 16
Chequeodel Nivetdel Aceite ..................16
Mantenimiento
Ma.ntenimiento
de la Lavadoraa Presidn 15
Acuerdo.................................................
3
RecomendadonesGenerales...................
15
Lavadora
a Presi6n
...............................
15
Reemplazode la Bujfa....................... 17
Motor ....................................................16
Servidodel DepuradordeAim ................16
Programa............................................. t5
Manguera de Alta Presi6n ............. 7, 9
Manubrio...........................................
8
Bomba'_e la Lavadora
a Presibn ..........
18
Motor.................................................... 18
Antes de Arrancar el Motor ............. 10
Antes de Cada Uso .......................... 15
B
Bocluilla_ustable ................ 13, 14, 17
Regulador de Presi6n ..................... 14
--M--
S
Servicio y Ajustes ........................... 17
Sifonaje ...........................................
--C-Carburador ........................................ 17
Cerrojo de Seguddad ...................... 12
--D-Depurador de him ....................... 7, 16
Sugerenc_assobre Umpieza ........... 14
Operaci6n
Aplicaci6n
del Detergente.....................
14
An'anque del Motor ..........................
12
Como Usar el Equipo .........................
Empezando ....................................
Encendldo de ta Lavadora ..................
13
12
12
Parada .........................................
12
Diagn6stico
y Correcci6n de Averfa.s.............. 19
P
E
Ermezando
14
Paquete de Artt'culosAuxiliares......... 6
Pedido de Piezas ...... p&:Jinaposterior
Piezas de Repuesto ................... 20-28
AntesdeAn-a_caret Motor................... 10
ConozcaBtensuL_vadoraa Presi_ ..... 7
Ensambie
de los Componentes.............. 9
Ustade Vmi_
..................................
8
Preparacibn
paraelUso IniciaJ
.............
8
Sacat_0 el Equipode la Caja ...................8
Especificaciones ...............................
3
4
--V--
Vetocidad delMotor .....................
17
L, ,,-oouRiOS
Y CONEXIONES
Estos accesorios y conexiones estuvieron disponibles cuando rue comprada la m_quina lavadora de alta presi6n.
Tambi_n es_n disponibles en la ma¥orfa de puntos de venta al del_t y centros de servicio de Sears. La mayorfa de
1Jendas Sears pueden ordenar estos elementos para usted cuando Pr0Porcione et m'Jmero de modeto de su mdquina
lavadora a presidn. Es posible que atgunos de estos accesodos no se apliquen a su m_quina lavadora de presi6n.
t
1
JUEGO DE
fUEGO DE CEPILLOS
PARA
EXTENSION
CEPILLOS
JUEGO DE CEP_LLOS
GIRATOR|OS
DE
JUEGO DE
TURBOBOQUILLA
ACERO INOXIABLE
ELECTRICA
DE 18"
DE SERVICIO
EXTENSION
EN
ANGULO
PISO/PANELES
EMBOCADURA
DE
CHORRO
t_
t
MANGUERA
II4"DE
DE EXTENSION
DE
MANGUERA
D,I, 25 p_e=
3/_f3E
DE EXTENSION
DISPOStTIVO
DE
ACOPLE
JUEGO DE CONEXION
RAPIDA PARA LA
MANGUERA DE ALTA
CONEXION
RAPEtA
ACCESORIA
JUEGO DE CONEX]ON
MANGUERA
RAPIDA ACCESORIA
1600 y 19OOPSI
ENJUAGUE
TURBOBOQUtLLA
2300 y 26OD PSI
PARA
CASNMULT]PLE
PROPOSFrO
DE LA
JUEGO DE MANGUITO
CONEVJON RAPtDA
PARA LA MA;NGUE RA
DE ALTA
DEL ,Lt_RDIN CON 2
ADAPTADORES
PRESION
ENJUAGUE
PARA
SUPERFICIES
PLANAS
5
ENJUAGUE
DEL
SERVtCIO DE ACESSORIOS
A LA
MANGUERA
PRESTON
TURBOBOQUILLA
PARA tNYE CCION
DEL QUIMtCO
D,I, 50ples
PARA
VEHICULO/BOTE
DE SENGRASA-
MEDIDOR DE
PRESION
CERA PARA CARRO
CONTENIIDO DEL PAQUETE DE ARTICULOS AUXILIARES
Plezas empacadas por separado en la caja
n
i
lwl,$1
!
Ensamble de Pistota de Rociado
Manua!del Propiatatio
Unidad Principal
ExtensiSnde BoquiUaAjustable
..................
"
Extensi6nde Turboboquilla
Cestade Alambre
D
Juego para Umpiar la Boquitla
Manguera de
Alta Presk_n
V'_eo de lntroducci6n
al Producto
6
Aceite para el Motor
-:i_
EMPEZANDO.
CONOZCA
B IEN SU LAVADORA
DE ALTA PR ESION
LEA ESTE MANUAL DEL PROPIETARIO Y LAS REGLAS DE SEGURIDAD ANTES DE OPERAR SU LAVADORA DE ALTA PRESION.
Compare las ilustraciones con su Eavadora de atta presi6n as{ se famiIiariza con 1a ubicacidn de los diversos controles y ajustes.
Conserve este manual para futuras consultas.
ENSAMBLE DE
PtSTOLA DE ROCLADO
MANUBRIO
!TURBOBOQUILLA
MANGUERADE
ALTAPRESION
CONTROLO_OFF
DEL MOTOR
TANQUEDE
iCOMBUS_BLE
ARRANCADOR""\\'-\.,_\
LLENADORE
ACEffE
DE
OJAL P,_A SOSTF.NER
UNA _._'ON
DE
BOQUILLA DE REPUESTO
FILTRO Y TUBO
PARA RECOLECCI6N
DE DETERGENTE
BOOUILLA
ADJUSTABLE
i SILENCIADOR
CONEXJONRdPIDA
ENTRADA DE AGUA
DEPURADOR
DE AIRE
REGULADOR DE PRESION
BOMBA -- Produce alta presi6n.
REGULADOR DE PRESION -- Le perrnite ajustar la presi6n del
chorro (corriente) de salida.
CONTROL ON*OFF DEL MOTOR -- Pone at motor en el modo
de arranque para el arrancador de retroceso; apaga (pone en
OFF) el motor en marcha.
ARRANCADOR
DE RETROCESO
motor manualm ente°
BOMBA
-- Se usa para arrancar el
DEPURADOR DE A1RE -- El etemento de fittro tipo seco limita
la cantidad de suciedad y polvo que entra al motor,,
ENSAMBLE
DE PISTOLA DE ROCIADO-Controla
la
aplicackSn de agua a la superficie bajo timpieza mediante un
dispositivo de gatil!o, lnclLrye un cerrojo (traba) de seguridad°
SAL1DA D E ALTA
PRES_ION:'
MANGUERA DE ALTA PRESION -- Se conecta uno de sus
extremos a la bomba de agua, y el otro a ia vara de rociado.
TUBO DE RECOLECClON DEL DETERGENTE Y F1LTRO
Mezcia el agua y el detergente en el flujo del agua de salidao
SALIDA DE ALTA PRESION
a{ta presi6n.
+ Conexi6n
para la manguere
de
TURBOBOQUILLA -- Ensancha et _rea de superficie del rocfo
de alta presi6n°
CONEXION RAP1DA-- Permits conectar fi_tcilmente el suministro
de agua de entrada.
EMPEZANDO
SAQUE
LA LAVADORA
A PRESTON DE LA CAJA
•
Saque la manguera de atta presk_n,la pistoiade rociadoy
sus extensiones, el aceite para el motor, y el video de
instrucc_nesde la envotturade catt6npuestaen lasparedes
intedores de la caja.
,
Saque la unidadcon unamane bajola bombay la otra mane
bajo el arrancadorde reLmceso.
Atextraerla unidadcomplete, encontrardunpaquateanvuelto
an cart6n y pldstico. En este paqueta est{m la cesta de
alambre y la cinta de video..
•
PASO 2- Tome lace-stade alambre e introduz_ .......
suspuntas en los agujems de la base del arrnaz6n
ubicados detrds det motor.
Vea en la Pdgina 6, "Contenidos del Paquete de Artfculos
Auxiiiares",una lista itustradade todos los itemsinctuidos con
su lavadora a presidn. Familiarfcesecon cada pieza antesde
ensambtarla lavadora a presi6n.Verffkluerodee! contenidoan
base alas ilustmcionesen Pdgina 6, Si hay piezas dafiadaso
faltantes, Ilame a la L_neade Ayudade Lavadorasa PreskSn,
tel.
1..800_222-3136+
PREPARACION
DE LA LAVADORA
PAPA EL USO INiCIAL
A PRESION
SI TIENE ALGUN PROBLEMA CON EL ENSAMBLE DE SU
LAVADORAA PRESION, POR FAVOR LLAME A LA LINEA DE
AYUDA DE LAVADORAS A PRESlON, TEL. 1-800-222-3136.
Su Lavadora de Atta Presi6n Sears Craftsman ha side, an su
mayor parte, ensambladaan f,_brica.Sin embargo, pare preparer
su lavadora a presi6npare su funcionamiento, usted debar&Ilevat
a cabo estas tareas:
•
•
Puntas
)
Lavante el manubrio y coloque la cesta de alambre donde
se ponen las substancias qu[micas.
Conecte ta manguera de alta preskSn a la pistola de rociado
y a la bomba, y conecte et suministm de agua a la bomb_L
-
Ponga aceite en el c_rter de[ motor:
•
Ponga combustible
.....
PASO
1-Levante
en el tanque de combustible.
Ponga aqu[la cesta
FIG°2
PASO 3- Ajuste la cestaal eje.
Trasin_educirtas I_Jntasen los agujeros, girela cestahacia
abajo.Sostangala cesta comese muestraan la Fig.3.
el rnanubrio.
L
Aftoje la pedlla pare
!avantar et manubrio.
Apd_tela cuando et
manubdo est,_ derecho_
J Pongasueputgaressobre el eje y presionehacia arriba, asf
puedeubicarel soportesobreel eje.
FIG. 1
FIG.3
EMPEZANDO
ENSAMB_
DEL RESTO DE LOS COMPONENTES
IMPORTANTE: ANTES DE ARRANCAR EL MOTOR, DEBE
ENSAMBLAR LA VARAY FIJAR TODAS [_ASMANGUERAS.
SI SE ARRANCA EL MOTOR SIN QUE TODAS LAS
MANGUERAS ESTEN CONECTADAS Y SIN SUMINISTRAR
AGUA, VAA DA_fARLA BOMBAo
.
"PAso
6-
Conecte
una manguera
de jardin
aJ conector r_q3idoy ABRA et suministro de agua.
Oesenrolle [a manguera de aJtapresi6n y conecte uno de
sueextremos a la base de lapistolade rociado(F_o4).Apriete
a maRo.
,i
PASO 4- Conecte la manguera
de alta presi6n
a
la pistola de rociado.
Revise et tamiz del
conector hembra.
SI EL.TAMIZ ESTA
DARADO, NO
CONECTE EL AGUA.
©
FIG. 6
PASO 7 - Apdete el gatillo para purger de aire
e impurezas el sistema de bombeo.
\
FIG. 4
Fije el otro extremo de la manguerade alta preskSnal herraje
de alta presi6nen la bomba (Fig. 5)° Aprietea manoo
PASO 5 - Conecte la manguera de alta presi6n
a la bomba.
\
FIG. 7
PASO 8 - Conecte la extensi6n de boquitla a la
_istota de rociado.
FIG. 5
Esta unidad tree un accesorio de conexi6nr,;_pidaque estfi
fiiado a laEntrada de Agua en [abomba. Este mnector rfupido
tiene dos partes -- un Conector Macho y un Conector
Hembra (F'_j.6). Revise elTamiz (cedazo o cfiba) de Entrada
en el c_nectorhembra. LImpielo si contiene desechos, o
reemp!,tce!o si est& daSado. NO HAGA FUNCtONAR LA
LAVADORAA PRESION SI EL TAMIZ ESTA DAiqADO.
Conecte extenc_6n de'
boqui]la ajustabie inserts en
extremo de pis_ola rociedo y
apriete conector negro,
FIG. 8
EMPEZANDO
Si bien los aceites de multiviscosidad
(5W30, 10W30, etc.)
mejoran et arranque en tiempo frfo, tales aceites de
multivissosidad resuttar_n on un mayor consumo de aceite al
usados a mz_tsde 32 ° F (0° C). Chequee frecuentemente et nivel
de aceite del motor para evitar pos_les da.fios por funcionar con
poco aceite. !,.acapacidad det colector de aceite es de 20 onzas.
PASO
9 - Ponga la pistola
de rociado
ensamblada
en et soporte
y coloque la
turboboquilla en el soporte de almacenaje.
Suiaukdor
d= .\
=_=====r
-
Ubique la lavadora a presi_n de manera que e! motor est6
nivetado,
•
iJmpie el =_reaque rodea el [lenadorde aceite, y saque la
variUade nivelde aceite (F'_g+10).
PASO 10 - A_ada aceite al c&rter del motor. No
trate de arrancar el motor sin a_adir aceite.
+
FIG. 9
ANTES
DE ARRANCAR
EL MOTOR
Comopastedel procesode ensamblado,deber&prepararel motor
para et arranque inicial+Pata operar el motor, va a requerir Io
s_juiente:
ACEITE DEL MOTOR
IMPORTANTE: CUALQUIER fNTENTO DE CRANQUEAR O
ARRANCAR EL MOTOR ANTES DE DARLE EL SERVICIO
APROPIADO CON EL ACEITE QUE SE RECOMIENDA,
RESULTARA EN UNA FALLA DEL MOTOR.
;)ebeIlenarsehasta la marca FULL an la varillade nivel+Toda
vez que cambieaceite,use uno del mismo g_ado+
FIG;'lO
Se incluyeun frasco de 20 onzas de aceite peso SAE 30 en la
caja de repuestos+
Limpie la varitla de nivel,introdezcala en el o_icio de tlenado
de aceite, y apri6tela firme_ente+ Saque la varilla de nivel
de asoite. Si el aceite no est_ hasta la marca FULL en la
varilla, ahada et aceite recomendado.
VtERTALO
LENTAMENTE.
NOTA: At aSadir acelte en lo suces_voal _er del motor, use
s61oaceite detergente de atta calidadcon ctasificaci6nAPI de
servicio SF, SG, o SH, de peso SAE 30+Seleccione el gradode
visoosidad del aceite de acuerdo a la temperatura esperada de
funcionamiento+
m&s frfo
32_ F (0° C)
5W30
|
SAE30
m&s caliente
I
|
+
10
•
,
Cada vez que chequeeet nivet de ace_te,limpiebienla variila_
Vierta aceite del frasco en el orificio de Ilenaclode aceite.
•
Vuelva a poner la varilla de nivel, apret,_ndola bien con la
mano.
EMPEZANDO
Ai_ADA GASOLINA
ADVERTENC|A: NUNCA LLENE ELTANQUE uE
COMBUSTIBLE EN UN LUGAR INTERIOR.
NUNCA LLENE EL TANQUE DE COMBUSTIBLE
CUANDO EL MOTOR ESTA EN MARCHA O
CALIENTE. NO FUME MIENTRAS LLENA EL
TANQUE DE COMBUSTIBLE,,
PASO
11 - Afiada
combustible,
gasolina
al tanque
de
ADVERTENCIA: NUNCA LLENE TOTALME_E
A
EL TANQUE
DE COMBUSTIBLE_
HASTA
APROXIMADAMENTE
1/2"LLENELO
(1o3 CM)
BAJO LA BASE DEL GOLLETE DEL LLENADOR,
PARA DAR ESPACIO A LA EXPANSION DEL
COMBUSTIBLE.
ANTES DEL ARRANQUE,
LIMPIE EL COMBUSTIBLE
QUE SE HAYA
D4EFR_AM&OO
_
EL ik_'OR Y EL EQUJPOo
FJfa_te
_a
- at_H!lotor,
fresca
User gasc_'iegular
y ttt_ia,
con
u¢= m
_n _rra
de 77 _
(LIe
"Uene el tanque hasta este nivet
gasoiinacon plomo de grado regular es un substitutoaceptable).
La capacidad del tanque es de 1-1/2 quartos (aprox.095 litros)
• Use combustible limpio, y atmac_nelo en recipientes
apmbadoscubiertosy limpios°Use embudos IimpiosoNunca
se debe user gasolina vieja ("rancia")que haya sobradode
ia estaci6nanterior,nigasolinaatmacsnada duranteun largo
tiempo_
IMPORTANTE: ES DE SUMA IMPORTANCIA EL EVITAR QUE
SE FORMEN DURANTE EL ALMACENAJE DEPOStTOS
GOMOSOS EN PARTES ESENCIALES DEL SISTEMA DE
COMBUSTIBLE, TALES COMO EL CARBURADOR, EL FtLTRO
DE COMBUSTIBLE, LA MANGUERA DE COMBUSTIBLE, O EL
TANQtJE.ASIMISMO, SE SABE POR EXPERIENCIAQUE LOS
COMBUSTIBLES MEZCLADOS CON ALCOHOL (ELLLAMADO
GASOHOL, O LOS QUE USAN ETANOLO METANOL)PUEDEN
ATRAER HUMEDAD, LO QUE LLEVA A LA SEPARACION Y
FORMAClON DE ACIDOS DURANTE EL ALMACENAJE. EL
GAS ACIDO PUEDE DAI'_AREL SlSTEMA DE COMBUSTIBLE
DE UN MOTOR DURANTE EL ALMACENAJE PARA EVlTAR
PROBLEMAS EN EL MOTOR, EL SISTEMA DE COMBUSTIBLE
DEBE VACIARSE AtonES DE UN ALMACENAJE DE30 DIAS O
MAS. VER "ALMACENAJE" EN LA PAGINA 18. NUNCA DEBE
USAR PRODUCTOS LIMPIADORES DEL MOTOR O DEL
CARBURADOR EN EL TANQUE DE COMBUSTIBLE, PUES
PUEDEN OCASIONAR DANOS PERMANENTESo
,
Limpie el _rea que rodea la tapa de ilenado de combustible,
y qu_te esta tapa (F_j. 11).
•
Afiada lentamente
de combustible.
gasolina
regular"SIN
FIG, 11
•
Coloque la tapa de combustible, y limpie toda la gasolina
derramada.,
LJSTA DE VERIFtCACION
Una vez que haya Ilegado a este punto, vuelva a revisar
ensamble para ver si ha efectuado todo 1osiguiente,.
•
Chequee que las mangueras (de alta presi6n y de suministro
de agua) est_n debidamente conectadas, que las conexiones
est_n bien apretadas, y que la manguera de alta presi6n no
est_ retorcida ni tenga cortes u otros dafios.
.
Antes de tratar de arrancar la lavadora a pres_n, revise si
se aSadi6 aceite hasta el nivel apropiado en el cfirter det
motor,.
-
Afiada ta gasolina apmpiada al tanque de combustible°
•
Provea un suministm apmpiado de agua, que no exceda de
1400 F (60QC}.,
•
Antes de usar la lavadora a presibn, no deie de leer las
secciones sobre "Reglasde Seguridad" y "OperaciSn"o
PLOMO" al tanque
tMPORTANTE:
PEQUEfiAS GOTAS DE AGUA SE PRESENTARAN POR DEBAJO DE LA BOMBA DURANTE SU
OPERACl6N.
ESTA CONDICI6N
ES NORMAL DEBIDO
AL AGUA UTILIZADA PARA LUBRICAR LOS SELLOS EN
LA BOMBA, VER FIGURA 1 IA.
FIG. llA
I1
el
OPERACION
•
EMPEZANDO
I PASO
St TIENE ALGUN PROBLEMA OPERANDO SU LAVADORAA
PRESION, POR FAVOR LLAME A LA LINEA DE AYUDA DE
LAVADORAS A PRESION, TEL 1-800-222-3136.
13- Apriete
et gatillo p_a aliviar la presi6n'
del agua y enganchar
ON.
el cerrojo
de seguridai:t
en
Usted ha ensamblado su lavadora de alta presi6n, y ha preparado
el motor para el arranque. Est& ahora listo para limpiar su
autom6vit o barco, o cuaJquiera sea io que tenga planeado iimpiar.
COMO ARRANCAR
EL MOTOR
EL ARRANQUE DE SU LAVADORA A PRESION ES
DIFERENTE DELDEAQUELLAS OPERAOAS POR MONEDAS.
Pata que saIga el agua de la pistolade rociado en las mismas,
debe poner ta cantidadrequerida de monedas y oprimir unbotdno
LA MEJOR MANERA DE ARRANCAR SU LAVADORA A
PRESION ACCIONADA POR MOTOR POR PRIMERAVEZ ES
SEGUIR ESTAS INSTRUCCIONES PASO A PASO° ESTA
INFORMAClON DE ARRANQUE DEBE APLICARSE TAMBIEN
CI2ANDOARRANQUE EL MOTOR LUEGO QUE LA LAVADORA
A PRESION ESTUVO SIN FUNCIONAR DURANTE POR LO
MENOS UN DIA_
.
Salety
ON
FIG. 13
Coloque fa lavadora a presi6n en un &rea suficientemente
c_rcana a una fuente exterior de agua que pueda fluir a una
velocidad de tres (3) galones pot minuto (11,4 l/m). Conecte
una manguera de jardfn at caSo de aguao
•
Verifique que ta manguera de alta presi6n est6 conectada
apretadamente a la pistola de rociado y a ta bomba, Vea las
ilustraciones en la secci6n sobre ensamble.
-
Verifique
que la manguera
de jardJn est6 conectada
apretadamente a la abertura de entrada de agua en la bomba
de la lavadora, y que el suministro de agua est6 ABIERTO.
•
Ajuste el control del obturador del motor a ta posici6n RUN
(Figo12).
,,111,
PASO
i4. op.m 5veoo bo 6o
12- Ponga el interruptor de control det
FIG. 14
•
•
Si el motor no arranca tras jalar tres veces, cebe el motor
3 veces nuevamente, apriete el gatillo para aliviar la presi6n,
suelte ei gatiilo y jaie otra vez la cuerda det arrancador,
Una vez que haya artancado el motor, ponga et Cerrojo de
Seguridad en posici6n OFF.
PARANDO SU LAVADORA
FIG. 12
•
°
•
•
A PRESION
IMPORTANTE: NO HAGA FUNCIONAR LA BOMBA SIN QUE
EL SUMfNISTRO DE AGUA ESTE CONECTADO Y ABtERTO.
SI NO CUMPLE CON ESTO, LA BOMBA RESULTARA DAt_IADA.
Apriete el gatiIlo de la pistota de rociado para aJi,Aarla presi6n
de aim producida aI ABRIR eI suministro de agua. El agua
saldr_ de ta pistola on un chorro fino. Esto har_ m_s f&cil
arrancar el motor jalando la cuerdao
Aplique et cerrojo de seguridad al gatiIIo de la pistola de
rociado (Figo13).
,_ofiete firrnement_ 5 veces el bol_n cebador (Fig. 14}.
Agarre la manija de la cuerda y jate lentamente basra que
note atgo de resistencia_ Mantenga los dodos de la otra mano
alejados del'volante
rotativo, Luego, jaie de la cuerda
r4,_pidamente para vencer Ia compres_6n, evitar el c_ntragotpe,
y arrancar el motor.
.
Primero, mueva la pafanca del obturador
posici6n "STOP" (Fig. 12)_
del motor a la
•
No basta con APAGAR el motor para aliviar la presi_n
dot sistema,, Dispare el gatiiIo en eI ensambie de vara de
reciado para aliviar la presi6n en la manguera.
NOTA:AI liberar la presi6n, satdr& una pequeSa cantidad de agua.
I2
OPERACION
COMO
USAR SU LAVADORA
Es necesario que sepa como ARRANCAR su tavadora a presi6n
y como PARARLA. La informaci6n en esta secc_n le indic.ar_
como ajustar [a configuraci6n (patr6n o forma) del rociado, as[
como aplicar detergente y otras substancbs qufmicas de limpieza.
COMO USAR LA BOQUILLA
AJUSTABLE
ADVERTENCIA:
NUNCA DEBE AJUSTAR
LA CONFIGURACION DE ROCIADO MIENTRAS
ESTA ROClANDO. NUNCA PONGA LAS MANOS
DELAN'rE DE LA BOQUILLA PAPA AJUSTAR
LA CONFIGURAClON DE ROCIADO. PODRIA
LESIONARSE.
EN LAS LAVADORAS A PRESION OPERADAS POR
MONEDA.S, SI SE DESEA CAMBIAR LA FUERZA DEL
ROCIADOSE DEBE APRETAR UN BOTON, O GIRARUN DIAL
SU LAVADORA A PRESlON ACCIONADA POR MOTOR NO
TIENE BOTONES QUE APRIETAR NI DIALES QUE GIRAR.
AI extremode su pistola de mciado hay unaboquiIlaque puede
deslizarse hacia adelante o atr&s, y tambi_n rotarsede un [ado
al otto. Esta boquilta ajustable est,_en lugar de los botones o
dialeso Con ta boquitla ajusta,ble usted puede variar la
configurac_nde rociadoentre altaobaja presk_n.
Puedetambi6n
ajustar el rociadopara que se ¢oncentrecomo un chorro,o se
expanda en forma de abanico. Use esta boquitla para apticar
detergents.
• Destice la ly-.x_uilla
hacia adetante cuandodesee ajustare!
mciadoat modo de baja presi6n (Fig. 15)..Deslicela boquilla
hacia arras para alcanzar alia pres_dno
,
•
FIG. 16
Paraprobarla configuraci6n,apuntelaboquiila haciast suelo
y apriete el gatillo(Fig. 16).
Atrotar Ia boquilla se ajusta ta conf'.3uraci6nde rociadodesde
un chorroangosto a un chorroensanchado.
BOQUILLA EN MODO
DE At.TA PRESION
•
Para una timpieza m_s oficaz, mantenga la boqui[la do
rociadoentre 8 y 24 pulgadas(20 y 6t crn) de la superficio
que soest& limpiando.
,
La supefficieque so est_ limpiando puede resultardafiada
si toacercademasiado la boquillade rociado,especiaimente
al usar el modo de alta presi_n.
•
No so acerque m_s do 6 pulgadas(15 cm) al ]impiartlantas
de autom6viieso
EMPUJE LA BOQUILLA HAC1A
ADELANTE PARAMODO DE
BAJA PRESIONY APLICACION
DE DETERGENTE
FIG. 15
13
GIRE LA BOQUILLA
PARA ENSANCHAR
EL ROCIADO
GIRE LA BOQUILLA
PARA ANGOSTAR
EL CHORRO DE
ROCIADO
OPERACION
Puede tambi_n ajustar la presi6n girando la Periita
Regutadora (F_j,, 17) hasta el punto de preskSn deseado.
Girando esta perilla totalmente an el sentido de las agujas
del reloj se Iogra la presi6n m_s alta_
Peritla Reguladora
de Presibn
FIG. 19
.
Deje que el detergente se absorba en ta superfk:ie durante 3
a 5 minutes antes del lavado y el enjuague.
•
Para la limpieza, comience en la parte inferior del &rea a
lavar, siguiendo hacia arriba con movimientos
largos y
superpuestos.
Para el enjuague, empuje la manga de la boquil[a hacia alta
presiSn, y espere a que desaparezca
el detergente.
Comience en la parte superior del _rea a enjuagar, siguiendo
hacia abajo con movimientos similares a los de ta limpieza.
FIG. 17
APLICACION
DE DETERGENTE
CON LA BOQUILLA
•
AJUSTABLE
IMPORTANTE:
CIF!CAMENTE
DETERGENTES
LA BOMBA.
USE JABONES
FORMULADOS
ESPEPARA LAVADORAS
A PRESION,
LOS
DE TIPO DOMESTICO
PODRIAN DANAR
•
ENJUAGUFJLAVADO
IMPORTANTE: DEBE FIJAR TODAS LAS MANGUERAS ANTES
DE ARRANCAR
EL MOTOR, LA BOMBA SE DAI_ARA AL
ARRANCAR EL MOTOR SIN QUE TODAS I.AS MANGUERAS
ESTEN CONECTADAS.
PARAAPLICAR
EL DETERGENTE,
Se puede tambi_n detener et f[ujo de detergente quitando el
sff6n del frasco_
ADVERTENCtA:
_k
Lea en fa P&go 13 sobre el use de boquillas
•
Prepare ta soluck_n detergente
•
Ponga un pequeSo filtro de tube transparente de sifonaje de
detergente an el recipiente del detergente (Fig, 18) ubicado
en la cesta de alambre.
TENGA
SUMO CUIDADO
SI
DEBE USAR
LA LAVADORA
A PRESION
UNA
ESCALERA,
ANDAMIAJE,
U DESDE
OTRA
UBtCACION RELATIVAMENTE INESTABLE. LA
PRESION DE UNA LAVADORA EN MARCHA SE
INCREMENTA
EN LA VARA A MEDIDA QUE
USTED SUBE. AL APRETAR EL GATILLO, EL
CONTRAGOLPE DEL ROCIADO INICIAL PUEDE
HACERLO CAER, O, SI ESTA DEMASIADO
CERCA DE LA SUPERFICtE BAJO L[MPIEZA, LA
PRES|ON ALTA PUEDE EMPUJARLO FUERA DE
DONDE ESTA PAR.ADO.
SIGA ESTOS PASOS:
-
A PRESION
ajustables.
segdn lo requiera su tarea.
Trabaie desde la parte superior de la superficie hacia abajo.
•
Limpie primero un _rea y verifique luego si la superficie se
ha dafiado. Si no encuentra daSos, puede suponer que no
habr_ probtema en continuar limpiando.
SUGERENCIAS
,
Nunca use ia toma de la manguera de jardin para sifonear
detergente o cera, ni agua de otro suministro que no sea el
domdstico.
•
Si mantiene la boqui!la de rociado demasiado
[impieza set_ menos eficaz_
Fi_o de Detergente
alejada, la
SIFONAJE
FIG. 18
Recomendamos que NO tome su suministro de agua de atras
fuentes que la conexiSn al suministro dom_stico de agua.
Deslice hacia adelante la boquilla ajustabie (F_jo 19), al mode
de baja presi6n. El detergerrte no puede apticerse con la
boquilla an posici6n de alta presi6n_
COMe
Conecte una manguera de jard[n a la entrada de agua,
verifktue si la manguera de alta presi6n est_ conectada a la
pistola de rociado y a ta bomba, y arranque el motor. Aplique
detergente en una supefficie seca, comenzando en la parle
inferior y siguiendo hacia arriba.
14
USAR LA TURBOBOQUtLLA
•
Esencialmente, la tuffaoboquilla giratoria expande et _readel
chorro de aita presi6n_
°
Con esta boquilla no se puede ajustar la configuraci6n
rociado,.
,
No se puede apticar detergente con esta boquiilao
de
RESPONSABaUDADES DEL CLIENTE
' " PROGRAMA
DE MANTENIMIENTO
LLENECON [.ASFECHAS
AL IR COMPL__ANDO EL SERVICIO
REGULAR
TAREA DE MANTENIMIENTO
]NTERVALO
Antes de
Cada Use
HORARIO DE OPERACION
C_
25
Horas o
On
50
Hnras o
........
_
100.........
Horas o
_u__Jment8 AnuaJn'_nt8 Anuaim_nt_
FECf-IAS DE SERV1CIO
r*
t
LAVADORA A PRESION
Revisatlimpie el tamiz de entrada
Xt
Revisela mangue_a de alia prasi6n
X
Revisela mangueradet det_geflte
X
Cheques si hay fugas en la pist_a y rare"'
X
X•
Purguela bombadeaimy cont_,,ninantes
MOTOR
X
Cheques el nivet del aoeilB
iCambie el acaiia del motor 4,
X_
Umpieel elemento de espuma de ac_ite
R_mp_A_mp__ buj_a
.....
= .....
X
Prepare !a unidad patnael almacenaje
La unidaddeber_prepararseparesu aimacenaie
sise Ia mantandr_,inacliva durante m,_L_
de 30 dies.
"_ Llmpielo si est_ obs_uido,. Reempi&celo si est_ perforadoo rote.
Cambie et aceite luego de las primeras 5 horas, y cada 50 horas de attf en adelante,
" C_nbielo antes si se opera con carga pesada o a elevada temperature ambienteo
"" L[mpielo con m&s freoJencia-si se trabaja en condiciones polvorientas o ¢uando hay basuras an el airs.
RECOMENDACIONES
GENERALES
MANTENIMIENTO
La garantla de la Iavadora de alta presi6n no cubre items que
hayan estado sujetos a negligencia o abuse per parle del
operador. Pare recibir la cobertura complete de la garantia, el
operador deber_, mantener la lavadora de atta presiOn segQn tas
instrucciones de este manual.
Revise la Manguera de Alta Presi6n: En la manguera de alta
presi6n pueden producirse fugas debidas al desgaste,
retorcimiento, abuse, etc,. Cheques todas las mangueras per si
hay cortes, fugas, abrasiones, o abuitamiento de la cubierta, o si
hay dales o juego en los acoplamientos. Si se detecta cualquiera
de estas condiciones, reemplace inmediatamente la manguera..
Todos los ajustes indicados en la se_n
de Servicio y Ajustes
de este manual deber_n hacerse per 1o menos una vez cada
estaciOn de! ale.,
PELIGRO:
Una vez al _5o deber& reemplazar la bujfa, y limpiar o
reemplazar el fiitro de airs, y reviser el ensemble de pistola y
vara per si est&n dosgastados. Una bujfa nueva y un fittro
limpio de aim dar_n una buena mezcla combustible-aim, y
contribuir&n a un meier funcionamiento y una vide m&s farga
del motor°
Cheques el nive! del aceiteo
•
Cheques si el tamiz de la conexi6n, r_pida est_ da_ado.
•
Revise si la manguera de aita presi6n tiene fugas.
.
Cheques si el fittro y la manguera de entrada de detergents
est_n dafadoso
•
Revise el ensemble de pistola y vara per si hay fugas_
EL AGUA ROCIADA
A TRAVES
DE
UNA FUGA
PUEDE
INYECTAR
MATERIAL EN LA
PIEL.
REVISE
SIEMPRE
LA MANGUERAANTES
DE USARLA. NUNCA SE DEBE REPARAR UNA
MANGUERA
DE ALTA
PRESION.
DEBE
REEMPLAZARLA CON OTRA MANGUERA QUE
CUMPLA CON LA CLASIFICACION
MINIMA DE
PRESION DE SU LAVADOP, A A PRESTON.
DE CADA USO
•
A PRESION
Revise y Limpie el Tamiz de Entrada: Quite de la entrada de
agua el tamiz de entrada. Limpie el tam]z si estd obstruido, o
reempl_celo si est& dafiado.
Deber_n realizarse periOdicamente algunos ajustes para et
mantenimiento adecuado de su lavadora de atta presi6n.
ANTES
DE LA LAVADORA
Revise la Manguera del Detergents: Examine et filtro en la
manguera del detergents, y ltmpielo si est_i obstruido, La
manguera deber& ajustarse herm_ticamente al accesorio
arponado. Revisefa manguera persi hay fugas o desgarraduras.
Reemptace el fiitro o la manguera si cualquiera de silos est_
daSado_
Revise la Pistola y la Vara: Verifique si la conexiOn de ia
manguera estb firms,, Pruebe el gatitlo oprimi_ndofo y
asegur_dose que vuetve a su lugar al ser liberadoo Ponga el
cerrojo de seguddad en la posici6nON _ no deberia entonces
p_er oprimir et gatillo.
I5
RESPONSABILIDADES DEL CLIENTE
Purgue ta Bomba de Aire y de Contaminantes:
sire de Is bomba, siga estos pesos:
Pare qu_tar el
-
Prepare la favadora a presi6n seg_n se descr_e en la secc_n
sabre ensamble, y conecte el suministro de agus_
-
Quite el accesork_ de boquiila de la pistOl_L
•
Apriete el gatilfo de Is pistols, y mant_ngalo oprimidoo
Pare quitar los contaminantes
de la bomba, siga estos pasos:
• Prepare la lavadora a preskSnseg,3n se describe en la secc_n
sobre ensemble, conecte el suministro de ague, y arrsnque el
motor de scuerdo alas instrucciones an la secck_n OPERACION
.
Quite el accesodo de boquilla de Is pistola.
•
Apdete el gstillo de la pLstota, y mant_ngalo oprimido.
• Cuando el suministro de agua sea regular y constante, puede
voJver a fijar el accesorio de boquills y arrary-..arla bombao
MANTENIMIENTO
CHEQUEO
DEL MOTOR
DEL NIVEL DE ACEITE
FIG. 20
Ver"ANTES DEARRANCAR EL MOTOR"parainformaci6n
sobre
chequeodel nivelde aceiteoEI nivetde aceitedeber_chequearse
antes de csda usa, o par 1omenos csda 5 horas de operaci6n_
Mantenga constsnteei nivelde aceite_
CAMBIO DE ACEITE
Pare limipiar o memplazar el depurador de aire (Fig. 21), siga
estospasos:
=
Quite el tomillo.
e
Saque cuidosamente el depurador de aire_
TORNILLO
j_Jk
UIDADO:
Deeconecte
el alambre
de bujla de Is
buJis,
y mantdngslo
alejsdo
de ta misma.
I
DEPURADOR DE hIRE
Cambie el aceite luego de tas primates 5 bores de opersci6n.
De sill' an adelsnte, cambie el sceite cada 50 horsso Si est,_
usando su lavsdora a presi6n bajo extremadss condiciones de
suciedad y polvo, o de temperature ambiente sumamente sita,
cambie el sceite con mayor frecuencia,
Cambie el aceite mientras el motor estd, a_n tibio luego de
funcionar, como se indica a continuaci6n:
•
Antes de inclinar ls lavadora a presi6n para evacuar el ace_te,
desagote el tanque de combustible haciendo funcionar la
lsvsdors haste qua el tanque est_ vact'o.
•
Limpie el _,res qua rodea et llenador de aceite, y s_.quele la
taps, as[ como la vsnlls de nivel. Limpie la varilla de niveL
•
Incline Is tsvadora a presi_n como se muestra en Fig. 20
pars dasagotsr comptetsmente
el aceite en un recipiente
sdecusdo. AI inclinsr la Isvadors s presiSn, msntengs hscia
srriba el lado del silenciador det motor.
CUBIERTO
[Jane el cdrter det motor con el sceite qua se recomiends,
hasta slcanzar etpunto "FU_" an la varillade niveldeaceiteo
No llene por arriba de ess mares. Se requieren
aproximsdamente
20 onzas. VIERTA EL ACEITE
LENTAMENTE.
•
Cuando el c_rterdel motor haya sido Ilenacloal nivelcorrecto,
coloquey spdete la varilla de nivelde aceite.
SERVICIO DEL DEPURADOR
o
Saque fill_-ode aim.
o
Lirnpie el filtro de airs golpdardoto suavemente en una
supe_ce s61ida. Si el filtro est_ demasiado sucio, reempldcelocon unonuevo. Bateel fittro viejoen farinaaprop_ada.
o
Cotoquede nuevo Is tapa y apriet_Is tomillofirmernent_
DE AIRE
Su motor no trabajard adecuadamente, y puede resuttar daSado,
siio hate funcionar usando un depurador de aire qua estd suc_o.
Limpie o reempiace et fiitto de papal del depurador de aJre cada
100 horas de operaci6n o uns vez pot aSo, 1oqua ocurra antes.
Li'mpieto o reempldcelo m&s a menudo si el motor funciona bajo
condic_ones polvodentas o de suciedad. Su Centro Autorizado
local de Servicio Sears cuenta con las plazas de repuesto.
J
I6
RESPONSABILIDADES
DEL CL!ENTE
REEMPLACE LA BUJIA
CALIBRADOR DE 0.030"
Cambie la buj[a cada 100 horas de operaci6n o una vez al afio,
1o que ocurra antes. Esto contribuirfi a que el motor arranque
m&s f&cilmente y funcione mejor.. Lea en las especificaciones de
[a lavadora a presi6n sobre el tipo de b@a que so necesita. El
intersticio de la bujia (Fig,. 22) es de 0..030 pulgadas (0.76 mm).,
FIG. 22
SERViCIO Y AJUSTES
CARBURADOR
Si piensa qua su carburador requiem ser ajustado, visits a su
concesionario de Servicio Sears m_s cercano. El rendimiento
del motor puede verse afectado
en altitudes de rods de
4.000 pies (1,219 m). Pare mejorar el rendimiento de su motor,
visits a su conc_sionario de Servicio Sears m_s cercano.
VELOCIDAD
DEL MOTOR
ADVERTENCIA:
A
N0
ALTERE
_ JAMAs
EL
REGULADOR
DEL MOTOR,
QUE HA SIDO
RJADO EN FABRICA
PARA LA VELOCIDAD
APROPIADA DEL MOTOR. PUEDE RESULTAR
PELIGROSO
AOELERAR
EL MOTOR
EN
EXCESO
DEL
AJus'rE
oEALTA
WLOCIDAD
DE
FABRICA.
IMPORTANTE: EL CAMBIO DE LA VELOCIDAD REGULADA
DEL MOTOR INVAL1DARA LA GARANTIA DEL MOTOR.
MANTENIMIENTO
DE LA BOQUILLA
Si la boquilla estfi re.stringida u obstruida con matefiates extrafios,
tal como suciedad, puede desarrollarse excesiva presiSn en Ia
bombao AI user una boquilla parcialmente obstruida, se puede
notar una sensaciSn
pulsante., Este no es un problema
generalmente rek_cionado con ta bomba, sino con una boquilla
obstruida o parcialmente restringida.
FIG. 23
Si la boquiIla se obstruye o se restfinge parcialmente, ffmpiela
de inmediato con el juego [ncluido con su [avadora a presFSn,
siguiendo estas instrucciones:
,
.
•
•
.
.
.
•
•
Pare et motor y cierre el suministro de ague,
Separe de la pistola et soporte de la boquilla ajustable..
Saque ta boquilla del extremo del soporte usando una llave
Allen de 2 mm o 5/64" (como la que viene con el juego).
Use et atambre inctuido en et juego (Fig° 23) o un pequeSo
sujetapapeles
pare quitar los materiates extraSos que
obstruyen o restringen la boquilla=
Quite el resto de )a suciedad pasando agua a c_ntracordente
a tray, s dei soporte (Fig. 24). Este lavado a contracorriente
debe durar entre 30 y 60 segundos,. Gire ia vara a un roci_fo
de chorro y mueva ia boquilla de )a posici6n baja a la alta
mientras est_ lavando.
Vuelva a colocar Ia boquilIa en la vara,. NO DEBE apretarla
excesivamente.
FIG._
Vue_va a conectar la vara a [a pistotao
Conecte nuevamente y abra el suministm de agua, y arranque
el motor.,
Pruebe ia ]avadora a presidn operdndola con la boquitla en
las posiciones alia y baja.
17
ALMACENAJE
BOMBA DE LA LAVADORA
A PRESION
Para evitar probtemas en el motor, el sistema de combustible
debe vaciarse antes de un aJmacenaje de 30 di'as o m_is. Siga
estas instrucdones:
No debe dejarse agua en la unidad durante perfodos prolongados
de tiempo_ PodrIan depositarse sedimentos de minerales en las
partes de la bomba que "paralizadan" su funcionamiento.
Si
ptanea no utilizar ta Lavadora a Presi6n pot rods de 30 dfas, siga
este proc_dimiento:
•
.
Desagote el Sisterna de Combus_Jble:Saqua toda la gasofina
del carburadory del tanque de combust_le para evitarque se
formen dep6s_tosgomosos en dichas partes, lo que podrfa
provocarun real funcionamientodel motor°
Lave la manguera del detergents colocando el filtro del
inyector en un recipients con agua limpia mientras hace
funcionar la Lavadora a Presi6n con la boquitla en et mode
de baja presi6n_ ContinUe el lavado hasta ver que el agua
que fluye de ta manguera es limpia.
ADVERrTENCIA:DESAGOTE EL COMBUSTIBLE
EN UN RECIPIENTE APROBADO, AL AIRE
LIBRE, LEJCS DE LLAMAS AL DESCUBIERTOo
ASEGURESE QUE EL MOTOR ESTE FRIO.
NO FUME.
Pare et rectory deje que se enfrie. SAQUE LUEGO TODAS
LAS MANGUERAS.
Ponga la paianca del obturador en
posici6n "STOP".
A
Si esque puso"gasohoI", hagafuncionar elmotorhastaque
pate per falta de combustible.Aseg(_reseque el suministro
de agua est_ conectado a la entrada de fa bomba, y est_
ABIERTOo
CUIDADO: ANTES DE CONTINUAR, DEBE
ASEGURARSE
QUE LA PALANCA DEL
OBTURADOR ESTA EN PGSICION "STOP". SI
ARRANCA EL MOTOR SIN TENER CONECTADO
EL SUMINISTRO APROPtADO DE AGUA, LA
BOMBA PODRIA DAt_ARSE.
•
Camble elAceite: Mientras el motor estd a0n tibio, vac[e et aceite
del o_r_er: AI volverlo a Ilenar, use el grade recomendado.
Evacue de la bomba todo lfquido bombeado tirahdo unas 6
votes de ta manija de tetroceso. Esto deberfa sacar de la
bomba la mayor parte det Ifquido..
Calibre del Cilindro de Aceite:
Quite la bujia y vierta
aproximadamente t/2 onza (15 ml) de aceite de motor en el
cilindro, Cubra con un trapo el agujero de ]a bujia., Cranquee
lentamente para distfibuir el aceite.
Recomendamos seguir los procedimientos de atmacenaje de la
bomba de ]a lavadora a presi6n luego de cada usoo
•
•
Enrolls la manguera de aJta ptesi6n y examine si est,_da_ada.,
Los cortes o deshilachaduras en la manguera pueden resultar
en fugas y p_rdidas de presi6n. Si encuentra daSos en la
manguera, deber._ reemplazada. NO trate de reparar y usar
una manguera dafiada. Reempldceta
con una genuina
manguera Craftsman.
i,_jl
•
k
DELAGUJERO
De LA BUJlAM=ENTRASIt
iCUIDADO,
EVITEELROCIADOQUESALE
c NQu LENTAMENTE
ELMOTOR.
,!
Instals la bujfa. No coriecte ei alambre de ia bujfa.
OTRAS SUGERENCIAS
Desagote el agua de Eamanguera y cu_lgueta debidamente
del soporte de alambre que hay en el manubrio.
NOTA: Para proteger
la unidad de las temperaturas
de
congelamiento, puede poner fkiido limpiaparabdsas en la bomba
verti_ndolo a ttav6s de una secci6n de 3 pies (91 cm) de
manguera de jardin conectado al adaptador de entrada, y jalando
dos votes la manija de retroceso.
•
Un estabitizador de combustible (come ei STA-BIL _) es una
afternativa aceptable para minimizar _osdep6sitos gomosos
durante el atmacenaje_
•
No aimacene gasolina de una estaci6n aotra.
•
Reemplace su Iata de gasolina si es que est_ empezando a
herrumbrarse_ El herrumbre y/o la suciedad en la gasolina
ocasionar_n problemas.
-
Si es posible, almacene su unidad en un lugar interior,
cubd_ndota para protegeda dei poivo y la suciedad.
.
Cubra su unidad con una cubierta protectora adecuada
que no retenga ia humedad, No use una cubierta pl_stica.
El pl&stico no "respira", per Io que se forma condensaci6n
que puede a su vez herrumbrar la unidad.
IMPCRTANTE: NO DEBE JAMAS CUBRtR SU LAVADORA A
PRESION MIENTRAS
LAS AREAS DEL ESCAPE Y DEL
MOTOR ESTAN TIBIAS.
Almacene la unidad en un lugar limpio y secoo
MOTOR
ADVERTENCIA: NUNCAALMACENE UN MOTOR
CON COMBUSTIBLE EN UN LUGAR INTERIOR,
O EN AREAS CERRADAS Y MAL VENTILADAS
DONDE LOS VAPORES PODRIAN ALCANZAR
UNA LLAMA AL DESCUBIERTO, UNA CHISPA,
O UNA LUZ PILOTO COMO LA DE UN HORNO,
CALENTADOR DEAGUA, SECADOR DE ROPAS,
U OTRO ARTEFACTO A GAS.
Es importante evitat durante el almacenaje
que se formen
dep6sitos gomosos en partes esenciafes
det sistema de
combustible, tales come el carburador, el filtro de combustible,
la manguera de combustible, o et tanque. Asimismo, se sabe per
experiencia que los combustibles
mezclados con alcohol (el
!lamado_gasohol", o los que usan etanol o metanot) pueden atraer
humsdad, to que lieva a la separad6n y formad6n de _cidos
durante el almacenajeo La gasolina acidificada puede da_ar el
sistema de combustible de un motor mientras estd atmacenado..
18
DaAGNOSTiCO Y CORRECCaON DE AVERIAS
PROBLEMA
CAUSA
CORRECCION
La bomba tiens los sk.:juientes
probtemas:
no produce pres_n, preskSn
err_ic&, traqueteo, p6rdida de
presi6n, bajo volumen de agua°
"1. La boquilla est,_ en el modo de baja
presi6n.
2. Baja presi6n del regulador.,
I. Tire ta boquiita hacia atr&s para
ponerla en el modo de alta presi6n.
2,, Ajuste el regulador ai punto deseado_
3. La entrada de agua est& bloqueada.,
3, Despeje el bloqueo de la entrada,,
4, Suministroinadecuado de agua_
4., Suministre un flujo adecuado de agua.
5. La manguera de entrada est_ retorcida
- o tienefiJgas,
& El _tro de la manguera de entrada
est_ obstruidoo
7. La t[neadel detergente no est&
sumergid&
8oEt suministro de agua est& a m_s de
140oF (60oC)o
9° La manguera de salida est& bloqueada
o tiene fuga&
t0. La pistola tiene fugaso
11. La boquiIlaest,. obstruida.
!2. La bomba es defec_Josa.
Et detergente no se mezcla
con et rociado.,
.....
,,, ,,i
I,, La manguerade detergente no est._
sumergid&
2_E1fittrc de substanciasqu_micas
est_ obstruido.
3. La boquilla est_ en el modo
de alto presi6n.
4.,E] ajustador de substancias quimicas
est&cerrado.
Et motor funciona bien en vaciol
pero se =atasca" al poner carg&
El motor no arranca;:0 arranca
y funciona en forma abrupt&
Lavelocidaddel motor es demasiadobaja,,
8oProvea un suministro de agua
de menor temperatura,,
& Despeje los bioqueos en ta manguera
de entrad&
10,,Reemplace la pistol&
11.,Despeje la obstrucci6n de la boquiil&
12,,Contacte el Departamento de
Servicio de Sears.
'io Insertela ][nea de substancias
qu[micas en el detergenteo
2. Limpie o reemplace la l[nea
det fittro/detergente°
& Empuje la boquiIla hacia adelarrte,
al modo de baja presi6n.
4. Abra el ajustador de substancias
qu[micas.
Cor_tacteel oepartarnento de Servici_ .....
de Sears,
1,,"_Jene
el' _nei:"at nrvel _mpiaddi'
2oEl depurador de aire est& sucio.
2,,Limpiar o reemplazar et depurador
de aire.
3. Uene el tanque de combustible..
4. Gasolinavieja,,
& Vacfe el tanque de combustible;
II6nelo con combustible fresco.
& E1alambre de la bujia no est&
conectado a la buj[a.
& Bujfa en malas condiciones.,
5. Conecte el alambre a la bujfa.
7. Agua en la gasolina.
7. Vac[e el tanque de combustible;
li6nelocon combustible fresco.
8. Sobreestrangulac;_n_
9,, Mezcia excesivamente _a
de gasolina.
10.,La v_vula de admisi6n est_ pegada
en posick_nabierta o cerrada.
11, El motor ha perdidocompresi6n.
' Falta de potencia en el motor.
7. Sumerja la l_nea dot detergenteo
']: Bajdn_el aeiace_&
3,,No hay gasolina,
El motor se para durante su
funcionamiento°
5. Enderece la manguera de entrada,
ponga un parche en la fuga,,
6oChequee y _impie el filtro de entrada
de la manguer&
6. Reemplace la bujia.
8. Abra totalmente el estrangulador
y cranquee el motor,,
9. Contacte el Departamento de
Servicio de Sears.
10. Contacte et Departamento de
Servicio de Sears,,
1,,Sin gasofin&
11, Co.acre el Departamento de
Servicio de Sears.
1_Llene et tanque de gasolina,
2, Bajo nivet dot aceite.
2,,Llene el c_rter at nivel apropiadoo
Et fitlro de aire est_ sucioo
I9
Reemplace el filtro de aireo
01
I0
!
IZl
m
?
t,j
"0
1"11
22
_.L
16
hl
GL_, WAND, AND HOSE STORAGE LOCATION
•
1500 PSi DE MAQUINA LAVADOi_A DE ALTA PRESION 580.741380
REPUESTOS
PARA LISTE DE PARTES
VEAL A PA GINA 21
VERSION
INGLES
21
Drawing
No. 97335
REPUESTOS
1,500 PSI DE MAQUINA
LAVADORA
DE ALTA PRESION
580.74.1380
O
t_
22
1500 PS! DE MAQUINA
LAVADORA
DE ALTA
PRESION
580.741380
PARA L.IS TA DE PAR TES
VEA LA PA GINA 23
VERSION EN INGL ES
23
REPUESTOS
MOTOR BRIGGS & STRATTON DE 4-CICLIOS -.12E802-1115-,01 1
MAQUINA LAVADORA DE ALTA PRESION DE i500 PSI ,_1_74--1_
REPUESTOS
307
306
635
REQUIRES
13
SPECIAL
TOOLS
TO INSTALL SEE REPAIR
INS3'RUCTtON
MANUAL
34_35
_40
33
I_20
883
24
REPUESTOS
MOTOR BRIGGS & STRATTON DE 4..ClCLIOS.12E802-1115-01
MAQUINA LAVADORA DE ALTA PRESION DE 1500 PSI ,580.741380
@
670A
258
969
968
606
%
971A
529
967
t63
843
25
MOTOR BRIGGS & STRATTON DE 4-ClCLIOS 12/E00_llltF_
MAQUINA LAVADORA DE ALTA PRESTON DE 1500 P_ 500.741380
REPUESTOS
=_
@
634
124
__95_130
0
.....
_io_
617
11o_
.....
I
127
134
55
110
121 CARBURETOR
KIT
515 O
456
t
1095 VALVE OVERHAUL
GASKET SET
J3S J3NSV_) gS_
617_'___J _)
634
977 CARBURETOR
GASKET SET
OL9 _
6 _t
110
MOTOR BRIGGS & STRATTON DE 4-ClCLIOS 121EB02-11t_1
MAQUINA LAVADORA DE ALTA PRESION DE 1500 PSI 580.741380
PARA LISTE DE PARTES
VEA LA PAGINA 25
VERSION EN iNGLES
2?
REPUESTOS
CRRFTSMRN°
MANUAL DEL
PROPIETARIO
MAQUINA
LAVADORA
DE ALTA PRESION
A 1500 PS! ET 2 GPM
DE 3.8 CABALLOS
MODEL NO.
580.741380
Cada Maquina Lavadora de Alta Presi6n
modelo_
tiene su propio nL_mero de
El nt3mero de modelo de su maquina lavadora de presi6n ser_. encontmdo
en la calcomania adherida a la unidad.
Todas las partes enlistadas aqui adelante pueden ser ordenadas a trav_s
de los Centros de Servicio de Sears, Roebuck and Co_ y la mayoria de las
Almacenes de Venta al DetaL
Si NECESITA
REPARACIONES
O PARTES
PARA SERVIC10
SIEMPRE PROPORCIONE
L_A SIGUIENTE
INFORMACION
CUANDO ESTE ORDENANDO PARTES DE REEMPLAZO:
®
PRODUCTO-PRESION
MAQUINA
LAVADORA
e
NUMERO
DE MODELO
•
NUMERO
DE LA PARTE
•
DESCRIPClON DE LA PARTE
DE ALTA
DE
REPARAClON LLAME A
ESTE NUMERO DE LLAMADA
GRATUITA
1-800-4=REPAIR
(1-800-473-7247)
PARA INFORMACION ACERCA
DE PARTES DE RECAMBIO Y
ORDENES, LLAME A SETE NUMERO DE LLAMADA GRATUITA:
1-800-FON-PART
w 580.741380
A su mercancia de Sears se le ha aSadid valor debido a que Sears tiene
unidades de servicio en toda la naci6n equipades con t_chnicos entrenados por Sears.._.t_cnicos profesionales entranados especif_camente en
los productos de Sears, poseyendo las partes, fa herramientas y los
equipos neceesadeos para aseguraie que vamos a satisfacer nuestro
comprosio con usted, le damos servicio a, lo que vendemos.
(1-800-366-7278)
SEARS,
ROEBUCK
and
CO.,
Hoffman Estates,
IL
60179
U.S.A.