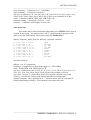
1
AR8000 3&0$1$*(5 for DOS User’s Manual © Simon Collings, G4SGI 1995 Software Published and Distributed by: AOR (UK) LTD., Adam Bede High Tech Centre, Derby Road, Wirksworth, Derbyshire DE4 4BG ENGLAND Tel: +44 1629 825926 Fax: +44 1629 825927 CONTENTS _____________________________________________________________________ CONTENTS CONTENTS .....................................................................................................2 INTRODUCTION..............................................................................................5 MINIMUM SYSTEM REQUIREMENTS ...........................................................6 INSTALLING THE PROGRAM ........................................................................7 Copy Protection................................................................................................................ ...................7 To Install... .................................................................................................................. .........................8 GETTING STARTED .....................................................................................10 RS-232 connection.............................................................................................................. ...............10 Starting the Program ........................................................................................................... .............10 Setting up ..................................................................................................................... ......................11 Obtaining Help ................................................................................................................. .................12 Working with windows ........................................................................................................... ..........13 Size/Move Ctrl-F5 .........................................................................................................................13 Zoom F5 ........................................................................................................................................14 Tile..................................................................................................................................................14 Cascade ..........................................................................................................................................14 Next F6 ..........................................................................................................................................14 Previous Shift-F6...........................................................................................................................14 The format of text..............................................................................................................................14 Memory data .................................................................................................................................14 Search bank data...........................................................................................................................15 Auto mode data .............................................................................................................................16 FILE MENU OPTIONS...................................................................................18 New .....................................................................................................................................................18 Open F3..............................................................................................................................................18 Close Alt-F3 .......................................................................................................................................18 Save ....................................................................................................................................................18 Save as ................................................................................................................................................19 Change dir... ......................................................................................................................................19 DOS shell............................................................................................................................................19 _____________________________________________________________________ AR80003&0$1$*(5 for DOSUser’s Manual 2 CONTENTS _____________________________________________________________________ Print F7 ..............................................................................................................................................19 Send file to RX...................................................................................................................................19 Get file from RX... .............................................................................................................................19 Import from raw file... ......................................................................................................................19 Export to raw file... ...........................................................................................................................20 Terminal.............................................................................................................................................20 Exit .....................................................................................................................................................20 EDIT MENU OPTIONS ..................................................................................21 Undo ...................................................................................................................................................21 Cut Shift-Del.....................................................................................................................................21 Copy Ctrl-Ins....................................................................................................................................21 Paste Shift-Ins....................................................................................................................................21 Clear Ctrl-Del....................................................................................................................................21 Renumber...........................................................................................................................................21 Check F10 ..........................................................................................................................................22 FIND MENU OPTIONS ..................................................................................24 Find.....................................................................................................................................................24 Replace... ............................................................................................................................................24 Search again ......................................................................................................................................24 SETUP MENU OPTIONS ..............................................................................25 Serial Port... .......................................................................................................................................25 Machine Speed...................................................................................................................................25 Mouse... ..............................................................................................................................................26 Colours... ............................................................................................................................................26 Password... .........................................................................................................................................27 Power Save Delay..............................................................................................................................27 Power Save Cycle... ...........................................................................................................................28 Priority Scan Interval... ....................................................................................................................28 _____________________________________________________________________ AR80003&0$1$*(5 for DOSUser’s Manual 3 CONTENTS _____________________________________________________________________ SEARCH AND SCAN MENU OPTIONS........................................................29 Squelch level... ...................................................................................................................................29 Audio squelch... .................................................................................................................................29 Delay time... .......................................................................................................................................29 Free time... .........................................................................................................................................30 TERMINAL WINDOW ....................................................................................31 MOVING COPY PROTECTION.....................................................................32 _____________________________________________________________________ AR80003&0$1$*(5 for DOSUser’s Manual 4 INTRODUCTION _____________________________________________________________________ INTRODUCTION Welcome to AR8000 3&0$1$*(5 for DOS, the management software for the PC and AOR AR8000 hand portable radio receiver. This simple to use program lets you configure memory, search and auto mode data in your AR8000 using text based windows which display the data in a friendly understandable way. Managing frequencies with your AR8000 could not be simpler with AR8000 3&0$1$*(5 for DOS . The program uses an RS-232 serial port to communicate with your radio and has these exciting features and more: • Easy to use intuitive text based windowing system with tile and cascade. You may have any number of memory or search files as you wish (disk space permitting). • On-line context sensitive help. You may obtain help at any time simply by pressing the F1 key. • Memory, search and auto mode data is presented in an easy to read format which is simple to edit. You can use cut and paste or edit each line of text in a number of text windows for easy changes to your data. • Auto line number when adding memory data. • Renumber each line of search or memory data. • Set password, search and scan parameters with simple dialogs. • Send memory, search or auto mode data to your radio or print it out. • Edit auto mode data to define your own setup and send it to the radio. • Import and export memory and search bank data into raw format (for interoperability with your existing data) • Choose the serial port parameters to suit your radio. • A built-in terminal is also provided for full control of the AR8000 • 3&0$1$*(5 can be run as a DOS application under Microsoft® WindowsTM v3.1 or WindowsTM for Workgroups v3.11 You have purchased a “licence” to install and operate a maximum of two copies of 3&0$1$*(5. There are two copy protection tokens on the master disk. See the section on copy protection for more details. _____________________________________________________________________ AR80003&0$1$*(5 for DOSUser’s Manual 5 MINIMUM SYSTEM REQUIREMENTS _____________________________________________________________________ MINIMUM SYSTEM REQUIREMENTS • 80286 PC compatible (or higher) with colour or monochrome text display • Microsoft® DOS v3.0 or PC-DOS v3.0 or higher • 1M byte of DOS memory (640k bytes of base memory) • Microsoft® mouse or equivalent (strongly recommended) • 1M byte of free hard disk space or twin 720k bytes floppy disks • At least two RS-232 serial ports (one for mouse if used) • Text printer (optional) • AOR AR8000 had portable radio receiver with AOR CU8232 remote control interface and connecting cable (available separately) _____________________________________________________________________ AR80003&0$1$*(5 for DOSUser’s Manual 6 INSTALLING THE PROGRAM _____________________________________________________________________ INSTALLING THE PROGRAM In this manual, it is assumed that you are familiar with Microsoft® DOS and the hardware you are using with your computer. If you need further information on using specific DOS commands, you can use the on-line help that is provided by Microsoft® as part of the operating system (just type HELP command name Õ (Enter) at the DOS prompt) or consult your DOS manuals. Copy Protection AR8000 3&0$1$*(5 for DOS is copy protected. The protection does not use a dongle or other cumbersome devices, however, there are a few simple points that you may need to refer to. Please read this section carefully. AR8000 3&0$1$*(5 for DOS is copy protected using a system which places a “token” on your hard disk (or working floppy disk) when you install the program. The program will only work on the disk you installed it to. There is no dongle or key-disk, so once installed the program runs completely normally and you will not be inconvenienced (unlike other schemes). Specific points to remember: 1. The distribution disk contains a two tokens. This means that you can install up to two complete copies of the software on separate machines at once. You cannot transfer the program to another machine without first moving one of the tokens back onto the original distribution disk then re-installing. The tokens can easily be moved with the program that is provided. Contact your AOR distributor if you need additional copies of the software. 2. You should keep your original disk in a safe place away from strong magnetic fields, high humidity or other environmental conditions that could damage it. You will not be able to re-install the software or move it to another machine without the distribution disk. 3. Two hidden files are copied to a hidden subdirectory of the AR8000 3&0$1$*(5 for DOS directory (AR8000.CCC and CCONTROL.SYS) when you install the software. These contain configuration information for the copy protection scheme and are normal DOS format files. DO NOT DELETE THESE FILES UNDER ANY CIRCUMSTANCES. If these files are deleted, AR8000 3&0$1$*(5 for DOS will not run. 4. If you are using a backup utility, make sure that the two hidden files are not backed up. When restored, the copy protection scheme may not be able to validate the installation and AR8000 3&0$1$*(5 for DOS will not run. Most backup utilities do not touch these files because they have the hidden, system and read-only attributes set. The two copy protection files also do not have the archive bit set, so you should _____________________________________________________________________ AR80003&0$1$*(5 for DOSUser’s Manual 7 INSTALLING THE PROGRAM _____________________________________________________________________ be able to exclude them from backups by setting up your backup software to ignore files without an archive bit. Remember, it is not the backup but the restore that can cause problems. 5. The /d+ option of the PC-Kwik disk cache software from Multisoft Corporation is not compatible with the copy protection scheme and should be temporarily disabled when installing AR8000 3&0$1$*(5 for DOS or moving the token. HyperCache also affects the copy protection scheme in the same way because of non-standard methods of accessing the floppy disk drive. Again, it should be temporarily disabled, but both caches may be used at other times. 6. The copy protection scheme is compatible with disk drives compressed with SuperStor, Stacker and DoubleSpace. However, you should temporarily remove the token from the hard disk when installing one of these compression utilities because the protection will appear invalid when the drives are compressed. The disk compression utilities warn you of this in their manuals. 7. The copy protection scheme is known to be compatible with the following disk defragmenters: Central Point’s Compress, Digital Research’s Diskopt, Stac’s Sdefrag and Microsoft’s Defrag. See the section of this manual entitled MOVING COPY PROTECTION for instructions on using the utility for moving the copy protection token. To Install... To install AR8000 3&0$1$*(5 for DOS , you need to place the distribution disk in drive A and log onto that drive by typing at the DOS prompt: A: Õ (Enter) Next you can install the program onto your hard disk by running a simple utility that transfers the files onto your system. First choose a name for the AR8000 3&0$1$*(5 for DOS directory (eg ‘AR8000’) on your hard disk then type: TRANSFER A: For example: directory name Õ (Enter) TRANSFER A: C:\AR8000 Õ (Enter) In the example above, the directory where the AR8000 3&0$1$*(5 for DOS files will be installed is called ‘AR8000’ and it is in the root directory of hard disk drive C: (this is the normal letter for the hard disk). _____________________________________________________________________ AR80003&0$1$*(5 for DOSUser’s Manual 8 INSTALLING THE PROGRAM _____________________________________________________________________ NOTE: You can install the program files to a floppy disk in your second disk drive (if you have one) by changing the command above to include your floppy disk drive (TRANSFER A: B: Õ (Enter)). You must have prepared a blank formatted disk with at least 720k bytes capacity before doing this. _____________________________________________________________________ AR80003&0$1$*(5 for DOSUser’s Manual 9 GETTING STARTED _____________________________________________________________________ GETTING STARTED RS-232 connection The RS-232 connection between your computer and the AR8000 is simple to set up. Connect your AOR CU8232 remote control interface unit by following the instructions given in the CU8232 manual. You will need to prepare and fit an RS232 interface lead, again instructions are given in the CU8232 manual. Starting the program To start the AR8000 3&0$1$*(5 for DOS program you need to change directory to the location where you installed the package. You can do so by typing the following commands from the DOS prompt: C: Õ (Enter) CD C:\AR8000 Õ (Enter) Here, it is assumed that you installed the program files into a directory called ‘AR8000’ on your hard disk drive C:. If you installed somewhere else, you need to change directory to the correct location. Type the following at the DOS prompt: AR8000 Õ (Enter) The program will start up and display the main desktop with a number of menu options along the top of the screen and two hot keys along the bottom. A terminal window is opened for you automatically. The main screen looks like: When you open a file for editing it will be displayed in a window on the desktop (a grey shaded area in the central part of the display not shown above). As you open more and more files, you will be able to organise the windows by tiling and cascading them on the desktop. You can also move and resize them with your mouse (if you have one). _____________________________________________________________________ AR80003&0$1$*(5 for DOSUser’s Manual 10 GETTING STARTED _____________________________________________________________________ Setting up Before proceeding, you must select the correct serial port parameters and an appropriate delay for RS-232 data transfers between the AR8000 and your computer. Pull down the Setup menu options by clicking on Setup with your mouse or by typing Alt-t from your keyboard. NOTE: You can use your keyboard or a mouse to operate the software. If you are using a keyboard, the ‘hot keys’ to use are highlighted as appropriate. For example, the ‘F’ in the File option is highlighted, so you can use the Alt-F key sequence to select the File menu. When you have selected the Setup menu, you will see the following options: One of the menu options will always be highlighted. You can use the Ï and Ð arrow keys to move the highlighting up and down over the list of options. Press the Enter key when you want to select a menu option. Alternatively, you can use your mouse to click on the menu option you desire. You need to select the Serial Port... and Machine Speed... options to correctly setup AR8000 3&0$1$*(5 for DOS. Start with the RS-232 serial port parameters by selecting the Serial port... menu option. You will need to select the serial port you have connected your radio to and the RS-232 parameters in use. The dialog you see may look like: _____________________________________________________________________ AR80003&0$1$*(5 for DOSUser’s Manual 11 GETTING STARTED _____________________________________________________________________ There are a variety of options to change: the serial port (COM1 through COM4), the baud rate, the RS-232 command delimiter (CR or CR,LF) and the software flow control protocol. All the RS-232 parameters must EXACTLY match those in your AR8000 for AR8000 3&0$1$*(5 for DOS to work correctly. Refer to section 18 of your AR8000 Operating Manual for instructions on setting and reviewing the RS-232 parameters in your radio. Select the parameters you need and OK to accept them, or Cancel to abort. You also need to setup a delay for RS-232 command transfers to the AR8000 for reliable operation. A small amount of time is needed by the radio to process the last command before the next arrives. For this reason delays are used to moderate the flow of data from the computer so that it is processed reliably by the AR8000. The value of these delays are affected by the speed of your computer. The Machine Speed... menu option gives you the following dialog: This allows you to set the value of the delay using a slider control. Use the following procedure to select the optimum delay setting. 1. Choose an initial slider position near the right hand side of the scale (“Fast”) and use the File|Get from RX... option in the File menu to transfer a file of memory data from the radio into a new (blank) text window. The exact setting you need will depend on the speed of your computer (eg fast Pentium “Fast”, mid-range 486SX25 or 386 and below “Slow”). 2. Check that the data is not corrupted (it should look like that described in the section below) then try moving the slider a bit to the left and repeat the transfer. 3. Keep doing this to find the minimum delay before the data becomes incorrect. The optimum delay corresponds to a slider position a little to the right of this value. This gives the fastest reliable transfer of data. Obtaining Help You may obtain help at almost any time while using AR8000 3&0$1$*(5 for DOS by pressing the F1 key. The help information you are shown depends on what you are were doing when you pressed F1 - it is context sensitive. Whenever help is in use, a text viewer window will be displayed on the desktop which will contain the help information (sometimes with links to other topics for your convenience). From the desktop, press F1 to see the following display: _____________________________________________________________________ AR80003&0$1$*(5 for DOSUser’s Manual 12 GETTING STARTED _____________________________________________________________________ You can use the scroll bars or page up or down to view the text. You can even resize or move the help viewer window to suit your display. All windows in AR8000 3&0$1$*(5 for DOS have the same behaviour for consistency. If you want to obtain help on specific menu options, highlight the option you want to find out about then press F1. You can also obtain help on the dialogs in the program by pressing F1 whenever a dialog box is displayed. Working with windows AR8000 3&0$1$*(5 for DOS uses a system of windows and dialogs which are very similar to those provided by Microsoft® WindowsTM. You can drag windows using your mouse by positioning the mouse cursor along the top edge of the window then moving the cursor while holding the left mouse button down. To make the window fill the entire desktop, click once on the [Ï] symbol in the top right hand corner. Click on the scroll bars or use the cursor keys to view all the text within the window. Close the window by clicking on the [] symbol in the top left hand corner of the window. The software is operated using a system of menus and dialogs which are accessible from the menu options along the top of the desktop. Some of the menu options will be greyed if you have not opened any files. This is because these menu options are for functions that only work on files. They become active as soon as you open a file. The Windows menu contains a number of options which allow you to alter the layout and size of the windows displayed on the desktop. The following options are available. Size/Move Ctrl-F5 _____________________________________________________________________ AR80003&0$1$*(5 for DOSUser’s Manual 13 GETTING STARTED _____________________________________________________________________ When you choose Size/Move, the active window moves in response to the arrow keys. Once you've moved the window to where you want it, press Enter. You can also move a window by dragging its title bar with the mouse. Choose this command to change the size or position of the active window. If you press Shift while you use the arrow keys, you can change the size of the active window. Once you've adjusted its size or position, press Enter. If a window has a [Ï] symbol, you can drag that corner to resize the window. NOTE: When a window is being moved, 3&0$1$*(5 only responds to the arrow keys and Enter. Press the Enter key to position the window and restore normal program operation. Zoom F5 Choose Zoom to resize the active window to the maximum size. If the window is already zoomed, this command will restore it to its previous size. You can also double-click anywhere on the window's title bar (except where an icon appears) to zoom or un-zoom the window. Tile Choose Tile to tile all file windows on the desktop. Cascade Choose Cascade to stack all file windows on the desktop. Next F6 Choose Next to cycle forwards through the windows on the desktop. Previous Shift-F6 Choose Previous to cycle backwards through the windows on the desktop. The format of text A simple to read comma separated format is used for all text displayed in windows. This means that the format of data is converted to RS-232 command format before sending to the radio and is converted back when it is read from the radio. There is a format for memory data and for search bank data as follows: Memory data _____________________________________________________________________ AR80003&0$1$*(5 for DOSUser’s Manual 14 GETTING STARTED _____________________________________________________________________ memory channel, frequency, step size, mode, attenuator, comment For example: A00, A01, A02, A03, A04, A05, A06, A07, A08, A09, 0.198000, 0.252000, 0.558000, 0.567000, 0.585000, 0.603000, 0.603000, 0.603000, 0.612000, 0.630000, 9.00, 9.00, 9.00, 9.00, 9.00, 9.00, 9.00, 9.00, 9.00, 9.00, AM, AM, AM, AM, AM, AM, AM, AM, AM, AM, ATT, ---, ---, ---, ---, ---, ---, ---, ---, ---, Radio 4 Atl 252 Spectrm RTE 1 R Scot 603 R Invicta Radio 4 RTE 2FM 3 Count etc... where the fields are memory channel - 3 characters (A00-J49 and a00-j49) frequency - 12 characters (0.1 - 1950.0 MHz) step size - 6 characters ( 50, 100, 200, 500, 1.00, 2.00, 5.00, 6.25, 9.00, 10.00, 12.50, 20.00, 25.00, 30.00, 50.00, 100.0, 200.0, 250.0, 500.0 or any multiple of 50 Hz) mode - 3 characters (WFM, NFM, AM, USB, LSB, CW) attenuator setting - 3 characters (ATT=on, ---=off) comment - 7 characters ASCII upper or lower case Search bank data search bank, lower frequency, upper frequency, step size, mode, attenuator, comment For example: A, 118.000000, 136.000000, 25.00, AM, B, 225.000000, 410.000000, 25.00, AM, C, 410.000000, 425.000000, 10.00, AM, D, 156.000000, 163.000000, 5.00, NFM, E, 88.000000, 104.900000, 100.0, WFM, F, 145.200000, 145.775000, 12.50, NFM, G, 433.000000, 433.600000, 50.00, NFM, H, 1297.000000, 1298.000000, 25.00, NFM, I, 71.000000, 87.000000, 12.50, NFM, J, 163.400000, 225.000000, 12.50, NFM, ---, ---, ---, ---, ---, ---, ---, ---, ---, ATT, CIV AIR MIL AIR USAF MARINE BAND 2 2m HAM 70c HAM 23c HAM LO PMR VHF PMR etc... where the fields are search bank - 1 character (A-J and a-j) _____________________________________________________________________ AR80003&0$1$*(5 for DOSUser’s Manual 15 GETTING STARTED _____________________________________________________________________ lower frequency - 12 characters (0.1 - 1950 MHz) upper frequency - 12 characters (as above) step size - 6 characters ( 50, 100, 200, 500, 1.00, 2.00, 5.00, 6.25, 9.00, 10.00, 12.50, 20.00, 25.00, 30.00, 50.00, 100.0, 200.0, 250.0, 500.0 or any multiple of 50 Hz) mode - 3 characters (WFM, NFM, AM, USB, LSB, CW) attenuator setting - 3 characters (ATT=on, ---=off) comment - 7 characters ASCII upper or lower case Auto mode data Auto mode data is used to determine what mode your AR8000 selects when it is tuned in auto mode. You need to select “AUT” mode from the front panel of the radio to use auto mode tuning. The format used by 3&0$1$*(5 is: address, frequency, mode, step size, half step, (optional) comment 0, 1, 2, 3, 4, 5, 6, 7, 8, 9, 0.100, 0.153, 1.800, 1.842, 2.000, 2.300, 2.500, 3.200, 3.400, 3.500, CW, 0.05, N AM, 9, N CW, 0.05, N LSB, 0.05, N USB, 0.05, N AM, 1, N USB, 0.05, N AM, 1, N USB, 0.05, N CW, 0.05, N ; ; ; ; ; ; ; ; ; ; DATA LW & MW 160 HAM 160 HAM UTILS 120M B UTILS 90M B UTILS 80M HAM where the fields are address - 0 to 127 (maximum) frequency - in mega Hertz (values in the range 0.1 - 1950.0 MHz) mode - WFM, NFM, AM, USB, LSB, or CW step size - in kilo Hertz (one of: 0.05, 0.1, 0.2, 0.5, 1.0, 2.0, 5.0, 6.25, 9.0, 10.0, 12.5, 20.0, 25.0, 30.0, 50.0, 100.0, 200.0, 250.0, 500.0 or any multiple of 50 Hz) step offset - N=none, Y=allow offset of the VFO frequency by half a step in the positive (+) direction to comply with channel allocation in certain bands optional comment - this is preceded by a “;” character and is used as a reminder of what the band being defined is. The comment is not sent to the radio. _____________________________________________________________________ AR80003&0$1$*(5 for DOSUser’s Manual 16 GETTING STARTED _____________________________________________________________________ Whenever you edit text in a window, you MUST use the format described. AR8000 3&0$1$*(5 for DOS checks the data to make sure it can be converted to RS-232 commands: press F10 to run a check. NOTE: You can automatically number memory channels as you edit by pressing Ctrl-N. Every time you press Enter the next memory channel number is entered automatically on the next line. Press Ctrl-N again to turn this option off. _____________________________________________________________________ AR80003&0$1$*(5 for DOSUser’s Manual 17 FILE MENU OPTIONS _____________________________________________________________________ FILE MENU OPTIONS The file menu contains all the menus you need to work with files. The contents of each file is shown inside a window on the desktop. The following options are available: New This creates a completely new (and blank) file window for you to start editing from scratch. You can edit memory or search data. Open F3 Open an existing file for editing, printing or sending to the AR8000. A dialog lets you select a file from disk. In AR8000 3&0$1$*(5 for DOS a simple convention is used where memory files normally have a .MEM extension to the filename, search bank files have a .SCH extension, auto mode files have a .AUT extension and raw data files have a .RAW extension. For example, BRITISH.MEM is a file of memory channel data and DEFAULT.SCH is a file of search bank data. The dialog looks like: NOTE: Search files (.SCH), auto mode (.AUT) and raw files (.RAW) are not listed in the open dialog by default. Simply enter *.SCH, *.AUT or *.RAW into the Name field and press Enter to see these file types. Close Alt-F3 Close the currently selected file. You will be asked if you want to save any changes you have made since opening the file. Save Save the current file under the same name. This will commit all changes. _____________________________________________________________________ AR80003&0$1$*(5 for DOSUser’s Manual 18 FILE MENU OPTIONS _____________________________________________________________________ Save as... Save the current file under a different name. A very similar dialog to that for opening a file is used to enter the new filename. Change dir... Change directory so that files are read or written to a new disk or directory. DOS shell Execute a DOS shell so that you can run other DOS applications before returning to AR8000 3&0$1$*(5 for DOS . Type EXIT Õ (Enter) from the DOS prompt to return to 3&0$1$*(5. PrintF7 Print the currently selected file on a text printer. AR80003&0$1$*(5 for DOS will print to the printer connected to the default port (called ‘LPT1’ or ‘PRN’). Make sure it is connected and working correctly before starting to print. Send file to RX... Send the current file to the AR8000 by interpreting the text displayed in the window and creating RS-232 commands for the radio. You can send memory files or search bank files. If you have not used the default file extensions (.MEM for memory files, .SCH for search bank files and .AUT for auto mode files), you will be asked which type the current file is. Get file from RX... Gets data from the radio and places it in the currently selected window. Open a new file to get data without appending it to existing data. You will be asked if you want to select memory data or search bank data. NOTE: This option is unavailable for auto mode (.AUT) files. Import from raw file... Import a file of search bank or memory data that was previously saved by another application (not supplied) in raw format. Raw format is the format of text data produced by the radio itself in response to command typed at the keyboard of a _____________________________________________________________________ AR80003&0$1$*(5 for DOSUser’s Manual 19 FILE MENU OPTIONS _____________________________________________________________________ terminal program. This feature is to make AR8000 3&0$1$*(5 for DOS interoperable with your existing data. Export to raw file... This is complementary to the import function. When you export a memory or search bank file to raw format, the data used by AR8000 3&0$1$*(5 for DOS is converted to the format used by RS-232 commands typed from the keyboard of a terminal program. The same filename is used for the exported data except that the extension is always .RAW (eg if the memory file is called BRITISH.MEM, the raw file will automatically be called BRITISH.RAW). This feature is included so that AR8000 3&0$1$*(5 for DOS is interoperable with your existing data. NOTE: This option is unavailable for auto mode (.AUT) files. Terminal This menu option opens a new text terminal window so that commands can by typed in for dialog with the AR8000 using the RS-232 interface. This gives you full control over the radio from within 3&0$1$*(5. You can have several terminal windows open at once if required. Refer to the section on the Terminal Window for more information. Exit Exit from AR8000 3&0$1$*(5 for DOS and return to the DOS prompt. You can also type Alt-X. NOTE: If you changed any of the program’s parameters (eg machine speed), these will be saved in the AR8000.INI initial values file. You may like to keep a printout of the file in case you want to restore parameters that have changed. _____________________________________________________________________ AR80003&0$1$*(5 for DOSUser’s Manual 20 EDIT MENU OPTIONS _____________________________________________________________________ EDIT MENU OPTIONS The edit menu provides you will all the facilities you need to edit the data displayed inside the windows. Most of the edit menu options work by copying, cutting and pasting using a clipboard: this is not the same as WindowsTM Clipboard. You often need to highlight areas of text before using edit menu options. This can be done using the mouse or by moving the cursor with the arrow keys while holding the Shift key down. The following options are provided: Undo Reverse the last edit operation to restore the text in the current window and correct an error when editing. Cut Shift-Del Remove the highlighted text from the current window and put it in the clipboard. Copy Ctrl-Ins Copy the highlighted text from the current window into the clipboard. Paste Shift-Ins Place text in the clipboard into the current window at the cursor position. Clear Ctrl-Del Delete the highlighted text from the current window. Renumber Renumber each line of text so that the channel numbering is continuous. The program checks the file name to see if it needs to renumber a memory file or a search bank file. You will be asked to confirm which type of data you are using if the program cannot work it out from the filename. NOTE: This option is unavailable for auto mode (.AUT) files. _____________________________________________________________________ AR80003&0$1$*(5 for DOSUser’s Manual 21 EDIT MENU OPTIONS _____________________________________________________________________ Check F10 Check the syntax of each line of text and report any errors that will prevent AR8000 3&0$1$*(5 for DOS from creating RS-232 commands for sending to the radio. The format required for the text is described in a previous section of this manual. The following syntax checks are made: • • • • • • • • • • • Invalid channel number - not A00-j49 or A-j Channel number not in ascending order Invalid frequency - not in range 0.1 - 1950.0 MHz Invalid step size - not in range 50 Hz - 999.995 kHz Invalid mode type - not WFM, NFM, AM, USB, LSB, CW Invalid attenuator setting - not ATT or --Invalid lower frequency (search data only) Invalid upper frequency (search data only) Lower frequency is higher than upper (search data only) Frequency is not divisible by current or previous step (auto mode data only) Invalid step offset (auto mode data only) If an error is detected, you will be told what the error was and on what line it was found. Go to the relevant line, make a correction and try again. When editing auto mode data, a simple set of rules must be followed so that the radio works correctly when the data is transferred to it. The rules are as follows: 1. The frequencies must be listed in ascending order (0.1 - 1950 MHz). 2. Each step frequency must be a multiple of 0.05 kHz (50 Hz). 3. The current frequency must may a whole number of steps in it. For example: 54, 29.200, NFM, 10, N is OK because 29.200 is divisible by 10 kHz, but 1, 0.150, AM, 9, N is not OK because there is not a whole number of 9 kHz steps in 0.150 MHz 4. The current frequency must be divisible by a whole number of steps used in the previous band definition. For example, for line 65: 64, 70.000, CW, 0.05, N 65, 70.030, USB, 1.0, N is OK because 70.030 is divisible by a step size of 0.05, but _____________________________________________________________________ AR80003&0$1$*(5 for DOSUser’s Manual 22 EDIT MENU OPTIONS _____________________________________________________________________ 64, 70.000, CW, 9.0, N 65, 70.030, USB, 0.05, N is not OK because 70.030 is not divisible by a whole number of 9.0 kHz steps You should check auto mode data carefully before sending the data to your AR8000, improper operation of the radio may otherwise result. NOTE: Although the guaranteed frequency coverage of the AR8000 is 500 kHz - 1900 MHz, its microprocessor allows tuning over the range 100 kHz - 1950 MHz. 3&0$1$*(5 supports this wider tuning range for your convenience. _____________________________________________________________________ AR80003&0$1$*(5 for DOSUser’s Manual 23 ACKNOWLEDGEMENT _____________________________________________________________________ FIND MENU OPTIONS This menu contains options for searching through the text you are editing and conducting a search and replace. The options are greyed, or disabled, if you have no files open. Find... This option lets you define a string of characters to search for in the current text window. The following dialog is displayed when you select find: Type the text you want to search for in the Text to find field. You can search for strings that exactly match the case of the text you typed or for whole words only by ticking the two check boxes below before selecting OK. Replace... The dialog for this option looks very similar to that for Find, however, this menu option lets you search for the text you specify then replace it with an alternative text string. Enter the text you wish to find in the Text to Find field and the text to replace it with in the New text field. In addition to the Case sensitive and Whole words only check boxes, you can also request a prompt before replacing or request that all occurrences of the search text should be replaced. The dialog looks like: Search again You will need to use this menu option if you did not request Replace all when doing a Replace. Select Search again to resume searching when stopped. _____________________________________________________________________ AR80003&0$1$*(5 for DOSUser’s Manual 24 SETUP MENU OPTIONS _____________________________________________________________________ SETUP MENU OPTIONS This set of menu options will allow you to alter the setup of AR8000 3& 0$1$*(5 for DOS to match the RS-232 settings of your AR8000 and also to adjust the values of parameters in the radio which are used for in general operation (eg: the password). Serial Port... This option lets you select RS-232 serial port parameters to match your radio. The dialog that is displayed looks like: You can select the serial port on your computer (COM1 to COM4), the baud rate, the delimiter (either CR or CR,LF) and the software flow control protocol (either XON/XOFF or none). In the dialog above, COM2 is selected for use at 9600 baud with CR,LF delimiters and no flow control protocol. Once selected, the parameters will be stored in the AR8000.INI file so that they will be used next time you run the program. You must ensure that the parameters specified in the AR8000 3& 0$1$*(5 for DOS software EXACTLY match the settings in your AR8000. You will get unreliable or corrupted data transfers if the settings do not match. Particular care is needed with the delimiter. Refer to section 18 of your AR8000 Operating Manual for instructions on setting and reviewing the RS-232 parameters in your radio. Machine Speed... This menu option lets you ‘tune’ the speed of RS-232 command transfers so that you can obtain maximum performance from your system. The following dialog lets you alter the value of the delays used to slow down RS-232 commands: _____________________________________________________________________ AR80003&0$1$*(5 for DOSUser’s Manual 25 SETUP MENU OPTIONS _____________________________________________________________________ Move the slider to alter the amount of delay used. ‘Fast’ machines have the largest delay and ‘Slow’ the smallest. You should start with the slider set to somewhere near the ‘Fast’ end of the scale to begin with (especially if you have a DX2/66 machine or faster). You only need to set the delay once. The value you select is stored in the AR8000.INI file so that it will be used again next time you run the program. Mouse... The Mouse... menu option brings up the Mouse options dialog box, where you can set various options that control how your mouse works: how fast a double-click is and which mouse button (right or left) is active. This dialog box looks like: The Mouse double click slider bar adjusts the double-click speed of your mouse. Reverse mouse buttons makes the right mouse button take on the normal functions of the left and vice versa. Colours... The Colours... menu option brings up the Colors dialog box, which lets you customise the colours of the display. The Colors dialog box has different controls depending on the type of display you are using: on colour and black-andwhite systems (that is, systems with a colour graphics card but a monochrome monitor), it contains two colour palettes; on monochrome systems, it contains a set of radio buttons instead of the palettes. A typical dialog for a colour system is shown below: The Group list box contains the names of the different region of the program that you can customise. When you select a region from the Group list, the _____________________________________________________________________ AR80003&0$1$*(5 for DOSUser’s Manual 26 SETUP MENU OPTIONS _____________________________________________________________________ Item list box displays the names of the different views in that region. On both colour and black-and-white systems, use the Foreground and Background palettes to modify colours. On monochrome systems, use the Colors set of radio buttons to modify the character attributes. Changes do not take effect on the desktop until you close the Colors dialog box by choosing OK. Password... This menu option displays a dialog that lets you alter the password stored in the AR8000. The current password is read from the radio and placed in the dialog when it opens. For example: Enter any 4-digit password value into the Password field and click on OK to change the password in the radio. NOTE: You can disable the password feature by entering “0000”. Power Save Delay... This menu option provides a dialog for altering the power save delay. This is the length in time in seconds the radio remains active after the squelch last closed or the radio’s keypad was used. The radio then enters a “dormant” mode where the power to the IF circuitry is cycled so that your batteries are conserved. Use the dialog that is shown to alter the amount of time the radio remains active before it returns to the “dormant” state. The dialog looks like: The current power save delay value is copied into the dialog when it opens. Enter a two-digit value (the number of seconds) into the dialog (00-99) then click on OK to transfer the new value to the radio or Cancel to abort and keep the old value. NOTE: Enter “00” to disable the power save feature. NOTE: Refer to section 16 of your AR8000 Operating Manual for more details of the power save feature. _____________________________________________________________________ AR80003&0$1$*(5 for DOSUser’s Manual 27 SETUP MENU OPTIONS _____________________________________________________________________ Power Save Cycle... This menu option provides a dialog for altering the power save cycle period. This is the length in time in seconds the radio remains dormant then returns to active operation before becoming dormant again. The dialog looks like: The current power save cycle value is copied into the dialog when it opens. Enter a single digit value (the number of seconds) into the dialog (0-9) then click on OK to transfer the new value to the radio or Cancel to abort and keep the old value. NOTE: Refer to section 16 of your AR8000 Operating Manual for more details of the power save feature. Priority Scan Interval... This menu option lets you alter the priority scan interval. The priority scan interval is the period of time between checks for activity on the priority memory channel when scanning, searching or monitoring. The dialog that is used to alter the value looks like: The factory default value is 05 seconds, but you can change the value from 01 -19 sec using this dialog. NOTE: Refer to section 12 of your AR8000 Operating Manual for more details of priority operation. _____________________________________________________________________ AR80003&0$1$*(5 for DOSUser’s Manual 28 SEARCH AND SCAN MENU OPTIONS _____________________________________________________________________ SEARCH AND SCAN MENU OPTIONS A number of options are provided for adjusting search and scan parameters. Both search and scan are described here because the parameters have the same meaning but you will need to select options form the Search menu to adjust search parameters and options from the Scan menu to adjust scan parameters. NOTE: “Search” refers to automatic tuning operations between set frequency limits. “Scan” is automatic tuning based on memory channel contents. Squelch level... Use the dialog obtained from this menu option to alter the signal level required to open the squelch when searching or scanning. The value can be 1 to 7 with zero being interpreted as OFF. The dialog looks like: NOTE: Refer to section 10 of your AR8000 Operating Manual for more details on scanning and section 13 for more details on searching. Audio squelch... This menu option displays a dialog to switch ON/OFF audio detection when the squelch opens. When switched ON, the receiver will not stop on a channel if the signal is not modulated. When switched OFF, the radio will always stop when the squelch opens during search or scan operations. The dialog looks like: Enter “1” into the Audio Squelch field to turn on audio squelch or “0” to switch it off. NOTE: Refer to section 10 of your AR8000 Operating Manual for more details on scanning and section 13 for more details on searching. Delay time... _____________________________________________________________________ AR80003&0$1$*(5 for DOSUser’s Manual 29 SEARCH AND SCAN MENU OPTIONS _____________________________________________________________________ The delay time is the period the receiver will stay on an active channel after the signal has disappeared and the squelch has closed before resuming the search or scan. Use this dialog to set the delay time (in seconds). You can choose 0.1s to 9.9s. The dialog for search mode looks like: If you are setting up the radio for search mode, you can enter “FF” to prevent the radio from resuming the search. If you have done this, you will have to use the up/down keys on the radio’s front panel to manually resume the search. NOTE: Refer to section 10 of your AR8000 Operating Manual for more details on scanning and section 13 for more details on searching. Free time... The free time is the period the radio will stay on an active frequency before resuming the search or scan without waiting for the signal to disappear. Use this dialog to change the free time (in seconds). The range of values you can enter are 01 99 sec. The dialog looks like: NOTE: Refer to section 10 of your AR8000 Operating Manual for more details on scanning and section 13 for more details on searching. _____________________________________________________________________ AR80003&0$1$*(5 for DOSUser’s Manual 30 WINDOWS MENU OPTIONS _____________________________________________________________________ TERMINAL WINDOW A simple to use text based terminal window is provided with 3& 0$1$*(5 for DOS for full control of your AR8000. You can type any of the text commands listed in the CU8232 Remote Control Interface Manual into the terminal window to send them to the radio via the RS-232 connection. WARNING: You need to type commands in upper case. Make sure that you have Caps Lock on when typing into the terminal window. The terminal window looks just like an empty file window except that it is titled as “Terminal” and the arrow keys, cut and paste, and most File menu options are not available. You can resize and position the window and also operate the scroll bars on the bottom and right hand size. A typical terminal window may look like this: The example above shows the MR command and the response from the AR8000. You can use the File|Terminal menu option to open a terminal window. Close the window by clicking on the [] symbol in the top left hand corner of the window. It is possible to have more than one open at a time if you wish. NOTE: Refer to your CU8232 Remote Control Interface Manual for more details on the range of commands that are available. NOTE: There is a delay of a few seconds after a command for reading a full bank of memory data (such as MA) before any text is actually displayed because of the large quantity of data that has to be read. There is no such delay for other commands. _____________________________________________________________________ AR80003&0$1$*(5 for DOSUser’s Manual 31 ACKNOWLEDGEMENT _____________________________________________________________________ MOVING COPY PROTECTION The CCMOVE.EXE utility can be used to place a copy protection ‘token’ back onto the AR8000 3&0$1$*(5 for DOS distribution floppy disk or to move it between systems. You may need to move the copy protection token back onto you original distribution disk in the following circumstances: • • • • When installing disk compression software When upgrading AR8000 3&0$1$*(5 for DOS When moving the program to a new computer When returning the original disk to your AOR distributor (for updates etc.) To transfer the token onto the distribution floppy disk, run the CCMOVE.EXE utility from the original distribution disk by first placing the disk in drive A: of your computer then logging onto the drive by typing the following at the DOS prompt: A: Õ (Enter) Now run the transfer utility to move the copy protection token back onto the original distribution disk by typing the following at the DOS prompt: CCMOVE C:\AR8000 A: Õ (Enter) Here, it is assumed that the AR8000 3&0$1$*(5 for DOS software was installed into a directory called ‘AR8000’ in the root directory of your hard disk drive C:. If you installed it somewhere else you must include the correct location instead. You can use the CCMOVE.EXE utility to have copies of the program on several computers at once, however the program will only work on a machine that has a copy protection token on it. You will not be able to copy the distribution disk itself. This AOR software product comes with two licenses. Contact your AOR dealer to obtain additional copies of the software. _____________________________________________________________________ AR80003&0$1$*(5 for DOSUser’s Manual 32