1
Printing with Mac OS X: An ICC Workflow 12
STEP 6: Choosing Your Printer Driver Settings & Printing Your Image
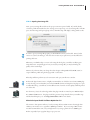
Take note of the ‘Print Space Profile’ selection within the ‘Print with Preview’ dialog box then click
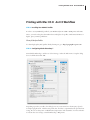
the ‘Print...’ button. The following dialog box will appear.
1
2
Select the same printer model and
media input type you made in Step 4
Select each of the menu choices here
to setup your printer driver’s various
features - when done, create a Preset!
The Apple ‘Print’ dialog looks very similar to the standard Apple LaserWriter or AdobePS PostScript
drivers under OS 9. With the introduction of Mac OS X, Apple has rest the look and feel for all
printer manufacturer’s to follow. Epson has tried to implement our driver technology from Mac OS
9 to X, while keeping the Apple interface guidelines intact. As a result, Pre OS X users might find
this driver a little unusual, while new OS X users will find it quite easy to use.
1
First, make sure you select the printer model and media input type that you also selected in step 4.
2
Using this pull down menu, you must navigate through the various driver features. Once you’ve
selected all your driver settings, you can create a preset by pulling down the ‘Presets:’ menu to save
your settings.
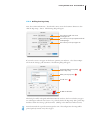
Many Epson users like to go through their selections repeatedly to be sure they are correct before
printing. This process sometimes causes the driver to ‘reset’ all your settings back to a default mode,
forcing you to redo all your driver settings. This can be very frustrating.
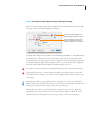
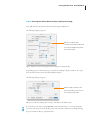
The best advice I can give is to go through the driver settings from top-to-bottom. When done,
immediately create a preset for future use. Do NOT be tempted to click on or ‘flash’ the ‘Presets:’
pull down menu after selecting all your driver settings. Doing so will reset the entire driver!