1
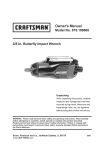
0M-199601
IRAFTSMAH I
Owner's Manual
Model No. 875.199601
6=in. Orbital Palm Sander
Unpacking
When
unpacking
inspect
occurred
loose
before
this
for any damage
during
fittings,
putting
transit.
bolts,
this
product,
carefully
that may have
Make
sure
any
etc. are tightened
product
into service.
WARNING:
Please read and save these safety and operating instructions.
Read carefully
before attempting
to assemble, install, operate or maintain the product
described.
Protect yourself and others by observing all safety information.
Failure to comply with
instructions
could result in personal
injury and/or property
damage! Retain instructions
for future reference.
Sears, Roebuck
and
www.CRAFTSMAN.com
Co., Hoffman
Estates,
IL 60179
0807
Owner's
Manual
Model
No. 875.199601
Owner's
Manual
Model
No. 875.199601
90 PSI Maximum
This tool is designed to operate at an air
_, Features
& Benefits
ONE YEAR FULL WARRANTY
ON
_, Specifications
_, Product Warranty
CRAFTSMAN
_, Compressor
If this Craftsman tool fails to give
complete satisfaction within one year
from the date of purchase, RETURN IT
TO ANY SEARS STORE OR PARTS &
REPAIR CENTER OR OTHER
CRAFTSMAN OUTLET IN THE UNITED
Requirements
_, General Safety Instructions
_, Installation and Operation
_, Maintenance
_, Exploded View Drawing & Parts List
_, Troubleshooting
TOOL
STATES FOR FREE REPAIR (or
replacement if repair proves impossible).
Read Operating
gauge pressure (90 PSI) maximum,
instructions
tool. Use of higher air pressure can, and
and warnings
The Craftsman
875.199601
6-in. Orbital
Sander is designed for applications
as sanding,
polishing
variety of surfaces
and fiberglass
and finishing
including
air pressure places the internal
Always
Wear Approved
wood, metal
unit. Tool features
inlet swivel, a low 78dBa operating
Eye Protection
Impact resistant eye protection
should
meet or exceed the standards
ANSI Z87.1, Occupational
an air
noise
level and a built-in regulator which allows
speed control during
operation.
set forth in
Average Air Consumption ....... 3.1 SCFM
Recommended
Hose Size ............... 3/8"
Max. Air Pressure ......................... 90 PSi
tool failure.
Prop 65
and
Look for marking Z87.1 on your eye
California
Some dust created by power
date of purchase.
style.
This warranty does not include
expendable parts, such as lamps,
Hearing
batteries,
bits or blades.
to ensure that it is an approved
sanding,
sawing, grinding, drilling and other
construction
activities contains
Protection
Hearing protection
is Recommended
should be used when
the noise level exposure
equals or
average
chemicals
defects
known
or other
Some examples
to cause cancer,
reproductive
birth
harm.
of these chemicals
are:
This warranty gives you specific legal
rights, and you may also have other rights
exceeds an 8 hour time-weighted
sound level of 85dBA. Process noise,
Lead from lead based paint, crystalline
silica from bricks and cement and other
which vary from state to state.
reflective surfaces, other tools being
masonry
Sears, Roebuck and Co.,
Hoffman Estates, IL 60179
operated
chromium
lumber.
nearby, all add to the noise level
in a given work area. If you are unable to
Light Use - 26 Gallon
Typical Use - 33 Gallon
to Vibration
ventilated
safety
to vibration or very
cause injury. Discontinue
tool if you experience
discomfort
and
Your risk from those exposures
Prolonged exposure
hand and arm movements
arsenic
from chemically-treated
can
the use of any
varies,
depending
on how often you do this
type of work. To reduce your exposure
to these chemicals:
work in a well
Pneumatic tools can vibrate during use.
repetitive
Heavy Use - 25 Gallon Professional
Exposure
products,
we
the use of hearing protection.
Avoid Prolonged
area, and work with approved
equipment,
such as dust masks
that are specifically
designed
out microscopic
particles.
to filter
tingling, numbness,
or pain in your hands or arms.
You should consult your physician before
resuming
ENG-2
premature
protection
recommend
Weight .......................................
2.02 Ibs.
Length .................................................
7"
Air Inlet .............................................
I/4"
under loads and stresses
Eye and Face Protection.
determine your noise level exposure,
Free Speed ......................... 12,000 RPM
Pad Size ..............................................
6"
Spindle Thread .......................... 5/16"-24
Orbital Stroke .................................
3/16"
components
they were not designed for, causing
such
on a
at the
may cause injury. Also, the use of higher
commercial or rental purposes, this
warranty applies for only 90 days from the
- and it can be used as a
vac or a non-vac
convenient
tool is ever used for
before
operating any pneumatic tool.
Educational
If this Craftsman
pressure of 90 pounds per square inch
Instructions
Please become familiar with all the
use of tool.
ENG-3
Owner's
Manual
Disconnect
Model
No. 875.199601
the air tool from air supply
and during non-operation.
Do not depress
trigger
when connecting
Manual
Some materials
before changing tools or attachments,
servicing
Owner's
tar, contain
Use attachments
designed for use with
air powered tool. Always examine
could
accessories
prolonged
before mounting
for chips,
such
as adhesives
chemicals
cause
serious
Model
whose
injury
exposure.
and
vapors
with
Always
No. 875.199601
work in a
Tools which cut, shear, drill, staple,
punch, chisel, etc. are capable of
the air supply hose.
cracks,
causing
serious
Never trigger
Never use mounted points or other
working
part of the tool away from
accessories that have been dropped or
exposed to water, solvent or extreme
hands and body.
the tool when not applied
to a work object.
Attachments
attached.
must be securely
Loose attachments can cause
or signs
temperature
clean, dry, well ventilated
of damage.
Protect air lines from damage
enclosure for one minute after mounting
or
any accessory.
discs,
or any
other person. Serious injury could occur.
Check
air hoses
for weak or worn
Tools which contain moving
or drive other
grinding
puncture.
Never point an air tool at oneself
Always
use accessories
conditions
before each use. Make sure all
rating
connections
are secure.
RPM rating.
injury.
Keep the
changes, it is a good practice
to operate the tool in a protected
serious injury.
area.
with an RPM
that meets or exceeds
the tool
moving
wheels,
elements,
tools, such
sockets,
etc., can become
as
sanding
entangled
in
hair, clothing, jewelry and other loose
objects, resulting in severe injury.
Never wear loose fitting apparel
contains
loose straps
After
an air tool has been lubricated,
will discharge
through
the exhaust
oil
port
during the first few seconds of
operation.
Thus, the exhaust port must
be covered
with a towel before applying
air pressure.
which
or ties, that could
become tangled in moving parts of the
tool. Remove any jewelry, watches, etc.,
which
Release all pressure from the system
tool.
before
parts.
attempting
relocate
to install, service,
might become
caught
Always disconnect
sander from air
supply before attaching the sanding
Tie up or cover long hair.
pad. Do not operate
or perform any maintenance.
Keep all nuts, bolts
and screws
tight
Inhalation
hazard: Abrasive
and ensure equipment is in safe working
as grinders,
condition.
generate
which
sanders
tools, such
materials
to human
system.
Always
lungs
Improperly
accessories
wear
Maintain
MSHA/NIOSH approved, properly fitting
face mask or respirator when using
such tools.
compressor.
hose that is damaged,
weak or worn.
replace
binding
a worn or damaged
injury
could
occur.
tool, with sharp cutting
edges, reduces the risk of binding
is easier to control.
There is a risk of bursting
any
Always
if
tightened.
the tool with care. A properly
maintained
damaged.
Keep hoses away from
pad is not securely
maintained
tools and
can cause serious injury.
Never carry a tool by the hose or pull
the hose to move the tool or a
heat, oil and sharp edges. Replace
the sander
sanding
pad. Serious
and cut-off tools
dust and abrasive
can be harmful
and respiratory
of moving
and
if the tool is
Check for misallgnment
parts, breakage
or
of
parts and any other condition
that
affects the tool's operation. If damaged,
have the tool serviced
ENG-4
by the
Keep hands away from moving
before
using.
ENG-5
Owner's
Manual
Model
No. 875.199601
Owner's
Manual
be a flexible
Air Tool Hook Up
Main line=l/2"
[]_e._
Slopesdown
....
h., L!
movement
ID mininum
an_d away
Model
No. 875.199601
hose in order to isolate
of the compressor.
SPEED ADJUSTMENT
[]_
....
Take Off Line
Route the initial take-off line (pipe) as
This sander is equipped with a regulator
straight
for speed adjustment
up the shop wall and as high
as possible.
This will help minimize
water leaving the compressor
traveling
(See Replacement
Parts List for Specifications).
and
ATTACHING
through system
SANDING
PAD
6-IN. SANDERS
Stop
Valve
Drain
Valve
_
_n
Line
Isolation
Hose
Slope the main lines down at least
Adhesive
3/4 inch per 10 feet of pipe away
To apply the sandpaper,
from air compressor;
edge and press self adhesive paper onto
the condensate
Air Compressor
Figure 1
Air Hose Hook Up
Before the tool is connected to the air
supply, clear the air hose of accumulated
wrench in between the pad cover and
Never carry a tool by the hose or pull the
unrealistic
The
sanding pad. Rotate the pad until the
hose to move the tool or a compressor.
further the drop, the more that
wrench engages on the two flat edges of
Keep hoses away from heat, oil and sharp
condensation
the balancer shaft. Once engaged,
edges. Replace any hose that is damaged,
drier the air will be when it reaches
the wrench tightly and rotate the sanding
weak or worn.
the water separator.
pad to the right to tighten and left to
loosen.
Small (home) shop hard piping:
is shown.
Some helpful tips are:
Always use hoses and pipes rated for
A 3/8 inch ID air hose is required up to a
higher pressure
length of 25 feet. A 3/8 inch ID hose
encounter.
than your system will
longer than 25 feet will cause a pressure
If
more length is required, a ½ inch ID air
Be sure all hoses
and fittings are the correct size and
before using the tool.
Never use PVC pipes for
compressed
explosion
air piping systems
and serious
as
injury may
result.
The connection
the water separator,
hold
that get into
install the take-
off line on the top of the main air
hose hook up.
hose is recommended.
can occur, and the
In order to reduce the amount of
A piping diagram for a typical home shop
drop and may impede performance.
for a small shop).
water and contaminants
air
To remove the sanding pad, insert the pad
although
Air Hoses for your Air Tools
1 Illustrates a recommended
as the size of your shop
will allow (50 feet is optimal,
by running air freely
through the air hose for 5-10 seconds.
correctly secured
the pad. Change sandpaper as needed.
Place the first drop as far from the
compressor
Figure
with the flow of air
align outside
and away from the compressor.
I I Valve
dust and moisture
this will draw
backed discs are recommended.
supply line for each air drop.
To use vacuum feature, remove the
vacuum cover (Ref. #43) attach your
vacuum hose. A vacuum hose adapter /
A Drain line should be placed at the
reducer may need to be purchased
end of the main line for condensate
separately
drainage.
the tool.
to adapt your vacuum hose to
Drain valves should be placed at the
end of branch lines and the drain
line, and drained daily.
from the compressor
to the initial take-off hard pipe must
ENG-6
ENG-7
Owner's
SANDING
Manual
Model
6-IN. SANDERS
No. 875.199601
run for approximately
ensure oil has been evenly distributed
enough to remove the high spots and any
throughout
excessive
stored in a clean and dry environment.
second sandpaper
Follow with a
Manual
Model
No. 875.199601
30 seconds to
Begin sanding with an abrasive grit coarse
roughness.
Owner's
the tool. The tool should be
Exploded
View Drawing
38
using a grit one to two
ranges finer. Continue with successively
Recommended
finer grits until the desired finish is
Use air tool oil or any other high grade
obtained.
turbine oil containing
Do not change from a coarse
Lubricants
moisture
;4o Ms
absorbent,
grit to a very fine grit in one step. In doing
rust inhibitors,
metal wetting agents and
so, it is difficult to remove swirl marks that
an EP (extreme pressure) additive. See
might have been made by the coarse grit
Figure
3 for location/air
j_27
inlet.
4 _
_
31<
abrasive. Always use the finest grit
practical for the sanding operation.
7
Lubricate air motor here
Lubrication
10-_
An in-line filter-regulator-lubricator
is recommended
as it increases
and keeps the tool in sustained
The in-line lubricator
11.
(fig 1)
15
tool life
operation.
Parts List
should be regularly
checked and filled with air tool oil. Proper
adjustment
of the in-line lubricator
performed
by placing a sheet of paper
next to the tools exhaust
seconds. The lubricator
is
ports and holding
the throttle open approximately
30
is properly set
when a light stain of oil collects on the
paper.
Excessive amounts of oil should be
avoided.
In the event that it becomes
necessary
to store the tool for an
extended
period of time (overnight,
weekend,
etc.), it should receive a
generous
amount of lubrication
the air inlet (Figure
ENG-8
,
through
3). The tool should be
Figure
3
Ref.
1
2
3
4
5
6
7
8
9
10
11
12
13
14
15
16
17
18
19
20
21
22
Description
Housing
Housing Cover
Snap Ring
Bearing
Spring Pin
Rear End Plate
Rotor
Rotor Blade (5)
Cylinder
Front End Plate
Bearing
O-Ring
Lock Ring
Crank Shaft
Key
Bearing (2)
Washer
Bearing Seal
Washer
Snap Ring
Balancer Shaft
Pad Cover
Part No.
9287001A
9287002A
9287003
9287004
9287005
9287006
9287007
9287008
9287009
9287010
9287011
9287012
9287013
9287014
9287015
9287016
9287017
9287018
9287019
9287020
9287021
9287043
Ref.
23
24
25
26
27
28
29
30
31
32
33
34
35
36
37
38
_Q
40
41
42
43
44
45
Description
Sanding Pad
Lever
Pin
E-Clip (2)
Snap Ring
O-Ring
Valve Stem
O-Ring
O-Ring (3)
Regulator
Spring
O-Ring
Valve Screen
Outlet Bushing
Muffler Inset
Muffler Cap
n_pi_ c (_)
Air Inlet Bushinq
Pad Wrench
Vacuum Adapter
Vacuum Cover
Craftsman Logo Insert
O-Ring
Part No.
9287023
9287024
9287025
9287026
9287027
9287028
9287029
9287030
9287031
9287032
9287033
9287034
9287035
9287036
9287037
9287038
Q_RTN_Q
9287040 I
9287041
9287042
9287045
9287049
9295002
ENG-9
Owner's
Manual
Model
No. 875.199601
Owner's
Manual
Model
No. 875.199601
Notes:
Tool runs
slow or will
1. Grit or gum in tool
not operate.
1. Flush the tool with air tool oil, gum
solvent, or an equal mixture of SAE 10
motor oil and kerosene. Lubricate the tool
after cleaning
2. No oil in tool
2. Lubricate the tool according to the
lubrication instructions in this manual
3. Low air pressure
3a. Adjust the regulator on the tool to the
maximum setting (If applicable)
3b. Adjust the compressor regulator to tool
maximum while the tool is running free
4. Air hose leaks
5. Pressure drops
4. Tighten and seal hose fittings if leaks are
found
5a. Be sure the hose is the proper size.
Long hoses or tools using
large volumes of air may require a hose with
an I.D. of 1/2" or larger depending on the
total length of the hose
5b. Do not use multiple number of hoses
connected together with quick connect
fittings. This causes additional pressure
drops and reduces the tool power. Directly
connect the hoses together
Moisture
1. Water in tank
1. Drain tank. (See air compressor manual).
Oil tool and run until no water is evident. Oil
tool again and run 1-2 seconds
2. Water in the air lines/
hoses
2a. Install a water separator/filter. NOTE:
Separators only work properly when the air
passing through the separator is cool.
Locate the separator/filter as far as
possible from the compressor
blowing out
of tool
2b. Install an air dryer
2c. Anytime water enters the tool, the tool
should be oiled immediately
Sanderstops
when applied
to work
surface
ENG-10
1. Spindle lock is in the
locked position
1. Unlock spindle (Figure 3)
ENG-11
I RAFTSMAH I
Lijadora manual
Manual dei Propietario
Modelo No. 875.199601
de vibraciones
de 6"
Desempaquetar
Despues
de desempaquetar
examinelo
cuidadosamente
da_os que pudieron
durante
el transporte.
apretar
cualquier
antes de poner
haber
el producto,
para identificar
ocurrido
Cerci6rese
accesorio,
este producto
perno,
de
etc.,
en servicio.
ADVERTENCIA:
Lea y guarde estas instrucciones
de seguridad y operaci6n.
Lea
detalladamente
antes de tratar de ensamblar,
instalar, operar o mantener el producto
descrito. Prot_jase usted y protega a los demos respetando
toda la informaci6n
de
seguridad.
El incumplimiento
con estas instrucciones
podria
resultar en una lesi6n
personal,
un da_o de la propiedad
o ambos. Conserve las instrucciones
como
referencia
futura.
Sears, Roebuck
www.CRAFTSMAN.com
and Co., Hoffman Estates,
IL 60179
0807
Manual del Propietario
Modelo
Caracteristicas y operaci6n
Especificaciones
Garantia del producto
Requisitos del compresor
Instrucciones de seguridad importantes
Instalaci6n y operaci6n
Mantenimiento
Piano de vista despiezada y lista de
piezas
Localizaci6n y soluci6n de fallas
Esta lijadora de vibraciones de 6 pulgadas
Craftsman, Modelo 875.199601, esta
disefiada para usar en apticaciones como
en el Iijado, pulido y acabado de una
variedad de superficies, inctuidas
maderas, metaies y fibras de vidrio, y
puede usarse o no como una unidad
aspiraci6n. La herramienta consta de un
mecanismo giratorio de admisi6n de aire,
un bajo niveI de ruido de operaci6n de 78
dBa y un regulador incorporado que
permite el control conveniente de veIocidad
durante Ia operaci6n.
No. 875.199601
GARANTiA COMPLETA POR UN ANO DE
HERRAMIENTA CRAFTSMAN
Siesta herramienta Craftsman falIa en
proporcionarte una satisfacci6n compteta
dentro de un afio a partir de su fecha de
compra, DEVU¢:LVALAA CUALQUIER
TIENDA O CENTRO DE PIEZAS Y
REPARAClON DE SEARS U OTROS
ESTABLEClMIENTOS
DE SEARS EN
LOS ESTADOS UNIDOS, PARA UNA
REPARAClON GRATIS (o reemptazo si Ia
reparaci6n es imposibte).
Si esta herramienta Craftsman
se usa para fines comerciales
aiquiIer, esta garantia se apiica
por 90 dias a partir de Ia fecha
alguna vez
o de
soIamente
de compra.
Esta garantia no inctuye Ias piezas
consumibies, como Iamparas, baterias,
brocas u hojas.
Esta garantia Ie proporciona derechos
Iegales especificos, y usted puede tener
tambien otros derechos que varian de
estado a estado.
Sears, Roebuck and Co.,
Hoffman Estates, IL 60179
Velocidad libre .............................. 12,000 RPM
Tamafio de almohadilla .................................
6"
Rosca del husillo ................................. 5/16"-24
Carrera orbital ...........................................
3/16"
Peso ................................................
2.02 libras
Longitud ........................................................
Admisi6n de aire ........................................
7"
1/4"
Consumo promedio de aire .............. 3.1 SCFM
Tamafio recomendado de la manguera ...... 3/8"
Presi6n de aire max ..............................
90 PSI
SPA-2
Poco uso - 26 galones
Uso regular
- 33 galones
Uso pesado - 25 galones profesional
Manual del Propietario
Lea las instrucciones
de operacion
FamiIiaricese con todas Ias instrucciones y
advertencias antes de usar cuaiquiera
herramienta neumatica.
Use siempre proteccion adecuada para
los ojos
La protecci6n ocular resistente aI impacto
debera satisfacer o superar Ias normas
especificadas en ANSI Z87.1, bajo el tituIo
Protecci6n ocular y facial ocupacional y
educativa. Busque Ia marca Z87.1 en su
protector de los ojos para asegurar que es
un estiIo aprobado.
Se recomienda proteccion de los oidos
La protecci6n de los oidos debe usarse
cuando Ia exposici6n de niveI de sonido
iguala o excede un niveI promedio
ponderado por tiempo, de 8 horas, de
85dBA. El ruido deI proceso, superficies
reftectoras, otras herramientas operadas
en Ia cercania, todos agregan aI niveI de
ruido en un area determinada de trabajo. Si
no es posibte determinar Ia exposici6n al
nivel de ruido, se recomienda usar
protecci6n auditiva.
Evite la exposicion prolongada a la
vibracion.
Las herramientas neumaticas pueden
vibrar durante su uso. La exposici6n
prolongada a Ias vibraciones o los
movimientos muy repetidos de manos y
brazos pueden causar Iesiones. Interrumpa
el uso de cuaIquier herramienta si
experimenta cosquiIIeo, adormecimiento,
maIestar o dolor en Ias manos o brazos.
Debera consuItar con su medico antes de
seguir usando Ia herramienta.
Modelo
No. 875.199601
90 PSIG MAXIMO
Esta herramienta esta disefiada para
operar a una presi6n neumatica maxima de
indicador de 90 Iibras por pulgada cuadrada
(90 PSI), en Ia herramienta. El uso de una
presi6n de aire mayor puede y podra
causar Iesiones. Tambien, el uso de una
presi6n neumatica mayor somete a los
componentes internos a cargas y tensiones
para Ias cuales no fueron disefiados,
causando una falla prematura de Ia
herramienta.
Proyecto de ley 65 de California
AIgunos polvos creados por el lijado,
aserrado, desgastado, taladrado y otras
actividades de construcci6n
contienen
substancias quimicas conocidas come
causantes de cancer, defectos de
nacimiento u otras lesiones en el
sistema de reproducci6n.
AIgunos
ejemplos de esas sustancias quimicas
son:
Plomo de pinturas que contienen plomo
silice cristalino de ladrillos, cemento y
otros productos de alba#ileria ars@nico
y cromo de madera quimicamente
tratada
Su riesgo de esas exposiciones varia,
dependiendo de cuan a menudo usted
electra este tipo de trabajo. Para reducir
su exposici6n a estos materiales: trabaje
en un area bien ventilada y con los
equipos de protecci6n aprobados, como
mascaras de polvo que esten
especificamente
dise#adas para filtrar
particulas microsc6picas.
SPA-3
Manual del Propietario
Desconecte la herramienta del
suministro de aire antes de cambiar
herramientas o accesorios, darte servicio o
durante el tiempo que no este funcionando.
No presione el disparador cuando este
conectando Ia manguera de suministro de
aire.
No apriete el disparador de la
herramienta cuando no se aptique a un
objeto de trabajo.
Los accesorios deben acoplarse de
forma segura. Los accesorios sueltos
pueden causar una Iesi6n grave.
Protega las lineas de aire contra los
da5os y punciones.
Nunca apunte una herramienta
neumatica a sus propia persona ni a
ninguna otra persona. Podria ocurrir una
Iesi6n grave.
Revise las mangueras de aire en busca
de condiciones debiles o de desgaste
antes de cada uso. AsegQrese de que todas
Ias conexiones esten bien afianzadas.
Libere toda la presion del sistema antes
de tratar de instalar, dar servicio,
reubicar o realizar cualquier
mantenimiento.
Mantenga todas las tuercas, pernos y
tornillos apretados, y asegure que el
equipo este en condiciones de trabajo
seguras.
Nunca Ileve una herramienta por la
manguera ni nunca tire de la manguera
para mover una herramienta o un
compresor. Mantenga las mangueras
alejadas del calor, aceite y bordes
afilados. Reemplace cualquier manguera
que este dahada, debil o desgastada.
SPA-4
Modelo
No. 875.199601
Use accesorios dise#ados para utilizar
con la herramienta el#ctrica neumatica.
Siempre examine los accesorios antes
del montaje en busca de astillas, grietas
o indicios de alg_n daho.
Nunca use puntos montados u otros
accesorios que se han caido o se han
expuesto al agua, disolventes o cambios
extremos de temperatura. Es bueno usar la
herramienta en un alojamiento protegido por
un minuto despues de montarle cualquier
accesorio.
Siempre use accesorios clasificados
para revoluciones
pot minutos (RPM)
que cumplan o excedan con la
clasificaci6n
de RPM de la herramienta.
Peligro de inhalaci6n: Las herramientas
abrasivas, como molinillos, lijadoras y
herramientas de corte, generan polvo y
materiales abrasivos que pueden ser
da#inos para los pulmones y el sistema
respiratorio de las personas. Siempre
use una m#scara facial o respirador con
buen ajuste, que este aprobado por
MSHA/NIOSH, cuando utilice tales
herramientas.
Manual del Propietario
Algunos materiales, como adhesivos y
alquitran, continen compuestos
quimicos cuyos vapores podrian causar
una grave lesi6n con la exposici6n
prolongada. Trabaje siempre en un area
limpia, seca y bien ventilada.
Las herramientas que contienen piezas
m6viles, o que impulsan a otras
herramientas m6viles, como ruedas
amoladoras, cubos, discos lijadores,
etc., pueden enredarse en el pelo, ropa,
joya y otros objetos sueltos, resultando
en una grave lesi6n.
Nunca use ropa suelta que contengan
correas o corbatas, que podrian quedar
atrapados en las piezas m6viles de la
herramienta. Quitese cualquierjoya,
reloj, etc. que podria ser atrapado por la
herramienta.
Mangenga las manos
alejadas de las piezas m6viles. Rec6jase
o c_brase el pelo.
Las herramientas y accesorios mal
mantenidos pueden causar una lesi6n
grave. D#le mantenimiento
a la
herramienta con cuidado. Estas
herramientas de torte con el
mantenimiento
adecuado, con bordes
de corte afilados, reducen el riesgo de
atasco y son m#s f#ciles de controlar.
Modelo
No. 875.199601
Las herramientas que cortan, cizallan,
barrenan, apilan, punzonan, cincelan,
etc. pueden causar una lesi6n grave.
Mantenga la pieza de trabajo de la
herramienta alejada de las manos y el
cuerpo.
Despu#s de lubricar la herramienta
neum#tica, el aceite ser# descargado
por el puerto de escape durante los
primeros segundos de operaci6n. Por
Io tanto, el puerto de escape debe estar
tapado con una toalla antes de aplicar
presi6n de aire.
Siempre desconecte la lijadora del
suministro de aire antes de acoplar la
almohadilla. No use la lijadora si la
almohadilla lijadora no est# bien
apretada. Siempre reemplace las
almohadillas gastadas o da#adas.
almohadilla. El usuario podria sufrir
lesiones graves.
Si la herramienta esta da#ada existe el
peligro de que explore repentinamente.
Revise los desajustes o atascos de las
piezas m6viles, roturas de las piezas y
cualquier otra condici6na que afecte el
funcionamiento
de la herramienta. Si la
misma esta da#ada, haga que se le de
mantenimiento
antes de usarla.
SPA-5
Manual del Propietario
Cone×i6n
Modelo
de la manguera
Linea principal
= Dia. int. min.
tnclinado
hacia abajo y
Linea
bifurcaci6n
Di&
int.
Linea
2 =
Dia.
1/2 putg
Lubricador
Regulador
1 =
de admisi6n
pulg
Filtro
de drenaje
Valvula
de
!drenaje
Vaivula
drenaje
Manguera
de
aislamiento
de
Conexion
Figura 1
de la manguera de aire
Compresor
de aire
correcto y que esten bien conectados antes
de usar Ia herramienta neumatica.
Antes de conectar Ia herramienta aI
suministro de aire, Iimpie Ia manguera de
aire para quitarte el poIvo y Ia humedad
acumulados. Hagalo pasando aire
Iibremente por Ia manguera por un tiempo
de 5 a 10 segundos.
Nunca Ileve una herramienta por Ia
manguera ni nunca tire de Ia manguera
para mover una herramienta o un
compresor. Mantenga Ias mangueras
alejadas deI calor, aceite y bordes afilados.
Reemptace cuaIquier manguera que este
daSada, debiI o desgastada.
Mangueras de aire para sus
herramientas neumaticas
Tuberia para taller pequefio (para la
casa):
La Figura 1 ilustra Ia conexi6n
recomendada de una manguera de aire.
Se muestra un diagrama de tuberia para
un taller tipico de una casa. Atgunos
consejos Qtiles son:
Se requiere una manguera neumatica de un
diametro interior de 3/8 pulg hasta un largo
de 25 pies. Una manguera con un diametro
interior de 3/8 puIg mas Iarga de 25 pies
causara una caida de presi6n, Io que podria
impedir el rendimiento. Si se requiere un
mayor Iongitud, se recomienda usar una
manguera de aire de un diametro interior de
1/2 puIg. AsegQrese de que todas Ias
mangueras y accesorios sean deI tamaSo
SPA-6
Encamine
Ia tuberia
de admisi6n
iniciaI recta hacia hacia arriba por Ia
pared deI taller y Io mas alto posibte.
Esto ayudara a minimizar que el agua
que sale deI compresor viaje por el
sistema.
VaIvula de
cierre
Linea
Manual del Propietario
La conexi6n desde el compresor a Ia
tuberia rigida de admisi6n inicial debe
ser a traves de una manguera flexible
para aisIar el movimiento deI
compresor.
de aire
1/2 pulg
bifurcacion
int. 1/2
No. 875.199601
Siempre use mangueras y tuberias
que esten clasificadas para una
presi6n mayor que Ia que su sistema
necesitar&
Nunca use tuberias de PVC para
sistemas de tuberia de aire
comprimido porque pueden resuItar en
una exptosici6n o una Iesi6n grave.
Incline hacia abajo Ias Iineas
principales por Io menos 3/4 de
puIg por cada 10 pies de tuberia
alejandose deI compresor de aire.
Esto extraera Ia condensaci6n con
el ftujo de aire que sale deI
compresor.
Coloque el primer bajante Io mas Iejos
posibte deI compresor que el tamaSo
de su taller permita (50 pies es Io
6ptimo, aunque poco reaIista para un
taller pequeSo). Entre mas alejado
este el bajante, mayor condensaci6n
puede ocurrir, y mas seco sera el aire
cuando alcance el separador de agua.
Para reducir la cantidad de agua y
contaminantes que entran al
separador de agua, instale Ia Iinea de
admisi6n arriba de Ia Iinea principal de
suministro de aire para cada bajante
de aire.
Se debe colocar una Iinea de drenaje
al final de Ia Iinea principal para
evacuar Ia condensaci6n.
Modelo
No. 875.199601
AJUSTE DE VELOClDAD
Esta Iijadora esta equipada con un
regulador para el ajuste de Ia velocidad (vea
Ia Iista de piezas de repuesto para Ias
especificaciones).
ACOPLE DE ALMOHADILLA LIJADORA
LIJADORAS DE 6 PULGADAS
Se recomienda usar discos con capa de
respaldo adhesiva. Para apticar el papeI de
Iija, alinee el borde exterior y presione el
papeI autoadhesivo a Ia almohadilIa.
Cambie el papeI de Iijar cuando sea
necesario.
Para quitar Ia almohadilIa Iijadora, inserte
una Ilave para almohadilIas entre Ia cubierta
de Ia almohadilIa y Ia propia almohadilIa
Iijadora. Gire Ia almohadilIa hasta que Ia
Ilave se engrane en los dos bordes ptanos
deI eje equilibrador. Una vez engranada,
sujete bien Ia Ilave y gire Ia amohadilla
Iijadora hacia Ia derecha para apretar y
hacia Ia izquierda para aftojar.
Para utilizar Ia funci6n de vacio, retire Ia
cubierta de vacio (Ref. #43) y acopte Ia
manguera de vacio. Es posibte que haya
que comprar el adaptador/reductor de Ia
manguera de vacio de forma separada para
adaptar su manguera de vacio a Ia
herramienta.
Las valvulas de drenaje deben
colocarse aI final de Ias Iineas de
ramificaci6n y Ia Iinea de drenaje,
y se deben evacuar diariamente.
SPA-7
Manual del Propietario
LIJADO CON LIJADORAS DE 6
PULGADAS
Comience el Iijado con una arenilIa abrasiva
Io suficientemente gruesa para que retire
los puntos altos y Ias asperezas excesivas.
Siga con un segundo papeI de Iija que tenga
una arenilIa de uno o dos grados mas finos.
Luego de un Iijado adicionaI usando
arenilIas mas finas hasta que obtenga el
acabado deseado. Nunca pase de una
arenilIa gruesa a una muy fina en un solo
paso. Si Io hace, sera dificiI retirar Ias
marcas de remolino que el abrasivo de Ia
arenilIa gruesa pudo haber hecho. Siempre
use Ia arenilIa mas fina posibte para Ia
operaci6n de Iijado.
Modelo No. 875.199601
para asegurar Ia distribuci6n pareja deI
aceite en toda Ia herramienta. Debera
almacenarse Ia herramienta en un medio
Iimpio y seco.
Deberan evitarse Ias cantidades excesivas
de aceite. En caso de ser necesario
almacenar Ia herramienta durante un largo
tiempo (de Ia noche a Ia mafiana, un fin de
semana, etc.), debera Iubricarta
abundantemente a traves de Ia entrada de
aire (Fig. 3). Debera operar Ia herramienta
durante 30 segundos aproximadamente
SPA-8
Modelo No. 875.199601
Piano de vista despiezada
Lubricantes recomendados
Use un aceite de herramienta neumatica u
cualquier otro aceite de grado elevado de
turbina que contenga absorbente de
humedad, inhibidores de 6xido, agentes
humidificadores deI metal y un aditivo EP
(presi6n extrema). Vea Ia Fig. 3 para Ia
ubicaci6n y entrada de aire.
Lubrique
Lubricacion
Se recomienda usar un filtro-reguladorIubricador en Iinea (Fig.l) ya que
incrementa Ia duraci6n de Ia herramienta y
mantiene Ia herramienta en una operacidn
sostenida. Debera comprobar el Iubricador
en Iinea con regularidad y Ilenarto con
aceite para herramientas de aire
comprimido. El ajuste correcto deI
Iubricador en Iinea se realiza colocando una
hoja de papeI pr6xima a los orificios de
escape de Ia herramienta y manteniendo
abierto el acelerador durante 30 segundos
aproximadamente. Se ajusta correctamente
el Iubricador cuando el papeI queda
manchado con una Iigera mancha de
aceite.
Manual del Propietario
el motor neumatico por aqui
Lista de piezas
Figura 3
Ref.
1
2
3
4
5
6
7
8
9
10
11
12
13
14
15
16
17
18
19
20
21
22
Descripci6n
Cerramiento
Tapa de caja protectora
Aniilo sujetador
Rodamiento
Clavija del resorte
Placa posterior
Rotor
Paleta del rotor (5)
Cilindro
Placa delantera
Rodamiento
Junta t6rica
Aro de seguridad
Eje del cigQefial
Chaveta
Cojinete (2)
Arandela
Sello de rodamiento
Arandela
Aniilo sujetador
Eje equilibrador
Cubierta de la almohadilla
Nro. de pieza
9287001A
9287002A
9287003
9287004
9287005
9287006
9287007
9287008
9287009
9287010
9287011
9287012
9287013
9287014
9287015
9287016
9287017
9287018
9287019
9287020
9287021
9287043
Ref.
23
24
25
26
27
28
29
30
Descripci6n
Almohadiila
lijadora
Palanca
Clavija
Arandela de seguridad
Anillo sujetador
Junta t6rica
Vastago de valvula
Junta t6rica
31
32
33
34
35
36
37
38
39
40
41
Anillo t6rico (3)
Regulador
Resorte
Junta t6rica
Pantalla de la valvula
Manguito de salida
Inserci6n
de silenciador
Tap6n de silenciador
Anillo t6rico (2)
Admission D,Air
Llave de ajuste de la
almohadilla
Adpatador de vacio
Cubierta de vacio
Inserto de Iogotipo de
Craftsman
Anillo t6rico
42
43
44
45
(2)
No, de pieza
9287023
9287024
9287025
9287026
9287027
9287028
9287029
9287030
9287031
9287032
9287033
9287034
9287035
9287036
9287037
9287038
9287039
9287040
9287041
9287042
9287045
9287049
9295002
SPA-9
Manual del Propietario
Modelo
No. 875.199601
Manual del Propietario
Modelo
No. 875.199601
Notas:
La herramienta
funciona
lentamente o
no funciona.
1. En la herramienta hay
polvo, arena o resina.
1. Irrigue la herramienta con aceite para
herramientas neumaticas, diluyente de resinas, o
una mezcla de igual proproci6n de aceite de motor
SAE 10 y queroseno. Lubrique la herramienta
despues de la limpieza.
2. En la herramienta
hay aceite.
2. Lubrique la herramienta de acuerdo alas
instrucciones de lubricaci6n indicadas en este
manual.
3. La presi6n del aire esta
baja.
3a. Ajuste el regulador de la herramienta
maximo (si corresponde).
no
a su valor
3b. Ajuste el regulador del compresor al maximo
de la herramienta mientras que la herramienta
funciona libre.
4. Fugas de la manguera
de aire
4. Apriete y selle los accesorios
ha encontrado escapes.
de la manguera
si
5. Caidas de presi6n.
5a. AsegOrese de que la manguera que esta
usando tenga el tamafio correcto. Las mangueras
largas o las herrramientas que
que usan grandes volOmenes de aire podrian
requerir una manguera con un diametro interno de
1/2 pulgada o mas, dependiendo de la Iongitud
total de la manguera.
5b. No use varias mangueras conectadas una a la
otra a traves de accesorios de conexi6n rapidos.
Esto causa caidas de presi6n adicionales
y reduce la potencia de la herramienta. Conecte
las mangueras una con la otra directamente.
Humedad sale
de la
herramienta
1. Agua en el tanque.
1. Drene el tanque. (Consulte el manual del
compresor). Engrase la herramienta y hagala
funcionar hasta que no vea agua. Engrase la
herramienta otra vez y dejela funcionar de 1 a 2
segundos.
2. Agua en las lineas
de aire o mangueras.
2a. Instale un separador/filtro de agua. NOTA: Los
separadores s61o funcionan bien cuando el aire
que pasa por los mismos esta frio. Ubique el
separador/filtro Io mas
separado posible del compresor.
2b. Instale un secador de aire.
La lijadora se
detiene cuando
se aplica a la
superficie de
trabaio,
SPA-10
2c. Cada vez que entra agua a la herramienta,
herramienta debe engrasarse inmediatamente.
1. Bloqueo de husillo esta
en la posici6n bloqueada.
1. Desbloquee
la
el husillo (Figura 3).
SPA-11
Your
Home
For repair - in your home - of all major brand appliances,
lawn and garden equipment,
or heating and cooling systems,
no matter who made it, no matter who sold it!
For the replacement
parts, accessories
and
owner's manuals that you need to do-it-yourself.
For Sears professional
installation of home appliances
and items like garage door openers and water heaters.
1-800-4-MY-HOME
®
(1-800-469-4663)
Call anytime, day or night (U.S.A. and Canada)
www.sears,com
www.sears.ca
For expert home solutions advice: www.managemyhome.com
Our
Home
For repair of carry-in items like vacuums,
lawn equipment,
and electronics,
call or go on-line for the location of your nearest
Sears
Parts & Repair
1-800-488-1222 (U.S.A.)
Service
Center
1-800-469-4663 (Canada)
Call anytime, day or night
www.sears.com
www.sears.ca
To purchase
a protection
1-800-827-6655
agreement
on a product
(U.S.A.)
serviced
1-800-361-6665
Para pedir servicio de reparaci6n
a domicilio, y para ordenar piezas:
1-888-SU-HOGAR
®
(1-888-784-6427)
by Sears:
(Canada)
Au Canada pour service en frangais:
1-800-LE-FOYER
M°
(1-800-533-6937)
www.sears.ca
Sesit
® Registered
® Marca
w Marque
Trademark
Reg
strada
/ i_ Trademark
/ TM Marca
de commerce
/ _
/ s_ Se_[ce
de F_bfica
Marque
/ SM Marca
d_pos_e
Mark
of Seats
de Servic[o
de Sears
Brands,
Brands,
de Sears
LLC
LLC
Brands,
LLC
© Sears
Brands,
LLC