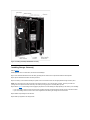
1
Dell™ PowerVault™ 136T LTO Library User's Guide Device Drivers
Introduction
Description
Safety
Operation
Using the Menus
Handling Media
Troubleshooting
Getting Help
Installation
Specifications
Warranty and Return Policy
Information in this document is subject to change without notice.
© 2002 Dell Computer Corporation. All rights reserved.
Reproduction in any manner whatsoever without the written permission of Dell Computer Corporation is strictly forbidden.
Trademarks used in this text: Dell, the DELL logo, DellWare, and PowerVault are trademarks of Dell Computer Corporation. Microsoft, Windows NT, and Windows are
registered trademarks of the Microsoft Corporation.
Other trademarks and trade names may be used in this document to refer to either the entities claiming the marks and names or their products. Dell Computer Corporation
disclaims any proprietary interest in trademarks and trade names other than its own.
Initial release: 23 July 2001
Last revised: 19 March 2002
Back to Contents Page
Description: Dell™ PowerVault™ 136T LTO Library User's Guide
Subsystem Description
Quick Start Guide
Functional Description
Functional Units
Tape Cartridge
Optional Features
The Dell PowerVault 136T LTO Library automates the retrieval, storage and control of LTO cartridge tapes. Cartridges are mounted and
dismounted on tape drives via supporting software from the host without operator intervention.
Subsystem Description
The Dell PowerVault 136T LTO Library has expandable configurations. It can be configured from 1 to 6 tape drives; however, the storage capacity
varies and is determined by the media type and the number of drives installed. The following table illustrates the possible Dell PowerVault 136T
LTO Library configurations.
Table 1. Dell PowerVault 136T LTO Library Configurations
Number of Installed Drives
Cartridge Capacity
1 to 6
18/36/54/72
The maximum cartridge configuration includes a mailbox feature that contains two removable magazines and one fixed magazine. The magazine
capacity is dependent on the type of magazine and each LTO magazine is capable of holding a maximum of 6 cartridges. The Dell PowerVault
136T LTO Library is offered as either a stand-alone model or as a standard 19 inch rack mounted model. All of the above configurations can be
field upgraded to the maximum drive and storage configurations, and a redundant DC power supply. See Optional Features for additional
information.
Figure 1 shows an example of a Dell PowerVault 136T LTO Library with a multiple slot Mailbox.
Figure 1. Dell PowerVault 136T LTO Library
Quick Start Guide
Refer to the Quick Start Guide, which guides the user through a simple setup of the Dell PowerVault 136T LTO Library with Quick Start Illustrations.
NOTE: To view the Quick Start Guide pdf, if Adobe™ Acrobat Reader is not already installed, go to http://www.adobe.com/acrobat/ to download a
free copy.
Host Attachment
The Dell PowerVault 136T LTO Library is a SCSI target device and must be connected to a Single Ended/Low Voltage Differential SCSI bus. Both
ends of the bus must be terminated and a terminator is shipped with each library. Although the Dell PowerVault 136T LTO Library can be attached
to a wide SCSI bus, it is not a wide SCSI device and its SCSI ID must be in the range of 0 to 7. The default SCSI ID for the Dell PowerVault 136T
LTO Library is 0.
NOTE: Typically, 7 is the ID set for a SCSI adapter.
The Dell PowerVault 136T LTO Library can also be connected to a Fibre Channel Host Storage Area Network (SAN) via the Dell PowerVault
136T Fibre Bridge. The Fibre Bridge module translates (bridges) the SCSI protocol between the two media types.
Remote Management Unit (RMU)
The Remote Management Unit (RMU) resides in each system and is pre-installed at the factory. The RMU allows remote access via a Web
browser to the library. Microsoft Internet Explorer version 4.0 and above, as well as Netscape Navigator versions 4.01, 4.5, 4.7X and above are
supported by the RMU.
The user is able to remotely access library status and the library Operator Panel via the RMU. The RMU also allows the user to remotely update
firmware in the RMU, the drives, and the library's controller, retrieve library command and error logs, and make configuration changes. The RMU
supports Simple Network Management Protocol (SNMP) version 2.0 and acts as an SNMP-server. The RMU acquires Tape Alert 3.0 compatibility
information from the library over the serial interface port and sends that information to an SNMP server. The RMU also detects a power loss and
generates an SNMP trap for notification. For more information, refer to Remote Management Unit (RMU).
Functional Description
The Dell PowerVault 136T LTO Library configuration must include at least one tape drive. A maximum of 6 drives can be included. The Dell
PowerVault 136T LTO Library system contains cartridges, library control hardware, tape drives and a robotic system. The tape cartridges are
stored in removable magazines. The magazines are designed such that tape cartridges can only be inserted in the proper orientation. Once
inserted, the tape cartridges will be retained in the magazine such that they remain in place even when the magazine is inverted and shaken lightly.
The magazines can only be inserted one way into the mounting columns in the library.
The library robotics system moves cartridges between storage slots, tape drives and the Mailbox. A picker is used to get/put cartridges in a
storage slot or a tape drive feed slot. A barcode scanner on the picker identifies the cartridge or slot. The Mailbox allows cartridges to be added or
removed from the Dell PowerVault 136T LTO Library without interrupting the operation of the Library.
The cartridge storage slots and cartridge picker are accessed for maintenance purposes by opening the front door of the Dell PowerVault 136T
LTO Library. The tape drives, power supplies, and host interface PCBA are accessed from the back of the Dell PowerVault 136T LTO Library for
maintenance purposes.
Requests issued from the host result in cartridge movement in the library. The primary requests issued are for mounting and dismounting
cartridges to and from the tape drives and for importing and exporting cartridges to or from the library. The host has records of the physical
location of a cartridge in the library. The physical location is also managed by the library. Each cartridge needs a machine and operator-readable
external label to identify a volume serial number (volser) in the library during initial inventory and any time a cartridge is added to the library. The
library stores the physical location of the cartridge in an inventory database based on the cartridge volser. All host requests for operations involving
movement or use of a cartridge need only reference the physical location of the cartridge for the library to perform the request.
In addition to requesting movement of cartridges in the library, the host can obtain status, performance, configuration information, and information
about the cartridges stored in the Dell PowerVault 136T LTO Library.
Functional Units
The Dell PowerVault 136T LTO Library consists of the following functional units:
l
l
l
l
l
Tape drives in Drive Modules
Library control hardware
Cartridge storage
Robotic system
Mailbox
Tape Drives
The Dell PowerVault 136T LTO Library currently supports the following tape drives:
l
LTO type drive
All tape drives are packaged in a common Drive Module that is designed for quick removal and replacement. The Drive Module is a Field
Replacement Unit (FRU) that is returned for repair.
Library Control Hardware
The library control hardware controls all operations in the Dell PowerVault 136T LTO Library, including the interaction between the library and
operators. The library firmware creates and maintains the Dell PowerVault 136T LTO Library configuration, the physical location of the robotic
system and the inventory of cartridges. The database is kept in the memory of the Library control hardware.
Cartridge Storage
The Dell PowerVault 136T LTO Library contains cartridge storage slots in addition to any tape drives installed.
Storage Slot Numbering
The following convention is used to identify the coordinates of each Library element (storage slots or drives).
Table 2. Storage Slot Coordinates
1
A
2
Column
Magazine
Row
The columns are numbered 1 to 5 from the mailbox column and continuing clockwise. The magazines within each column are designated A to C
from top to bottom. The rows within each magazine are numbered 1 to 6 from top to bottom for the LTO media type. The Drive magazine is
designated A to F from bottom to top. See Figure 3 below.
Figure 3. Storage Column Configurations and Coordinate system
NOTE: The fixed slot in columns 2, 4, and 5 does not have a magazine designation and is always numbered 0 so the coordinate for the
fixed slot in column 2 would be 2-0 (the "-" indicates no magazine is present). The Drive column (3) can have up to six drives. The magazine
letter can be A through F.
To manipulate the media within the library, the host must reference each movement with source and target designations. This is done via element
addressing, which specifies precisely which slots within the library are to be used. The following addressing scheme is used for the library.
Table 3. Element Addressing
Slot Type Starting Address
Storage
4096 (0x1000)
Mailbox
16 (0x0010)
Drives
256 (0x0100)
Picker
1 (0x0001)
Robotic System
The robotic system identifies and moves cartridges between the storage slots, tape drives and the Mailbox. The robotic system has:
l
l
l
l
l
l
A picker assembly for mounting a cartridge picker and the barcode scanner.
A cartridge picker for picking and placing cartridges in storage slots, tape drives or the Mailbox.
A barcode scanner for reading the external labels on the cartridges. The barcode scanner is used during the inventory process to locate and
categorize all cartridges installed in the library. The barcode scanner is also used during the teaching process where it reads the fiducial
labels to identify the types of storage and tape drives installed in the Library.
A Y-axis drive for moving the picker assembly in a vertical position. An X-axis drive for moving the picker assembly in a rotary position.
A Z-axis drive for moving the picker assembly forward and backward motion.
Mailbox
This facility allows the insertion and ejection of cartridges without interrupting the normal operation of the library. There are two models of the
Mailbox:
l
l
The standard Mailbox has a capacity of one cartridge.
The optional Mailbox has a capacity of 12 LTO cartridges contained in two magazines that can be inserted or ejected by opening the
Mailbox door plus one fixed magazine containing 6 LTO storage slots.
Tape Cartridge
The Dell PowerVault 136T LTO Library automates the retrieval, storage and control of LTO cartridge tapes. The corresponding tape drive types
must be installed in the library.
Each tape cartridge in the Dell PowerVault 136T LTO Library must have an external label that is operator and machine readable to identify the
volume serial number (volser). The external label contains up to thirteen characters for the volser. They can be uppercase A-Z and numeric 0-9.
NOTE: The external labels on the cartridges identify the cartridges to the Dell PowerVault 136T LTO Library. Some software requires that
the internal volser and the external label on the physical volume to be identical.
Optional Features
Optional features for the Dell PowerVault 136T LTO Library are as follows:
l
l
l
l
l
l
Dell PowerVault 136T Fibre Bridge.
Additional Storage Columns (each column can accommodate up to 3 magazines).
Additional LTO tape Drive Module.
Casters for Stand-alone model.
Rackmount Kit.
Redundant DC Power Supply.
Back to Contents Page
Back to Contents Page
Device Drivers: Dell™ PowerVault™ 136T LTO Library User's Guide
Dell PowerVault 136T LTO Library Driver
Installation
Dell PowerVault 136T LTO Tape Driver Installation for
Windows® 2000
Dell PowerVault 136T LTO Tape Driver Installation
for Windows NT® 4.0
When using Windows® 2000 native backup, ensure that the proper drivers for the library and drives are installed. Under Windows NT® 4.0, only
the driver for the drives is needed; there is no medium changer support when using Windows NT® native backup. If any doubt exists about the
proper drivers residing on the system, use the following procedures to install the appropriate drivers.
Dell PowerVault 136T LTO Library Driver Installation
l
l
l
l
l
l
l
l
l
l
l
l
l
l
Connect the Dell PowerVault 136T LTO Library, and restart the machine.
Start the Windows® 2000 Device Manager.
In the Device Manager select Medium Changers.
Right click on the Unknown Medium Changer device.
Select Properties from the pop-up menu.
Select Driver tab on the properties page.
Click the Update Driver... button. This will start the Upgrade Device Driver Wizard. Click Next.
Select the option Search for a suitable driver for my device. Click Next.
In Optional search locations check ONLY CD-ROM drives. Click Next.
Setup will select the installation file, pv136t.inf. Click Next.
Required files will be installed for the driver now.
Click Finish.
Click Close on the Properties page.
Make sure that in Device Manager, under Medium changers, Dell (TM) PowerVault (TM) 136T Tape Library is listed.
Dell PowerVault 136T LTO Tape Driver Installation
Windows® 2000 Driver File Installation
l
l
l
l
l
l
l
l
l
l
l
l
l
Start the Windows 2000 Device Manager.
Find the HP Ultrium 1-SCSI SCSI Sequential Device in the device manager.
Right click on the HP Ultrium tape drive.
Select Properties from the pop-up menu.
Select the Driver tab on the properties page.
Click the Update Driver... button. This will start the Upgrade Device Driver Wizard. Click Next.
Select the option Search for a suitable driver for my device. Click Next.
In Optional search locations check ONLY CD-ROM drives. Click Next.
Setup will select the installation file, dell-lto.inf. Click Next.
Required files will be installed for the driver now.
Click Finish.
Click Close on the Properties page.
In Device Manager, make sure that the Dell (TM) PowerVault (TM) 110T LTO Drive is listed under Tape Devices.
Windows NT® 4.0 Driver File Installation
l
l
l
l
l
l
l
l
l
l
l
l
l
Click the Start button, point to Settings, then click Control Panel.
Double-click the Tape Devices icon.
Note: If the host server or workstation already has drivers installed, continue with the next step; otherwise, skip the next two steps.
Click the Drivers tab.
Click the Add button.
Click the Have Disk button.
Type x:\drivers\nt4, replacing x: with the drive letter of the CD-ROM drive into which you inserted the Dell PowerVault 136T LTO Library
User's Guide CD.
Click the Hewlett Packard LTO Ultrium Drive entry and click the OK button.
When the New SCSI Tape Device Found dialog box appears, click its OK button.
Required files will be installed for the driver now.
If you have multiple drives of this type, click OK at each prompt to install the driver for each device.
When the driver has been installed for all devices, click the OK button in the Tape Devices dialog box.
Restart the host server or workstation.
After restarting, click the Start button, point to Settings, click Control Panel, double-click the Tape Devices icon, and verify that the drivers
were properly loaded.
NOTE: Refer to support.dell.com for the latest device driver and to obtain ISV device driver upgrades.
Back to Contents Page
Back to Contents Page
Getting Help: Dell™ PowerVault™ 136T LTO Library User's Guide
Help Overview
Dell Contact Numbers
Help Overview
This section describes the tools Dell provides to help you when you have a problem with your system. It also tells you when and how to contact Dell
for technical or customer assistance.
Technical Assistance
If you need assistance with a technical problem, perform the following steps:
1. Check the Troubleshooting procedures provided in this guide.
2. Use Dell's extensive suite of online services available at Dell's website (http://www.dell.com) for help with installation and troubleshooting
procedures.
For more information, see World Wide Web.
3. If the preceding steps have not resolved the problem, call Dell for technical assistance.
For instructions on using the technical support service, see Technical Support Service and Before You Call.
Help Tools
Dell provides a number of tools to assist you. These tools are described in the following sections.
NOTE: Some of the following tools are not always available in all locations outside the continental U.S. Please call your local Dell
representative for information on availability.
World Wide Web
The Internet is your most powerful tool for obtaining information about your system and other Dell products. Through the Internet, you can access
most of the services described in this section, including AutoTech, TechFax, order status, technical support, and product information.
You can access Dell's support website at http://support.dell.com. To select your country, click the map that appears. The Welcome to
support.dell.com page opens. Enter your system information to access help tools and information.
Dell can be accessed electronically using the following addresses:
l
World Wide Web
http://www.dell.com/
http://www.dell.com/ap/ (for Asian/Pacific countries only)
http://www.euro.dell.com (for Europe only)
http://www.dell.com/la (for Latin American countries)
l
Anonymous file transfer protocol (FTP)
ftp://ftp.dell.com/
Log in as user:anonymous, and use your e-mail address as your password.
l
Electronic Support Service
[email protected]
[email protected] (for Asian/Pacific countries only)
http://support.euro.dell.com (for Europe only)
l
Electronic Quote Service
[email protected]
[email protected] (for Asian/Pacific countries only)
l
Electronic Information Service
[email protected]
AutoTech Service
Dell's automated technical support service—AutoTech—provides recorded answers to the questions most frequently asked by Dell customers
about their portable and desktop systems.
When you call AutoTech, you use your touch-tone telephone to select the subjects that correspond to your questions.
The AutoTech service is available 24 hours a day, seven days a week. You can also access this service through the technical support service. For
the telephone number to call, see Dell Contact Numbers.
TechFax Service
Dell takes full advantage of fax technology to serve you better. Twenty-four hours a day, seven days a week, you can call the Dell TechFax line tollfree for all kinds of technical information.
Using a touch-tone phone, you can select from a full directory of topics. The technical information you request is sent within minutes to the fax
number you designate. For the TechFax telephone number to call, see Dell Contact Numbers.
Automated Order-Status System
You can call this automated service to check on the status of any Dell products that you have ordered. A recording prompts you for the information
needed to locate and report on your order. For the telephone number to call, see Dell Contact Numbers.
Technical Support Service
Dell's industry-leading hardware technical-support service is available 24 hours a day, seven days a week, to answer your questions about Dell
hardware.
Our technical support staff pride themselves on their track record: more than 90 percent of all problems and questions are taken care of in just one
toll-free call, usually in less than 10 minutes. When you call, our experts can refer to records kept on your Dell system to better understand your particular question. Our technical support staff use computer-based diagnostics to provide fast, accurate answers to questions.
To contact Dell's technical support service, see Before You Call and then call the number for your country as listed in Dell Contact Numbers.
Problems With Your Order
If you have a problem with your order, such as missing parts, wrong parts, or incorrect billing, contact Dell for customer assistance. Have your
invoice or packing slip handy when you call. For the telephone number to call, see Dell Contact Numbers.
Product Information
If you need information about additional products available from Dell, or if you would like to place an order, visit Dell's website at
http://www.dell.com/. For the telephone number to call to speak to a sales specialist, see Dell Contact Numbers.
Returning Items for Warranty Repair or Credit
Prepare all items being returned, whether for repair or credit, as follows:
1. Call Dell to obtain an authorization number, and write it clearly and prominently on the outside of the box.
For the telephone number to call, see Dell Contact Numbers.
2. Include a copy of the invoice and a letter describing the reason for the return.
3. Include a copy of any error messages reported by the library.
4. Include any accessories that belong with the item(s) being returned (such as power cables, software diskettes, and guides) if the return is for
credit.
5. Pack the equipment to be returned in the original (or equivalent) packing materials.
You are responsible for paying shipping expenses. You are also responsible for insuring any product returned, and you assume the risk of loss
during shipment to Dell. Collect-on-delivery (C.O.D.) packages are not accepted.
Returns that are missing any of the preceding requirements will be refused at our receiving dock and returned to you.
Before You Call
If possible, turn on your system before you call Dell for technical assistance and call from a telephone at or near the system. You may be asked to
type some commands at the keyboard, relay detailed information during operations, or try other troubleshooting steps possible only at the system
itself. Make sure that the system documentation is available.
CAUTION: Before servicing any components inside your system, see Safety First—For You and Your Computer.
Dell Contact Numbers
The following table provides country-specific access codes and telephone numbers, websites, and email addresses that you can use to contact
Dell.
The codes required depend on where you are calling from as well as the destination of your call; in addition, each country has a different dialing
protocol. If you need assistance in determining which codes to use, contact a local or an international operator.
NOTE: Toll-free numbers are for use only within the country for which they are listed. Area codes are most often used to call long
distance within your own country (not internationally)—in other words, when your call originates in the same country you are calling.
Country (City)
International Access Code
Country Code
City Code
Australia (Sydney)
International Access Code:
0011
Country Code: 61
City Code: 2
Austria (Vienna)
International Access Code:
900
Country Code: 43
City Code: 1
Department Name or Service Area,
Website and E-mail Address
Home and Small Business
1-300-65-55-33
Government and Business
toll free: 1-800-633-559
Preferred Accounts Division (PAD)
toll free: 1-800-060-889
Customer Care
toll free: 1-800-819-339
Corporate Sales
toll free: 1-800-808-385
Transaction Sales
toll free: 1-800-808-312
Fax
toll free: 1-800-818-341
Home/Small Business Sales
01 795 67602
Home/Small Business Fax
01 795 67605
Home/Small Business Customer Care
01 795 67603
Preferred Accounts/Corporate Customer Care
Home/Small Business Technical Support
Preferred Accounts/Corporate Technical Support
Switchboard
Belgium (Brussels)
International Access Code: 00
City Code: 2
0660 8056
01 795 67604
0660 8779
01 491 04 0
Website: http://support.euro.dell.com
E-mail: [email protected]
Technical Support
02 481 92 88
Customer Care
02 481 91 19
Home/Small Business Sales
Country Code: 32
Area Codes,
Local Numbers, and Toll Free Numbers
toll free: 0800 16884
Corporate Sales
02 481 91 00
Fax
02 481 92 99
Switchboard
02 481 91 00
Website: http://support.euro.dell.com
E-mail: [email protected]
Brazil
Customer Support, Technical Support
0800 90 3355
International Access Code:
0021
Sales
0800 90 3366
Country Code: 55
Website: http://www.dell.com/br
City Code: 51
Brunei
Country Code: 673
Customer Technical Support (Penang, Malaysia)
604 633 4966
Customer Service (Penang, Malaysia)
604 633 4949
Transaction Sales (Penang, Malaysia)
604 633 4955
Canada (North York,
Ontario)
Automated Order-Status System
toll free: 1-800-433-9014
AutoTech (Automated technical support)
toll free: 1-800-247-9362
International Access Code:
011
Customer Care (From outside Toronto)
toll free: 1-800-387-5759
Customer Care (From within Toronto)
toll free: 1-800-847-4096
Sales (Direct Sales—from outside Toronto)
toll free: 1-800-387-5752
Sales (Direct Sales—from within Toronto)
Chile (Santiago)
416 758-2400
Customer Technical Support
416 758-2200
Sales (Federal government, education, and medical)
toll free: 1-800-567-7542
Sales (Major Accounts)
toll free: 1-800-387-5755
TechFax
toll free: 1-800-950-1329
Sales, Customer Support, and Technical Support
toll free: 1230-020-4823
Country Code: 56
City Code: 2
China (Xiamen)
Technical Support
toll free: 800 858 2437
Country Code: 86
Customer Experience
toll free: 800 858 2060
Home and Small Business
toll free: 800 858 2222
Preferred Accounts Division
toll free: 800 858 2062
Large Corporate Accounts
toll free: 800 858 2999
City Code: 592
Czech Republic (Prague)
Technical Support
International Access Code: 00 Customer Care
Fax
Country Code: 420
TechFax
City Code: 2
Switchboard
02 22 83 27 27
02 22 83 27 11
02 22 83 27 14
02 22 83 27 28
02 22 83 27 11
Website: http://support.euro.dell.com
E-mail: [email protected]
Denmark (Horsholm)
Technical Support
45170182
International Access Code:
009
Relational Customer Care
45170184
Home/Small Business Customer Care
32875505
Country Code: 45
Switchboard
45170100
Fax Technical Support (Upplands Vasby, Sweden)
Fax Switchboard
859005594
45170117
Website: http://support.euro.dell.com
E-mail: [email protected]
Finland (Helsinki)
Technical Support
09 253 313 60
International Access Code:
990
Technical Support Fax
09 253 313 81
Relational Customer Care
09 253 313 38
Country Code: 358
Home/Small Business Customer Care
09 693 791 94
Fax
09 253 313 99
Switchboard
09 253 313 00
City Code: 9
Website: http://support.euro.dell.com
E-mail: [email protected]
France (Paris/Montpellier)
Home and Small Business
International Access Code: 00 Technical Support
Customer Care
Country Code: 33
Switchboard
City Code: (1) (4)
Switchboard (Alternative)
0825 387 270
0825 823 833
0825 004 700
04 99 75 40 00
Sales
0825 004 700
Fax
0825 004 701
Website: http://support.euro.dell.com
E-mail: [email protected]
Corporate
Technical Support
Customer Care
0825 004 719
0825 338 339
Switchboard
01 55 94 71 00
Sales
01 55 94 71 00
Fax
01 55 94 71 99
Website: http://support.euro.dell.com
E-mail: [email protected]
Germany (Langen)
International Access Code: 00
Country Code: 49
City Code: 6103
Technical Support
Home/Small Business Customer Care
06103 766-7200
0180-5-224400
Global Segment Customer Care
06103 766-9570
Preferred Accounts Customer Care
06103 766-9420
Large Accounts Customer Care
06103 766-9560
Public Accounts Customer Care
06103 766-9555
Switchboard
06103 766-7000
Website: http://support.euro.dell.com
E-mail: [email protected]
toll free: 800 96 4107
Hong Kong
Technical Support
International Access Code:
001
Customer Service (Penang, Malaysia)
Transaction Sales
toll free: 800 96 4109
Country Code: 852
Corporate Sales
toll free: 800 96 4108
Ireland (Cherrywood)
Technical Support
International Access Code: 16 Customer Care
Sales
Country Code: 353
SalesFax
City Code: 1
Fax
Switchboard
604 633 4949
0870 908 0800
01 204 4026
01 286 0500
01 204 0144
0870 907 5590
01 286 0500
Website: http://support.euro.dell.com
E-mail: [email protected]
Italy (Milan)
Home and Small Business
International Access Code: 00 Technical Support
Customer Care
Country Code: 39
Fax
City Code: 02
Switchboard
02 577 826 90
02 696 821 14
02 696 824 13
02 696 821 12
Website: http://support.euro.dell.com
E-mail: [email protected]
Corporate
Technical Support
02 577 826 90
Customer Care
02 577 825 55
Fax
02 575 035 30
Switchboard
Website: http://support.euro.dell.com
E-mail: [email protected]
02 577 821 Japan (Kawasaki)
International Access Code:
001
Technical Support (Server)
toll free: 0120-1984-35
Technical Support (Dimension™ and Inspiron™)
toll free: 0120-1982-26
Technical Support Outside of Japan (Dimension and Inspiron)
81-44-520-1167
Country Code: 81
Technical Support (OptiPlex™, Dell Precision™, and Latitude™)
toll free: 0120-1984-33
City Code: 44
Technical Support Outside of Japan (OptiPlex, Dell Precision, and
Latitude)
81-44-556-3894
24-Hour Automated Order Service
044 556-3801
Customer Care
044 556-4240
Home and Small Business Group Sales
044 556-3344
Preferred Accounts Division Sales
044 556-3433
Large Corporate Accounts
044 556-3430
Faxbox Service
044 556-3490
Switchboard
044 556-4300
Website: http://support.jp.dell.com
Korea (Seoul)
Technical Support
toll free: 080-200-3800
International Access Code:
001
Sales
toll free: 080-200-3777
Country Code: 82
Customer Service (Penang, Malaysia)
City Code: 2
Latin America
Customer Service (Seoul, Korea)
2194-6220
604 633 4949
Fax
2194-6202
Switchboard
2194-6000
Customer Technical Support (Austin, Texas, U.S.A.)
512 728-4093
Customer Service (Austin, Texas, U.S.A.)
512 728-3619
Fax (Technical Support and Customer Service)(Austin, Texas, U.S.A.)
512 728-3883
Sales (Austin, Texas, U.S.A.)
512 728-4397
SalesFax (Austin, Texas, U.S.A.)
512 728-4600
or 512 728-3772
Luxembourg
Technical Support (Brussels, Belgium)
International Access Code: 00 Home/Small Business Sales (Brussels, Belgium)
Corporate Sales (Brussels, Belgium)
Country Code: 352
Customer Care (Brussels, Belgium)
02 481 92 88
toll free: 080016884
02 481 91 00
02 481 91 19
Fax (Brussels, Belgium)
02 481 92 99
Switchboard (Brussels, Belgium)
02 481 91 00
Website: http://support.euro.dell.com
E-mail: [email protected]
Macau
Country Code: 853
Technical Support
Customer Service (Penang, Malaysia)
toll free: 0800 582
604 633 4949
Transaction Sales
toll free: 0800 581
Technical Support
toll free: 1 800 888 298
International Access Code: 00 Customer Service
04 633 4949
Country Code: 60
Transaction Sales
toll free: 1 800 888 202
City Code: 4
Corporate Sales
toll free: 1 800 888 213
Mexico
Automated Order-Status System (Austin, Texas, U.S.A.)
Malaysia (Penang)
International Access Code: 95 AutoTech (Automated technical support) (Austin, Texas, U.S.A.)
Customer Technical Support
Country Code: 52
Sales
512 728-0685
512 728-0686
525 228-7870
525 228-7811
City Code: 5
or toll free: 91-800-900-37
or toll free: 91-800-904-49
Netherlands (Amsterdam)
Customer Service
525 228-7878
Main
525 228-7800
Technical Support
020 581 8838
International Access Code: 00 Customer Care
Home/Small Business Sales
Country Code: 31
Home/Small Business Sales Fax
City Code: 20
020 581 8740
toll free: 0800-0663
020 682 7171
Corporate Sales
020 581 8818
Corporate Sales Fax
020 686 8003
Fax
020 686 8003
Switchboard
020 581 8818
Website: http://support.euro.dell.com
E-mail: [email protected]
Home and Small Business
0800 446 255
International Access Code: 00 Government and Business
Sales
Country Code: 64
Fax
0800 444 617
New Zealand
Norway (Lysaker)
International Access Code:
095
Country Code: 47
0800 441 567
0800 441 566
Technical Support
671 16882
Relational Customer Care
671 17514
Home/Small Business Customer Care
23162298
Switchboard
671 16800
Fax Technical Support (Upplands Vasby, Sweden)
590 05 594
Fax Switchboard
671 16865
Website: http://support.euro.dell.com
E-mail: [email protected]
Poland (Warsaw)
International Access Code:
011
Country Code: 48
City Code: 22
Technical Support
22 57 95 700
Customer Care
22 57 95 999
Sales
22 57 95 999
Fax
22 57 95 998
Switchboard
22 57 95 999
Website: http://support.euro.dell.com
E-mail: [email protected]
Portugal
Technical Support
International Access Code: 00 Customer Care
Country Code: 35
Sales
Fax
35 800 834 077
34 902 118 540 or
35 800 834 075
35 800 834 075
35 121 424 01 12
E-mail: [email protected]
toll free: 800 6011 051
Singapore (Singapore)
Technical Support
International Access Code:
005
Customer Service (Penang, Malaysia)
Transaction Sales
toll free: 800 6011 054
Country Code: 65
Corporate Sales
toll free: 800 6011 053
South Africa
(Johannesburg)
Technical Support
011 709 7710
Customer Care
011 709 7707
International Access Code:
09/091
Sales
011 709 7700
Fax
011 706 0495
604 633 4949
Country Code: 27
Switchboard
City Code: 11
Website: http://support.euro.dell.com
011 709 7700
E-mail: [email protected]
Southeast Asian and
Pacific Countries
Customer Technical Support, Customer Service, and Sales (Penang,
Malaysia)
Spain (Madrid)
Home and Small Business
International Access Code: 00 Technical Support
Customer Care
Country Code: 34
Sales
City Code: 91
Switchboard
Fax
604 633 4810
902 100 130
902 118 540
902 118 541
902 118 541
902 118 539
Website: http://support.euro.dell.com
E-mail: [email protected]
Corporate
Technical Support
902 100 130
Customer Care
902 118 546
Switchboard
91 722 92 00
Fax
91 722 95 83
Website: http://support.euro.dell.com
E-mail: [email protected]
Sweden (Upplands Vasby)
International Access Code:
009
Country Code: 46
City Code: 8
Technical Support
08 590 05 199
Relational Customer Care
08 590 05 642
Home/Small Business Customer Care
08 587 70 527
Fax Technical Support
08 590 05 594
Sales
08 590 05 185
Website: http://support.euro.dell.com
E-mail: [email protected]
Switzerland (Geneva)
Technical Support (Home and Small Business)
0844 811 411
0844 822 844
International Access Code: 00 Technical Support (Corporate)
Customer Care (Home and Small Business)
Country Code: 41
Customer Care (Corporate)
City Code: 22
Fax
022 799 01 90
Switchboard
022 799 01 01
0848 802 202
0848 821 721
Website: http://support.euro.dell.com
E-mail: [email protected]
Taiwan
International Access Code:
002
Technical Support
toll free: 0080 60 1255
Technical Support (Servers)
toll free: 0080 60 1256
Transaction Sales
toll free: 0080 651 228
Corporate Sales
toll free: 0080 651 227
Country Code: 886
or 0800 33 556
or 0800 33 555
Thailand
Technical Support
International Access Code:
001
Customer Support (Penang, Malaysia)
Country Code: 66
U.K. (Bracknell)
Sales
Technical Support (Corporate/Preferred Accounts/PAD [1000+
employees])
toll free: 0880 060 07
604 633 4949
toll free: 0880 060 09
0870 908 0500
International Access Code:
010
Country Code: 44
City Code: 1344
Technical Support (Direct/PAD and General)
0870 908 0800
Global Accounts Customer Care
01344 723186
Corporate Customer Care
01344 723185
Preferred Accounts (500-5000 employees) Customer Care
01344 723196
Central Government Customer Care
01344 723193
Local Government Customer Care
01344 723194
Home/Small Business Sales
0870 907 4000
Corporate/Public Sector Sales
01344 860456
Website: http://support.euro.dell.com
E-mail: [email protected]
U.S.A. (Austin, Texas)
International Access Code:
011
Country Code: 1
Automated Order-Status System
toll free: 1-800-433-9014
AutoTech (for portable and desktop systems)
toll free: 1-800-247-9362
Dell Home and Small Business Group (for portable and desktop systems):
Customer Technical Support (Return Material Authorization Numbers)
toll free: 1-800-624-9896
Customer Technical Support (Home sales purchased via
http://www.dell.com)
toll free: 1-877-576-3355
Customer Service (Credit Return Authorization Numbers)
toll free: 1-800-624-9897
National Accounts (systems purchased by established Dell national accounts [have your account number
handy], medical institutions, or value-added resellers [VARs]):
Customer Service and Technical Support (Return Material
Authorization Numbers)
toll free: 1-800-822-8965
Public Americas International (systems purchased by governmental agencies [local, state, or federal] or
educational institutions):
Customer Service and Technical Support (Return Material
Authorization Numbers)
toll free: 1-800-234-1490
Dell Sales
toll free: 1-800-289-3355
or toll free: 1-800-879-3355
Spare Parts Sales
toll free: 1-800-357-3355
DellWare™
toll free: 1-800-753-7201
Desktop and Portable Fee-Based Technical Support
toll free: 1-800-433-9005
Server Fee-Based Technical Support
toll free: 1-800-967-0765
Sales (Catalogs)
toll free: 1-800-426-5150
Fax
toll free: 1-800-727-8320
TechFax
toll free: 1-800-950-1329
Dell Services for the Deaf, Hard-of-Hearing, or Speech-Impaired
toll free: 1-877-DELLTTY
(1-877-335-5889)
Switchboard
Dellnet Technical Support
512 338-4400
toll free: 1-877-Dellnet
(1-877-335-5638)
Back to Contents Page
Back to Contents Page
Installation: Dell™ PowerVault™ 136T LTO Library User's Guide
Pre-Installation
Special Tools
Unpacking
Start Installation
Installing a Stand-alone Library
Installing the Dell PowerVault 136T LTO Library in a
Rack
Installing a Tape Drive Module
Installing a Redundant DC Power Supply
Installing the Dell PowerVault 136T Fibre Bridge
Installing Multiple-Slot Mailbox
Installing Storage Column(s)
Cables from Hosts
Installation Checkout
This chapter contains step by step procedures for installing all models of the Dell PowerVault 136T LTO Library and optional features.
Pre-Installation
The Dell PowerVault 136T LTO Library can be installed in a rack or as a stand-alone model.
Parts required for installation are shipped with each library. When unpacking the library and removing the packing material, do not lose or
misplace any enclosed parts.
Two door keys shipped with each library are used to lock and unlock the front door.
Step 1 Familiarize yourself with these instructions before proceeding with the installation tasks.
Step 2 Understand the requirements for connecting cables between the host and the Dell PowerVault 136T LTO Library and all tape drives. Refer
to Quick Start Guide for more information.
Special Tools
No special tools are required to install the Dell PowerVault 136T LTO Library. A standard CE tool kit is all you need to install the library.
Unpacking
Use the instructions supplied with the Dell PowerVault 136T LTO Library to unpack. When you remove the packing material from the palette, put
the parts in a safe area so they will not get damaged.
Start Installation
Use the following table to start your installation.
Table 1. Start Installation
Go to...
Stand-alone Library
Installing a Stand-alone Library
Library in a standard 19" rack
Installing the Dell PowerVault 136T LTO Library in a Rack
Tape Drive Module
Installing a Tape Drive Module
Redundant DC Power Supply
Installing a Redundant DC Power Supply
Multiple slot Mailbox Assembly
Installing Multiple-Slot Mailbox
Storage Column
Installing Storage Column(s)
Fibre Channel Router (FCR) Module
Installing the Fibre Channel Router (FCR)
Installation
Installing a Stand-alone Library
Tools required: None.
Step 1 Position the Dell PowerVault 136T LTO Library in place.
NOTE: The doors must be closed when performing this step.
Step 2 Open the front door and move the Picker Assembly along its vertical axis to ensure that all packing material was removed and no binds
exist.
CAUTION: Do not move the Picker Assembly along the rotary axis by hand as it will be damaged. The Picker Assembly can be
rotated by turning the gear on the Rotary Motor by hand.
Step 3 If you have other library features to install, go to Start Installation to find the correct procedure, otherwise go to Cables from Hosts.
Installing the Dell PowerVault 136T LTO Library in a Rack
Refer to the Dell Rack Installation Guide supplied with the rack mount hardware for instructions on how to install the Dell PowerVault 136T LTO
Library in a Dell rack.
Installing a Tape Drive Module
Refer to Figure 1 and Figure 2.
CAUTION: To ensure SCSI bus integrity, power down the library before starting this procedure.
Tools required: None.
CAUTION: It is mandatory that you install the first Tape Drive Module in the library in the bottom drive slot of the drive column
(Column 3 - slot A) and additional Drive Modules occupying subsequent slots (B to F) as shown in Figure 1 . If this configuration is
not followed, the library will not be able to complete its initialization and the drive(s) are not recognized during the teaching process.
Figure 1. Tape Drive Module Installation Allowable Configuration
Step 1 From the rear of the Dell PowerVault 136T LTO Library, locate the drive slot where the Tape Drive Module will be installed.
l
l
Loosen the two captive thumbscrews on the filler plate and remove the filler plate.
Save the filler plate for future drive maintenance activity.
Step 2 Slide the Tape Drive Module into position and tighten the two captive thumbscrews.
CAUTION: After installing the Tape Drive Module, power up the library. Wait 2 minutes before connecting the SCSI bus cable to
the drive SCSI connector.
Step 3 If you have other library features to be installed, go to Start Installation to find the correct procedure, otherwise go to Cables from Hosts.
Figure 2. Installing a Tape Drive Module
Installing a Redundant DC Power Supply
Refer to Figure 3.
Tools required: None.
Step 1 From the rear of the Dell PowerVault 136T LTO Library, locate the slot where the redundant DC Power Supply will be installed.
l
Loosen the two captive thumbscrews on the cover plate and remove the cover plate.
Step 2 Position the Power Supply with the LED as shown and slide it into position until it mates with the Power Distribution PCBA then tighten the
two captive thumbscrews.
Step 3 If you have other library features to be installed, go to Start Installation to find the correct procedure, otherwise go to Cables from Hosts.
Figure 3. Installing a Redundant DC Power Supply
Installing the Dell PowerVault 136T Fibre Bridge
Refer to Figure 4 .
Tools required: None.
Step 1 From the rear of the Dell PowerVault 136T LTO Library, locate the area reserved for the Dell PowerVault 136T Fibre Bridge.
l
Loosen the two captive thumbscrews on the cover plate and remove the cover plate.
Step 2 Slide the Fibre Bridge module into position until it mates with the connector then tighten the two captive thumbscrews. Refer to the Dell
PowerVault 136T Fibre Bridge User's Guide for in-depth information about the Fibre Bridge module and cabling.
Step 3 If you have other library features to be installed, go to Start Installation to find the correct procedure, otherwise go to Cables from Hosts.
Figure 4. Installing the Dell PowerVault 136T Fibre Bridge
Installing Multiple-Slot Mailbox
Refer to Figure 5.
Step 1 The Multiple Slot Mailbox Assembly is installed similarly as the Standard Mailbox. Attach the Multiple Slot Mailbox to the door using eight
11/32 nuts.
Step 2 Attach the cable clamps using 2 Phillips screws and one 11/32 nut. Connect the cable to the Display Assembly.
Step 3 Insert magazines and any cartridges in the Mailbox.
Step 4 If you have other library features to be installed, go to Start Installation to find the correct procedure, otherwise go to Cables from Hosts.
Figure 5. Installing the Multiple-Slot Mailbox Assembly
Installing Storage Column(s)
Refer to Figure 7.
Tools required: 11mm or 7/16 Nut driver, T20 Torx driver and flashlight.
Step 1 Power off the Dell PowerVault 136T LTO Library by setting the main switch on the AC Input Power Module to the Off position.
Step 2 Open the Dell PowerVault 136T LTO Library front door.
Step 3 If necessary, move the Picker Assembly to a position in the Y-axis to allow access room and gently slide the storage column in place.
NOTE: The Y-axis refers to the vertical movement of the Picker Assembly. It can be moved gently, manually. The rotary axis refers to a
spinning action and requires the Picker Assembly to be rotated by turning the gear on the Rotary Motor by hand.
Step 4 Refer to Figure 6 for the storage column topography and perform one of the following two steps depending on the column you are installing:
l
l
If you are installing column 4, use the T20 Torx wrench to tighten two bottom screws attaching the storage column to the bottom chassis.
If you are installing column 5, use the 7/16 nut driver to tighten the bolt attaching the storage column to the bracket.
Step 5 Install the top bolt using the 7/16 Nut driver.
Step 6 Install any magazines in the storage column.
Figure 6. Storage Column Topography
Figure 7. Installing Storage Column(s)
Cables from Hosts
The Dell PowerVault 136T LTO Library supports SCSI-3 Low Voltage Differential (LVD) attachments via a SCSI-3 P cable with 68-pin Dconnector.
The Dell PowerVault 136T LTO Library is configured with one SCSI adapter; the adapter is connected to a SCSI bus and this bus must be
properly terminated with the terminator shipped with each library.
Since the Dell PowerVault 136T LTO Library only logically supports the one-byte wide protocol, the library SCSI ID value must be within the range
of 0-7.
NOTE: The default Library SCSI ID is 0 (zero). This default value will appear when a new SCSI PCBA is installed, or after a Microcode
update.
Terminator power is provided via a jumper on the Host SCSI Interface PCBA. Refer to the Host SCSI Interface PCBA for locations of the Term
Power jumpers.
CAUTION: The factory will have the jumper installed to provide term power as the default setting.
Host to Tape Drive
Attach host cable to the tape drive(s) according to your desired configuration. An example of SCSI cable connections from the host system to the
library and tape drives is shown in Figure 8.
Figure 8. SCSI cables connection from the host
Host to Library
Step 1 Route the cable from the host to the back of the Dell PowerVault 136T LTO Library.
Step 2 Connect the cable straight into one of the two SCSI connectors on the Host SCSI Interface PCBA.
Step 3 If this is the last device on the SCSI bus, install an LVD terminator on the other connector of the SCSI PCBA.
Step 4 If attaching to the next device in the chain, install the next cable into the other connector of the Host SCSI Interface PCBA
Installation Checkout
Step 1 Ensure there is at least one cartridge in the storage area of the library. Make sure that the front door of the library is closed.
Step 2 Make sure the Main Switch on the AC Input Power Module in the back of the library is turned on.
Step 3 Turn the Power On/Off Switch on the Dell PowerVault 136T LTO Library front door to on.
Step 4 The library firmware will initialize and begin the Teach/Inventory process automatically. This process can take several minutes depending
on the number of drives installed in the library.
Step 5 Run library demo from the Operator Panel (Main Menu >More >Service >Library>Exercise >Demo).
l
Run this test for at least 5 cycles.
Back to Contents Page
Back to Contents Page
Introduction: Dell™ PowerVault™ 136T LTO Library User's Guide
Intended Audience
Assistance
Regulatory Notices
Declaration of Conformity
Intended Audience
This guide is intended for operators, trained customer specialists, and maintenance personnel of the service partner who interact with the Dell
PowerVault 136T Library.
CAUTION: Operation of the Dell PowerVault 136T LTO Library by untrained personnel can lead to dangerous situations. The
consequence could be severe or fatal injury caused by contact with electrical connections. Therefore, introductory training by Dell is
recommended for all who work with the Dell PowerVault 136T LTO Library.
An operator is responsible for ensuring that only qualified personnel perform the following procedures on the equipment:
l
l
l
l
l
l
l
Prepare for operation
Set-up
Start-up
Operate
Shutdown
Maintenance
Restart
CAUTION: Some work and modifications can only be performed with the appropriate qualifications and training. Most importantly,
know and observe all safety rules before working with the equipment.
Assistance
If problems cannot be solved with the aid of this document or if recommended training is desired, contact the Dell Technical Assistance Center.
Dell provides a number of Help tools to assist you when contacting Dell. These tools are described in the Getting Help section.
Regulatory Notices
Federal Communication Commission Class A Notice (Section 15.105)
This equipment has been tested and found to comply with the limits for a Class A digital device, pursuant to Part 15 of the FCC Rules. These limits
are designed to provide reasonable protection against harmful interference when the equipment is operated in a commercial environment. This
equipment generates, uses, and can radiate radio frequency energy and, if not installed and used in accordance with the instruction manual, may
cause harmful interference to radio communications. Operation of this equipment in a residential area is likely to cause harmful interference in
which case the user will be required to correct the interference at his own expense. In compliance with FCC regulations, the following information is provided on the device or devices covered in this document.
Product Name: Dell PowerVault 136T LTO Library
Model number: SC100
Company name: Dell Computer Corporation One Dell Way
Round Rock, TX 78682
512-338-4400
IC Notice (Canada Only)
This Class A digital apparatus complies with Canadian ICES-003.
Cet appareil numérique de la classe A est conforme à la norme NMB-003 du Canada.
NOTE: Industry Canada regulations provide that changes or modifications not expressly approved by Dell Computer Corporation could
void your authority to operate this equipment.
EN 55022 Compliance (Czech Republic Only)
This device belongs to category B devices as described in EN 55022, unless it is specifically stated that it is a category A device on the
specification label. The following applies to devices in category A of EN 55022 (radius of protection up to 30 meters). The user of the device is obliged to take all steps necessary to remove sources of interference to telecommunication or other devices.
CE Notice
Marking by the symbol
indicates compliance of this tape library to the EMC (Electromagnetic Compatibility) directive of the European
Community. Such marking is indicative that this tape library meets or exceeds the following technical standards:
l
l
l
l
l
l
l
l
l
l
l
l
l
l
EN 55022 Limits and Methods of Measurement of Radio Interference Characteristics of Information Technology Equipment.
¡ This system is an EN 55022 Class A device.
EN 50081-1 Electromagnetic compatibility - Generic emission standard Part 1: Residential, commercial, and light industry.
EN 55024:1998 Information technology equipment - Immunity characteristics -Limits and methods of measurements.
EN 61000-3-2 Harmonic current emissions test.
¡ Device Class B.
EN61000-3-3 Voltage fluctuations and flicker in low-voltage supply systems test.
EN 61000-4-2 Electrostatic discharge immunity test. Severity level 3.
EN 61000-4-3 Radiated, radio-frequency, electromagnetic field immunity test.
¡ Severity level 2.
EN 61000-4-4 Electrical fast transient/burst immunity test.
¡ Severity level 2.
EN 61000-4-5 Surge immunity test.
¡ Severity level 2.
EN 61000-4-6 Immunity to conducted disturbances, induced by radio-frequency fields.
¡ Severity level 2.
EN 61000-4-8 Power frequency magnetic field immunity test.
¡ Severity level 2.
EN 61000-4-11 Voltage dips, short interruptions and voltage variations immunity test.
¡ Performance criteria B and C.
EN 60950:1992 + Amd.1:1993 + Amd.2:1993 with considerations to Amd.3:1995
Safety of Information Technology Equipment including Electrical Business Equipment.
A Declaration of Conformity in accordance with the preceding standards has been made and is on file at Dell Computer Corporation.
VCCI Notices (Japan Only)
This is a Class A product based on the standard of the Voluntary Control Council for Interference by Information Technology Equipment (VCCI). If
this equipment is used in a domestic environment, radio disturbance may occur, in which case, the user may be required to take corrective
actions.
NOTE: VCCI regulations provide that changes or modifications not expressly approved by the Dell Computer Corporation could void your
authority to operate this equipment.
Declaration of Conformity
DECLARATION OF CONFORMITY
according to EN 45014
Manufacturer's Name:
Dell Computer Corporation
Manufacturer's Address:
One Dell Way
Round Rock, TX 78682
USA
declares, that the product:
Product :
Dell PowerVault 136T LTO Library
Model Number:
SC100
conforms to the following international standards,
Emissions:
EN 50081-1:1992, EN-55022:1998 Class A
Immunity:
EN 55024:1998
Safety:
EN 60950/A11:1997
Quality:
ISO 9001
Supplementary Information:
Signature:
Full Name:
Position:
Signature on File
Date:
Place:
Round Rock, TX
USA
Back to Contents Page
Back to Contents Page
Using the Menus: Dell
PowerVault
136T LTO Library User's Guide
Using the Operator Panel Menu
Main Menu Selection
Online/Offline Selection
Status Menu Selection
Command Menu Selection
Setup Menu Selection
Service Menu Selection
About Menu Selection
The Operator Panel provides a menu driven operator interface to the PowerVault 136T LTO Library. The menus allow selection of parameters and
information regarding the status and current operating parameters of the PowerVault 136T LTO Library.
Using the Operator Panel Menu
NOTE: The information menus are not dynamically updated. To view changes, reselect the menu.
Each menu is accessible through the Operator Panel push buttons. Refer to Operator Panel for an illustration and definition of the push buttons. An
illustration of the menu tree mapping is located on Figure 1 . Refer to Main Menu Selection for the actual menus.
Figure 1. Menu Tree
Menu Guidelines
All menus and respective options are grouped according to function. Some options are followed by special characters. The special characters
following the softkey menu titles are described below.
l
l
l
A keyword leading to another menu is suffixed by a small black arrow. Example: >
A keyword leading to a dialog box is suffixed with three closely spaced dots. Example: ...
A keyword leading to an immediate action has no suffix.
Most fields on the menus, submenus, dialogs, and screens are read only. Those fields that are read/write are shown in reverse video. During
Export operations, cartridge selection is also indicated by reverse video. Example:
Using Commands That Require an Offline State
Those commands listed under the Commands and Service softkey menus require that the library be in an offline state. If any such commands are
attempted while the library is in an online state, the operator will be requested to take the library offline with the following dialogs. A NOTE box, as
shown below, can be found on the appropriate menu description page. The originating command is completed once the PowerVault 136T LTO
Library is OFFLINE.
NOTE: To use this command, the library must be offline with the door closed.
Figure 2. Change Dialog
To choose one of the two selections, follow the step.
Step 1 Press the button beneath the desired softkey.
l
l
If the button beneath the Change softkey is pressed, Figure 3 is displayed.
If the button beneath the Cancel softkey is pressed, the operation is cancelled and the originating menu is displayed.
Figure 3. Offline Confirmation Dialog
To choose one of the two selections, follow the step.
Step 2 Press the button beneath the desired softkey.
l
l
If the button beneath the OK softkey is pressed, Figure 4 is displayed. The library goes offline.
If the button beneath the Cancel softkey is pressed, the operation is cancelled and the originating menu is displayed.
Figure 4. Completed Verification Dialog
Collecting Command and Error Logs
If a problem causes a Service Action Code (SAC) generation, collect the command and error logs. The logs are used by Technical Support to
resolve the problem. There are three procedures for retrieving the logs.
NOTE: The preferred procedure is to use the RMU. Refer to the Diagnostics File Dialog.
The other two available procedures are listed below:
Use a PC running Windows® and utilizing an RS-232 port with a straight through serial cable.
NOTE: A null modem cable will not work with this procedure.
Step 1 Connect the serial cable from the PC to the serial port located on the library Host SCSI PCBA. See Figure 5.
Figure 5. Host SCSI Interface PCBA
Step 2 Refer to the HyperTerminal documentation for the procedures to configure and execute the HyperTerminal program.
Step 3 Configure HyperTerminal with the following parameters:
l
l
l
l
l
l
Bits per second 38400
Data bits 8
Parity None
Stop bits 1
Flow control None
Emulation ANSI
Step 4 Run HyperTerminal.
Step 5 Use the procedure shown in Command Log Dialog or Error Log Dialog to print the logs to the PC. Save the log for Dell Customer Support.
If HyperTerminal is not available, use the Command Log Dialog or Error Log Dialog and manually retrieve and copy as many logs as possible.
Operator Intervention Message
If a problem causes an operator intervention message to appear, refer to Table 2 for an explanation of the parameters in the message.
Operator Information Message
During the course of normal operation, operator information messages appear. Refer to Table 3 for a listing of the available messages.
Main Menu Selection
The Main Menu is the first interactive menu displayed after applying power. The Main Menu consists of the initial screen and the alternate screen.
All subsequent menus and options are selectable from the Main Menu. Eight options are available with four of the options present at all times. See
Figure 6 for an illustration of the initial screen and Figure 7 for the alternate screen of the Main Menu.
Figure 6. Main Menu (initial screen)
Pressing the button beneath the More softkey causes the Main Menu (alternate screen) to appear.
Figure 7. Main Menu (alternate screen)
Pressing the button beneath the Back softkey causes the Main Menu (initial screen) to reappear. To choose any of the selections, press the button
beneath the desired softkey selection.
The selected operation is applied and the appropriate menu is displayed.
Online/Offline Selection
The ONLINE/OFFLINE selection is primarily used to change the operating state of the PowerVault 136T LTO Library after startup, before
shutdown, or before diagnostic operations.
ONLINE/OFFLINE is selected from the Main Menu (initial screen) by following the procedure.
Step 1 Press the button beneath the ONLINE/OFFLINE softkey location.
The PowerVault 136T LTO Library changes from either OFFLINE to ONLINE state or ONLINE to OFFLINE state. This group of menus is
discussed in Using Commands That Require an Offline State.
Status Menu Selection
The Status Menu is primarily used to provide various static and dynamic operating statistics. Status is selected from the Main Menu (initial screen)
by following this procedure.
Step 1 Press the button beneath the Status softkey from the Main Menu.
The Status Menu appears. This menu offers four selections. See Figure 8.
Figure 8. Main Menu > Status Menu
To choose one of the four selections, follow the step.
Step 2 Press the button beneath the desired softkey.
l
l
l
l
If the button beneath the Library softkey is pressed, the Library Submenu is displayed.
If the button beneath the Drives softkey is pressed, the Drives Dialog is displayed.
If the button beneath the Logs softkey is pressed, the Logs Submenu is displayed.
If the button beneath the Back softkey is pressed, the Main Menu Selection is displayed.
Library Submenu
When Library is selected, the Library Submenu is displayed. See Figure 9. This is a collection of specific library status options. This submenu
offers four selections.
Figure 9. Status >Library Submenu
To choose one of the four selections, follow the step.
Step 1 Press the button beneath the desired softkey.
l
l
l
l
If the button beneath the System softkey is pressed, the System Dialog is displayed.
If the button beneath the Slot softkey is pressed, the Slot Dialog is displayed.
If the button beneath the Media softkey is pressed, the Media Dialog is displayed.
If the button beneath the Back softkey is pressed, the Status Menu Selection is displayed.
System Dialog
When System is selected, the System Dialog is displayed. See Figure 10. This option is used to view the current library physical and statistical
characteristics. This dialog offers two options.
NOTE: All field values are read only.
Figure 10. Status > Library > System Dialog
Field
Value
Description
Full: 0 .. 72
The number of occupied slots
Empty: 0 .. 72
The number of empty slots
Full: 0 ..12
The number of filled slots
Empty: 0 .. 12
The number of empty slots
Full: 0 .. 6
The number of filled drive slots
Empty: 0 .. 6
The number of empty drive slots
Storage Slots
Mailbox Slots
Drives
To choose one of the two selections, follow the step.
Step 1 Press the button beneath the desired softkey.
l
l
If the button beneath the OK softkey is pressed, the Library Submenu is displayed.
If the button beneath the Next softkey is pressed, the follow on dialog is displayed. Refer to Figure 11
Figure 11. Status > Library > System > Statistics Dialog
Field
Value
Description
Moves
0 .. 4,294,967,295
The lifetime number of slot to slot moves
IO accesses
0 .. 65535
The lifetime number of mailbox door openings
Get retries
0 .. 65535
The lifetime number of recovery tries on Gets
Put retries
0 .. 65535
The lifetime number of recovery tries on Puts
Scan retries
0 .. 65535
The lifetime number of recovery retries on scans
To choose one of the two selections, follow the step.
Step 2 Press the button beneath the desired softkey.
l
l
If the button beneath the OK softkey is pressed, the Library Submenu is displayed.
If the button beneath the Next softkey is pressed, the System Dialog is redisplayed.
Slot Dialog
When Slot is selected, the Slot Dialog is displayed. See Figure 12. This option is used to view the current slot physical and statistical
characteristics.
Figure 12. Status > Library > Slot Dialog
NOTE: The column, magazine, and slot parameter selections are interactive. The combination of the three parameters generates the
element address.
To choose one of the four selections, follow the step.
Step 1 Press the button beneath the desired softkey.
l
l
l
l
If the button beneath the OK softkey is pressed, the source parameters are accepted and the Slot Status Dialog is displayed.
If the button beneath the Change Column softkey is selected, the column indicator is stepped clockwise to the next column address.
Repeat until the desired column is indicated.
If the button beneath the Next softkey is selected, the current source parameter changes from column to magazine and the Change
Magazine Dialog is displayed. Refer to Figure 13.
If the button beneath the Cancel softkey is pressed, the Library Submenu is displayed.
Figure 13. Status > Library > Slot > Change Magazine Dialog
Step 2 Press the button beneath the desired softkey.
l
l
l
If the button beneath the OK softkey is pressed, the source parameters are accepted and the Slot Status Dialog is displayed.
If the button beneath the Change Magazine softkey is selected, the magazine indicator is stepped downward to the next magazine
address. Repeat until the desired magazine is indicated.
If the button beneath the Next softkey is selected, the current source parameter changes from magazine to slot and the Change Slot
Dialog is displayed. See Figure 14.
NOTE: If the chosen column element is a drive (column 3), no slot or magazine parameters are available. The menu will revert from the
drive parameter back to the change column parameter.
l
If the button beneath the Cancel softkey is pressed, the Library Submenu is displayed.
Figure 14. Status > Library > Slot > Change Slot Dialog
To choose one of the four selections, follow the step.
Step 3 Press the button beneath the desired softkey.
l
l
l
l
If the button beneath the OK softkey is pressed, the source parameters are accepted and the Slot Status Dialog is displayed.
If the button beneath the Change Slot softkey is selected, the slot indicator is stepped downward to the next slot address. Repeat until the
desired slot is indicated.
If the button beneath the Next softkey is selected, the current source parameter changes from slot to column as shown in the Slot Dialog.
Refer back to Figure 12.
If the button beneath the Cancel softkey is pressed, the Library Submenu is displayed.
Slot Status Dialog
When OK is selected, the Slot Status Dialog is displayed. See Figure 15. This screen displays the current slot physical and statistical
characteristics.
Figure 15. Status > Library > Slot > Slot Status Dialog
Field
Slot
Value
Description
1 .. 5
Indicates the location of the cartridge in a column
A, B, C
Indicates the location of the cartridge in a magazine section
1 .. 6
Indicates the location of the cartridge in a row
Empty
A cartridge is not present
Status
Full
A cartridge is present
Volser
0 .. 9, A .. Z
Indicates the barcode number
Source
None
Indicates the home position of the cartridge
Yes
The slot can be used
No
The slot cannot be used
Valid
To choose one of the two selections, follow the step.
Step 1 Press the button beneath the desired softkey.
l
l
If the button beneath the OK softkey is selected, the Slot Dialog is displayed.
If the button beneath the Next softkey is selected, the Slot Get/Put Dialog is displayed. See Figure 16.
Figure 16. Status > Library > Slot > Slot Get/Put Dialog
Field
Value
Description
Total Puts
0000000 .. 9999999
Indicates the total number of put operations
Put Retries
0000000 .. 9999999
Indicates the number of put retry operations
Get Retries
0000000 .. 9999999
Indicates the number of get retry operations
Yes
Indicates the slot is reserved by a SCSI host
No
Indicates the slot is not reserved
Reserved
Reserve ID
00 .. 72
Indicates the reserve ID
Reserved by
Indicates the ID of the reserving host
To choose one of the two selections, follow the step.
Step 2 Press the button beneath the desired softkey.
l
l
If the button beneath the OK softkey is selected, the Slot Dialog is displayed.
If the button beneath the Next softkey is selected, the Reserved Slot Dialog is displayed. See Figure 17.
Figure 17. Status >Library > Slot > X, Y, Z Position Slot Dialog
NOTE: X, Y, Z are the coordinates of the Get and Put Slot for the picker to select the cartridge. This information is used by the Dell service
technicians.
To choose one of the two selections, follow the step.
Step 3 Press the button beneath the desired softkey.
l
l
If the button beneath the OK softkey is selected, the Slot Dialog is displayed.
If the button beneath the Next is selected, the Slot Status Dialog is displayed. Refer to Figure 15 .
Media Dialog
When Media is selected, the Media Dialog is displayed. See Figure 18. This option is used to view the details of the selected LTO tapes using the
volser number and the current physical column, magazine, and slot parameter of each tape, along with the cell number. This dialog offers four
options.
Figure 18. Status >Library > Media Dialog
To choose one of the four options follow the step.
Step 1 Press the button beneath the desired softkey.
l
l
l
l
If the button beneath the Select softkey is pressed, the selected field becomes the active field. Refer to Figure 19.
If the button beneath the Page Up softkey is pressed, the current page scrolls back to the previous page.
If the button beneath the Page Down softkey is pressed, the current page scrolls forward to the next page.
If the button beneath the Cancel softkey is pressed, the Library Submenu is displayed.
Figure 19. Status >Library > Media Selection Dialog
To choose one of the four options follow the step.
Step 2 Press the button beneath the desired softkey.
l
l
l
l
If the button beneath the Up softkey is pressed, the currently active field is scrolled up to the next field above it.
If the button beneath the Down softkey is pressed, the currently active field is scrolled down to the next field below it.
If the button beneath the Select softkey is pressed, the details of the currently active field are displayed. See Figure 20.
If the button beneath the Cancel softkey is pressed, the Media Dialog is displayed.
Figure 20. Status >Library > Media Selection > Media Details Dialog
Field
Value
Description
Volser
0 .. 9, A .. Z
Indicates the barcode number
Column
1 .. 5
Indicates the location of the cartridge in a column
Section
A, B, C
Indicates the location of the cartridge in a magazine
Row
1 .. 6
Indicates the location of the cartridge in a slot
Cell
Indicates the location of the cartridge in a slot. It is an internal number used by Dell
Service Technicians.
To choose the selection, follow the step.
Step 3 Press the button beneath the desired softkey.
l
If the button beneath the OK softkey is pressed, the Media Dialog is displayed.
Drives Dialog
When Drives is selected, the Drives Dialog is displayed. See Figure 21. This option is used to view the current drive physical and statistical
characteristics. This dialog offers three options.
Figure 21. Status > Drives Dialog
Field
Value
Description
Drive
01 .. 06
The number of the drive currently selected
Type
HP LTO
The type of drive currently selected
Ser Num
A .. Z, 0 .. 9
The serial number of the drive currently selected
Version
A .. Z, 0 .. 9
The current level of firmware installed on the drive displayed
SCSI ID
00 .. 15
The SCSI ID of the drive currently selected
To choose one of the three selections, follow the step.
Step 1 Press the button beneath the desired softkey.
l
l
l
If the button beneath the OK softkey is pressed, the Status Menu Selection is displayed.
If the button beneath the Change Drive softkey is pressed, information on the next drive installed is displayed.
If the button beneath the Cancel softkey is pressed, the Status Menu Selection is displayed.
Logs Submenu
When Logs is selected, the Logs Submenu is displayed. See Figure 22. The submenu offers various log information. This submenu offers four
selections.
Figure 22. Status > Logs Submenu
To choose one of the four selections, follow the step.
Step 1 Press the button beneath the desired softkey.
l
l
l
l
If the button beneath the Command Log softkey is pressed, the Command Log Dialog is displayed.
If the button beneath the Error Log softkey is pressed, the Error Log Dialog is displayed.
If the button beneath the Drive Log softkey is pressed, the Drive Log Dialog is displayed.
If the button beneath the Back softkey is pressed, the Status Menu Selection is displayed.
Command Log Dialog
When Command Log is selected, the Command Log Dialog is displayed. See Figure 23. This option is used to view a running history log of library
operations with the option to dump the log to the serial port. This dialog offers four selections.
Figure 23. Status > Logs > Command Log Dialog
Field
Value
Description
Date
Month/Day/Year
The date of the error
Time
Hrs:Mins:Secs
The time of the error
Message
Text
This message is useful only to Dell Customer Support
The log display starts at the most recent entry. A maximum of 50 entries are kept.
To choose one of the four selections, follow the step.
Step 1 Press the button beneath the desired softkey.
l
l
l
l
If the button beneath the Next softkey is pressed, the next command is displayed.
If the button beneath the Previous softkey is pressed, the previous command is displayed.
If the button beneath the Print softkey is pressed, the Print Dialog is displayed.
If the button beneath the Cancel softkey is pressed, the Logs Submenu is displayed.
Print Dialog
When Print is selected, the Print Dialog is displayed. Refer to Figure 24. This option is used to print a running history log of library operations. This
dialog offers two selections.
Figure 24. Status > Logs > Command Log > Print Dialog
To choose one of the two selections, follow the step.
Step 1 Press the button beneath the desired softkey.
l
l
If the button beneath the OK softkey is pressed, the command log is output on the serial port.
If the button beneath the Cancel softkey is pressed, the Command Log Dialog is displayed.
Error Log Dialog
When Error Log is selected, the Error Log Dialog is displayed. See Figure 25. This option is used to view a running history log of error conditions
that have occurred with the option to dump the log to the serial port.
Figure 25. Status > Logs > Error Log Dialog
Field
Value
Description
Date
Month/Day/Year
The date of the error
Time
Hrs:Mins:Secs
The time of the error
Type
Text
This message is useful only to Dell Customer Support
Error
Hexadecimal number
This message is useful only to Dell Customer Support
Modifier
Hexadecimal number
This message is useful only to Dell Customer Support
Board
Any PCBA
The PCBA associated with the error.
The log display starts at the most recent entry. A maximum of 213 entries are kept.
To choose one of the four selections, follow the step.
Step 1 Press the button beneath the desired softkey.
l
l
l
l
If the button beneath the Next softkey is pressed, the next error is displayed.
If the button beneath the Previous softkey is pressed, the previous error is displayed.
If the button beneath the Print softkey is pressed, the Print Dialog is displayed.
If the button beneath the Cancel softkey is pressed, the Logs Submenu is displayed.
Print Dialog
When Print is selected, the Print Dialog is displayed. Refer to Figure 26. This option is used to print a running history log of library errors. This
dialog offers two selections.
Figure 26. Status > Logs > Error Log > Print Dialog
To choose one of the two selections, follow the step.
Step 1 Press the button beneath the desired softkey.
l
l
If the button beneath the OK softkey is pressed, the error log is output on the serial port.
If the button beneath the Cancel softkey is pressed, the Error Log Dialog is displayed.
Drive Log Dialog
When Drive Log is selected, the Select Drive Dialog is displayed. See Figure 27. This option is used to view a running history log of error
conditions that have occurred. Refer to Diagnostics File Dialog to access the Drive Log Report via the RMU.
Figure 27. Status > Logs > Drive Log > Select Drive Dialog
Field
Value
Description
Drive
01 .. 06
Drive number of log to be viewed
To choose one of the three selections, follow the step.
Step 1 Press the button beneath the desired softkey.
l
l
l
If the button beneath the OK softkey is pressed, the drive parameter is accepted and the Drive Log Dialog is displayed. Refer to Figure
28.
If the button beneath the Change Drive softkey is pressed, the Drive field is increased.
If the button beneath the Cancel softkey is pressed, the Logs Submenu is displayed.
Figure 28. Status > Logs > Drive Log Dialog
Command Menu Selection
The Command Menu is primarily used to manipulate the library at a motion command level. Command is selected from the Main Menu by following
this procedure.
NOTE: Commands listed under the Command Menu Selection require an offline state. Refer to Using Commands That Require an
Offline State for more information.
Step 1 Press the button beneath the Command softkey from the Main Menu.
The Command Menu appears. This menu offers four selections. See Figure 29.
Figure 29. Main Menu > Command Menu
To choose one of the four selections, follow the step.
Step 2 Press the button beneath the desired softkey.
l
l
l
l
If the button beneath the Move softkey is pressed, the Move Submenu is displayed.
If the button beneath the Mailbox softkey is pressed, the Mailbox Submenu is displayed.
If the button beneath the Drives softkey is pressed, the Drives Submenu is displayed.
If the button beneath the Back softkey is pressed, the Main Menu Selection is displayed.
Move Submenu
When Move is selected, the Move Submenu is displayed. See Figure 30. This submenu contains a group of movement options. This submenu
offers four selections.
Figure 30. Command > Move Submenu
To choose one of the four selections, follow the step.
Step 1 Press the button beneath the desired softkey.
l
l
l
l
If the button beneath the Move Media softkey is pressed, the Move Media Dialog is displayed.
If the button beneath the Position Picker softkey is pressed, the Position Picker Dialog is displayed.
If the button beneath the Scan Barcode softkey is pressed, the Scan Barcode Dialog is displayed.
If the button beneath the Back softkey is pressed, the Command Menu Selection is displayed.
Move Media Dialog
When Move Media is selected, the Source Move Media Dialog is displayed. See Figure 31. This option moves a cartridge from one element
location to another element location.
Figure 31. Command > Move > Move Media > Source Move Media Dialog
NOTE: The column, magazine, and slot parameter selections are interactive. The combination of the three parameters generates the
element address.
To choose one of the four selections, follow the steps.
Step 1 Press the button beneath the desired softkey.
l
l
l
l
If the button beneath the OK softkey is pressed, the source parameters are accepted and the Destination Move Media Dialog is
displayed.
If the button beneath the Change Column softkey is selected, the column indicator is stepped clockwise to the next column address.
Repeat until the desired column is indicated.
If the button beneath the Next softkey is selected, the current source parameter changes from column to magazine and the Change
Magazine Dialog is displayed.
If the button beneath the Cancel softkey is pressed, the Move Submenu is displayed.
Figure 32. Command > Move > Move Media > Change Magazine Dialog
Step 2 Press the button beneath the desired softkey.
l
l
l
If the button beneath the OK softkey is pressed, the source parameters are accepted and the Destination Move Media Dialog is
displayed.
If the button beneath the Change Magazine softkey is selected, the magazine indicator is stepped downward to the next magazine
address. Repeat until the desired magazine is indicated.
If the button beneath the Next softkey is selected, the current source parameter changes from magazine to slot and the Change Slot
Dialog is displayed.
NOTE: If the chosen column element is a drive (column 3), no slot or magazine parameters will be available. The menu will revert from the
drive parameter back to the change column parameter.
l
If the button beneath the Cancel softkey is pressed, the Move Submenu is displayed.
Figure 33. Command > Move > Move Media > Change Slot Dialog
To choose one of the four selections, follow the step.
Step 3 Press the button beneath the desired softkey.
l
l
l
l
If the button beneath the OK softkey is pressed, the source parameters are accepted and the Destination Move Media Dialog is
displayed.
If the button beneath the Change Slot softkey is selected, the slot indicator is stepped downward to the next slot address. Repeat until the
desired slot is indicated.
If the button beneath the Next softkey is selected, the current source parameter changes from slot to column as shown in the Source
Move Media Dialog.
If the button beneath the Cancel softkey is pressed, the Move Submenu is displayed.
Figure 34. Command > Move > Move Media > Destination Move Media Dialog
To choose one of the four selections, follow the step.
Step 4 Repeat the Source Move procedure Step 1 through Step 3 to establish the Destination Move element address.
l
The cartridge is moved from the chosen source element address location to the chosen destination element address location.
Position Picker Dialog
When Position Picker is selected, the Position Picker Dialog is displayed. See Figure 35. This option positions the picker in front of a specific
element.
Figure 35. Command > Move > Position Picker Dialog
To choose one of the four selections, follow the steps.
NOTE: The column, magazine, and slot parameter selections are interactive. The combination of the three parameters generates the
element address.
Step 1 Press the button beneath the desired softkey.
l
l
l
l
If the button beneath the OK softkey is pressed, the source parameters are accepted and the picker moves to the chosen element
address location.
If the button beneath the Change Column softkey is selected, the column indicator is stepped clockwise to the next column address.
Repeat until the desired column is indicated.
If the button beneath the Next softkey is selected, the current source parameter changes from column to magazine and the Change
Magazine Dialog is displayed. Refer to Figure 36.
If the button beneath the Cancel softkey is pressed, the Move Submenu is displayed.
Figure 36. Command > Move > Position Picker > Change Magazine Dialog
To choose one of the four selections, follow the step.
Step 2 Press the button beneath the desired softkey.
l
l
l
If the button beneath the OK softkey is pressed, the source parameters are accepted and the picker moves to the chosen element
address location.
If the button beneath the Change Magazine softkey is selected, the magazine indicator is stepped downward to the next magazine
address. Repeat until the desired magazine is indicated.
If the button beneath the Next softkey is selected, the current source parameter changes from magazine to slot and the Change Slot
Dialog is displayed. Refer to Figure 37.
NOTE: If the chosen column element is a drive (column 3), no slot or magazine parameters are available. The menu will revert from the
drive parameter back to the change column parameter.
l
If the button beneath the Cancel softkey is pressed, the Move Submenu is displayed.
Figure 37. Command > Move > Position Picker > Change Slot Dialog
To choose one of the four selections, follow the step.
Step 3 Press the button beneath the desired softkey.
l
l
l
l
If the button beneath the OK softkey is pressed, the source parameters are accepted and the picker moves to the chosen element
address location.
If the button beneath the Change Slot softkey is selected, the slot indicator is stepped downward to the next slot address. Repeat until the
desired slot is indicated.
If the button beneath the Next softkey is selected, the current source parameter changes from slot to column as shown in the Position
Picker Dialog. Refer to Figure 35.
If the button beneath the Cancel softkey is pressed, the Move Submenu is displayed.
Scan Barcode Dialog
NOTE: Best scanning results can be obtained by using Dell supplied barcode labels
When Scan Barcode is selected, the Scan Barcode Dialog is displayed. See Figure 38. This option performs an inventory on a range of slots.
Figure 38. Command > Move > Scan Barcode Dialog
To choose one of the four selections, follow the step.
NOTE: The column, magazine, and slot parameter selections are interactive. The combination of the three parameters generates the
location coordinate.
Step 1 Press the button beneath the desired softkey.
l
l
l
l
If the button beneath the OK softkey is pressed, the fields are accepted and the follow on dialog is displayed. Refer to Figure 41.
If the button beneath the Change Column softkey is selected, the column indicator is stepped clockwise to the next column address.
Repeat until the desired column is indicated.
If the button beneath the Next softkey is selected, the current source parameter changes from column to magazine and the Change
Magazine Dialog is displayed. Refer to Figure 39.
If the button beneath the Cancel softkey is pressed, the Move Submenu is displayed.
Figure 39. Command > Move > Scan Barcode > Change Magazine Dialog
To choose one of the four selections, follow the step.
Step 2 Press the button beneath the desired softkey.
l
l
l
If the button beneath the OK softkey is pressed, the fields are accepted and the follow on dialog is displayed. Refer to Figure 41.
If the button beneath the Change Magazine softkey is selected, the magazine indicator is stepped downward to the next magazine
address. Repeat until the desired magazine is indicated.
If the button beneath the Next softkey is selected, the current source parameter changes from magazine to slot and the Change Slot
Dialog is displayed. Refer to Figure 40 .
NOTE: If the chosen column element is a drive (column 3), no slot or magazine parameters are available. The menu will revert from the
drive parameter back to the change column parameter.
l
If the button beneath the Cancel softkey is pressed, the Move Submenu is displayed.
Figure 40. Command > Move > Scan Barcode > Change Slot Dialog
To choose one of the four selections, follow the step.
Step 3 Press the button beneath the desired softkey.
l
l
l
l
If the button beneath the OK softkey is pressed, the fields are accepted and the Select Slots Dialog is displayed. Refer to Figure 41.
If the button beneath the Change Slot softkey is selected, the slot indicator is stepped downward to the next slot address. Repeat until the
desired slot is indicated.
If the button beneath the Next softkey is selected, the current source parameter changes from slot to column as shown in the Scan
Barcode Dialog. Refer back to Figure 38.
If the button beneath the Cancel softkey is pressed, the Move Submenu is displayed.
Figure 41. Command > Move > Scan Barcode > Select Slots Dialog
Field
Value
Description
Slots to scan
0 .. 72
The number of slots to scan
Yes
Display the results of the scan
No
Do not display the results of the scan
Show results
To choose one of the four selections, follow the step.
Step 1 Press the button beneath the desired softkey.
l
l
l
l
If the button beneath the Up softkey is pressed, the value of the current field is increased.
If the button beneath the Down softkey is pressed, the value of the current field is decreased.
If the button beneath the Next softkey is pressed, the next field in the list is made the active field. Refer to Figure 42.
If the button beneath the Cancel softkey is pressed, the Scan Barcode Dialog is displayed.
Figure 42. Command > Move > Scan Barcode > Confirm Dialog
Field
Value
Description
Yes
Display the results of the scan
No
Do not display the results of the scan
Show results
To choose one of the four selections, follow the step.
Step 1 Press the button beneath the desired softkey.
l
l
l
l
If the button beneath the OK softkey is pressed, the fields are accepted and the follow on dialog is displayed. Refer to Figure 43 and
Figure 44.
If the button beneath the Yes/No softkey is pressed, the value of the current field is toggled.
If the button beneath the Next softkey is pressed, the next field in the list is made the active field. Refer back to Figure 41.
If the button beneath the Cancel softkey is pressed, the Scan Barcode Dialog is displayed.
Figure 43. Command > Move > Scan Barcode > Progress Dialog
Figure 44. Command > Move > Scan Barcode > Completion Dialog
Mailbox Submenu
When Mailbox is selected, the Mailbox Submenu is displayed. See Figure 45. This submenu imports cartridges to the library or exports cartridges
from the library. This submenu offers three selections.
Figure 45. Command > Mailbox Import/Export Dialog
To choose one of the three selections, follow the step.
Step 1 Press the button beneath the desired softkey.
l
l
l
If the button beneath the Import softkey is pressed, the Import Screen is displayed.
If the button beneath the Export softkey is pressed, the Export Dialog is displayed.
If the button beneath the Back softkey is pressed, the Command Menu Selection is displayed.
Import Screen
When Import is selected, the Import screen is displayed. See Figure 46. This screen indicates the initial operation for importing cartridges into the
library.
Figure 46. Command > Mailbox > Import > Command in Process Screen
The picker moves the cartridge(s) to the first available empty slot(s).
Figure 47. Command > Mailbox > Import > Command Completed Screen
To choose the selection, follow the step.
Step 1 Press the button beneath the desired softkey.
l
l
The picker has completed the Import operation.
If the button beneath the OK softkey is pressed, the Mailbox Submenu is displayed.
Export Dialog
When Export is selected, the Export screen is displayed. See Figure 48. This dialog indicates the initial operation for exporting cartridges out of
the library. The maximum export limit is reduced by each cartridge that is exported.
Figure 48. Command > Mailbox > Export Dialog
Field
Value
Description
Export Limit
0 .. 12
The number of empty slots in the mailbox
To choose one of the two selections, follow the step.
Step 1 Press the button beneath the desired softkey.
l
l
If the button beneath the OK softkey is pressed, the follow on dialog is displayed. See Figure 49.
If the button beneath the Cancel softkey is pressed, the Mailbox Submenu is displayed.
Figure 49. Command > Mailbox > Export List Dialog
To choose one of the four selections, follow the step.
Step 2 Press the button beneath the desired softkey.
l
l
l
l
If the button beneath the Select softkey is pressed, the selection cursor is displayed next to the first item in the item list. See Figure 50.
If the button beneath the Page Up softkey is pressed, the dialog is refreshed with the previous set of list items.
If the button beneath the Page Down softkey is pressed, the dialog is refreshed with the next set of list items.
If the button beneath the Cancel softkey is pressed, the Mailbox Submenu is displayed.
Figure 50. Command > Mailbox > Export > Export Select Dialog
To choose one of the four selections, follow the step.
Step 3 Press the button beneath the desired softkey.
l
l
l
If the button beneath the OK softkey is pressed and cartridges are selected, the selected list is accepted and the Export operation begins.
If no items are selected, this softkey is not enabled.
If the button beneath the Select softkey is pressed, the current item is highlighted in inverted video to indicate a valid selection. Refer to
Figure 51.
If the button beneath the Next softkey is pressed, the selection cursor is displayed by the next item in the item list.
l
If the button beneath the Pages softkey is pressed, the dialog returns to the Export List Dialog. Refer back to Figure 49. Additional
selections can be made or the Export operation can be cancelled.
Figure 51. Command > Mailbox > Export Selected Dialog
To choose one of the four selections, follow the step.
Step 4 Repeat the instruction in Step 3.
The results are the same as Step 3.
Drives Submenu
When Drives is selected, the Drives Submenu is displayed. See Figure 52. This submenu contains a collection of drive commands. This submenu
offers four selections.
Figure 52. Command > Drives Submenu
To choose one of the four selections, follow the step.
Step 1 Press the button beneath the desired softkey.
l
l
l
l
If the button beneath the Unload softkey is pressed, the Unload Dialog is displayed.
If the button beneath the Reset softkey is pressed, the Reset Dialog is displayed.
If the button beneath the Firmware Update softkey is pressed the Firmware Update Dialog is displayed.
If the button beneath the Back softkey is pressed, the Command Menu is displayed.
Unload Dialog
When Unload is selected, the Unload Dialog is displayed. See Figure 53. This option is used to unload a tape from a specific drive and place the
tape in its home slot.
Figure 53. Command > Drives > Unload Dialog
Field
Value
Description
Drive
01 .. 06
Number of drive to be unloaded.
To choose one of the three selections, follow the step.
Step 1 Press the button beneath the desired softkey.
l
l
If the button beneath the OK softkey is pressed, the Command in Progress Dialog is displayed. Refer to Figure 54.
If the button beneath the Change Drive softkey is pressed, the next drive is selected.
l
If the button beneath the Cancel softkey is pressed, the Drives Submenu is displayed.
Figure 54. Command > Drives > Unload > Command in Progress Dialog
The selected drive unloads the tape, and the picker places the tape in its home position. The Command Complete Dialog is displayed. See
Figure 55.
Figure 55. Command > Drives > Unload > Command Complete Dialog
Reset Dialog
When Reset is selected, the Reset Dialog is displayed. See Figure 56. This option is used to reset the selected drive.
Figure 56. Command > Drives > Reset Dialog
Field
Value
Description
Drive
01 .. 06
Number of the drive to be reset
SOFT
Issues a drive reset command
HARD
Removes power from the drive
Reset type
To choose one of the four selections, follow the step.
Step 1 Press the button beneath the desired softkey.
l
l
l
l
If the button beneath the OK softkey is pressed, the current fields are accepted and the Command in Progress Dialog and the Command
Complete Dialog are displayed.
If the button beneath the Change Drive softkey is pressed, the selected drive is changed to the next drive.
If the button beneath the Next softkey is pressed, the next field is made active. Refer to Figure 57.
If the button beneath the Cancel softkey is pressed, the Drives Submenu is displayed.
Figure 57. Command > Drives > Reset > Reset Type Dialog
Field
Value
Description
SOFT
Issues a drive reset command
HARD
Removes power from the drive
Reset Type
To choose one of the four selections, follow the step.
Step 1 Press the button beneath the desired softkey.
l
l
l
l
If the button beneath the OK softkey is pressed, the current fields are accepted and the Command in Progress Dialog and the Command
Complete Dialog are displayed.
If the button beneath the Change softkey is pressed, the Reset type field is changed to the next value in the list.
If the button beneath the Next softkey is pressed, the previous field is made active.
If the button beneath the Cancel softkey is pressed, the Drives Submenu is displayed.
Figure 58. Command > Drives > Reset > Command in Progress Dialog
The selected drive is reset and the Command Complete Dialog is displayed. See Figure 59.
Figure 59. Command > Drives > Reset > Command Complete Dialog
Firmware Update Dialog
When Firmware Update is selected, the Firmware Update Dialog is displayed. See Figure 60. This option is used to update the drive firmware.
Figure 60. Command > Drives > Firmware Update Dialog
To update the current drive firmware, follow the steps.
Step 1 Open the mailbox.
Step 2 Place the tape containing the new drive firmware into the top slot of the mailbox.
Step 3 Close the mailbox.
l
The library executes the TEACH and INVENTORY procedures.
Step 4 Press the button beneath the desired softkey.
l
l
If the button beneath the OK softkey is pressed, the Select Drive Dialog is displayed.
If the button beneath the Cancel softkey is pressed, the Drives Submenu is displayed.
Figure 61. Command > Drives > Firmware Update > Select Drive Dialog
Field
Value
Description
Drive firmware is to be updated
Sel
Drive firmware is not to be updated
Drive
1..6
Drive number
Firmware
A..Z, 0..9
Drive firmware version currently loaded
Step 5 Press the button beneath the desired softkey.
l
If the button beneath the OK softkey is pressed, the Firmware Update Starting Dialog is displayed.
¡ The picker retrieves the new drive firmware update tape cartridge from the first Mailbox slot and places it into the first selected drive.
¡ The drive updates the firmware, and unloads the tape.
¡ The picker retrieves the tape from the drive and places it into the next selected drive.
¡ After the firmware on the last selected drive is updated, the picker retrieves the tape from the drive and places it into the first slot of
the mailbox. The operator panel displays the Drive Migration Complete Screen.
¡ Press the button beneath the OK softkey
¡ The Drives Submenu is displayed.
NOTE: After updating the drive firmware, return to the Select Drive Dialog to view the current firmware version that is loaded on each drive.
l
l
l
If the button beneath the Change Drive softkey is pressed, the next drive in the list becomes the blackened active drive field.
If the button beneath the Unselect softkey is pressed, the checkbox of the blackened active drive field is unchecked.
¡ Also, the Unselect softkey becomes the Select softkey.
n If the button beneath the Select softkey is pressed, the checkbox of the blackened active drive field is checked, and the Select
softkey becomes the Unselect softkey.
If the button beneath the Cancel softkey is pressed, the Drives Submenu is displayed.
Figure 62. Command > Drives > Firmware > Update > Firmware Update Starting Dialog
Step 6 Press the button beneath the desired softkey.
l
If the button beneath the Cancel softkey is pressed, the drive firmware update is stopped after the currently selected drive finishes its
update. Drives Submenu is displayed.
¡ For example, suppose drives 1, 2 and 3 are selected to be updated with the new drive firmware tape.
n Drive 1 becomes updated, drive 2 is in the process of being updated, and drive 3 is not updated.
n If the button beneath the Cancel softkey is pressed, drive 2 completes its update and drive 3 is not updated.
n Drives 1 and 2 have the new firmware version loaded, drive 3 does not.
NOTE: After canceling the drive firmware update, refer to the Select Drive Dialog to view the current firmware version that is loaded on
each drive.
Setup Menu Selection
The Setup Menu is primarily used to configure the system. Setup is selected from the Main Menu alternate screen by following this procedure. This
menu offers four selections.
Step 1 Press the button beneath the Setup softkey from the Main Menu (Alternate Screen).
l
The Setup Menu appears. This menu offers four selections. See Figure 63.
Figure 63. Main Menu > More > Setup Menu
To choose one of the four selections, follow the step.
Step 2 Press the button beneath the desired softkey.
l
l
l
l
If the button beneath the Library softkey is pressed, the Library Submenu is displayed.
If the button beneath the Drives softkey is pressed, the Drives Submenu
If the button beneath the Utils softkey is pressed, the Utils Submenu is displayed.
If the button beneath the Back softkey is pressed, the Main Menu (Alternative) Selection is displayed.
Library Submenu
When Library is selected, the Library Submenu is displayed. See Figure 64. This submenu contains a collection of routines to setup the library.
This submenu offers three selections.
Figure 64. Setup > Library Submenu
To choose one of the three selections, follow the step.
Step 1 Press the button beneath the desired softkey.
l
l
l
If the button beneath the SCSI softkey is pressed, the SCSI Dialog is displayed.
If the button beneath the RMU softkey is pressed, the RMU Dialog is displayed.
If the button beneath the Back softkey is pressed, the Setup Menu Selection is displayed.
SCSI Dialog
When SCSI is selected, the SCSI Dialog is displayed. See Figure 65. This menu allows setting the SCSI ID, Retries, Parity, and sign-on..
Figure 65. Setup > Library > SCSI Dialog
Field
Value
Description
Current: 0 .. 7
The current SCSI address
New: 0 .. 7
The new requested SCSI address
Current: 0 .. 255
The current threshold number for retries
New: 0 .. 255
The new threshold number for retries
SCSI ID
Retries
Yes
Enable Parity (default)
No
Disable Parity
PV-136T
PowerVault 136T LTO Library
Scalar 100 EMU
Library emulation
Parity
Library sign-on
To choose one of the four selections, follow the step.
Step 1 Press the button beneath the desired softkey.
l
l
l
l
If the button beneath the Up softkey is pressed, the value of the current field is increased.
If the button beneath the Down softkey is pressed, the value of the current field is decreased.
If the button beneath the Next softkey is pressed, the next field in the list is made the active field.
¡ If the next field is the Parity field, see Figure 66.
If the button beneath the Cancel softkey is pressed, the Library Submenu is displayed.
Figure 66. Setup > Library > SCSI > Parity Dialog
Field
Value
Description
Yes
Enable Parity (default)
No
Disable Parity
Parity
To choose one of the four selections, follow the step.
Step 2 Press the button beneath the desired softkey.
l
If the button beneath the OK softkey is pressed, the values of the fields are accepted.
NOTE: The library must be restarted for changes to take affect.
l
l
l
If the button beneath the Yes/No softkey is pressed, the value of the current field is toggled.
If the button beneath the Next softkey is pressed, the next field in the list is made the active field. If the next field is the Library sign-on
field, see Figure 67.
If the button beneath the Cancel softkey is pressed, the Library Submenu is displayed.
Figure 67. Setup > Library > SCSI > Library Sign-On Dialog
Field
Value
Description
PV-136T
PowerVault 136T LTO Library
Scalar 100 EMU
Library emulation
Library sign-on
To choose one of the four selections, follow the step.
Step 3 Press the button beneath the desired softkey.
l
If the button beneath the OK softkey is pressed, the values of the fields are accepted.
NOTE: The library must be restarted for changes to take affect.
l
l
l
If the button beneath the Change softkey is pressed, the value of the current field is toggled.
If the button beneath the Next softkey is pressed, the first field in the list is made the active field.
If the button beneath the Cancel softkey is pressed, the Library Submenu is displayed.
RMU Dialog
When RMU is selected, the RMU Dialog is displayed. See Figure 68. This option allows the user to view the Remote Management Unit (RMU)
information.
Figure 68. Setup > Library > RMU Dialog
Field
Value
Description
IP
000.000.000.000 .. 255.255.255.255
Indicates the IP address
Sub
000.000.000.000 .. 255.255.255.255
Indicates the Subnet mask
Gate
000.000.000.000 .. 255.255.255.255
Indicates the Gateway
Name
A .. Z, 0 .. 9
Indicates the host name assigned to the RMU for communication
with the library via the RMU
To choose one of the four selections, follow the step.
Step 1 Press the button beneath the desired softkey.
l
l
l
l
If the button beneath the Up softkey is pressed, the active field is increased.
If the button beneath the Down softkey is pressed, the active field is decreased.
If the button beneath the Next softkey is pressed, the active field is accepted and the next field in the list is made the active field.
If the button beneath the Cancel softkey is pressed, the Library Submenu is displayed.
Drives Submenu
When Drives is selected, the Drives Submenu is displayed. See Figure 69. This submenu contains a collection of routines to setup the drives. This
submenu offers two selections.
Figure 69. Setup > Drives Submenu
To choose one of the two selections, follow the step.
Step 1 Press the button beneath the desired softkey.
l
l
If the button beneath the SCSI softkey is pressed, the SCSI Dialog is displayed.
If the button beneath the Back softkey is pressed, the Setup Menu is displayed.
SCSI Dialog
When SCSI is selected, the SCSI Dialog is displayed. See Figure 70. This option allows the user to set the SCSI ID of the drive.
Figure 70. Setup > Drives > SCSI Dialog
Field
Value
Description
Drive
01 .. 06
Drive number
SCSI ID: Current
00 .. 15
Current SCSI ID of the selected drive
SCSI ID: New
00 .. 15
New SCSI ID of the selected drive
1 .. 06
Indicates the drive with the same SCSI ID as the drive selected
None
No drive set with the same SCSI ID
Drives with this ID
To choose one of the four selections, follow the step.
Step 1 Press the button beneath the desired softkey.
l
l
l
l
If the button beneath the OK softkey is pressed, the current field values are accepted, and the Drives Submenu is displayed.
If the button beneath the Change Drive softkey is pressed, the drive number is changed.
If the button beneath the Next softkey is pressed the next field in the list is made the active field. Refer to Figure 71.
If the button beneath the Cancel softkey is pressed, the Drives Submenu is displayed.
Figure 71. Setup > Drives > SCSI > SCSI ID New Dialog
Refer to the Table associated with Figure 70.
To choose one of the four selections, follow the step.
Step 2 Press the button beneath the desired softkey.
l
l
l
l
If the button beneath the Up softkey is pressed, the currently active field is increased.
If the button beneath the Down softkey is pressed, the currently active field is decreased.
If the button beneath the Next softkey is pressed, the Drive field is made the active field. Refer to Figure 70.
If the button beneath the Cancel softkey is pressed, the Drives Submenu is displayed.
Utils Submenu
When Utils is selected, the Utils Submenu is displayed. See Figure 72. This submenu contains a collection of utility routines. This submenu offers
four selections.
Figure 72. Setup > Utils Submenu
To choose one of the four selections, follow the step.
Step 1 Press the button beneath the desired softkey.
l
l
l
l
If the button beneath the Date/Time softkey is pressed, the Date/Time Dialog is displayed.
If the button beneath the Config softkey is pressed, the Config Dialog is displayed.
If the button beneath the Secure softkey is pressed, the Secure Dialog is displayed.
If the button beneath the Back softkey is pressed, the Setup Menu Selection is displayed.
Date/Time Dialog
When Date/Time is selected, the Date/Time Dialog is displayed. See Figure 73. This option sets the library date and time.
Figure 73. Setup > Utils > Date/Time Dialog
Field
Value
Description
Year
00 .. 99
The year of the century
Month
1 ..12
The month of the year
Day
1 .. 31
The day of the month
Hour
0 .. 23
The hour of the day
Min
0 .. 59
The minute of the hour
Sec
0 .. 59
The second of the minute
Yes
Enable synchronization
No
Disable synchronization (default setting)
Sync interface
To choose one of the four selections, follow the step.
Step 1 Press the button beneath the desired softkey.
l
l
l
l
If the button beneath the Up softkey is pressed, the value of the current field is increased.
If the button beneath the Down softkey is pressed, the value of the current field is decreased.
If the button beneath the Next softkey is pressed, the next field in the list is made the active field. If the next field is the last field, see
Figure 74.
If the button beneath the Cancel softkey is pressed, the Utils Submenu is displayed.
Figure 74. Setup > Utils > Date/Time > Sync Dialog
Field
Value
Description
Yes
Enable synchronization
No
Disable synchronization (default setting)
Sync interface
To choose one of the four selections, follow the step.
Step 1 Press the button beneath the desired softkey.
l
l
l
l
If the button beneath the OK softkey is pressed, the value of the fields is accepted.
If the button beneath the Yes/No softkey is pressed, the value of the current field is toggled.
If the button beneath the Next softkey is pressed, the active field reverts to the first field in the list.
If the button beneath the Cancel softkey is pressed, the Utils Submenu is displayed.
Config Dialog
When Config is selected, the Config Dialog is displayed with the default settings. See Figure 75. This option sets the library configuration.
Figure 75. Setup > Utils > Config Dialog
Field
Value
Description
Yes
Turns on the backlighting
No
Turns off the backlighting
Yes
Enables audio output
No
Disables audio output
Yes
The picker will scan for all cartridges upon library initialization
No
The picker will not scan for all cartridges upon library initialization
Yes
Unlabeled tape inventory support
No
No unlabeled tape inventory support
Imprt/Exprt
The mailbox is configured as a cartridge import/export location
Storage
The mailbox is configured as cartridge storage cells
Backlight on
Audio on
Scan on Init
Touch on Init
Mailbox
To choose one of the four selections, follow the steps.
Step 1 Press the button beneath the desired softkey.
l
l
l
l
If the button beneath the OK softkey is pressed, the current field values are accepted, and Utils Submenu is displayed.
If the button beneath the Yes/No softkey is pressed, the selected field is changed to Yes or No.
If the button beneath the Next softkey is pressed, the next field in the list is made the active field. If the next field is the last field, see
Figure 76.
If the button beneath the Cancel softkey is pressed, the Utils Submenu is displayed.
Figure 76. Setup > Utils > Config > Mailbox Dialog
Field
Value
Description
Imprt/Exprt
The mailbox is configured as a cartridge import/export location (default)
Storage
The mailbox is configured as cartridge storage cells
Mailbox
To choose one of the four selections, follow the step.
Step 2 Press the button beneath the desired softkey.
l
If the button beneath the OK softkey is pressed, the current field values are accepted and Utils Submenu is displayed.
NOTE: The library must be restarted for changes to take affect.
l
l
l
If the button beneath the Change softkey is pressed, the Mailbox field value is changed to Import/Export or Storage.
If the button beneath the Next softkey is pressed, the Config Dialog is displayed.
If the button beneath the Cancel softkey is pressed, the Utils Submenu is displayed.
Secure Dialog
When Secure is selected, the Secure Dialog is displayed. See Figure 77. This option allows the user to enable or disable operator panel security
and set or change the library password.
CAUTION: Set a user selected password during the first initialization of the new library, and safely store a copy of it for future
reference. Refer to the Secure Dialog. Press the button beneath the Next softkey to make the Set/Change Password the currently
active blackened field. Press the button beneath the Change softkey. Enter a user selected password when prompted, then select
OK. See Figure 80. To save the change press the button beneath the OK softkey in the Secure Dialog screen.
CAUTION: If security is enabled, all Menu Selections with a few exceptions, throughout the entire Dell PowerVault 136T LTO
Library will require the user selected password. Refer to Enter Password Dialog. If security is enabled and the user selected
password is lost, Contact Dell Customer Support.
Figure 77. Setup > Utils > Secure Dialog
Active Field
Value
Description
Operator Panel Security is enabled when checked. See Figure 77.
Enable Security
Operator Panel Security is disabled when unchecked.
To choose one of the four selections, follow the step.
Step 1 Press the button beneath the desired softkey.
l
If the button beneath the OK softkey is pressed, the Utils Submenu is displayed if no security changes are made.
CAUTION: If security and/or password changes are made, they are saved when the button beneath the OK softkey is
pressed.
l
l
l
If Enable Security is the active field that is blackened, see Figure 77:
¡ If the button beneath the Yes/No softkey is pressed, the checkbox will change.
n If yes, the checkbox is checked and the Security On Dialog is displayed.
n If no, the checkbox is unchecked and the Security Off Dialog is displayed.
¡ If the button beneath the Next softkey is pressed, the next field Set/Change Password, is made the currently active field.
If Set/Change Password is the active field that is blackened, the Yes/No softkey becomes a Change softkey, see Figure 77.
¡ If the button beneath the Change softkey is pressed, the Change Password Dialog is displayed.
¡ If the button beneath the Next softkey is pressed, the next field Enable Security, is made the currently active field, see Figure 77.
If the button beneath the Cancel softkey is pressed,
¡ If no security or password changes are made, the Utils Submenu is displayed.
¡ If security or password changes are made, refer to Figure 78.
Figure 78. Setup > Utils > Secure > Security On > Cancel Security Changes Dialog
To choose one of the two selections, follow the step.
Step 2 Press the button beneath the desired softkey.
l
l
If the button beneath the OK softkey is pressed, the security and/or password changes are canceled and the Utils Submenu is displayed.
If the button beneath the Cancel softkey is pressed, the Secure Dialog is redisplayed.
NOTE: To save all security changes and to exit the Secure Dialog press the button beneath the OK softkey in the Secure Dialog
screen.
Enable Security
When the Enable Security field is currently active, and is checked by pressing the button under the Yes/No softkey, the Security On Dialog is
displayed. See Figure 79.
Figure 79. Setup > Utils > Secure > Security On Dialog
To choose the option, follow the step.
Step 1 Press the button beneath the desired softkey.
l
If the button beneath the OK softkey is pressed, the Secure Dialog is displayed with the box checked.
Disable Security
The Enable Security field is currently saved as enabled and an active blackened field. Refer to the Secure Dialog. If it is changed from checked to
disabled and unchecked by pressing the button under the Yes/No softkey, the Enter Password Dialog is displayed.
Figure 80. Setup > Utils > Secure > Enter Password Dialog
Field
Value
Description
Password
0000 .. 9999
Current password
To choose one of the four selections, follow the step.
Step 1 Press the button beneath the desired softkey.
l
l
l
l
If the button beneath the OK softkey is pressed, the password is entered.
¡ If the Enable Security field is saved as enabled, then disabled by unchecking the checkbox, the Security Off Dialog is displayed.
If the button beneath the Up softkey is pressed, the currently active field is increased.
If the button beneath the Next softkey is pressed, the currently active field is accepted and the next field is made active.
If the button beneath the Cancel softkey is pressed, the Utils Submenu is displayed.
Figure 81 . Setup > Utils > Secure > Security Off Dialog
To choose the option, follow the step.
Step 1 Press the button beneath the desired softkey.
l
If the button beneath the OK softkey is pressed, the Secure Dialog is displayed with the box unchecked.
Change Password Dialog
Set/Change Password is the currently active blackened field. Refer to Figure 77. If the button beneath the Change softkey is pressed, then OK is
selected, the Change Password Dialog is displayed.
Figure 82. Setup > Utils > Secure > Change Password Dialog
Field
Value
Description
Old
0000 .. 9999
Current password
New
0000 .. 9999
New password
To choose one of the four selections, follow the step.
Step 1 Press the button beneath the desired softkey.
l
If the button beneath the OK softkey is pressed, the old or new password is entered. Refer to Figure 82.
¡ If the the correct password is entered into the Old field, then press the button beneath the OK softkey.
n Next, enter the new password into the New field, then press the button beneath the OK softkey. The password is changed, but
it is not saved. See Figure 83.
NOTE: The security change to the password is not saved until the button beneath the OK softkey is pressed in the Secure
Dialog screen. To cancel the password change, press the button beneath the Cancel button in the Secure Dialog screen.
l
l
l
If the button beneath the Up softkey is pressed, the currently selected field is increased.
If the button beneath the Next softkey is pressed, the current field is accepted and the next field is made the active field.
If the button beneath the Cancel softkey is pressed, the Secure Dialog is displayed.
Figure 83. Setup > Utils > Secure > Password Changed Dialog
To choose the option, follow the step.
Step 1 Press the button beneath the desired softkey.
l
If the button beneath the OK softkey is pressed, the Secure Dialog is displayed.
Service Menu Selection
The Service Menu is primarily used to provide various routines associated with maintaining the system. Service is selected from the Main Menu
alternate screen by following this procedure.
NOTE: Commands listed under the Service Menu Selection require an offline state. Refer to Using Commands That Require an Offline
State for more information.
Step 1 Press the button beneath the Service softkey from the Main Menu (Alternate Screen) Screen.
l
The Service Menu appears. This menu offers four selections. See Figure 84.
Figure 84. Main Menu > More > Service Menu
To choose one of the four selections, follow the step.
Step 2 Press the button beneath the desired softkey.
l
l
l
l
If the button beneath the Start softkey is pressed, the Start Dialog is displayed.
If the button beneath the Library softkey is pressed, the Library Submenu is displayed.
If the button beneath the Drives softkey is pressed, the Drives dialog is displayed.
If the button beneath the Back softkey is pressed, the Main Menu (Alternate Screen) Selection is displayed.
Start Dialog
When Start is selected, the Start Dialog is displayed. See Figure 85.
Figure 85. Service > Start Dialog
Field
Value
Description
Normal
Displays SACs reported
Advanced
Used for Dell customer support engineers only
Service type
To choose one of the three selections, follow the step.
Step 1 Press the button beneath the desired softkey.
l
l
l
If the button beneath the OK softkey is pressed, the Normal Service Dialog is displayed.
If the button beneath the Normal/Advanced softkey is pressed, the Advanced Service Dialog is displayed.
If the button beneath the Cancel softkey is pressed, the Service Menu is displayed.
Normal Service Dialog
When Normal is selected from the Start Dialog, the Normal Service Dialog is displayed. See Figure 86. This option reports SACs. Refer to
Service Action Codes for a detailed explanation.
Figure 86. Service > Start > Normal Service Dialog
Step 1 Press the button beneath the desired softkey.
l
If the button beneath the OK softkey is pressed, the Service Menu is displayed. Refer to Figure 84.
Advanced Service Dialog
When Advanced is selected from the Start dialog, the Enter Password Dialog is displayed. See Figure 87.
NOTE: This option is only used by the Dell service technicians.
Figure 87. Service > Start > Advanced > Enter Password Dialog
Library Submenu
When Library is selected, the Library Submenu is displayed. See Figure 88. This dialog displays a collection of routines specific to servicing the
library.
Figure 88. Service > Library Submenu
To choose one of the four selections, follow the step.
Step 1 Press the button beneath the desired softkey.
l
l
l
l
If the button beneath the Firmware Update softkey is pressed, the Firmware Update Dialog is displayed.
If the button beneath the Diags softkey is pressed, Diags Submenu is displayed.
If the button beneath the Exercise softkey is pressed, Exercise Submenu is displayed.
If the button beneath the Back softkey is pressed, the Service Menu Selection is displayed.
Firmware Update Dialog
When Firmware Update is selected, the Firmware Update Dialog is displayed. See Figure 89. This option is used by service engineers to update
the library firmware . Refer to the Firmware Dialog in the Remote Management Unit (RMU) section.
Figure 89. Service > Library > Firmware Update Dialog
Diags Submenu
When Diags is selected, the Diags Submenu is displayed. See Figure 90. This option is a collection of library exercisers and diagnostics.
Figure 90. Service > Library > Diags Submenu
To choose one of the four selections, follow the step.
Step 1 Press the button beneath the desired softkey.
l
l
l
l
If the button beneath the Sensors softkey is pressed, the Sensor Dialog is displayed.
If the button beneath the Fingers softkey is pressed, the Fingers Submenu is displayed.
If the button beneath the Picker softkey is pressed, the Picker Submenu is displayed.
If the button beneath the Back softkey is pressed, the Library Submenu is displayed.
Sensor Dialog
When Sensor is selected, the Sensor Dialog is displayed. Refer to Figure 91. This option displays the real time state of the sensors and provides
a means to lock or unlock the Mailbox.
Figure 91. Service > Library > Diags > Sensor Dialog
NOTE: All field values are read only.
To choose one of the two selections, follow the step.
Step 1 Press the button beneath the desired softkey.
l
l
If the button beneath the Lock/Unlock softkey is pressed, the Mailbox is toggled between locked and unlocked.
If the button beneath the Cancel softkey is pressed, the Diags Submenu is displayed.
Field
Value
Description
0
The power supply fan is not running
1
The power supply fan is running
0
Additional power supply is not installed
1
Additional power supply is installed
0
Drive has not been removed
1
Drive has been removed
0
Gripper thermometer not installed
1
Gripper thermometer installed
0
Gripper is open
1
Gripper is closed
0
IE is unlocked
1
IE is locked
0
IE is closed
1
IE is open
0
IE is open
1
IE is closed
0
Front door is closed
1
Front door is open
PwrFan
PwrSply
DrvRmvd
GrpThrm
GrpClsd
IE Lock
IE Open
IE Closed
DoorOpn
Fingers Submenu
When Fingers is selected, the Fingers Submenu is displayed. See Figure 92. This option is a collection of routines to manipulate the open/close
and reach/retract operations.
Figure 92. Service > Library > Diags > Fingers Submenu
To choose one of the four selections, follow the step.
Step 1 Press the button beneath the desired softkey.
l
l
l
l
If the button beneath the Get/Put softkey is pressed, the Get/Put Dialog is displayed.
If the button beneath the Step softkey is pressed, the Step Dialog is displayed.
If the button beneath the Scanner softkey is pressed, the Scanner Dialog is displayed.
If the button beneath the Back softkey is pressed, the Diags Submenu is displayed.
Get/Put Dialog
When Get/Put is selected, the Get/Put Dialog is displayed. See Figure 93. This option does gets and puts of cartridges to either storage slots or
drives.
Figure 93. Service > Library > Diags > Fingers > Get/Put Dialog
Field
Value
Description
Cycles to run
0 .. 9999
The number of cycles to run
Number of slots
0 .. 60
The number of slots to use in the cycles
Starting slot
0 .. 60
Use this start cell. This is read only and changes only after a new starting slot is
selected.
No
Use this starting slot
Yes
Change the start slot
New start slot
To choose one of the four selections, follow the step.
Step 1 Press the button beneath the desired softkey.
l
l
l
l
If the button beneath the Up softkey is pressed, the value of the current field is increased.
If the button beneath the Down softkey is pressed, the value of the current field is decreased.
If the button beneath the Next softkey is pressed, the next field in the list is made the active field. When the Next push-button moves the
field to New start slot, the follow on dialog appears. See Figure 94 . After reaching the end of the field list, the active field reverts to the first
field in the list.
If the button beneath the Cancel softkey is pressed, the Fingers Submenu is displayed.
Figure 94. Service > Library > Diags > Fingers > Get/Put > New Start Slot Dialog
Field
Value
Description
No
Use this starting slot
Yes
Change the start slot
New start slot
Step 2 Press the button beneath the desired softkey.
If the button beneath the OK softkey is pressed, the values of the fields are accepted and the get/put operation executes
If the button beneath the Yes/No softkey is pressed, the value of the current field is toggled.
If the button beneath the Next softkey is pressed, the first field in the list is made the active field.
If the button beneath the Cancel softkey is pressed, the Fingers Submenu is displayed.
l
l
l
l
Step Dialog
When Step is selected, the Step Dialog is displayed. See Figure 95. This option is a collection of routines to manipulate the open/close and
reach/retract in incremental steps.
Figure 95. Service > Library > Diags > Fingers > Step Dialog
To choose one of the two selections, follow the step.
Step 1 Press the button beneath the desired softkey.
If the button beneath the OK softkey is pressed, the follow on dialog is displayed. Refer to Figure 96.
l
NOTE: This is an advanced diagnostic tool that is not intended for use during normal operation.
l
If the button beneath the Cancel softkey is pressed, the Fingers Submenu is displayed.
Figure 96. Service > Library > Diags > Fingers > Step > Gripper Finger Dialog
Field
Value
Description
Open
The gripper fingers are open
Closed
The gripper fingers are closed
Extended
The gripper fingers are extended
Retracted
The gripper fingers are retracted
Grip
Reach
To choose one of the three selections, follow the step.
Step 2 Press the button beneath the desired softkey.
l
l
l
If the button beneath the Open/Close softkey is pressed, the gripper fingers toggle between open and closed and the screen updates to
reflect the state.
If the button beneath the Extend/Retract softkey is pressed, the gripper fingers toggle between extended and retracted and the screen
updates to reflect the state.
If the button beneath the Cancel softkey is pressed, the Fingers Submenu is displayed.
Scanner Dialog
When Scanner is selected, the Scanner Dialog is displayed. Refer to Figure 97. This option triggers the barcode scanner and reads the label
information.
Figure 97. Service > Library > Diags > Fingers > Scanner Dialog
To choose one of the two selections, follow the step.
Step 1 Press the button beneath the desired softkey.
l
l
If the button beneath the Scan softkey is pressed, the barcode label immediately in front of the scanner is read. See Figure 98.
If the button beneath the Cancel softkey is pressed, the Fingers Submenu is displayed.
Figure 98. Service > Library > Diags > Fingers > Scanner > Scan > Barcode Label Dialog
Picker Submenu
When Picker is selected, the Picker Submenu is displayed. See Figure 99. This is a collection of routines to manipulate the vertical and rotary
axes.
Figure 99. Service > Library > Diags > Picker Submenu
To choose one of the four selections, follow the step.
Step 1 Press the button beneath the desired softkey.
l
l
l
l
If the button beneath the Move softkey is pressed, the Move Dialog is displayed.
If the button beneath the Step softkey is pressed, the Step Dialog is displayed.
If the button beneath the Home softkey is pressed, the Home Dialog is displayed.
If the button beneath the Back softkey is pressed, the Diags Submenu is displayed.
Move Dialog
When Move is selected, the Move Dialog is displayed. See Figure 100. This option cycles the vertical and rotary axes in a motion pattern.
Figure 100. Service > Library > Diags > Picker > Move Dialog
Field
Value
Description
Cycles to run
0 .. 9999
The number of move cycles
Yes
Move on the vertical axis
No
Do not move on the vertical axis
Yes
Move on the horizontal axis
No
Do not move on the horizontal axis
Use vertical
Use horizontal
To choose one of the four selections, follow the step.
Step 1 Press the button beneath the desired softkey.
l
l
l
l
If the button beneath the Up softkey is pressed, the value of the current field is increased.
If the button beneath the Down softkey is pressed, the value of the current field is decreased.
If the button beneath the Next softkey is pressed, the next field in the list is made the active field. See Figure 101.
If the button beneath the Cancel softkey is pressed, the Picker Submenu is displayed.
Figure 101. Service > Library > Diags > Picker > Move > Use Axes Dialog
Field
Value
Description
Yes
Move on the vertical axis
No
Do not move on the vertical axis
Yes
Move on the horizontal axis
No
Do not move on the horizontal axis
Use vertical
Use horizontal
To choose one of the four selections, follow the step.
Step 2 Press the button beneath the desired softkey.
l
l
l
l
If the button beneath the OK softkey is pressed, the values of the fields are accepted.
If the button beneath the Yes/No softkey is pressed, the value of the current field is toggled.
If the button beneath the Next softkey is pressed, the next field in the list is made the active field. After reaching the end of the field list,
the active field reverts to the first field in the list.
If the button beneath the Cancel softkey is pressed, the Picker Submenu is displayed.
Step Dialog
When Step is selected, the Step Dialog is displayed. See Figure 102. This option is a collection of routines to manipulate the vertical and rotary
axes in incremental steps.
Figure 102. Service > Library > Diags > Picker > Step Dialog
To choose one of the two selections, follow the step.
Step 1 Press the button beneath the desired softkey.
l
If the button beneath the OK softkey is pressed, Figure 103 appears. This is an advanced diagnostic tool that is not intended for use
l
during normal operation.
If the button beneath the Cancel softkey is pressed, the Picker Submenu is displayed.
Figure 103. Service > Library > Diags > Picker > Step > Axes Dialog
Field
Value
Description
Pivot axis
000.0 .. 360.0
Degrees of rotary position
Vert. axis
000.0 .. max range
Height of picker in millimeters
Step amount
001 .. 100
Tenths of millimeters to step
To choose one of the four selections, follow the step.
Step 2 Press the button beneath the desired softkey.
l
l
l
l
If the button beneath the Up softkey is pressed, the value of the current field is increased.
If the button beneath the Down softkey is pressed, the value of the current field is decreased.
If the button beneath the Next softkey is pressed, the next field in the list is made the active field. After the last field, the first field is displayed.
If the button beneath the Cancel softkey is pressed, the Picker Submenu is displayed.
Home Dialog
When Home is selected, the Home Dialog is displayed. Refer to Figure 104. This option locates the vertical and rotary axes to the home positions.
Figure 104. Service > Library > Diags > Picker > Home Dialog
To choose one of the two selections, follow the step.
Step 1 Press the button beneath the desired softkey.
l
l
If the button beneath the OK softkey is pressed, the picker returns to the home position and the operation completes.
If the button beneath the Cancel softkey is pressed, the Picker Submenu is displayed.
Exercise Submenu
When Exercise is selected, the Exercise Submenu is displayed. See Figure 105. This option is a collection of library exercisers.
Figure 105. Service > Library > Exercise Submenu
To choose one of the four selections, follow the step.
Step 1 Press the button beneath the desired softkey.
l
l
l
l
If the button beneath the Demo softkey is pressed, the Demo Dialog is displayed.
If the button beneath the Self Test softkey is pressed, the Self Test Dialog is displayed.
If the button beneath the Teach softkey is pressed, the Teach Dialog is displayed.
If the button beneath the Back softkey is pressed, the Library Submenu is displayed.
Demo Dialog
When Demo is selected, the Demo Dialog is displayed. Refer to Figure 106. This option executes an operator configured demonstration routine.
Figure 106. Service > Library > Exercise > Demo Using Cycles Dialog
Field
Value
Description
Demo Mode:
Cycle
Demo the library using cycles
0 .. 9999
The number of Demo cycles to run
Demo Mode:
Time
Time the Demo using hours
2 .. 24
The number of hours to run the Demo
Yes
Include drives in Demo cycles
No
Do not include drives in Demo cycles
Yes
Include Mailbox in Demo cycles
No
Do not include Mailbox in Demo cycles
Cycles to run
Hours to run
Include drives
Mailbox
To choose one of the four selections, follow the step.
Step 1 Press the button beneath the desired softkey.
l
l
l
l
If the button beneath the OK softkey is pressed, the field values are applied and the Demo operation is started. Refer to Figure 109.
If the button beneath the Change softkey is pressed, the field value is changed.
If the button beneath the Next softkey is pressed, the next field in the list is made the active field, refer to Figure 107. After reaching the
end of the field list, the active field reverts to the first field in the list, refer to Figure 106.
If the button beneath the Cancel softkey is pressed, the Exercise Submenu is displayed.
Figure 107. Service > Library > Exercise > Demo > Cycles to run Dialog
To choose one of the four selections, follow the step.
Step 2 Press the button beneath the desired softkey.
l
l
l
l
If the button beneath the Up softkey is pressed, the currently selected field is increased.
If the button beneath the Down softkey is pressed, the currently selected field is decreased.
If the button beneath the Next softkey is pressed, the next field in the list is made the active field. Refer to Figure 108.
If the button beneath the Cancel softkey is pressed, the Exercise Submenu is displayed.
Figure 108. Service > Library > Exercise > Demo Using Cycles > Include Dialog
To choose one of the four selections, follow the step.
Step 3 Press the button beneath the desired softkey.
l
l
l
l
If the button beneath the OK softkey is pressed, the field values are applied and the Demo operation is started. See Figure 109.
If the button beneath the Yes/No softkey is pressed, the Drives or Mailbox are included or not included accordingly.
If the button beneath the Next softkey is pressed, the next field in the list is made the active field. After reaching the end of the field list,
the active field reverts to the first field in the list.
If the button beneath the Cancel softkey is pressed, the Exercise Submenu is displayed.
Once the cycles have run, the test displays the results. See Figure 109.
Figure 109. Service > Library > Exercise > Demo Using Cycles >Execution Dialog
Field
Value
Description
Cycle
Time
0000 .. 9999
00h00m .. 23h59m
Number of Cycles Completed
Number of Hours and Minutes Completed
To choose the selection, follow the step.
Step 4 Press the button beneath the desired softkey.
l
If the button beneath the OK softkey is pressed, the Exercise Submenu is displayed.
Figure 110. Service > Library > Exercise > Demo Using Time Dialog
Refer to the Table associated with Figure 106.
To choose one of the four selections, follow the step.
Step 1 Press the button beneath the desired softkey.
l
l
l
l
If the button beneath the OK softkey is pressed, the field values are applied and the Demo operation is started. See Figure 111.
If the button beneath the Yes/No softkey is pressed, the Drives or Mailbox are included or not included accordingly.
If the button beneath the Next softkey is pressed, the next field in the list is made the active field. After reaching the end of the field list,
the active field reverts to the first field in the list.
If the button beneath the Cancel softkey is pressed, the Exercise Submenu is displayed.
Figure 111. Service > Library > Exercise > Demo Using Time > Execution Dialog
To choose the selection, follow the step.
Step 2 Press the button beneath the desired softkey.
l
If the button beneath the Cancel softkey is pressed, Figure 112 is displayed.
Figure 112. Service > Library > Exercise > Demo Using Time> Canceled Dialog
Self Test Dialog
When Self Test is selected, the Self Test Dialog is displayed. See Figure 113. This option executes a series of preprogrammed tests to exercise
the system.
Figure 113. Service > Library > Exercise > Self Test Dialog
Field
Value
Description
Cycles to run
0 .. 999
The number of cycles to run
Yes
Include the drives in the self test
No
Do not include the drives in self test
Include drives
To choose one of the four selections, follow the step.
Step 1 Press the button beneath the desired softkey.
l
l
l
l
If the button beneath the Up softkey is pressed, the value of the current field is increased.
If the button beneath the Down softkey is pressed, the value of the current field is decreased.
If the button beneath the Next softkey is pressed, the next field in the list is made the active field. Refer to Figure 114.
If the button beneath the Cancel softkey is pressed, the Exercise Submenu is displayed.
Figure 114. Service > Library > Exercise > Self Test > Include Drives Dialog
Field
Value
Description
Yes
Include the drives in the self test
No
Do not include the drives in self test
Include drives
To choose one of the four selections, follow the step.
Step 2 Press the button beneath the desired softkey.
l
l
l
l
If the button beneath the OK softkey is pressed, the field values are applied and the Self Test operation is started. See Figure 115.
If the button beneath the Yes/No softkey is pressed, the drives are included or not included accordingly.
If the button beneath the Next softkey is pressed, the next field in the list is made the active field. After reaching the end of the field list,
the active field reverts to the first field in the list.
If the button beneath the Cancel softkey is pressed, the Exercise Submenu is displayed.
Once the cycles have run, the test displays the results. See Figure 115.
Figure 115. Service > Library > Exercise > Self test > Self Test Execution Dialog
Teach Dialog
When Teach is selected, the Teach Dialog is displayed. Refer to Figure 116. This option calibrates the library. This dialog offers three selections.
Figure 116. Service > Library > Exercise > Teach Dialog
To choose one of the two selections, follow the step.
Step 1 Press the button beneath the desired softkey.
l
l
If the button beneath the OK softkey is pressed, refer to Figure 117 and Figure 118.
If the button beneath the Cancel softkey is pressed, the Exercise Submenu is displayed.
Figure 117. Service > Library > Exercise > Teach > Teach in Progress Dialog
l
If the button beneath the Cancel softkey is pressed, the Exercise Submenu is displayed.
Figure 118. Service > Library > Exercise > Teach > Teach Completed Dialog
Drives Dialog
When Drives is selected, the Drives Dialog is displayed. See Figure 119. The option allows the user to select the drive to be serviced.
Figure 119. Service > Drives Dialog
Field
Value
Description
Drive
01 .. 06
Drive to be serviced
To choose one of the three selections, follow the step.
Step 1 Press the button beneath the desired softkey.
l
l
l
If the button beneath the OK softkey is pressed, the current values are accepted and the Drive Service Function Submenu is displayed.
Refer to Figure 120.
If the button beneath the Change Drive softkey is pressed the drive to be serviced is changed.
If the button beneath the Cancel softkey is pressed, the Service Menu Selection is displayed.
Drive Service Dialog
When the drive is selected, the Drive Service Dialog is displayed. See Figure 120.
Figure 120. Service > Drives Service Dialog
To choose the selection, follow the step.
Step 1 Press the button beneath the OK softkey.
l
If the button beneath the OK softkey is pressed, the Drives Dialog is displayed.
About Menu Selection
The About Menu displays the system serial number, installed firmware revision, and application and boot code for the picker, sleds, and display.
About is selected from the Main Menu alternate screen by following this procedure.
Step 1 Press the button beneath the About softkey from the Main Menu (alternate screen).
l
The About Menu appears. This menu has two selections. See Figure 121.
Figure 121. Main Menu > More > About Menu
To choose one of the two selections, follow the step.
Step 2 Press the button beneath the desired softkey.
l
l
If the button beneath the OK softkey is pressed, the Main Menu Selection (alternate screen) is displayed.
If the button beneath the Details softkey is pressed, the Details Dialog is displayed.
Details Dialog
When Details is selected, the Details Dialog is displayed. Refer to Figure 122. This option is used to view the library current application and boot
code for the picker, drive modules, and display. This dialog offers two options.
Figure 122. About > Details Dialog (initial screen)
NOTE: All field values are read only.
To choose one of the two selections, follow the step.
Step 3 Press the button beneath the desired softkey.
l
l
If the button beneath the OK softkey is pressed, the Main Menu Selection (alternate screen) is displayed.
If the button beneath the Details softkey is pressed, the follow on dialog is displayed. See Figure 123.
Figure 123. About > Details Dialog (secondary screen)
To choose one of the two selections, follow the step.
Step 4 Press the button beneath the desired softkey.
l
l
If the button beneath the OK softkey is pressed, the Main Menu Selection (alternate screen) is displayed.
If the button beneath the Details softkey is pressed, the follow on dialog is displayed. See Figure 124.
Figure 124. About > Details Dialog (tertiary screen)
To choose one of the two selections, follow the step.
Step 5 Press the button beneath the desired softkey.
l
l
If the button beneath the OK softkey is pressed, the Main Menu Selection (alternate screen) is displayed.
If the button beneath the Details softkey is pressed, the display is toggled back to the original About menu. Refer back to About Menu
Selection.
Back to Contents Page
Back to Contents Page
Troubleshooting: Dell™ PowerVault™ 136T LTO Library User's Guide
Service Action Codes
Operator Intervention Messages
Operator Information Messages
Firmware Download Procedure
When a failure occurs, the PowerVault 136T LTO Library firmware performs error recovery and reporting. If the failure requires a service call, twobyte Service Action Codes (SACs) are generated and posted to the Operator panel. The following list details the two-byte definition.
l
l
nn represents the Service Action Code
xx represents the modifier to the Service Action Code
¡ 00 represents the Main Controller
¡ 10 represents the Picker Controller
¡ 20 represents the Display Assembly
¡ 3x represents the Drive Sled
n x represents the Drive ID
¡ 40 represents the SCSI Controller
¡ 50 represents the Remote Management Unit (RMU)
When an operator intervention is required, a message is generated at the Operator Panel. See Table 2 for operator intervention messages and
parameters.
Additionally, information messages that relate to the current operation are posted to the Operator panel. See Table 3.
Service Action Codes
Table 1 lists the SACs and the corresponding actions that the operator can take. If the stated remedy does not clear the SAC code, information
about how to contact Dell Customer Support is located in the Getting Help section.
Table 1. Service Action Codes
Reported
SAC
Perform these actions
Type 1 Software errors including Microcode and Operating System errors.
01 xx
Power Off and On the PowerVault 136T LTO Library to recover from the error. Use the Rear Switch to perform this action, wait at
least one minute between power Off and On.
Type 2 Software errors including Microcode Logic and Operating System errors.
02 xx
Power Off and On the PowerVault 136T LTO Library to recover from the error. Use the Rear Switch to perform this action, wait at
least one minute between power Off and On.
Type 3 Software errors including Microcode Logic and Operating System errors.
03 xx
Power Off and On the PowerVault 136T LTO Library to recover from the error. Use the Rear Switch to perform this action, wait at
least one minute between power Off and On.
Type 4 Software errors (Inter Processor) including Microcode and Operating System errors.
04 xx
Power Off and On the PowerVault 136T LTO Library to recover from the error. Use the Rear Switch to perform this action, wait at
least one minute between power Off and On.
A permanent Operating System error occurred.
05 xx
Power Off and On the PowerVault 136T LTO Library to recover from the error. Use the Rear Switch to perform this action, wait at
least one minute between power Off and On.
Contact Dell Customer Support.
Barcode scanner communications failed.
Retry the failing operation.
10 xx
Power Off and On the PowerVault 136T LTO Library to recover from the error. Use the Rear Switch to perform this action, wait at
least one minute between power Off and On.
Contact Dell Customer Support
Barcode scanner communication is OK, data received from the Barcode scanner is bad.
11 xx
Ensure that the barcode label was supplied by Dell or a Dell approved vendor.
Contact Dell Customer Support
Cannot read Barcode label or the label is bad.
Ensure that the barcode label was supplied by Dell or a Dell approved vendor.
Check the cartridge labels to ensure that they meet specifications, are properly installed, and not damaged or dirty. The cartridge
slots in question are displayed with the Service Action Code.
13 xx
Ensure that scan beam is not obstructed.
Retry the failing operation.
Power Off and On the PowerVault 136T LTO Library to recover from the error. Use the Rear Switch to perform this action, wait at
least one minute between power Off and On.
Contact Dell Customer Support.
The system detects that the Serial Number is missing from its NVRAM.
Record and re-enter the System Serial Number by either of these two methods:
14 xx
l
l
Using the serial cable and HyperTerminal, enter the setser command from the HyperTerminal prompt.
Using the Menu panel, proceed through Menu>More>Service>Start. For Service>Advanced, use 4535 as the password.
Select Serial # and enter the serial number.
Contact Dell Customer Support.
An intermittent scanning error was detected. During Demo, the library performs inventory after each complete demo
cycle and detects a mismatch between the number of cartridges scanned and its previous database.
15 xx
Note the number of cartridges installed in the library and use the Operator Panel to compare this information with the number of
cartridges reported by the library. Examine the cartridges that are installed but not reported by the library for the proper cartridge
labels, replace labels if necessary. Note that if a whole column of cartridges is missing, the column fiducial label can be defective, in
this case the whole storage column must be replaced.
If all labels are correct, clear the SAC and retry the Demo program
Contact Dell Customer Support.
NVRAM failures.
Check the Library configuration and re-enter all data (SCSI ID, Time/Date, Library Serial Number, etc.).
21 xx
Power Off and On the Dell PowerVault 136T LTO Library a few times and see if the same error conditions re-appear. Use the Rear
Switch to perform this action. Wait at least one minute between power Off and On.
Contact Dell Customer Support.
An external network error was detected by the Remote Management Unit (RMU).
39 xx
Ensure that the network cable is properly connected to the RMU.
Verify that the network the RMU is connected to is working properly.
Contact Dell Customer Support.
The Library detects that Servo power is missing.
40 xx
Contact Dell Customer Support.
A wrong library configuration is detected: the mailbox storage column is missing.
42 xx
Check to make sure that the mailbox column is installed and the fiducial label is properly installed and not damaged. The fiducial
label is present on both the single slot Mailbox and the multi-slot Mailbox.
Contact Dell Customer Support.
An unknown library configuration is detected; the barcode scanner is unable to read the fiducial label located on the
storage column or storage magazine during a Teach operation.
43 xx
Ensure that the Microcode level in the PowerVault 136T LTO Library supports the Hardware installed. See About Menu Selection .
Check for a dirty, damaged, missing or wrong fiducial label located at the storage array in the Library.
Contact Dell Customer Support.
An unknown fiducial label is detected during a Teach operation.
44 xx
Ensure that the Microcode level in the PowerVault 136T LTO Library supports the Hardware installed. See About Menu Selection .
Check for a dirty, damaged, missing or wrong fiducial label where the picker is positioned.
Contact Dell Customer Support.
The fiducial label installed on the tape drive does not match the drive installed in the drive module. The "xx" part of the
SAC identifies the drive.
45 xx
Replace the Tape Drive Module with a DELL certified part.
Contact Dell Customer Support.
The barcode scanner detected a cartridge when one was not expected. This occurs because the magazine's fiducial
label was not scanned by the library. Therefore, the library does not recognize the magazine as being installed in the
column.
46 xx
This problem is caused by a magazine fiducial label that is too reflective for the Barcode scanner to read. Cover the fiducial label
with a piece of translucent scotch tape to correct this problem.
Check for a dirty, damaged, missing or wrong fiducial label on the magazine containing the cartridge in question.
Contact Dell Customer Support.
Cannot complete the Lock/Unlock Mailbox commands.
60 xx
Run Lock Diagnostics from the Operator panel to see if there are any mechanical bindings. See Sensor Dialog.
Contact Dell Customer Support.
Failures detected in the Picker Assembly Grip Finger Open operation.
70 xx
Run Grip finger diagnostics. See Picker Submenu .
Contact Dell Customer Support.
Failures detected in the Picker Assembly Grip Finger Close operation.
71 xx
Run Grip finger diagnostics. See Picker Submenu.
Contact Dell Customer Support.
A Get command was issued but the sensor indicated that a cartridge is already present in the Picker Assembly.
72 xx
Look into the Picker Assembly and see if a cartridge is present. If a cartridge is found in the picker, recover the cartridge and place
it in any empty slot, close the door and retry the failing operation.
Failures detected in the Picker Assembly Finger Open/Close operations.
73 xx
Contact Dell Customer Support.
A Get command was issued but the sensor indicated that the source location is empty.
74 xx
This error can be caused by a cartridge that is not fully inserted in the storage slot above the failing slot. If this condition exists, push
the cartridge into its slot and close the library door.
Contact Dell Customer Support.
Failures detected in the Picker Assembly during a Retract operation.
77 xx
Contact Dell Customer Support.
A Put command was issued but the sensor indicated that the cartridge is not present in the Picker Assembly.
78 xx
Contact Dell Customer Support.
Failures detected in the Picker Assembly Reach/Retract operations.
7A xx
Contact Dell Customer Support.
Failures detected in the Picker Assembly Reach operation.
Check for obstruction in the slot. Obstruction can be in the form of:
l
7C xx
l
l
l
an unlabeled cartridge.
a cartridge in the slot during a Put operation.
the slot wall in the magazine is too tight.
a tape drive failure which prevents the cartridge from being inserted properly.
Remove the obstruction or replace the magazine, close the door and retry the failing operation.
Contact Dell Customer Support.
Failure detected while pushing a cartridge into a Tape drive feed slot.
7E xx
Check the cartridge for any physical damage.
Replace the failing Drive Module.
Failures detected in the Rotary-axis Servo system.
80 xx
Contact Dell Customer Support.
Failures detected in the Y-axis Servo system.
81 xx
Contact Dell Customer Support.
An unexpected Motion Control condition was received.
82 xx
Contact Dell Customer Support.
The Locate Fiducial Command failed with no target found. This failure happens most likely during an initial installation
of the Library Subsystem.
83 xx
Ensure that all fiducial labels are present on Mailbox, storage columns, magazines, and drives. Replace the components that do not
have a fiducial label.
Clean all Teach Fiducial labels.
Contact Dell Customer Support.
Failure was detected while communicating with the Motion Controllers.
89 xx
Contact Dell Customer Support.
The returned sense indicated that a motion command completed sooner than expected.
8A xx
Check the Y axis for binding. Binding can be caused by an object that prevents the Y axis from homing and reaching its target
correctly.
Contact Dell Customer Support.
Servo Failures detected in the Rotary and/or Reach axes.
8B xx
Contact Dell Customer Support.
A failure was detected in the drive communication hardware within the Library: the Library cannot communicate with
one or more drives (note the physical location of the failing drive, this information is presented with the SAC).
93 xx
If the accompanying message indicated that the Library cannot communicate with one specific tape drive:
l
l
Re-seat the drive in question by loosening the two thumbscrews, remove the drive and re-install it in the same drive slot.
Replace the failing Tape Drive Module.
Communication was previously established between the Library and the tape drive but the Library detected that
communication is no longer present or the drive status is not as expected.
NOTE: The coordinates of the failing tape drive sled are posted on the Operator Panel, but if this information was reset by
the operator, it can be retrieved by going to the error log and referring to the error modifier "xxxx". This value will show the failing
drive.
94 xx
If the SAC modifier "xx" = "00":
l
l
Re-seat the drive in question by loosening the two thumbscrews, remove the drive and re-install it in the same drive slot.
Check to see if there is a cartridge in the failing tape drive that prevents the drive from becoming ready: Eject the cartridge
and retry the operation then replace the Tape Drive Module if appropriate.
Contact Dell Customer Support.
The Picker Assembly delivered a cartridge to a tape drive but the drive does not confirm tape loading status. The "xx"
part of the SAC identifies the drive.
95 xx
Retry the operation by manually loading a cartridge into the tape drive. Replace the failing Drive Module if this operation failed.
Contact Dell Customer Support.
The firmware variant installed on the tape drive is not supported by the Library. The "xx" part of the SAC identifies the
drive.
98 xx
If the user has a certified spare tape drive module available, replace the suspect tape drive module.
Contact Dell Customer Support.
The Main Controller and Remote Management Unit failed to establish communication.
A0 00
Ensure that the Remote Management Unit is securely installed and properly connected.
Contact Dell Customer Support.
The Library Main Controller established, but then lost communications with one of the auxiliary controllers.
A1 xx
Contact Dell Customer Support.
A2 xx
Communication was initially established but is now lost between the Main Controller PCBA and the Picker Control
PCBA.
Contact Dell Customer Support.
A3 xx
Communication was initially established but is now lost between the Main Controller PCBA and the Display Control
PCBA.
Contact Dell Customer Support.
The Library detected that a fan has failed in one of the DC Power Supplies.
D2 xx
If this Library has only one DC Power Supply, replace the DC Power Supply.
If this Library has two DC Power Supplies, listen to the fan located on the back of each Power Supply. Replace the Power Supply
that does not have the fan running.
E0 xx
A cartridge is stuck in the Picker Assembly; Operator Intervention is required to remove the cartridge from the Grip
fingers.
Remove the cartridge.
The mailbox door is not fully closed
E1 xx
Close the mailbox door.
The front door is not fully closed; Operator Intervention is required to close the door.
E2 xx
Close the front door.
The Picker Assembly detected that a cartridge is not present in the Grip fingers. The cartridge may not be seated
properly in the Grip fingers or the Get operation is not successful. Locate the cartridge in question.
E7 xx
If the cartridge is not properly seated in the grip fingers, remove the cartridge, insert it in any empty slot and retry the operation.
If the cartridge is not in the Picker but located in its original slot, the cartridge may be seated too tightly in the slot. Replace the
magazine, re-inventory and retry the operation.
Contact Dell Customer Support.
During a put cartridge after a successful Get command, the Picker Assembly detected that the cartridge is no longer
present in the Grip fingers. Locate the missing cartridge.
E8 xx
If a cartridge is found, recover the cartridge, re-inventory the Library and retry the operation.
Contact Dell Customer Support.
Preventive Maintenance is required.
FB xx
Contact Dell Customer Support.
Operator Intervention Messages
Table 2 describes the operator intervention messages. Each intervention message is composed of four lines. The third and/or fourth lines may
contain variable information specific to the message. For SAC indications, see Service Action Codes.
Table 2. Operator Intervention Messages
Message Lines
Variables
Alert not found.
Press OK.
None
-=>ERROR!<=Initialization Error
Code: 0x%Y
%Y = 4 digit error modifier
-=>PERM ERROR!<=SEE USER'S GUIDE
SAC :%X
Code:0x%Y
%X = 2 digit hex
%Y = 4 digit error modifier
-=>PERM ERROR!<=SYSTEM WILL REBOOT
SAC :%X
Code:0x%Y
%X = 2 digit hex
%Y = 4 digit error modifier
->SYSTEM REBOOTED<NEW CODE LOADED
Version %X.%YY.%ZZZZ
current version
%X = 1 digit major rev
%Y = 2 digit minor rev
%Z = 4 digit minor rev
->SYSTEM REBOOTED<%X = 2 digit hex
RECOVERED FROM ERROR %Y = 4 digit error modifier
SAC :%X
Code:0x%Y
->SYSTEM REBOOTED<CALL FOR SERVICE
SAC :%X
Code:0x%Y
%X = 2 digit hex
%Y = 4 digit error modifier
->TOO MANY ERRORS!<CALL FOR SERVICE
%X = 2 digit hex
%Y = 4 digit error modifier
SAC :%X
Code:0x%Y
INTERVENTION NEEDED!
Close the mailbox to complete
the action.
None
INTERVENTION NEEDED!
Unexpected door open
detected. Make sure the door
is closed.
None
INTERVENTION NEEDED!
Single-ended device detected
on this Differential bus.
None
INTERVENTION NEEDED!
Check SCSI bus port 0
connector and/or termination.
None
INTERVENTION NEEDED!
Remove cartridge in picker
and return to storage.
None
BAD MEDIA
Cannot get type.
Please label media.
Slot [%X %Y %Z]
%X = column number
%Y = magazine number
%Z = row number
INTERVENTION NEEDED!
Remove cartridge from slot.
Slot [%X %Y %Z]
%X = column number
%Y = magazine number
%Z = row number
UPSIDE DOWN MEDIA
Ensure cartridge is in slot
properly.
Slot [%X %Y %Z]
%X = column number
%Y = magazine number
%Z = row number
Slot IS OBSTRUCTED
Please check to see if slot is
empty.
Slot [%X %Y %Z]
%X = column number
%Y = magazine number
%Z = row number
Slot IS EMPTY
Please check to see if slot is
full.
Slot [%X %Y %Z]
%X = column number
%Y = magazine number
%Z = row number
COMMUNICATION FAILED
Restart drive to try
communication again.
Drive %N[%X %Y %Z]
%N = drive number
%X = column number
%Y = magazine number
%Z = row number
DRIVE COMM FAILED
Please verify drive
communication path.
Drive %N [%X %Y %Z]
%N = drive number
%X = column number
%Y = magazine number
%Z = row number
DRIVE SCSI ID FAILED
Please verify drive SCSI id
setting for
Drive %N [%X %Y %Z]
%N = drive number
%X = column number
%Y = magazine number
%Z = row number
TAPE PUSH FAILED
Please remove tape from
drive.
Drive %N [%X %Y %Z)
%N = drive number
%X = column number
%Y = magazine number
%Z = row number
DRIVE INIT FAILED
Please correct drive
initialization for
Drive %N [%X %Y %Z]
%N = drive number
%X = column number
%Y = magazine number
%Z = row number
DRIVE CLEAN FAILED
A cleaning operation failed to
clean
Drive %N [%X %Y %Z]
%N = drive number
%X = column number
%Y = magazine number
%Z = row number
INVALID LABEL
Please check media for valid
label
Slot [%X %Y %Z]
%X = column number
%Y = magazine number
%Z = row number
DUPLICATE LABEL
Please check volsers at
element address
[%X and %Y]
%X = element address
%Y = element address
SER NUMBER MISSING
Please enter the system serial
number via the monitor.
None
Your library firmware versions
do not match. Download the
latest version to the library.
None
One or more drives have
downlevel firmware. You may
wish to update these drives.
See User's Guide.
None
Operator Information Messages
Table 3 describes the operator information messages. Each information message is a single line.
Table 3. Operator Information Messages
Message Lines
Variables
INITIALIZING
None
OFFLINE
None
ONLINE
None
HOMING PICKER
None
TEACHING COLUMN [%X] %X = column number
SCANNING COLUMN [%X] %X = column number
INITIALIZING DRIVES
None
GOING READY
None
DOOR IS OPEN
None
PICKER HOME FAIL
None
PICKER NOT HOME
None
GOING ONLINE
None
GOING OFFLINE
None
-=>ERROR!<=-
None
REBOOTING
None
CARTRIDGE RECOVERY
None
CARTRIDGE IN PICKER
None
SELF TEST FAILED
None
Firmware Download Procedure
The Firmware is downloaded through the Remote Management Unit. Refer to Figure 11 in the Operation section of the Dell PowerVault 136T LTO
Library User's Guide, and go to the Firmware Tab in the RMU.
Back to Contents Page
Back to Contents Page
Operation: Dell™ PowerVault™ 136T LTO Library User's Guide
Operator Panel
Remote Management Unit (RMU)
Library Startup
Library Shutdown
Library Restart
Normally, the host issues commands to the Dell PowerVault 136T LTO Library. Operator control is provided via the Operator Panel. The Operator
is responsible for:
l
l
l
Starting the Dell PowerVault 136T LTO Library.
Shutting down the Dell PowerVault 136T LTO Library.
Handling media.
See Inserting Media and Ejecting Media for media handling procedures. In the case of equipment failures, the operator can perform media
processing.
Operator Panel
The Operator Panel provides an interactive path between the Operator and the Dell PowerVault 136T LTO Library. Visual indications and pushbuttons enable the Operator to control the Dell PowerVault 136T LTO Library. See Figure 1 for an illustration of the Operator Panel.
Figure 1. Operator Panel
The Dell PowerVault 136T LTO Library Operator Panel is divided into four discrete areas; leftmost, upper center, rightmost, and lower center. The
leftmost screen area provides constant status about the Mailbox.
Table 1. Mailbox Indications
Indicator
Description
This indicator is displayed on screen if the host has issued a
PREVENT/ALLOW MEDIUM REMOVAL SCSI command and locked the Mailbox.
An indicator is displayed on screen if the Mailbox is locked. The Mailbox can be locked by either of the following conditions.
· The host issues a PREVENT/ALLOW MEDIUM REMOVAL SCSI command and locks the Mailbox
· The Dell PowerVault 136T LTO Library is accessing a mailbox slot.
· The Mailbox has been configured as all storage.
An indicator is displayed if the Mailbox is unlocked.
These indicators are displayed on screen for the six mailbox states.
State 1: The mailbox door is closed. Any cartridge in the Mailbox has previously been inventoried.
State 2: The mailbox door is partially open. Any cartridge in the Mailbox has previously been inventoried.
State 3: The mailbox door is fully opened. Any cartridge in the Mailbox has previously been inventoried. For an import operation, a
cartridge can be inserted.
State 4: The mailbox door is closed. A cartridge has been exported and not yet removed.
State 5: The mailbox door is partially open. A cartridge has been exported and not yet removed.
State 6: The mailbox door is fully open. A cartridge has been exported and not yet removed. While in this state, an exported
cartridge can be removed.
These indicators are displayed on screen for the three types of front door panel storage.
Type 1: A mailbox indicator showing a cartridge as indicated by the blackened out slot. A total of 12 slots are available.
Type 2: A single slot mailbox indicator.
Type 3: A continuous storage indicator. A total of 1 or 12 slots are available.
The upper center screen area displays informational, status and attention messages. Table 2 provides an illustration and description of the top
screen area associated with the Operator Panel.
Table 2. PowerVault 136T LTO Library Indications
Parameter
Description
This text line displays the current action, activity, or state of the library.
Text line
· OFFLINE - The equipment is in an offline state.
· ONLINE - The equipment is in an online state.
· Status or Attention Message - The equipment reports status or messages to solicit operator intervention.
Day
Mon, Tue, Wed, Thu, Fri, Sat, Sun
mm/dd/yy
Month/Day/Year
hh:mm
Hours:Minutes
The rightmost screen area provides constant status about the drives. Table 3 provides an illustration and description of the rightmost screen area
associated with the Operator Panel.
Table 3. Drive Indications
Indicator
Description
Drive Present
If a tape drive is present, the initial black outline box is displayed.
Power On
If power is applied to the tape drive, the Power On indication is displayed.
Cleaning
Required
If tape drive cleaning is required, the Cleaning Required indication is displayed.
Error Code
If a drive error condition exists, an Error Code indication is displayed. All errors are preceded by the character "!" followed
by the drive error code. "!..." indicates drive failures detected by the library and the drive is not capable of reporting the error.
Compression On
If the tape drive is compressing data on tape, the Compression On indicator is displayed.
Write Protect
If the tape is write protected, the Write Protect indicator is displayed.
A tape drive is present but does not contain a cartridge.
A tape drive is loading a cartridge.
A tape drive has a cartridge loaded.
A tape drive is rewinding a cartridge.
Tape Activity
A tape drive is unloading a cartridge.
A tape drive has unloaded a cartridge.
A tape drive is reading data from a cartridge.
A tape drive is writing data to a cartridge.
A tape drive is erasing data from a cartridge.
A tape drive is locating data on a cartridge.
The lower center screen area displays six lines of text, graphics representations, or a combination of both. Each text line can be up to twenty
characters long. These lines communicate interactive dialogs, special messages, alerts, and library configurations. Greater details are covered in
Using the Operator Panel Menu .
Remote Management Unit (RMU)
The RMU resides in each system and is pre-installed at the factory. The RMU allows remote access via a Web browser to the library. The RMU
supports Microsoft Internet Explorer version 4.0 and above, as well as Netscape Navigator versions 4.01, 4.5, 4.7X and above. All available
functions, as described below, are accomplished without the need of a dedicated server (or separate software).
The RMU performs the following functions:
l
l
l
l
l
l
l
l
Allows the user to quickly access the status of the system, including library and drive conditions, firmware levels and other useful information.
Provides remote operation of all library Operator Panel (LCD) functions via the Web browser.
Updates firmware in the RMU, the drives and the library's controller.
Supports Simple Network Management Protocol (SNMP) version 2.0 and acts as an SNMP-server, generating SNMP traps and responding
to SNMP requests.
Acquires Tape Alert 3.0 compatibility information from the library over the serial interface port and sends that information to an SNMP server.
Detects a power loss and generates an SNMP trap for notification.
Allows for the retrieval of the library command and error logs and the RMU error log.
Allows an administrator to make configuration changes such as network, users, and date/time changes.
See RMU Dialog for additional information.
System Administrator Responsibilities
The System Administrator (SA) must set up the RMU for proper operation. The SA responsibilities include establishing a network address for the
RMU and establishing the Uniform Resource Locators (URL). The network address consists of an Internet Protocol (IP) address, subnet mask, and
gateway IP Address. See RMU Dialog for information about setting the network address via the Operator Panel. After the network address has
been established, the SA should test the RMU and URL via a Web browser. Once the URL has been verified and accounts have been created, the
SA can broadcast the URL address to the potential RMU users. The SA can delete users and change any user password.
Menu Structure Description
The RMU startup dialog, Figure 2, is divided into two navigation frame segments and a single information frame segment. The first of three
illustrated segment descriptions is the left navigation frame. The left navigation frame has six hyperlinks as indicated in the following list:
l
l
l
l
l
l
Logout
Contents
SNMP MIB
Support
Version
www.Dell.com
See Left Navigation Frame for the dialogs and hyperlink descriptions.
The second segment is the top information frame. There are no hyperlinks or subsequent dialogs for this frame. One field value associated with
this frame follows:
l
URL identifier and equipment type
See Top Information Frame for the dialog.
The third segment is the center navigation frame. The center navigation frame has six tab style hyperlinks as indicated in the following list:
l
l
l
l
l
l
Status
Configuration
Firmware
Diagnostics file
Operator Panel
Logs
The Status Tab is an open dialog. The remaining five tabs are password protected. These tabs require a valid user or administrator account and a
successful login.
See Center Navigation Frame for the dialogs and hyperlink descriptions.
Figure 2. Startup Display
Left Navigation Frame
The Left Navigation Frame dialog and descriptions are indicated below.
Hyperlink
Description
Logout
This hyperlink logs out the current user and returns to the Status dialog.
Contents
This hyperlink opens a new page and displays a brief description of the Status, Configuration, Firmware,
Diagnostic files, Operator Panel, and Logs tabs. See Figure 3.
SNMP MIB
This hyperlink opens a new page and displays the SNMP MIB web page where a download hyperlink
directs the user to the SNMP MIB information. See Figure 4.
Support
This hyperlink opens a new page and displays the Support web page where additional hyperlinks direct
the user to the Dell Customer Support support center. See Figure 5.
Version
This hyperlink opens a new page and displays the current version information about the RMU
application. See Figure 6.
www.Dell.com This hyperlink opens a new page and redirects the user to the Dell web site home page.
Figure 3. Help Content Dialog
Figure 4. SNMP MIB Dialog
Figure 5. Technical Support Dialog
Figure 6. Version Dialog
Top Information Frame
The Top Information Frame dialog and description are indicated below.
Hyperlink
Name
Description
This location indicates the URL identifier of the RMU site and the attached library type.
Center Navigation Frame
All of the Center Navigation Frame dialogs and descriptions, beginning with Status, are indicated below.
Hyperlink
Description
The Status tab displays the current summary status of the library. This
tab is active even when a user is not logged into the RMU. The tab is
not password protected. The fields and values that are associated with
this tab are indicated below. This screen is refreshed periodically to
reflect the current states.
Status
Library
Status
This field indicates the current online/offline library status.
Drive
Status
This field value indicates the type and quantity of tape drives currently
installed in the attached library.
RMU User
This field value indicates the name and location of the current user.
Hostname
This field value indicates the Hostname used for the RMU connection.
IP Address
This field value indicates the Internet Protocol (IP) address for the RMU
connection.
MAC
Address
This field value indicates the MAC address of the RMU. This is also
the serial number of the RMU.
Library
Serial #
This field value indicates the library serial number.
SNMP
Alerts
This field value indicates the state of the SNMP Alert notification. This
value is either On/Off.
Library
Firmware
This field value indicates the current level of library firmware.
RMU
Firmware
This field value indicates the current level of RMU firmware.
Clicking any tab, other than the Status tab, initiates a Login dialog. See Figure 7.
Figure 7. Login Dialog
Field
Description
Enter Login Name
The user enters his/her user name. The default user name is admin and it is case sensitive.
Enter your
password
The user enters his/her password. The default password is password and it is case sensitive.
Submit
The user submits the name and password for login verification. If either user name or user password is not verified, the
login is rejected.
NOTE: After the Admin user has initially logged into the RMU, Dell recommends that the Admin user change the default password. No
regular user can log into the RMU while an existing Admin user is logged into the RMU. Only one regular user can be logged into the RMU at
a time.
The Configuration dialogs and descriptions are indicated below.
Figure 8. Configuration Dialog
Hyperlink
Description
The Configuration tab displays the current configuration status of the RMU and user account. The
fields and values that are associated with this tab are indicated below.
Configuration
Hostname
This field value indicates the Hostname used for the RMU configuration.
IP Address
This field value indicates the Internet Protocol (IP) address for the RMU connection.
Subnet Mask
This field value indicates what subnet an IP address belongs to.
Gateway
This field value indicates the Gateway address used for RMU communication.
SNMP Alerts
This field value indicates the state of the SNMP Alert notification. The value is either On/Off.
SNMP Server
This field value indicates the SNMP server address.
Public Name
This field value indicates the SNMP Read community string.
Private Name
This field value indicates the SNMP Set community string.
Management Action
This pull down menu allows the user to select the type of action to be accomplished.
No Action
This selection indicates that no change should be made.
Create User
This selection indicates that a new user is to be created. This can only be done by the SA.
Change User
Password
This selection indicates that the user password will be changed.
Delete User
This selection indicates that the current user will be deleted. This can only be done by the SA.
User Name
This section allows the user to perform management actions on the user selected.
Edit New
This section allows the user to enter a new User Name.
Select One
This pull-down menu allows the user to select a user name that has already been created. Only the
current user name is listed unless the SA is logged on.
Password
The user enters his password.
Re-enter Password
The user types his password in again for verification.
Date (mm/dd/yy)
This field value allows the user to change the current date.
Time (hh:mm)
This field value allows the user to change the current time.
Submit
The user submits the configuration data for verification and allows the user to confirm any
configuration changes.
Reset
This button will clear all the changed fields.
If the user changes the configuration, the Confirm Configuration Changes dialog appears. This dialog displays the old configuration and any
changes. See Figure 9.
Figure 9. Confirm Configuration Changes Dialog
Hyperlink
Description
Password The user must enter their password.
Confirm
This button confirms the configuration changes.
The Firmware dialog and descriptions are indicated below.
Figure 10. Firmware Dialog
Hyperlink
Firmware
Select target
for update
Description
The Firmware tab updates the firmware version of the RMU,
the drives, or the library. The fields and values that are
associated with this tab are indicated below
This selection allows the user to select which firmware is to be
upgraded.
Select
firmware file
This selection allows the user to select or browse to find the
firmware upgrade file.
Update
Firmware
When this button is clicked, the upgrade firmware process is
started.
The Diagnostics file dialog and descriptions are indicated below.
Figure 11. Diagnostics File Dialog
Hyperlink
Description
The Diagnostics files tab displays the library command error log, library error log, or RMU error log. The
fields and values that are associated with this tab are indicated below.
Diagnostics file
Select the file to
retrieve
This selection allows the user to choose which log to retrieve.
Retrieve selected
After selecting the log, click on this button to retrieve the log file.
files
The Operator panel dialog and descriptions are indicated below.
Figure 12. Operator Panel Dialog
NOTE: The RMU is a direct interface to the attached library. The user will see what is happening on the attached library and any
interaction the user performs (button presses) will reflect both on this web page and the attached library.
Hyperlink
Operator panel
Soft
Keys
Description
The Operator panel tab displays the library operator and duplicates
operator panel functionality. Access to this menu does not lock out the
library's front panel. The current state of the library menu is echoed and
continuously refreshed on the display. The fields and values that are
associated with this tab are indicated below.
The functionality of the four soft keys is dependent on the screen currently
being used.
The Logs dialog and descriptions are indicated below.
Figure 13. Logs Dialog
Hyperlink
Logs
Description
The Logs tab displays the library logs.
Library Startup
Use the following procedure to start the Dell PowerVault 136T LTO Library.
Step 1 Ensure that the front door is closed and mechanically locked.
Step 2 Locate the Rear Power Switch on the lower right rear panel.
Step 3 Push the rocker Rear Power Switch towards the top to apply power.
Step 4 Locate the Front Power Switch on the upper right front panel.
Step 5 Push the Front Power Switch inward to apply power to the electronics.
WARNING: Movements of mechanical components in the Dell PowerVault 136T LTO Library can cause injury. Before turning the
Rear Power Switch ON, confirm that no danger exists to personnel or property.
WARNING: Power is applied to the Dell PowerVault 136T LTO Library.
The firmware starts the boot process with an introductory splash screen. See Figure 14.
Figure 14. Splash Screen
The firmware initiates a SELF-TEST, TEACH (auto-configuration), and INVENTORY operation. After all of the firmware procedures are completed,
the LCD screen on the Operator Panel displays the Main Menu (initial screen). The Main Menu is illustrated by Figure 15.
Library Shutdown
The Dell PowerVault 136T LTO Library may be shut down normally or by the Emergency Shutdown method.
CAUTION: Except in emergencies, stop the Dell PowerVault 136T LTO Library with the normal shutdown procedure before
switching off the Rear Power Switch. Dell is not responsible for damage caused by improper use of the Rear Power Switch. All risk
lies entirely with the user.
Normal Shutdown
To gracefully shut down the Dell PowerVault 136T LTO Library, follow the procedure.
Step 1 If the Dell PowerVault 136T LTO Library is Online, as shown in Figure 15, press the button beneath the Online/Offline softkey.
Figure 15. Main Menu (Initial Screen)
l
The Offline Confirmation screen is displayed. See Figure 16.
Figure 16. Offline Confirmation Dialog
Step 2 Press the button beneath the OK softkey.
l
The Offline Dialog is displayed. See Figure 17.
Figure 17. Offline Dialog
Step 3 Visually confirm that the Dell PowerVault 136T LTO Library has changed to the Offline state.
l
The picker completes the current task. The upper center screen text line changes to Offline.
Step 4 Locate the Front Power Switch on the upper right front panel.
Step 5 Push the Front Power Switch inward to remove power to the electronics.
WARNING: Power is still present inside the library. Exercise extreme care when working inside the library.
Step 6 Locate the Rear Power Switch on the lower right corner of the back panel.
Step 7 Push the rocker Rear Power Switch to the bottom to remove power.
l
Power is removed from the Dell PowerVault 136T LTO Library.
Emergency Shutdown
CAUTION: Use the method described in Emergency Shutdown in cases of emergency only.
Use the following procedure if an emergency situation arises.
Step 1 Locate the Rear Power Switch on the lower right corner of the back panel.
Step 2 Push the rocker Rear Power Switch to the bottom to remove power.
l
Power is removed from the Dell PowerVault 136T LTO Library. All picker movements halt immediately.
Library Restart
Use the following procedure to restart the Dell PowerVault 136T LTO Library.
Step 1 If applicable, correct any situations that required the shutdown of the Dell PowerVault 136T LTO Library.
Step 2 Ensure that the front door is closed and mechanically locked.
Step 3 Locate the Rear Power Switch on the lower right rear panel.
Step 4 Push the rocker Rear Power Switch towards the top to apply power.
Step 5 Locate the Front Power Switch on the upper right front panel.
Step 6 Push the Front Power Switch inward to apply power to the electronics.
Back to Contents Page
Back to Contents Page
Handling Media: Dell™ PowerVault™ 136T LTO Library User's Guide
Inserting Media
Ejecting Media
Handling Media
Processing Media
Barcode Labels
Cleaning Drives
During the course of normal operations, it may become necessary to add or remove storage cartridges to or from the library. Two methods are
available to insert or eject storage cartridges. For either method to work, the Mailbox must be unlocked. Unlocking the Mailbox can be
accomplished by a PREVENT/ALLOW MEDIUM REMOVAL SCSI command that is issued by the host application software.
NOTE: SCSI commands such as Prevent/Allow Medium Removal and Move Medium are generally handled by the host application software.
Normally, the mailbox state is unlocked. Additional information is supplied in this chapter about processing media, safeguarding the media, and
using cleaning media.
Inserting Media
Placing new media into the library is best accomplished by using the Mailbox. Or, the cartridge could be placed directly into a specific storage slot
location by the Operator.
Mailbox
Using the Mailbox to insert cartridges does not disrupt library operations. To insert cartridges through the Mailbox, follow this procedure.
Step 1 Open the Mailbox door
Step 2 Insert the cartridge or magazine into an empty storage slot.
Step 3 Close the Mailbox.
l
The library locks the Mailbox. The picker teaches and inventories. The library unlocks the Mailbox.
Step 4 Move the cartridge to the desired storage slot with the SCSI MOVE MEDIUM command that is issued by the host application software.
or
Issue the Import command from the Operator panel. See Import Screen.
l
The library will request to go Offline. When the Import option is executed, the Mailbox is locked while the cartridges are moved to the first
available empty slots by the picker. After the move completes, the Mailbox unlocks.
or
Issue the Move Media command from the Operator panel. See Move Media Dialog .
l
The library will request to go Offline. After the Offline procedure is executed, see Online/Offline Selection, the cartridge can be moved to a
specified storage slot location by the picker.
Step 5 If the Import or Move Media command was used, place the library in the Online state. See Online/Offline Selection.
Direct Insertion into the PowerVault 136T LTO Library
There is one level of access control. It is a mechanical lock which is manipulated by a key.
To directly insert media, follow this procedure.
Step 1 Use the Operator panel to place the library into the Offline state. See Online/Offline Selection.
l
The picker completes any current task.
Step 2 Using the key, unlock and open the library door.
Step 3 Place the cartridge or magazine into the desired storage slot.
Step 4 Close and lock the door.
l
The library teaches and inventories.
Ejecting Media
Removing media from the library is best accomplished by using the Mailbox. Or, the cartridge could be directly removed from a specific storage
slot location by the Operator.
Mailbox
Using the Mailbox to remove cartridges does not disrupt library operations. To remove cartridges through the Mailbox, follow this procedure.
Step 1 Issue a SCSI MOVE MEDIUM command from the host with the source storage element address and the destination Mailbox element
address.
or
Execute the Export command from the Operator panel. See Export Dialog.
l
The library will request to go Offline. When the Export option is executed, the Mailbox is locked while the cartridge is moved to the
Mailbox by the picker. After the move completes, the Mailbox unlocks.
Step 2 Pull on the handle to open the Mailbox.
Step 3 Remove the cartridge from the storage slot.
Step 4 Close the Mailbox.
l
The library executes the TEACH and INVENTORY procedures.
Step 5 If the Export option was used, place the library in the Online state. See Online/Offline Selection.
Direct Removal from the PowerVault 136T LTO Library
There is one level of access control. It is a mechanical lock which is manipulated by the key.
To directly remove media, follow this procedure.
Step 1 Use the Operator panel to place the library into the Offline state. See Online/Offline Selection.
l
The picker completes any current task.
Step 2 Using the key, unlock and open the library door.
Step 3 Remove the cartridge or magazine from the desired storage slot.
Step 4 Close and lock the door.
l
The library executes the TEACH and INVENTORY procedures.
Handling Media
To ensure that the library conforms to Dell specifications for reliability, use the Dell supplied LTO Ultrium Data Cartridge. See Figure 1. Other LTO
certified media may be used, but it may not meet the standards of reliability established by Dell.
The data cartridges are housed in plastic cases and employ half-inch metal particle tape that has a native capacity of 100GB and a compressed
capacity of 200GB (assuming average 2:1 compression). The cartridge also contains a Linear Tape Open Cartridge Memory (LTO-CM) chip,
which contains information about the cartridge and the tape. The information includes the name of the manufacturer who created the tape, the
cartridge volume serial (volser) number, statistical information about the cartridge use, and a directory of the data on the tape.
Figure 1. Tape Cartridge
Write-Protect Switch
Each tape cartridge has a write-protect switch. Before loading the tape cartridge, position the write-protect switch on the front of the cartridge as
indicated.
If the switch is set to
(closed), data cannot be written to the tape.
If the switch is set to
(open), data can be written to the tape.
The write-protect switch is used to prevent recording over existing data. To prevent recording or deleting, set the write-protect switch to the closed
position. The drive senses the position of the switch and will not allow writing in this position.
Preserving Cartridges
Whenever possible, store the LTO Ultrium Data Cartridge in the following room-environment conditions:
l
l
Ideal temperature 20ºC, ±5ºC (68ºF, ±9ºF)
Ideal humidity 50% (±20%)
Table 1. Environmental Specifications
Environmental Factor
Operating
Storage
Shipping
Temperature
10º C to 40º C
(50º F to 104º F)
16º C to 32º C
( 61º F to 90º F)
-23º C to 49º C
(-9º F to 120º F)
Relative humidity
(non-condensing)
20% to 80%
20% to 80%
20% to 80%
Wet bulb temperature
26º C
(79º F)
26º C
(79º F)
26º C
(79º F)
Additionally:
l
l
l
l
l
l
l
Do not drop or bang the cartridge. This can displace the tape leader, making the cartridge unusable and possibly damaging the drive.
Keep tape cartridges out of direct sunlight and away from heaters and other heat sources.
For longer cartridge life, always store the cartridge in its plastic container.
Store tape cartridges in a dust-free environment.
If the tape cartridge is exposed to heat or cold extremes, stabilize the cartridge at room temperature for the same amount of time it was
exposed (up to 24 hours).
Do not place a cartridge near electromagnetic interference sources, such as terminals, motors, and video or X-ray equipment.
Place an identification label only in the slide-in slot on the front of the cartridge.
NOTE: Do not adhere labels to a cartridge anywhere except in the recessed area located on the face of the cartridge next to the writeprotect switch.
Processing Media
Each tape cartridge in the PowerVault 136T LTO Library must have an external label that is operator and machine readable to identify the volume
serial number. The external label may contain up to thirteen characters for the volser. A volser can be characters of uppercase A-Z and numerics 09. The PowerVault 136T LTO Library currently supports Code 39 labels. If there is a tape cartridge without an external label, the Touch on Init
must be enabled. Refer to Config Dialog.
Barcode Labels
For customers who wish to print barcode labels, the individual media labels are supported if the labels meet the ANSI MH10.8M-1983 standard
and other additional requirements. The requirements are:
l
l
l
l
l
l
l
ANSI MH10.8M-1983 Standard
Number of digits: 6
Background reflection: at least 25 percent
Print contrast: at least 75 percent
Ratio: at least 2.2
Module: 250 mm
Print tolerance: ± 57 mm
Quality Testing
Compliance with these specifications can be checked and documented with the Ergilaser 3000 High Density bar code measuring device that is
manufactured by the Laetus Company.
If barcode scanning labels are purchased, the individual media labels are supported if they are acquired from the sources listed in Table 2.
Table 2. Supported Barcode Labels
Source
Media
Label
Dell
LTO
Any
Barcode Label Restrictions
All labels are restricted to 13 or fewer character volsers.
Applying the Label
All barcode scanning labels are applied to the front of the cartridge. Extreme care should be taken to ensure that the barcode labels are never
applied in an upside down fashion.
Cleaning Drives
The drive cleaning method is controlled by the host application software and applies to all drive types in the PowerVault 136T LTO Library. Host
application software controlled drive cleaning is the default condition.
Back to Contents Page
Back to Contents Page
Safety: Dell™ PowerVault™ 136T LTO Library User's Guide
Intended Use
Hazard Alert Messages
Area of Application
Protective Devices
NOTE: In addition to the safety instructions presented in this guide, local and professional safety rules apply.
Avoid dangerous situations while operating the Dell PowerVault 136T LTO Library by following all safety procedures and operating the equipment
carefully. Read and follow all instructions in this guide. It is mandatory that operators of the Dell PowerVault 136T LTO Library understand and
comply with all instructions contained in this guide and other related documentation.
Intended Use
This equipment is designed for processing:
l
Magnetic tape cartridges
Any other application is not considered the intended use. Dell shall not be held liable for damage arising from unauthorized use of the library. The
user assumes all risk in this aspect.
Hazard Alert Messages
Emphasized paragraphs in this guide warn of danger or draw attention to important information. Dell classifies hazards in several categories.
Table 1 shows the relationship of the symbols, signal words, actual hazards, and possible consequences.
Table 1. Hazard Alert Messages
Symbol
Damage to ...
Signal Word
Definition
Consequence
Person
WARNING
Imminent hazardous electrical or
mechanical situation
Material
CAUTION
Potential damaging situation
Possible damage to the
product, data, or
environment
NOTE
Indicates important information that
helps make better use of the system
No hazardous or damaging
consequences
Death or serious injury
Area of Application
NOTE: Other manufacturer documentation is an integral part of the Dell PowerVault 136T LTO Library User's Guide documentation set.
This information applies to the entire Dell PowerVault 136T LTO Library family. Further safety instructions for components used in the equipment
are not invalidated by these instructions.
Protective Devices
The Dell PowerVault 136T LTO Library is equipped with the following protective devices:
l
l
l
Monitored access to the library
Front Power Switch
Rear Power Switch
Library Enclosure
The Dell PowerVault 136T LTO Library is completely surrounded by an enclosure. The library can only be accessed through monitored access
area(s). The enclosure around the library separates the danger area of the Dell PowerVault 136T LTO Library from the normal working area. The
danger area of the library is the area in which personnel can be injured by component movements.
WARNING: Movements of mechanical components in the library can cause serious injury. Access to the library should be
restricted to authorized personnel only.
Mechanical Lock
The library access door can only be opened with a key from the outside. Authorized personnel are responsible for the security of the key.
Front Power Switch
Switching off the Front Power Switch removes power from the electronics which causes the picker to stop immediately. This switch also removes
power from the drives. The library still has standby power applied. Therefore, the library is not completely disconnected from the power source.
Rear Power Switch
Switching off the Rear Power Switch removes all power from the library. In case of danger to personnel or property, immediately switch off the Rear
Power Switch.
WARNING: To completely remove all power, either use the Rear Power Switch or disconnect the line cord from the electrical
source.
WARNING: Except in emergencies, stop the Dell PowerVault 136T LTO Library with the normal shutdown procedure before
switching off the Rear Power Switch. Dell is not responsible for damage caused by improper use of the Rear Power Switch. Such
risk lies entirely with the user.
WARNING: Movements of mechanical components in the Dell PowerVault 136T LTO Library can cause serious injury. Before
turning the Front or Rear Power Switch on and restarting the Dell PowerVault 136T LTO Library, confirm that no danger exists to
personnel or property.
Back to Contents Page
Back to Contents Page
Specifications: Dell™ PowerVault™ 136T LTO Library User's Guide
Physical Specifications
Electrical Specification
Performance Specifications
Environmental Specification
This section of the document describes the physical, electrical, performance, environmental, and regulatory specifications of the Dell PowerVault
136T LTO Library.
Physical Specifications
The physical specifications for the Dell PowerVault 136T LTO Library are shown in Table 1.
Table 1. Physical Specifications
Configuration
Height
Stand-alone
Rack Mount
(14 Rack Units)
Width
Depth
Maximum Weight
(1)
25 inches
18.9 inches
28.8 inches
250 lbs
0.635
meters
0.48 meters
0.732 meters
113.6 Kg
24.5 inches
17.4 inches
28.8 inches
250 lbs
0.625
meters
0.442 meters
0.732 meters
113.6 Kg
1 Includes the weight of 6 - LTO drives.
Electrical Specifications
The library contains an internal autoranging power supply that accepts 90 to 260 V~ and provides automatic input voltage and frequency selection.
The library is capable of continued operations during periods of AC power fluctuation, voltage surges, and voltage spikes. Conducted emissions
are reduced by an AC line filter. The electrical specifications for the Dell PowerVault 136T LTO Library are shown in Table 2.
Table 2. Electrical Specifications
Power Supply Type Voltage Frequency (Hz) Amperage
Autorange
90 - 260 50 - 60
3.0 - 6.0
Performance Specifications
The performance information for the Dell PowerVault 136T LTO Library is listed in Table 3.
Table 3. Performance Specifications
Maximum Allowable Time
Cartridge Change
10 Seconds
Inventory
Less than 60 Seconds
Environmental Specifications
The environmental information for the Dell PowerVault 136T LTO Library is listed in Table 4.
Table 4. Environmental Specifications
Operating Temperature
Operating Humidity
Altitude
50° - 104° F (10° - 40° C) 20 - 80% (non-condensing) 30,000 feet (9,144 meters)
Back to Contents Page
Back to Contents Page
Warranty and Return Policy: Dell™ PowerVault™ 136T LTO Library User's Guide
Three-Year Limited Warranty (U.S. Only)
Three-Year Limited Warranty (Canada Only)
One-Year End-User Manufacturer Guarantee (Latin
America and the Caribbean Only)
Total Satisfaction Return Policy (U.S. and Canada Only)
Three-Year Limited Warranty (U.S. Only)
Dell Computer Corporation ("Dell") manufactures its hardware products from parts and components that are new or equivalent to new in
accordance with industry-standard practices. Dell warrants that the hardware products it manufactures will be free from defects in materials and
workmanship. The limited warranty term is three years beginning on the date of invoice, as described in the following text.
Damage due to shipping the products to you is covered under this limited warranty. Otherwise, this limited warranty does not cover damage due to
external causes, including accident, abuse, misuse, problems with electrical power, servicing not authorized by Dell, usage not in accordance with
product instructions, failure to perform required preventive maintenance, and problems caused by use of parts and components not supplied by
Dell.
This limited warranty does not cover any items that are in one or more of the following categories: software; external devices (except as specifically
noted); accessories or parts added to a Dell system after the system is shipped from Dell; accessories or parts added to a Dell system through
Dell's system integration department; accessories or parts that are not installed in the Dell factory; or DellWare™ products. Monitors, keyboards,
and mice that are Dell-branded or that are included on Dell's standard price list are covered under this limited warranty; all other monitors,
keyboards, and mice (including those sold through the DellWare program) are not covered. Batteries for portable computers are covered only
during the initial one-year period of this limited warranty.
Coverage During Year One
During the one-year period beginning on the invoice date, Dell will repair or replace products covered under this limited warranty that are returned
to Dell's facility. To request warranty service, you must call Dell's Customer Technical Support within the warranty period. Refer to "Getting Help" in
your system's troubleshooting documentation to find the appropriate telephone number for obtaining customer assistance. If warranty service is
required, Dell will issue a Return Material Authorization Number. You must ship the products back to Dell in their original or equivalent packaging,
prepay shipping charges, and insure the shipment or accept the risk of loss or damage during shipment. Dell will ship the repaired or replacement
products to you freight prepaid if you use an address in the continental U.S., where applicable. Shipments to other locations will be made freight
collect.
NOTES: Before you ship the product(s) to Dell, back up the data on the hard-disk drive(s) and any other storage device(s) in the product(s).
Remove any removable media, such as diskettes, CDs, or PC Cards. Dell does not accept liability for lost data or software.
Dell owns all parts removed from repaired products. Dell uses new and reconditioned parts made by various manufacturers in performing warranty
repairs and building replacement products. If Dell repairs or replaces a product, its warranty term is not extended.
Coverage During Years Two and Three
During the second and third years of this limited warranty, Dell will provide, on an exchange basis and subject to Dell's Exchange Policy in effect on
the date of the exchange, replacement parts for the Dell hardware product(s) covered under this limited warranty when a part requires
replacement. You must report each instance of hardware failure to Dell's Customer Technical Support in advance to obtain Dell's concurrence that
a part should be replaced and to have Dell ship the replacement part. Dell will ship parts (freight prepaid) if you use an address in the continental
U.S., where applicable. Shipments to other locations will be made freight collect. Dell will include a prepaid shipping container with each
replacement part for your use in returning the replaced part to Dell. Replacement parts are new or reconditioned. Dell may provide replacement
parts made by various manufacturers when supplying parts to you. The warranty term for a replacement part is the remainder of the limited
warranty term.
You will pay Dell for replacement parts if the replaced part is not returned to Dell. The process for returning replaced parts, and your obligation to
pay for replacement parts if you do not return the replaced parts to Dell, will be in accordance with Dell's Exchange Policy in effect on the date of
the exchange.
You accept full responsibility for your software and data. Dell is not required to advise or remind you of appropriate backup and other procedures.
General Provisions
THIS LIMITED WARRANTY GIVES YOU SPECIFIC LEGAL RIGHTS WHICH VARY FROM STATE TO STATE (OR JURISDICTION TO
JURISDICTION). DELL'S RESPONSIBILITY FOR MALFUNCTIONS AND DEFECTS IN HARDWARE IS LIMITED TO REPAIR AND
REPLACEMENT AS SET FORTH IN THIS LIMITED WARRANTY STATEMENT. ALL EXPRESS AND IMPLIED WARRANTIES FOR THE
PRODUCT, INCLUDING BUT NOT LIMITED TO ANY IMPLIED WARRANTIES OF AND CONDITIONS OF MERCHANTIBILITY AND FITNESS
FOR A PARTICULAR PURPOSE, ARE LIMITED IN DURATION TO THE WARRANTY PERIOD SET FORTH ABOVE AND NO WARRANTIES,
WHETHER EXPRESS OR IMPLIED, WILL APPLY AFTER SUCH PERIOD.
SOME STATES (OR JURISDICTIONS) DO NOT ALLOW LIMITATIONS ON HOW LONG AN IMPLIED WARRANTY LASTS, SO THE
PRECEDING LIMITATION MAY NOT APPLY TO YOU.
DELL DOES NOT ACCEPT LIABILITY BEYOND THE REMEDIES SET FORTH IN THIS LIMITED WARRANTY STATEMENT OR LIABILITY FOR
INCIDENTAL OR CONSEQUENTIAL DAMAGES, INCLUDING WITHOUT LIMITATION ANY LIABILITY FOR PRODUCTS NOT BEING
AVAILABLE FOR USE OR FOR LOST DATA OR SOFTWARE.
SOME STATES (OR JURISDICTIONS) DO NOT ALLOW THE EXCLUSION OR LIMITATION OF INCIDENTAL OR CONSEQUENTIAL
DAMAGES, SO THE PRECEDING EXCLUSION OR LIMITATION MAY NOT APPLY TO YOU.
These provisions apply to Dell's three-year limited warranty only. For provisions of any service contract covering your system, refer to your invoice
or the separate service contract that you will receive.
If Dell elects to exchange a system or component, the exchange will be made in accordance with Dell's Exchange Policy in effect on the date of the
exchange. In any instance in which Dell issues a Return Material Authorization Number, Dell must receive the product(s) for repair prior to the
expiration of the warranty period in order for the repair(s) to be covered by the limited warranty.
NOTE: If you chose one of the available warranty and service options in place of the standard three-year limited warranty described in the
preceding text, the option you chose will be listed on your invoice.
Three-Year Limited Warranty (Canada Only)
Dell Computer Corporation ("Dell") manufactures its hardware products from parts and components that are new or equivalent to new in
accordance with industry-standard practices. Dell warrants that the hardware products it manufactures will be free from defects in materials and
workmanship. The warranty term is three years beginning on the date of invoice, as described in the following text.
Damage due to shipping the products to you is covered under this limited warranty. Otherwise, this limited warranty does not cover damage due to
external causes, including accident, abuse, misuse, problems with electrical power, servicing not authorized by Dell, usage not in accordance with
product instructions, failure to perform required preventive maintenance, and problems caused by use of parts and components not supplied by
Dell.
This limited warranty does not cover any items that are in one or more of the following categories: software; external devices (except as specifically
noted); accessories or parts added to a Dell system after the system is shipped from Dell; accessories or parts added to a Dell system through
Dell's system integration department; accessories or parts that are not installed in the Dell factory; or DellWare products. Monitors, keyboards, and
mice that are Dell-branded or that are included on Dell's standard price list are covered under this limited warranty; all other monitors, keyboards,
and mice (including those sold through the DellWare program) are not covered. Batteries for portable computers are covered only during the initial
one-year period of this limited warranty.
Coverage During Year One
During the one-year period beginning on the invoice date, Dell will repair or replace products covered under this limited warranty that are returned
to Dell's facility. To request warranty service, you must call Dell's Customer Technical Support within the warranty period. Refer to "Getting Help" in
your system's troubleshooting documentation to find the appropriate telephone number for obtaining customer assistance. If warranty service is
required, Dell will issue a Return Material Authorization Number. You must ship the products back to Dell in their original or equivalent packaging,
prepay shipping charges, and insure the shipment or accept the risk of loss or damage during shipment. Dell will ship the repaired or replacement
products to you freight prepaid if you use an address in Canada, where applicable. Shipments to other locations will be made freight collect.
NOTE: Before you ship the product(s) to Dell, back up the data on the hard-disk drive(s) and any other storage device(s) in the product(s).
Remove any removable media, such as diskettes, CDs, or PC Cards. Dell does not accept liability for lost data or software.
Dell owns all parts removed from repaired products. Dell uses new and reconditioned parts made by various manufacturers in performing warranty
repairs and building replacement products. If Dell repairs or replaces a product, its warranty term is not extended.
Coverage During Years Two and Three
During the second and third years of this limited warranty, Dell will provide, on an exchange basis and subject to Dell's Exchange Policy in effect on
the date of the exchange, replacement parts for the Dell hardware product(s) covered under this limited warranty when a part requires
replacement. You must report each instance of hardware failure to Dell's Customer Technical Support in advance to obtain Dell's concurrence that
a part should be replaced and to have Dell ship the replacement part. Dell will ship parts (freight prepaid) if you use an address in Canada, where
applicable. Shipments to other locations will be made freight collect. Dell will include a prepaid shipping container with each replacement part for
your use in returning the replaced part to Dell. Replacement parts are new or reconditioned. Dell may provide replacement parts made by various
manufacturers when supplying parts to you. The warranty term for a replacement part is the remainder of the limited warranty term.
You will pay Dell for replacement parts if the replaced part is not returned to Dell. The process for returning replaced parts, and your obligation to
pay for replacement parts if you do not return the replaced parts to Dell, will be in accordance with Dell's Exchange Policy in effect on the date of
the exchange.
You accept full responsibility for your software and data. Dell is not required to advise or remind you of appropriate backup and other procedures.
General Provisions
DELL MAKES NO EXPRESS WARRANTIES OR CONDITIONS BEYOND THOSE STATED IN THIS LIMITED WARRANTY STATEMENT. DELL
DISCLAIMS ALL OTHER WARRANTIES AND CONDITIONS, EXPRESS OR IMPLIED, INCLUDING WITHOUT LIMITATION IMPLIED
WARRANTIES AND CONDITIONS OF MERCHANTABILITY AND FITNESS FOR A PARTICULAR PURPOSE. SOME STATES (OR
JURISDICTIONS) DO NOT ALLOW LIMITATIONS ON IMPLIED WARRANTIES OR CONDITIONS, SO THIS LIMITATION MAY NOT APPLY TO
YOU.
DELL'S RESPONSIBILITY FOR MALFUNCTIONS AND DEFECTS IN HARDWARE IS LIMITED TO REPAIR AND REPLACEMENT AS SET
FORTH IN THIS LIMITED WARRANTY STATEMENT. THESE WARRANTIES GIVE YOU SPECIFIC LEGAL RIGHTS, AND YOU MAY ALSO
HAVE OTHER RIGHTS, WHICH VARY FROM STATE TO STATE (OR JURISDICTION TO JURISDICTION).
DELL DOES NOT ACCEPT LIABILITY BEYOND THE REMEDIES SET FORTH IN THIS LIMITED WARRANTY STATEMENT OR LIABILITY FOR
INCIDENTAL OR CONSEQUENTIAL DAMAGES, INCLUDING WITHOUT LIMITATION ANY LIABILITY FOR PRODUCTS NOT BEING
AVAILABLE FOR USE OR FOR LOST DATA OR SOFTWARE.
SOME STATES (OR JURISDICTIONS) DO NOT ALLOW THE EXCLUSION OR LIMITATION OF INCIDENTAL OR CONSEQUENTIAL
DAMAGES, SO THE PRECEDING EXCLUSION OR LIMITATION MAY NOT APPLY TO YOU.
These provisions apply to Dell's three-year limited warranty only. For provisions of any service contract covering your system, refer to your invoice
or the separate service contract that you will receive.
If Dell elects to exchange a system or component, the exchange will be made in accordance with Dell's Exchange Policy in effect on the date of the
exchange. In any instance in which Dell issues a Return Material Authorization Number, Dell must receive the product(s) for repair prior to the
expiration of the warranty period in order for the repair(s) to be covered by the limited warranty.
NOTE: If you chose one of the available warranty and service options in place of the standard three-year limited warranty described in the
preceding text, the option you chose will be listed on your invoice.
One-Year End-User Manufacturer Guarantee (Latin America and the Caribbean Only)
Dell Computer Corporation ("Dell") warrants to the end user in accordance with the following provisions that its branded hardware products,
purchased by the end user from a Dell company or an authorized Dell distributor in Latin America or the Caribbean, will be free from defects in
materials, workmanship, and design affecting normal use, for a period of one year from the original purchase date. Products for which proper
claims are made will, at Dell's option, be repaired or replaced at Dell's expense. Dell owns all parts removed from repaired products. Dell uses
new and reconditioned parts made by various manufacturers in performing repairs and building replacement products.
Exclusions
This Guarantee does not apply to defects resulting from: improper or inadequate installation, use, or maintenance; actions or modifications by
unauthorized third parties or the end user; accidental or willful damage; or normal wear and tear.
Making a Claim
Claims must be made in Latin America or the Caribbean by contacting the Dell point of sale within the guarantee period. The end user must
always supply proof of purchase, indicating name and address of the seller, date of purchase, model and serial number, name and address of the
customer, and details of symptoms and configuration at the time of malfunction, including peripherals and software used. Otherwise, Dell may
refuse the guarantee claim. Upon diagnosis of a warranted defect, Dell will make arrangements and pay for ground freight and insurance to and
from Dell's repair/replacement center. The end user must ensure that the defective product is available for collection properly packed in original or
equally protective packaging together with the details listed above and the return number provided to the end user by Dell.
Limitation and Statutory Rights
Dell makes no other warranty, guarantee or like statement other than as explicitly stated above, and this Guarantee is given in place of all other
guarantees whatsoever, to the fullest extent permitted by law. In the absence of applicable legislation, this Guarantee will be the end user's sole
and exclusive remedy against Dell or any of its affiliates, and neither Dell nor any of its affiliates shall be liable for loss of profit or contracts, or any
other indirect or consequential loss arising from negligence, breach of contract, or howsoever.
This Guarantee does not impair or affect mandatory statutory rights of the end user against and/or any rights resulting from other
contracts concluded by the end user with Dell and/or any other seller.
Dell World Trade LP
One Dell Way, Round Rock, TX 78682, USA
Dell Computadores do Brasil Ltda (CNPJ No. 72.381.189/0001-10)/
Dell Commercial do Brasil Ltda (CNPJ No. 03 405 822/0001-40)
Avenida Industrial Belgraf, 400
92990-000 - Eldorado do Sul - RS - Brasil
Dell Computer de Chile Ltda
Coyancura 2283, Piso 3- Of.302,
Providencia, Santiago - Chile
Dell Computer de Colombia Corporation
Carrera 7 #115-33 Oficina 603
Bogota, Colombia
Dell Computer de Mexico SA de CV
Rio Lerma #302- 4 Piso
Col. Cuauhtemoc, Mexico, D.F. 06500
"Total Satisfaction" Return Policy (U.S. and Canada Only)
If you are an end-user customer who bought new products directly from a Dell company, you may return them to Dell within 30 days of the date of
invoice for a refund or credit of the product purchase price. If you are an end-user customer who bought reconditioned or refurbished products from
a Dell company, you may return them to Dell within 14 days of the date of invoice for a refund or credit of the product purchase price. In either case,
the refund or credit will not include any shipping and handling charges shown on your invoice. If you are an organization that bought the products
under a written agreement with Dell, the agreement may contain different terms for the return of products than specified by this policy.
To return products, you must call Dell Customer Service to receive a Credit Return Authorization Number. Refer to the chapter titled "Getting Help"
in your system's trouble-shooting documentation to find the appropriate telephone number for obtaining customer assistance. To expedite the
processing of your refund or credit, Dell expects you to return the products to Dell in their original packaging within five days of the date that Dell
issues the Credit Return Authorization Number. You must also prepay shipping charges and insure the shipment or accept the risk of loss or
damage during shipment. You may return software for refund or credit only if the sealed package containing the diskette(s) or CD(s) is unopened.
Returned products must be in as-new condition, and all of the manuals, diskette(s), CD(s), power cables, and other items included with a product
must be returned with it. For customers who want to return, for refund or credit only, either applications software or an operating system that has
been installed by Dell, the whole system must be returned, along with any media and documentation that may have been included in the original
shipment.
This "Total Satisfaction" Return Policy does not apply to DellWare products, which may be returned under DellWare's then-current return policy. In
addition, reconditioned parts purchased through Dell Spare Parts Sales in Canada are nonreturnable.
Back to Contents Page