1
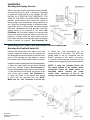
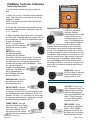
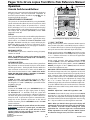
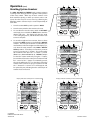
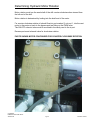
Pages 14 to 22 are copies from Micro-Trak Reference Manual Illustration 10 Operation DrillMaster Console Switches and Buttons MANAUTO CALHOLD V 1 2 3 4 Make sure your system is properly calibrated before beginning to apply product. We also recommend completion of Pre-Field System Checkout described on page 27 prior to 10 beginning any field operations. ConSole power/SySTeM on/off The system can be turned ON and OFF by using the ON/OFF switch and bracket kit. When the console is turned on, it will display the number of hours of operation for 1.5 seconds, then it will display PUL for 1.5 seconds and then displays the Software Number and Software Revision for 1.5 seconds. The Sections will be disabled (turned off) and the PWM output will remain off. During normal operation, the console will display information selected by the rotary switch position. Typically the rotary switch will be set on RATE, as shown in Illustration 10 to the right. With RATE selected, the console will display the Application Rate in units in lbs/acre, kg/hectares or lbs./ kFt2. See rotary positions on the next page for additional information about data displayed. ROWS/ SECTION WEIGHT / MINUTE ADJUST RATE AREA/ HOUR METER RPM CAL TEST TARGET RATE RATE SPEED TEST SPEED CAL DISTANCE SPEED CAL RESET Turn rotary dial to display desired readout. “+” AnD “-” bUTTonS During normal operation, when automatic “AUTO” control is active and the rotary dial is set to RATE, each press of the “+” or “-” buttons will increase or decrease the target application rate by the amount of the calibrated adjust rate (Delta). rUn/holD SwiTCh The RUN/HOLD is the master switch for turning all (active) sections on and off. noTe: The DrillMaster system can be operated in either Manual (MAn) or Automatic (AUTo) mode. The following contains additional information. During normal operation, when MAn control mode is active and the Run/Hold switch is in the rUn position, pressing the “+” or “-” buttons will increase or decrease the application rate via the control valve. During normal operation, when either automatic (AUTo) or manual (MAn) is active, the RUN/HOLD switch is in the holD position and the rotary switch is turned to weiGhT/ MinUTe, pressing the “+” or “-” (reset) button will increase or decrease weight/minute rate. AUTo/MAn bUTTon This button will switch the control status of the system from fully automatic to manual control. Each press of the button will change the status. The display will show the AUTO icon when automatic control mode is active and the MAN icon when manual control mode is active. noTe: if in “AUTo” MoDe AnD no SpeeD SiGnAl iS preSenT, SySTeM will ShUT off The booMS AUToMATiCAlly. on-The-Go “DelTA” rATe ADjUSTMenTS (ADjUST rATe) The calibrated target rate in lbs./acre, kg/hectare or lbs./ kFt2 represents the amount of product that you typically want to apply. However, under certain conditions, you may want to increase or decrease this rate. This “DELTA” feature allows you to easily make on-the-go rate adjustments by simply using the “+” or “-” buttons. Each press of a button changes the calibrated target rate by the amount of calibrated adjust rate. MAnUAl In MAn , the PWM can be adjusted using the “+” and “-” (reset) buttons from Min pwM to Max pwM in 0.1% steps. The longer the “+” and “-” (reset) key is pressed the faster the PWM is changed. To use the “DELTA” feature, the console must be in automatic “AUTO” mode active and the rotary switch must be set to the RATE position. AUToMATiC To turn on the AUTo mode, press AUTo/MAn button so the AUTo icon appears in upper right portion of display. See Illustration 10. In automatic mode, the system will control the flow rate to maintain the calibrated application rate when the vehicle speed changes, or when sections are turned on or off. To operate the system in automatic mode, simply turn on the hydraulic system, turn on the desired number of sections, place the rUn/holD switch in the rUn position and drive. CrustBuster DrillMaster Quick Start Guide 346-001150 AREA TOTALS (1) (2) (3) ROW SPACING AUTO MAN DiSplAy noTe: in AUTo mode, the system will not turn the sections or conveyors on until it has a speed signal. Use either the rUn/holD switch to turn the system off and on when turning around or to stop spreading at any time. See the following sections for operation details. WEIGHT TOTALS (1) (2) (3) METER CAL exAMple: Adjust rate = 50.00 and Target rate = 500 With AUTo selected and the rotary selector turned to rATe, pressing the “+” key once will increase the target rate from 500 to 550. The display will momentarily show the new target rate of 550 and then show the actual application rate. Pressing the “-” key once will decrease the target from 550 to 500. noTe: when you “DelTA” the target rate, the display will momentarily show you the new target rate (approximately two seconds) and then resume showing the actual application rate. The new target rate is maintained until further adjustments are made using the “DelTA” feature or calibration changes occur, or the unit is turned off. 23 Pg 14 Revised 11/2010